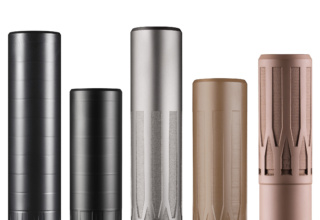
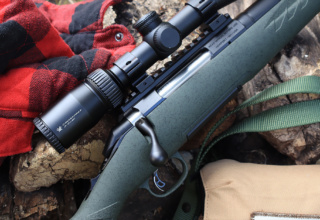
If you have an older hunting rifle looking for love, Dead Air’s new over-the-barrel Nomad Ti OTB suppressor is your ticket to get that gun back in the game
by Rob Reaser
Somewhere in the late 1990s, I picked up a new Remington 700 to take elk hunting. I didn’t get an elk on that trip, but I quickly became enamored with the 270 Win. cartridge for which the gun was chambered. Back home in the Eastern mountains, that gun became my Whitetail Devastator, employing Nosler ballistic tips to put deer down right where they stood.
But as with many guns we acquire, the itch to “run something different” gets under your skin and before you know it, years and decades pass since the last time you picked up that old friend.
Such was the case with my reliable 270 once rifled-barrel shotguns, straightwall-cartridge lever-actions, and assorted bolt-action platforms captured my fancy.
Then earlier this year, a new suppressor introduced by Dead Air Silencers lit a slow-burning fire in my brain.
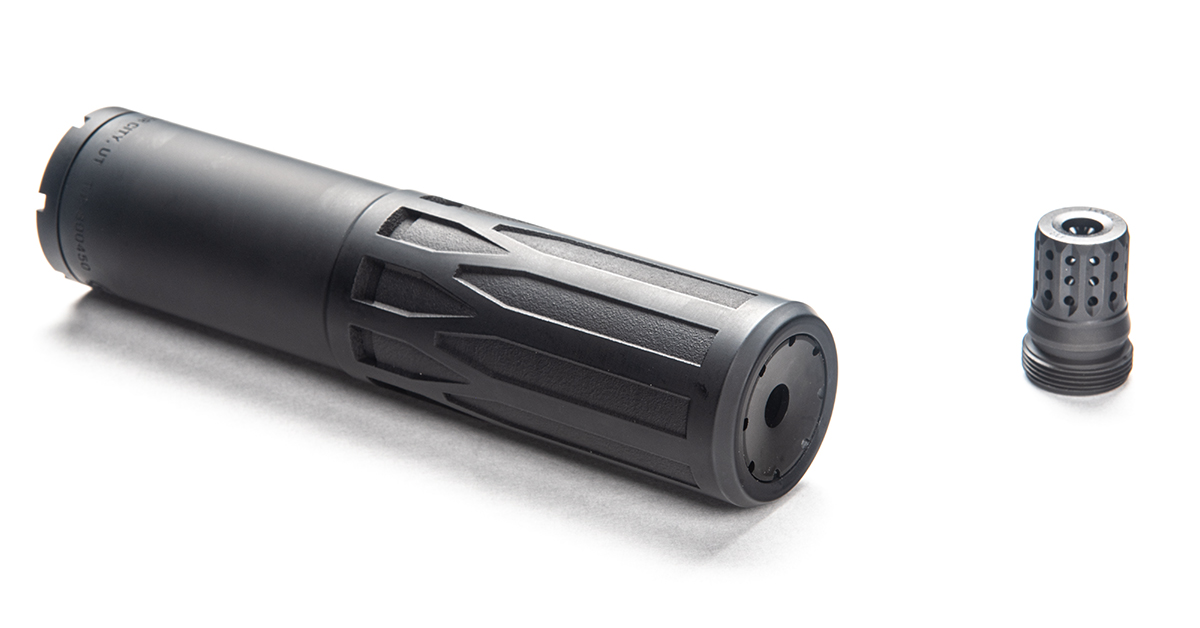
Called the Nomad Ti OTB, this suppressor sounded like the answer many traditional rifle hunters have been waiting for…and the hope that my old Remington 700 held for pulling it out of mothballs and back into the field.
Why?
Consider what the Nomad Ti OTB offers hunters of the long-rifle persuasion.
The Nomad Ti OTB
The OTB acronym stands for “over-the-barrel.” And just as the name implies, this means that a portion of the suppressor body covers the rifle barrel rather than extending exclusively past the muzzle, as is the case with conventional suppressor designs.
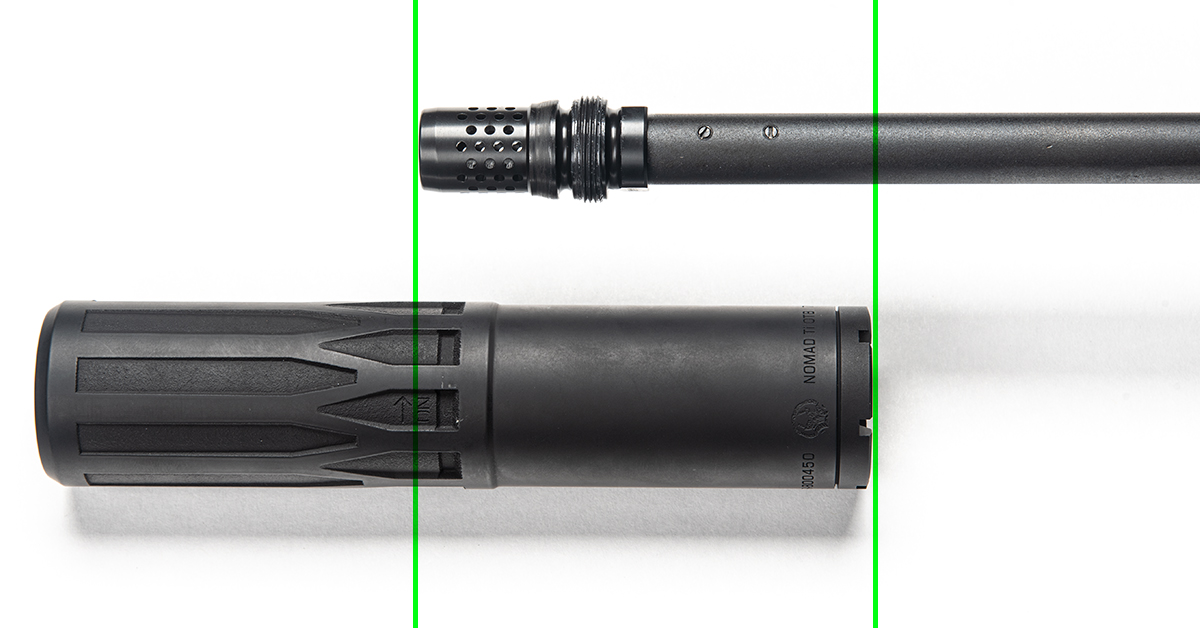
Here you can see what I’m talking about. The Nomad Ti OTB incorporates a blast chamber that is positioned well behind the barrel’s muzzle. The suppressor body has an overall length of 7.65 inches, yet it adds a mere 4.6 inches to the overall length of the rifle. That means that a hair over three inches of the suppressor body is positioned over the barrel.
This provides a couple of key advantages.
First, and most obvious, is that the Nomad Ti OTB allows you to run suppressed without grossly increasing the length of the rifle. This means maneuverability and overall handling doesn’t take a big hit just so you can enjoy a quieter and safer shooting experience.
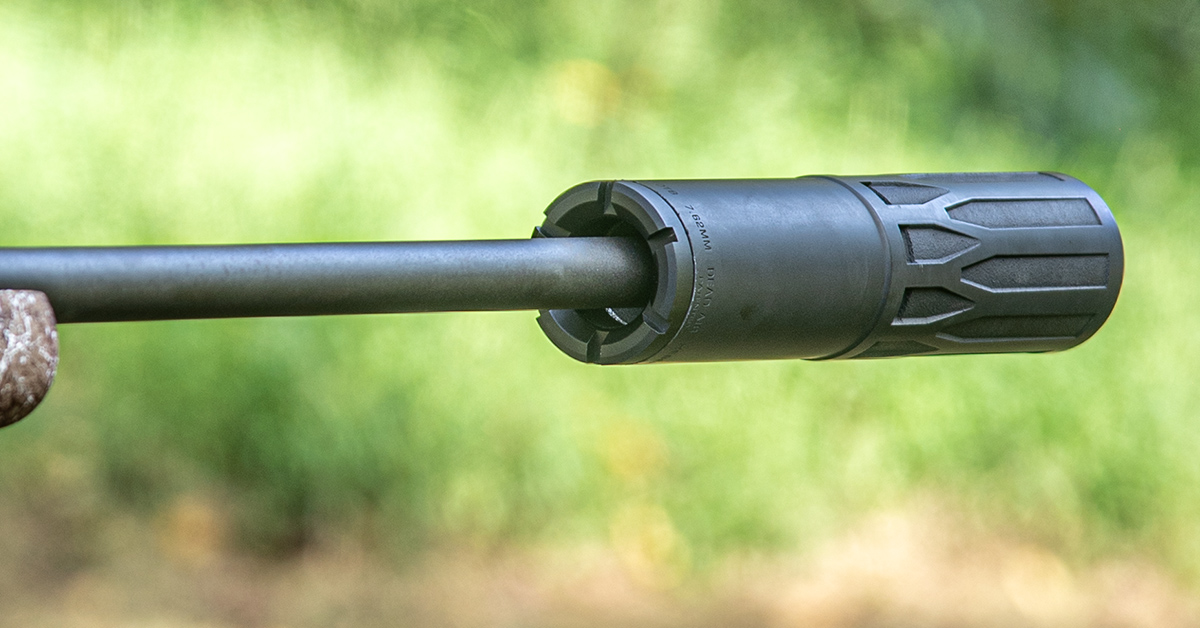
Second, moving the suppressor mass back toward the shooter shifts weight rearward. This rearward weight bias goes a long way toward improving balance and reducing fatigue in field shooting conditions when compared to conventional forward-of-muzzle suppressor designs.
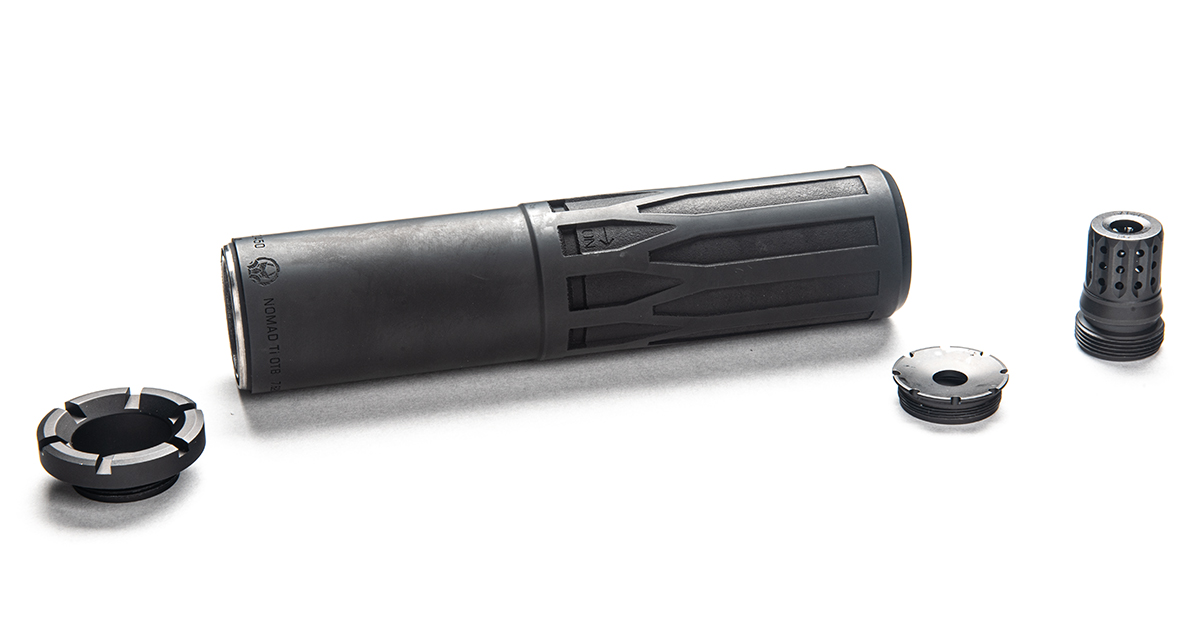
Another standout feature of the Nomad Ti OTB is its exceptionally light weight for a 30-caliber suppressor rated for up to 300 RUM/7mm Backcountry. The 10.5-ounce weight not only tips the scale toward enhanced balance, but it also means it’s not going to wear you down during a long day in the bush.
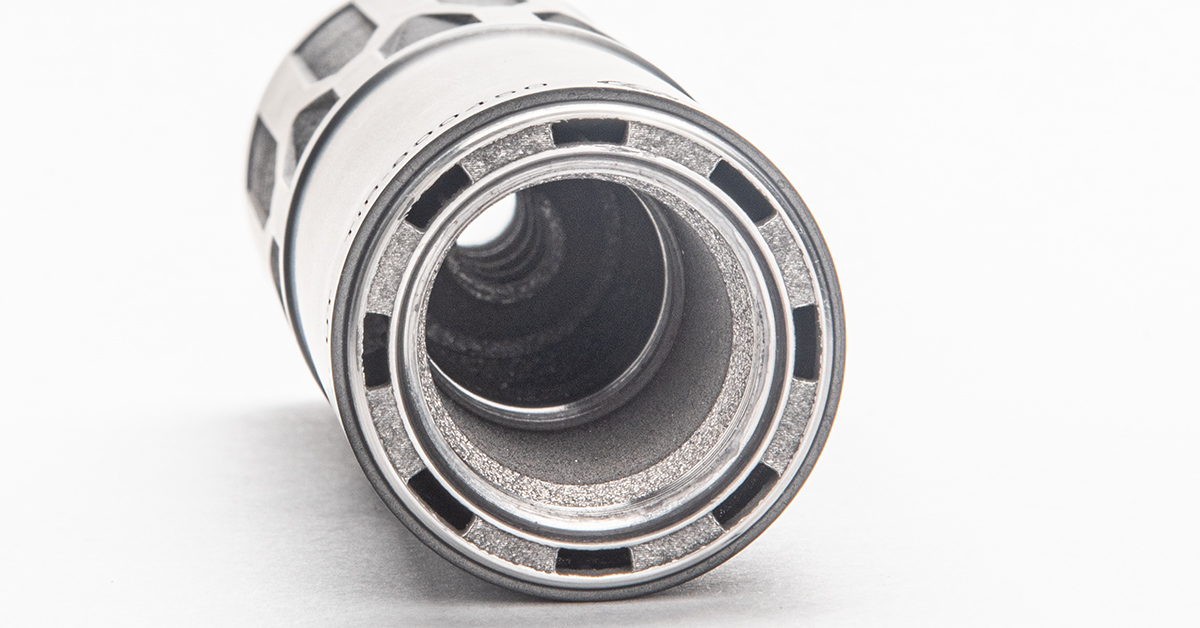
The suppressor body is constructed of 6AL4V Grade 5 Titanium (hence the “Ti” in the name) through an additive manufacturing process (3D printing). The one-piece body construction delivers structural strength and means there are no baffles to disassemble for cleaning.
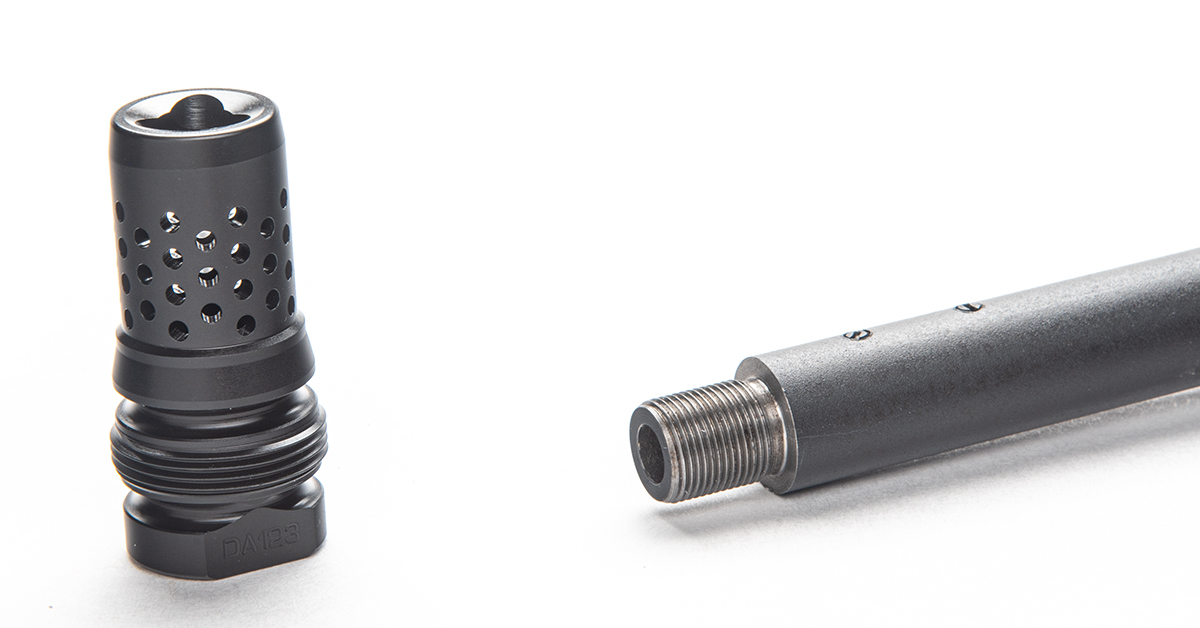
The Nomad Ti OTB accepts Dead Air’s Xeno tapered mount system. It comes with a Xeno Radial Brake threaded 5/8-24. That’s perfect for heavier barrels, but smaller-diameter barrels like my Remington 700’s sporter contour demand a smaller-diameter mount — in this case, 1/2-28.
I’ll talk more about that in a moment.
- Caliber Rating: 300 RUM, 7mm Backcountry
- Energy Rating: 4400+ ft.-lbs.
- Bore Diameter: .30-caliber
- Length: 7.65 in. (adds just 4.6 in. to overall length)
- Diameter: 1.76 in.
- Weight: 10.5 oz.
- Materials: 6AL4V Grade 5 Titanium
- Finish: Black or FDE high-temp Cerakote
- Mount: DA870 Xeno Radial Brake, 5/8-24 (included)
- MSRP: $1049
- Barrel Restrictions: 5.56: 12.5 in. | 300 RUM / 7mm Backcountry: 16 in.
- Full Auto Rated: no; bolt-action, semi-auto
- Mount Compatibility: Dead Air Xeno muzzle devices; incompatible with the Browning Xeno Recoil Hawg Muzzle Brake
Making an Older Rifle New Again
So, the availability of this slick, over-the-barrel suppressor got me to thinking about my 270. It came with a 22-inch sporter barrel, so I already had a leg up on minimizing overall length and weight. The fact that the Nomad Ti OTB would keep the rifle as short as can be expected when shooting suppressed was a bonus.
All this put me in mind to turn my factory gun into a “mountain-style” rifle — something that would be as light as possible but also quiet and as accurate as I could make it. Several things would need to come together to make all that happen, but first, I wanted to validate the changes I had planned. That meant proofing the gun on the range to see exactly what it could do with a selection of quality, off-the-shelf factory ammunition and with no modifications to the gun other than the Leupold scope I had installed right after I bought it nearly 30 years ago.
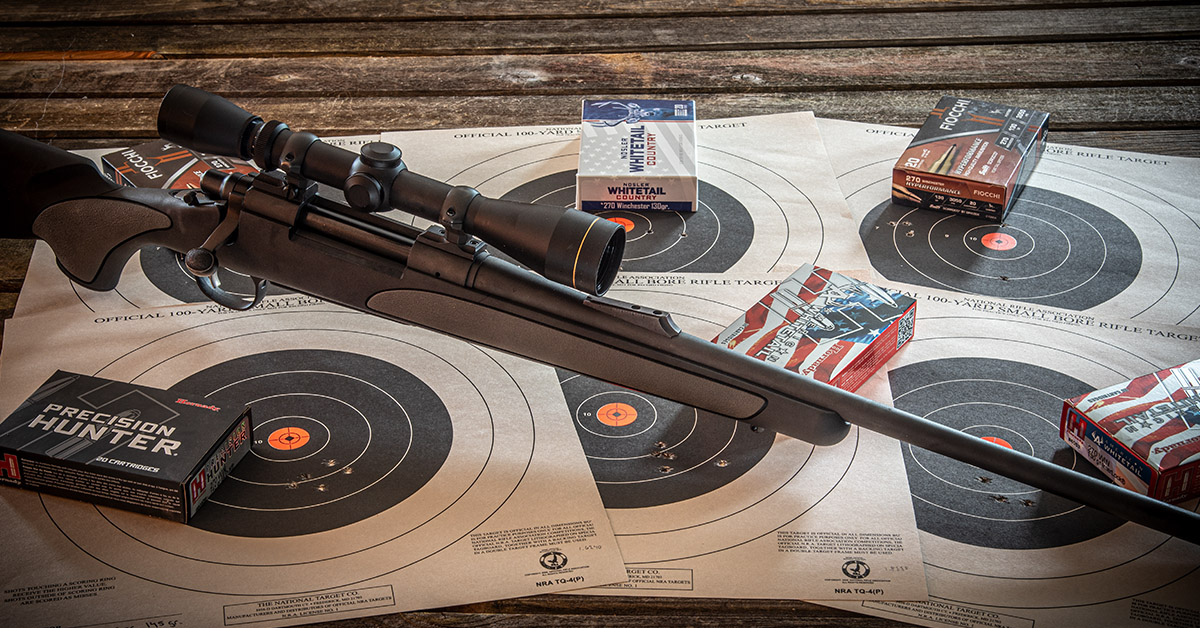
For the accuracy test, I chose three loadings from Hornady, two from Fiocchi, and one from Nosler:
- Hornady Precision Hunter 145-gr. ELD-X
- Hornady American Whitetail 130-gr. InterLock
- Hornady American Whitetail 140-gr. Interlock
- Fiocchi Hyperformance 130-gr. Scirroco BT Spitzer
- Fiocchi Hyperformance 150-gr. SST
- Nosler Whitetail Country 130-gr.
I figured this would be a good representative sampling of quality ammo across typical whitetail bullet weights and designs.
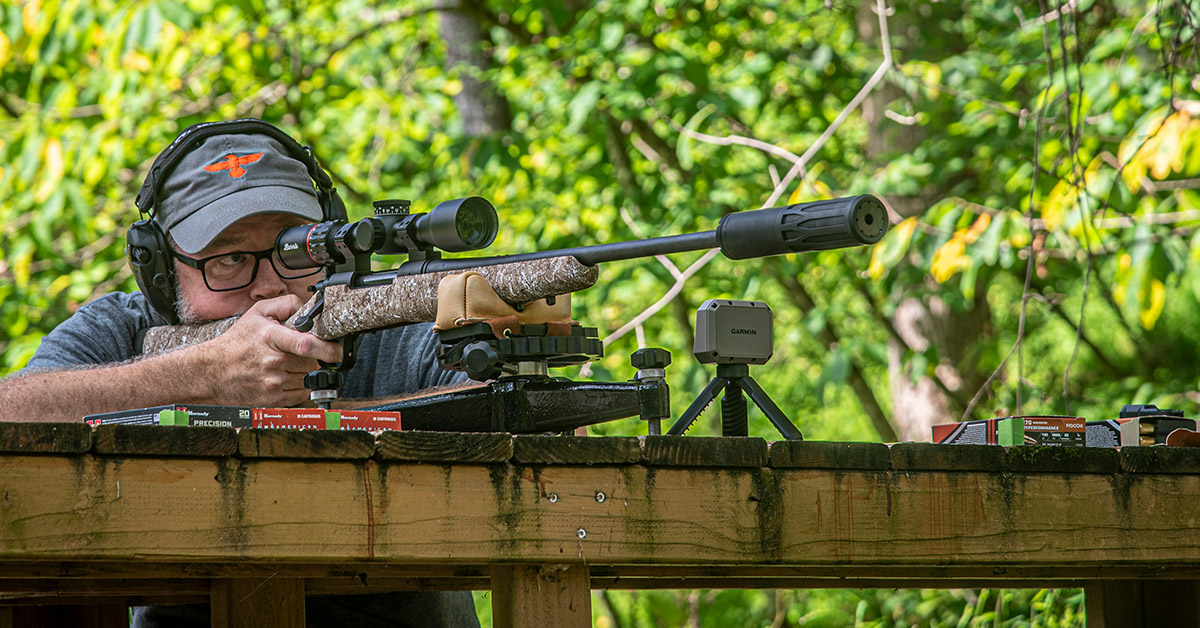
The testing protocol was simple. From a sturdy bench rest, shoot five rounds each at 100 yards and measure the group size.
The results:
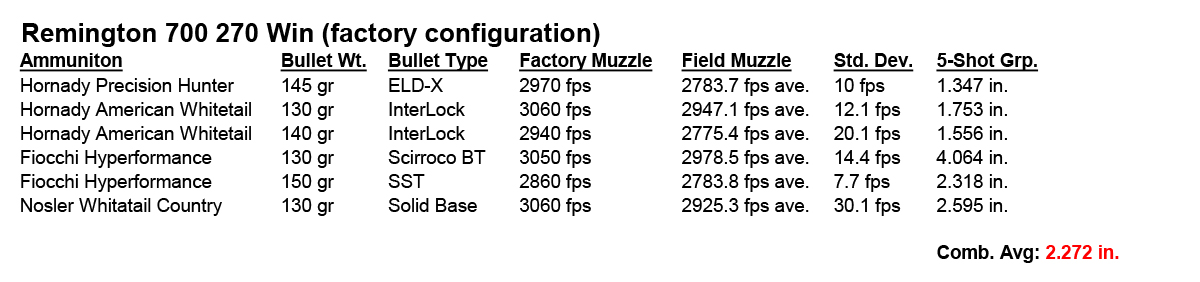
Like most folks, I was hoping that all rounds would fall within that magical (sometimes mythical) one-inch group.
Didn’t happen. The best five-shot group came from Hornady’s Precision Hunter with the 145-gr. ELD-X at 1.347 inches. Nothing to complain about there. Hornady’s American Whitetail in 140-gr. Interlock also fared well at 1.556 inches.
Although this was a relatively small ammunition sampling, it did show me that my barrel likes bullets in the 140- to 145-gr. weight range and the 2700-2800 fps velocity range.
As a takeaway from this experiment, you can see how looking at raw data (rather than just eyeballing results on a target) can help you find the loading your gun likes best. For example, if I weren’t going to repeat this test after modifying the gun, I would acquire several more loadings within these bullet weight and velocity ranges and see if those group sizes could shrink even further. But for this test, I must maintain consistency with the ammunition.
With the factory accuracy established, it was time to execute the plan: to see if select aftermarket parts, along with the addition of the suppressor, would produce a rifle that would not only be light and maneuverable for hunting mountainous terrain, but would also be satisfactorily accurate at extended distances.
The Suppressor Fix for Older Firearms
Today, we look with squinted eyes at most rifles and pistols that don’t come from the factory with muzzles threaded for suppressors. Like red dot-compatible pistols, we now expect barrels to come out of the box ready for suppressor mounting.
That’s not the case with older rifles. Fortunately, there are solutions.
The traditional means for threading a muzzle for a brake or suppressor was to truck the gun off to a gunsmith, wait a long time, and then write a significant check for the service. Nowadays, we don’t want to wait, money is tight, and good luck finding a gunsmith/machinist you can trust to get the job done right.
I asked Shoot ON contributor Richard Mann, who lives in my part of the country, if he had any regional gunsmith recommendations.
“Yeah,” he said, “but he might take a while. You might want to try Silencer Central. They can do it.”
I didn’t realize Silencer Central offered that service, so Richard gave me a name to check with and I had it all lined up before dinner.
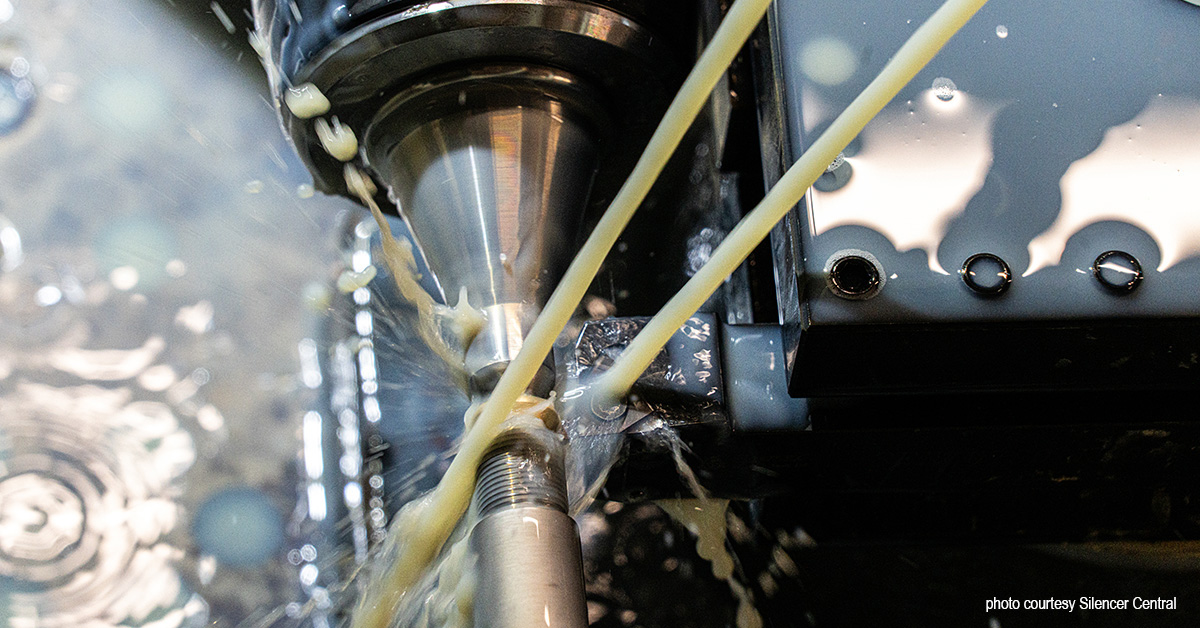
You can read all about Silencer Central’s barrel threading service on the company website. Here’s the thumbnail version:
Purchase your service through the Silencer Central website.
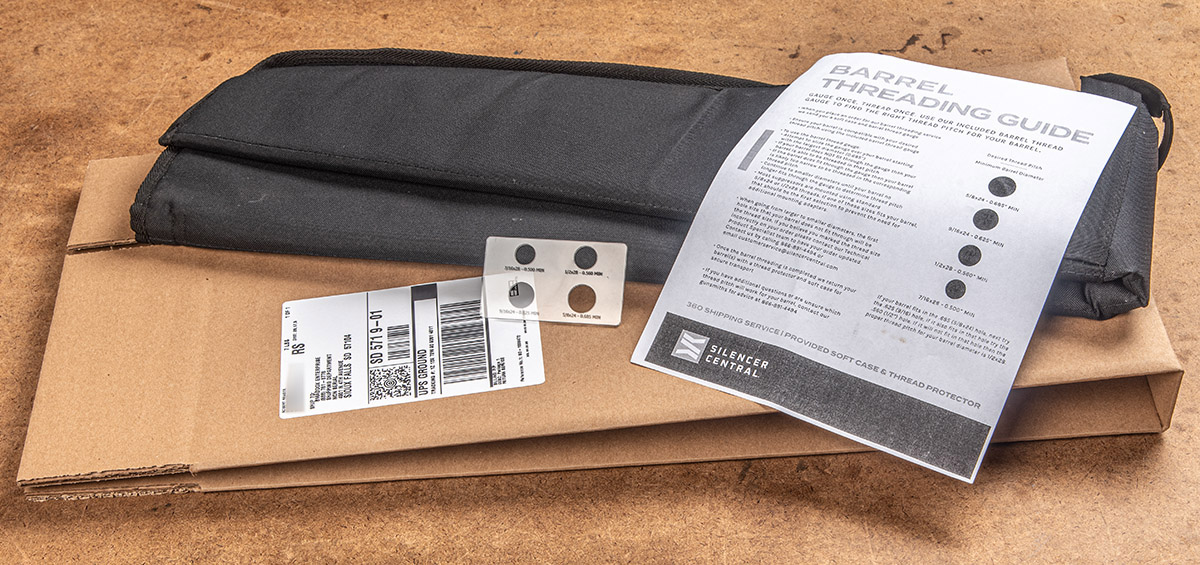
Silencer Central will send you a box, soft case, and shipping label that you’ll use to mail your stripped barreled action to the company. They also send a plastic barrel gauge and a barrel threading guide to help determine the correct thread pitch for your barrel.
When the service is completed (turnaround dependent on current workload volume…mine took less than two weeks), Silencer Central will mail the barreled action back to you with a thread protector.
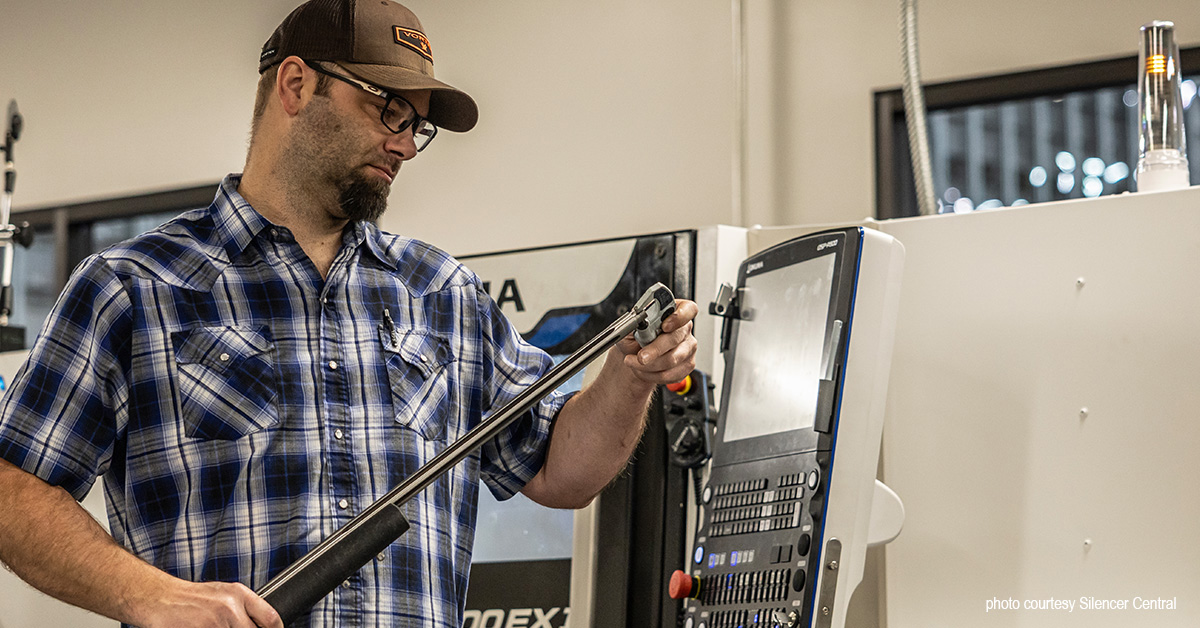
The best part of all this — aside from the quality work and fast turnaround — is that this service is super-reasonable in price. The cost for the barrel threading service is $124.99. Of course, there are some added-cost options you could also select, depending on what you intend to do, such as a barrel cut and recrown, thread/alignment check, front sight move or install, and muzzle brake timing.
Again, check out the website for full details and to coordinate the suppressor/mount system needed for the thread-to-caliber service.
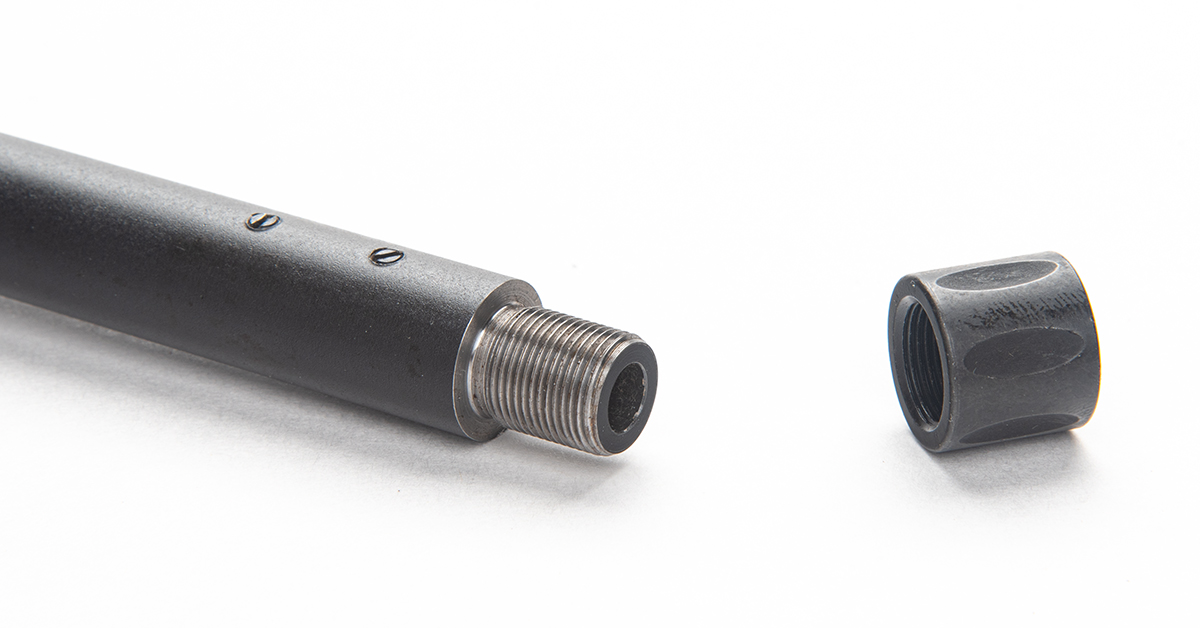
My barrel came back as promised — clean, perfectly machined threads in 1/2-28 with a thread protector.
If you want an easy option for adapting your rifle for suppressor use or you simply want to add a muzzle brake, give Silencer Central a call. To learn how to prep your Remington 700 barreled action for threading, check out this video…
To the Deep Freeze
Most of you are probably familiar with the concept of cryogenically treating firearm barrels. The theory — attested by top-shelf gunsmiths/machinist, precision barrel manufacturers, and competitive shooters all — is that slowly bringing a gun barrel down to -300° F and then slowly returning it to ambient temperature reduces or eliminates what is called “residual stress” from the barrel manufacturing process. This residual stress reveals itself in barrels as they heat up during repeated firing. The barrel can twist and warp as heat builds, resulting in shifting point-of-impact.
Cryogenic barrel treatment minimizes this action, cancelling the inherent, residual material stresses by stabilizing the gun metal at the molecular level. While the science is over my head, one company kept coming up when I asked colleagues where I should send my barreled action for cryo treatment: 300 Below.
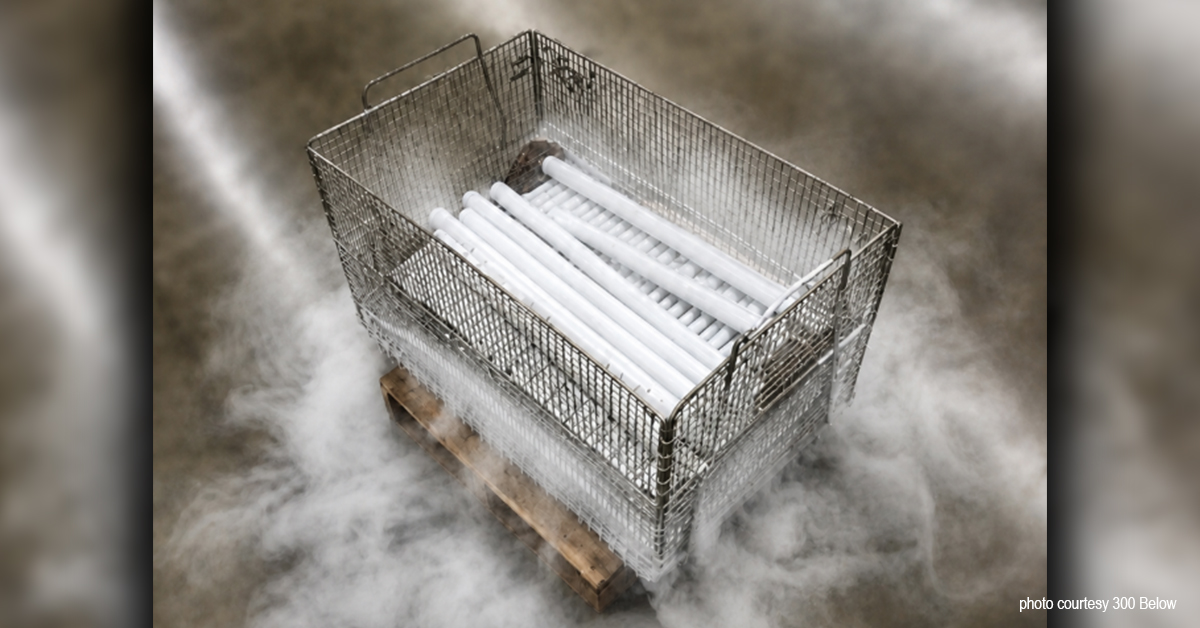
Rather than me trying to mangle the explanation, here’s what 300 Below says about their barrel treatment process:
50% More Accurate – Barrels tend to bend and warp from heating and repetitive firing. This leads to larger groupings and inconsistency. Cryogenic processing makes the barrel smoother and more resistant to heat and friction, so it can hold tighter groupings with larger round counts.
Extends Barrel Life – Our computer controlled cryogenic process is the proven way to eliminate barrel stress caused by manufacturing. Our proprietary process fills microscopic voids in the barrel to create a denser, smoother surface that reduces friction, heat, and wear.
Easier to Clean – Because of the refined metal molecular structure, cryogenically processed barrels are easier to keep clean. The smoother and denser inside surface makes it easy to eliminate dirt, powder, and residue build up even after routine cleanings.
Take business claims as you will. What I know is that people I trust swear by this process, manufacturers who use this process and whose guns I’ve tested lead me to believe there’s something to this, and one of my cryo-treated AR barrels is so accurate it’s scary.
Good enough for me, so after receiving the barrel back from Silencer Central for the muzzle threading, I called 300 Below and arranged to have the barreled action frozen. The process, again, was simple. Call the company to arrange payment and shipment (I just relabeled my Silencer Central box and stuffed it with my cased barreled action). Turnaround time for this service is also lightning-fast since 300 Below processes barrels every Friday and gets them back out to the customer toward the end of the following week.
The price for this service is $154 plus return shipping.
The Shooter Interface
A light, creep-free, precision-manufactured trigger is a must-have for any rifle if you expect to wring out the last ounce of a gun’s accuracy potential. For this, I admit my bias and look to Timney Triggers for the solution. My choice — Timney’s Elite Hunter for the Remington 700.
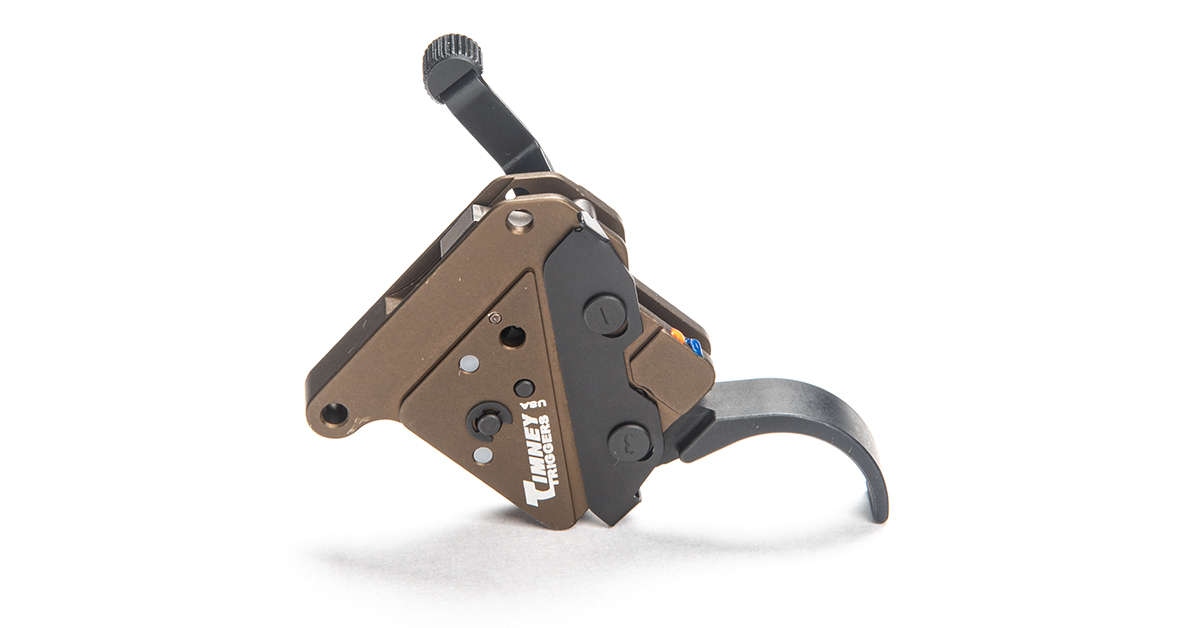
The Elite Hunter is a drop-in, cartridge trigger that comes from the factory with a pull weight of around 3 lbs. That said, the pull weight can be adjusted to between 2- to 4-lbs., and you can also adjust the overtravel if you choose. For a hunting rifle, 3 lbs. is about right for most folks.
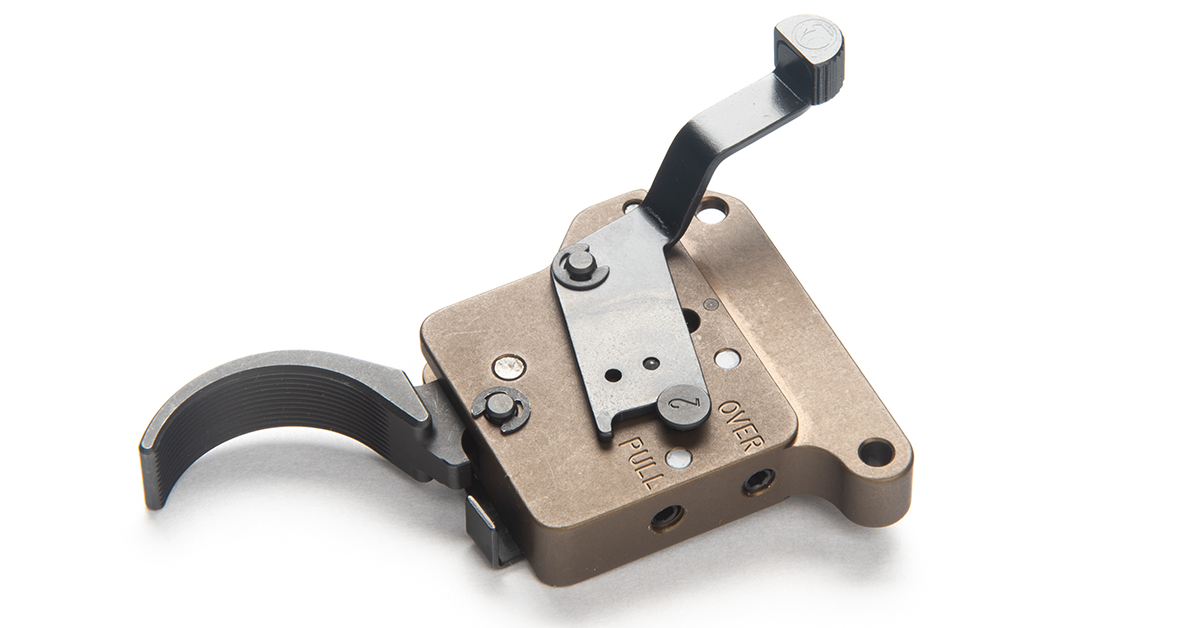
One feature I like about this model (aside from its exquisite sear performance) is the standard trigger’s broad, flat trigger shoe because it provides a sure, positive engagement with the trigger finger, allowing for a controlled, straight-back pull.
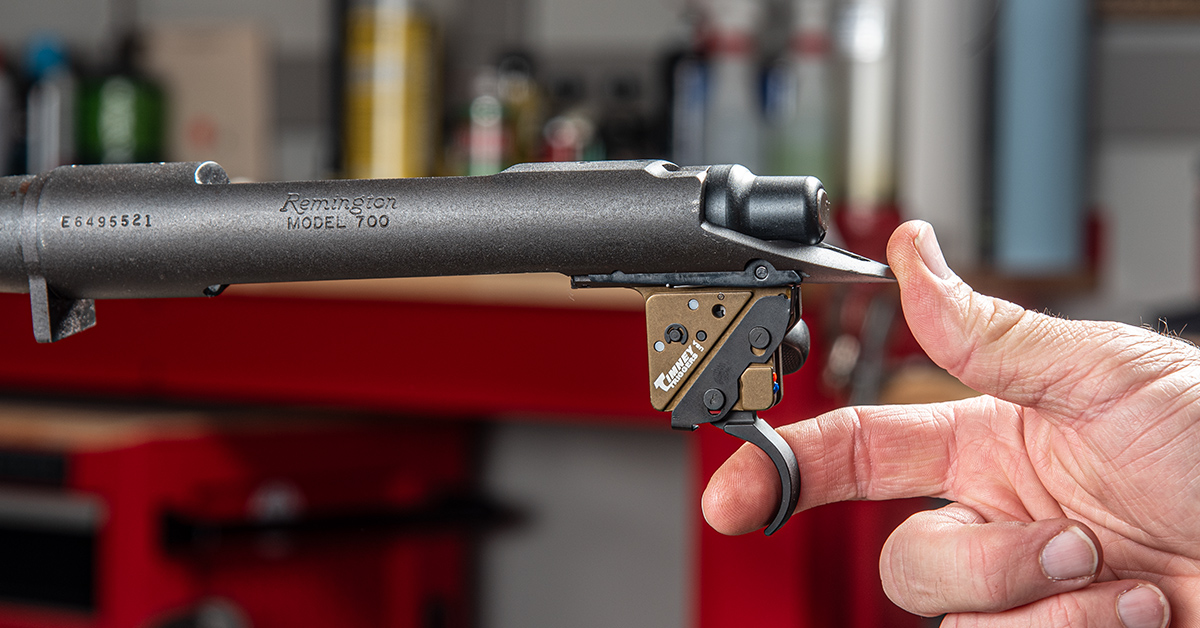
Installation is as simple as it gets. Remove the original factory trigger by disengaging the trigger module and sear assembly from the two trigger pins. Just be careful to keep the bolt stop/release lever in place to avoid the hassle of reinstalling that. Next, install the Elite Hunter and secure with the trigger pins. Done.
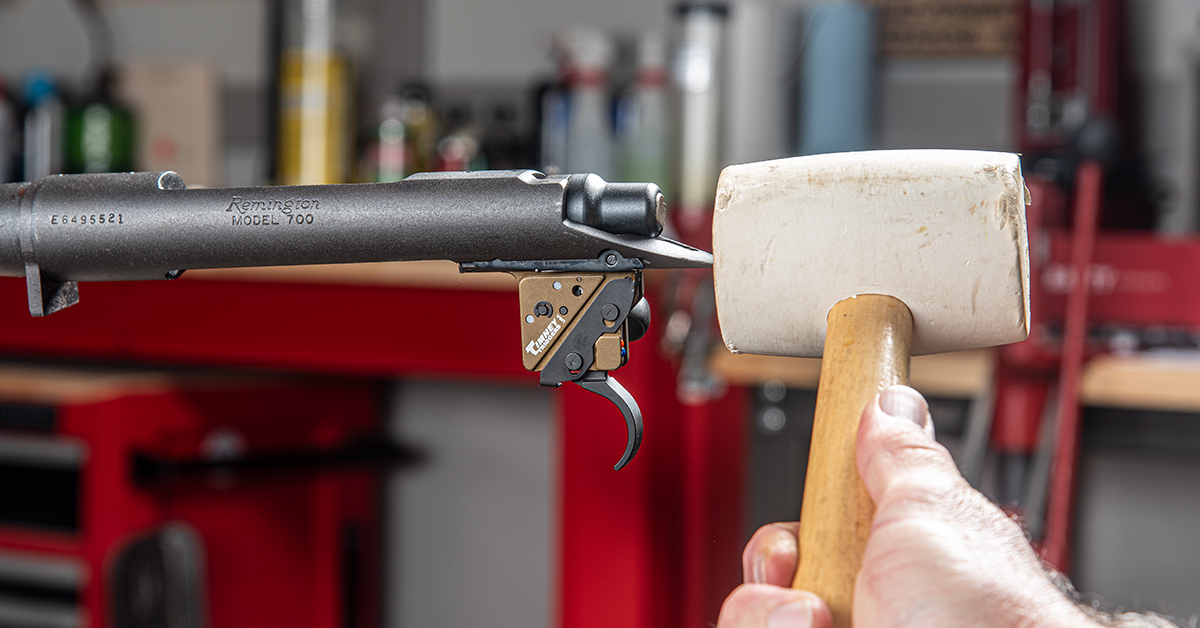
After making any desired adjustments to the pull weight (I set mine to around 2.5 lbs.) or overtravel, cock the bolt, place the safety on fire, and strike the back of the tang with a rubber mallet. This is to ensure the sear will not accidentally disengage when subjected to a hard blow when the safety is off. I’ve never had that happen, but it’s smart to check this during your function test.
Check out this article for a step-by-step on how to swap your factory trigger for a Timney unit.
A Proper Foundation
A barreled action’s accuracy potential is somewhat defined by the foundation in which it sits. A loose barrel-to-stock fitment or a flimsy stock that allows the barreled action to do the Jitterbug under recoil will contribute to larger-than-desired group sizes.
A heavy, dense stock with a bedded barreled action is the typical formula to address this issue. “Heavy” is the operative word here, and that was a characteristic I intended to dial out of this mountain rifle build. I wanted a stock that was light of weight, precise in construction to negate the need for bedding, and stiff enough to manage the recoil of the 270 Win. loading.
A tall order, indeed, but a company out of Rapid City, South Dakota, knows how to fill such requests.
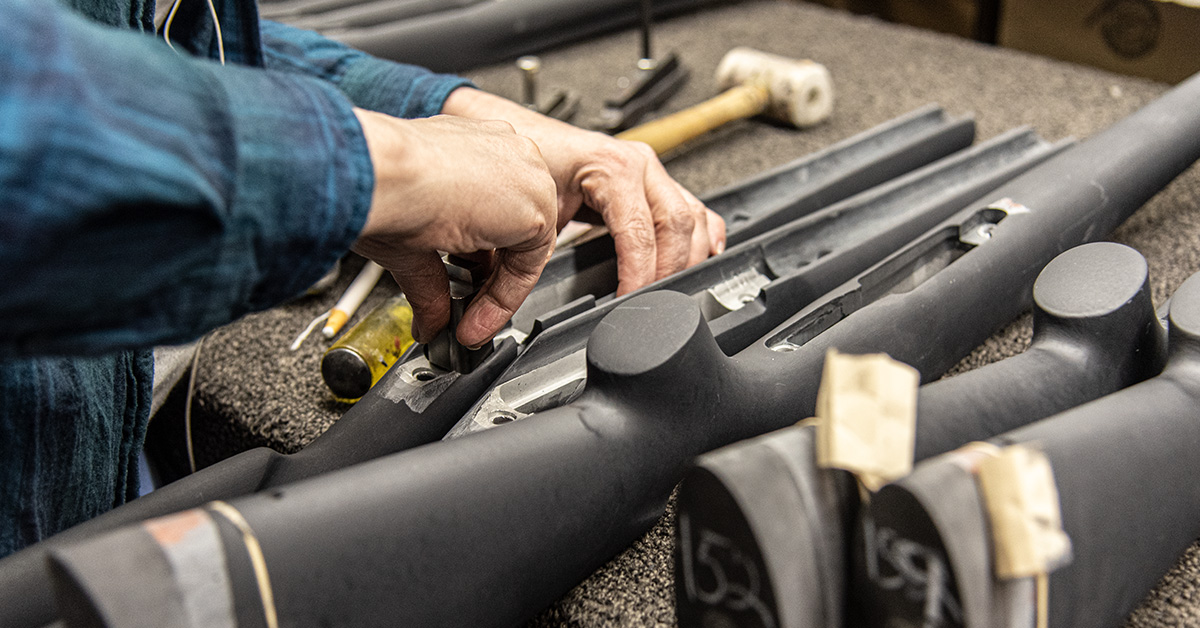
I visited the H-S Precision factory a few years ago while on a South Dakota turkey hunt and came away impressed. The company not only builds custom precision stocks, but they also build every major component of their custom firearms, like barrels, actions, magazines, and bottom metal. Heck…they are even the leading manufacturer of test barrels used by ammunition manufacturers. The ballistic data you see on the back of your ammunition box — that data was likely derived from an H-S Precision test barrel.
I knew from that visit that an H-S Precision stock would someday host one of my barreled actions.
The company offers a slew of configurations for a wide range of the most popular bolt-action rifles. My choice for the mountain rifle build was the Pro-Series Stock (#PSS104) for the Remington 700 long-action ($499).
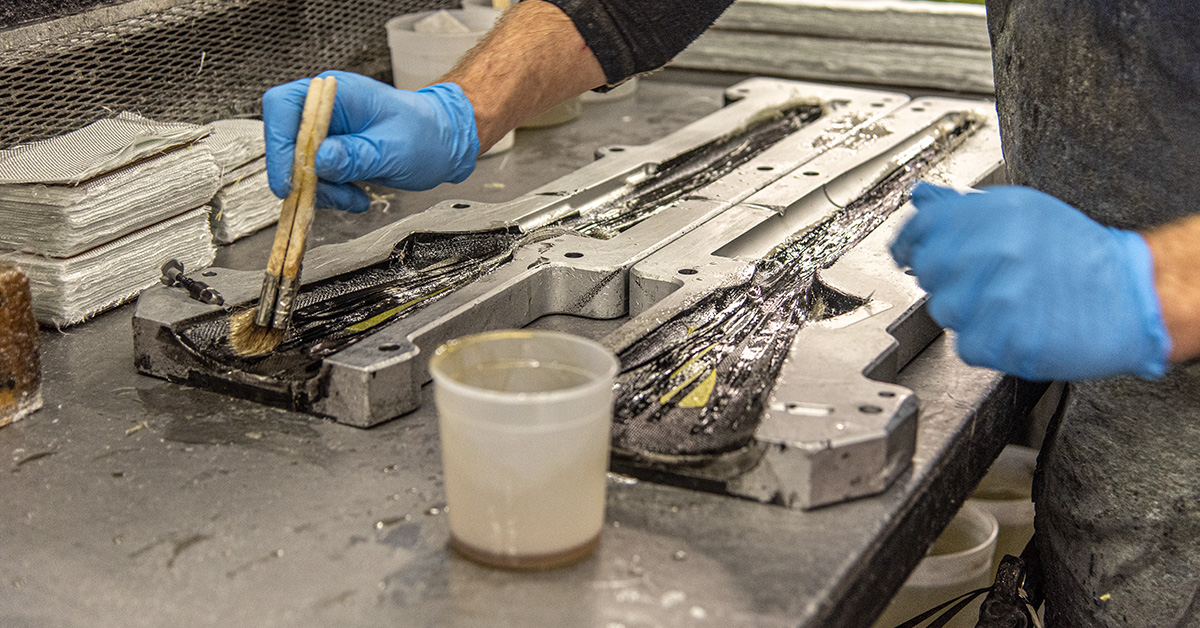
The stock is made from a combination of dense polyurethane foam, woven fiberglass, Kevlar, and unidirectional carbon fiber.
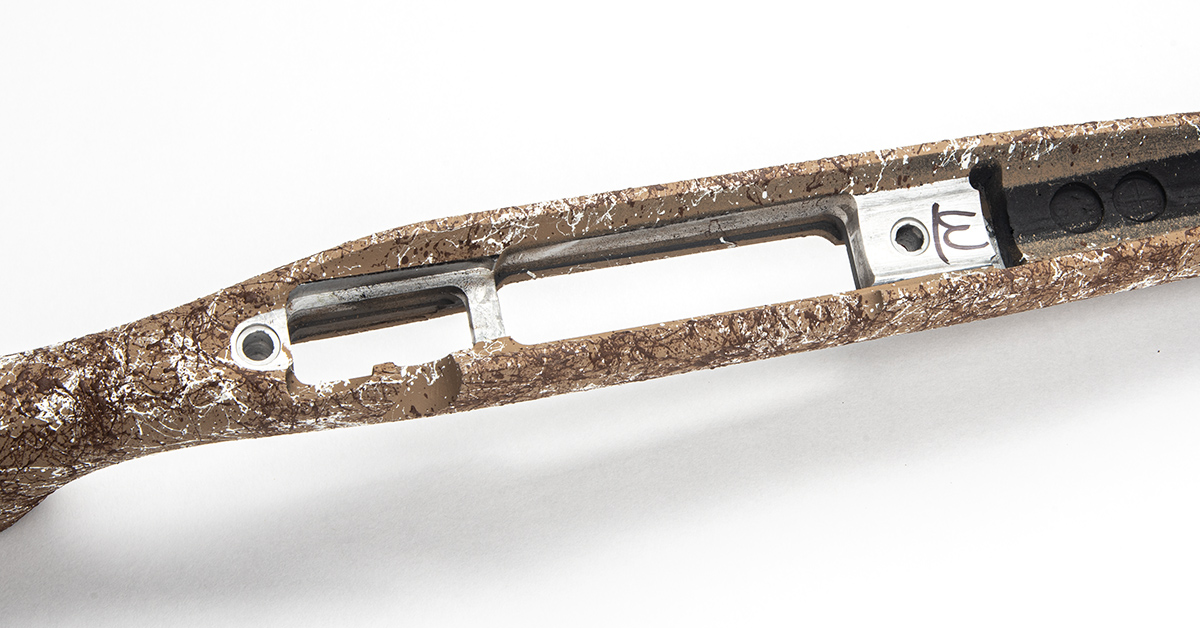
This stock is built around a half-length (doesn’t extend past the barrel lug recess) 7075 aluminum bedding block. Keeping the bedding block half-length instead of running all the way down the forearm eliminates a pile of weight, hence its average 1-lb., 14-oz. heft.
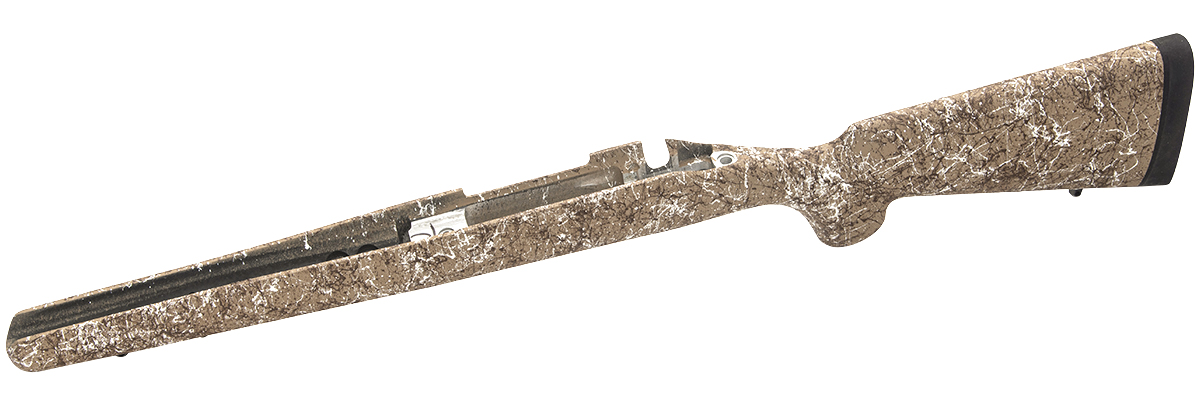
Overall, the sporter stock profile I chose is almost a mirror image of the Remington factory stock. But this is a custom, so you get to choose some things, such as the stock color (here, I went with Sand…one of 29 color options) and length-of-pull along with a handful of accessories if you so choose.
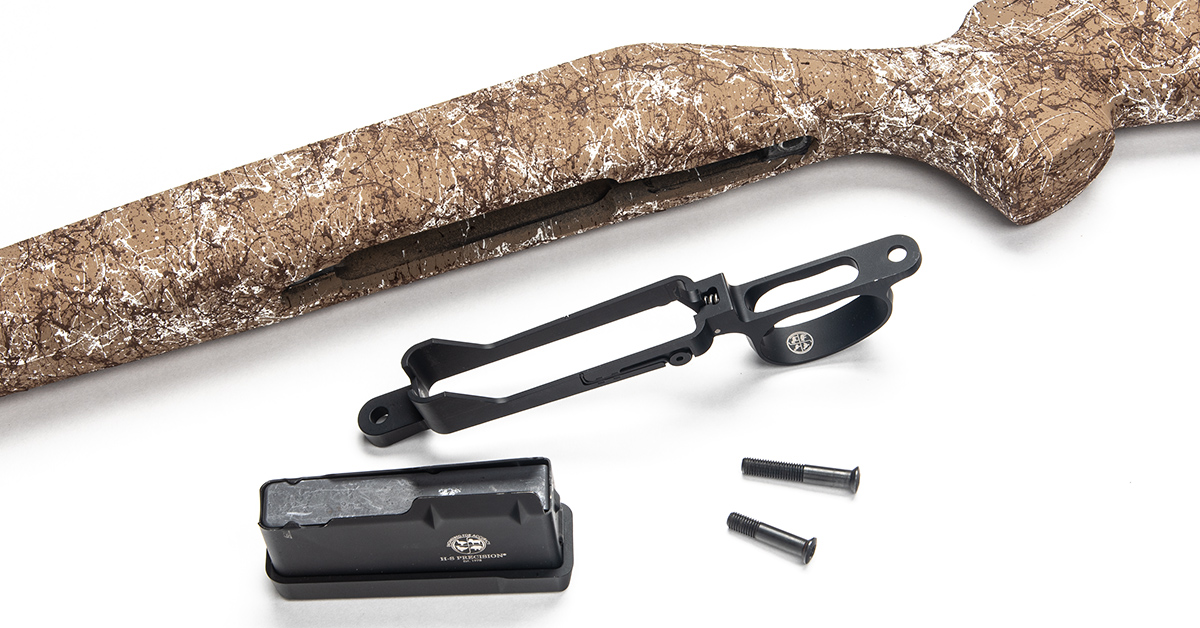
H-S Precision also manufactures the bottom metal and magazines for their stocks. This is their Remington 700 Detachable Magazine Assembly/Conversion Kit, and at $369, it adds a good chunk to the price of this conversion. In my case, it was totally worth it because my 700 ADL featured a blind box magazine, which I absolutely do not like.
H-S Precision offers their magazines in high or low capacity (round count dependent on the size of the cartridge). I chose the low-capacity mag to keep the weight down. This allows me a detachable magazine that holds four rounds with one in the chamber for a total of five rounds on board.
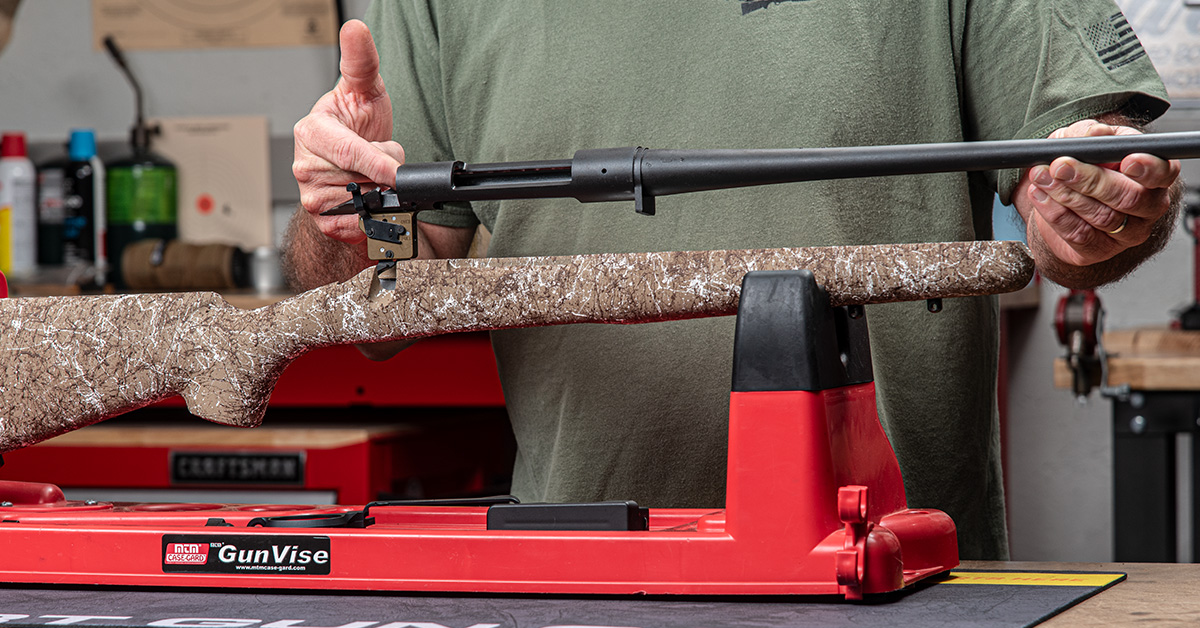
Mating the now-threaded and frozen barreled action proved effortless. The half-length aluminum bedding block and free-float barrel channel accepted the barreled action with confident precision. The fitment was perfect and I encountered zero interference issues and no need to adjust the inletting.
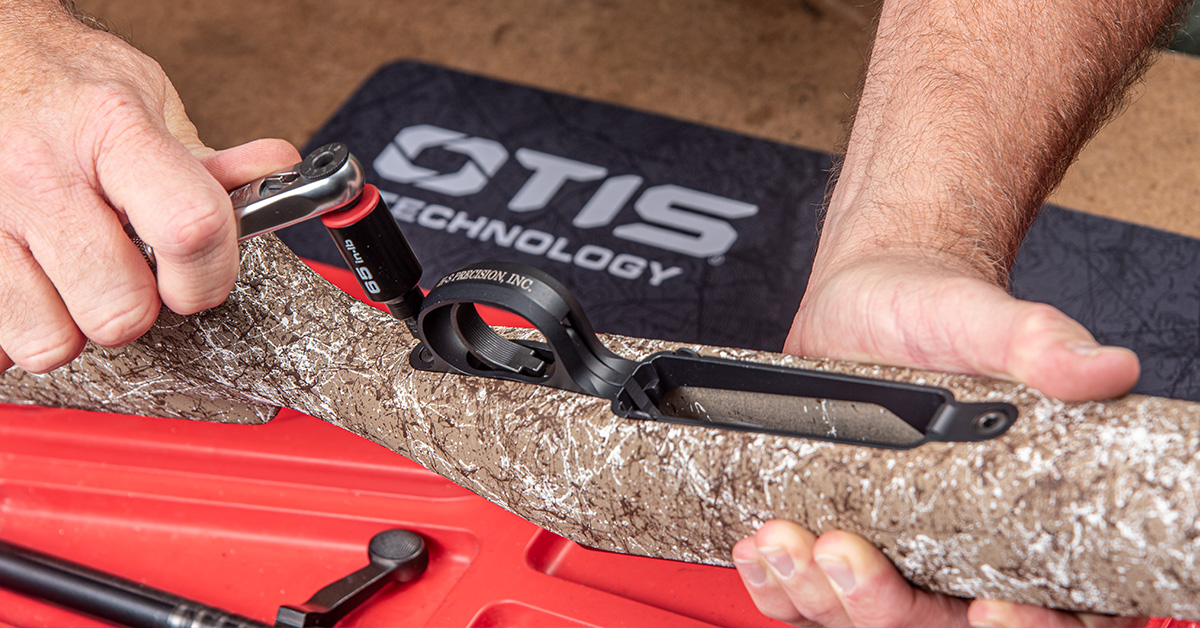
Two supplied action screws secure the bottom metal to the bedding block. With the factory-defined 65-in./lb. torque value, this combination delivers a solid installation that is going nowhere under recoil.
With the base rifle assembly complete, I was curious about the overall weight prior to the optic installation. After inserting the empty mag, I dropped the gun on the scale and recorded a weight of 7 lbs., 3 oz. Not what you would call a featherweight, but for a rifle with a precision stock, not bad at all. If that weight proves to be too much for an all-day mountain hunt, it’s time to hang up the boots.
Optic Considerations
I struggled a bit when trying to choose an optic for this gun. For mountain rifle duty, weight and maneuverability were primary considerations. There’s no point in building light only to drop a heavy brick on top of the rig. Besides, most of the hunting this gun would see would be in a woodland environment, so a big, long-range scope was not on the menu. On the other hand, that hot rod 270 Win. cartridge is well-suited for western open-country hunting, so I wanted to keep my options open and not install some puny glass.
The balance between weight and reach came with the newly updated and redesigned Burris Veracity in 3-15x44mm.
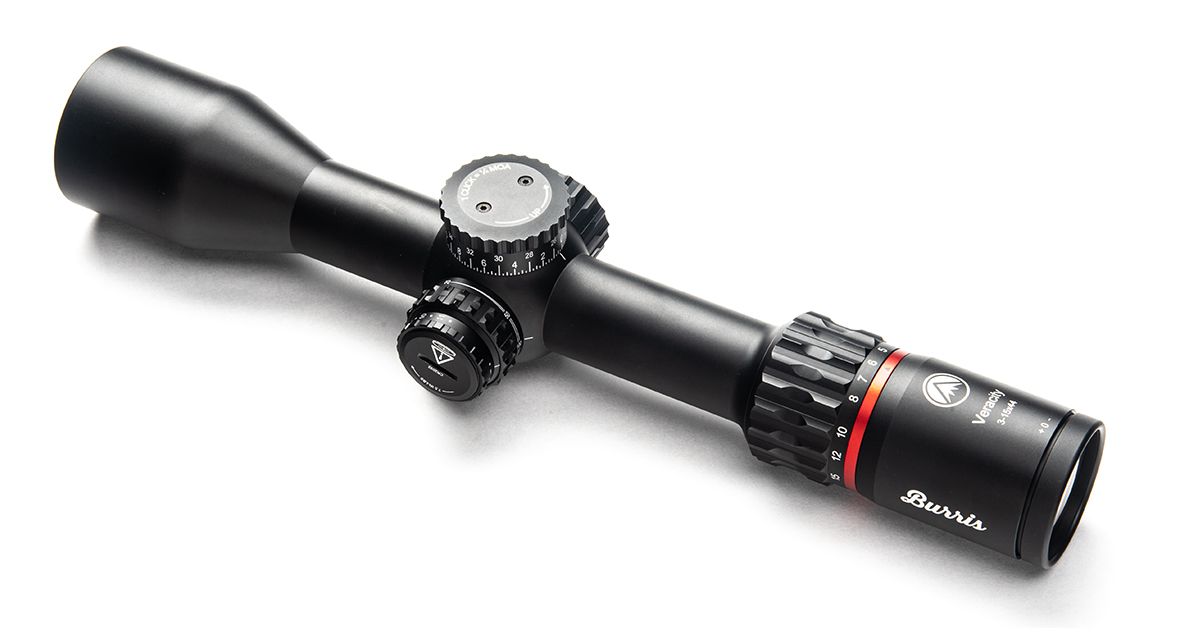
The 3-15x magnification range gives me everything I need, whether in the tight confines of eastern mixed hardwoods or the open prairie haunts of western mulies, whitetails, and pronghorns. Having already tested the Burris Veracity 5-25x50mm on a long-range varmint rifle I built this summer and trying out the 2.5-12x42mm model on my AR varmint setup, I have come to appreciate the quality and value Burris has packed into this second-generation scope series. The 3-15x44mm Veracity, thus, seemed to be the ideal option for the DIY mountain rifle.
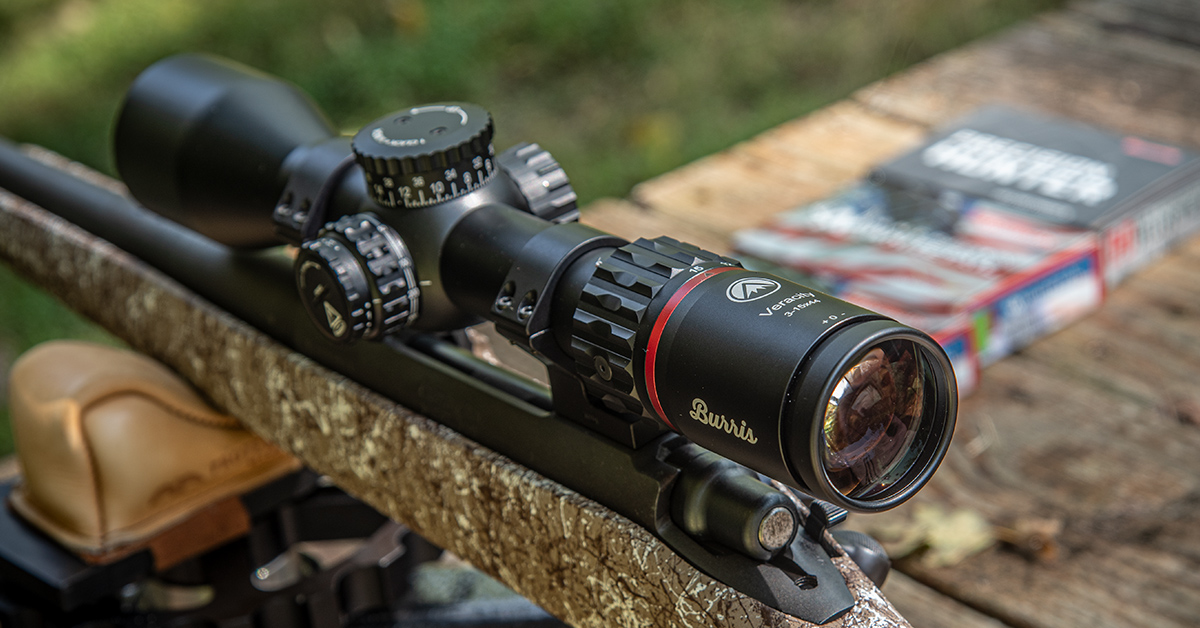
This model pretty much covers all the bases. Given its front focal plane configuration (the reticle size increases or decreases with the magnification), the illuminated and MOA-based RC-MOA reticle works well for both short- and long-range engagement under low to bright ambient light conditions. If you don’t want to use the reticle’s MOA holdover and windage hashes, you can dial-in bullet drop using the exposed turret Pro Elevation Knob — part of the Burris Knob Synergy System.
I have found the Veracity’s premium, fully multi-coated ED glass to deliver a crisp and clear downrange view, and I absolutely appreciate the aggressive knob design. It really gripes me when I’m testing a scope that has a super-stiff magnification ring or illumination/parallax adjustment knob (this Veracity has both) but lacks robust knurling or texturing. In other words, it makes it hard to turn when you’re wearing gloves or when your hands are wet and sweaty. The aggressive design of the new Veracity knobs means you can manipulate them quickly and positively with no slippage.
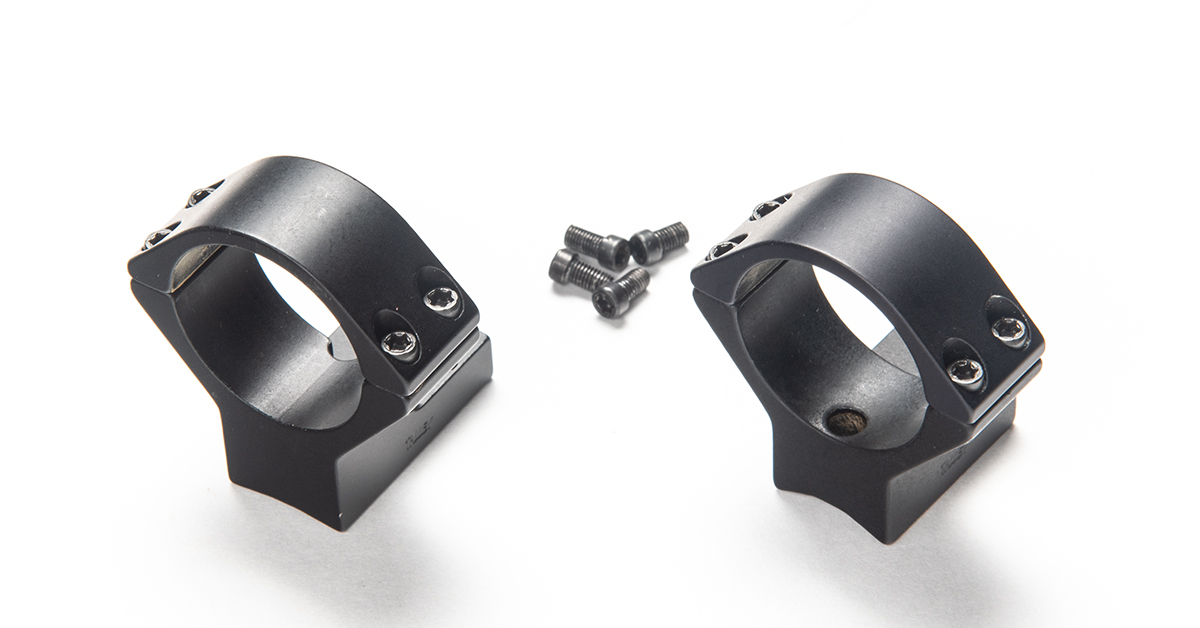
To mount the scope, I chose Talley Manufacturing’s one-piece 30mm scope ring and base set for the Remington 700. These are my first choice when mounting any optic to a Remington 700 because they are absolutely solid and precision machined. Further, they are simple to install, and the aluminum construction keeps the weight to a minimum. Another advantage of this design is that, as with most things, the fewer components the less chance of failure in the field.
Range Test, Revisited
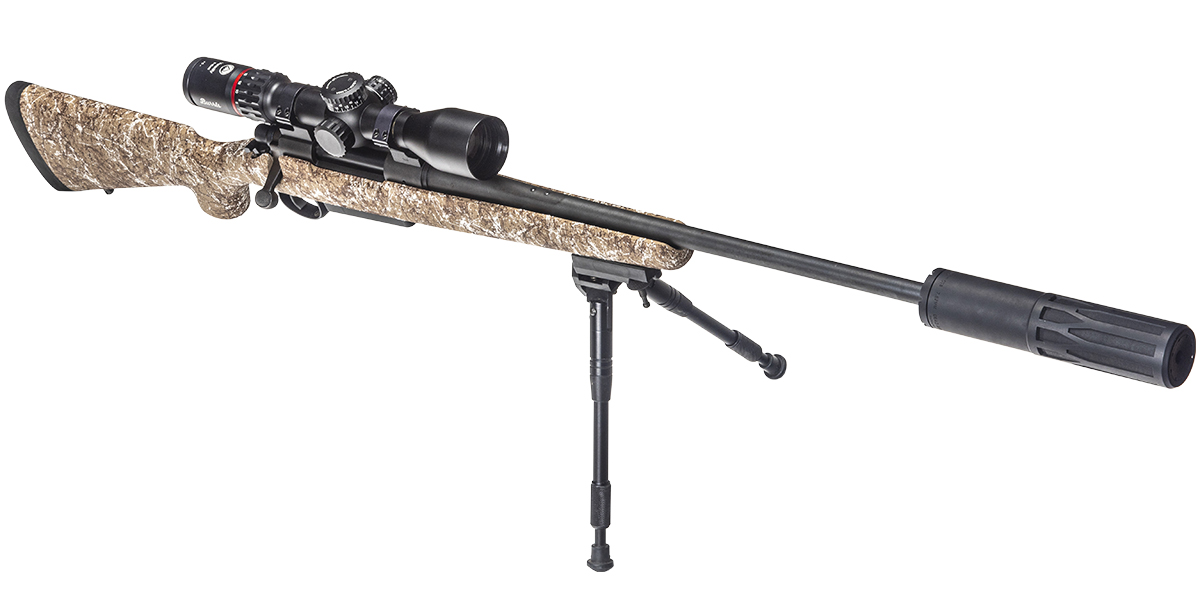
After getting it all together, I was extremely pleased with the results. Even with the scope and suppressor installed, the gun feels perfect for all-day carry. The balance finds equilibrium right at the barrel lug, which is ideal for me.
Another handling bonus is the spider web texturing of the stock’s paint. This offers no-slip performance at the grip and along the forend.
The question now became what, if anything, did all these upgrades do to improve accuracy over that of the stock rifle configuration? Did they boost accuracy or degrade it? If so, by how much?
We go into these kind of tests understanding that the barrel is king. An already decently made rifle’s accuracy potential can be improved with the kind of upgrades we’ve applied here. An “unfortunate barrel” — one that delivers a poor accuracy showing right out of the box — may do better with some strategic modifications to the platform, but there is no guarantee. Sometimes a “bad barrel” is just a bad barrel.
Then there is the load consideration. Every barrel likes a particular load. Finding that load then becomes the mission after you’ve done everything else possible to minimize platform and shooter variables.
And so we go…
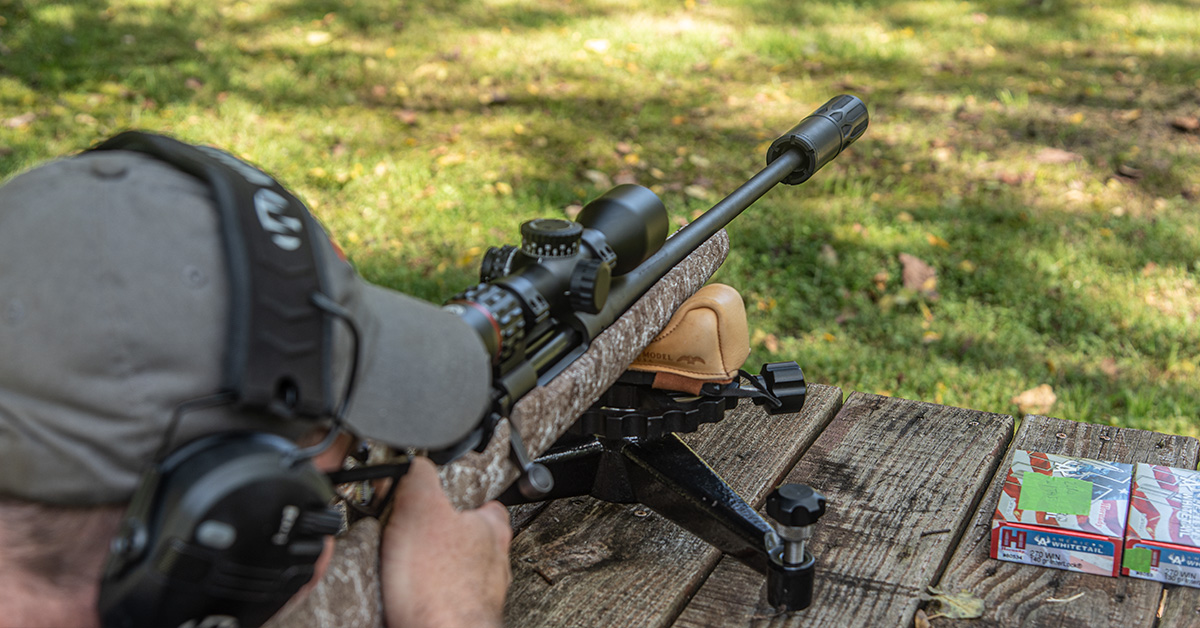
For the post-modification proofing, I set up everything as I did with the gun in its original configuration. Even the weather was identical…mid-80s and humid. Also, I used the same six ammunition loads as before.
The only caveat is that I chose not to shoot the gun without the Nomad Ti OTB suppressor installed. Shooting without the suppressor may have given different results, but since this was the hunting configuration I would be using, I went with the all-or-nothing approach and did all Round Two testing with the suppressor on the barrel.
Here are the before and after results together:
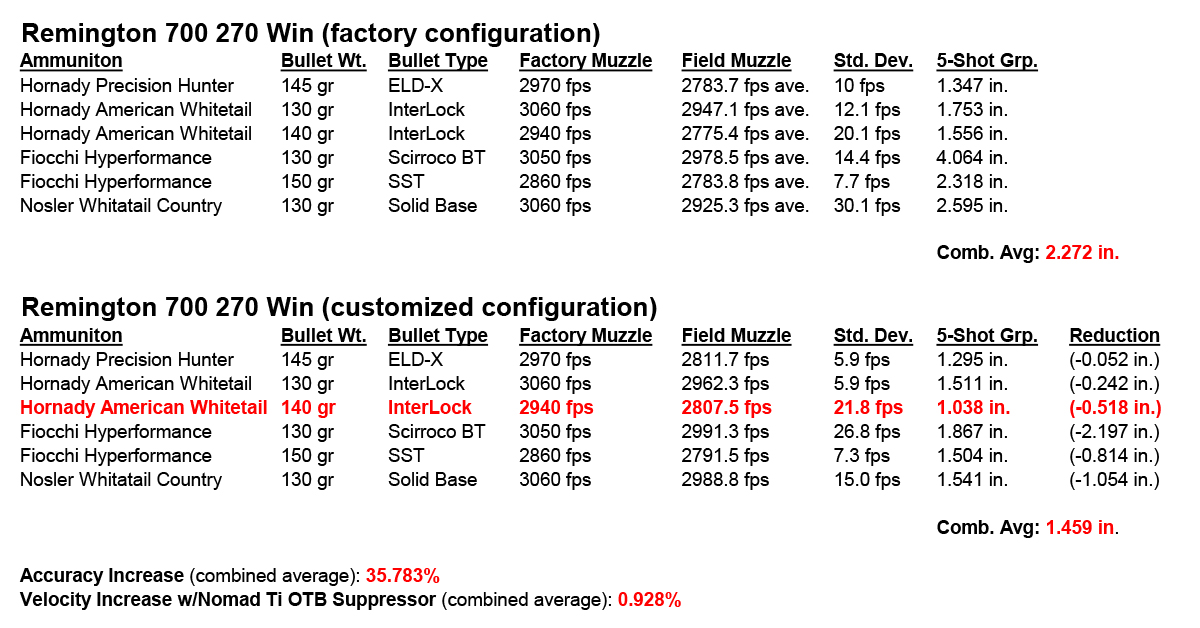
As you can see from a generalized perspective, the ammunition performed mostly the same relative to each other. The ammo the gun liked best before the modification was the ammo it liked best after the modifications. That trend pretty much held. No big surprises there.
What I really wanted to determine was the overall change from one rifle configuration to the next. For this, I calculated the average group size of all ammo combined from Round One (factory configuration) with all ammo combined from Round Two (customized configuration). This would give the relative change in group sizes. The result: the customized rifle configuration dropped the collective 100-yard, five-shot group average by almost one inch; to be exact, 0.813 inches.
Now, that may not sound like a big gain on the surface, but if your intention is to build a rifle that will deliver bullets on target at longer distances…say 300 to 400 yards…a 3/4- to 1-inch reduction in group size at 100 yards is a big deal.
The bottom line is, all the barrel work and the upgrade components resulted in a combined average increase in rifle accuracy of 35.783-percent.
You’ll also note from this test that all the different loadings performed better across the board after the modifications. Some improvements were marginal, such as the Hornady Precision Hunter, and some were significant, like the Fiocchi Hyperformance 130-gr.
I also wanted to see if there would be a change in muzzle velocity between the stock barreled action and the post-cryo-treated barreled action with the suppressor. By theory, extending the “rifle bore” by way of the suppressor bore should boost velocity by a tad. As you can see from the above chart, muzzle velocity (field velocity) did increase with every loading by a few fps. Again, taking the combined average of all loadings, the addition of the Nomad Ti OTB suppressor seems to have boosted average muzzle velocity by 0.928-percent.
Does that make a difference to anything as far as hunting rifles are concerned? Nah, but it’s an interesting observation.
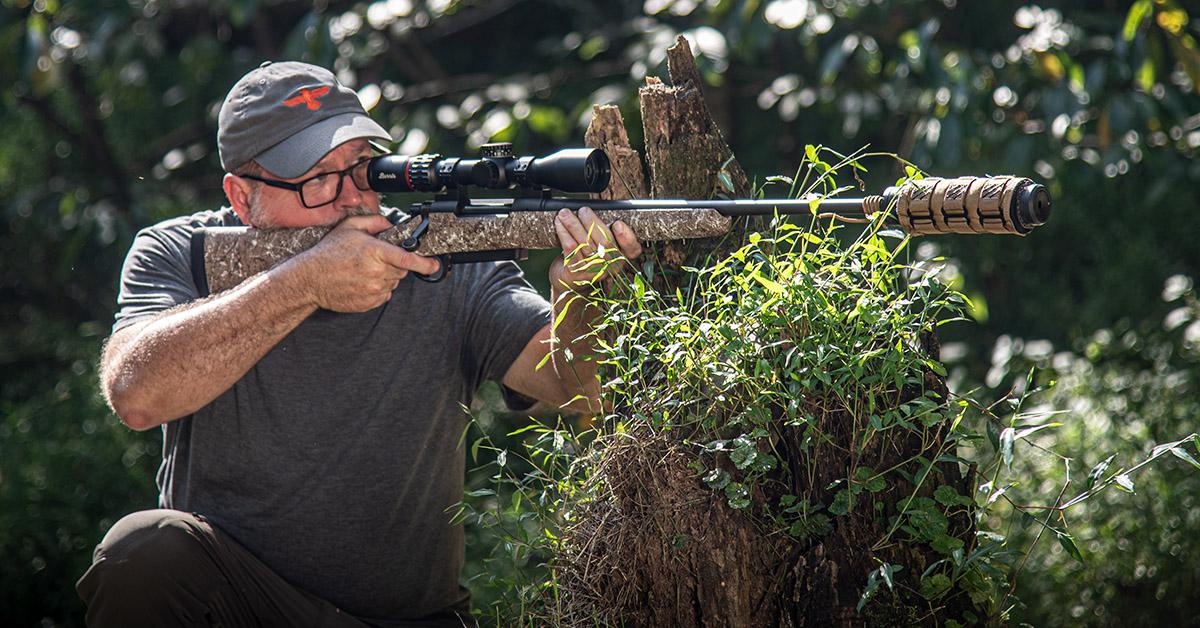
Overall, I’m thrilled with the results. The Nomad Ti OTB was everything I hoped it would be.
Although I continue to wear ear protection even when shooting suppressed (except for rimfires), I did shoot the rifle without ear pro just to see what the suppressor would sound like under hunting conditions. The sound suppression proved to be significant.
Previously, this gun always hurt my ears. One time, while hunting from a pop-up ground blind, I failed to place the muzzle all the way out the window. The report rocked my world for about ten minutes — a mistake I will never make again. The Nomad Ti OTB, though, proved easy on the ears, with what I would call a “softish” tone just below the hypersonic crack of the bullet.
No fear shooting this setup without ear pro.
To sum it up, all the changes worked together to boost accuracy by a notable percentage, and I now know the general load that this rifle barrel seems to favor. My smallest five-shot group came courtesy of Hornady’s American Whitetail 140-gr. InterLock (1.038 in.), with the Hornady Precision Hunter 140-gr. ELD-X coming in a close second (1.295 in.). From here, I can now experiment with adding a pressure point between the barrel and the stock, and start working up handloads based on these factory bullet weights/styles and velocities. With that, I am confident that I can bring the five-shot group average below one-inch at 100 yards.
I just need to find time to do that before hunting season…