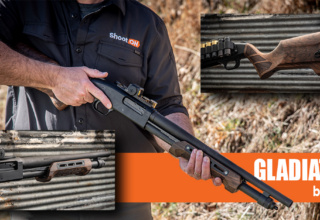
Modification and customization are honored traditions among dedicated AR-15 fans. If you are new to the AR scene or have yet to take advantage of the platform’s modularity, here is a case study of the possibilities that await you…
by Rob Reaser
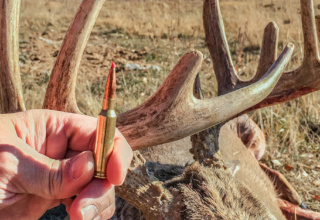
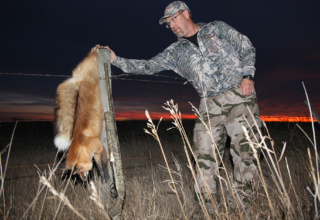
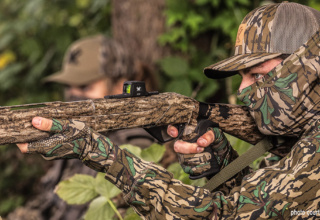
A month or so ago, I had an opportunity to buy a Burris BTC 50 clip-on thermal optic for a price I couldn’t pass up. My cousin’s son had been talking for some time about knocking down the coyote population that has grown alarmingly large in our hunting area, but neither of us had the equipment needed to get serious about it. So, when the thermal optic option presented itself, I jumped. But as with most things passion-driven, such a purchase has a domino effect.
“I have a thermal, now I need something to go behind it.”
What I needed was an AR specifically built for maximum precision while balancing the needs of the kind of coyote hunting we will be doing.
And this illustrates the beauty of and the ongoing favoritism by shooters and hunters of all stripes and experiences toward the AR platform.
Ever since ARs hit the mainstream, post-manufacture modifications became the rule for many gun owners. Most upgrades to factory rifles centered around “tactical add-ons” or modifications — usually involving handguards bristling with accessories. More adventurous AR fans simply take advantage of the platform’s piece-together nature and build their own guns from scratch.
Again, this has been going on for a long time, so there is nothing new about this discussion. Nevertheless, many new AR owners and fans have entered the scene over the last several years and most haven’t given much thought to the unexplored options the AR-15 has to offer.
One aspect of the AR that I find endearing is the ability to create a rifle that is built to achieve specific objectives. For the beginners reading this, know that creating your own rifle from a box of parts may seem intimidating at first, but the process is really simple. If you follow the proper steps (such as torquing) and ensure safe headspace dimension through correct gauging, building a safe, accurate, and reliable AR is easily accomplished with a few select tools.

We’ve covered the step-by-step process of building an AR several times in these digital pages. Here is how we built our latest upper receiver and lower receiver assemblies. This build covers the creation of an old-school M16 clone semi-auto. For guidance on building a modern AR with a free-float barrel, check out part 1 and part 2 of this series.
With these instructions, you have what you need to build your own regardless of which path you wish to travel — old school or new cool.
Once I decided to build a dedicated coyote rifle, there were a couple lines of thinking to address. First, and most importantly, I wanted the rifle to be accurate. Not just accurate, but ACCURATE. Anything greater than 1 MOA was not going to cut it.
Second, the rifle had to be manageable in the field. If you look at most production ARs intended for varmint hunting, many run with 18- to 20-inch barrels. Since I hunt mostly in wooded, mountainous country, I wanted to stay with a shorter and lighter 16-inch barrel. Stealth was another consideration, which negated the use of a typical 6-position stock (I find them to be too noisy at times). Thought was also given to weather conditions, meaning the system had to work well with gloved hands. And so on.
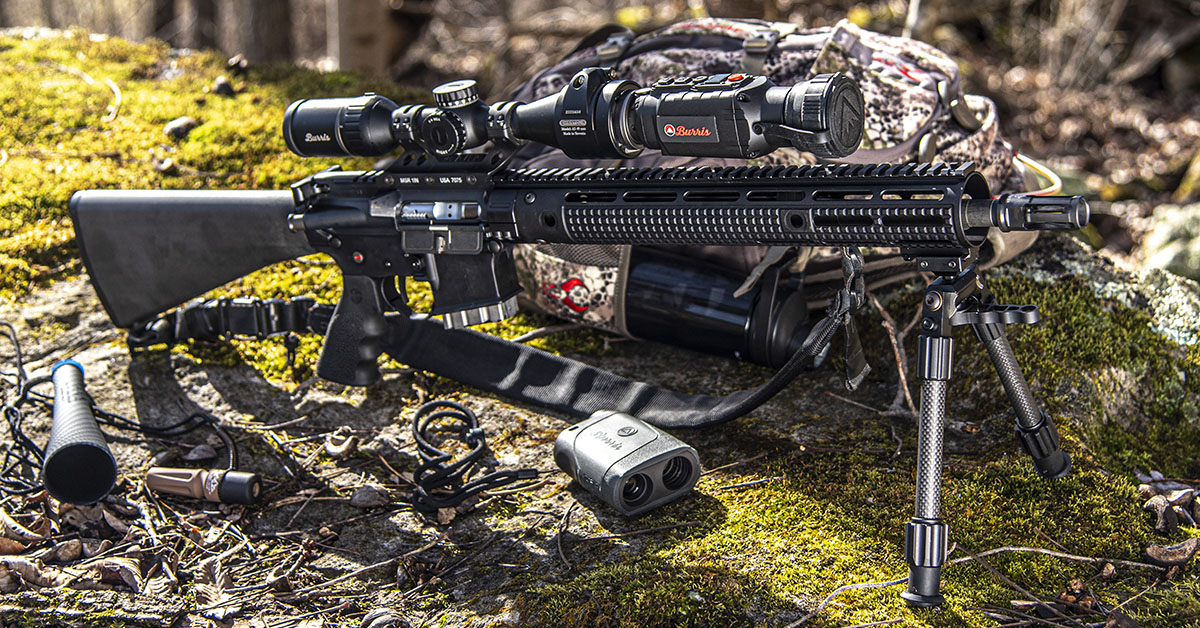
All of this to say to those of you who may be thinking of creating your own mission-specific AR, there are many things to consider even in terms of base components that can be beneficial or detrimental to achieving your goals. For me, I wanted a super-accurate coyote sniper suited for the hilly woodlands and broken pasture country I’d be hunting. Mission accomplished, and here’s what I used to do it.
LOWER RECEIVER
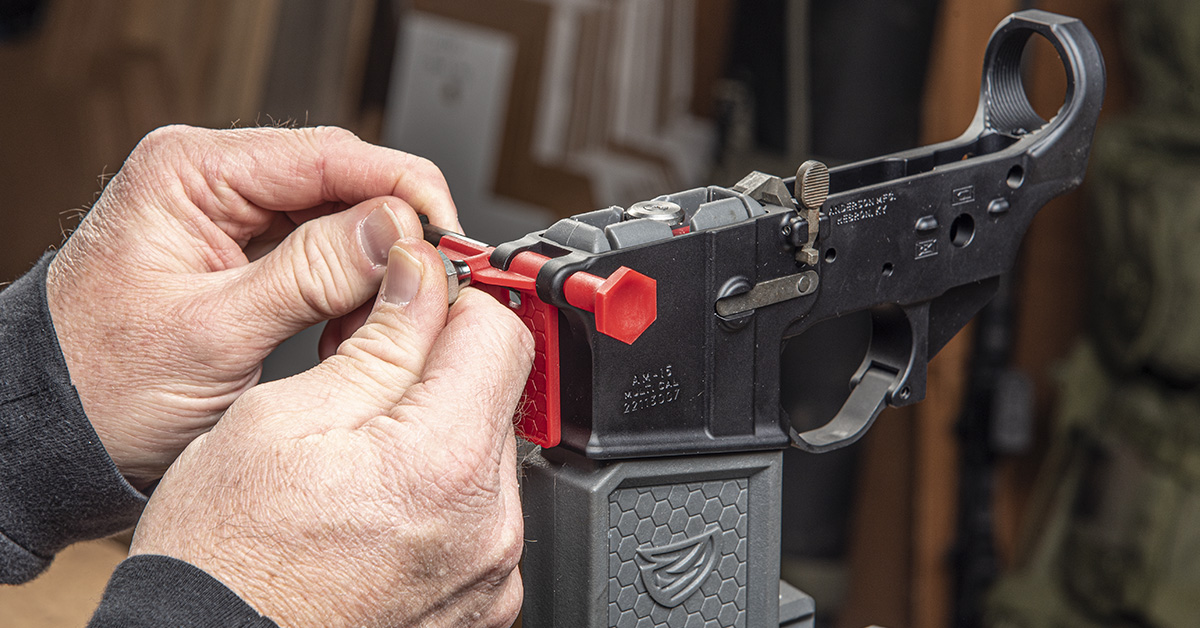
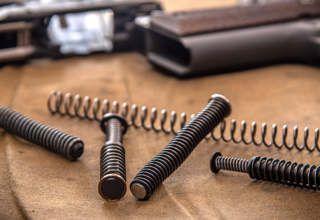
AR upper and lower receivers are standard stuff as far as dimensions and parts fitment are concerned. There are no real performance benefits from one to the next. Since this was my own custom creation, I wanted a clean lower receiver absent a prominent manufacturer’s logo. For this, I went to Anderson Manufacturing and ordered their AM-15 Stripped Lower Receiver with no logo. You can also buy lower and upper receiver completion kits from companies like Anderson Mfg. or Rock River Arms, which include all the necessary small parts for these assemblies.
Here’s a tip should you wish to go the do-it-yourself route: visit Real Avid and get a few of their AR build tools. We used them in the aforementioned build articles, so you can see which ones will work and how to use them. Sure, experienced AR builders can work without Real Avid’s specialty solutions, but you’ll save yourself a lot of grief by just getting the right tools for the job. Above is an example of one such Real Avid tool that takes the maddening frustration out of installing the pivot pin assembly.
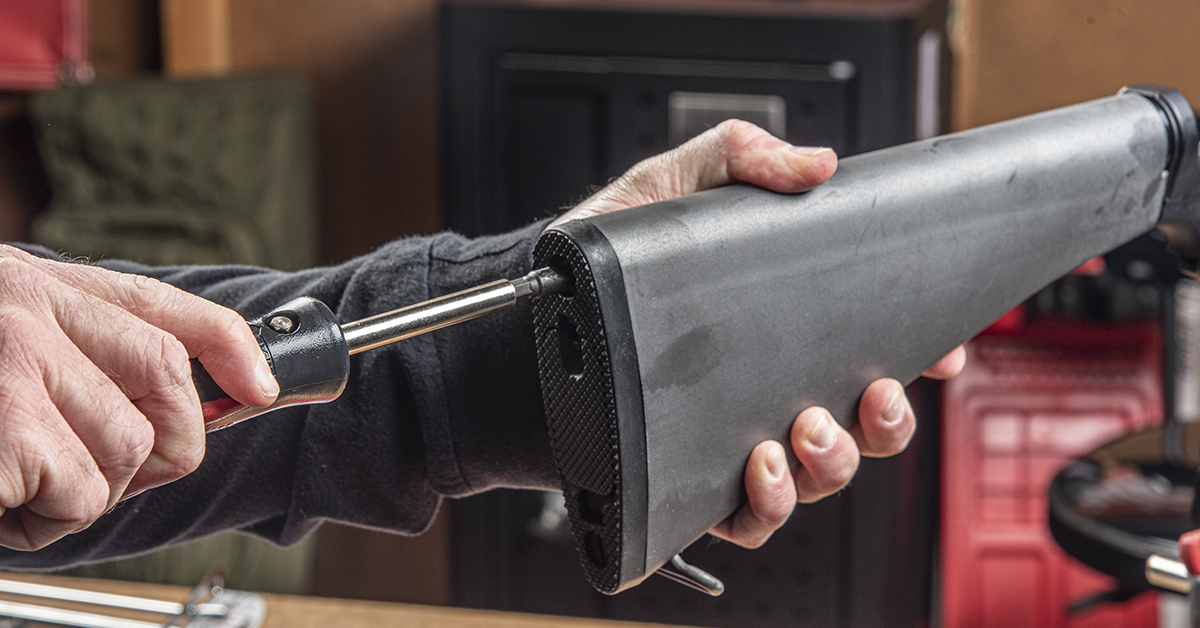
There were three reasons why I chose an A2-style rifle buttstock over the more conventional 6-position adjustable stocks. First, the solid, one-piece design of the rifle stock is inherently more ridged than the adjustable stocks. That’s an accuracy enhancer, to a slight degree. Second, the A2 stock isn’t going to rattle and bang like most adjustables tend to do. I can also wrap the rifle stock in a sound-suppressing material to further minimize noise. Third, my beard won’t snag on an A2 stock (something that always happens with adjustables)!
Rifle buttstocks use a different buffer tube, buffer spring, and buffer than the adjustable carbine stocks, so the best bet is to buy a complete A2 buttstock kit, should you go this route. Anderson Mfg. and Rock River Arms both sell these kits.

In addition to a high-quality barrel, I feel the trigger is the next most important influencer of accuracy in a rifle. A top-end trigger will greatly minimize shot disturbance (the time between breaking the trigger sear and the bullet leaving the barrel) offer more precise trigger control, resulting in more consistent and predictable point-of-impact. Compare a premium trigger with a MILSPEC trigger found in most ARs and you’ll immediately understand why this upgrade is a must for building a tack-driver.
Since I’ve used Timney triggers for several custom builds and modifications, theirs was an obvious choice for my custom coyote sniper. For this, I selected the AR Targa short two-stage trigger. It has a short first stage tuned for a light 2-lb. pull and a super-crisp second stage that trips at 2-lbs. I find it to be a perfect combination for a precision hunting rifle — light enough for a smooth, controlled pull but heavy enough to ensure you don’t break the sear before you’re ready. This is particularly import when wearing gloves, as you lose some feel with gloves and a trigger that is too light can lead to the sear breaking before you intend to take the shot.
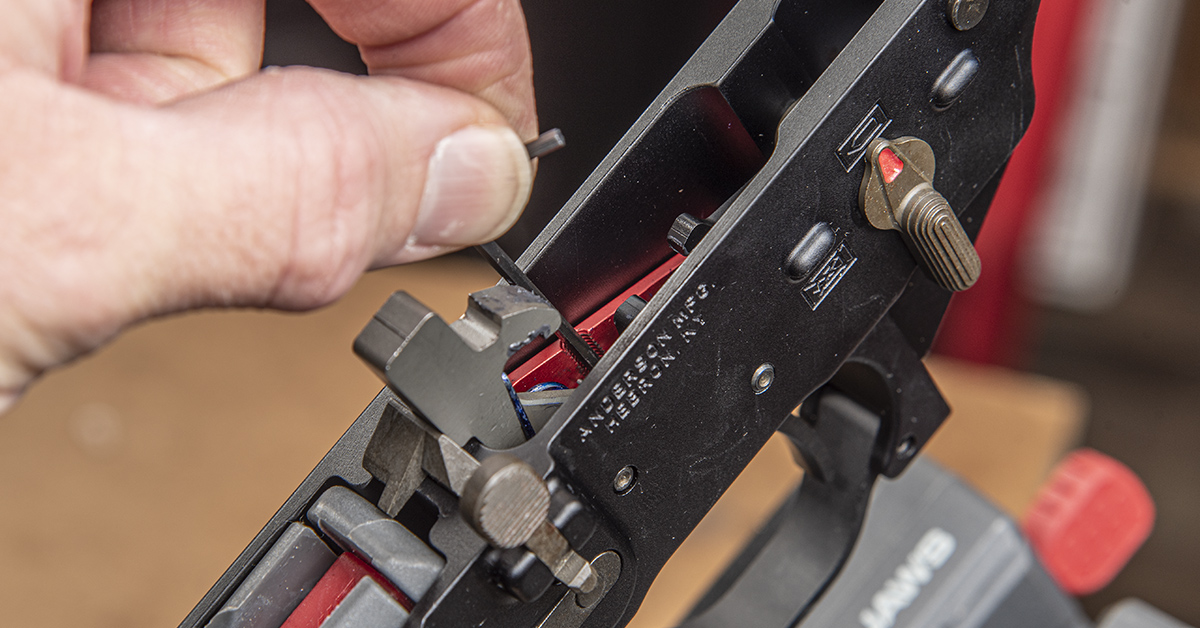
Although standard MILSPEC-style triggers aren’t difficult to install in an AR, the one-piece, drop-in design of the Timney AR Targa makes the job even easier. The cartridge design simply drops into the trigger pocket in the receiver. Secure with standard trigger and hammer pins, then snug the unit in place with the two set screws. Done.

Primetime coyote hunting means cold-weather hunting. That necessitates gloves, and gloved hands work best when you install a winter trigger guard. This is a Rock River Arms unit that provides ample trigger access even when wearing heavy gloves — a must for the serious coyote hunter.
Another consideration was the grip. I’ve always found the A2 grips to be less than ergonomic and a bit slippery when wearing gloves. Since we often hold the rifle only by the grip during certain operations, it is important to always have a solid, comfortable purchase.
Of all the grips I’ve used on ARs, I’ve found none better than the Rock River Arms Hogue model. It is comfortable, ideally positions the hand for good trigger operation, and the rubber overmold gives you a no-slip grasp with either bare or gloved hands.
So much for the noteworthy lower receiver assembly components.
UPPER RECEIVER
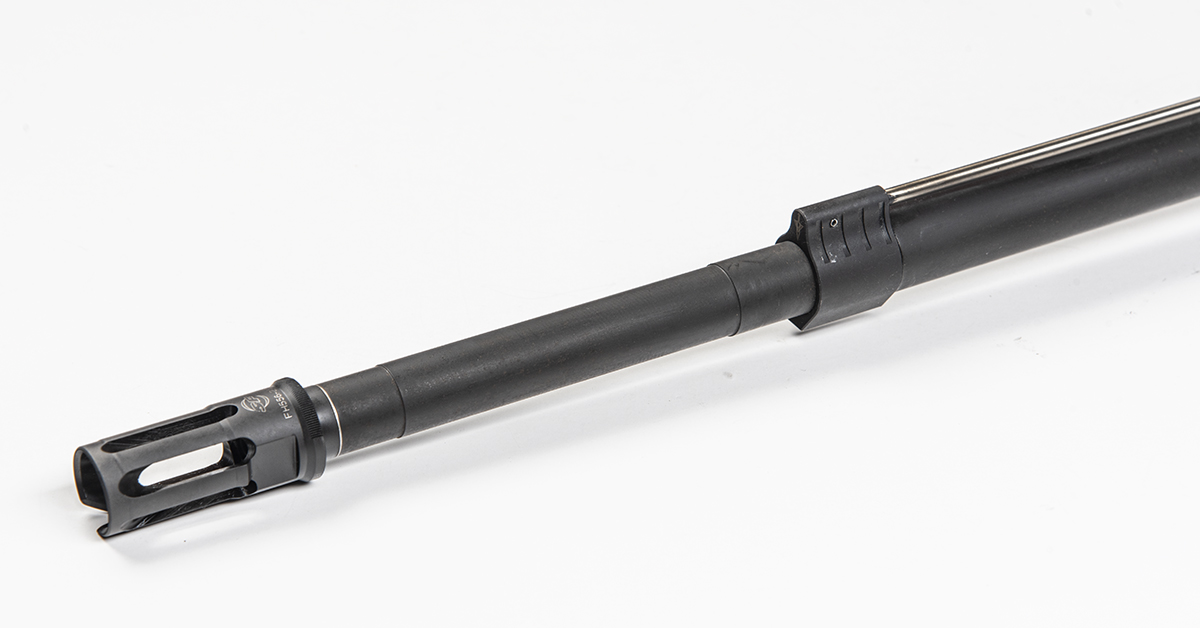
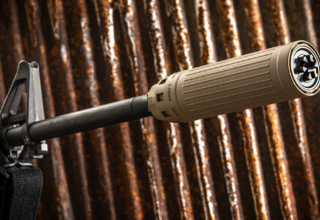
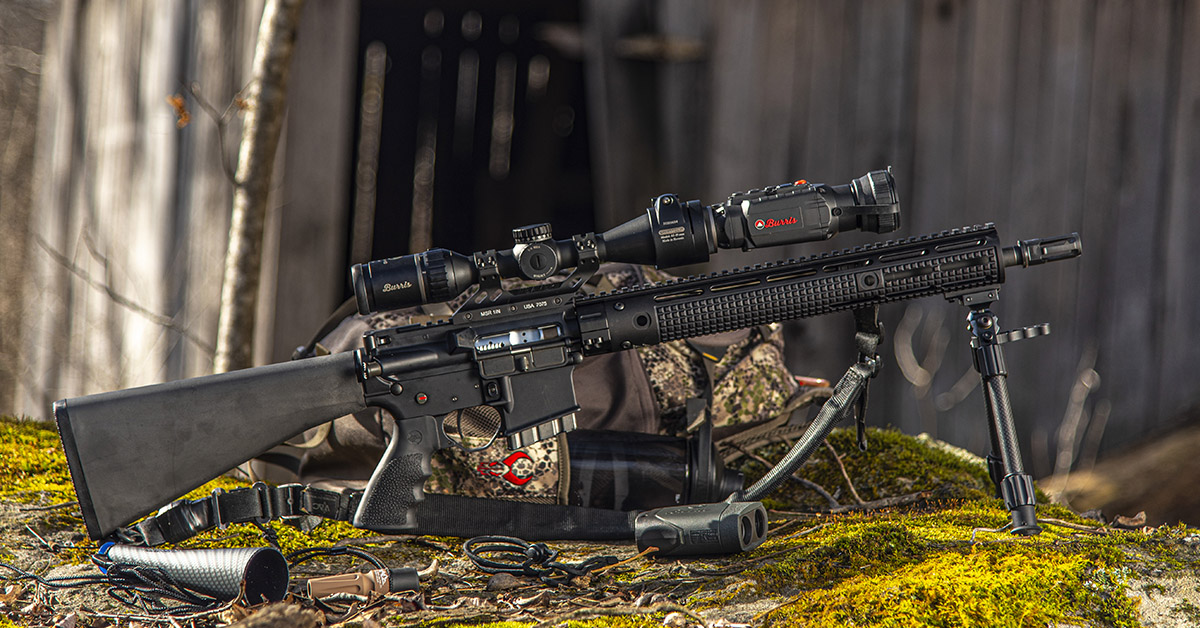
Moving to the upper receiver, the star of this show is a 16-inch Criterion chrome-lined barrel. Criterion’s claim to fame is producing match-grade button-rifled barrels at a price somewhere south of budget-busting. Having used them on previous rifles, I did not need to be sold on the quality and performance potential. The Vltor low-profile gas block and the Surefire flash hider/suppressor adapter were salvaged from an older rifle I had on-hand and used for economy’s sake. Neither are accuracy makers nor breakers. Pick your poison.
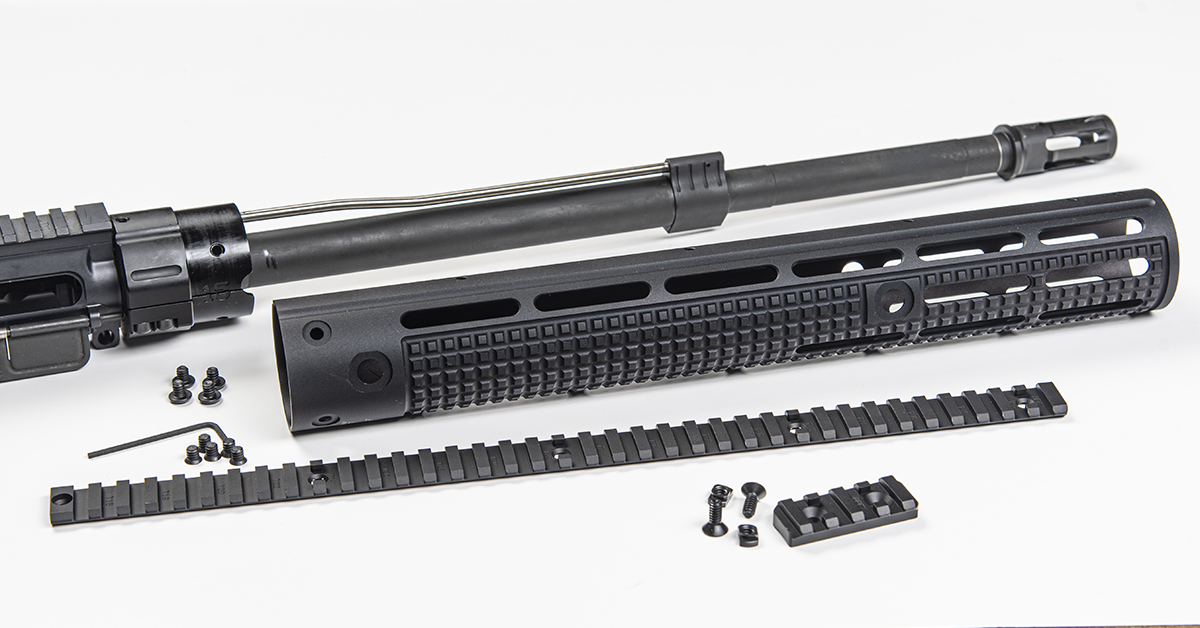
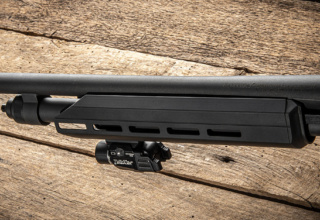
Some time ago, I became familiar with Apex Machining — a small handguard manufacturer out of White City, Oregon. You may not have heard of them since they fly under the radar, but their handguard design hits all the right notes for me. I like a minimalist, streamlined design, and the Apex models deliver.
Integrated into the aluminum tube is the Apex Gator Grip and M-LOK-compatible rail slots. Since I’m not into “cheese grater” rails all over the place and prefer to grip the forend as opposed to using a dropdown or forward angle grip, the Gator Grip profile presents a solid, no-slip purchase that is comfortable on bare hands and holds tight when you’re wearing gloves. As for rails, you can put them on or leave them off, depending on your needs.
The Apex model I chose for this build is their #2350 extended rifle, measuring 15 inches in length and weighing 13 ounces. Finished with an optional top rail for future expansion, a 2-inch accessory rail to mount a bipod, and four integrated QD sling swivel holes, this system is everything I could ask for in a hunting or defensive rifle handguard. Apex also makes rifle-, mid-, and carbine length handguard systems and low-profile nitride-coated gas blocks to go with them.
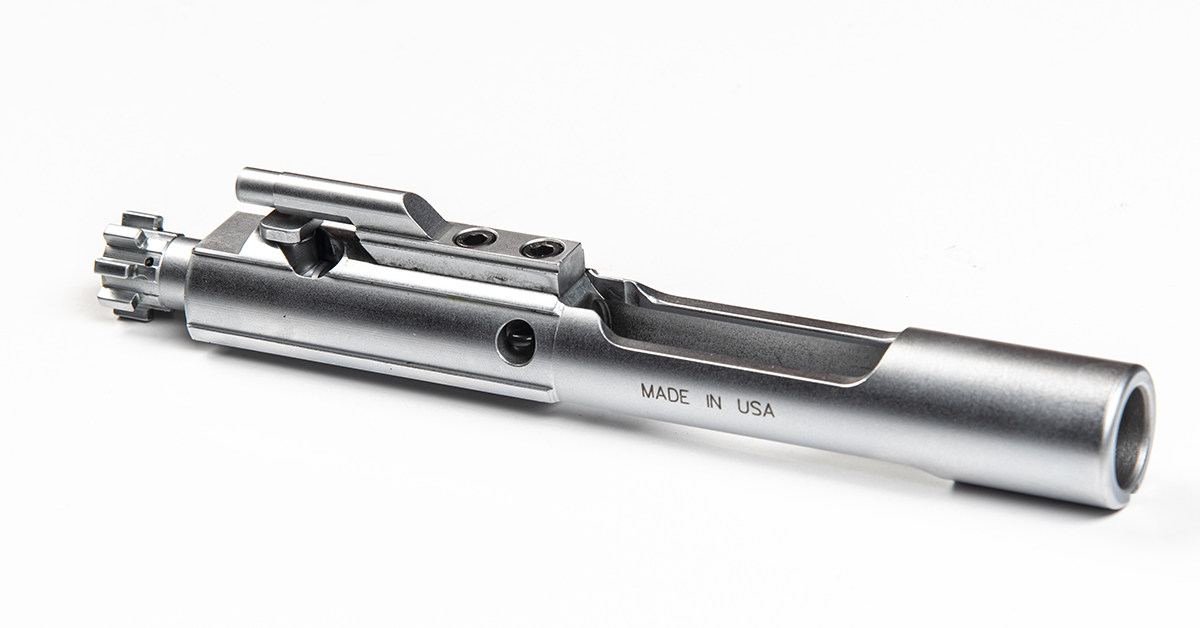
A quality barrel deserves to be backed by precision-machined bolt carrier group. For this, Shoot On‘s pro gunsmith and technical whiz contributor Lou Patrick heartily endorsed the Young Manufacturing BCG as the best of the best. With an MSRP pushing $300, the cost certainly supports that claim. What you get for the money, though, is the smoothest operating and easiest to clean BCG I’ve ever used, bar none. The chrome finish on these mechanical works of art is robust and is certainly your best friend when it’s time to hit the cleaning bench.
OPTIC SYSTEMS
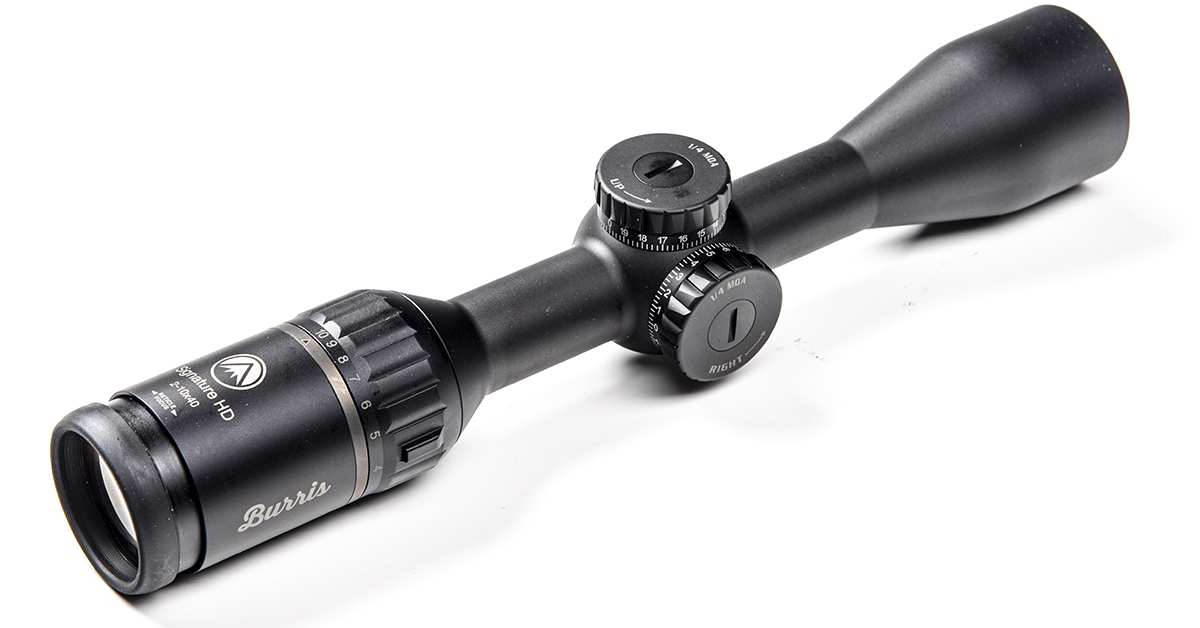
Everyone has their personal criteria when it comes to optics. For me, I like it simple. Good glass is a given, but I also prefer an uncomplicated reticle that is easy to see from bright daylight to murky, a power ring that is easy to rotate when wearing gloves, and no-nonsense turrets. The Burris Signature HD 2-10x40mm fit that bill nicely. Yes, I could have selected many quality optics to meet my criteria, but I prefer to keep like brands together whenever possible. Since I had already acquired the Burris BTC 50 thermal, it made sense to back it with a Burris day optic.
As it turned out, the Signature HD 2-10x40mm was spot-on for this build. With an overall length of 11.7 inches, it provides the necessary compactness when paired with the thermal. The power range is also well-suited to the thermal. There is a functional range of optical magnification (the scope) and digital magnification (the thermal) that must be balanced. That is because the scope is magnifying the thermal’s OLED screen and not the actual target. Thus, the lower-power range of the 2-10x is better suited to a thermal than, say, a 5-25x scope.
The 2-10x40mm Signature HD comes with the Burris Ballistic E3 reticle, which is calibrated for drop compensation of traditional, magnum, and varmint loads at 200, 300, and 400 yards given a 100-yard zero.
At the bench, I found this scope delivered a crisp, clear view and a rear focal plane reticle sized right for precise aiming. My bullseye was a 1-inch orange circle. At 100 yards and with the magnification at 10x, I could easily center the crosshair and still see the four quarters of orange on the bullseye.
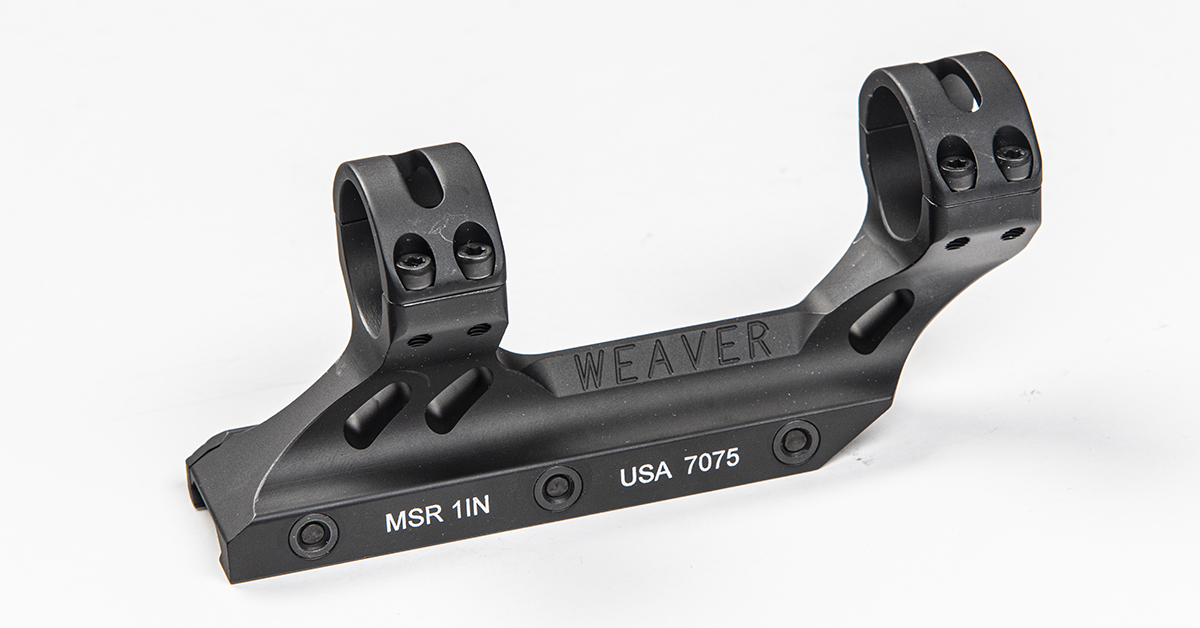
Since our optic system would include an additional 1.5 lbs. of weight courtesy of the thermal unit, a solid foundation was an absolute must. A couple years ago, the folks at Weaver came out with the Premium MSR Optics Mount. I’ve used it, like it a lot, and it has become my go-to choice any time I need to mount a magnified optic to an AR Picatinny rail.
Machined from a single 7075-T6 aluminum billet (base and rings) and finished in anodized Type III hardcoat black matte, the Premium MSR Optics Mount uses tough Torx-head screws and dual recoil lugs to hold onto the rail like nobody’s business (3,600 lbs. of clamping force, to be precise). This was the obvious choice for the coyote rifle build.
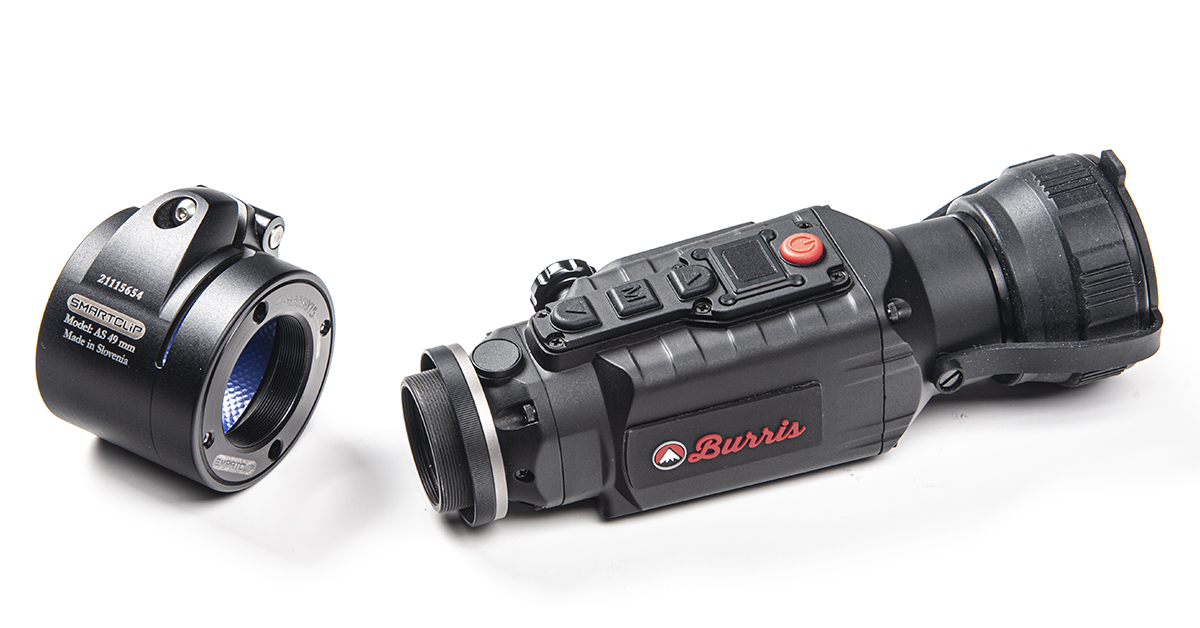
By this point, I wasn’t sure if the thermal or the rifle was the star of the show…maybe they are co-headliners. Whatever the case, all of this began with the Burris BTC 50 clip-on thermal. What’s neat about this clip-on approach is that you can use it two ways: secured to your scope’s objective bell when shooting or remove it and use it like a monocular for scanning.
I will admit to some trepidation when originally considering this system. First, I wasn’t really fond of the idea of hanging nearly 1.5 pounds off the end of a rifle scope. Seemed to me as if that much weight combined with recoil forces could wreak havoc on a scope’s internals and put a strain on the mounting system. Several people I talked to who had experience in this area told me there was no reason for concern.
Second, I wondered how the thermal could maintain its point-of-impact alignment with the scope after repeatedly taking it on and off. In theory, the clamping scope-to-thermal adapter would maintain concentric alignment between the two, but in practice? So, I shared with Jordan Egli, Burris Director of Marketing, my concerns. He answered me with an anecdote.
Jordan and a friend were recently coyote hunting. He repeatedly removed the BTC 50 from his scope to scan the dark prairie country in search of dogs, then returned the thermal to the scope when it was time to take the shots…all without any misalignments between the two. Intrigued, I asked what was his farthest successful shot taken after all this back and forth.
“Four-hundred yards,” he said.
I was impressed. While I’ll never have 400-yard shots where I hunt, it was good to know the thermal could hold alignment for that kind of distance. Nevertheless, I would need to see it for myself.
And that brings us to the acid test for this project — what hath all these ingredients wrought?
TEST DAY
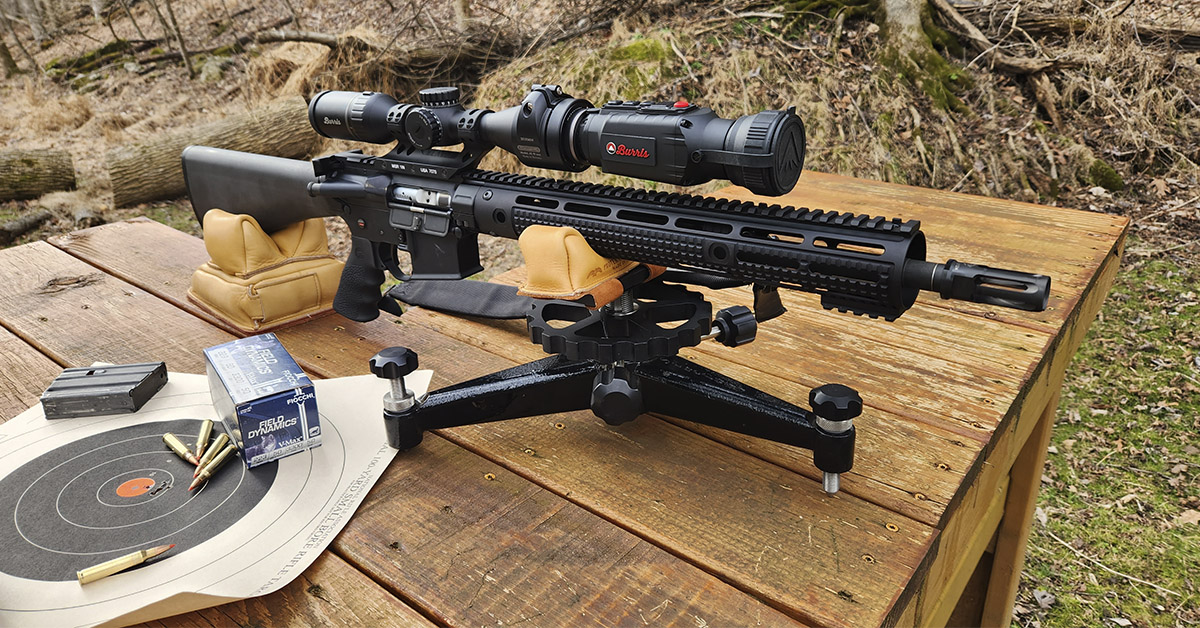
It was a pleasantly overcast day in mid-February, with temps a balmy 69 degrees and winds out of the south at about 500 mph. OK, that last part was a bit of exaggeration, but the entire time I was on the bench, wind steadily gusted at 15-20 mph — not the best conditions for sending lightweight bullets downrange, yet you take what you can get.
I began by zeroing the scope with Winchester’s M193 (55-gr. FMJ), then moved on to fire the four loads I brought with me. Ammo was a range of manufacturers, bullet weight, and profile, and the range was 100 yards:
- PMC X-TAC 62-gr. LAP
- Federal American Eagle 62-gr. FMJ
- Hornady Frontier Match 55-gr. HP
- Fiocchi Field Dynamics 50-gr. V-Max
While the Signature HD scope provided an excellent sight picture and the rifle felt good, the initial views through the spotting scope were quite disappointing. I was expecting sub-MOA results but that was not what I was seeing on paper. How much the wind played a part in the loose groups I couldn’t tell, but still… The PMC and American Eagle looked to be pushing 3 inches from 5-round groups. Figuring Hornady would come to my rescue, I sent five rounds downrange, looked through the spotter, and sighed. I may have also let loose a few expletives directed at the wind…whichever direction it happened to be whipping at the time.
Resigned to a not-so-happy drive back home, I loaded five rounds of the Fiocchi stash and began pulling the trigger. I moved back to the spotter and glanced hesitantly through the Leupold SX-5 Santiam HD and saw…a tight knot of holes at 12 o’clock to the bullseye.
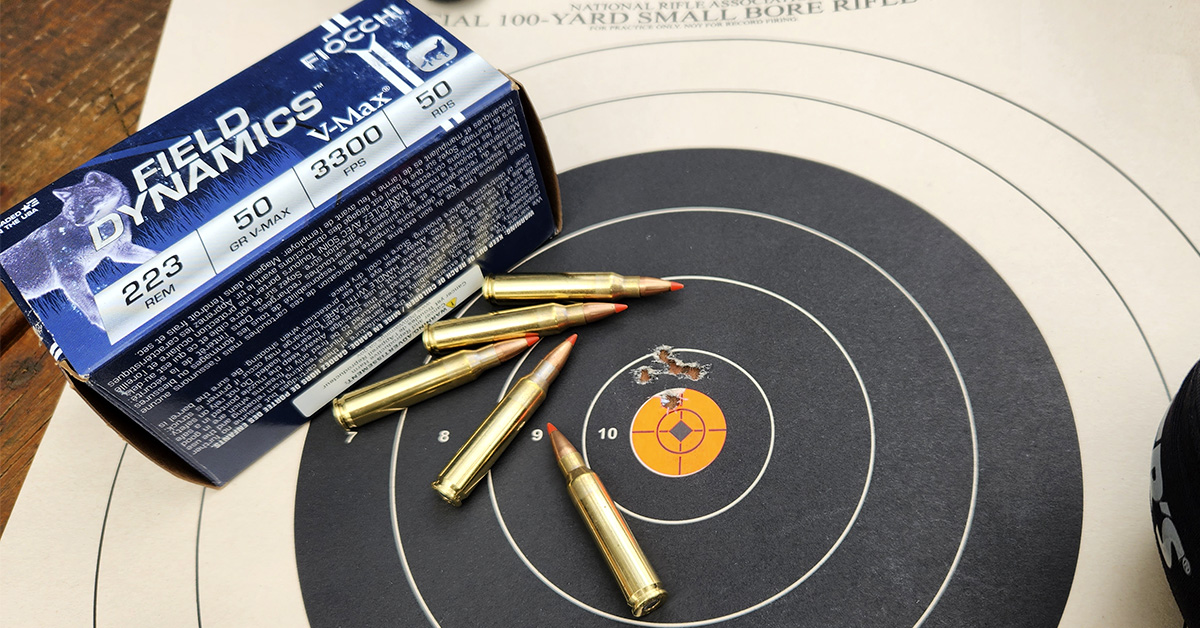
Turns out the Criterion barrel loved Fiocchi’s management of Hornady’s V-Max 50-grain bullets and so delivered a grin-splitting 0.573-inch, five-shot group. That vindication was much welcomed because I wasn’t sure how this story was going to turn out.
Here is the final, five-shot group tally at 100 yards:
- Fiocchi Field Dynamics 50-gr. V-Max: 0.573 in.
- Hornady Frontier Match 55-gr. HP: 1.948 in.
- PMC X-TAC 62-gr. LAP: 2.761 in.
- Federal American Eagle 62-gr. FMJ: 2.780 in.
All of this points to an important lesson that we try to stress to all shooters — every gun has a load that it likes the best and you won’t know what that load is until you shoot it. In my example, had I only shot the Federal, PMC, and Hornady loads, I would have assumed all my work was for nothing and that the barrel …or the scope…or something else was junk. As it turned out, Project Coyote Sniper proved itself to be exceptionally accurate. All systems go. Yet I would not have known that but for having the right load in my ammo box that day.
And so it goes. If you find yourself not shooting the groups you think you should, don’t give up until you’ve worked through the ammo options. Simple changes in bullet weight, bullet profile, primer type, powder type, powder charge, and cartridge construction can all have a positive or negative influence on a rifle’s accuracy potential. Every barrel likes a certain load. Your job is to find it.
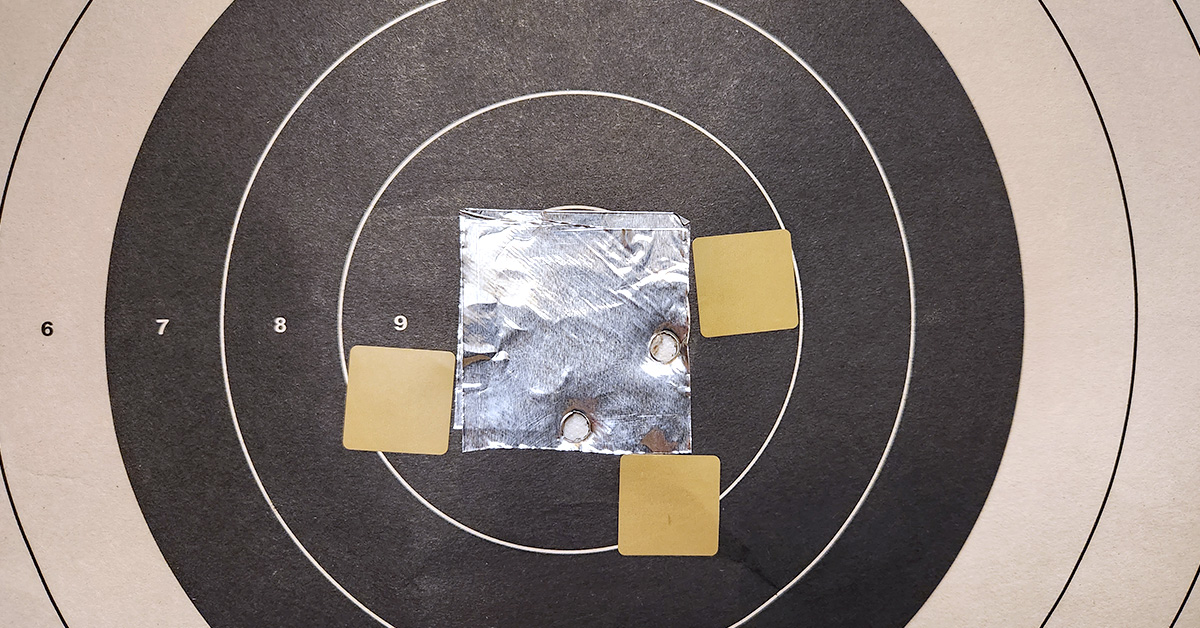
With the rifle zeroed and shooting like a champ, it was time for the final step — aligning the thermal for point-of-aim impact. This involves digitally moving the OLED screen along its X and Y axis. To do this, I placed a 2×2-inch piece of aluminum tape onto a target set at 100 yards. I used aluminum to present a heat signature I could aim at. Granted, it was something of a squarish, blurry blob at that distance, but it was enough to get a sight picture.
The first shot went about five inches high and slightly to the right. Accessing the thermal’s menu, I adjusted the X and Y axis, purely guessing which way to go. The second shot didn’t hit paper, so I made a few moves in the opposite directions and was back on paper but not on target. It took me a few more shots before I hit the aluminum square.
Now, I wanted to see if the alignment would hold after removing the thermal and then reinstalling it onto the objective bell. After taking the thermal off and putting it back on, I fired another round and, again, hit the 2-inch target. The thermal held its alignment and I could be confident going forward that I could alternately use the BTC 50 on the scope and as a scanning monocular with no worries.
As a customized, build-it-from-the-ground-up project, this one was no more difficult than building any other AR-15. And that is the beauty of the platform. You can go beyond the “regular production” rifles you buy off the shelf and craft your own firearm to meet your specific needs. Veteran AR fans have been doing this for years. Now, with a bit of planning, a few tools, and a drive to build your own, you can do it to.