AR components are once again in stock. If you’ve ever wanted to build your own AR-15, get those parts and we’ll show you how easy it is!
by Rob Reaser
In the summer of 2020, I made a mad dash to secure the parts to build a particular AR-platform rifle. It was a project I had wanted to do for some time but never got around to it. By the time the mass psychosis wave hit that summer and the world seemed to lose its collective mind, I thought I’d better put my orders in quickly or risk not getting my rifle built for the foreseeable future. It was nip-and-tuck for some parts (namely the lower receiver and barrel), but between what I was able to order and the box of spare parts I gathered in the shop, I pulled together everything I needed to make it happen.
If you were one of those folks who missed the opportunity to purchase AR-15 build components last year or thought you might want to build your own AR or engage in firearm DIY upgrades because many dealer shelves were bare of factory rifles, there’s good news: the supplies are coming back online.
One of the company’s that is back running strong with inventory is Anderson Manufacturing out of Hebron, Kentucky. Anderson produces their own complete AR-platform rifles but may best be known in the industry as a top-tier AR component manufacturer. Not only does Anderson produce every AR component they sell, they’re also an OE manufacture for many of the top names in the AR marketplace. That’s a big comfort to us because we’ve had the misfortune of handling some of those “CNC-machined-in-a-garage” components in the past and the results have been not so good.
Building an AR from scratch can seem a bit intimidating for the first-timer, although it shouldn’t be. With a little patience, the right tools, and some good instruction, you can put together your first safe and functioning AR in short order. What’s more, building your own rifle from the ground up allows you to fully understand how the AR-15 platform works, which goes a long way toward good maintenance and future upgrading. Plus, it’s just downright fun.
Here, we’re going to present a two-part series on building an AR-15 rifle from its elemental components. You can research and gather the components yourself, or you can take the easy route like we did and check out the several complete kits offered by Anderson Manufacturing. To do this, we will be building a kit offered by Anderson Manufacturing.
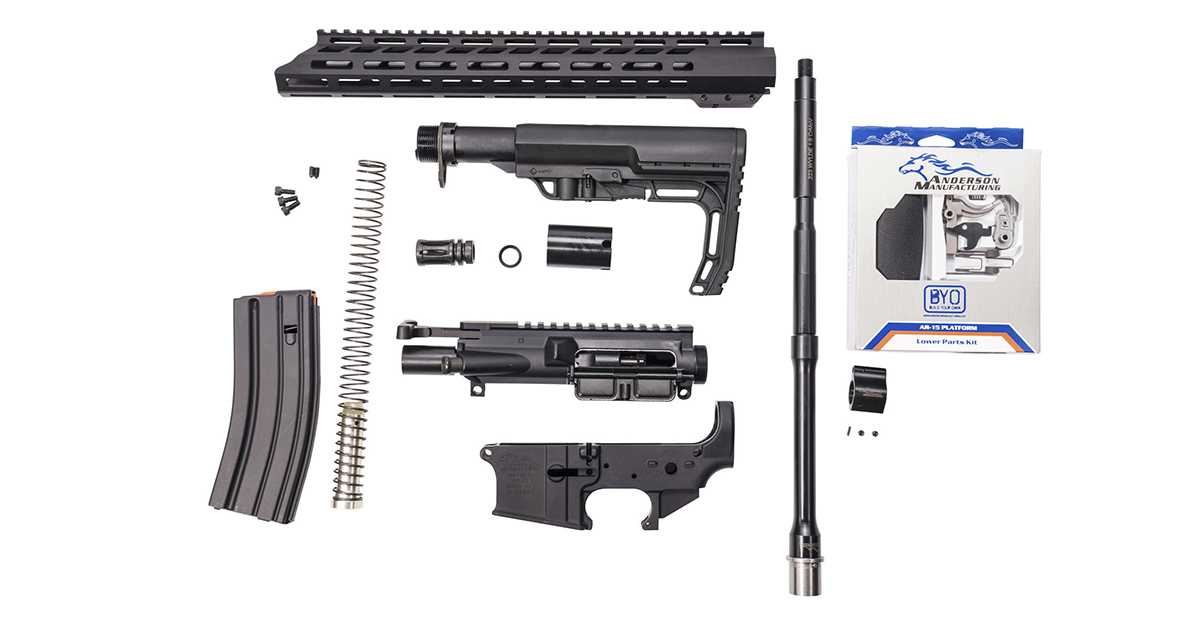
Our choice was the AR-15 with magazine, 15-inch M-Lok, 5.56 NATO, 16-inch (#G2-K823-A002). This kit is complete, down to the last spring and detent, which is ideal for the novice who is not yet familiar with all the parts that make up lower and upper receiver assemblies. Anderson offers five different kits, from a basic A2-style kit up to the more conventional configurations with free-float barrels and M-LOK handguards.

As for tools required, an AR build doesn’t require as many as you might think, but there are some specialty items that you will need. We’ll cover those as we walk you through the build, but to make life easy, the AR-15 Armorer’s Master Kit from Real Avid is hard to beat. It’s a bit pricey for one-time use; however, it contains everything you’ll need to build an AR and then some. If you’re planning on building ARs into the future, consider it a solid investment.
Supplies for an AR assembly are minimal, and again, we’ll mention those as we encounter them in the build.
In this article, we will walk you through the lower receiver assembly process. The upper receiver build follows in a separate article.
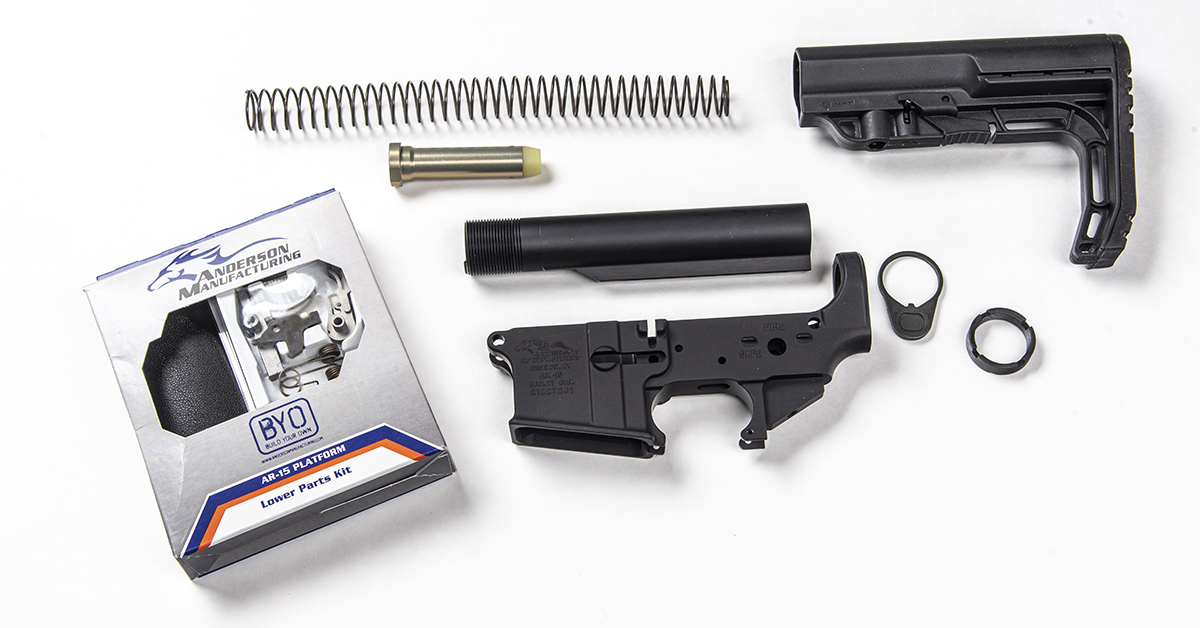
Here are the components for the lower receiver. These include a small parts kit, receiver, buffer tube, buffer spring, buffer, buttstock, stock latch plate, and castle nut.
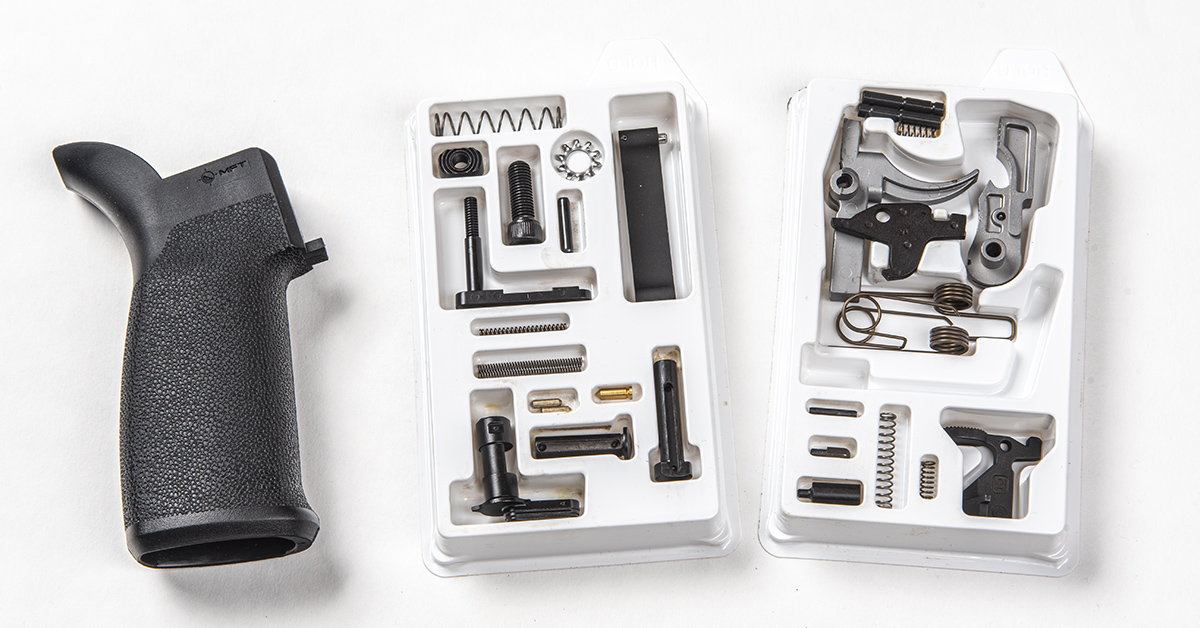
Anderson conveniently bundles the small components, which covers the grip, trigger assembly, and all the bitty items that make up the lower receiver assembly.
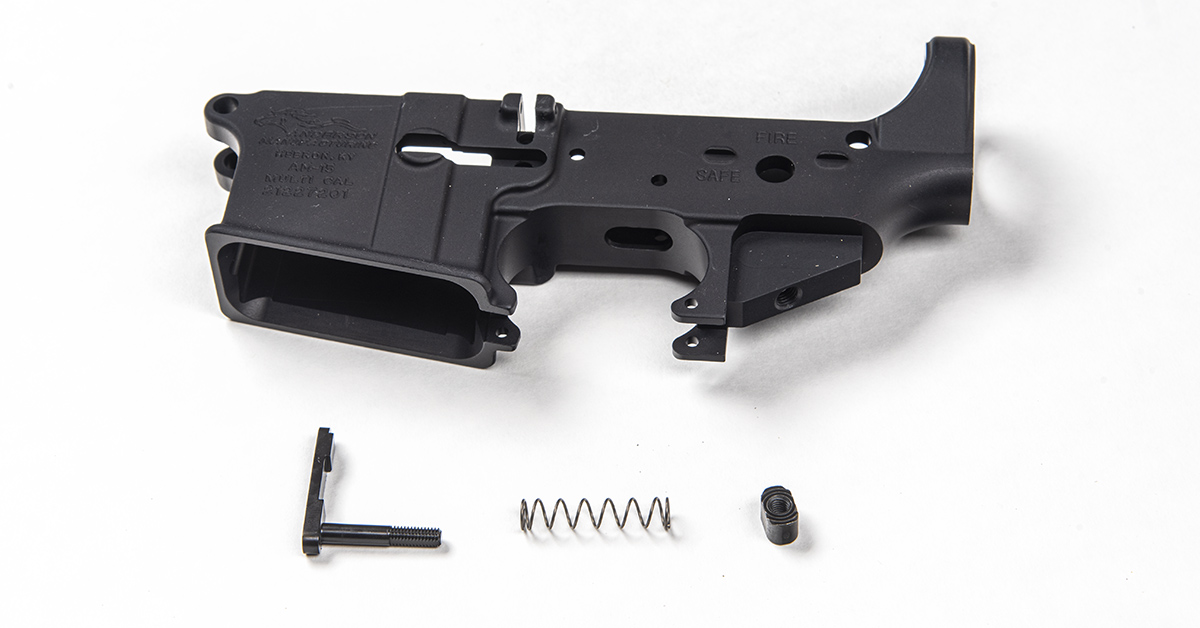
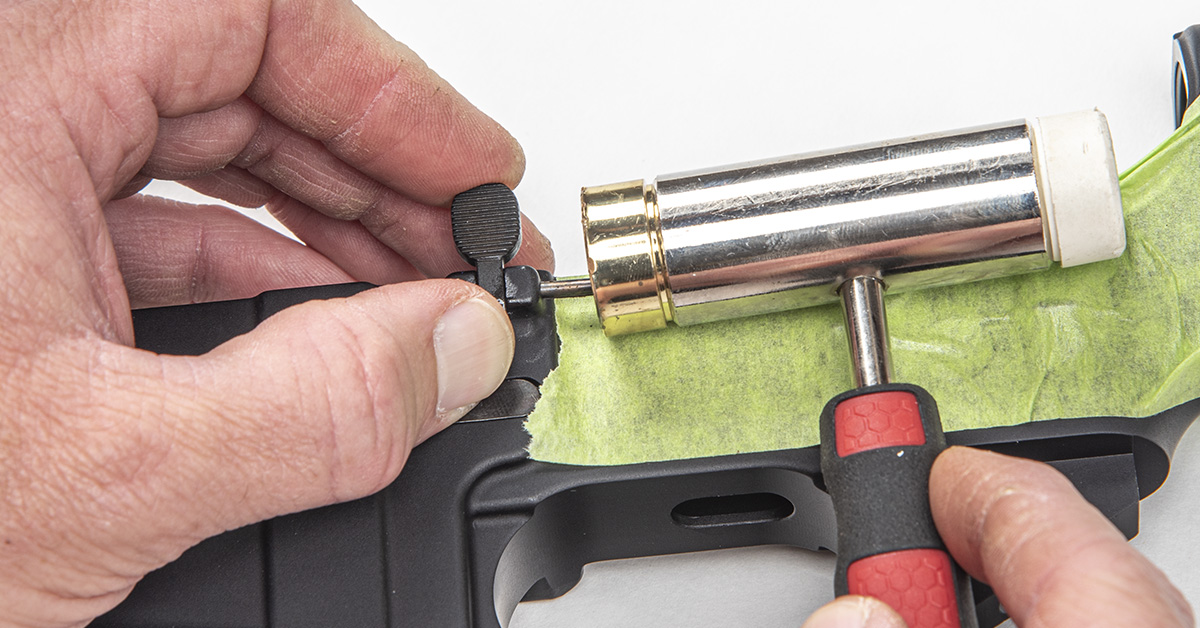
We’ll start with the magazine catch assembly, consisting of the magazine catch, spring, and button.

Lightly lubricate the magazine catch shaft with a light oil (we use food-grade mineral oil) and insert it into the left side of the receiver.
Install the magazine catch spring onto the catch shaft from the right side of the receiver.
Start threading the magazine catch button onto the catch shaft. Next, depress the catch button into the receiver with your finger and rotate the magazine catch, screwing the button further onto the shaft.
Continue rotating the catch until the end of the shaft is flush with the catch button.

Check the magazine catch assembly to ensure it is functioning properly without any sticky spots.
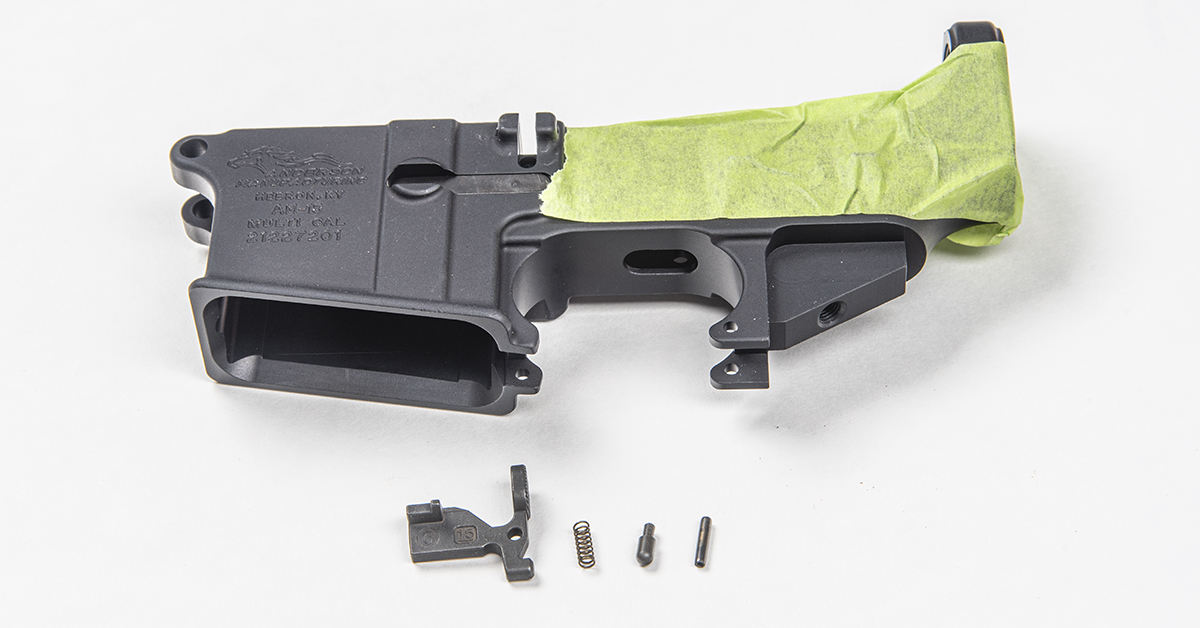
Next up is the bolt catch. This assembly consists of the bolt catch, spring, plunger, and roll pin and is installed on the left side of the receiver. Before installing this assembly, we recommend placing a piece of masking or painter’s tape to the side of the receiver as shown. This will help prevent marring the receiver finish when installing the roll pin.
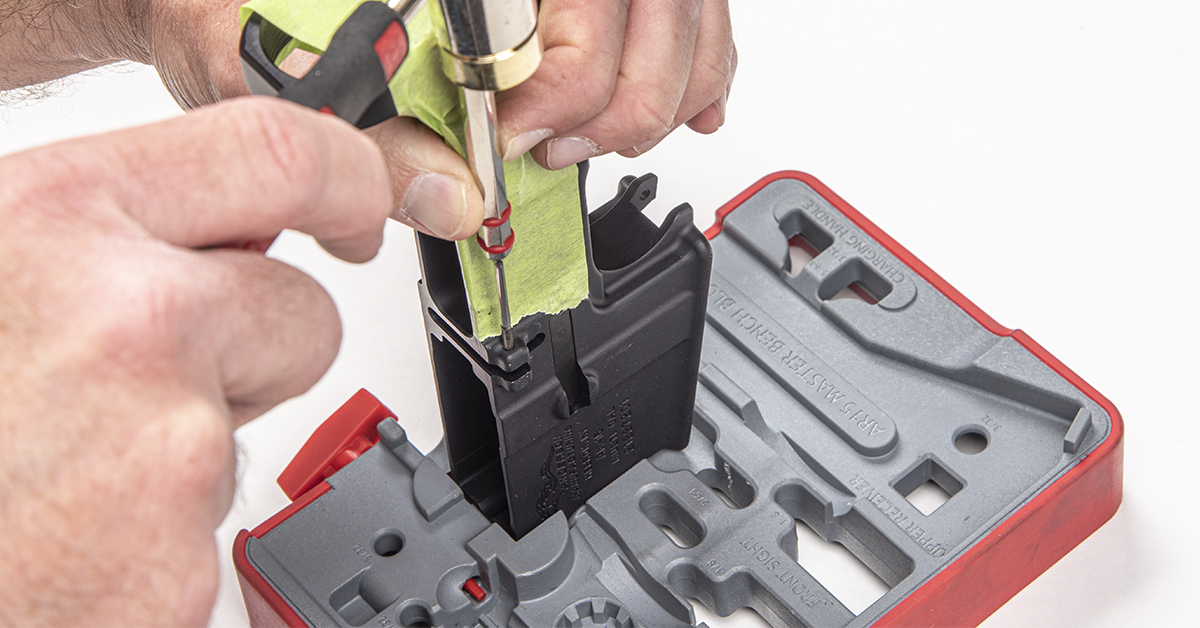
Here, we are using Real Avid’s AR-15 Master Bench Block to support the receiver. Use a 3/32 roll pin punch to start the lightly lubricated bolt catch roll pin into the rearmost boss. Tap the roll pin until it is just shy of the botch catch channel to leave room for the bolt catch to fit between the bosses.
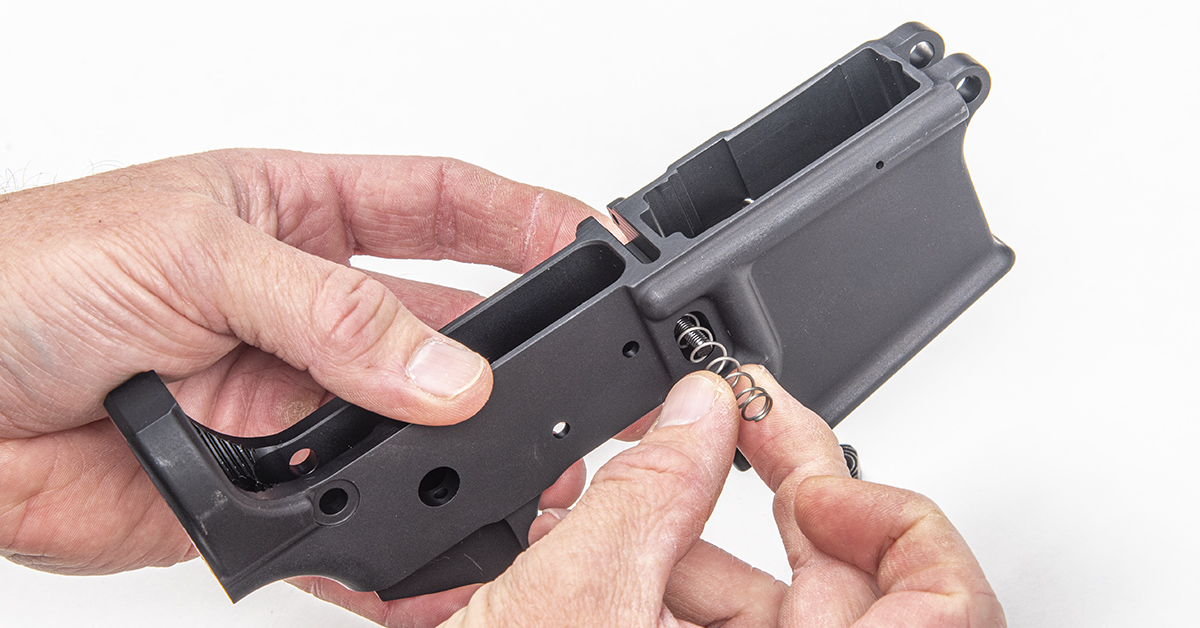
Lightly lubricate (yes, we’re going to use that phrase a lot in this article!) the bolt catch spring and insert it into its hole in the receiver.
Insert the lightly lubricated bolt catch plunger into the receiver with the rounded end pointing outward.
Install the lightly lubricated bolt catch into the receiver in the orientation as shown (it will go in only one way).
Align the roll pin holes and carefully tap the roll pin until it catches the bolt catch.

Returning to the bench block, fully seat the roll pin using the roll pin punch. The roll pin should be evenly spaced within the bosses.

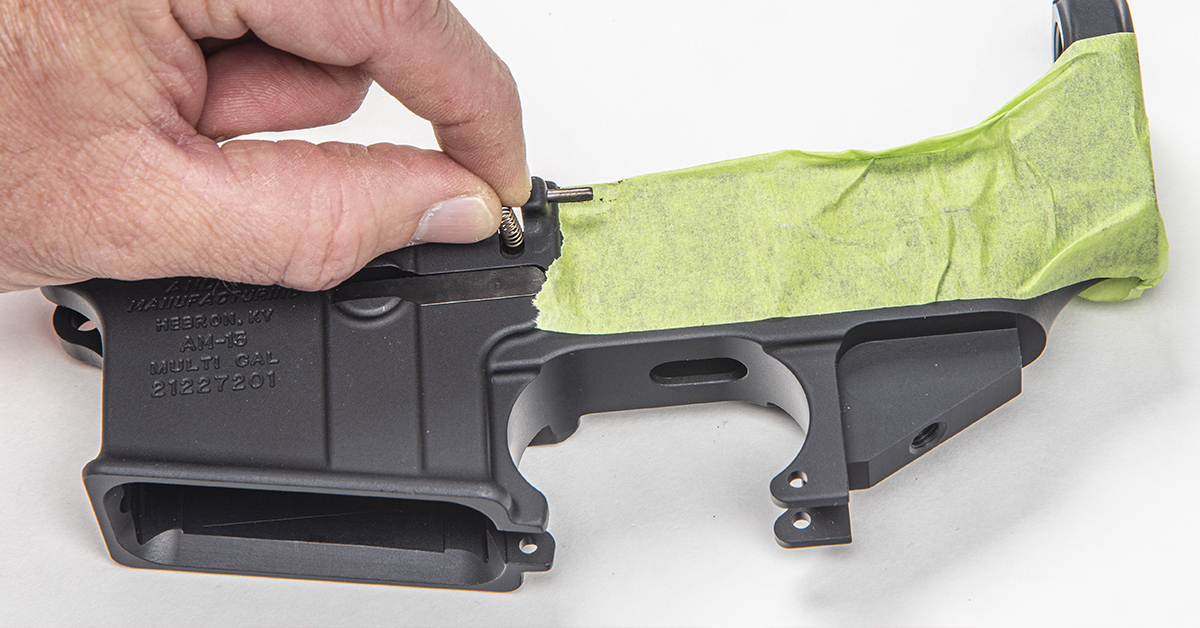
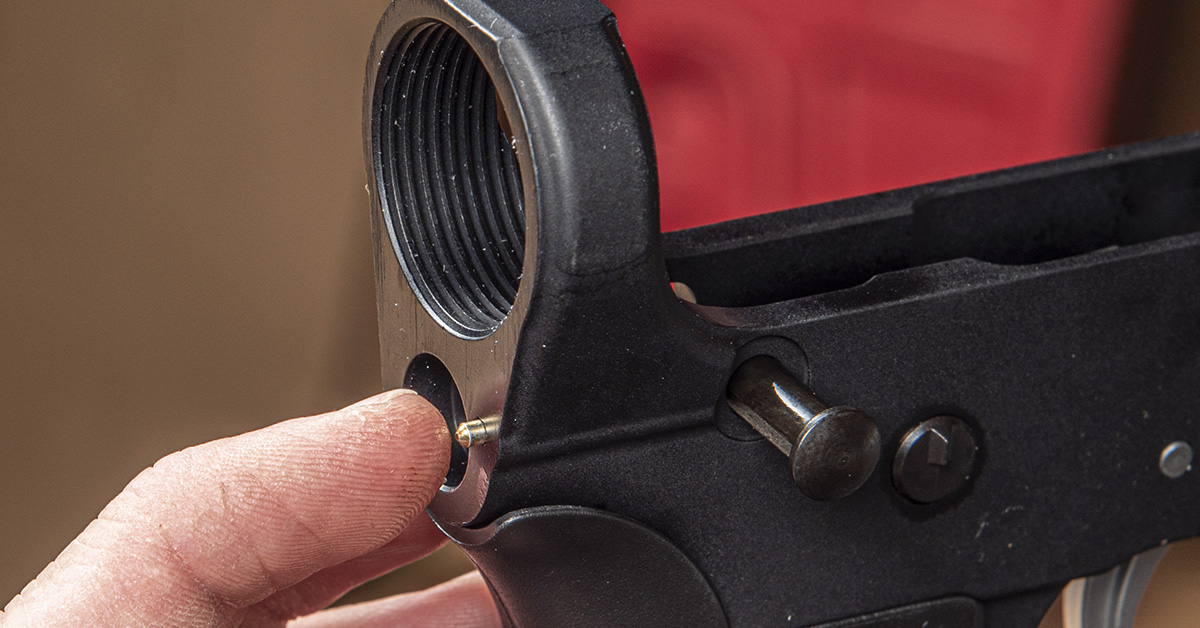
Although mechanically simple, the pivot pin assembly can be aggravating to install. The assembly consists of a pivot pin detent spring, detent, and pin.
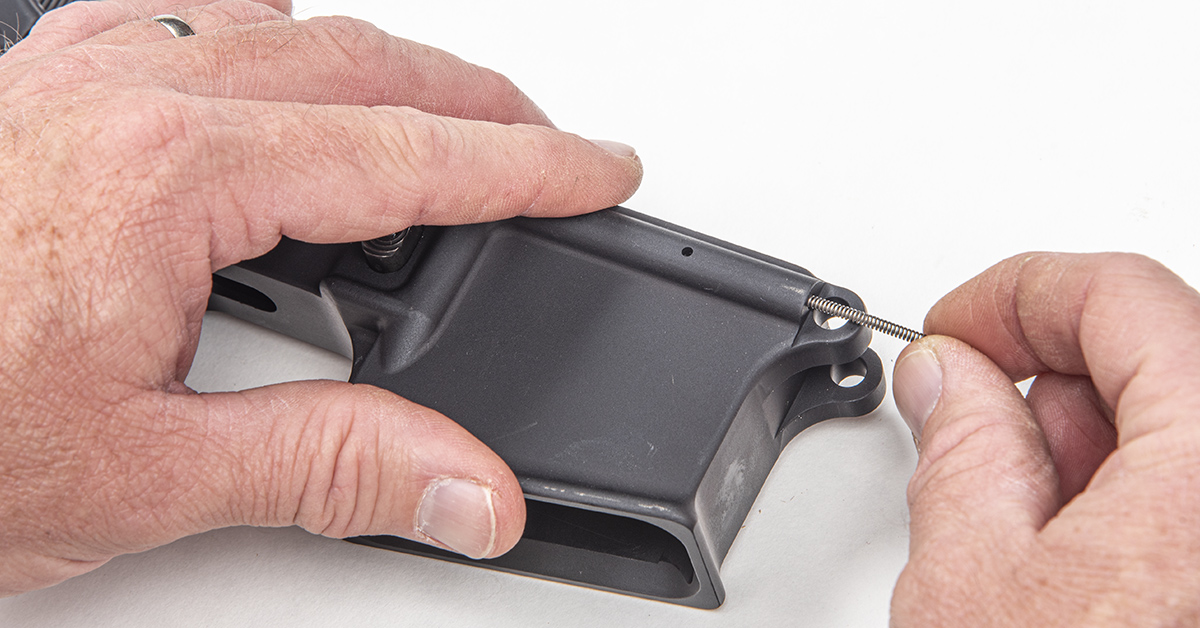
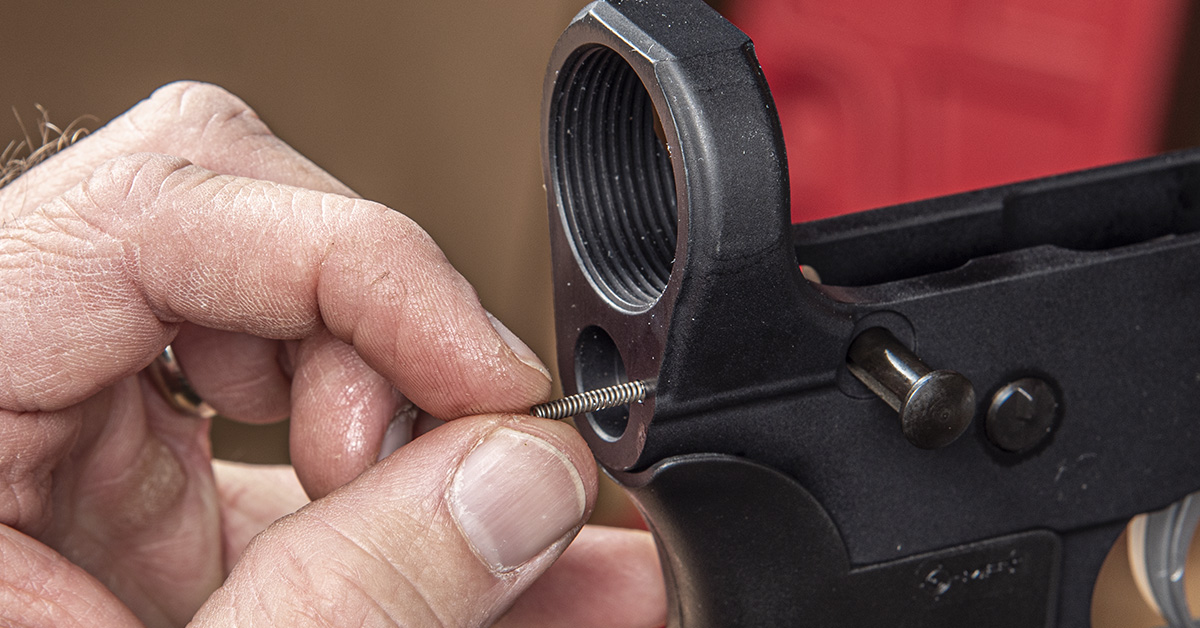
Lightly lubricate and install the pivot pin detent spring into its hole in the front of the receiver.
Insert the lightly lubricated pivot pin detent in the same hole.
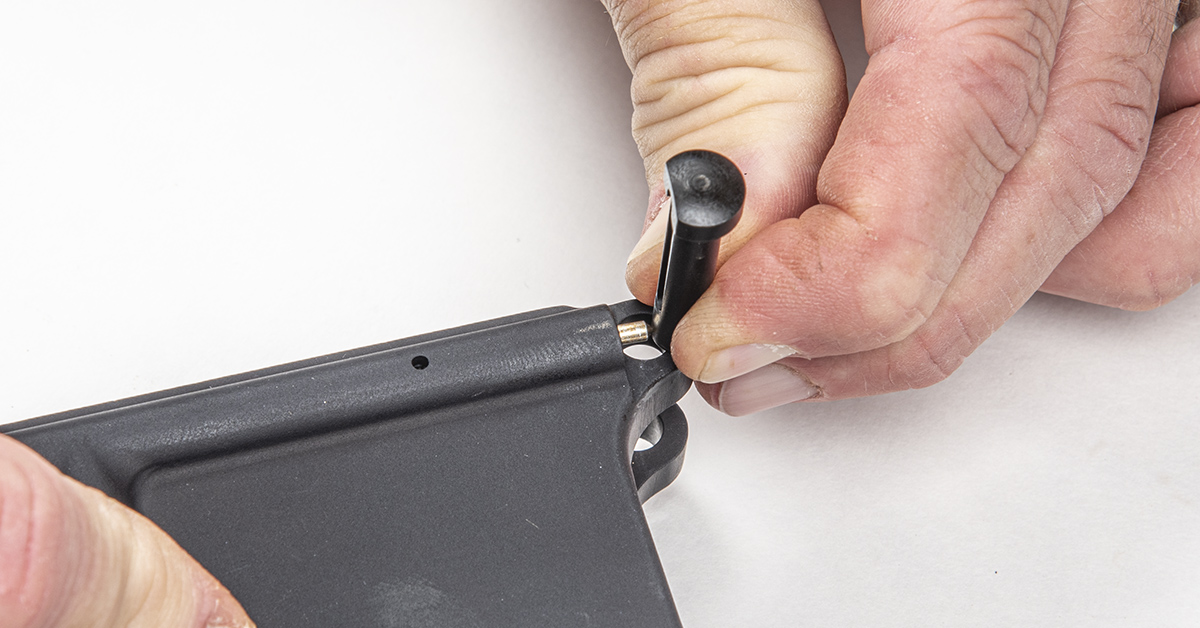
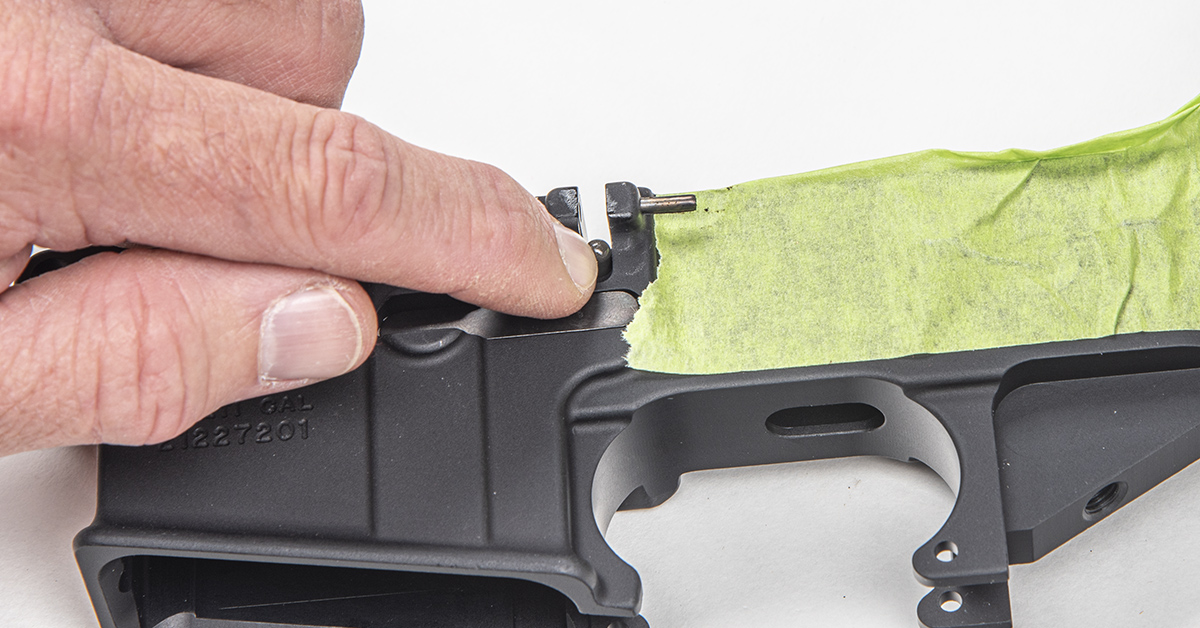
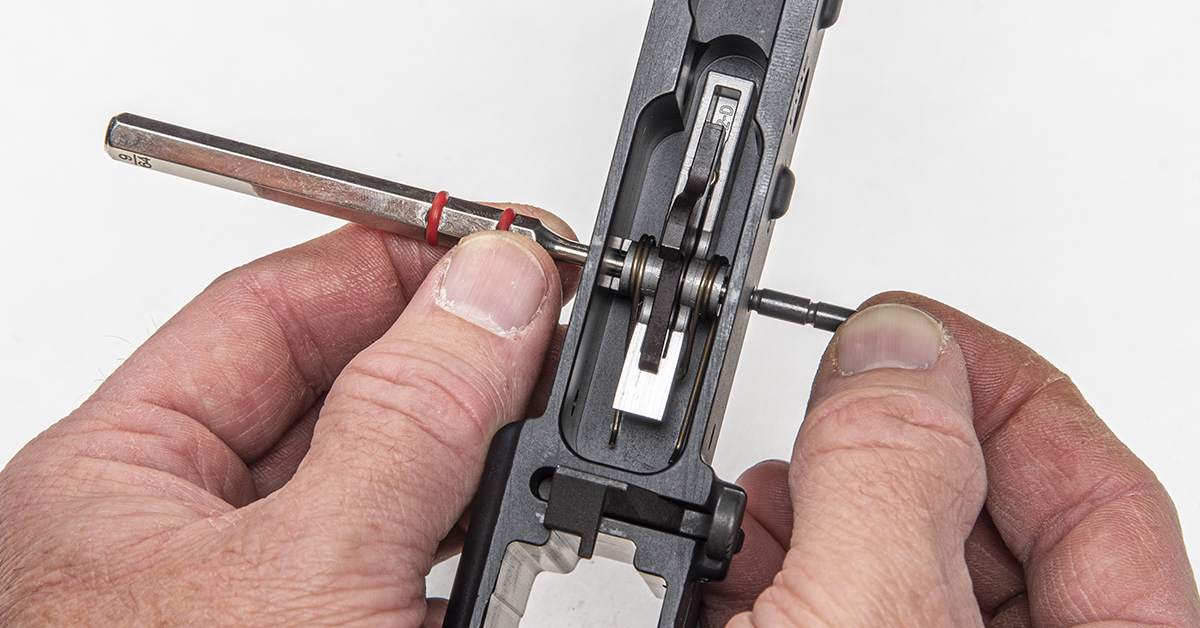
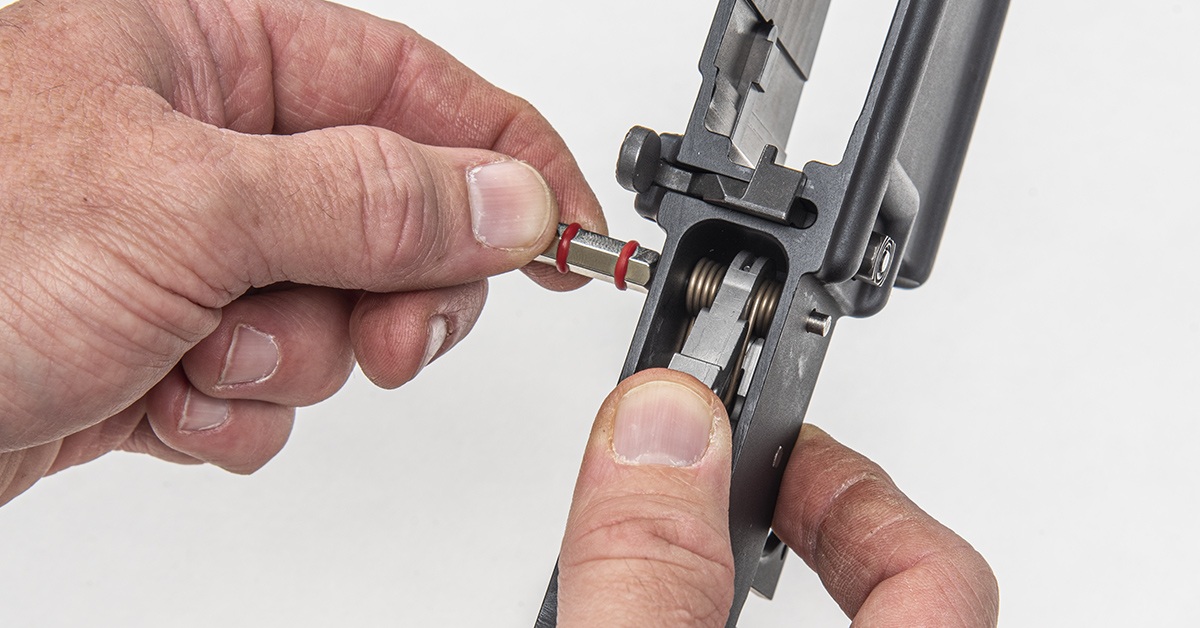
Here’s the tricky part. With the pivot pin oriented as shown (recessed channel/head flat pointing toward the rear of the receiver), the goal is to push in on the pivot pin detent and then push the pivot pin into its hole, thus securing the spring and detent in the receiver. This is difficult because the detent is under spring pressure and a little slip here can send the detent and spring shooting to parts unknown within your shop. Keep this in mind as you install the pivot pin.

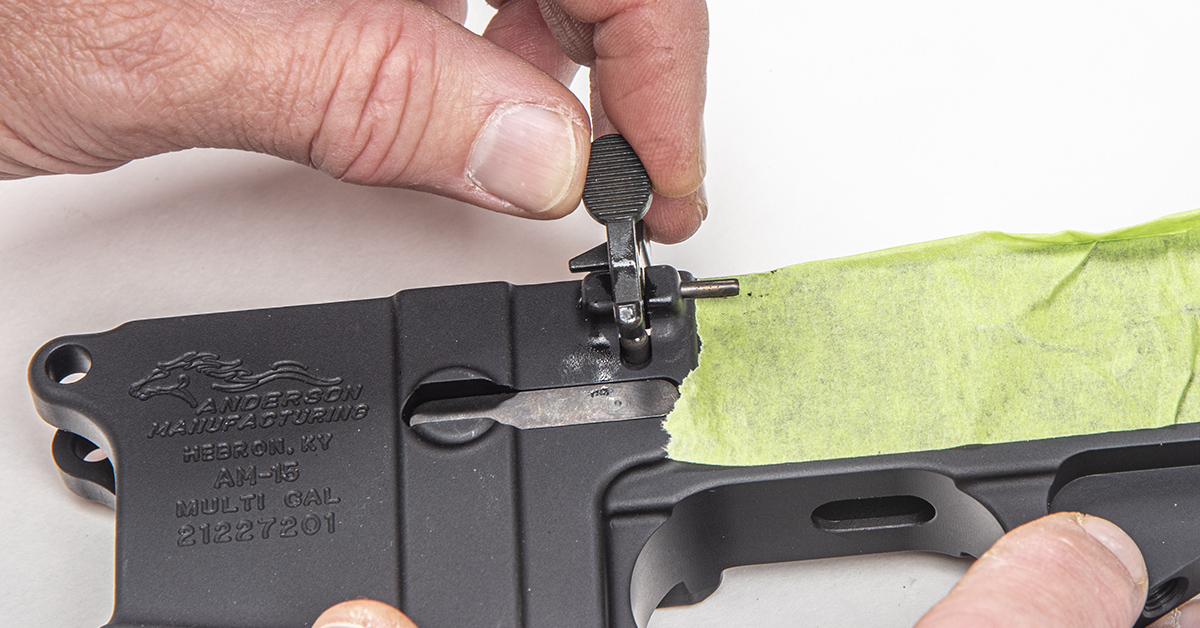
If you wish to prevent the hassle, the Real Avid Pivot Pin Tool keeps the spring and detent captured while you install the pivot pin. Just follow the instructions provided with the tool.

The installed pivot pin assembly.
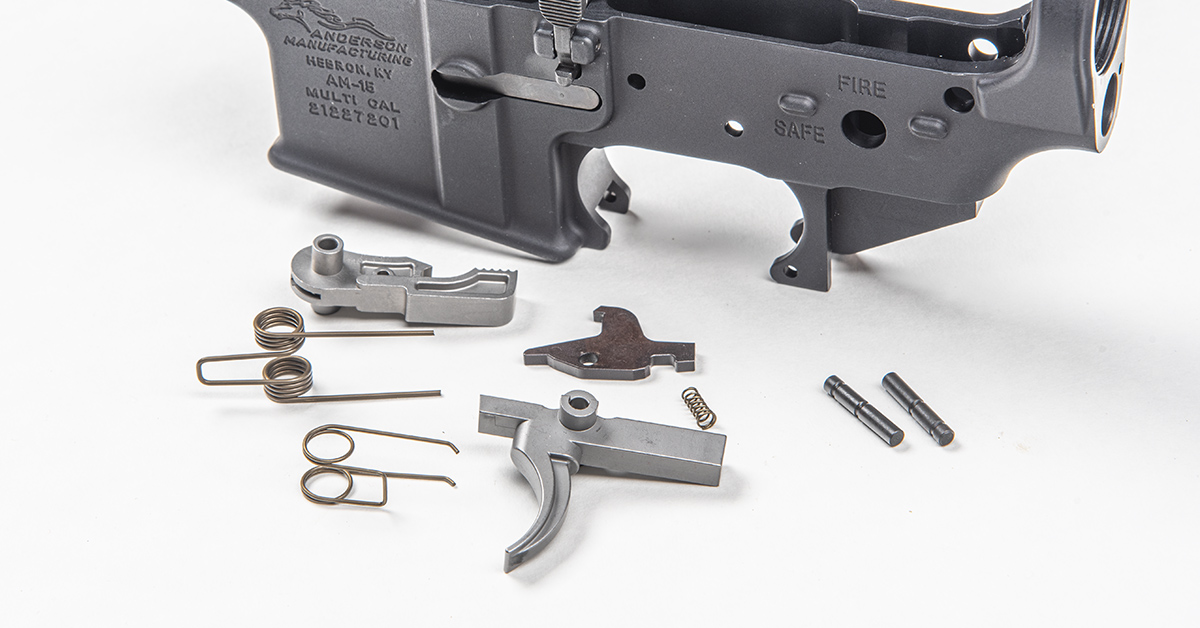
The standard AR trigger group might look scary, but it’s really simple to install. This assembly consists of the hammer, hammer spring, trigger, trigger spring, disconnect, disconnect spring, and the hammer and trigger pins. The hammer and trigger included in the Anderson kit is made of stainless steel.

Lightly lubricate the hammer spring bosses and the hammer spring and install the spring onto the hammer as shown.

Lightly lubricate the trigger spring bosses and trigger spring and install the spring onto the trigger as shown.

Lightly lubricate the disconnect spring and insert it (large coil down) into its recess in the trigger.
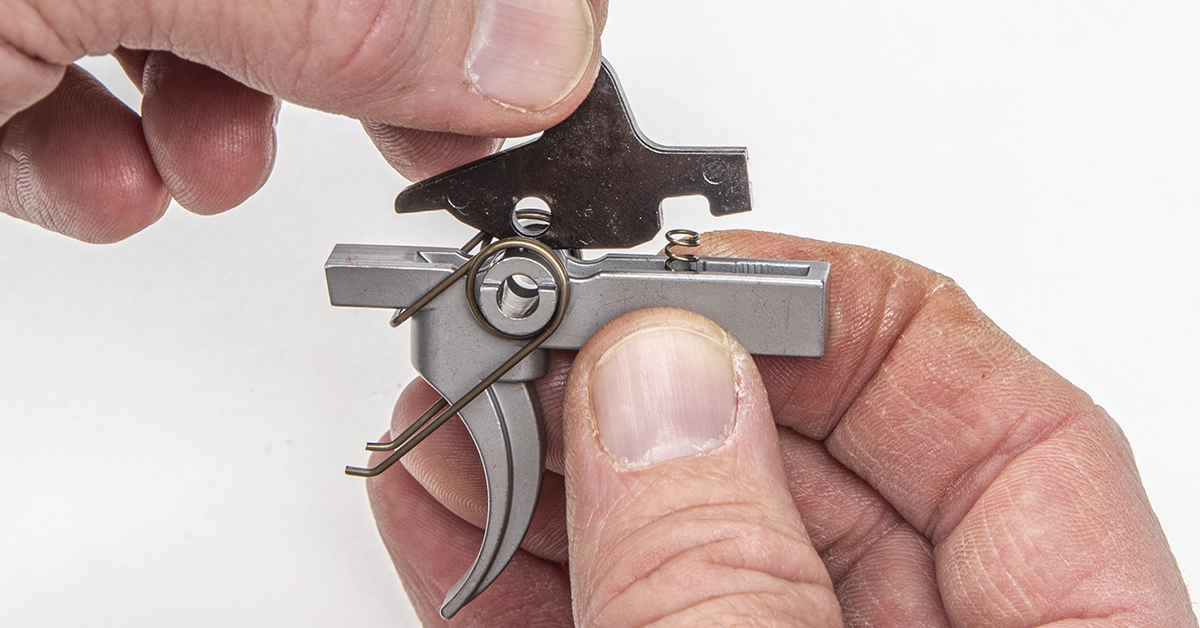
Place the lightly lubricated disconnect into the trigger as shown.
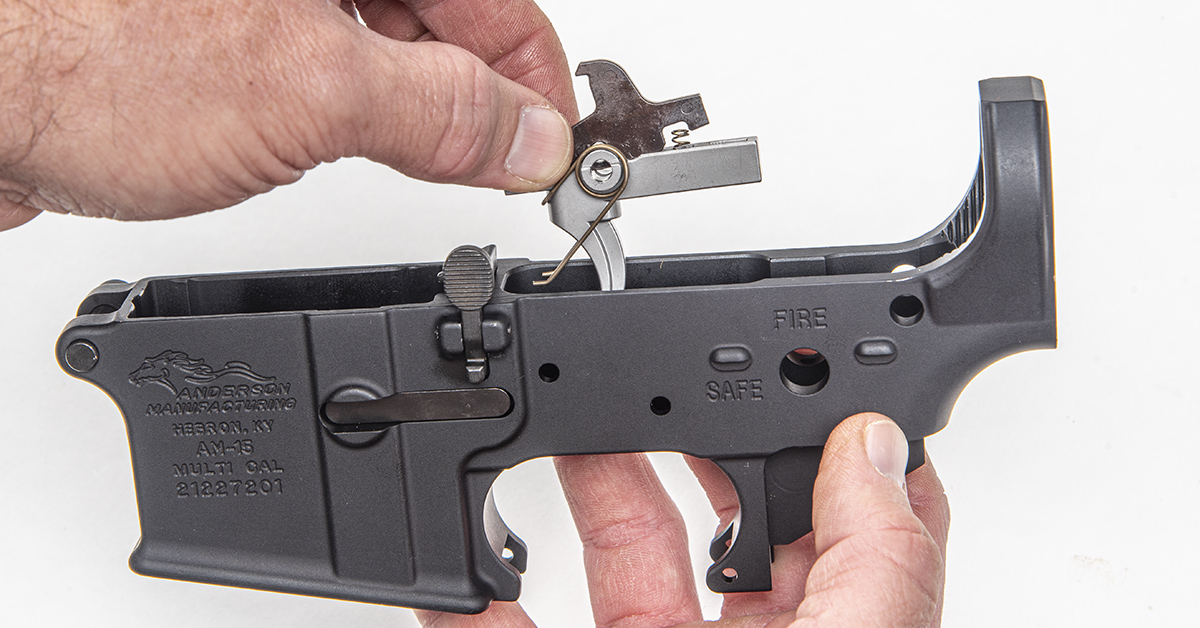
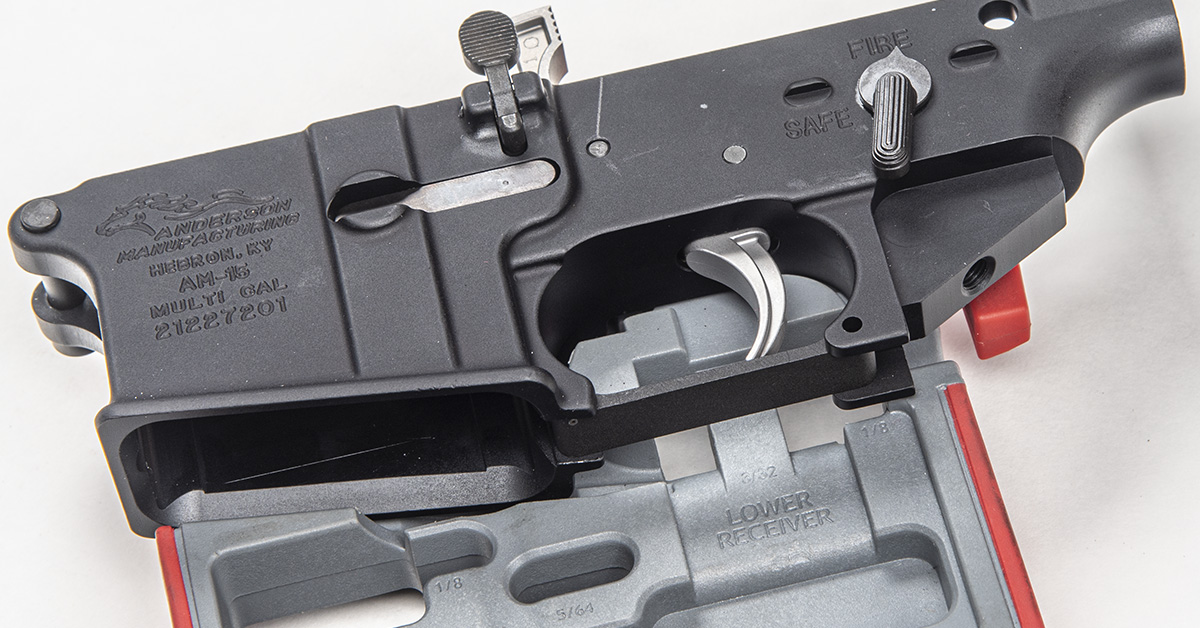
With the trigger spring arms pointing toward the front of the receiver, lower the trigger assembly into the receiver.
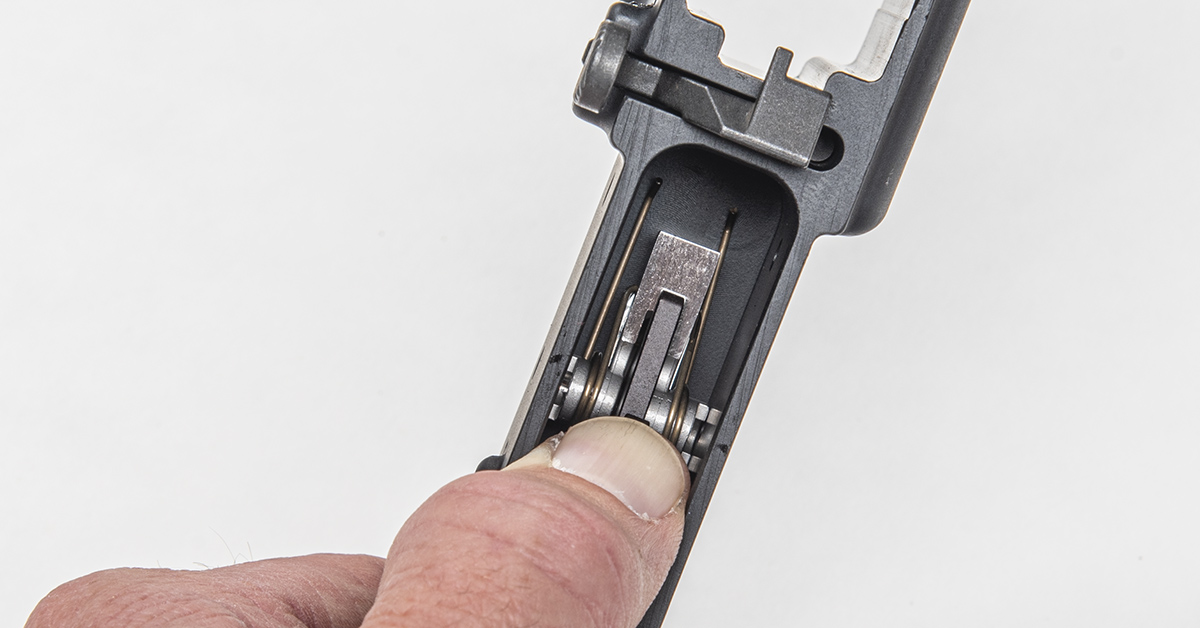
When correctly installed, the trigger spring ends lay flat on the bottom of the receiver, pointing forward.
Lightly lubricate the trigger pin (the trigger pin and hammer pin are identical, so don’t fret about mixing up the two). Use a 5/32 punch to act as a slave pin by inserting it through the receiver and trigger pin holes to align the holes. Next, push the trigger pin into the receiver hole, pushing out the pin punch as you go. Usually, you can push the pin in by hand. If you encounter resistance, check for proper hole alignment and use a plastic- or nylon-faced hammer to tap the pin into place.
When properly installed, the ends of the trigger pin will be flush with the sides of the receiver.

Moving to the hammer installation, place the hammer into the receiver with the hammer spring legs lying over the trigger spring bosses, as shown. This one takes a bit more effort than the trigger install because of the greater tension of the stronger hammer spring.
Press down on the hammer while inserting a pin punch into the receiver and through the hammer to achieve pin hole alignment. You will, again, use the punch as a slave pin as you push the lightly lubricated hammer pin into place evenly through the receiver. If necessary, tap the pin into place with a non-marring hammer.
Perform a preliminary function check of the trigger group. As you do so, make sure the hammer does not strike the receiver by arresting its forward movement with your thumb. Failure to do so could damage the receiver. Here, you are making sure that the trigger releases the cocked hammer (simulating firing). You can also check for proper trigger reset. To do this, hold the trigger back after releasing the hammer. Continue holding back the trigger while pushing the hammer back down into the cocked position. Carefully let up on the hammer. The disconnect should catch the hammer and prevent it from moving forward. Slowly release the trigger and you should hear a click as the disconnect releases the hammer and the trigger engages the hammer.
If you discover an issue during this function check, determine the cause and correct the problem.
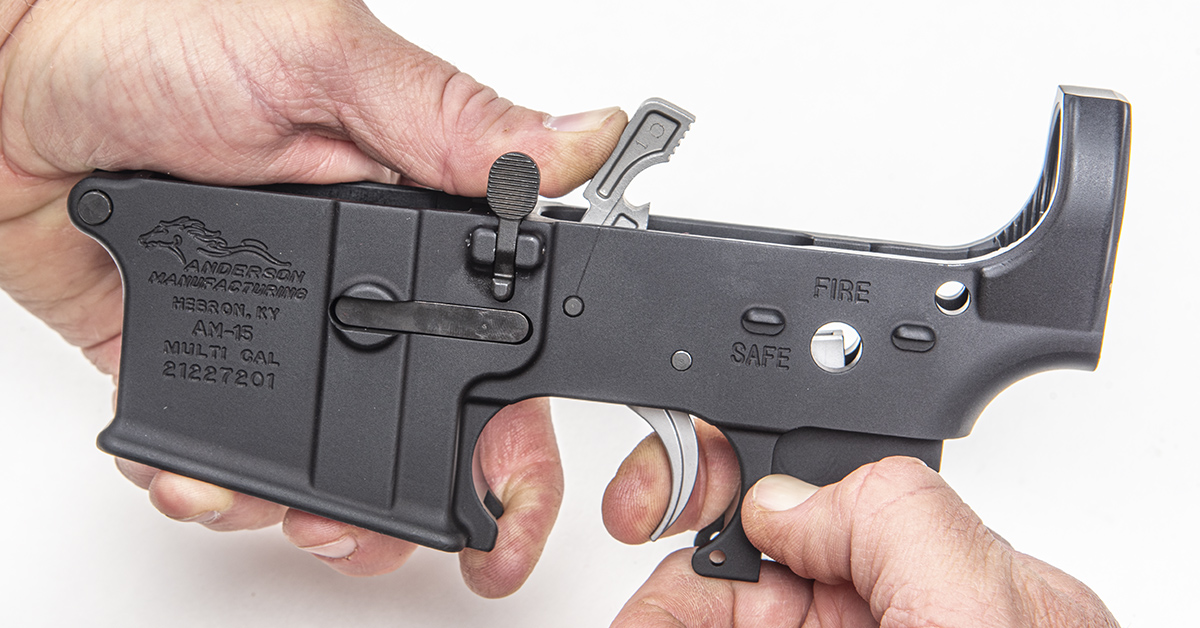
You can go ahead and insert the lightly lubricated safety selector lever at this time. Do this by cocking the hammer and inserting the lever into the left side of the receiver. Once installed, de-cock the hammer to keep the lever in place.

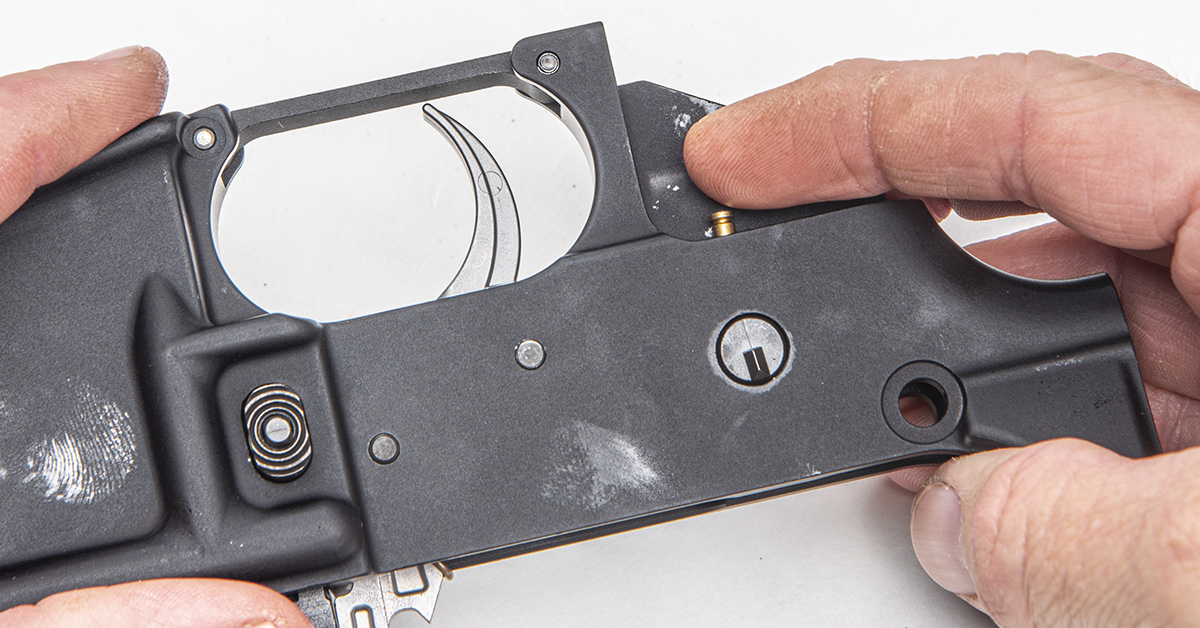
The trigger guard is up next. The front end of the trigger guard comes with a captured spring and plunger. Depress the plunger as you slide the front of the trigger guard into place in the receiver. The plunger will snap into its hole once correctly installed.
We return to the AR-15 Master Bench Block to install the trigger guard roll pin. This pin usually requires some aggressive tapping with a hammer to properly seat. The stress from the hammer taps can damage the “ears” of the aluminum receiver and so requires solid underneath support. The Master Bench Block is contoured to accept the receiver and provide this vital support. Lacking the Master Bench Block, you can also place a deck of playing cards beneath the receiver, removing cards until the deck provides the necessary support.

Align the rear trigger guard pin holes with the corresponding holes in receiver. Start the trigger guard pin into the receiver and carefully tap the pin until it captures the trigger guard. Be sure to maintain pin hole alignment as you do this. Should the trigger guard shift during tapping and you drive the pin too hard, the resulting pin jam can be difficult to correct.

Once the pin correctly starts into the trigger guard, use a roll pin punch and finish tapping the pin into place. The pin should sit equally in the receiver.
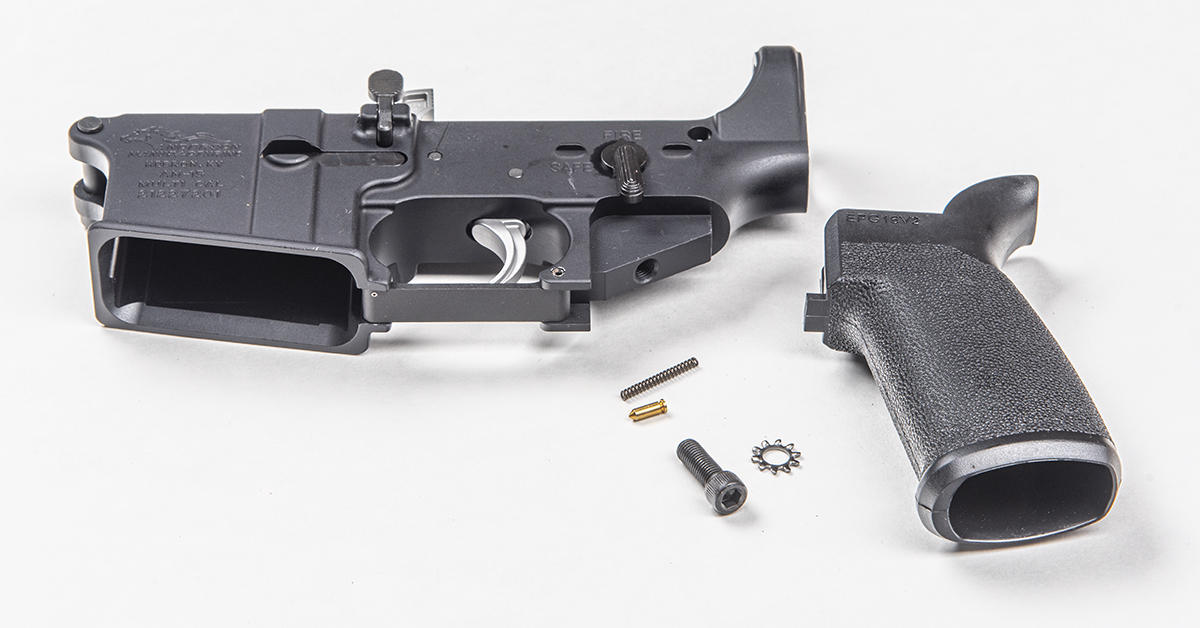
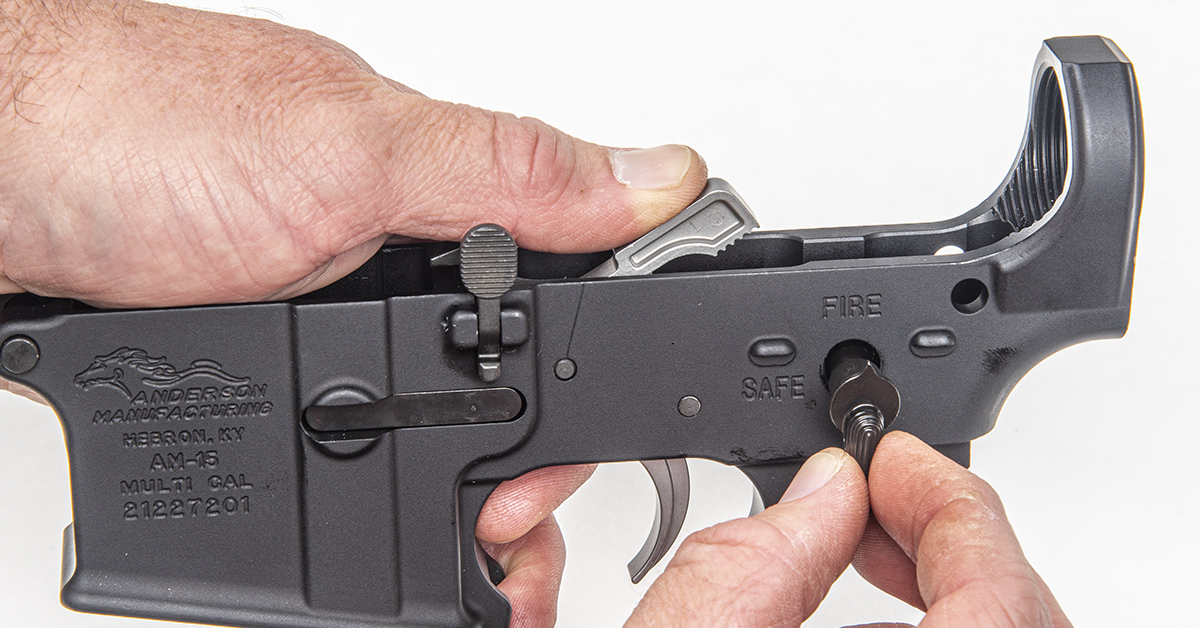
The next step involves simultaneously installing the safety selector spring and detent along with the grip. The grip assembly includes a screw, toothed washer, and the grip.
With the safety selector in the fire position, insert the lightly lubricated safety selector detent into its hole in the bottom right side of the receiver.
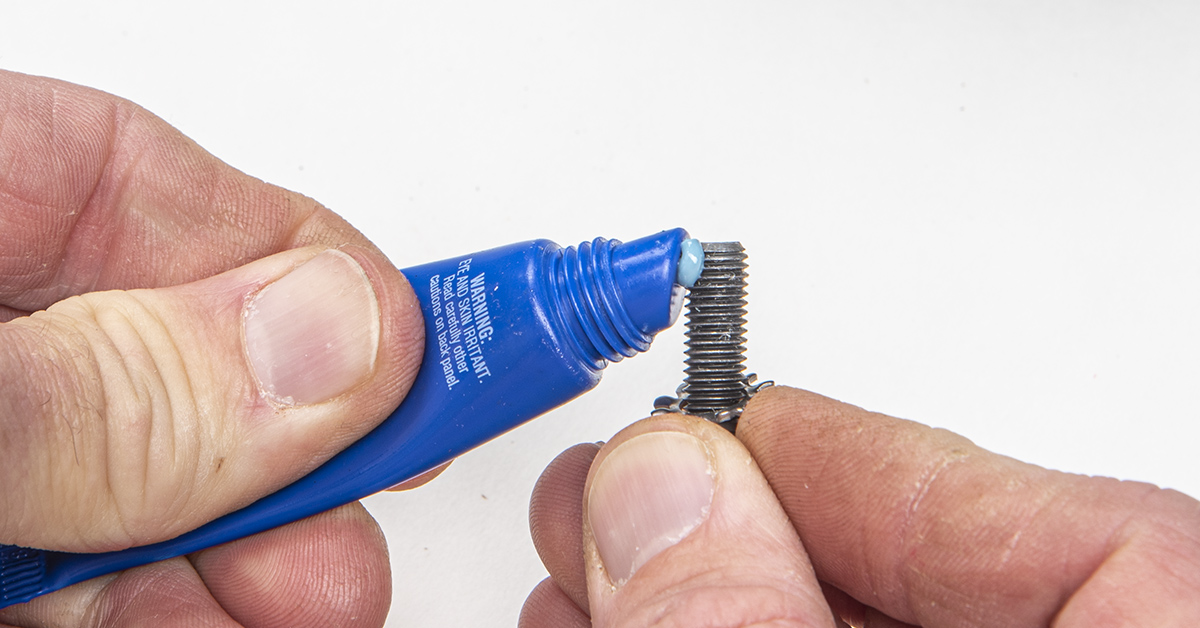
Degrease the grip screw with denatured alcohol. Install the washer onto the grip screw and then apply a small amount of medium-strength thread adhesive to the first few threads.
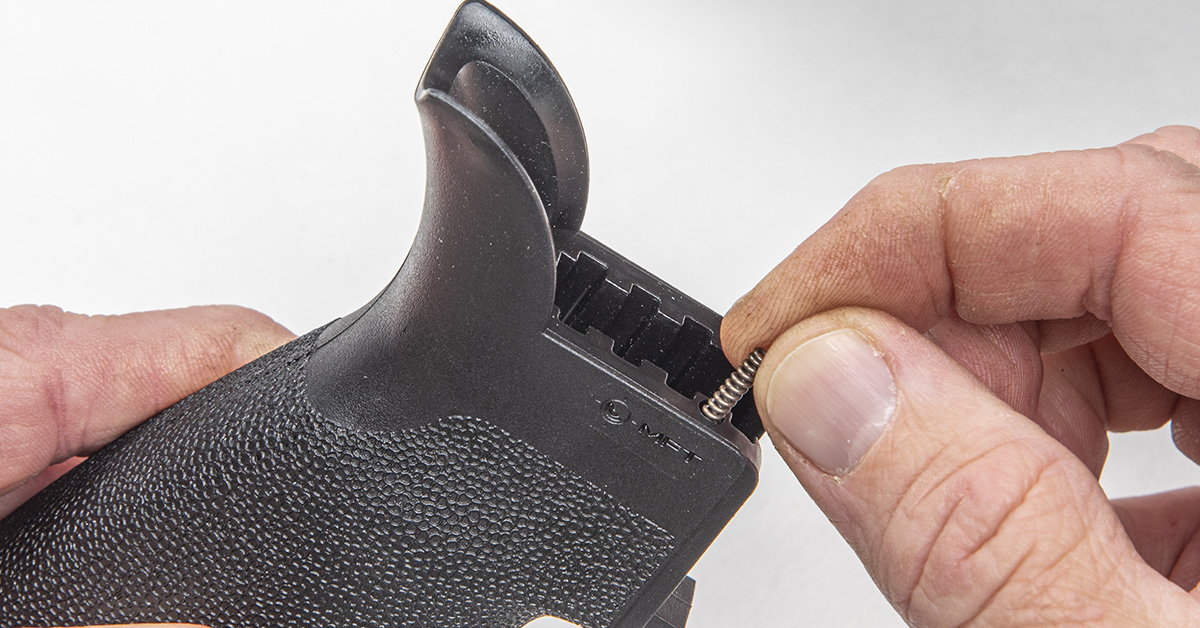
Lightly lubricate the safety selector lever spring and insert it into its hole in the right side of the grip.
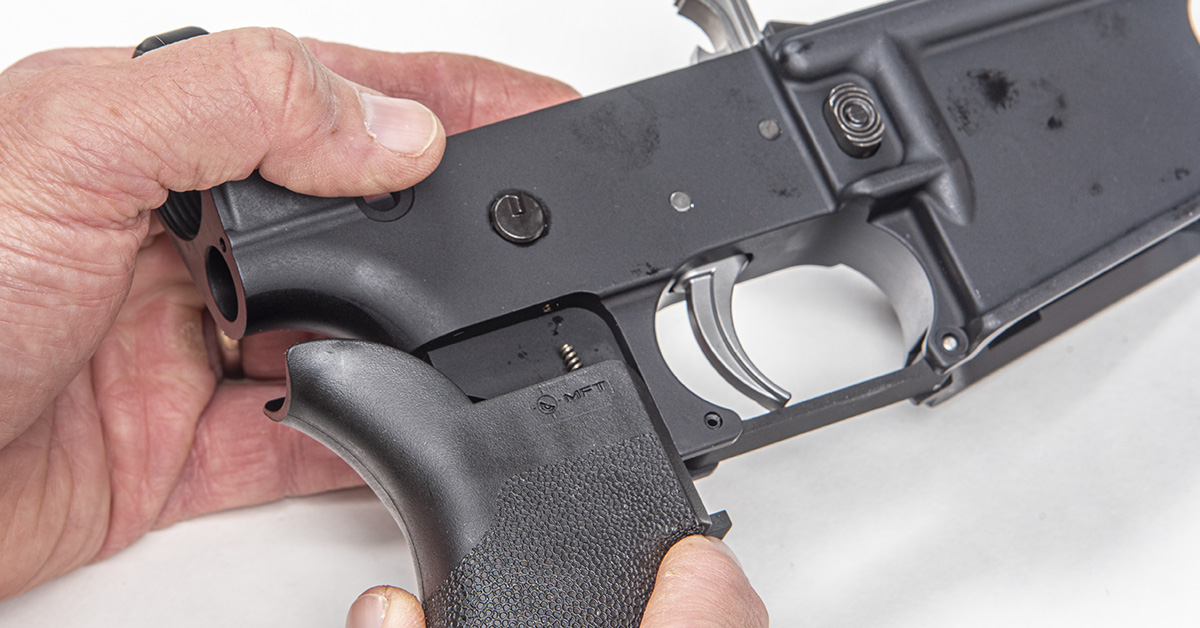
Slide the grip into place on the receiver, making sure the selector lever detent does not fall out and that the detent spring moves into its hole in the receiver.
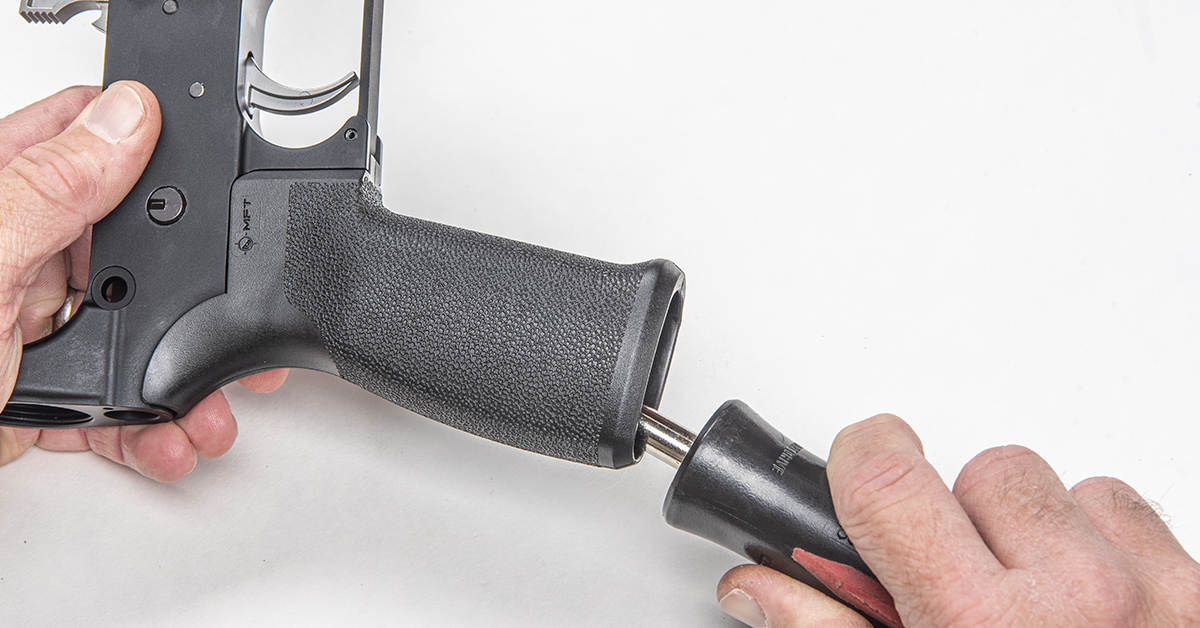
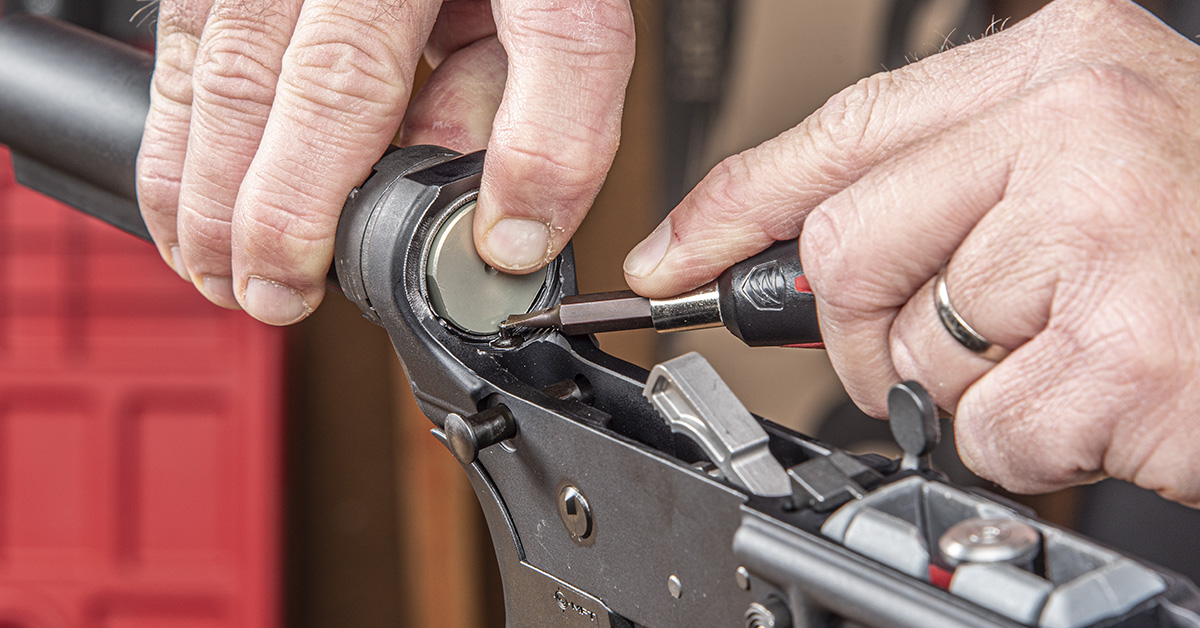
Using the appropriate driver for the screw, secure the grip screw into its hole in the receiver and tighten snug.
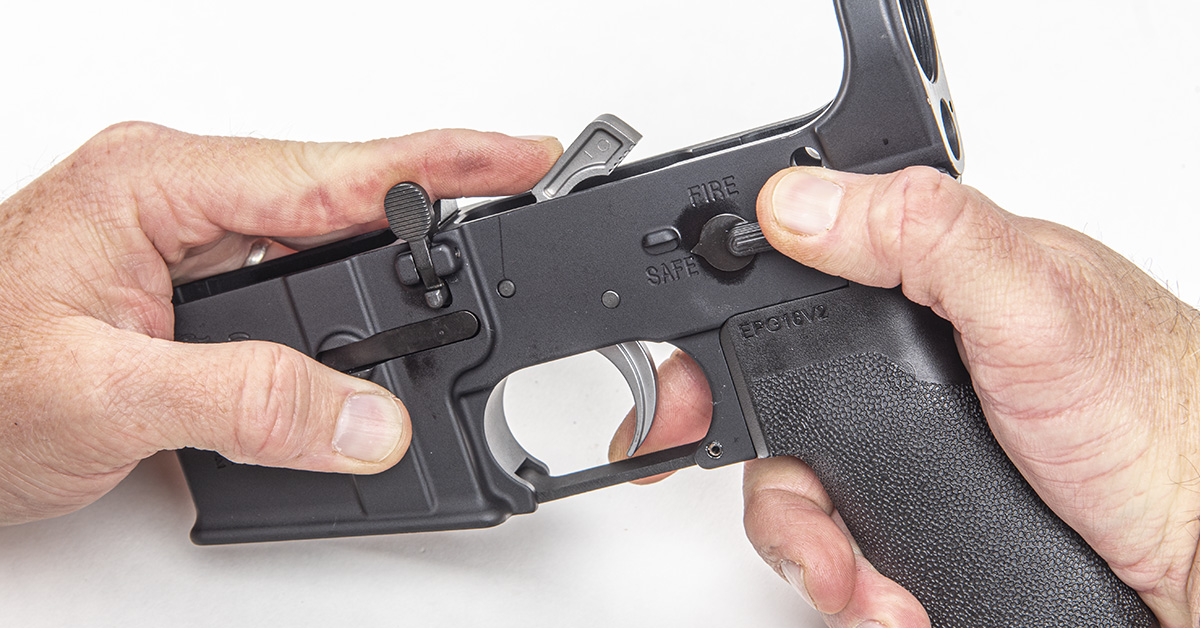
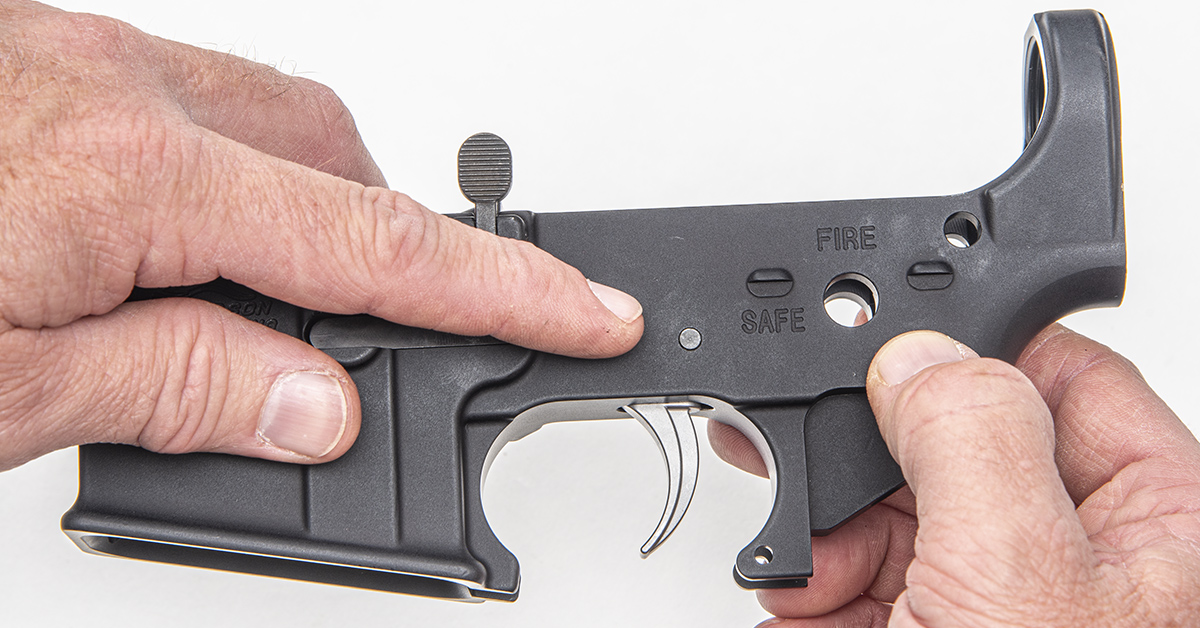
You can now perform a function check of the safety selector. The selector should click into the safe and fire positions when rotated between the two, and it should hold those positions until moved with moderate finger pressure. Again, keeping the hammer from falling against the receiver, make sure the cocked hammer falls when the trigger is pulled back and the selector is on “fire” and does not fall when the selector is on “safe” and the trigger is pulled back.
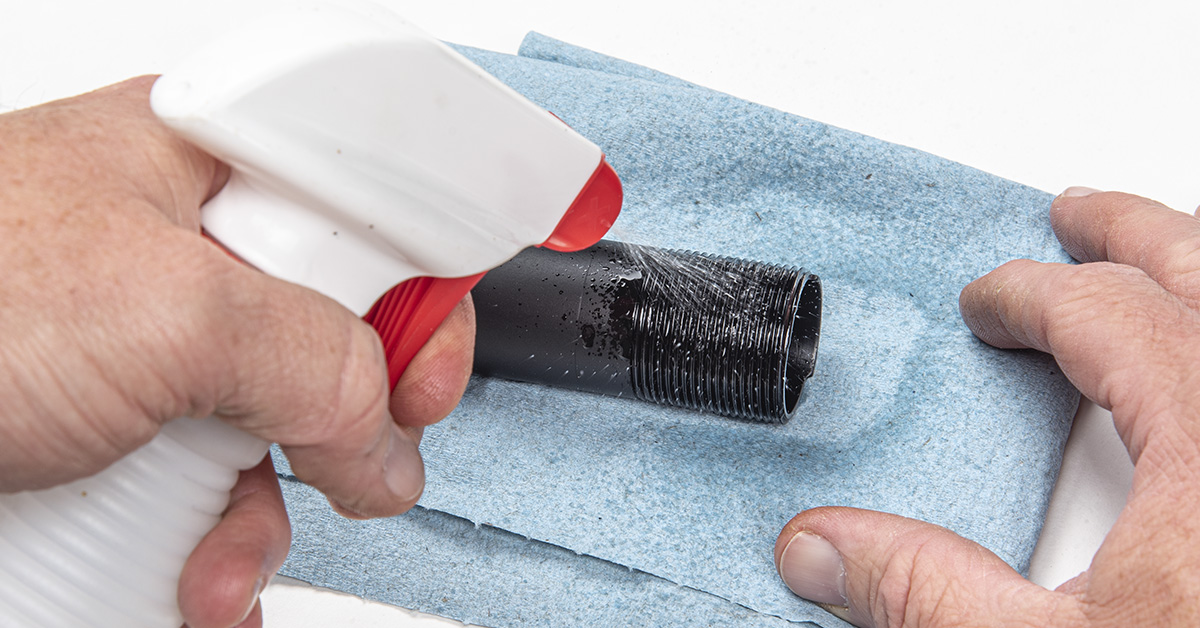
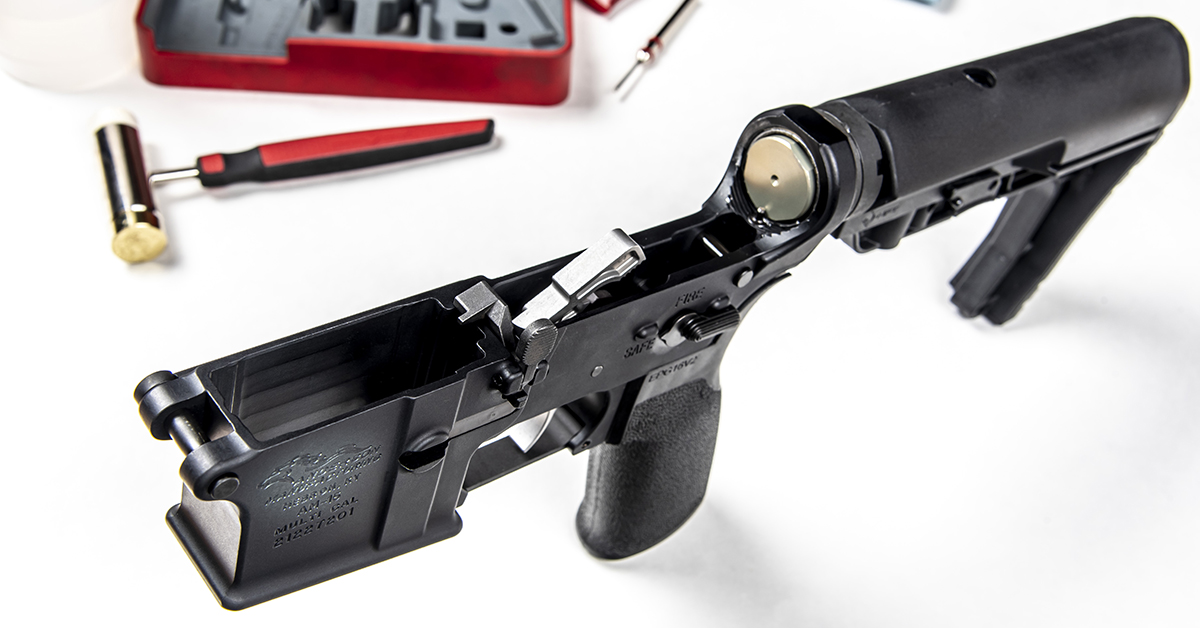
Lastly, we come to the buffer tube assembly, stock, and takedown pin installation. Start by degreasing the buffer tube threads with denatured alcohol.

Clean the castle nut threads with denatured alcohol and screw the nut onto buffer tube with the large slots orientated toward the rear of the tube as shown.
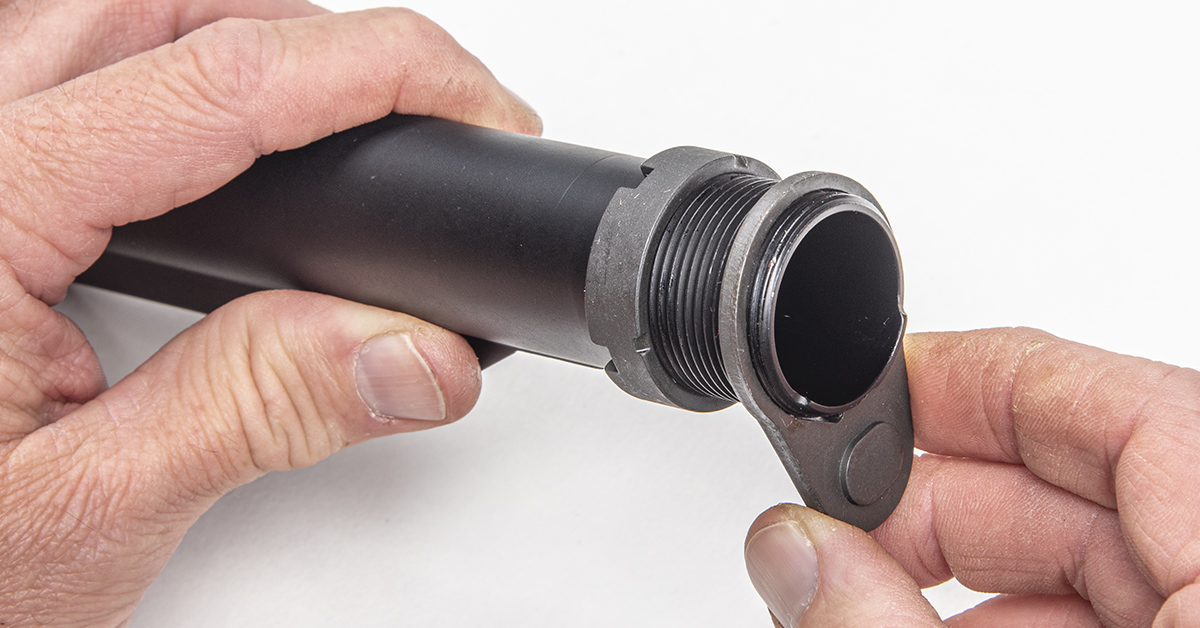
Install the end plate onto the tube.
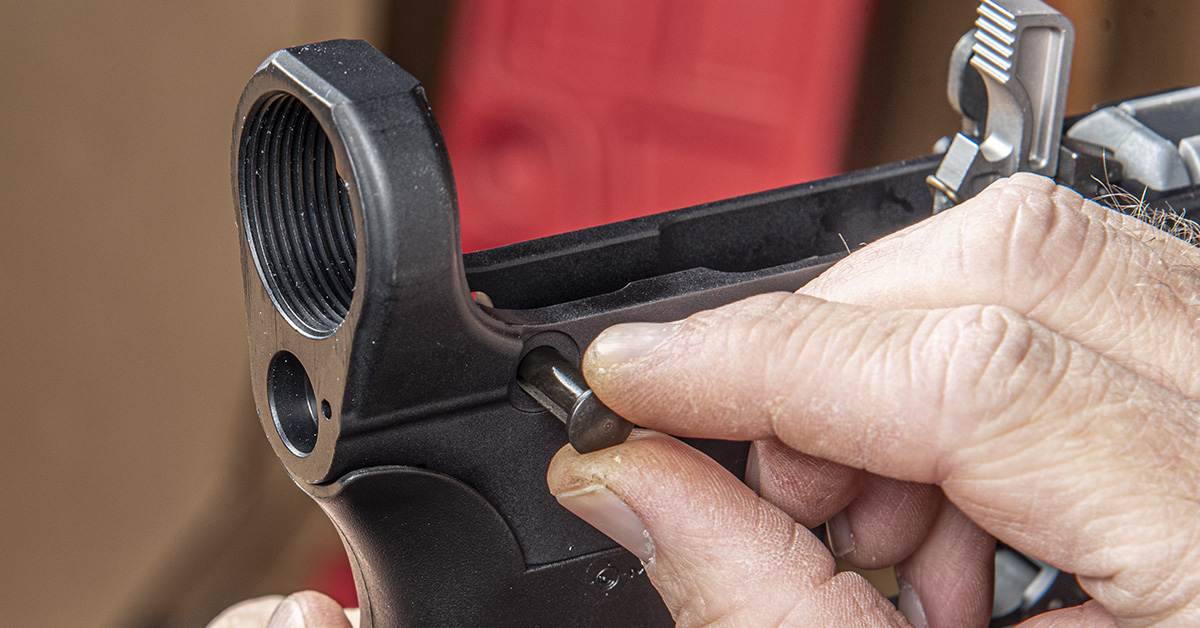
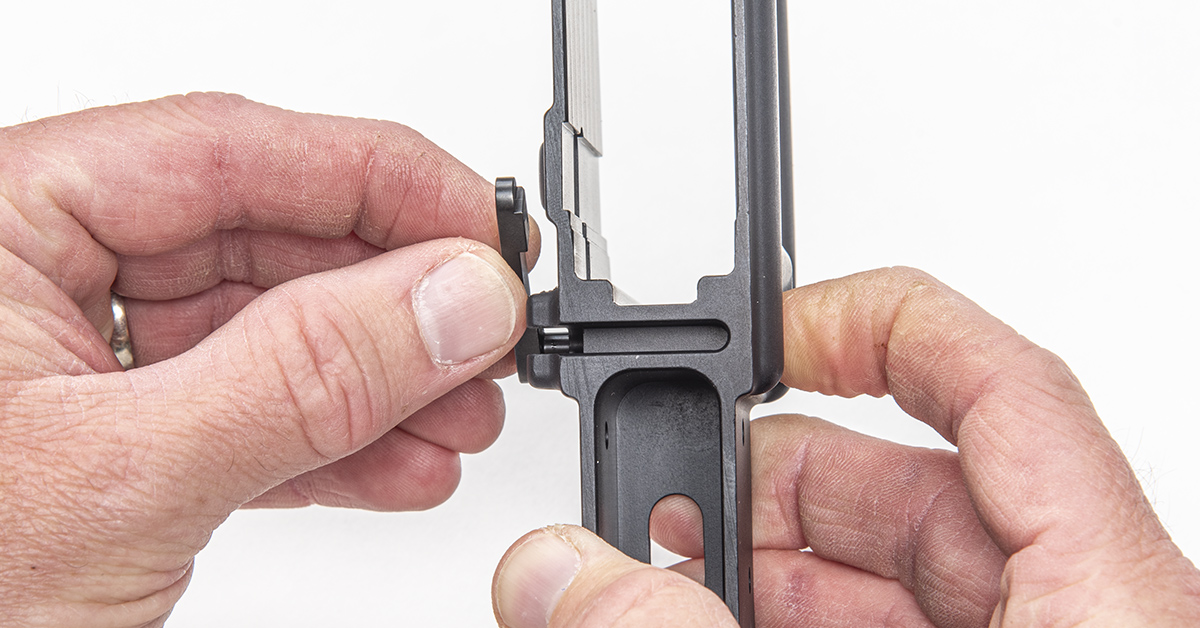
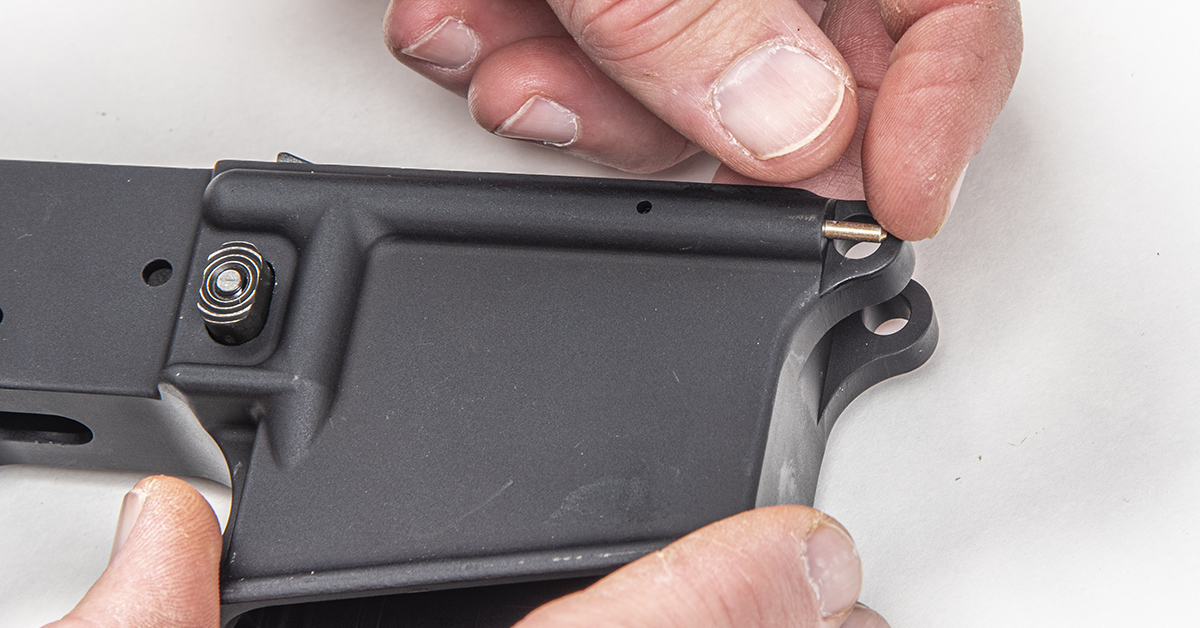
Install the lightly lubricated takedown pin into the right side of the receiver, with the detent slot pointed toward the rear as shown.
Install the lightly lubricated takedown detent into its hole in the receiver.
Install the lightly lubricated takedown pin detent spring into the receiver.

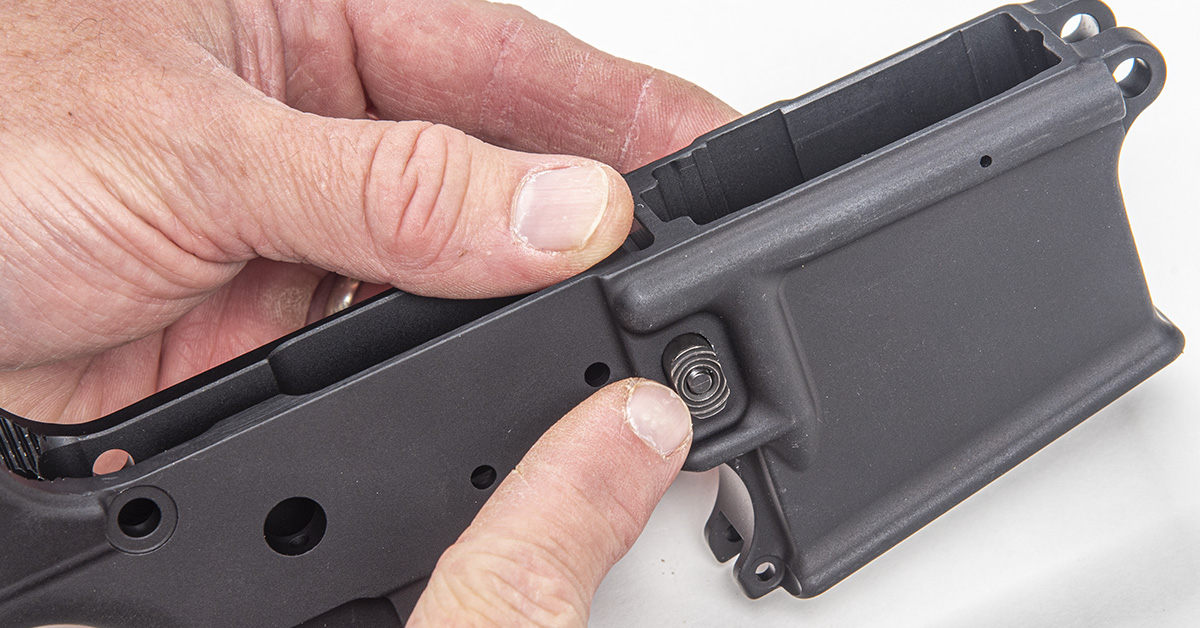
Install the lightly lubricated buffer detent spring into its hole in the receiver.

Install the lightly lubricated buffer detent over the detent spring.
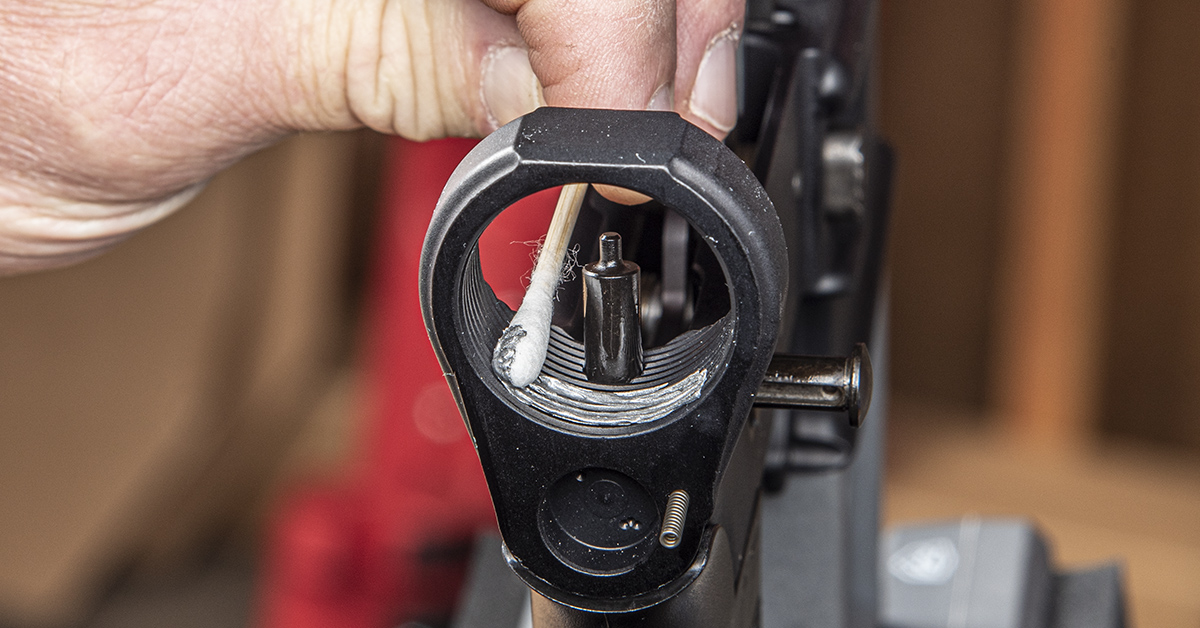
Apply a light coat of anti-seize to the rear threads.
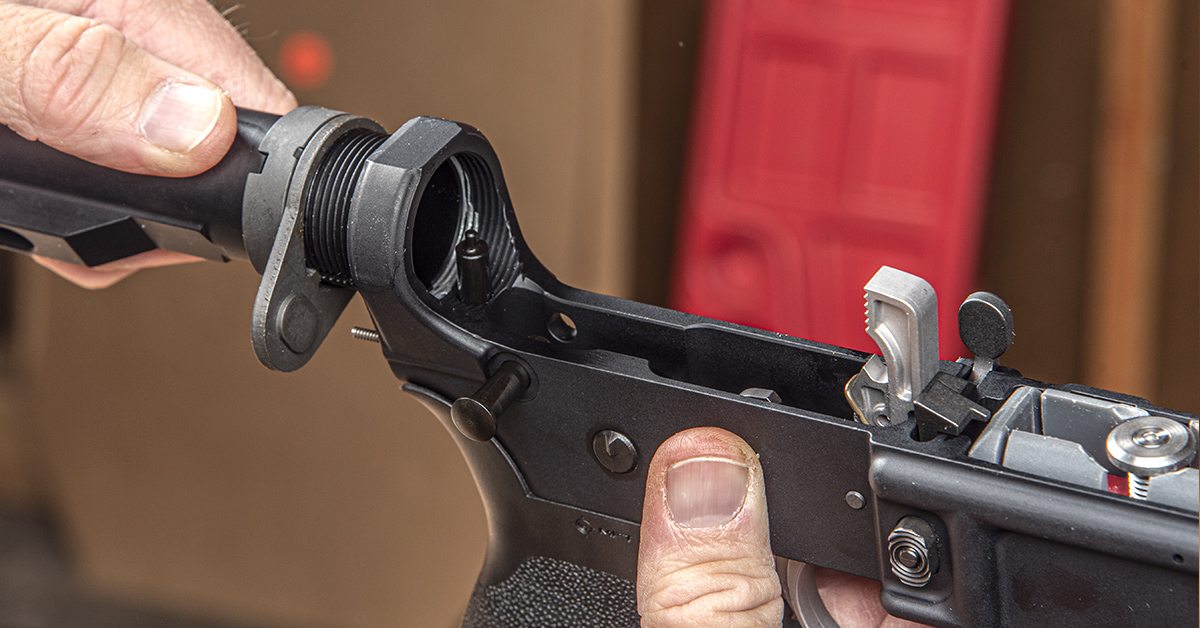
Begin screwing the buffer tube assembly onto the receiver.

When properly installed, the end of the buffer tube will capture the buffer detent. Push down on the buffer detent and screw the buffer tube until it captures the detent ledge and the buffer tube is properly oriented in the receiver as shown.

Realign the takedown pin detent spring (if necessary) so that the end plate will push it straight into the receiver when you tighten the castle nut.

With the end plate pushed against the back of the receiver, apply a small amount of medium-strength thread locker to the buffer tube threads just forward of the castle nut.

While pressing the end plate against the receiver, screw the castle nut against the end plate with finger pressure.
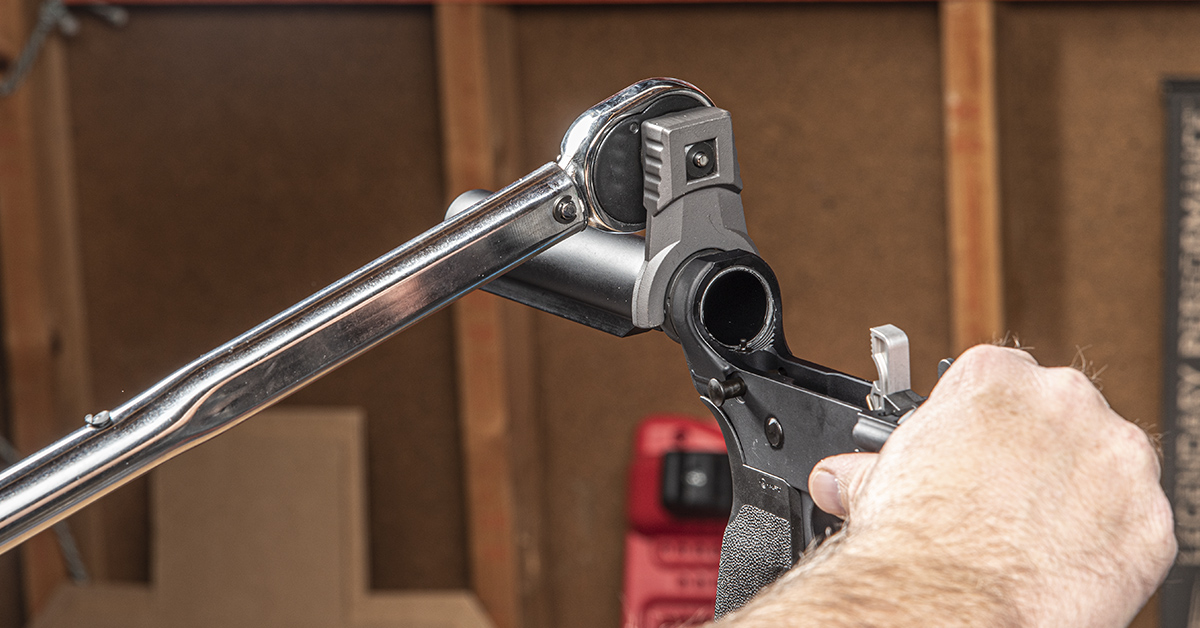
The castle nut should be torqued to 40 in/lbs, or about 5 ft/lbs. This operation requires an AR-15 armorer’s wrench or an AR-specific castle nut wrench. We’re using here the castle nut wrench and torque wrench from Real Avid’s AR15 Crowfoot Wrench Set.

Lightly lubricate the buffer spring and buffer, then install the buffer into the spring. When properly installed, the spring should snap into place with the front coil fully seated against the back of the buffer face.
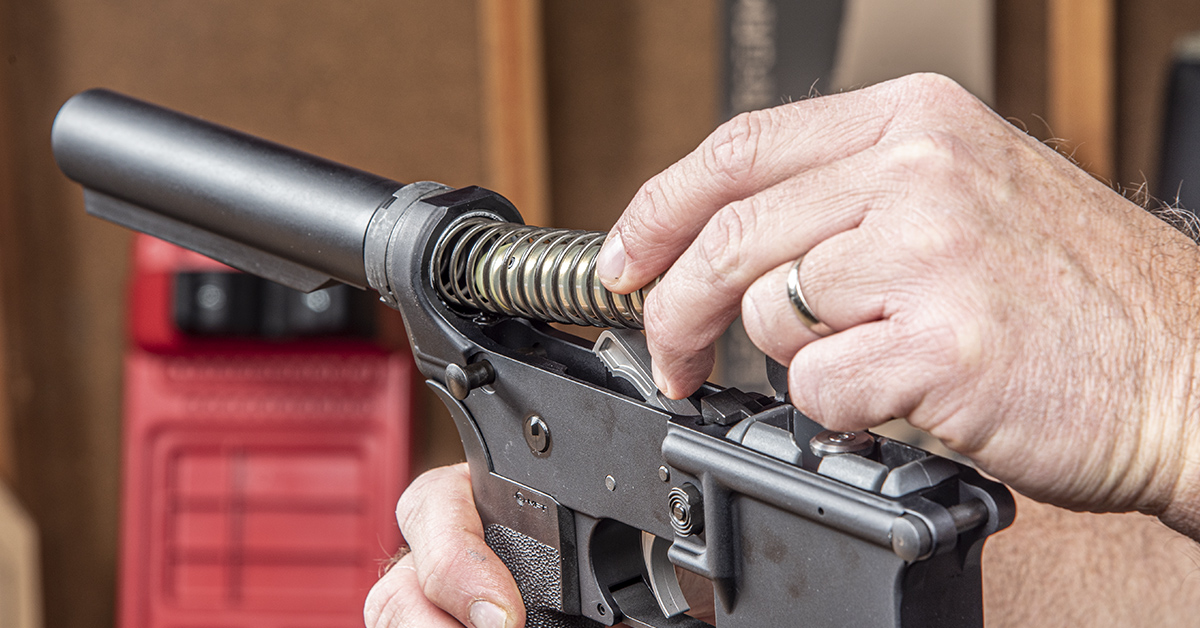
Feed the back end of the buffer spring and buffer assembly into the buffer tube.
Press the buffer detent into the receiver to provide clearance for the buffer. Once installed, the buffer detent will capture the correctly installed buffer and spring assembly.
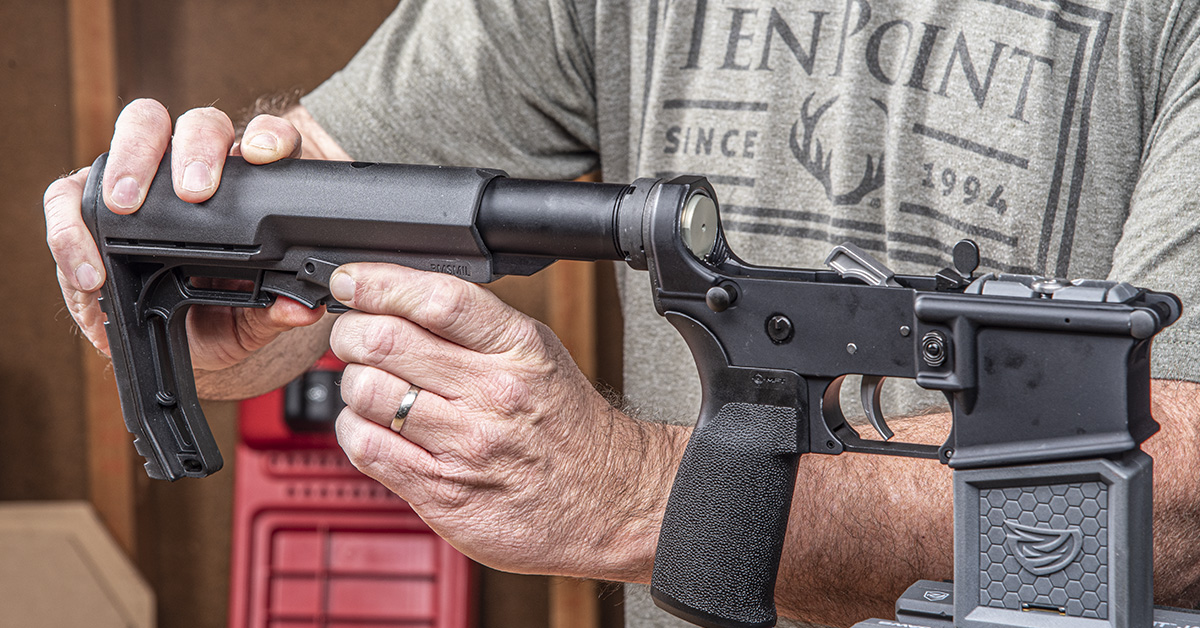
Finish the installation by installing the stock onto the buffer tube. To do this, you will need to simultaneously pull down on the stock positioning lever while simultaneously pushing the stock onto the buffer tube.
Stay Tuned
In our next installment, we will walk you through the upper receiver assembly process. Understand, though, that many firearm DIY fans stop right here in their AR builds, preferring to buy complete uppers to work with their home-built lowers. The choice is yours, of course, but we certainly encourage you to build your own upper receiver so you become familiar with the entire AR-15 build process. If you’re ready to take the plunge, head over to Anderson Manufacturing and pick your poison. If you have questions, a customer service representative will be glad to help. Until next time…