Timney enters the lever gun segment with the new Lever-Action Trigger upgrade for Marlin rifles
by Rob Reaser
Bolt guns, revolvers, pistols, and shotguns…they all have quite the portfolio of aftermarket upgrade parts to give shooters an edge over factory performance. Lever guns, though…not so much. Sure, there are some add-on options and a small handful of parts that can be upgraded with non-factory components, but meaningful internal upgrades aren’t so plentiful.
Timney Triggers is best known for their numerous bolt-action rifle precision trigger systems as well as a multitude of handgun triggers that deliver a night-and-day improvement in pistol performance. Recently, the company took its first step into the lever-action rifle waters with a replacement trigger for the ever-popular Marlin 336, 1894, and 1895 models.
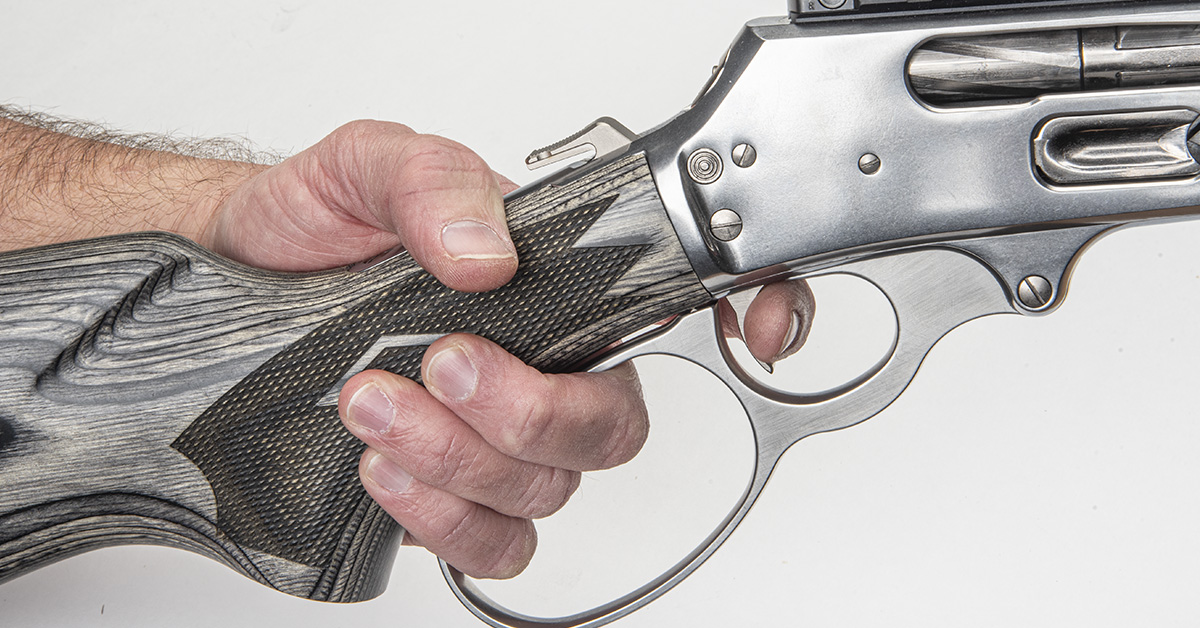
As factory triggers go, our Model 336’s hammer and trigger combo made a fairly good showing of itself. With its easy-mannered pull weight, modest sear travel, and relatively smooth sear engagement surface, the average shooter would have little to nothing to complain about. But then we’ve said that about a lot of factory triggers before upgrading with a precision-engineered aftermarket unit. Often, it takes a side-by-side comparison to realize how much better a trigger’s action can be in a firearm platform. And so it is with Timney’s Marlin upgrade.
One thing we must point out regarding this trigger is its compatibility with the aforementioned Marlin rifles. Our first attempt at installing this was on an old (like, 1960s old) 336 chambered in .44 Magnum. It didn’t go well…not because there was anything wrong with the new trigger, but we weren’t aware that Timney’s version only works with post-1983 Marlins. The difference is in the hammer width. Pre-1983 Marlins feature a hammer block and are .375 inches in width with a correspondingly-sized tang slot. Early models do not come with the hammer block, and those hammers measure .277 inches wide. In sum, the new triggers will not fit in the tang slot. So, just be aware that this trigger will not work with lever-action Marlins built prior to the 1983 model year.
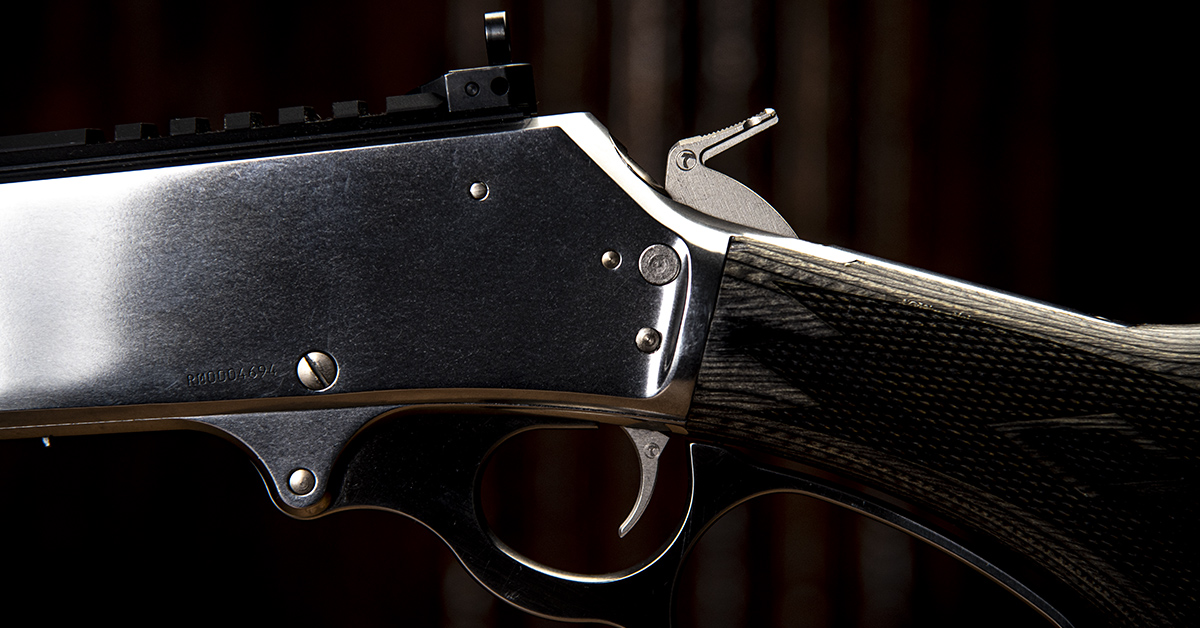
The Timney trigger replaces everything found in the factory assembly except for the trigger pin, which is reused. The system includes the hammer/hammer spring strut assembly, hammer spring, and the trigger/sear assembly. All components are wire EDM cut to ensure the closest tolerances. The trigger shoe, sear, and hammer strut are made of hardened A2 tool steel for enhanced wear resistance while S7 tool steel is employed for the hammer.
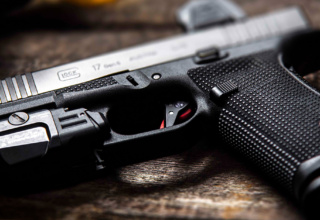
With most trigger upgrades, performance enhancement is noted in the quality of the sear travel/break and the pull weight. The new Timney trigger delivers in both departments but also solves a particular annoyance of some with the Marlin factory triggers — the trigger “flop.”
Timney installed dual springs between the trigger shoe and sear to introduce a pretension that eliminates the free-swinging fore and aft motion of the trigger shoe. This is also constructed as an assembly versus the two-piece arrangement of the factory system. With the Timney system, there is no free play in the trigger shoe regardless of whether the trigger is at the full-cock or half-cock positions. Trigger noise is thus eliminated.
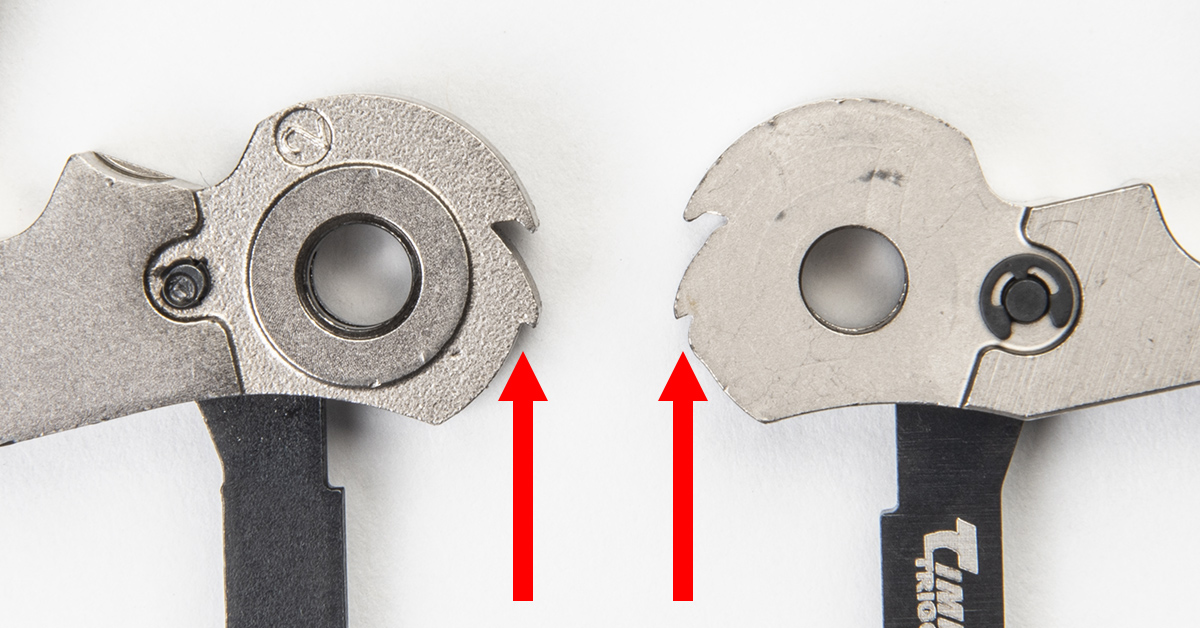
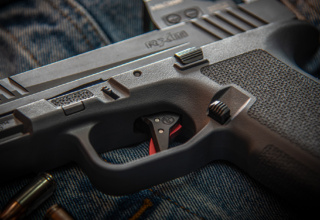
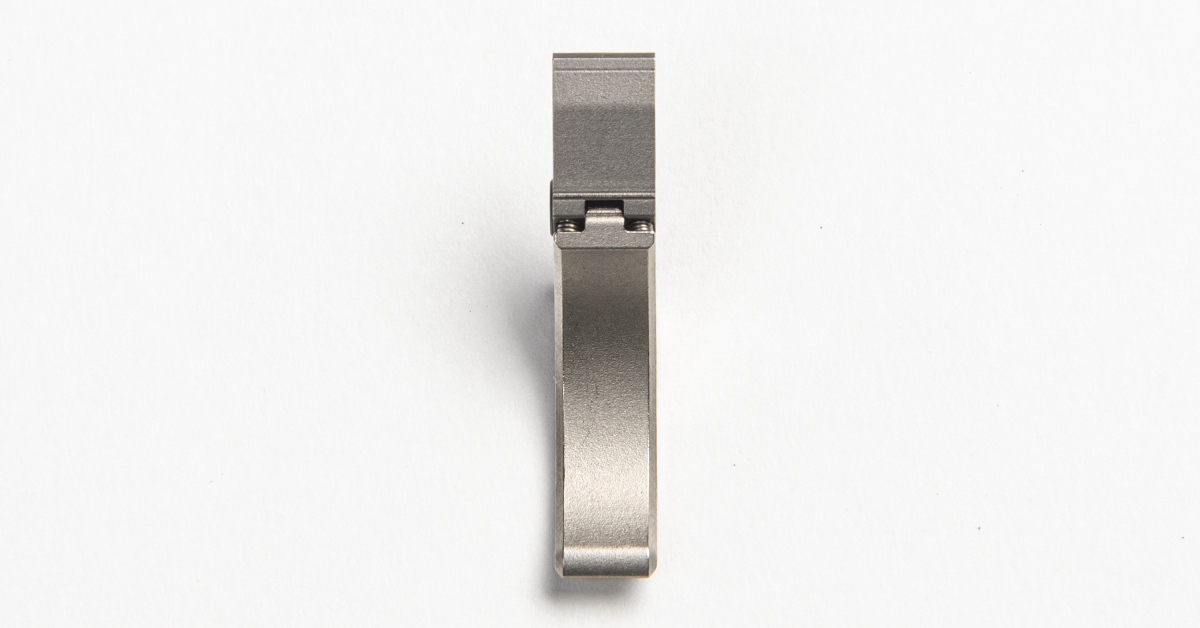
You can see here the change in geometry of the hammer hook (sear engagement surface) between the factory hammer (left) and the new Timney hammer (right). While subjective observation hints at a shorter sear travel and a crisper break with the Timney model (likely facilitated by the pronounced angle behind the hammer hook), the Timney’s reduced pull weight is objectively validated with a trigger pull scale.
Our stock trigger had a 4 lb., 10.0 oz. pull weight average. Timney advertises their lever-action trigger as having a 3- to 3.5-lb. pull weight. Our scale clocked the upgraded trigger at 2 lbs., 9.8 oz. — a solid two-pound reduction in pull weight that will easily translate to enhanced accuracy potential.
Trigger Installation
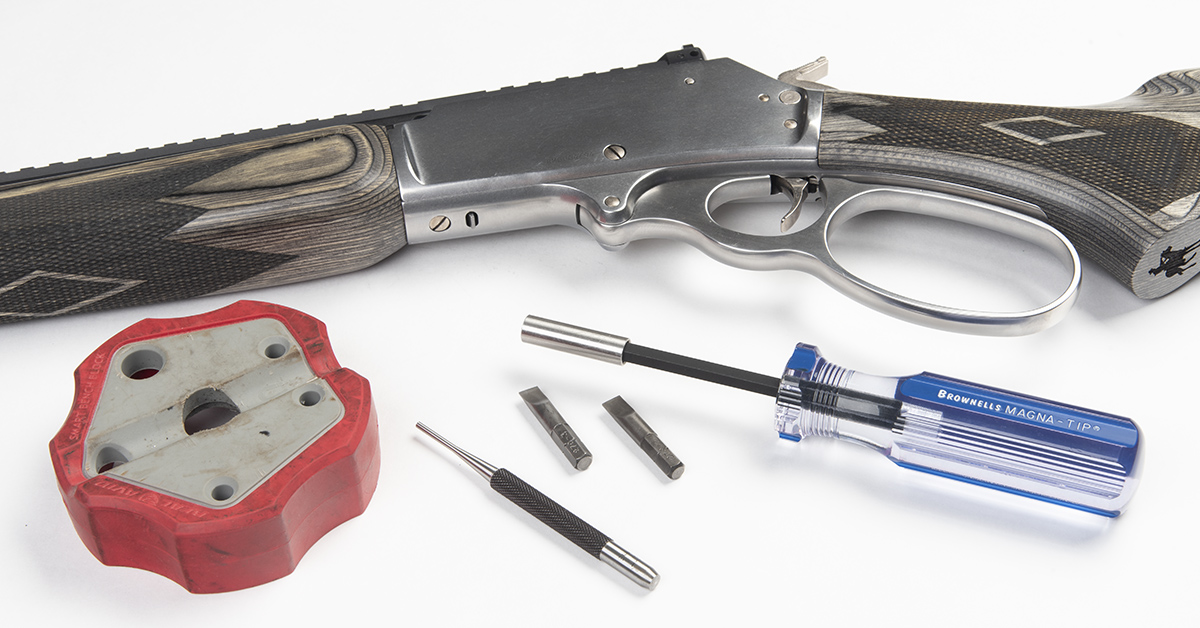
If you’ve never dug into a lever-action rifle and may be a bit hesitant at the thought, don’t be. Swapping out the factory trigger is a simple DIY operation that requires only two tools: a flat-blade driver and bit plus a 3/32 punch to move the trigger/sear pin. Anytime we remove pins, we recommend using a bench block like the Real Avid Smart Bench Block seen here. The open base and integrated magnets help keep small pins from “disappearing.” Also, be sure to use parallel (not tapered) flat bits sized to the three screw head slots to be removed. This will ensure good engagement and help prevent damaging the screws and work piece.
Before you begin work, be sure the firearm is ammo-free, with no cartridges in the chamber or in the magazine tube.

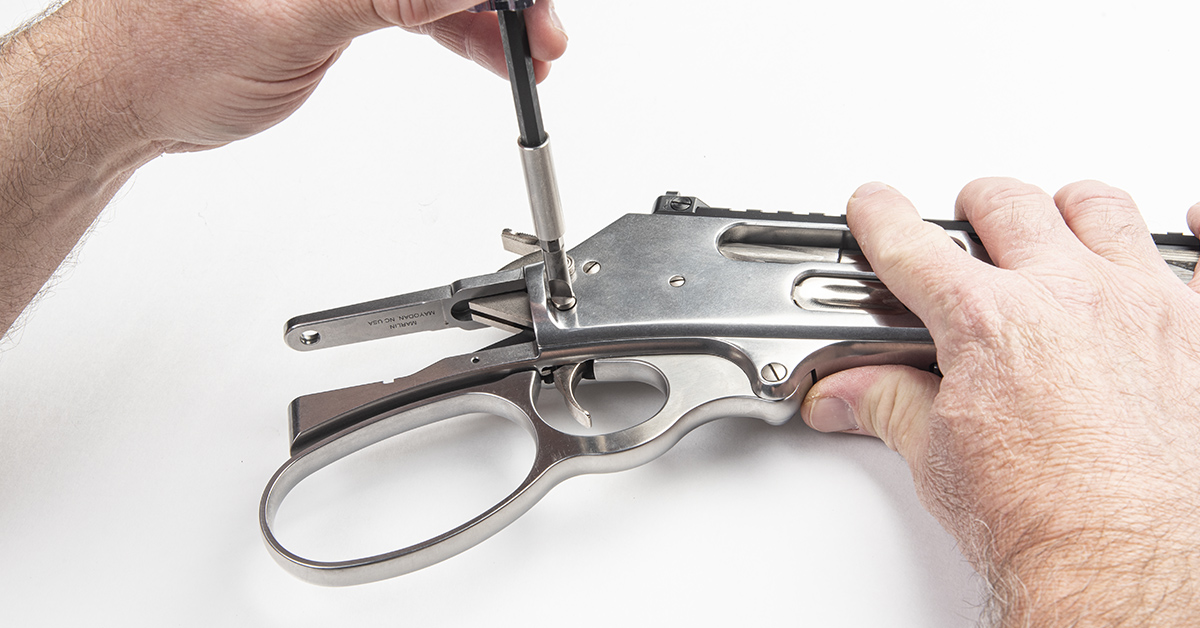
Remove the stock retaining screw at the back of the tang and then remove the stock.
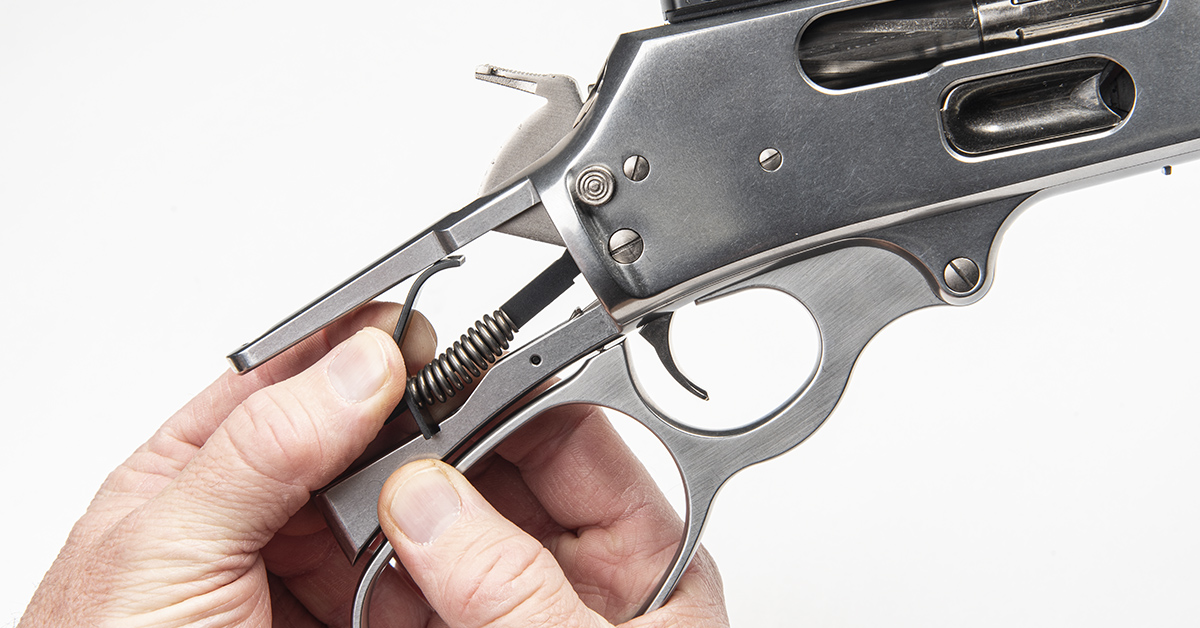
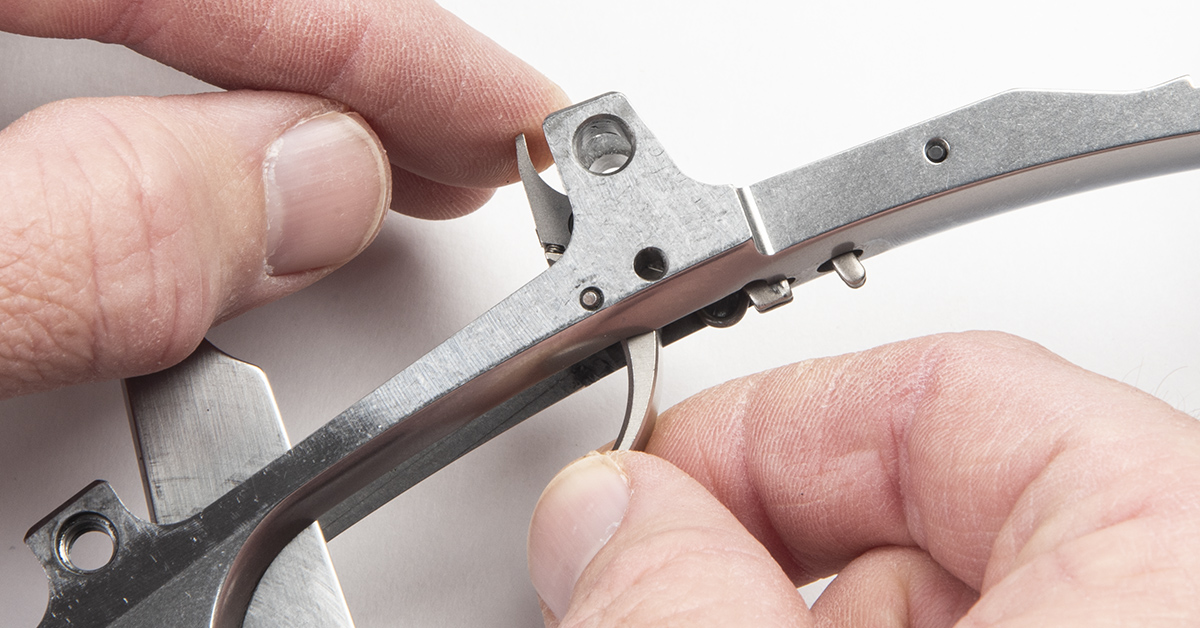
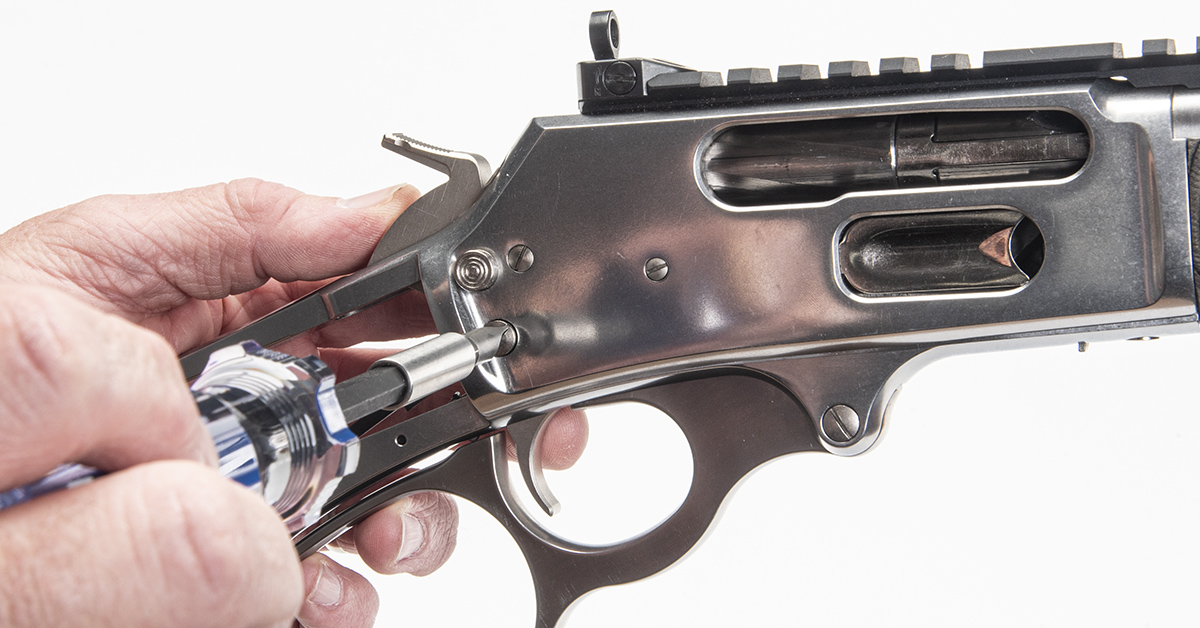
Lower the hammer to its full forward position to reduce the hammer spring tension. The hammer spring is secured to the hammer spring strut by a spring keeper. Even with the hammer lowered, there is considerable tension in the spring. While maintaining control of the spring, push the spring keeper left or right out of its slot in the bottom of the lever assembly.
The Timney kit comes with a new hammer spring, but the factory hammer spring keeper will be reused.

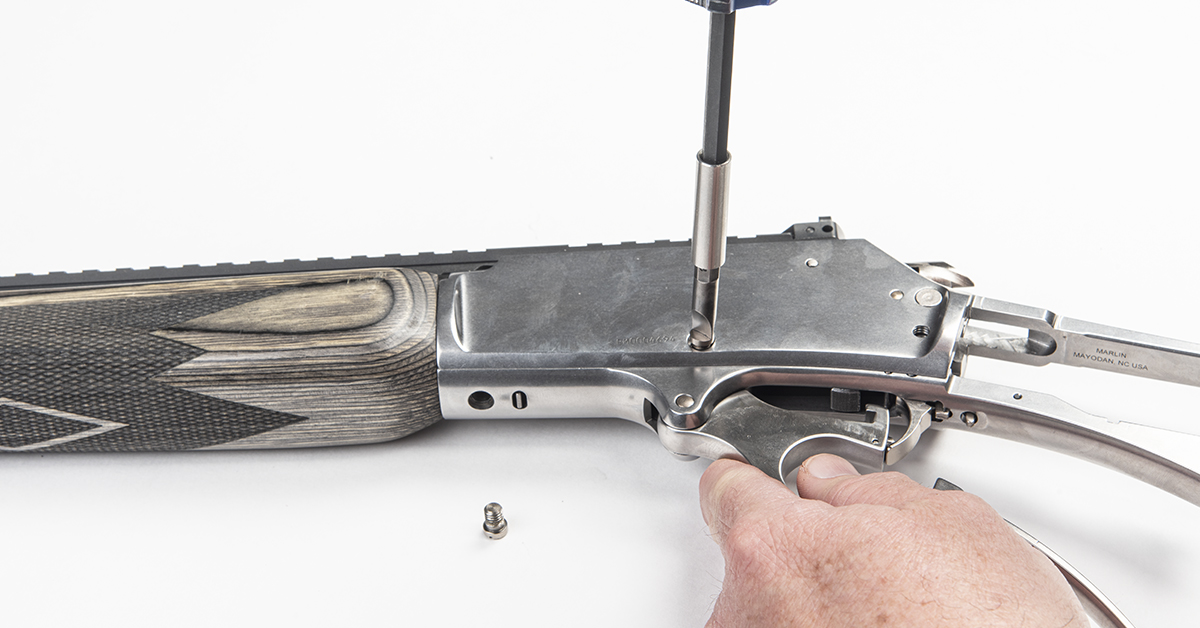
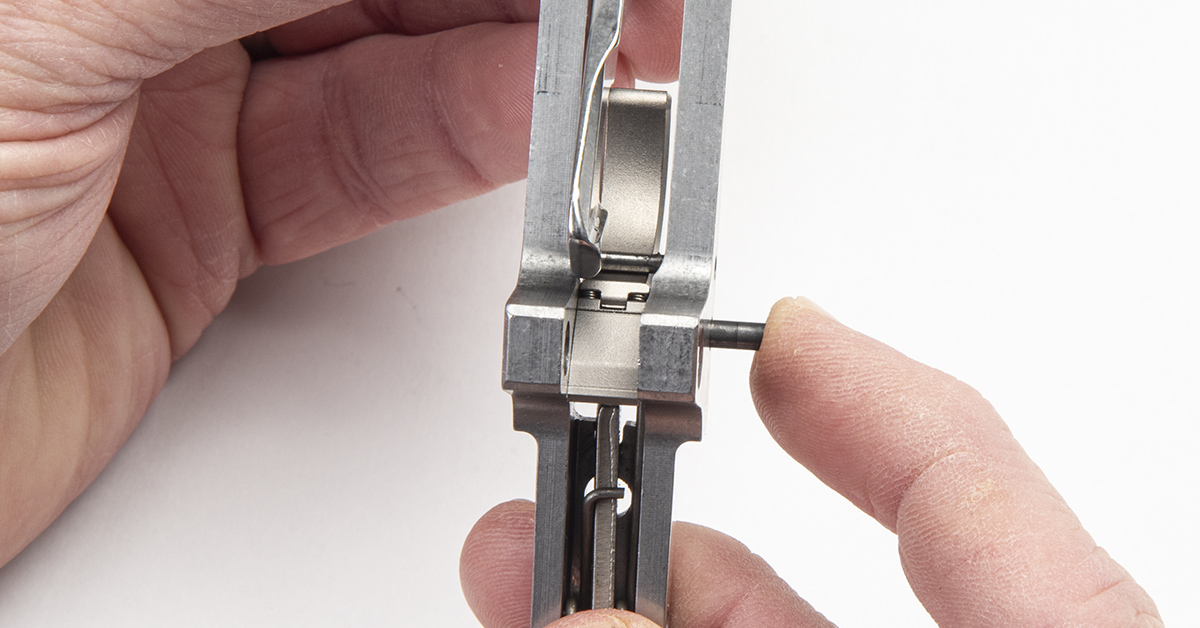
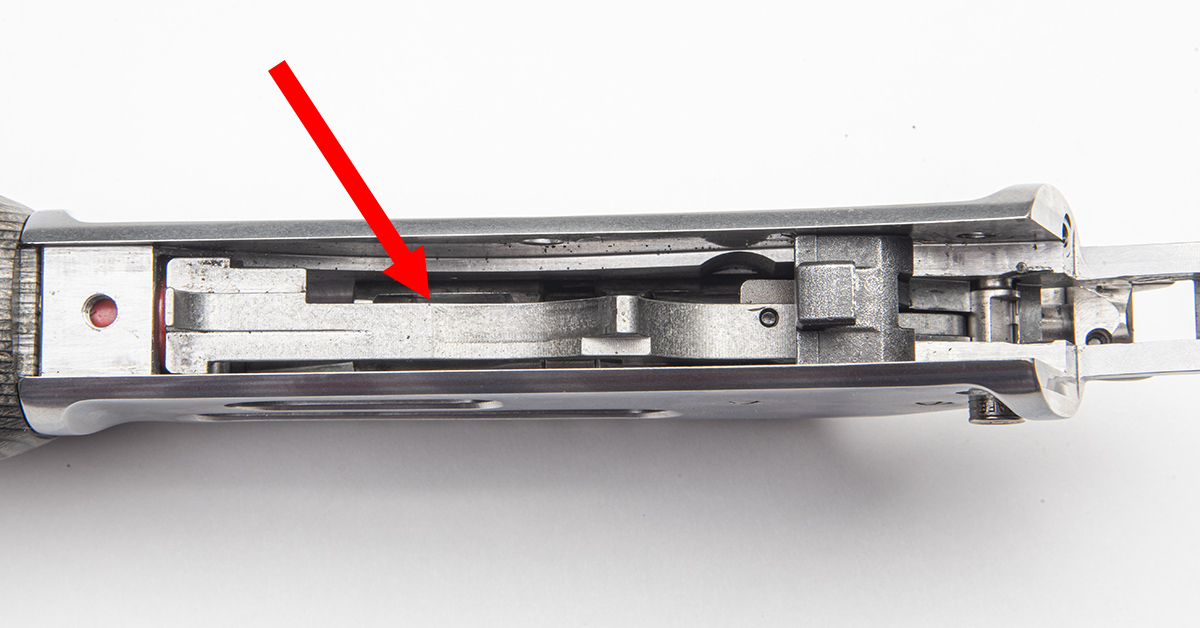
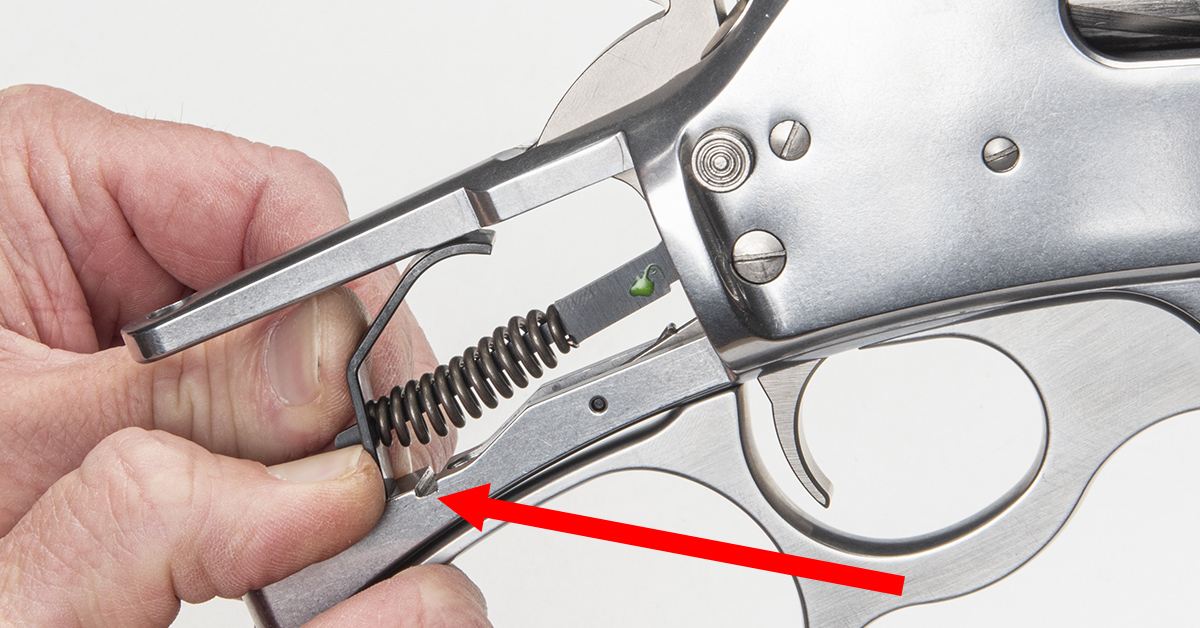
Using an appropriately-sized flat driver bit, partially unscrew (but do not remove) the bottom lever assembly screw and the side screw (arrow). A couple of counterclockwise rotations should be sufficient for each.
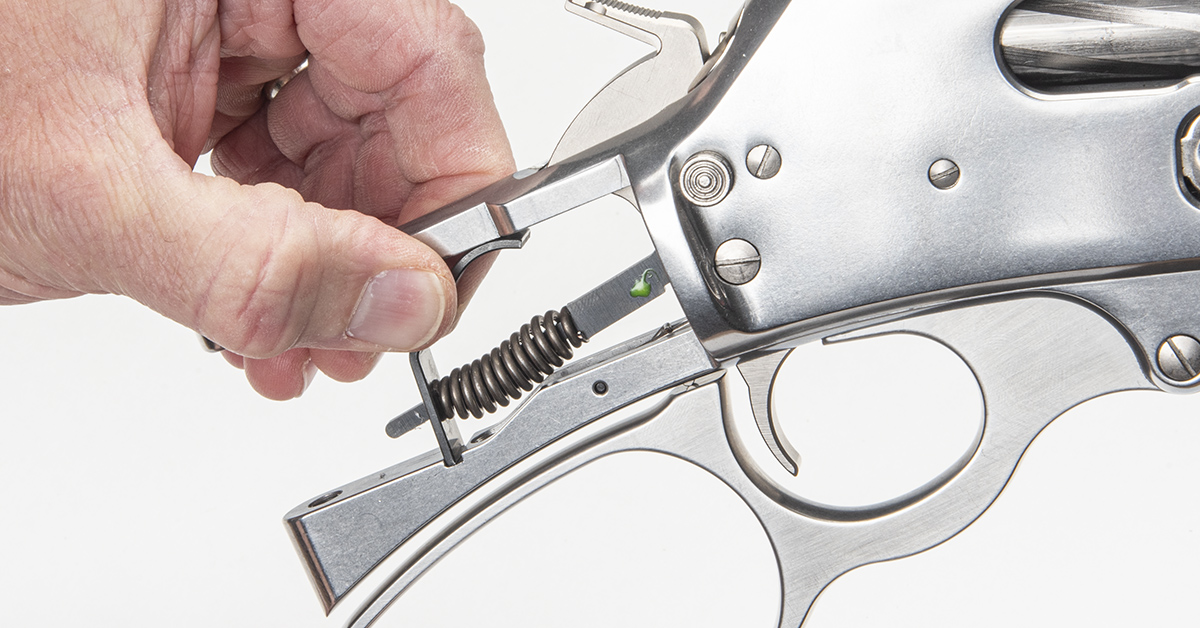
Remove the hammer pivot screw from the receiver.

Lift the hammer assembly out of its slot in the tang.

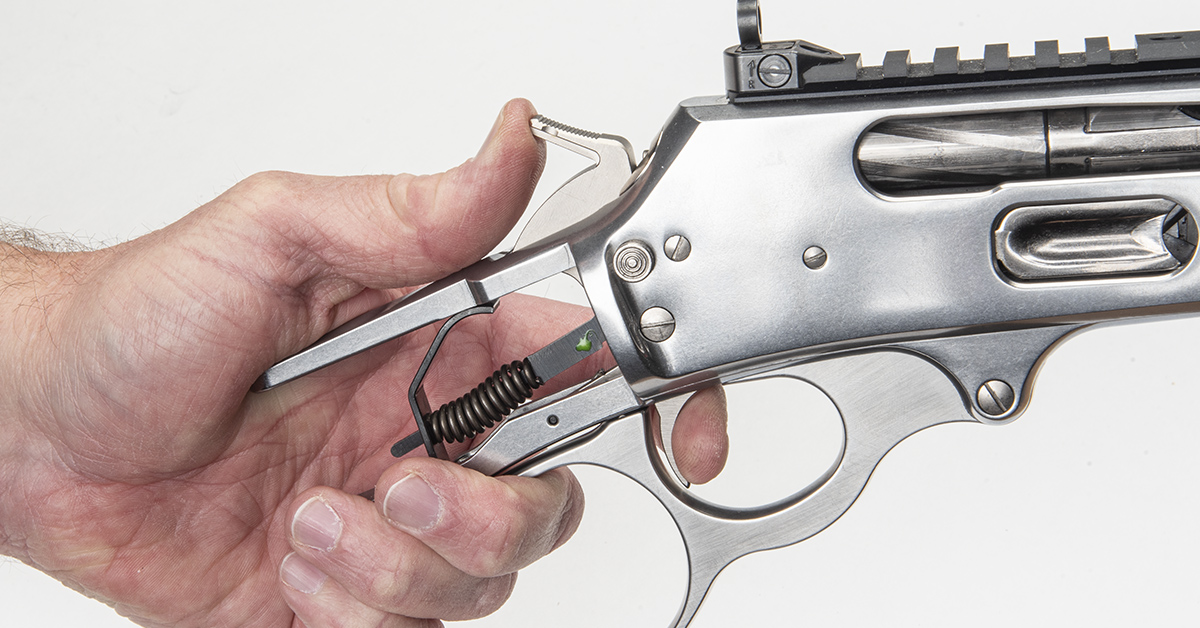
Move the lever downward so that the bolt extends out of the receiver about an inch. This will allow clearance for the lever arm to disengage the bolt when it is time to remove the lever assembly from the receiver.
Now remove the bottom and side lever assembly retaining screws.

Note that the bottom screw (left) is slightly longer than the side screw (right). This is important to remember for reassembly.
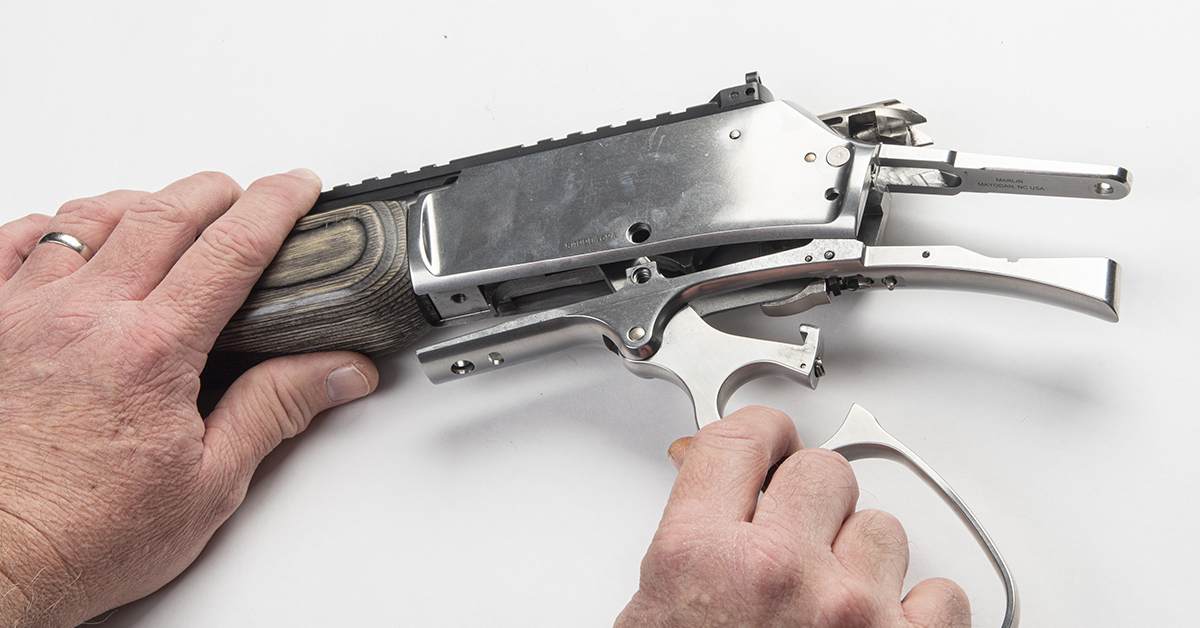
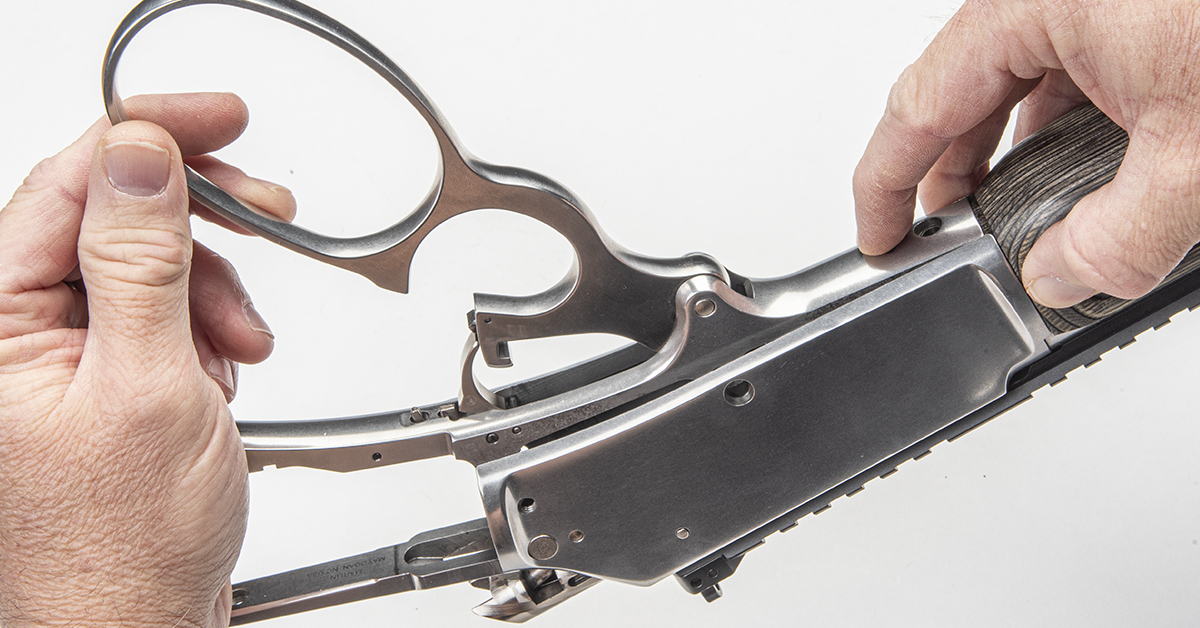
Pull the lever assembly from the receiver.
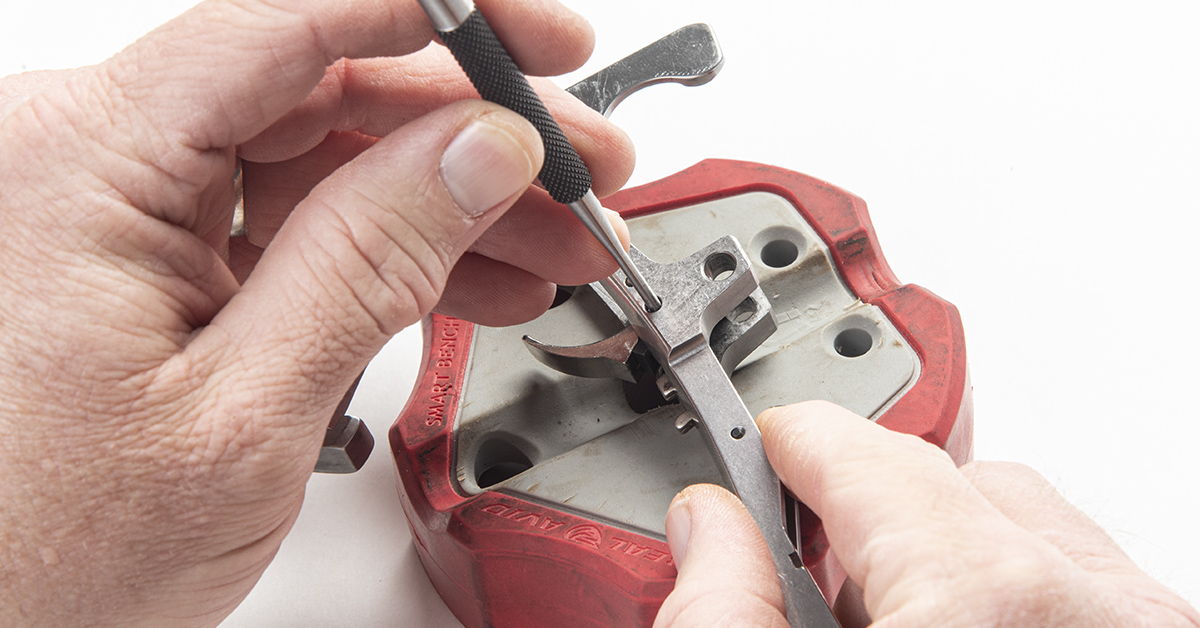
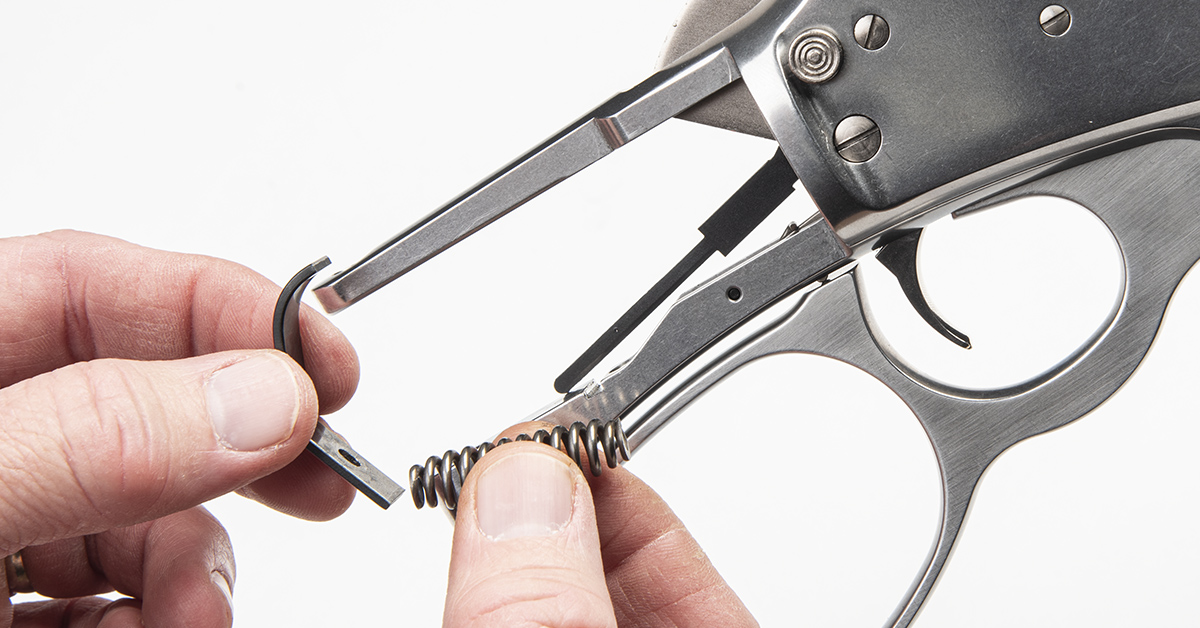
Use a 3/32 flat punch to push out the trigger/sear retaining pin from the lever assembly. Be careful not to lose the pin, as it will be reused.
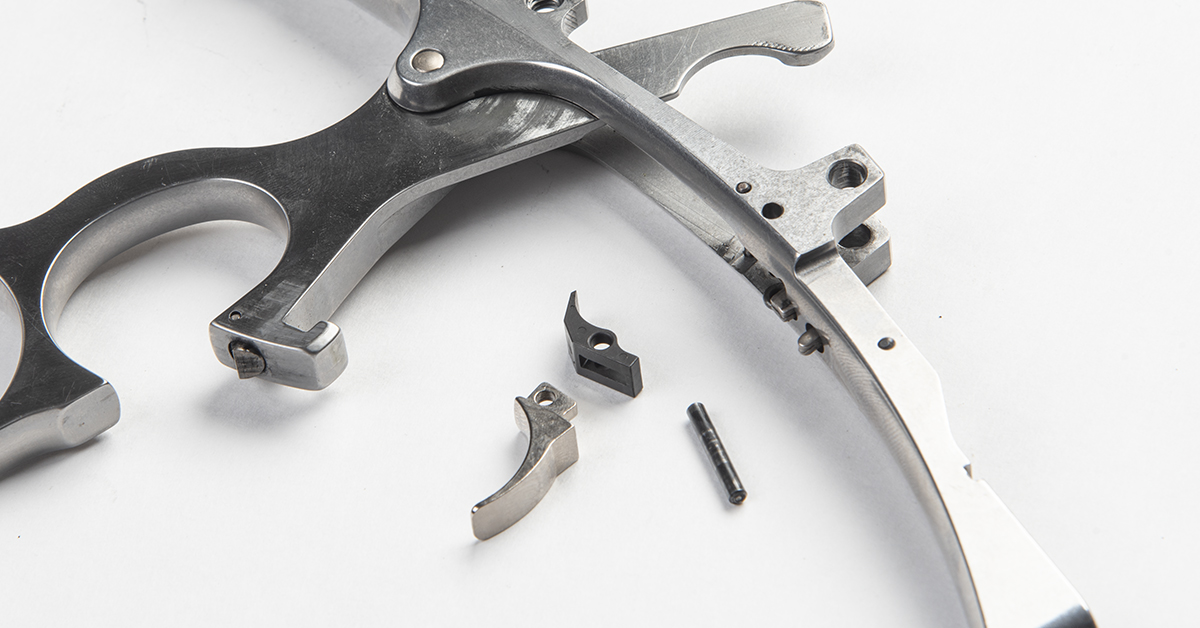
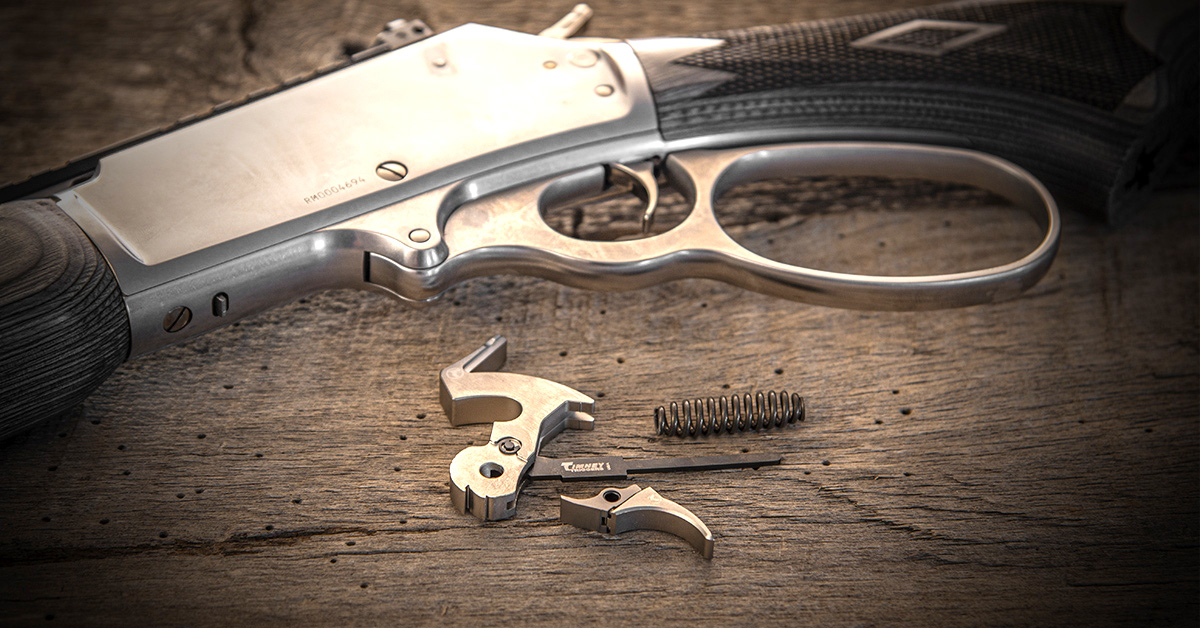
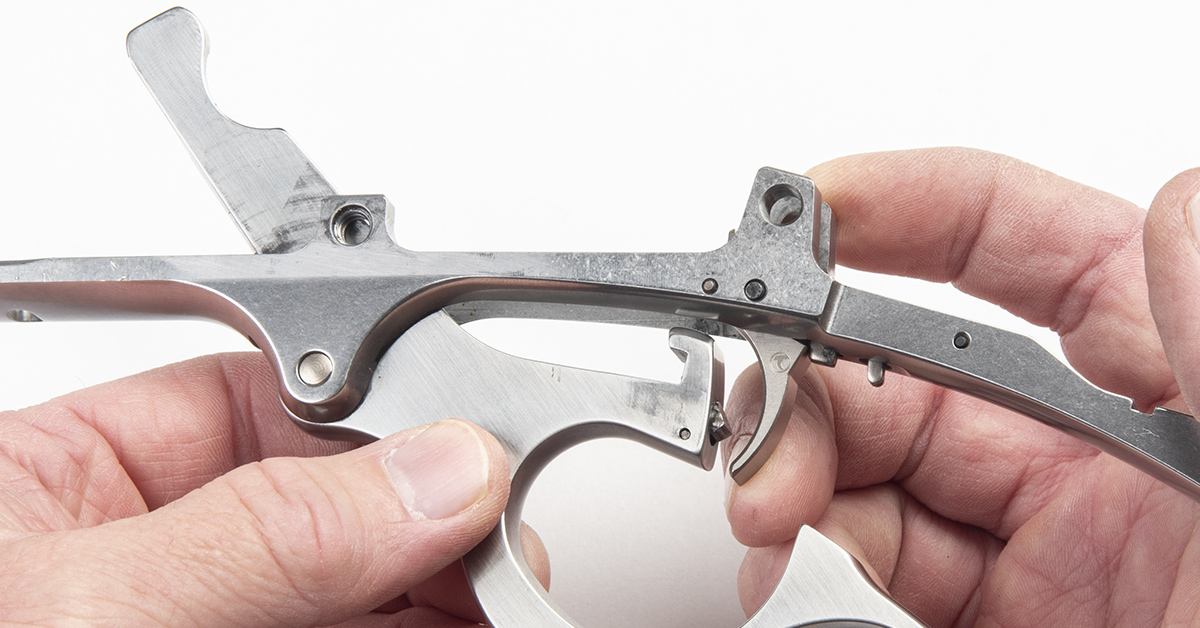
The disassembled factory trigger assembly.
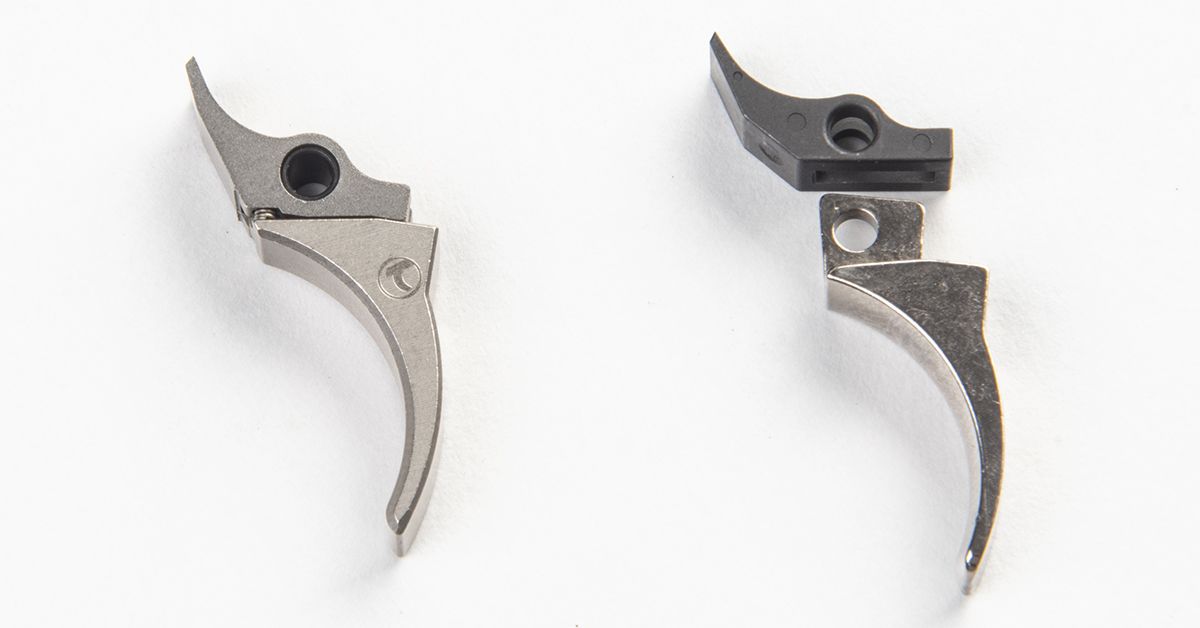
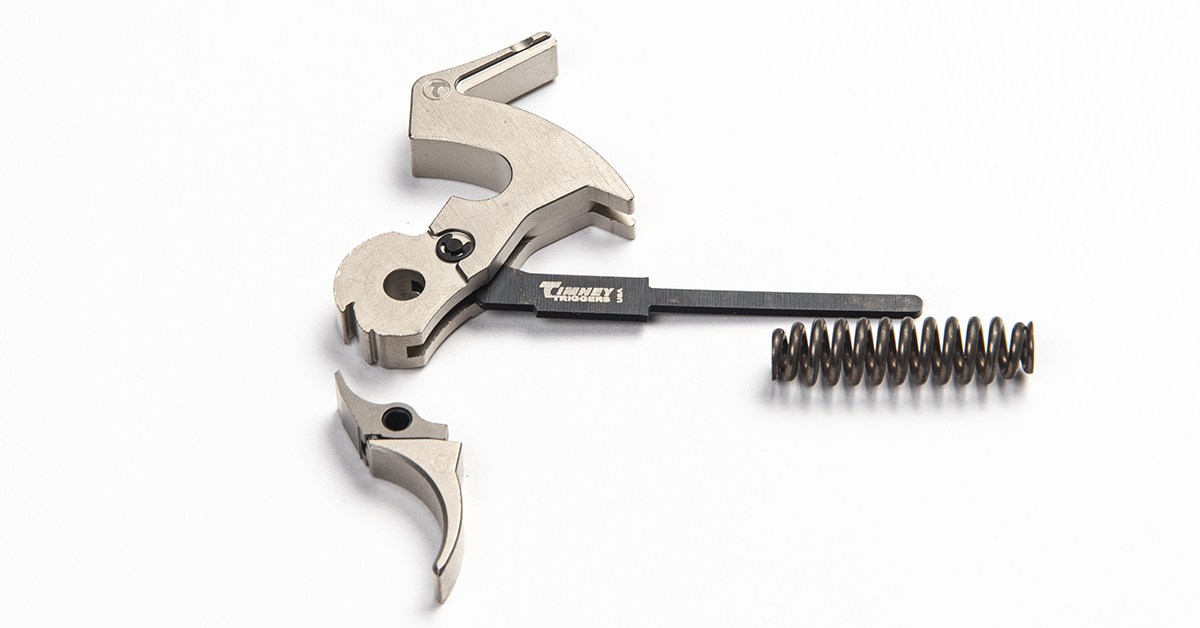
Here, you can see the differences between the Timney trigger/sear assembly (left) and the factory trigger and sear (right). The one-piece construction of the Timney trigger allows for the tension springs that eliminate the factory trigger flop and makes installation in the lever assembly much easier than the two-piece design.
Install the new trigger/sear into the lever assembly.
Reinstall the pin to secure. You may wish to use the punch as a slave pin to achieve proper alignment. The pin will go into place with finger pressure, so there is no need to use a hammer.
Pull back on the trigger so that the lever can be partially closed as shown.
The lever engages this slot on the left side of the bolt (arrow). Be sure that the bolt protrudes about an inch out of the receiver to access this slot.
Guide the lever assembly into the bottom of the receiver, making sure the lever arm engages the bolt slot. Once the lever engages the bolt, the lever assembly can be firmly pushed into the receiver and the screw holes aligned.

Start the bottom and side screws into the receiver but do not tighten them yet. This is to provide a slight amount of play when aligning the hammer pivot screw holes. Remember…the shorter screw goes into the side of the receiver and the longer screw into the bottom.
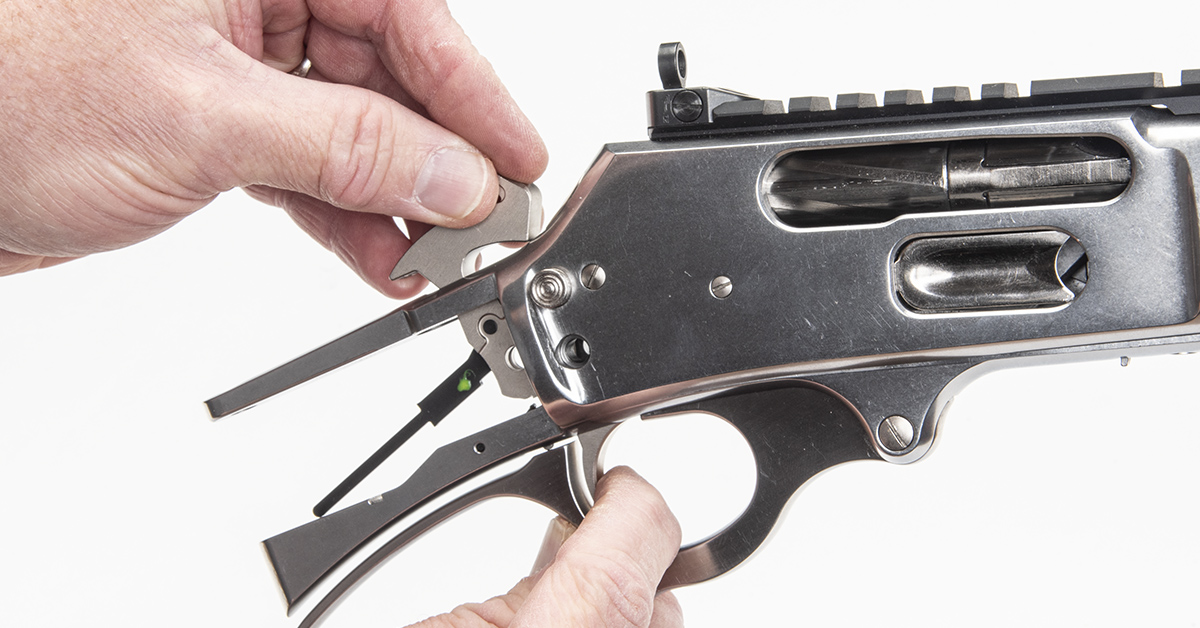
Install the new hammer/strut assembly by pulling back on the trigger and aligning the hammer pivot screw with its holes in the receiver.
Once aligned, insert the hammer pivot screw and tighten.

You can now tighten the bottom and side screws.
The most challenging part of this trigger swap is reinstalling the hammer spring and spring keeper, and that is only because of the stout nature of the spring. Fortunately, the process is easy enough. Simply install the hammer spring onto the strut and position the spring keeper between the receiver tang and lever assembly as shown. Next, push the assembly forward until the bottom of the keeper falls into its slot in the lever assembly (arrow).
Once the hammer spring assembly is in place, align it to the center of the tang and lever assembly.
Perform a function check to ensure the new hammer and trigger assemblies are functioning properly and are working as intended with the crossbolt safety.

If the gun passes the function check, reinstall the butt stock.
Perform a final function check to complete the installation.
Timney’s new trigger system is an honest upgrade for Marlin’s lever-action rifles, offering improved sear performance and lighter effective pull weight that enhances accuracy potential. It also eliminates the hated trigger flop found on factory triggers, and for that alone, many will opt for this easy swap. The trigger system is offered in nickel-plated and black finishes to match stainless steel and blued receivers. MSRP is $199.95 for the black version and $224.05 for the nickel-plated model.