Anderson Manufacturing is offering a new A4 series variant of the AR-15. You can buy one now or we’ll show you how to build your own.
by Rob Reaser
Coming from an automotive journalism background, I often find myself drawing parallels between vehicles and guns. Precision bolt rifles, for example, hearken in my mind to supercars like the GT40s of old. AKs and M16-style ARs…definitely kin to the rough-and-tumble Mopars of Dodge Charger and Plymouth ‘Cuda fame. Modern AR-15s outfitted with all manner of add-ons draw strong correlations to the ’80s and ’90s Mustang GTs in my mental family tree.
I cut my AR teeth in the post-“assault weapons ban” era and understandably gravitated toward the “outfit it your way” mentality fed by the exponentially growing aftermarket options. In other words, I never met a Picatinny-railed AR that didn’t say, “Place a [pick your accessory poison] here, please.” And, of course, I obliged.
Recently, though, I’ve come to look at things quite differently. Yes, there are few events more satisfying than clamping the latest high-tech wizardry onto an AR handguard. Yet when you step back and consider what makes the most sense for a full-on, your-life-depends-on-it, bug-out / engage enemy / retreat / repeat dystopian world scenario, the overly accessorized AR-15 doesn’t inspire the confidence of a plain Jane M16-style AR. The M16, after all, has proven itself faithfully reliable in the real world. It can take the hard licks in a combat environment, deliver the desired downrange results with a single open sight zero out to 300 yards (further if you adjust for bullet drop), and is elegantly uncomplicated.
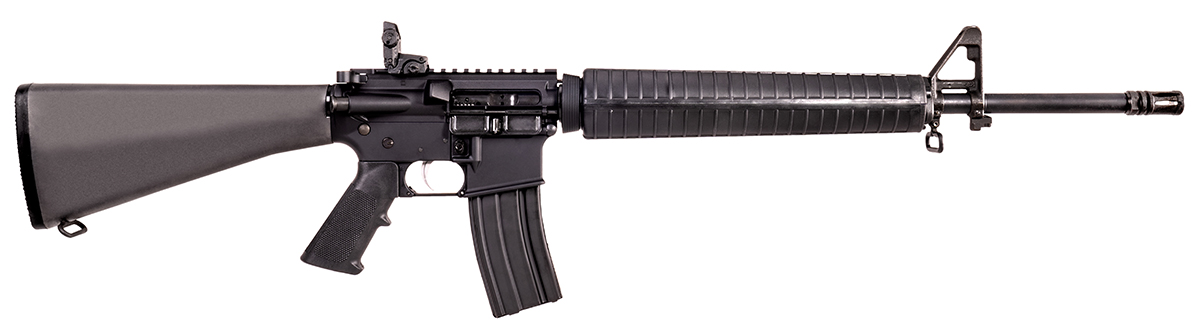
The AR-15, built to A4 (flat top receiver) standards, is no less dependable and capable. When fitted with quality open sights backed by practiced marksmanship skills, I’ll argue that there is no better platform for a worst-case situation with the exception of maybe an M1A (Springfield’s M14 variant) in 7.62 NATO or perhaps the Ruger Mini Thirty. Given current ammo costs and availability, though, the point goes to the A4-style AR-15 rifle.
In pure coincidental timing, around the moment I came to my “battle rifle revelation,” we got advanced word that Anderson Manufacturing — one of the country’s leading AR-15 parts and rifle manufacturers — had plans to launch a new round of AR-15s called the Anderson A4 series. The premise for the A4 series made perfect sense: mission-specific, ready-to-go fighting guns with a low price point of $599. This price makes the Anderson A4 an easy buy-in for those who want to keep their fully outfitted ARs but cannot quite otherwise justify a defense-only AR purchase.
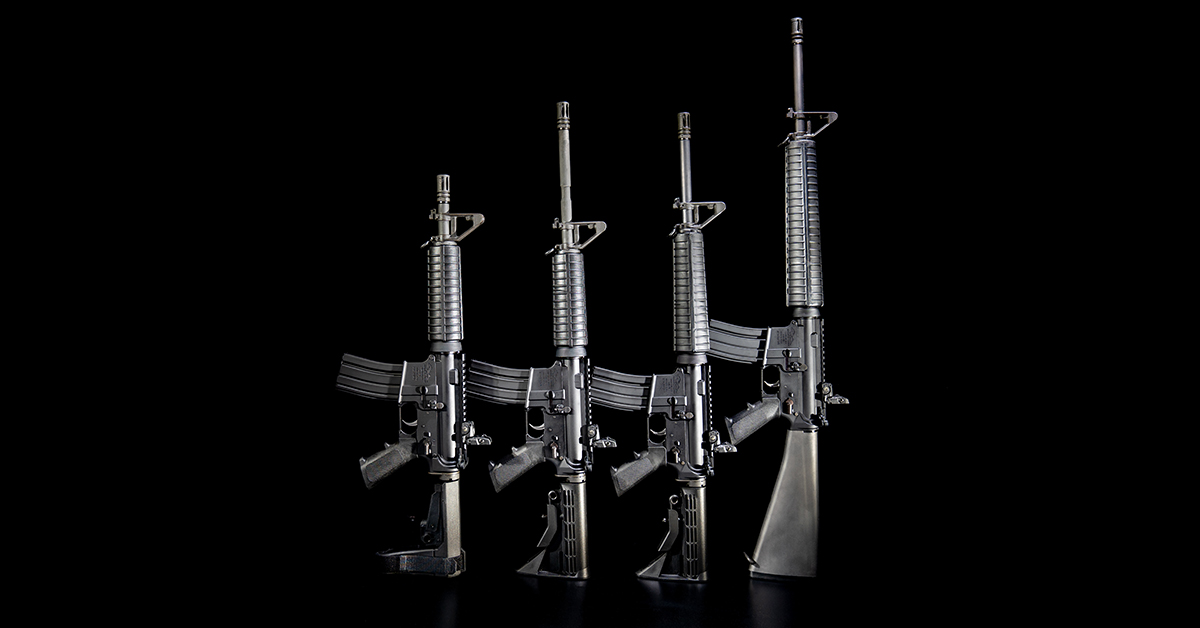
Four models make up the Anderson A4 series:
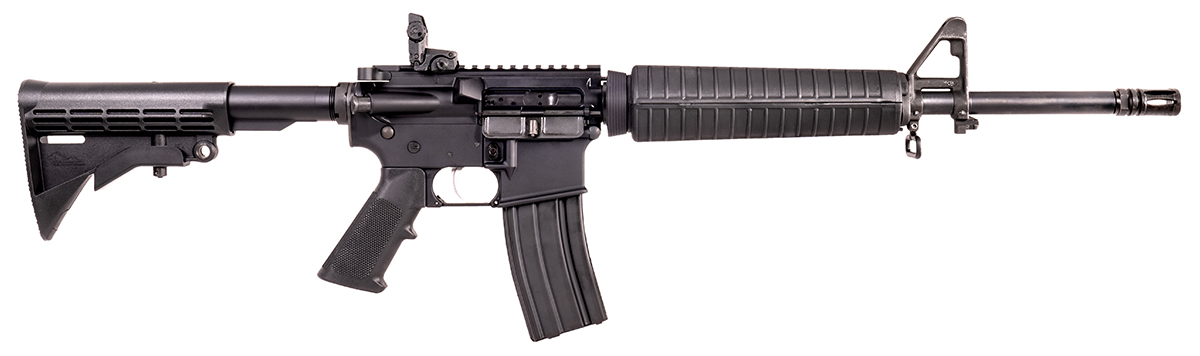
20-inch AM-15 5.56 NATO A4 Rifle
- 20-inch government profile barrel
- 1:9 twist
- fixed rifle stock
- rifle-length hand guard
16-inch AM-15 5.56 NATO A4 Mid-Length
- 16-inch government profile barrel
- 1:7 twist
- adjustable stock
- mid-length hand guard
16-inch AM-15 5.56 NATO A4 Carbine
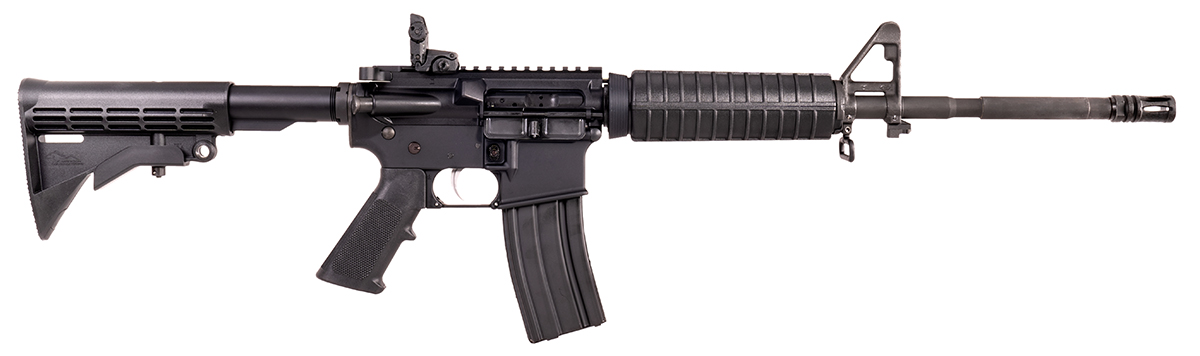
- 16-inch government profile barrel
- 1:8 twist
- adjustable stock
- carbine-length hand guard
10.5-inch AM-15 5.56 NATO A4 Pistol

- 5-inch 4150 chrome moly vanadium barrel
- 1:8 twist
- adjustable stock
- SBA3 Tactical Pistol Brace
As you can see, any hint of tacticool is out when it comes to the A4 series. These are intended to be no-nonsense fighting firearms that are affordable, simple to operate, and give you everything you need and nothing you don’t — exactly the attributes you want in a defensive firearm.
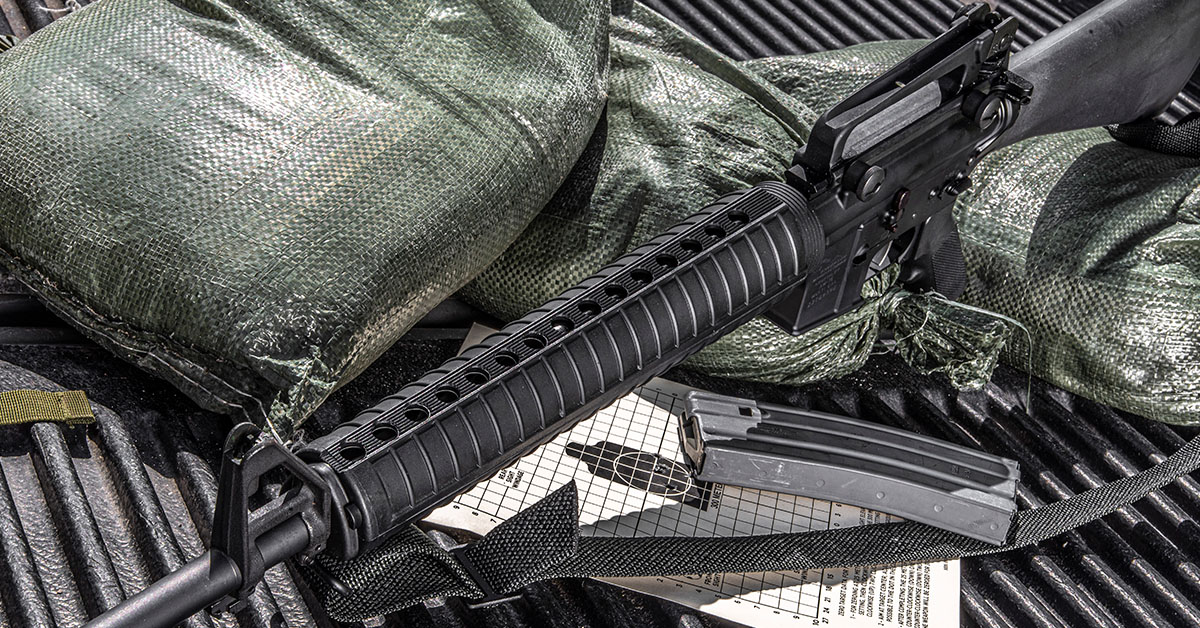
Since I had already decided to build an A4-style rifle to be my go-to defender and to further develop my core marksmanship skills, I tapped Anderson for all the parts needed to build their 20-inch A4 rifle because…well…building guns is what we do here at Shoot On. The only difference was I wanted the A4 carry handle/sight assembly to top the receiver instead of the Magpul flip-up rear sight that Anderson includes in their A4 series rifles. Simply put, the A4 carry handle offers a superior sight system. It is pipe-hitting tough, delivers a utilitarian function, and includes elevation and windage adjustment along with two aperture sizes so you can take full advantage of the 5.56 NATO’s ballistics (more on that in part three of this series).
So, if you want your Anderson A4-series firearm right now, head on over to their website and make your purchase. If, like us, you enjoy building your own rifle, Anderson also has the components to do it yourself.
For those of you who are on a really tight budget but also desire a straight-up battle rifle, there is an easy solution — simply build an A4 upper like we’re about to show you how to do. Part of the plug-n-play charm of the AR-15 platform is that most upper and lower receiver assemblies are interchangeable. Maybe you have a dressed-out AR-15 with all the goodies for target shooting, hunting, or whatever and want a purely defensive AR but don’t have the scratch for a new rifle. Just build your own upper receiver in A4 fashion and then fit it to your lower receiver assembly whenever you’re done playing. Presto…two guns in one.
With that, we start our three-part series. First up is building the Anderson A4 upper receiver assembly with a carry handle/sight assembly. In the next installment, we will walk you through the process of building the lower receiver assembly. Finally, we’ll bring it all together by taking you through the zeroing process using the standard U.S. military protocols for the M16A2/M16A4 rifle and set you up with some marksmanship basics so you can improve your shooting skills and be ready for whatever may come.
Building the Anderson A4 Upper Receiver Assembly
If this is your first AR-building rodeo and you’re not sure of what components you need, make a list as you read through this how-to article. AndersonManufacturing.com has all the goods you’ll need, including pre-packaged upper, lower, and complete small parts kits. For the tools, we recommend you visit RealAvid.com. They’ve got everything you need, and theirs are the tools we use at Shoot On for our builds.
The first step in any AR build is to check the headspace dimension (chamber length) established by the bolt and barrel. The headspace must fall within the recommended SAAMI specifications for safe operation. This will require 5.56 NATO GO and NO-GO gauges.
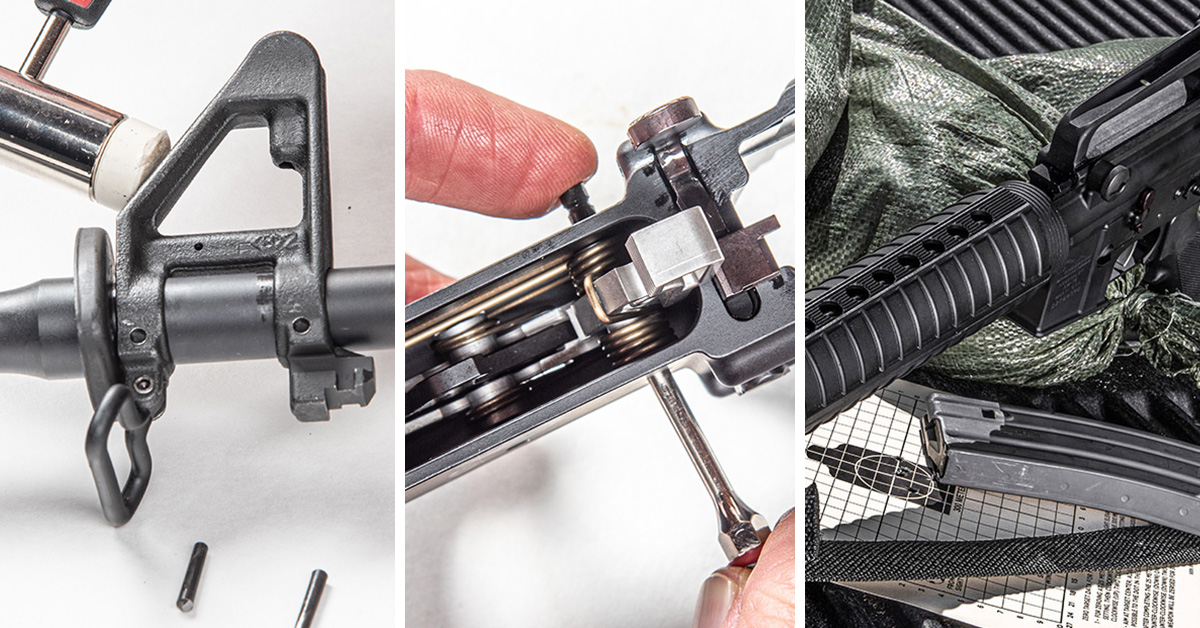
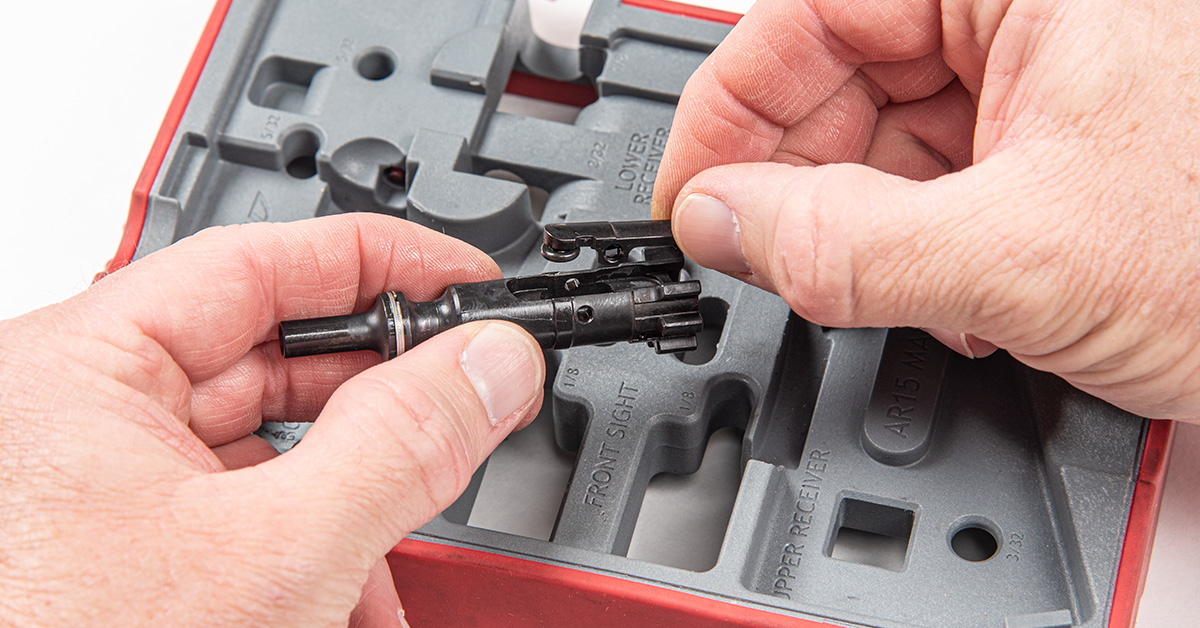
Checking AR headspace requires disassembling the bolt and cleaning any oils or debris from the bolt face and lugs. This means removing the extractor (seen here), extractor pin, ejector pin, ejector spring, and ejector. Real Avid’s Master Bench Block makes short work of this process.
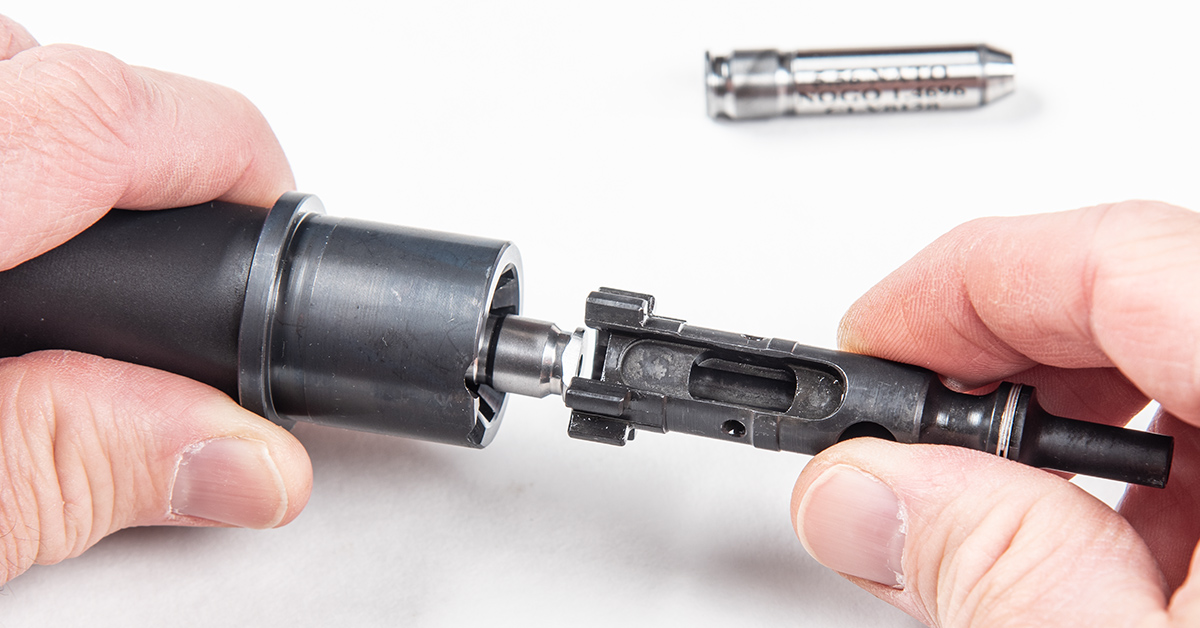
Safe headspace dimension is easily checked with the bolt stripped. Ensure the barrel extension and lugs are also thoroughly clean and debris-free (we use denatured alcohol and a swab), then insert the GO gauge into the chamber, followed by the bolt.
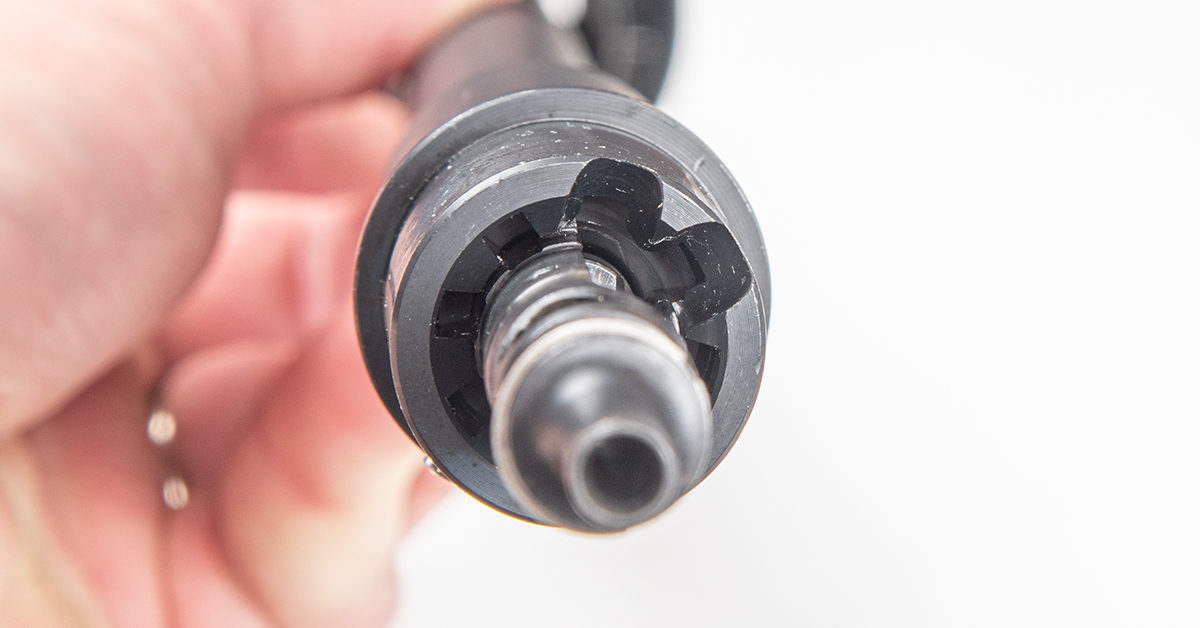
If the barrel and bolt combination is within the minimum headspace dimension, you should be able to easily rotate the bolt in the barrel extension, as seen here.
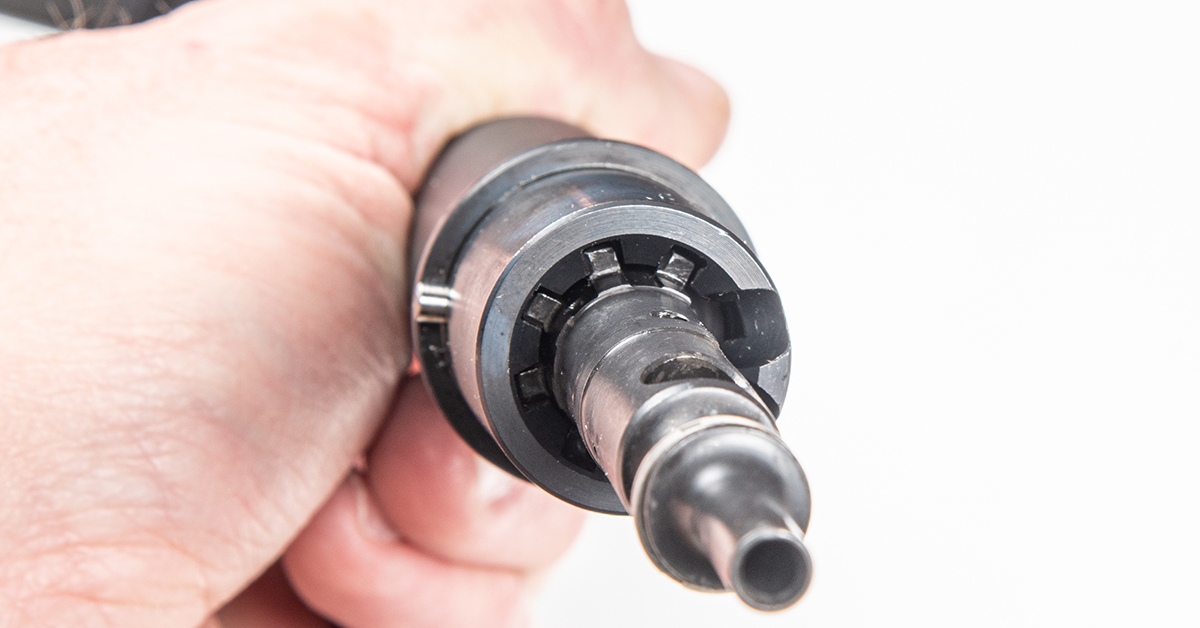
Next, insert the NO-GO gauge into barrel extension, followed by the bolt. The bolt should not be able to rotate within the barrel extension, indicating that the bolt and barrel combination is within the maximum safe headspace dimension. Here, you can see that the bolt lugs will not rotate behind the barrel extension lugs, as it should be. If you can rotate the bolt within the extension on a NO-GO gauge, or if the bolt won’t rotate within the extension on a GO gauge, you will need to find another bolt and barrel combination that is within the SAAMI recommendations. Fortunately, all the bolt and barrel assemblies we have ever acquired through Anderson have always passed the headspace check, as they also check this at the factory.
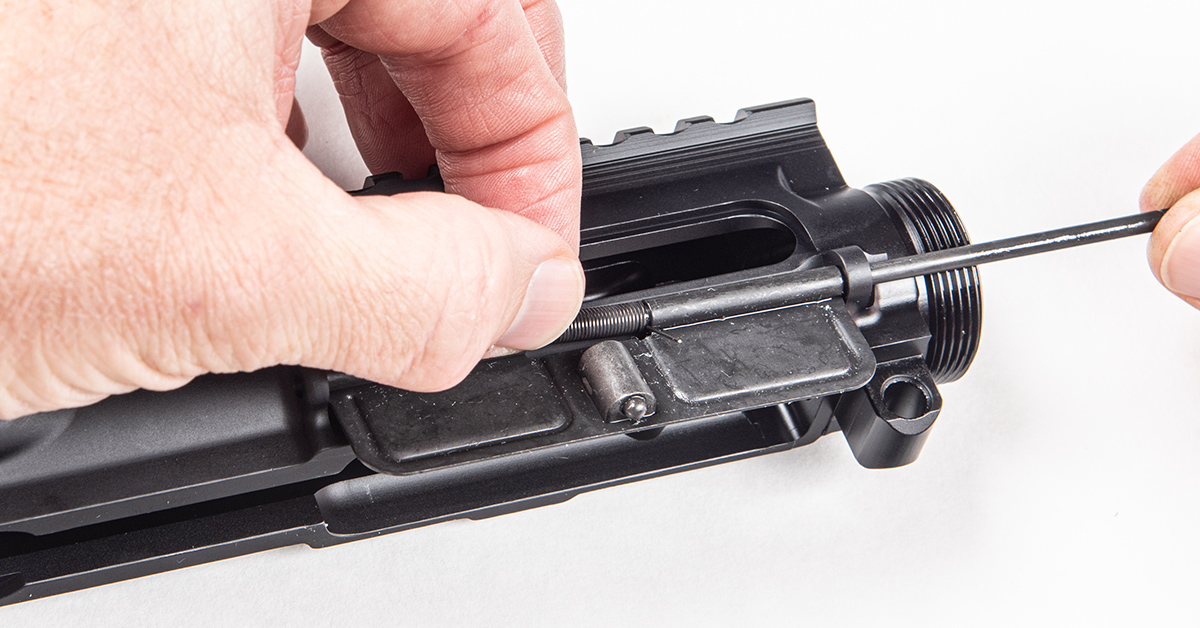
The dust cover assembly is comprised of the dust cover, spring, pin, and a small c-clip that comes installed on the pin. Place the dust cover between the pin bosses on the receiver as shown. Insert the bare end of the pin (opposite the c-clip end) into the front boss, through the first half of the dust cover, and through the first half of the spring. The spring should be oriented with the long tail toward the front of the receiver and against the dust cover. Now the tricky part…rotate the small tail end of the spring one complete turn toward and then away from you, then push the pin the rest of the way through the spring, the back half of the dust cover, and into the rear boss. This may take a few tries before you get it since it is challenging to rotate the spring while keeping everything lined up.
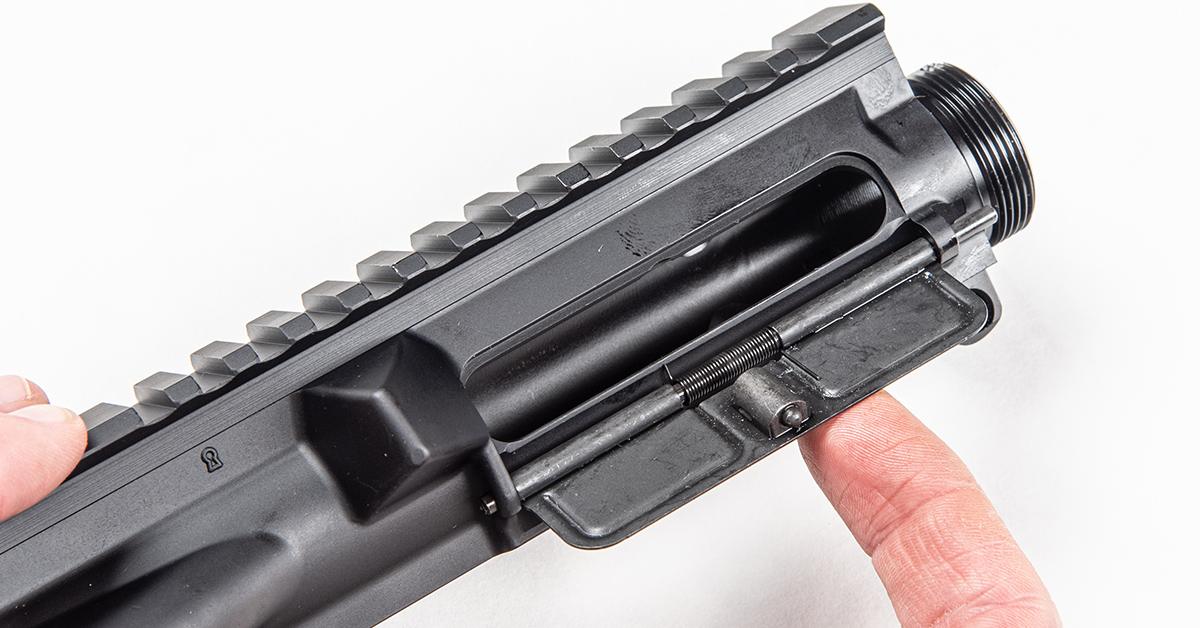
This is how the dust cover assembly looks when correctly installed. The short end of the spring pushes against the receiver while the long spring tail pushes against the dust cover.

The Master Bench Block is handy for installing the forward assist assembly into the receiver. After lightly lubricating all components, place the receiver into the bench block and insert the forward assist plunger and spring assembly into the receiver with the pawl pointing inward as shown.
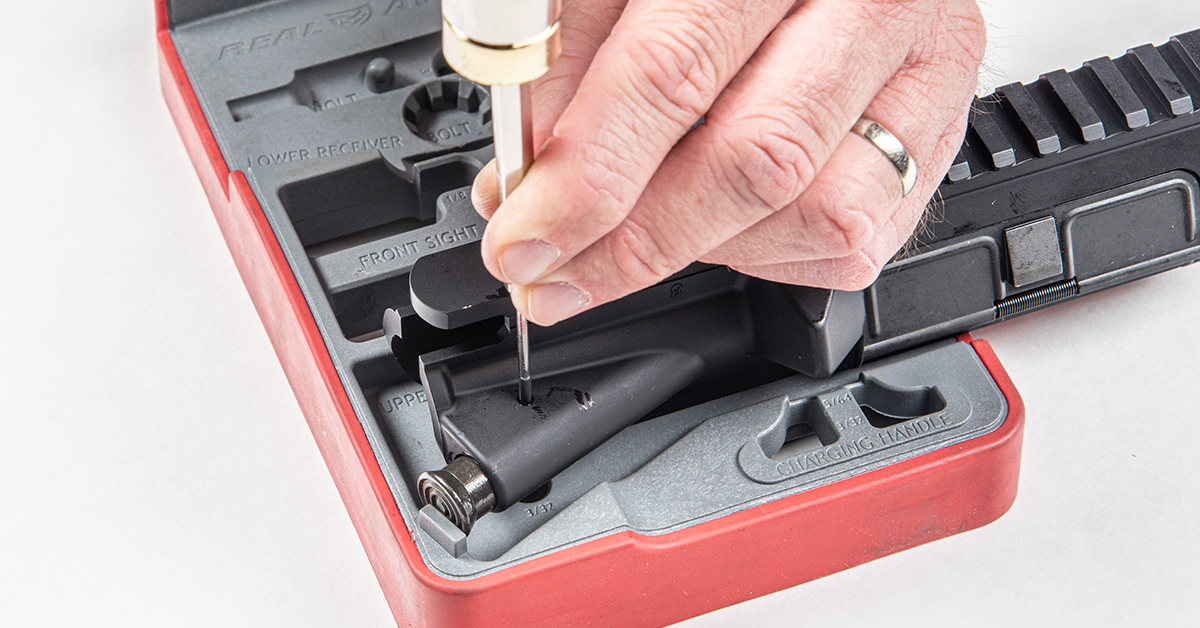
With the bench block holding the forward assist in position, secure the assembly by checking for pin hole alignment and then tapping the forward assist roll pin into place with a 3/32-inch roll pin punch.
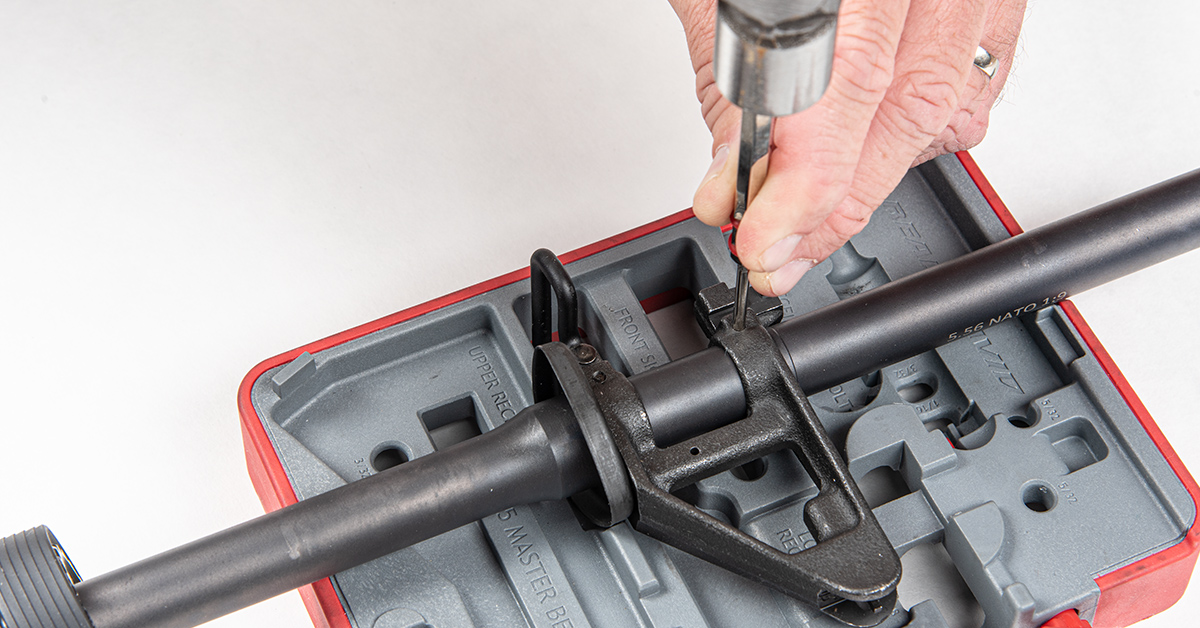
The Anderson 20-inch barrel assembly (PN #B2-K650-A004) comes with the F-stamp front sight assembly installed, which is great because installing a front sight onto a clean barrel is not something you want to do at home. This means the front sight must be removed by tapping out the two sight pins. These are tapered pins, so they will only go in and out from one side of the barrel. Using the bench block, tap out the pins with an appropriately sized punch. Tap on the small end of the pins for removal.
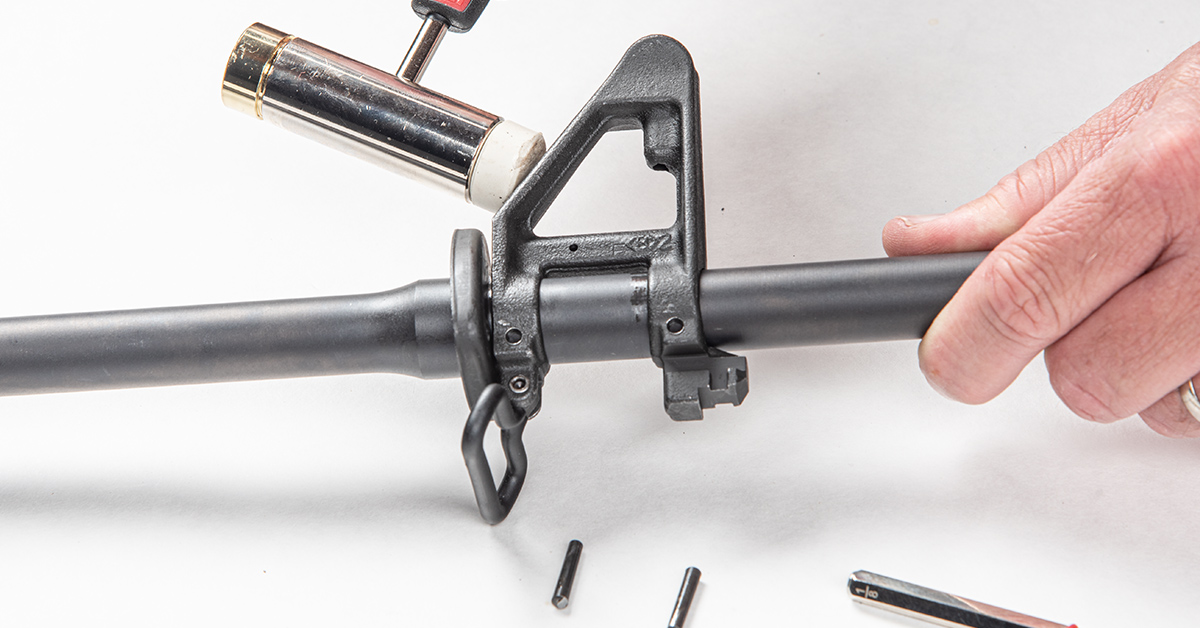
With the pins removed, carefully tap the sight off the barrel with a nylon- or rubber-faced hammer.

Here you can see how the pins secure the sight assembly to the barrel.
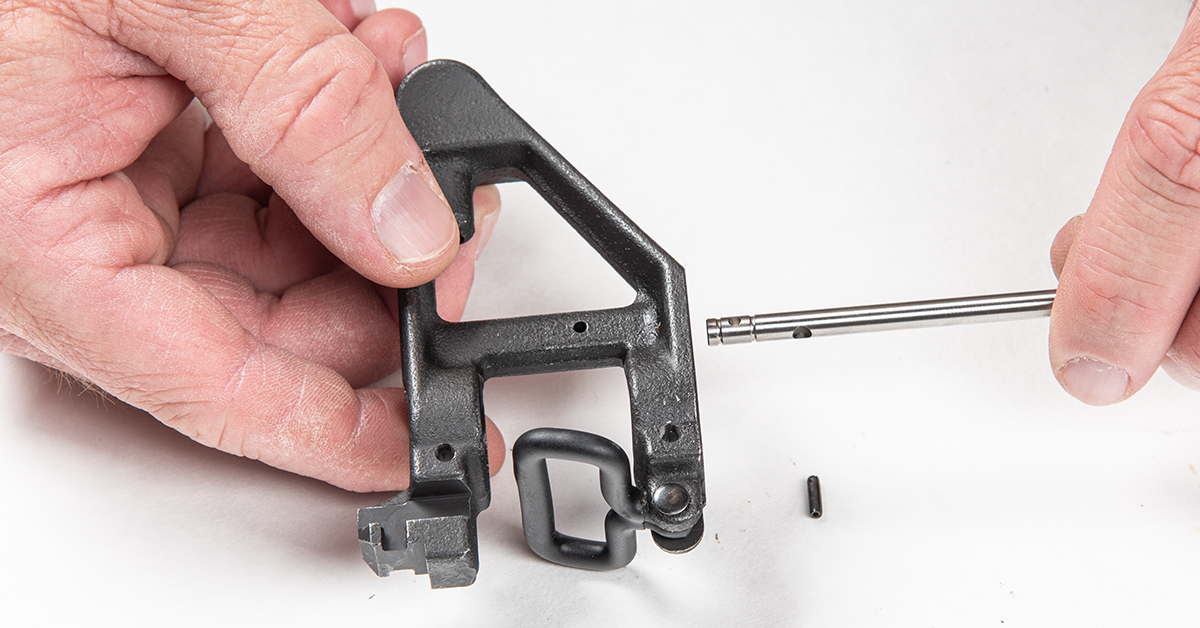
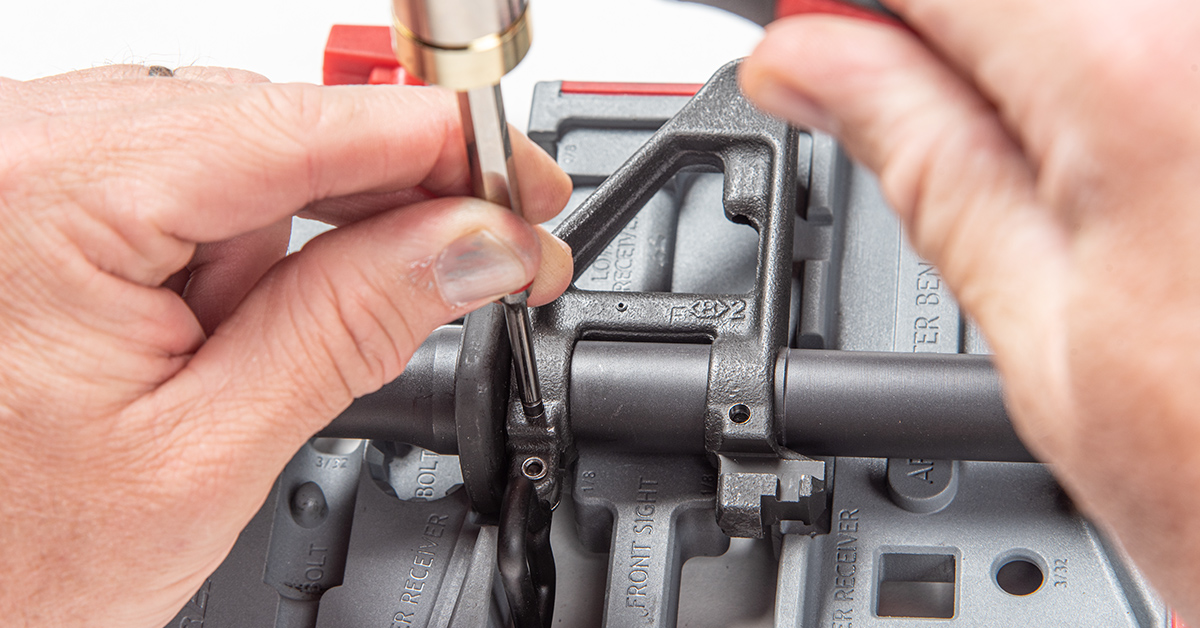
Insert the gas tube into the sight assembly. The gas port is oriented to the bottom of the tube. Push the tube all the way in and use a 5/64-inch punch to align the sight and gas tube pin holes.
Place the sight and gas tube assembly onto a sturdy bench block. While maintaining proper orientation, secure the assembly by tapping the gas tube roll pin in place with a 5/64-inch roll pin punch. The pin should be positioned equally inside the sight assembly.

Secure the upper receiver to an upper receiver vise block. Here we’re using the Lug-Lock upper vise block secured to a Master Gun Vise. Apply a coat of molybdenum grease or anti-seize to the receiver threads.
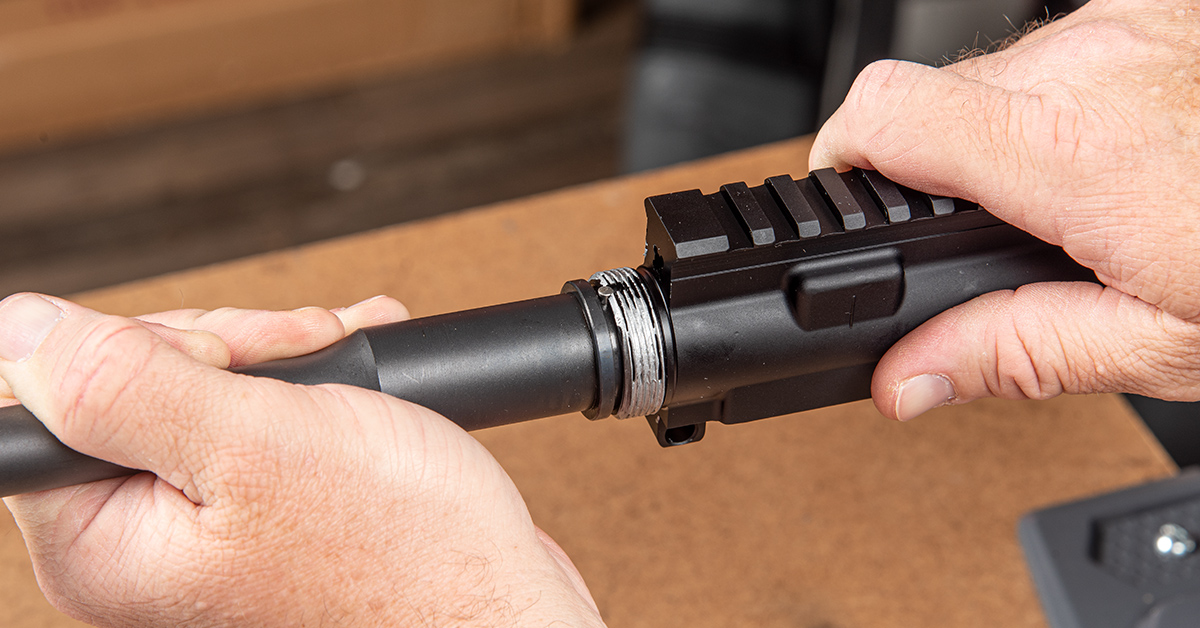
Insert the barrel into the receiver, ensuring that the barrel extension alignment pin seats in the receiver notch.

Thread the delta ring assembly onto the receiver until the ring starts to spin on the nut.
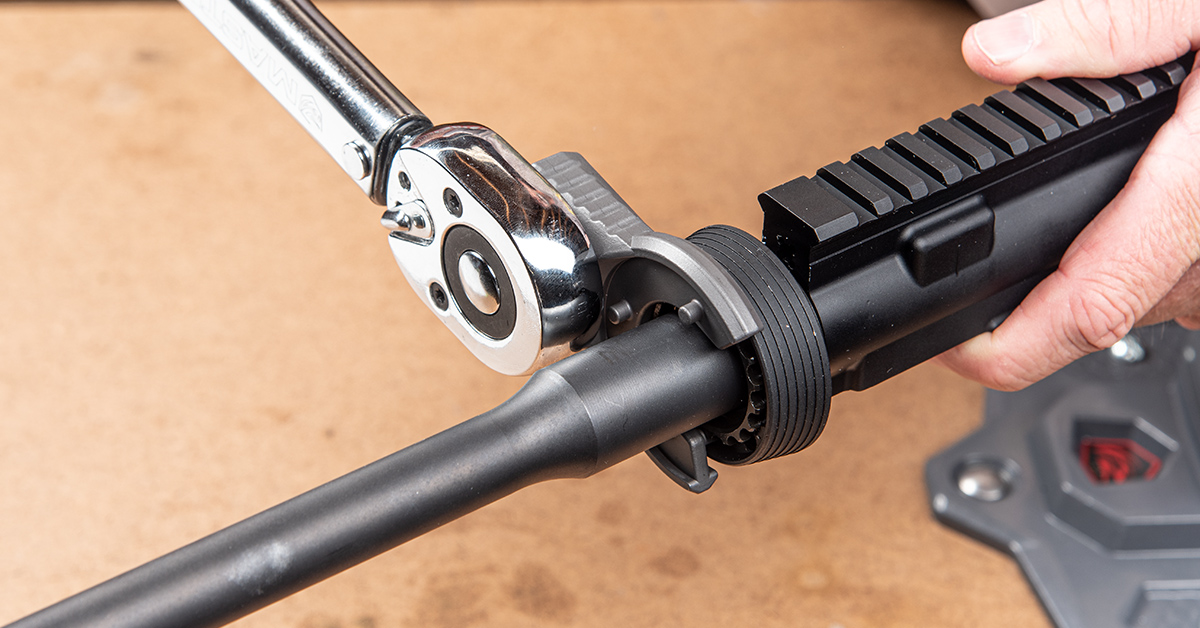
A foot-pound torque wrench and an AR barrel nut wrench are required to correctly install the barrel nut. Do this in three steps. Step one: tighten the nut to 30 ft/lbs and then loosen the nut. Step two: repeat step one. Step three: tighten the nut to a final 30 ft/lbs. Shown here is the torque wrench and barrel nut wrench from the Master-Fit Crowfoot Wrench Set.
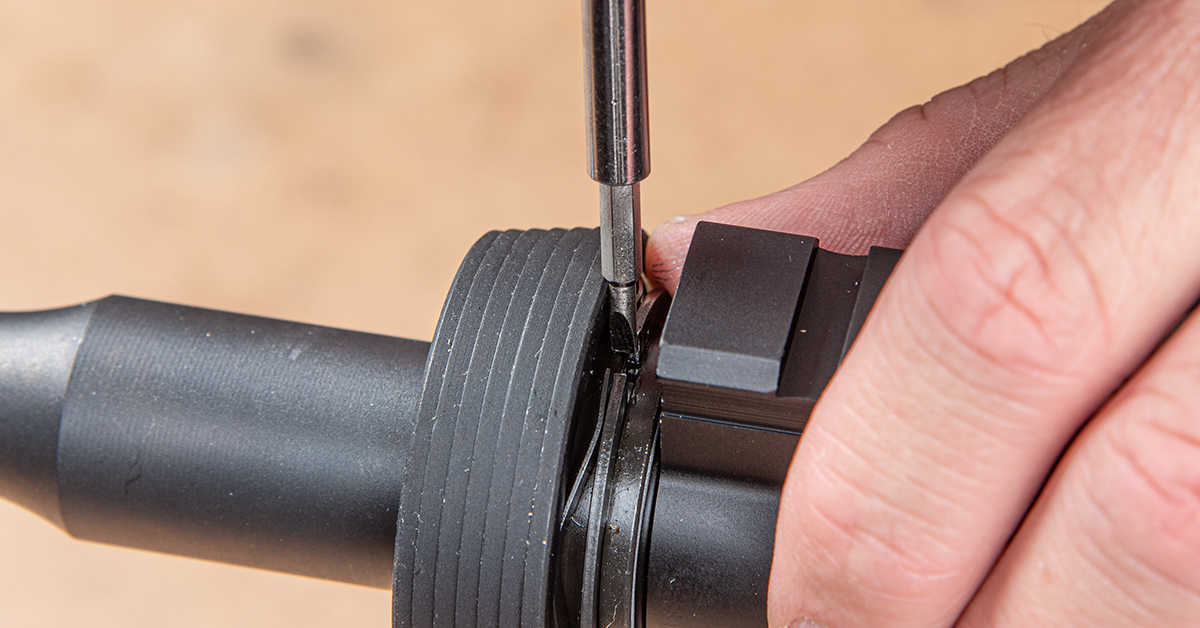
Use a small tool, such as a machinist flathead screwdriver, and rotate the delta ring notch until it aligns with the receiver gas tube hole.
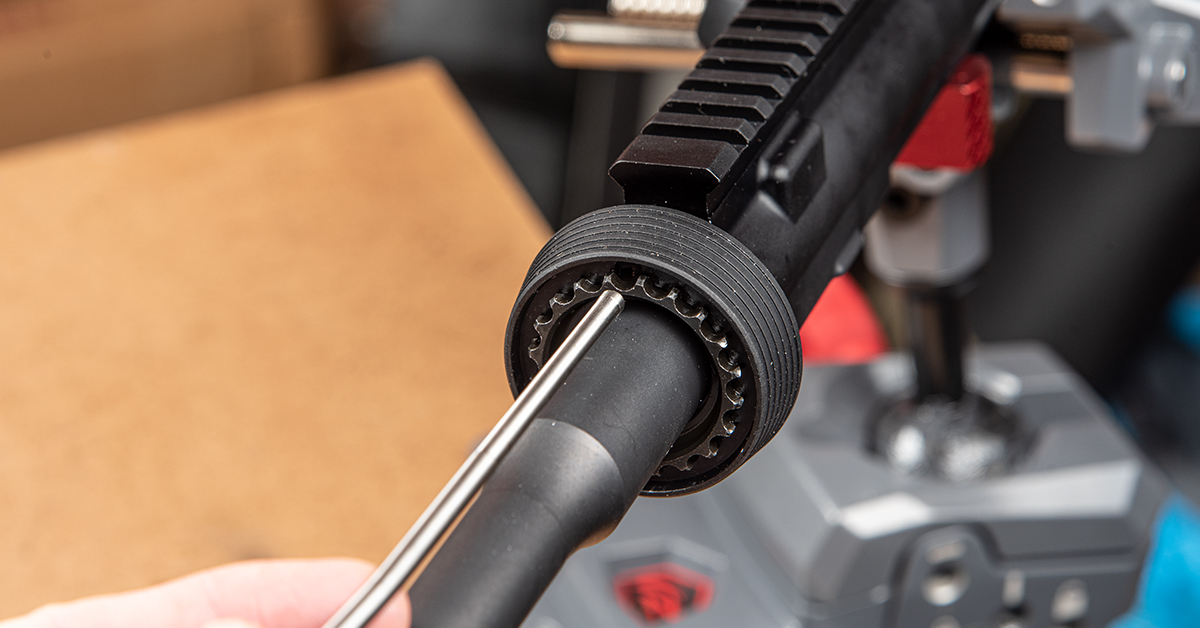
The next step is to align the barrel nut so that the gas tube can pass through the delta ring and into the receiver while the sight assembly is correctly aligned on the barrel (sight and barrel pin holes in perfect alignment). Slip the handguard cap and gas tube/front sight assembly onto the barrel and see if the gas tube will pass through the barrel nut, delta ring notch, and into the receiver. If so, check that the sight and barrel pin holes are in perfect alignment.
Should the barrel nut interfere with the gas tube, it will be necessary to rotate it until there is clearance for the gas tube. Do this by tightening the barrel nut until clearance is achieve (but do not exceed 80 ft/lbs.). Do not loosen the barrel nut to achieve alignment!
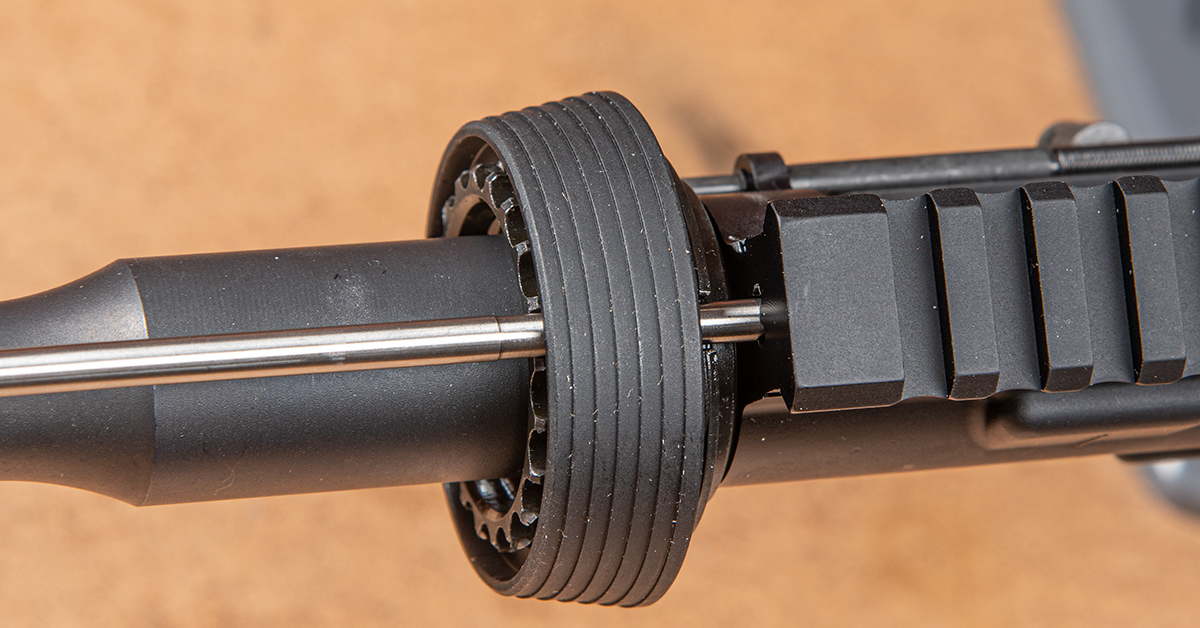
Here is the gas tube correctly installed in the receiver.
With the gas tube inserted in the receiver and the sight and barrel pin holes aligned, tap the tapered pins into position, small end pointing into the larger diameter holes in the sight block. When completed, the pins should be evenly spaced within the sight.
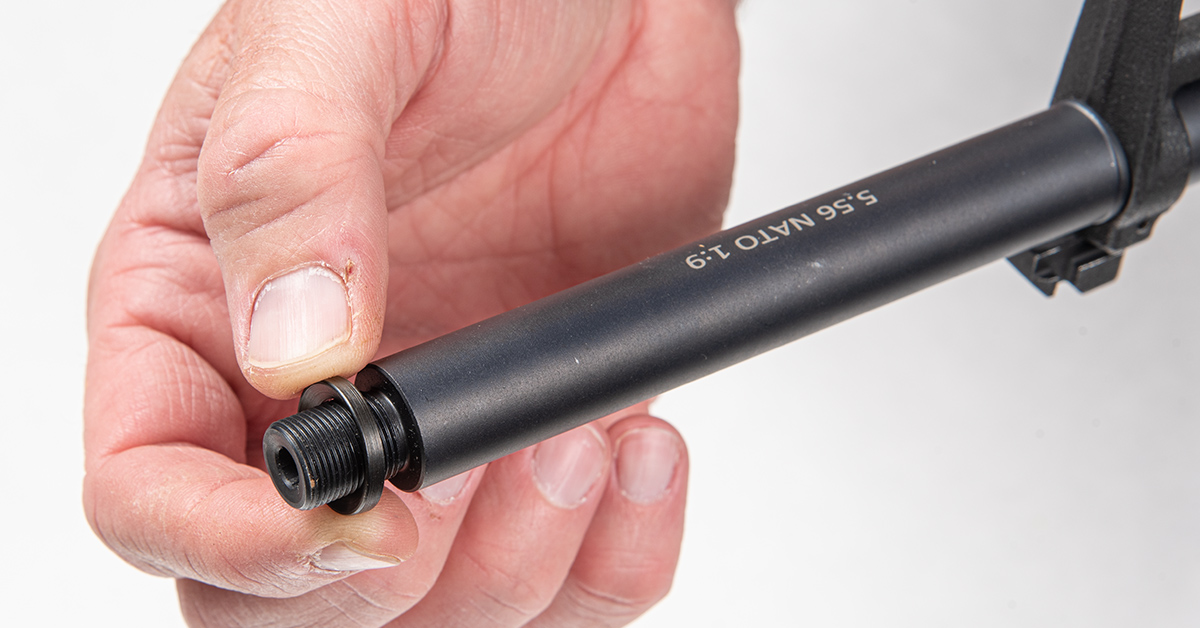
Return the upper assembly to the bench vise to install the flash hider. Install the flash hider crush washer onto the end of the barrel with the cupped side facing the muzzle.
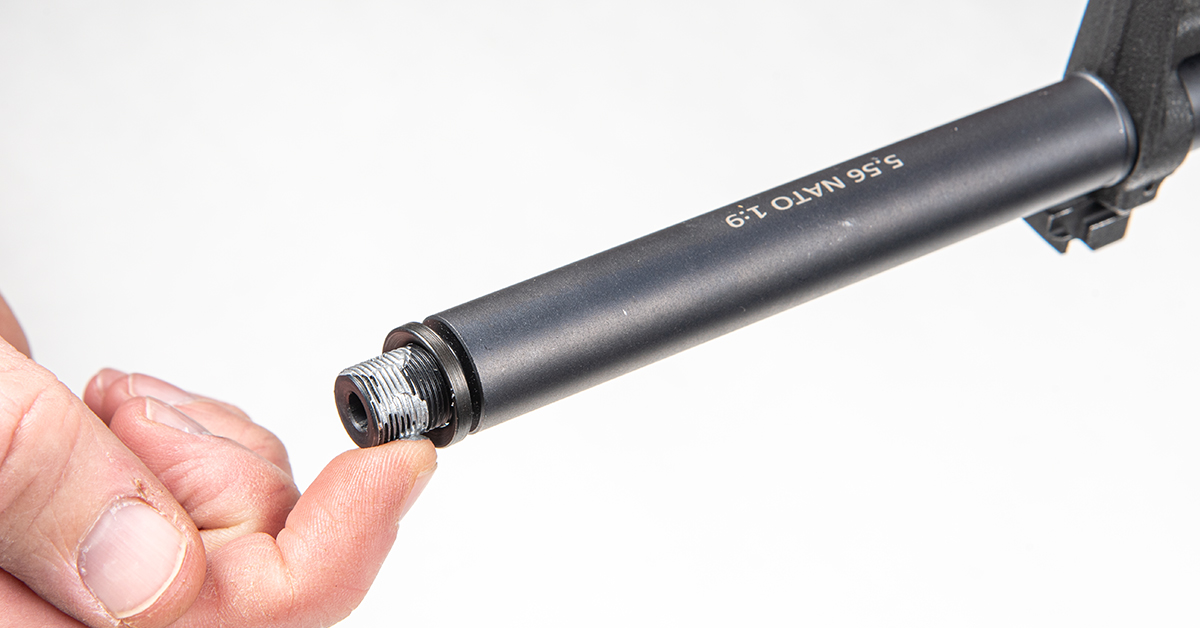
Apply a coat of anti-seize to the muzzle threads.
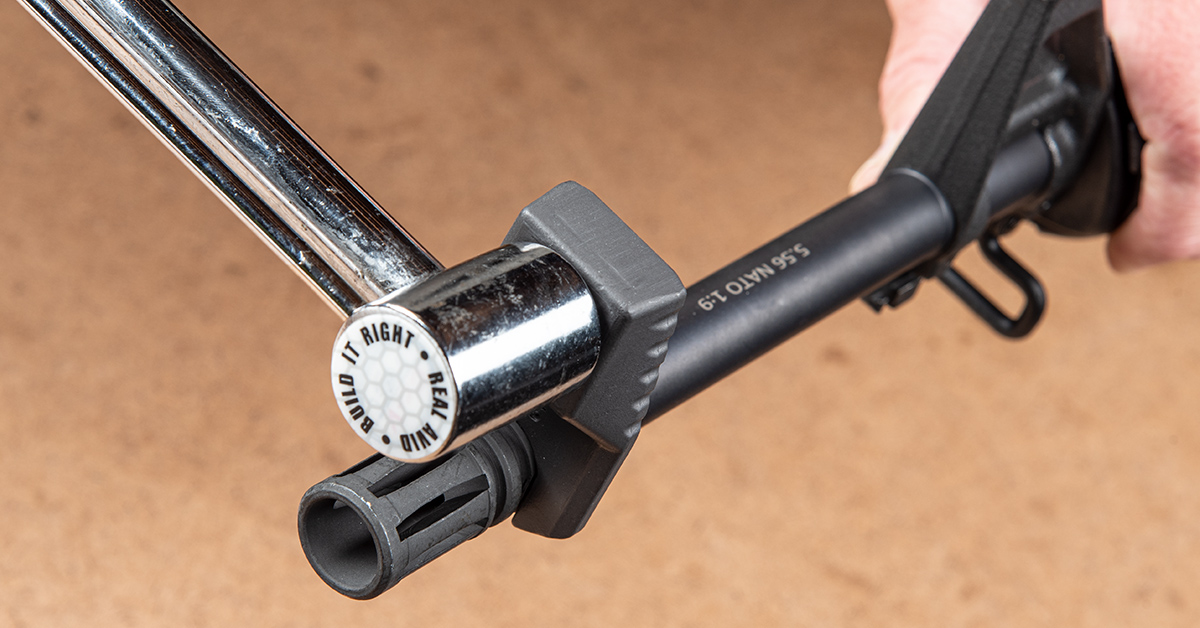
Screw the muzzle onto the barrel by hand and then torque to 15-20 ft/lbs. The objective is to fall within the correct torque range with the center slot of the flash hider in the straight up 12 o’clock position as seen here.
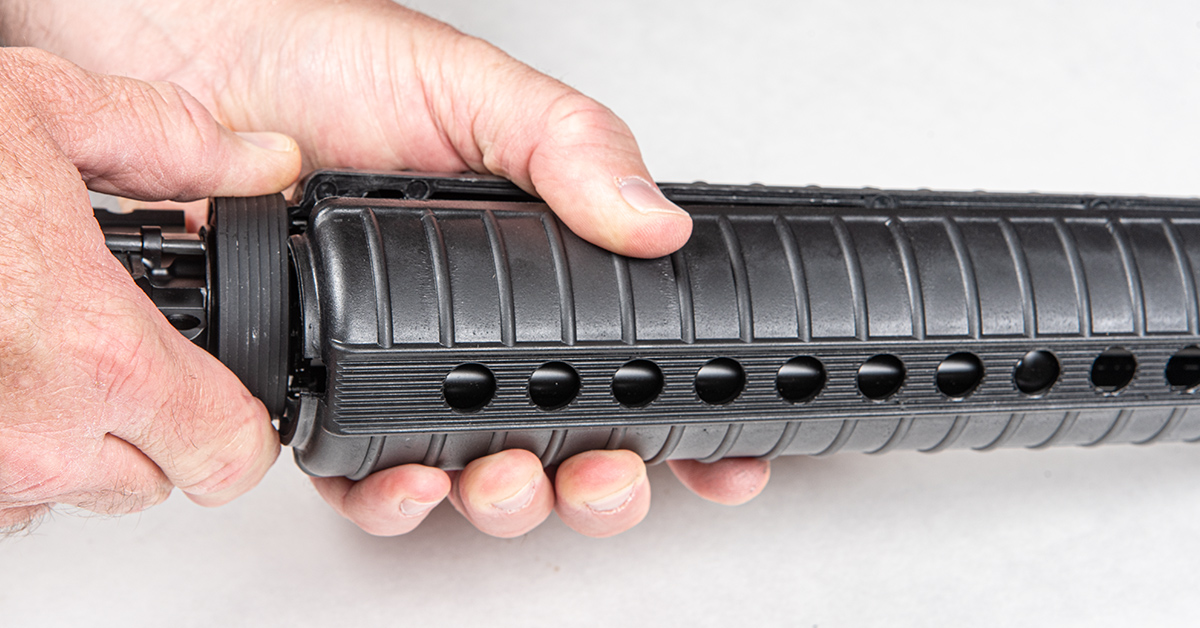
Pull down on the delta ring assembly and insert the two handguard halves between the delta ring and the handguard cap.
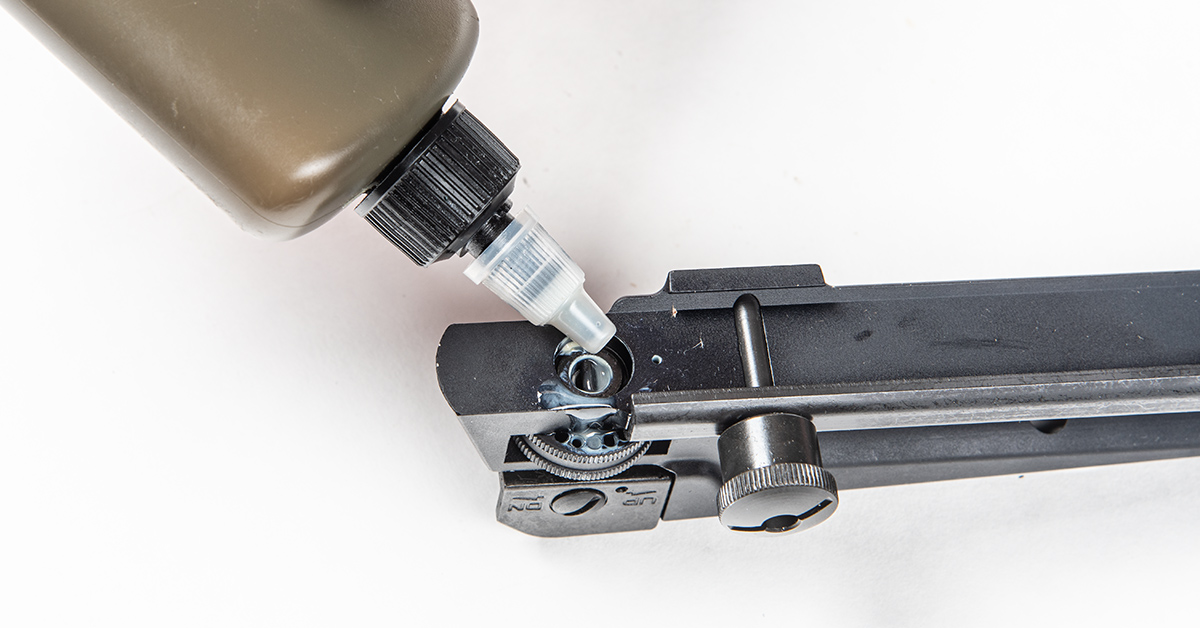
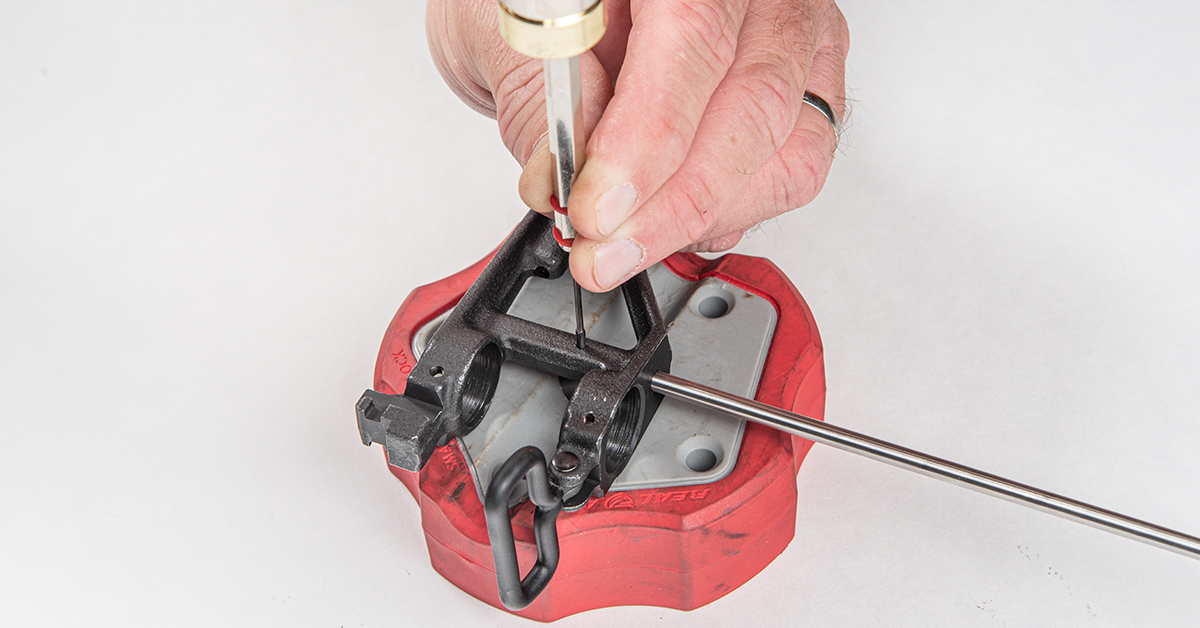
If you are installing an A4 rear sight, apply lubrication to the bottom of the elevation screw shaft and the elevation spring detent hole. Rotate the elevation knob to distribute the lubricant.

The A4 carry handle/rear sight assembly is used with flat top receivers. Install the assembly onto the Picatinny rail, turning the clamping screws finger tight only. As part of your ongoing firearm service, reaffirm these screws are tight every time you use the rifle.
This completes the upper receiver build of the Anderson A4 rifle. In our next installment, we’ll walk you through the process of building the lower receiver assembly with the fixed rifle stock. This will be followed by a rundown of zeroing the A4 sight system to U.S. military specifications and an overview of shooting positions and U.S. military marksmanship standards to help you become proficient with your defensive rifle.