We wrap up our Anderson Manufacturing A4 build series by putting our new rifle to the test with the U.S. Army zeroing procedure and the Alternate Course of Fire qualification
by Rob Reaser
If you’ve been following along with our Anderson Manufacturing A4 project (assembling an M16 A4 clone, minus the select-fire option), you now know how to build your own AR-15 rifle. Part one of the series discussed the step-by-step for how to build a rifle upper receiver assembly. Part two covered how to build a lower receiver assembly.
This particular rifle was the merging of a philosophical awakening on our part and a parallel product development on the part of Anderson Manufacturing.
To the former point, we came to realize that the old-school, “hairy knuckled” AR-15 based on the military M16 A2/A4 rifle made the most sense for a proven, no-fail defensive firearm should a worst-case scenario ever arise. That rifle, coupled with some diligent marksmanship training, provides a fighting firearm that delivers easy and accurate defensive performance out to 300 meters without the burden/handicap of optics or add-on gadgetry that could fail you in a clutch.
To the latter point, Anderson Manufacturing recently launched a new round of firearms called the Anderson A4 series.
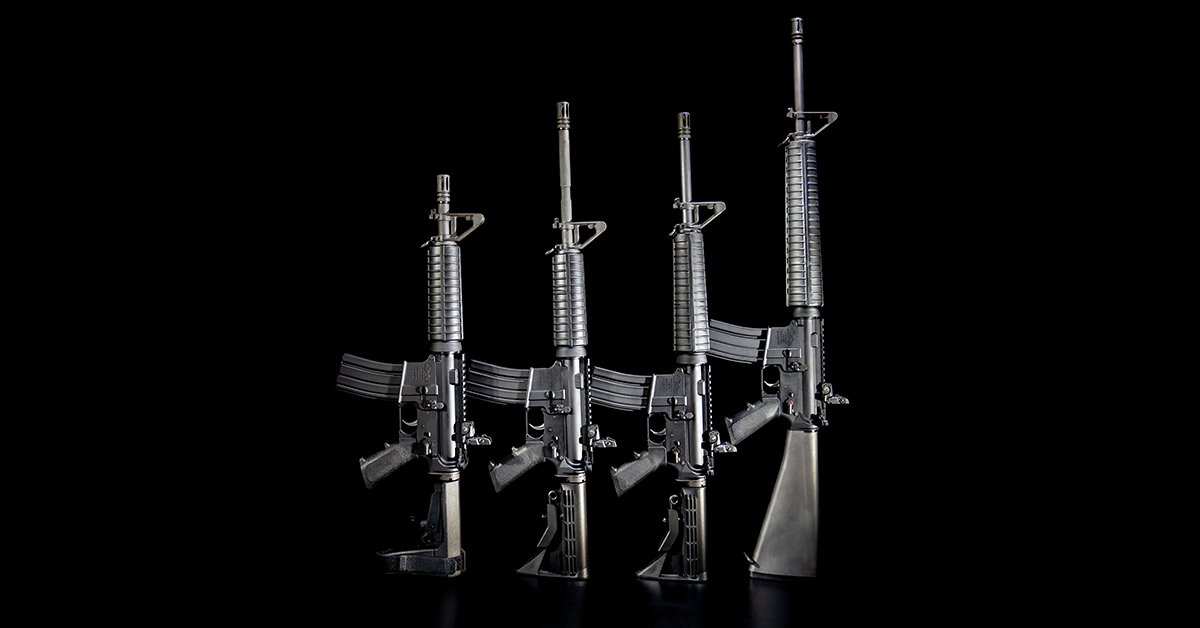
This series consists of one rifle-length, one mid-length, and one carbine-length AR-15, plus one pistol — all chambered in 5.56 NATO. As we mentioned in our first installment, “The premise for the A4 series made perfect sense: mission-specific, ready-to-go fighting guns with a low price point of $599. This price makes the Anderson A4 an easy buy-in for those who want to keep their fully outfitted ARs but cannot quite otherwise justify a defense-only AR purchase.”
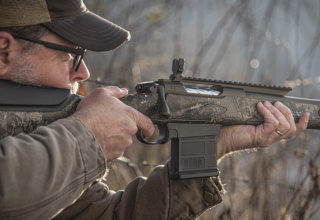
Since an M16 A4-style AR was what we wanted to build for a “last stand” rifle, we tapped Anderson Manufacturing for all the parts to build their rifle-length A4, the only modification of which was to add the A4 carry handle/rear sight in place of the Magpul flip-up rear sight that Anderson installs on their rifle.

The rifle turned out great.
Like many AR-15 shooters who did not cut their teeth on the M16 or M4 in military service, I never spent much time shooting with open sights. That is one of the problems far too many modern shooters face. The contemporary AR-15, sporting free-float handguards and flat top upper receivers, tend to host red dots or magnified optics, and most folks learn to shoot these guns with some sort of sighting system other than open sights. I was just as guilty of this. Aside from favoring open sights for handguns and sidelock muzzleloaders, I never used them for long guns, relying instead on magnified optics or red dots.
What a shame, because once you learn how to shoot effectively with open sights, the result is mental liberation and a confidence boost unlike most anything you’ll experience in your shooting endeavors. Plus, using open sights and shooting from field positions is WAY more fun than bench shooting with precision optics (unless long-range precision shooting is your bag).
A personal goal with this rifle build was to master its open sight system and to become competent in shooting the rifle as it was originally designed. To help me do this, I tapped the knowledge base of Shoot On contributor and former U.S. Army Drill Sergeant Lou Patrick. Lou, who has run his share of recruits through marksmanship training and qualification courses, suggested starting from ground zero, working through the initial zeroing process and getting a handle on shooting fundamentals such as aiming, breathing, trigger control, and many of the essentials we discussed in last year’s article Build Your Pistol Marksmanship Foundation.
The caveat to all this was that I would be limited to a 130-yard range absent pop-up silhouette targets (no 300-meter targets) and none of the combat simulation exercises recruits would be exposed to when developing their essential skills. Instead, I would practice shooting out to 100 meters and use the U.S. Army’s 25-meter Alternate Course “C” qualification to assess my progress. This is a reduced-distance version of the standard qualification course (targets at 50-300 meters) used when soldiers don’t have access to a 300-yard range at their duty station yet must make their annual marksmanship qualification.
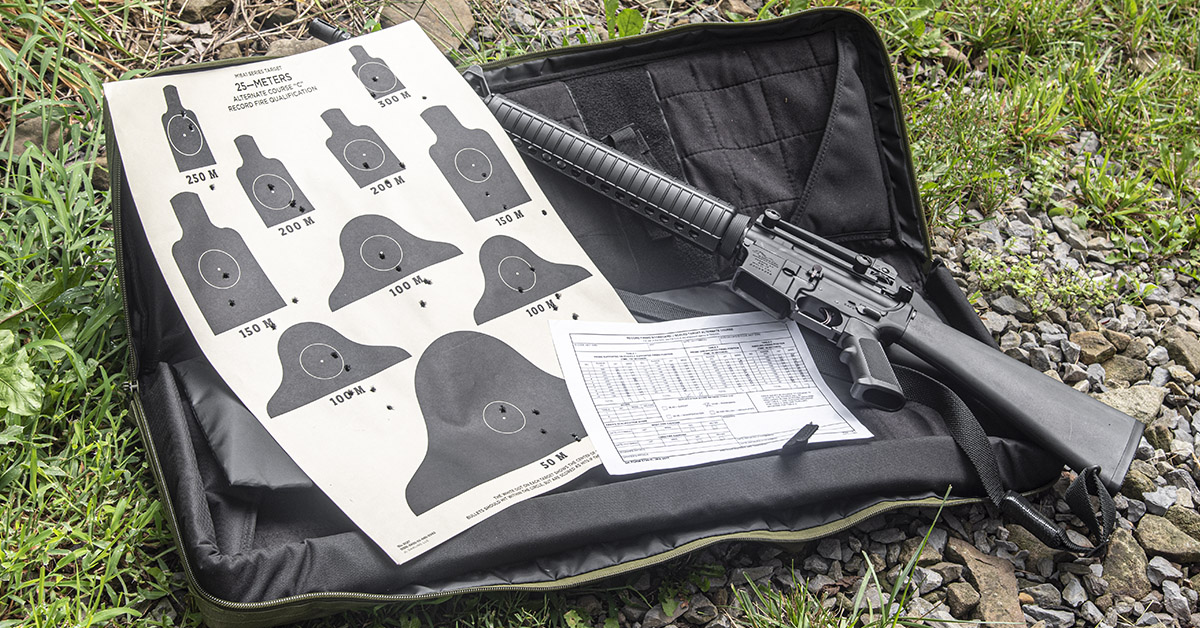
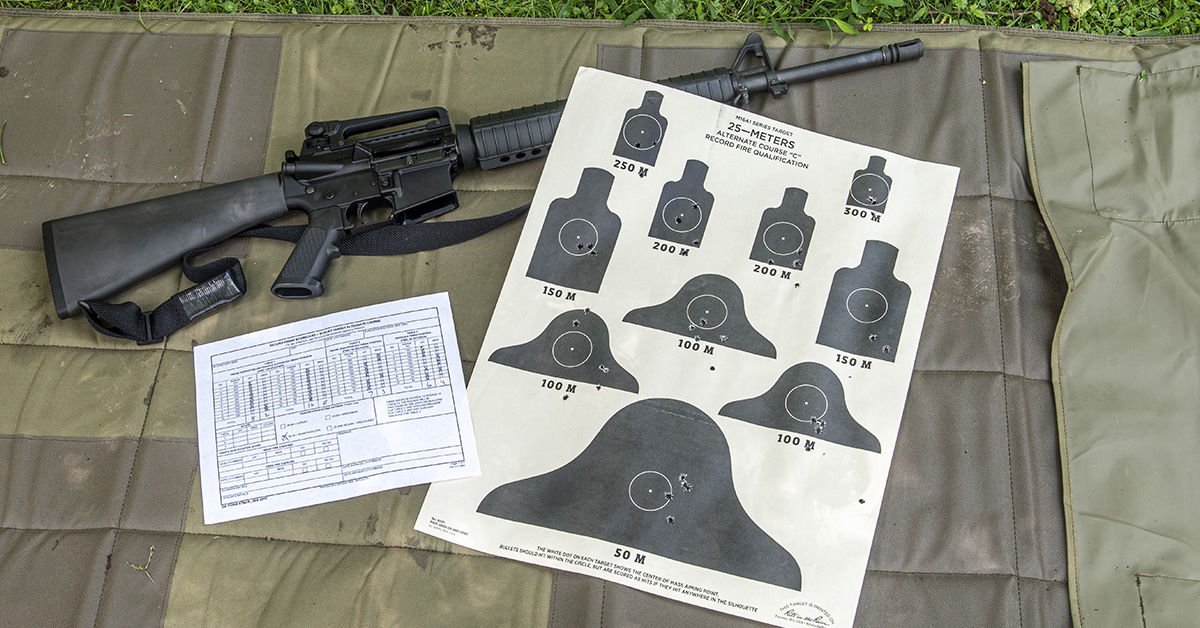
In a nutshell, the Alternate Course “C” is shot at 25 meters using a target with silhouettes proportionally sized to equal life-size silhouettes at 50, 100, 150, 200, 250, and 300 meters — the effective ballistic range of an M16 or M4 fed M193 or M855 ammunition and with sights set to a 300-meter battlesight zero.
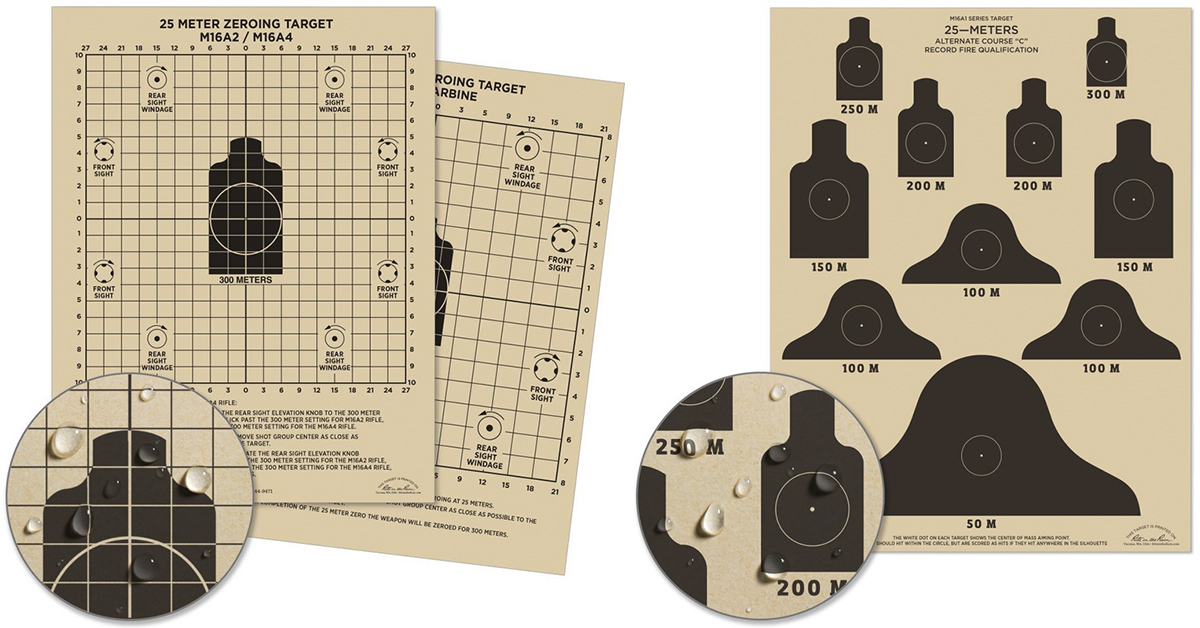
The targets used for zeroing and qualification are military spec produced by Rite in the Rain. These include the #9125 25-meter zeroing target for the M16A2/A4 rifle and M4 carbine, as well as the #9127X 25-meter Alternate Course “C” qualification target. Made from heavy, weatherproof card stock and printed with indelible ink, these are simply the best targets you can buy. A tad pricey, yes, but worth it.
Zeroing the AR-15 A4
Our first day on the range with the new rifle was intended to 1) verify safe and reliable function of the firearm, 2) establish the rifle’s battlesight zero, and 3) determine my raw skill level with the M16 A4 clone.
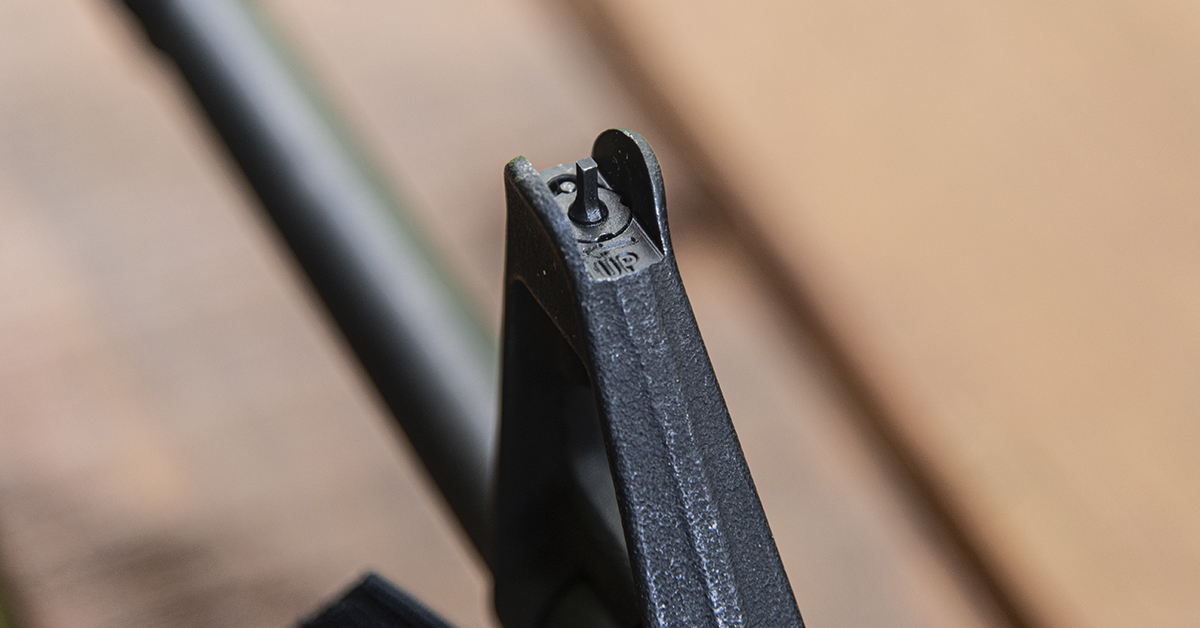
The first step in establishing a battlesight zero is to set the front and rear sights to their mechanical zero. For the front sight, mechanical zero is achieved when the flat portion of the front sight base is level with the sight housing, as seen here.
On a side note, the A2 front sight system uses notches and a spring detent to maintain the sight position. Elevation is adjusted by rotating the sight up or down. To do this, you must simultaneously depress the sight detent and rotate the sight. This can be done using a bullet tip, but that is a pain. The best method is to use an A2 front sight tool, such as the AR15 Front Sight Adjuster Tool made by Real Avid. This sturdy piece has the four prongs on one end for use with the A2 sight system and five prongs on the other end for use with A1-style sight.
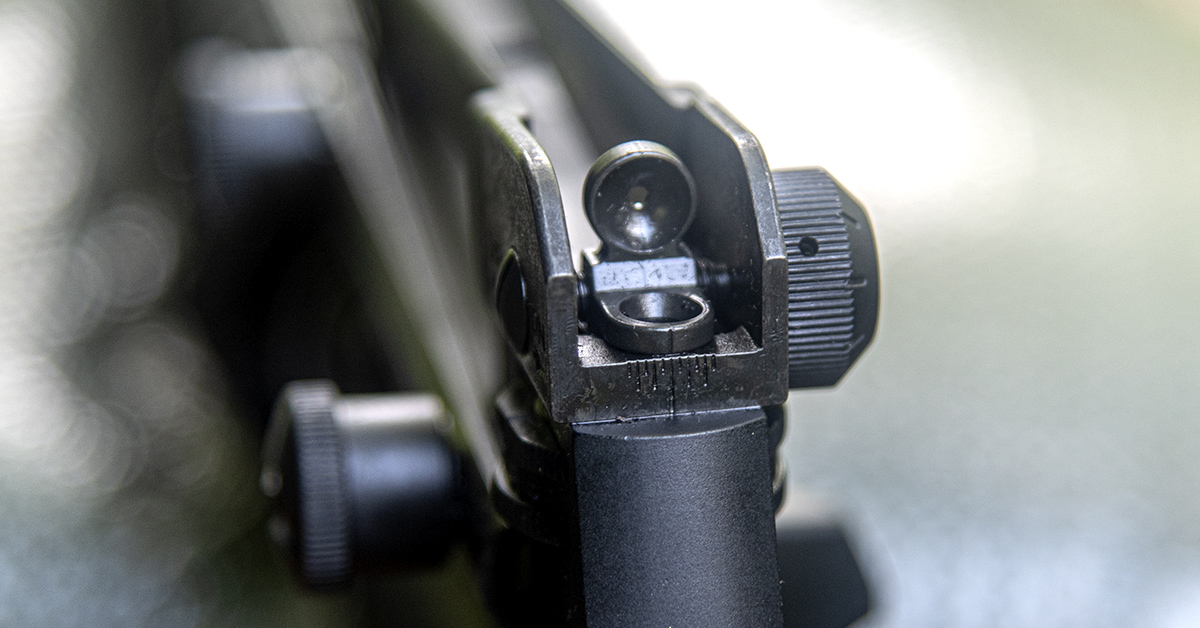
For the rear sight, establishing mechanical zero means rotating the rear peep with the small aperture up and the large aperture (0-2) down, as shown here. The windage adjustment knob on the right side of the sight assembly is then rotated until the index line on the large aperture aligns with the center line on the windage adjustment scale.
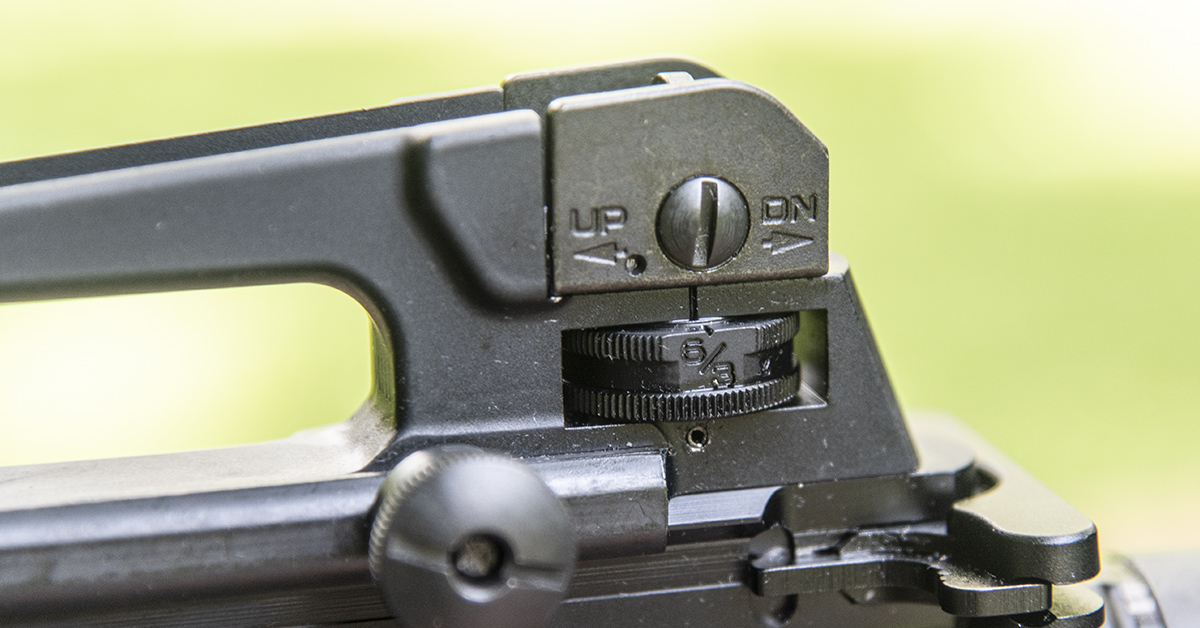
The rear sight elevation knob should be set to the 300-meter position (lowest position) so that the 6/3 index/detent is aligned with the index line on the sight housing above it, as shown. This sets the elevation knob mechanical zero for both the A2 (fixed carry handle) and the A4 (removeable carry handle) sight systems.
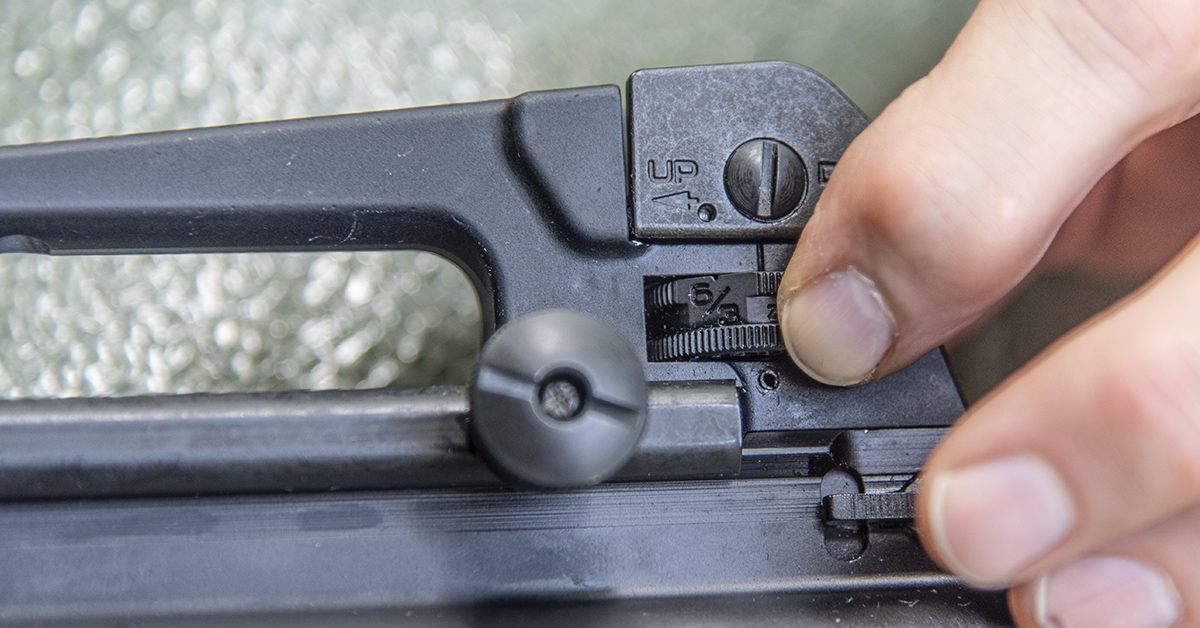
To zero rifles with the A4 sight system (like ours), the elevation knob must now be rotated two clicks clockwise (past the “6/3”, or 300-meter setting). This will place the sight housing index line above the “z” on the elevation knob. For A2 sights, the elevation knob is rotated one click clockwise past the 300-meter setting.
With the front and rear sight mechanical zeros set and the elevation knob rotated to the zeroing setting, the rifle is now ready to be zeroed on target.
The 25-meter zeroing target utilizes a grid pattern with a silhouette that is proportionally sized to simulate a human torso at 300 meters when positioned 25-meters from the shooter. Within the silhouette is a 4-centimeter circle. This is the “bullseye,” and it represents a center-of-mass aiming point. The grid pattern has numerical demarcations for windage and elevation adjustment along with graphic representations of the front and rear sights and the direction in which they must be adjusted, based on bullet impact, to achieve zero.
Per U.S. Army procedure, the soldier is given 18 rounds with which to zero their rifle, shooting in three-shot groups. Three shots are taken and windage and elevation adjustments are made accordingly. To be qualified as having zeroed the rifle, at least five of six consecutive shots must fall within the 4-centimeter circle or break the line.
Here are the results of my zeroing process with the first rounds fired through the new rifle (and my first time behind the A4 sight system).

The first three rounds hit low and to the right. This was at the rifle’s initial mechanical zero. Judging from the center of this group, I needed to move the rear sight left nine clicks and the front sight up five clicks.
The second three rounds hit even lower and to the left. Turns out I rotated the front sight down five clicks instead of up five clicks. Duh. Also, the nine-clicks-left windage adjustment was a bit too aggressive. To correct, I moved the front sight 10 clicks up and move the rear sight six clicks to the right.
The next three rounds all hit within the silhouette, with two rounds on the circle and one out. I was satisfied with the elevation but the windage needed to come left a bit, so I moved the rear sight three clicks to the left.
The fourth three-shot group all fell within the circle. According to Army protocol, the rifle was zeroed at this point, with five of six consecutive rounds falling within or breaking the circle.
My Drill Sergeant, though, did not have a smile on his face.
“If you were my soldier, I would have to pass you,” Lou explained, “but I would have some words to say.”
In short, Lou expected to see a tight knot of six holes all within the circle.
Feeling a bit brow-beaten, I decided to send three more shots downrange since I was comfortably under my 18-round limit and just to prove to Lou (and myself) that I was “on.” The next three rounds fell within the circle, so I figured I should quit while I was ahead. The Anderson A4 achieved battle zero with the first 12 shots out of its barrel and I was happy (nine if I hadn’t messed up the first sight adjustment).
Once the sights are zeroed, the elevation knob is returned to the 300-meter (6/3) position and the rifle is now ready to engage targets from zero to 300 meters.
Alternate Course “C” Qualification
The 55-grain M193 and 62-grain M855 ammo, shot from M16, M4, or AR-15 rifles, have a similar trajectory in that the travel arc of both bullets intersect the line of sight at 25 and 300 meters, give or take a skosh. This is why these rifles can be zeroed at 25 meters and hit a man-sized torso anywhere from point blank to 300 meters with the same sighting solution (center of mass). Hence the term “battlesight zero.” When a rifle is set to battlesight zero, the soldier need not adjust sights or change point-of-aim anywhere within that range and still be confident of hitting the target. This is why the elevation drum begins at the 300-meter setting and goes up from there.

As explained earlier, the U.S. Army developed the Alternate Course “C” qualification to simulate shooting full-size silhouette targets out to 300 meters but do so on a 25-meter range. This is not exactly the same as qualifying on a 300-meter range because there is no need to account for possible wind drift at such a short distance. Nevertheless, the degree of difficulty is generally the same because the 25-meter target silhouettes are scaled to be 1:1 representations of the full-size targets presented at those longer distances.
In other words, while the 300-meter silhouette on the Alternate Course “C” target may only be 25 meters away, it is as challenging to hit as if it were a man-sized silhouette at 300 meters distance.
The Alternate Course “C” is comprised of 40 rounds shot in three different stages. All qualifying hits must be in or breaking the silhouettes.
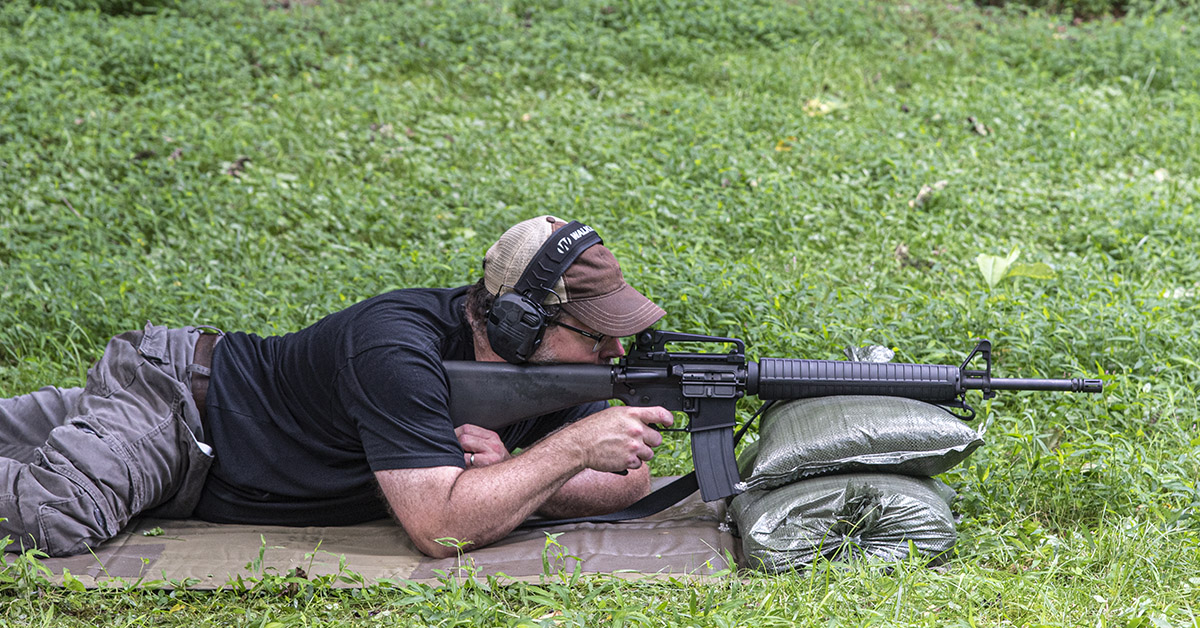
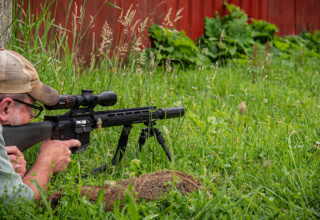
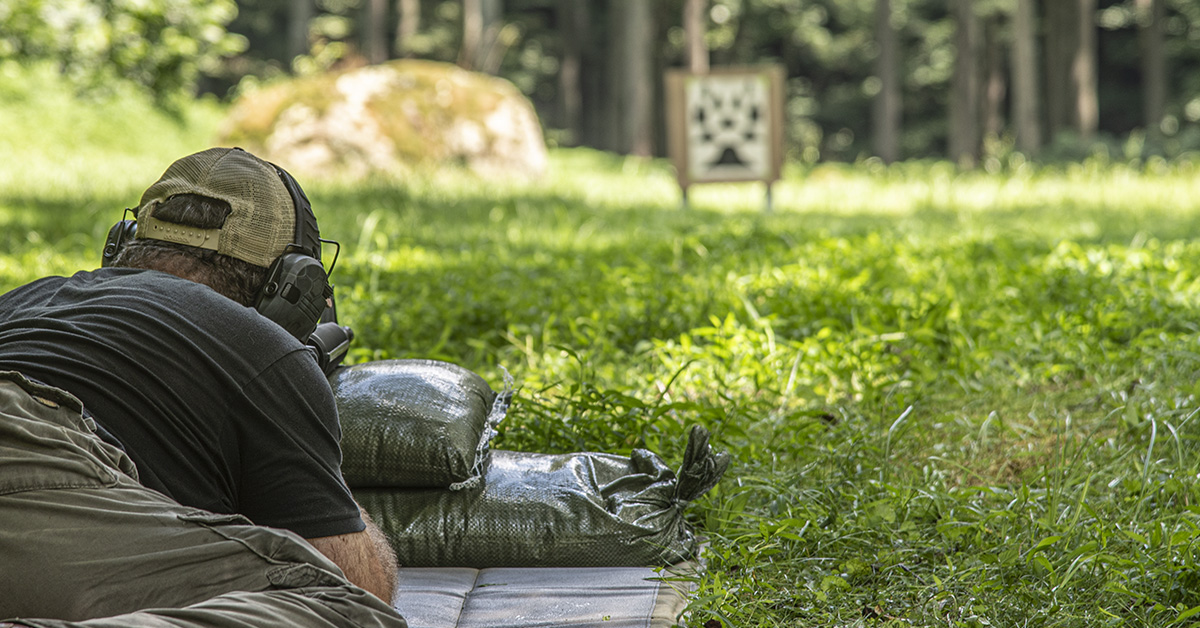
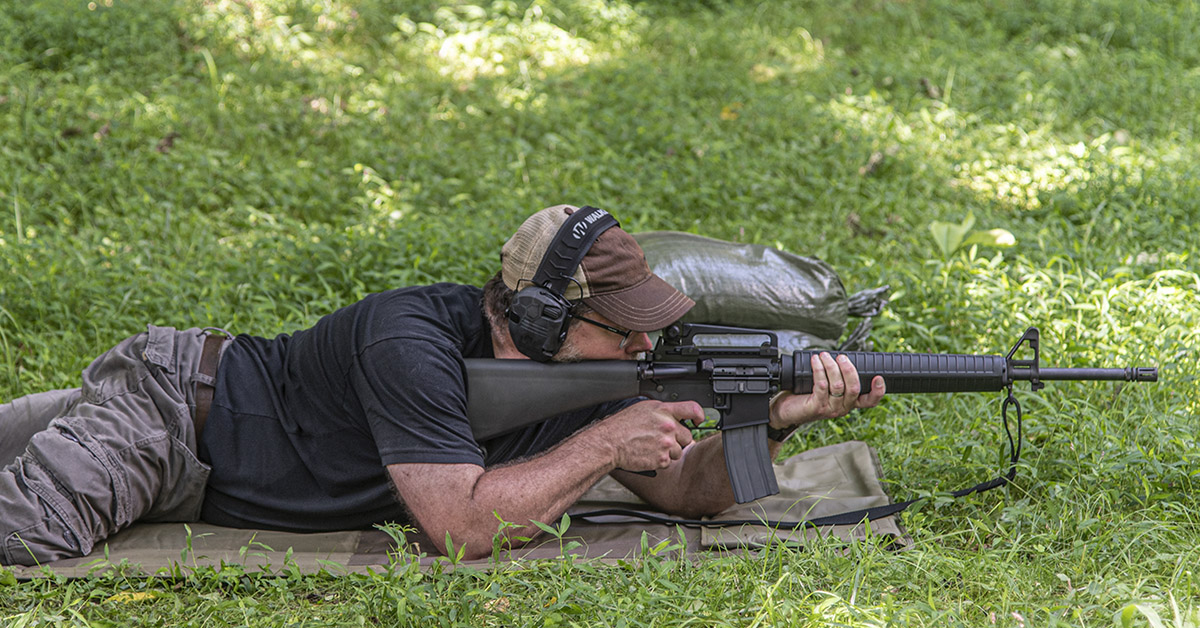
Twenty rounds are shot from a prone supported position. Two shots are made for each of the ten silhouettes on the target sheet, and the course must be completed within 120 seconds, or two minutes. We use sandbags for prone support on our range.
The second stage of the course is shot from a prone unsupported position (elbows only). Here, ten rounds are fired — one shot on each silhouette — to be completed within 60 seconds.
The final stage is also comprised of ten rounds. With this stage, only the 50-, 100-, and 150-meter silhouettes are engaged, with one shot to each 150-meter silhouette and two shots to the 50- and 100-meter silhouettes. Time for this stage is 60 seconds.
It all seems easy enough once you’ve become accustomed to shooting the 300-meter silhouette on the zeroing target (that being the smallest target of the lot), but that perspective changes quickly when you’re on a timer, trying to remember the target sequences, the number of shots on each silhouette, and you feel the pressure of attempting to qualify and not embarrass yourself. Well…that’s the way it seemed to me, anyway. Lou is a longtime friend of mine, but I was concerned that if I screwed up too badly his old Drill Sergeant persona would resurface and I’d get a royal dressing down!
I ran the three courses, completing each well under the allotted time. And it showed.
The Alternate Course “C” qualification score rating is:
- 36-40 hits: Expert
- 30-35 hits: Sharpshooter
- 23-29 hits: Marksman
- 22- and below: unqualified
You can download the scorecard by searching online for DA FORM 5790-R.
Back at the shooting bench, Lou reviewed my target, calling out the hits and misses while I checked off the scores. As we moved to the prone supported and then the kneeling position stages, the “misses” quickly outnumbered the “hits.”
Ugh. I was afraid to look at the final tally.
“You passed the qualification,” Lou said, “with two shots to spare.”
Twenty-five hits. Marksman, but just barely.
“Are you happy with that?” Lou asked.
Happy? I was borderline mortified. Working with 55-year-old eyes and bifocal glasses had made it challenging to focus on the front sight, and I’m not as fit or as flexible as I once was, but I thought I would have done better than that.
“Nope,” was all I could say, followed by, “I’ll be back.”
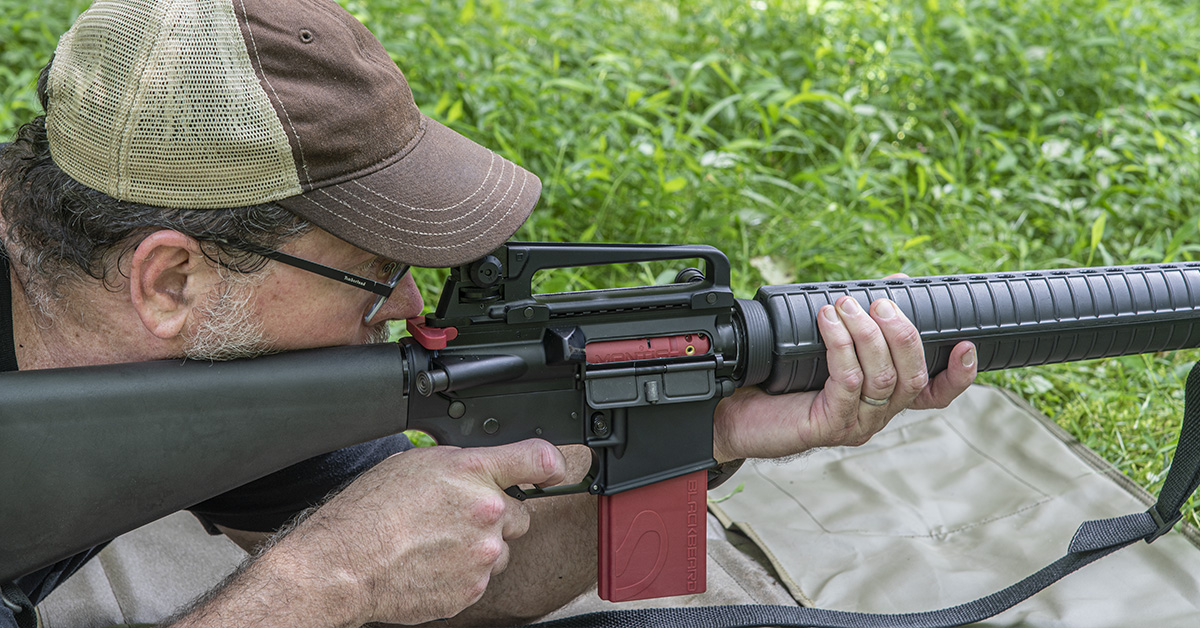
Enter the Mantis Blackbeard
While I have spent my share of time behind an AR-15, I was essentially a novice with open rifle sights in general and the A4 sight system in particular. More deliberate time behind the trigger was in order before I would run the qualification course again.
Recalling a recent article by Shoot On contributor and service rifle competitor Serena Juchnowski on the Mantis Blackbeard auto-resetting training system for ARs, I thought that was exactly what I needed to step up my game. Within days, I had one ordered and in my hands.

In brief, the Blackbeard replaces your rifle’s bolt carrier group with a trigger reset insert. It is powered by a battery that fits in the magwell. The Blackbeard “bolt carrier group” automatically resets your trigger after each shot, so you can dry fire practice until your trigger finger is sore and never once have to pull back a charging handle. Trigger feel is also the same as if you were firing live rounds. In fact, everything is the same except there is no report or recoil…both negligible factors when shooting 5.56 NATO ammunition.
I spent an afternoon testing the Blackbeard in the Anderson A4 and was thrilled at what the device offered. Since I purchased my Blackbeard with the laser option, I was able to set up a 25-meter zero target in my backyard.
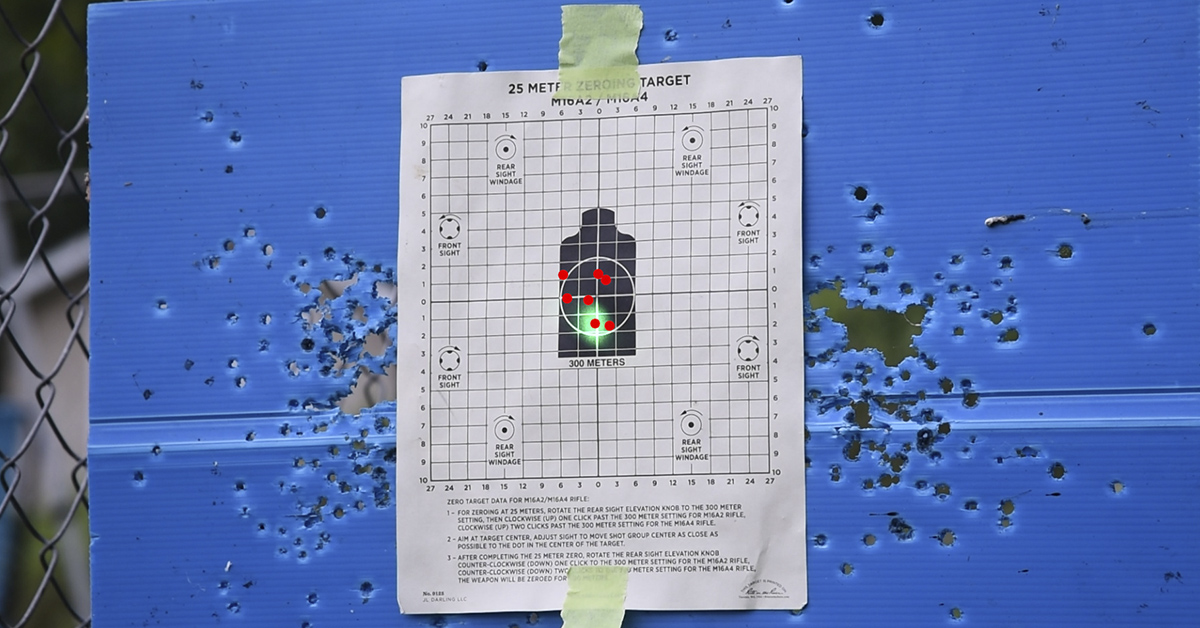
I placed my camera on a tripod and, after aligning the laser to my rifle’s bore and resetting my sights for point-of-impact with the laser, I hit the record button and began firing away. The Blackbeard laser was dead-on accurate, and by reviewing the video, I could confidently verify my hits. Later, I marked the laser hits with red dots in my video editing program, allowing me to have a digitally scored target to record my progress…all without firing a single round.
A few days later, Lou and I returned to the range for another project. I had only practiced the one afternoon with the Blackbeard but wanted to see if even that little bit of dry-fire exercise would help me on the same qualification course I took the week before.
Turns out, the Blackbeard may have provided the extra bit of marksmanship honing I needed because my second attempt at the Alternate Course “C” in as many weeks saw my score jump from 25 hits out of 40 to 31 out of 40 — enough to move me up to Sharpshooter status despite failing to shoot one of the silhouettes during the unsupported prone stage…a two-point reduction. With more dry-fire practice, I’m confident I can qualify as Expert before too long.
And this is what makes shooting the old-school AR so much fun for those like me who hit the AR-15 arena using only red dots or magnified optics — having a challenge that allows you to see real progress in marksmanship development and learning how to shoot accurately and confidently with only a bare-bones sighting system that won’t let you down.
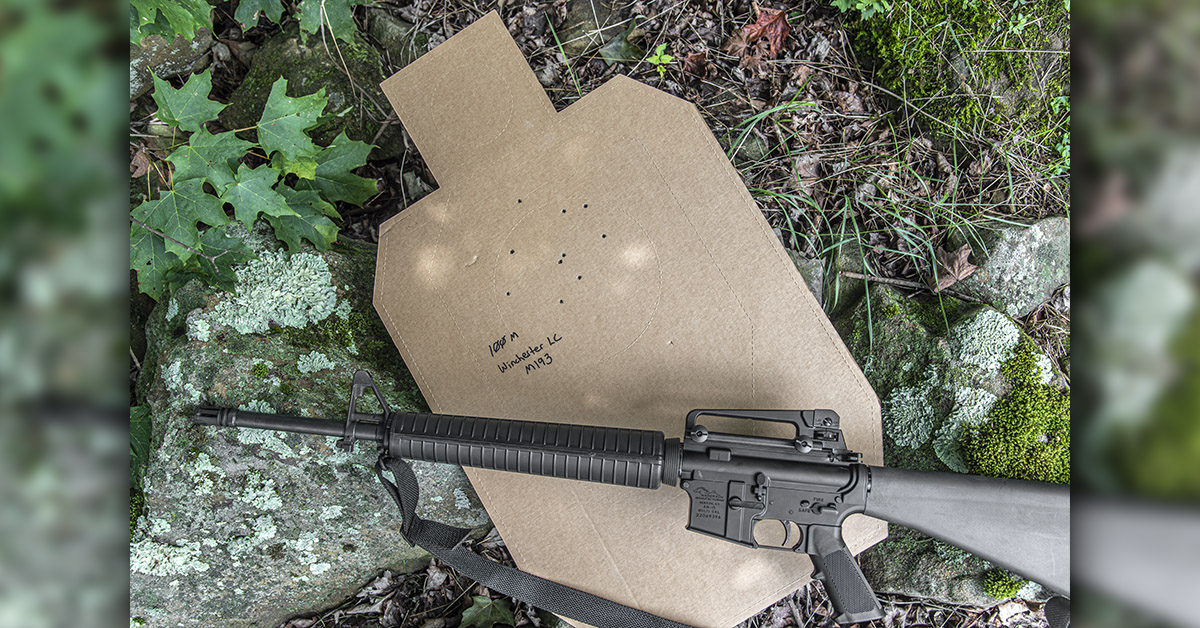
While at the range, I threw up a cardboard silhouette at 100 meters. When shooting open sights at that distance, there is no way to discern the perforated circle on the target. That’s a good thing because your “adversary” is not going to be walking around with a bullseye on their chest that says, “aim here.” Instead, targets like this force you to aim for center mass.
Aiming for center mass at that distance seemed a bit fuzzy to my eyes, but I gave it a go, sending 10 rounds downrange in about 25 seconds from an unsupported prone position. Even though I had practiced thus far only on the zeroing and alternate course targets at 25 meters, I was thrilled to see nine out of ten rounds fall within the 8-inch circle.
That real-distance performance was a huge confidence booster and really exemplified to me how too many shooters — myself included — have become far too reliant on optics at the expense of developing core rifle marksmanship skills.
If you fall into that category, I heartily recommend giving open sight training a try. You’ll become a better all-around shooter, free yourself from the handicap devices, and have a tremendous amount of fun in the process.