Precision manufacturing and a boatload of innovation separate KIDD Innovative Design components from the pack and set a high bar for rimfire accuracy
by Lou Patrick
Having been in production continuously since 1964, the Ruger 10/22 is certainly one of, if not the most, successful rimfire rifle designs in history. Many have been sold, which has also led to an enormous aftermarket support for this rifle — so much so, that this is one of the most customizable rifles on the market.
The Ruger 10/22 is a fine rifle in factory form, but its relatively simple design makes it a prime candidate for user upgrades and modifications. What’s more, the aftermarket industry had made it so that an entire rifle can be built without using any original Ruger parts.
And that’s exactly what we’re going to show you how to do here.
To narrow down the vast aftermarket support for this rifle, we set a few parameters for this project.
- High-quality parts.
- Parts must truly be an improvement over the original design.
- Must be “DIY friendly.”
- Products also available to upgrade a current rifle.
- Products available to build a “premium-grade” rifle.
With these parameters in mind, the search began, and one company quickly stood out: KIDD Innovative Design located in McQueeney, Texas.
On its website, the company poses the question, “Why Be Average?” Having worked as gunsmith in support of competitive shooters, I found this question intriguing. Upon careful examination of the products offered by KIDD, I must admit that I saw nothing “average” here. Owner Tony Kidd brings to bear some serious credentials in the precision shooting arena, including a four-year stint as head of the U.S. Army Marksmanship Unit’s R&D department and eight years of working as an AMU pistol gunsmith prior to that.
With our source settled, we decided to build a KIDD Supergrade 10/22 rifle and to approach this build through the eyes of a novice using only the information provided by the company. You can find all the Supergrade info at KIDD’s more commercially oriented site, CoolGuyGuns.com.
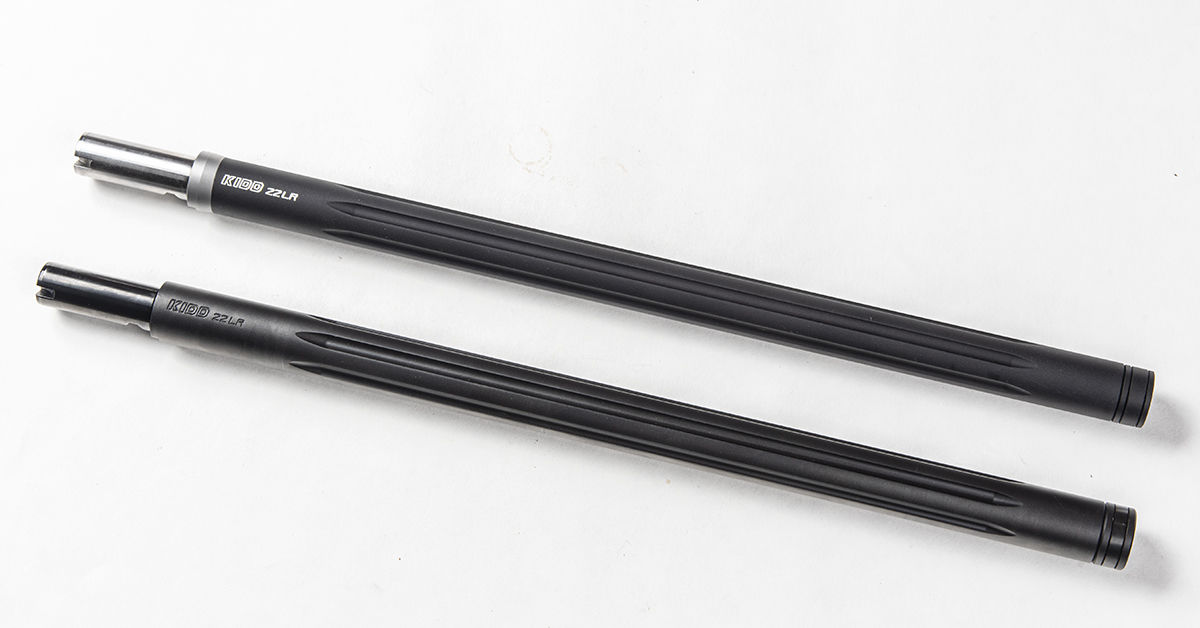
The KIDD Supergrade receiver and chassis system provides the means for quick and easy barrel changes. With this in mind, we selected two barrels for our Supergrade build — the Ultra Lightweight fluted .870 diameter barrel for squirrel hunting and the .920 diameter fluted bull barrel for off-season target shooting. Both barrels are hand lapped and have a longer 1 7/8” barrel extension that features the KIDD three-part locking and stabilization system. These hand-lapped barrels are designed for maximum accuracy and are available to fit factory Ruger-style receivers. If you already have a 10/22 that’s in need of an accuracy boost, installing one of these barrels is a good place to start.
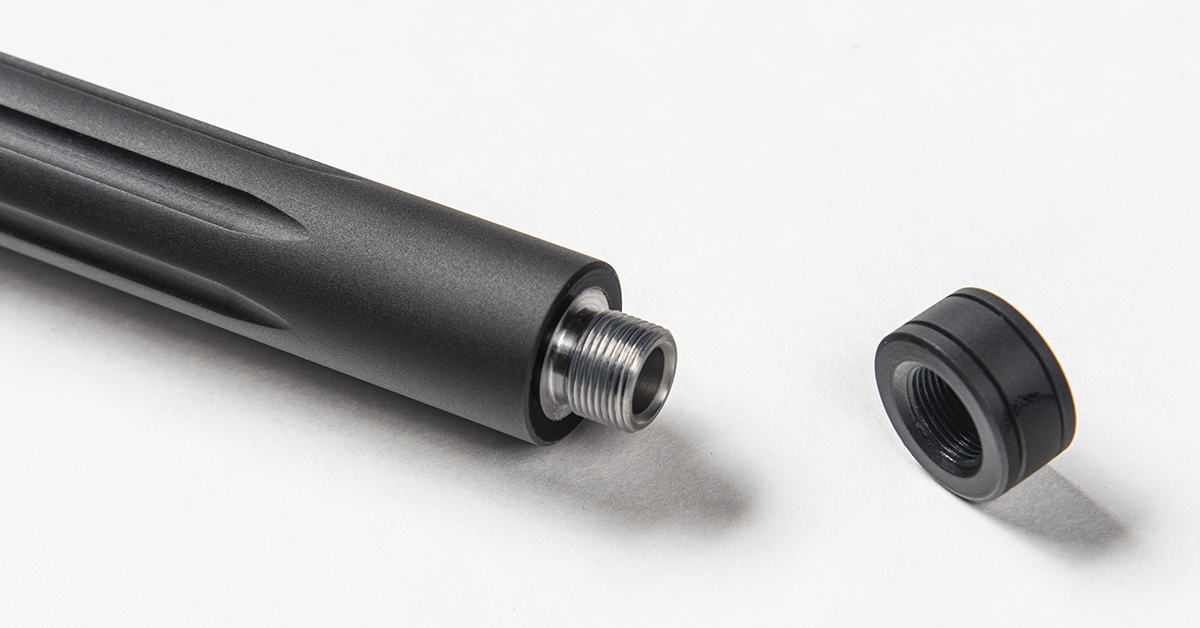
The muzzles of each of our barrels are threaded ½-28 for use with a muzzle brake or a suppressor. The barrels also came supplied with threaded caps to protect the threads when not in use. The barrels, as with all the parts, arrived on time and carefully packaged suspended on rubber O-rings inside their own plastic tubes. A nice touch, we think.

Except for a few AR-15 stock components, the entire rifle is built with parts produced by KIDD. Having worked as a professional gunsmith and machinist for over 20 years, it takes a lot to get me excited by aftermarket parts. These, though, pegged my needle. The quality is readily apparent, and the surface finish and fitment of each component is as good as it gets.
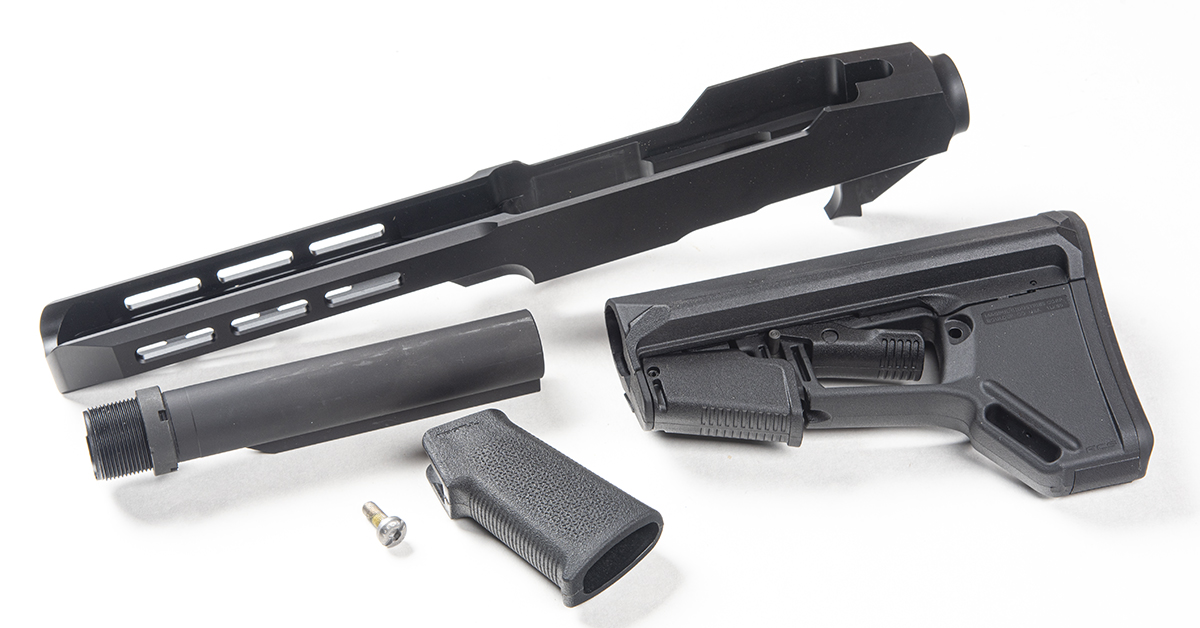
Our choice of chassis is the KIDD Tactical model, which will accept most AR-15 stock components. This chassis will also accept any 10/22 receiver and has M-LOK slots located on each side of the forearm. Most 10/22 receivers are commonly secured to the stock using one screw. While this method works, it can also allow the receiver to move around a bit within the stock. The KIDD Supergrade receiver, though, has an optional rear tang assembly that attaches to the rear of the receiver. This helps to hold the receiver more securely within the chassis. The KIDD Tactical Chassis is inletted to accommodate the KIDD rear tang. A filler plug is supplied with the chassis for use with factory or factory-style Ruger receivers.
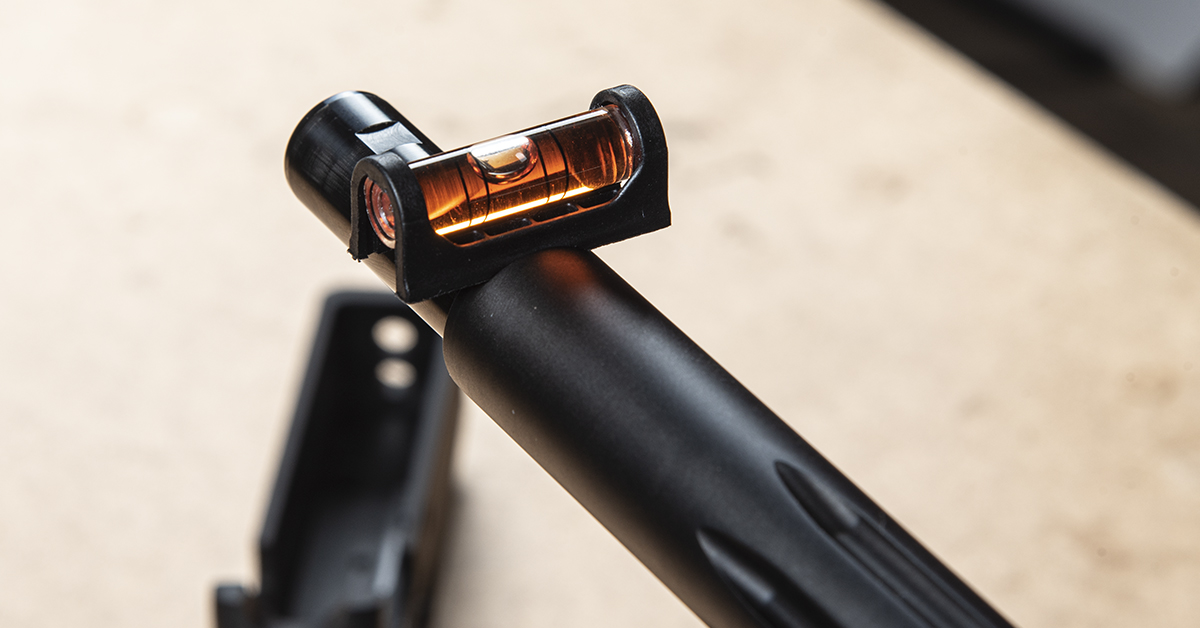
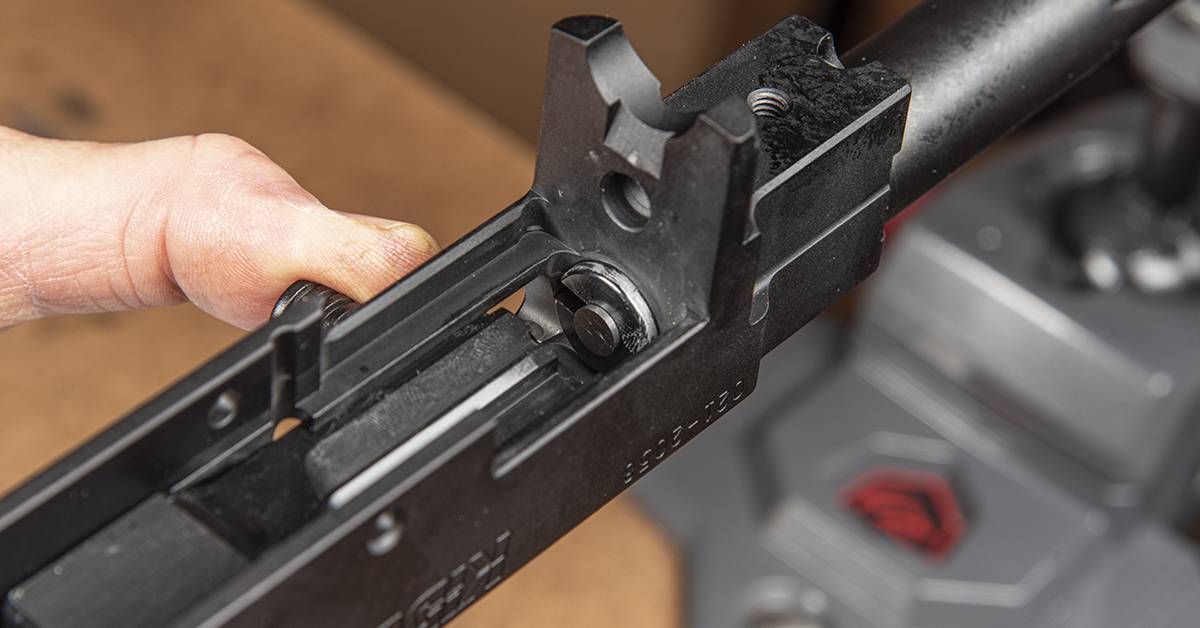
A key feature to the barrel’s quick changeability is this indexing flat. As the barrel is positioned into the receiver, this flat will engage the receiver and serve to properly align the extractor groove. During a first-time build of new components, begin installing the barrel by placing a level on the barrel’s indexing flat and position the barrel level in a bench vise.
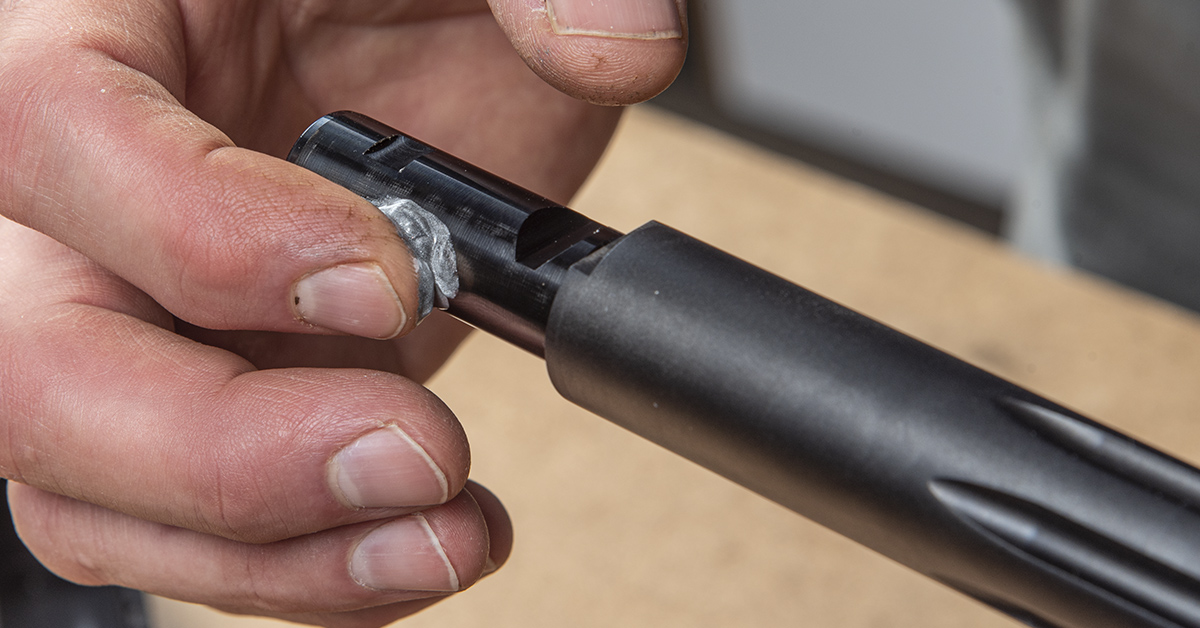
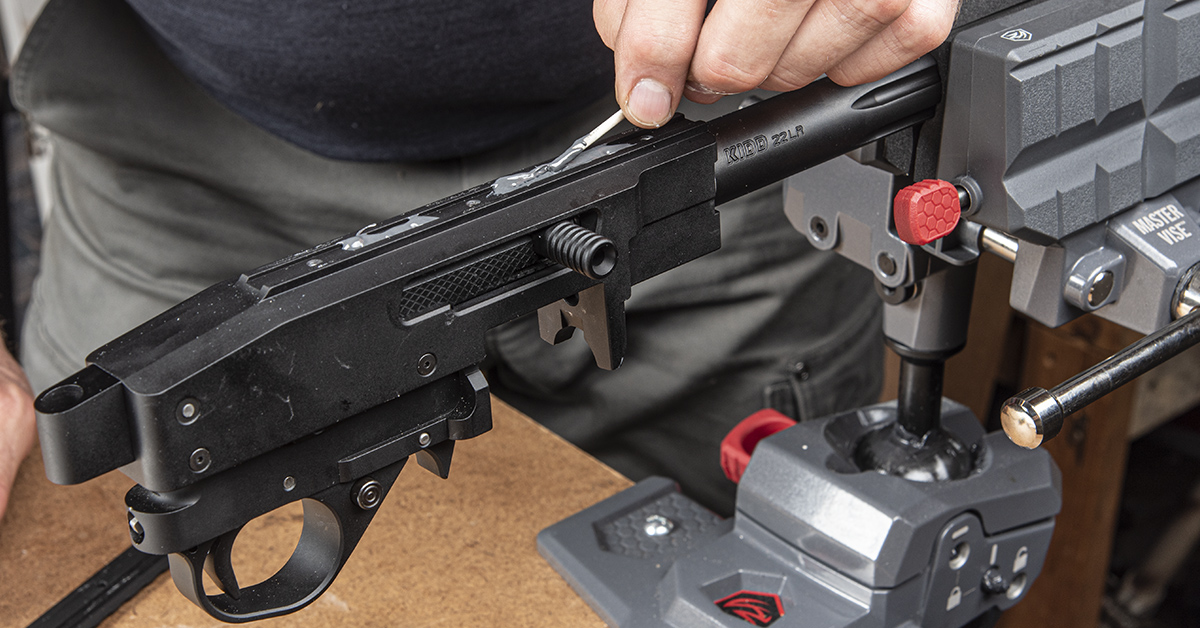
Place a light coat of anti-seize lubricant onto the barrel extension.
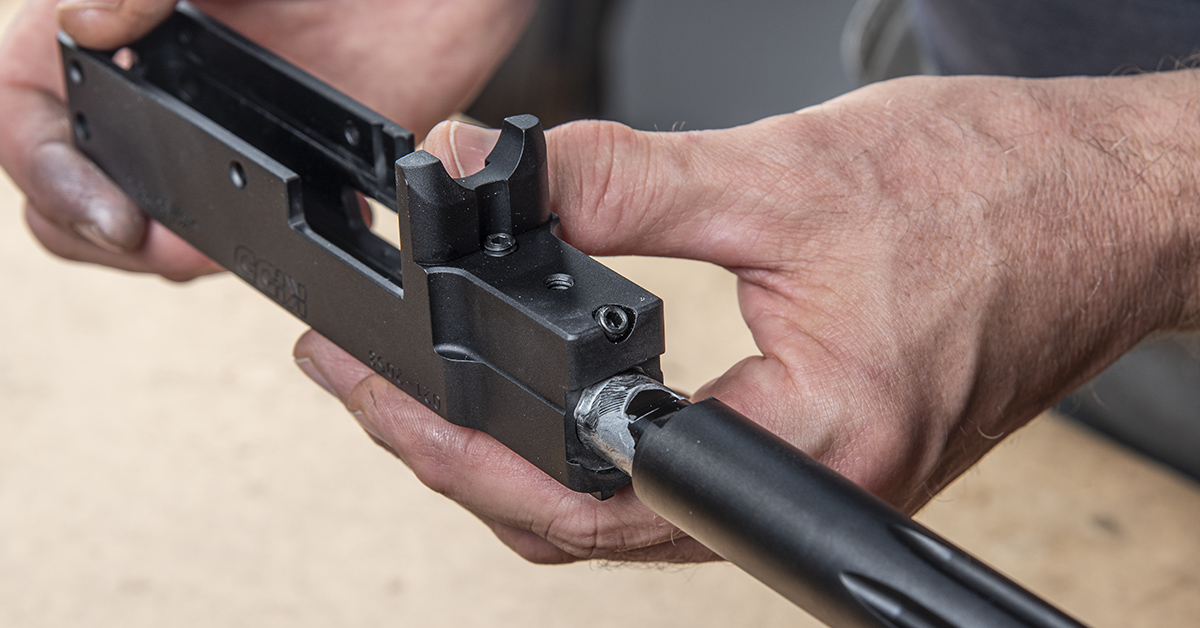
With the receiver inverted, slide the receiver onto the barrel extension. Our receiver slid onto the barrel extension easily. Being new parts, though, you may find that your receiver doesn’t slip as easily onto the barrel extension. If that is the case, place a level on the forward receiver flat, ensure that the receiver is level with the barrel, and then LIGHTLY tap the rear of the receiver with a soft-faced mallet to fully seat the receiver.
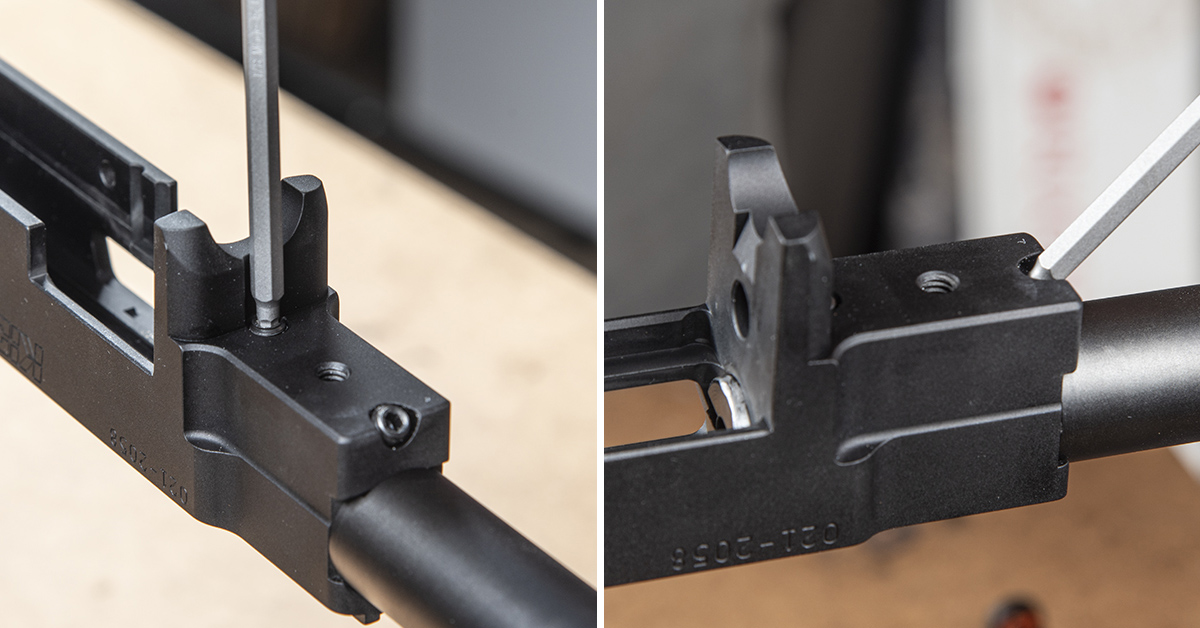
Using the KIDD recommended torque screwdriver, we tightened the barrel screws to the recommended 26.6 in/lbs.
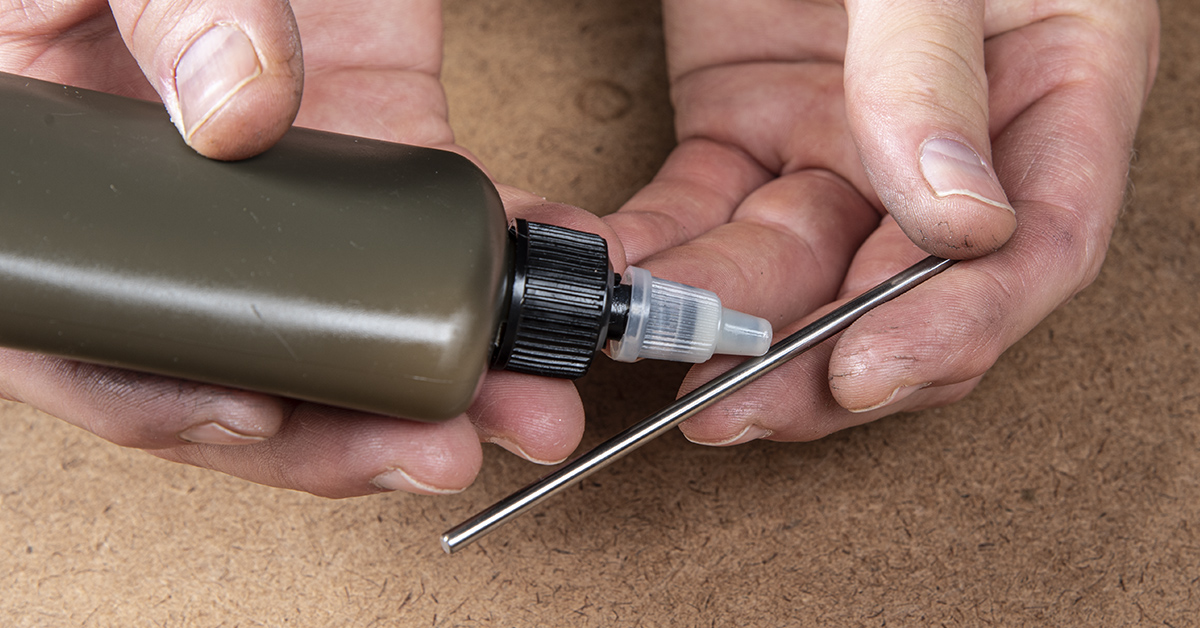
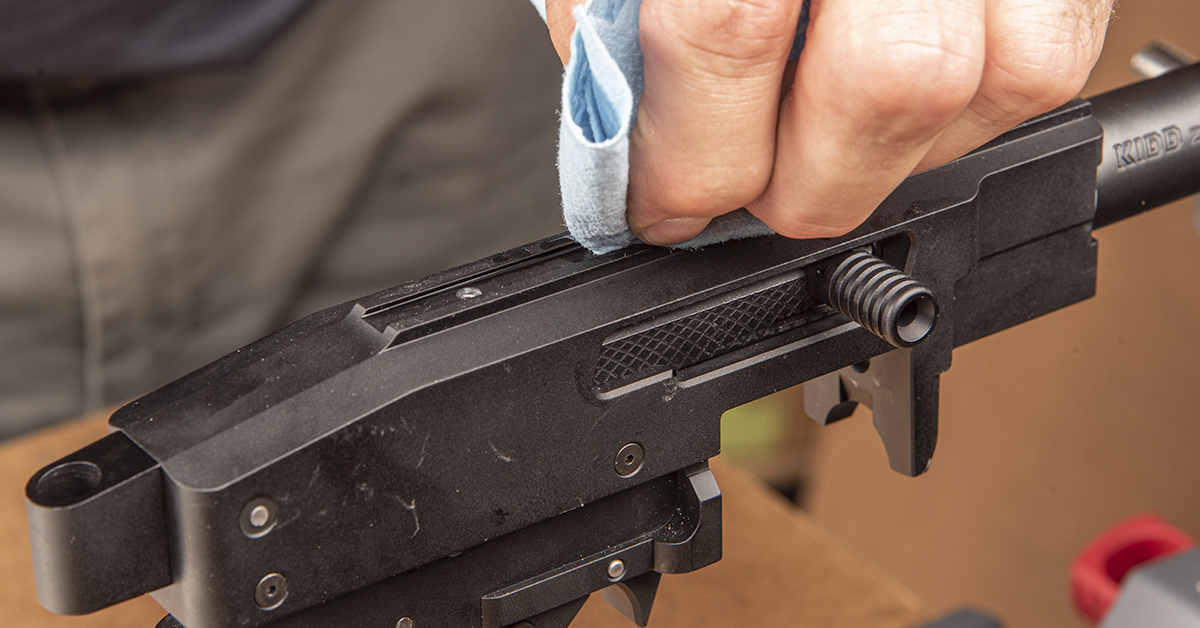
Lightly lubricate all parts during assembly. A small drop is usually all that is needed for each part. Spread the lubricant along the entire length of the parts. Lightly lubricate the guide rod and spring and then slide the spring onto the guide rod, seating it against the conical end of the rod.
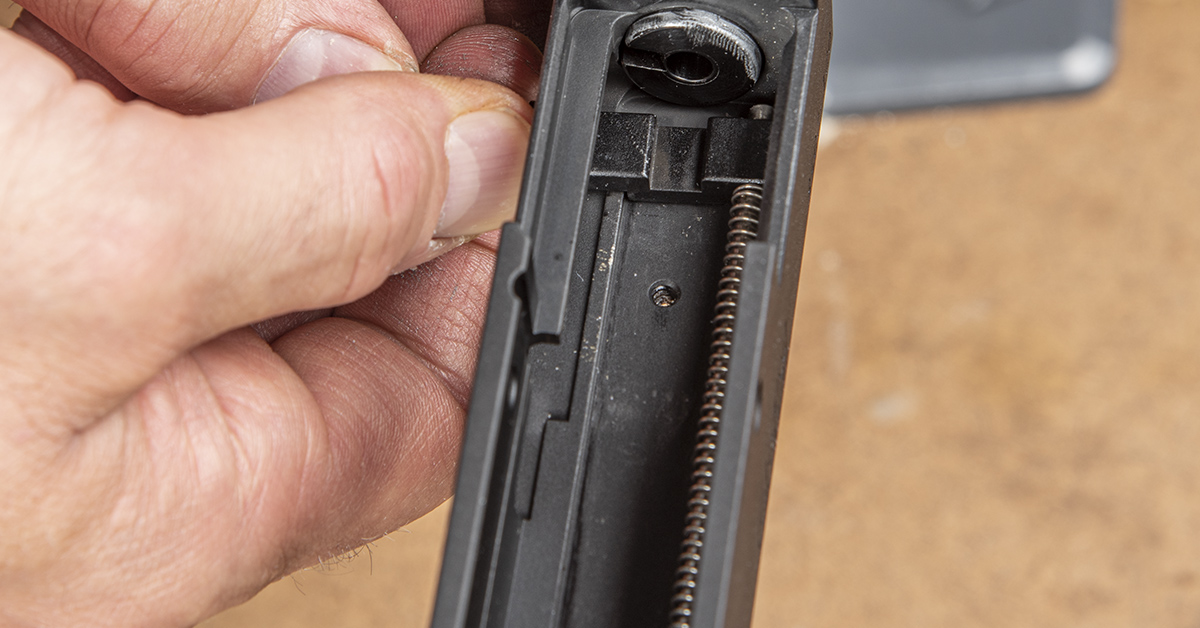
Slightly compress the spring and, while carefully maintaining control of the spring tension, install the bolt handle onto the guide rod. Continuing to maintain control of the spring tension, install the bolt handle guide rod assembly into the receiver through the ejection port. The conical end of the guide rod will seat at the rear corner of the receiver.
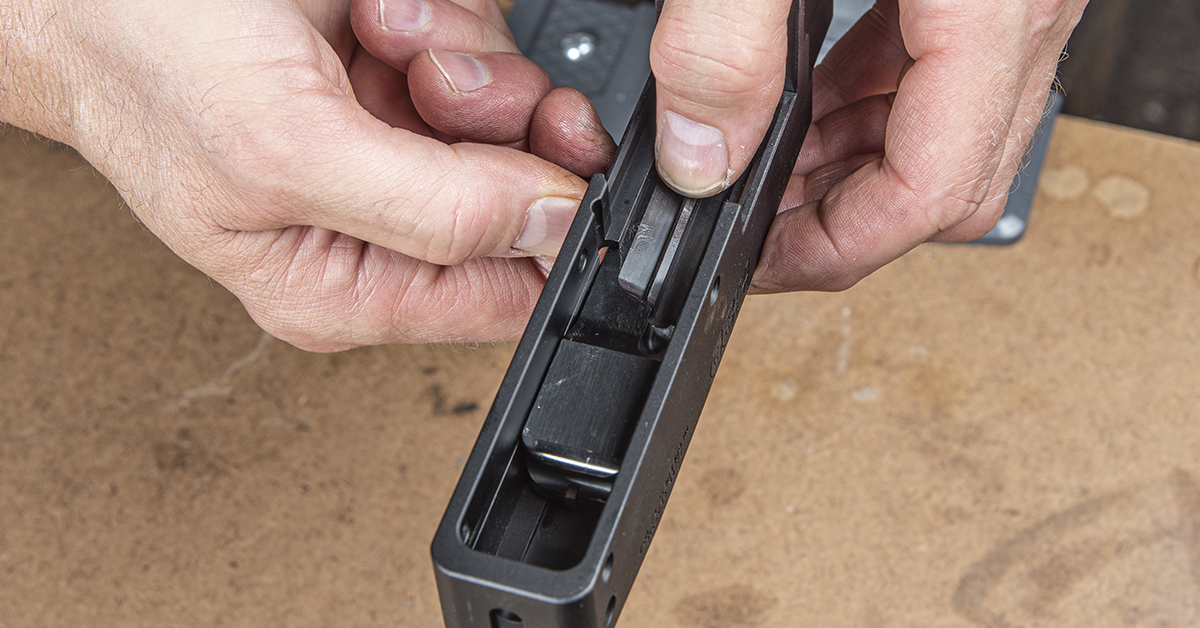
Pull the bolt handle rearward and install the bolt. The rectangular recess on the top of the bolt will capture the bolt handle and hold the components in place within the receiver.
The holes located in the receiver above the rear trigger pin hole accept the bolt buffer. Once installed, each end of the bolt buffer will be even with the receiver surface. A drop of oil may be needed to help it slide into position.
We checked headspace using GO and NO-GO gauges and found headspace to be within SAAMI specification.

Attach the KIDD rear tang assembly onto the rear of the receiver.
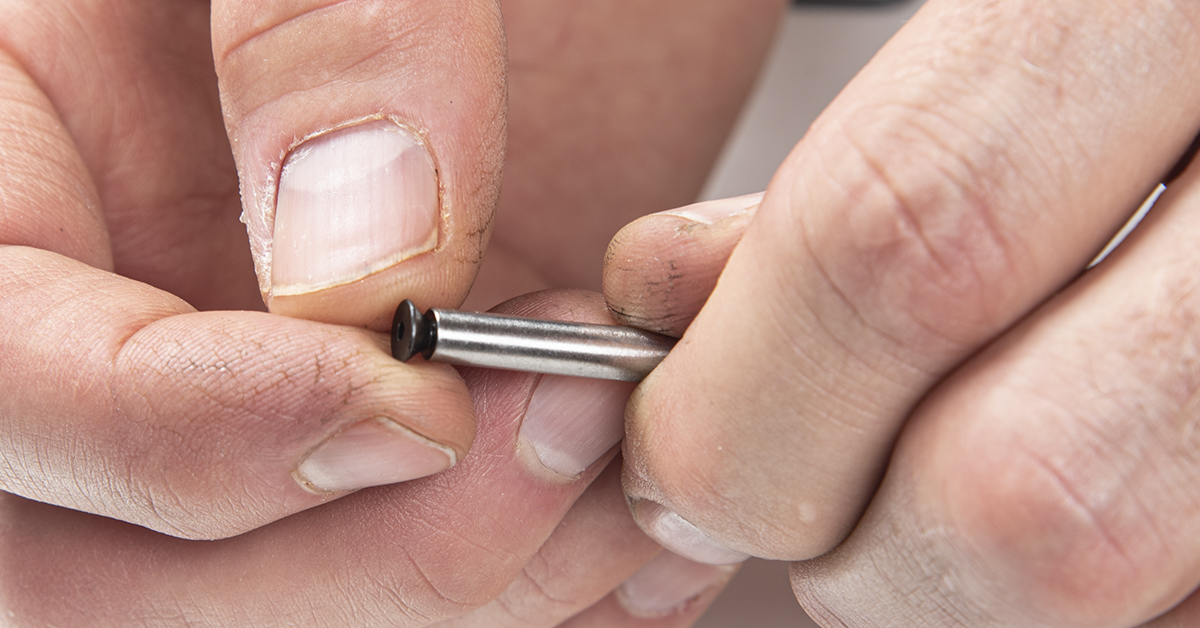
The KIDD trigger pins are threaded to accept a small screw on each end. These screws will hold the pins in place within the receiver. Install one screw into one end of each of the pins.
Place the trigger assembly into position within the receiver.

Align the holes and install the trigger pins.
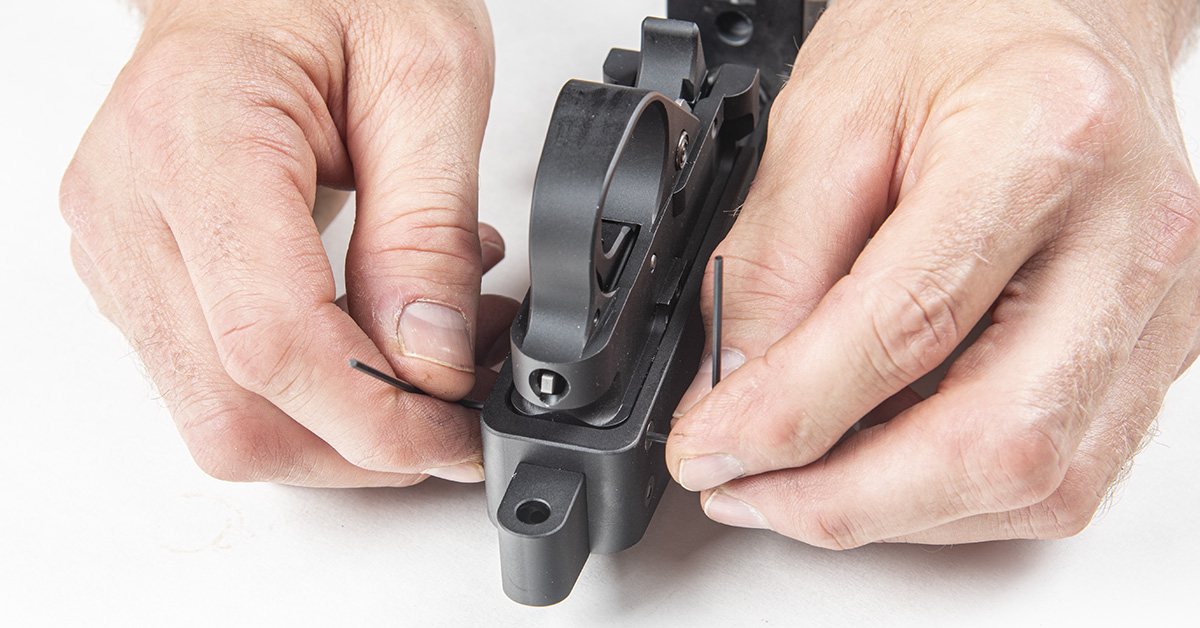
Install the remaining screws into each end of the trigger pins and tighten into place.
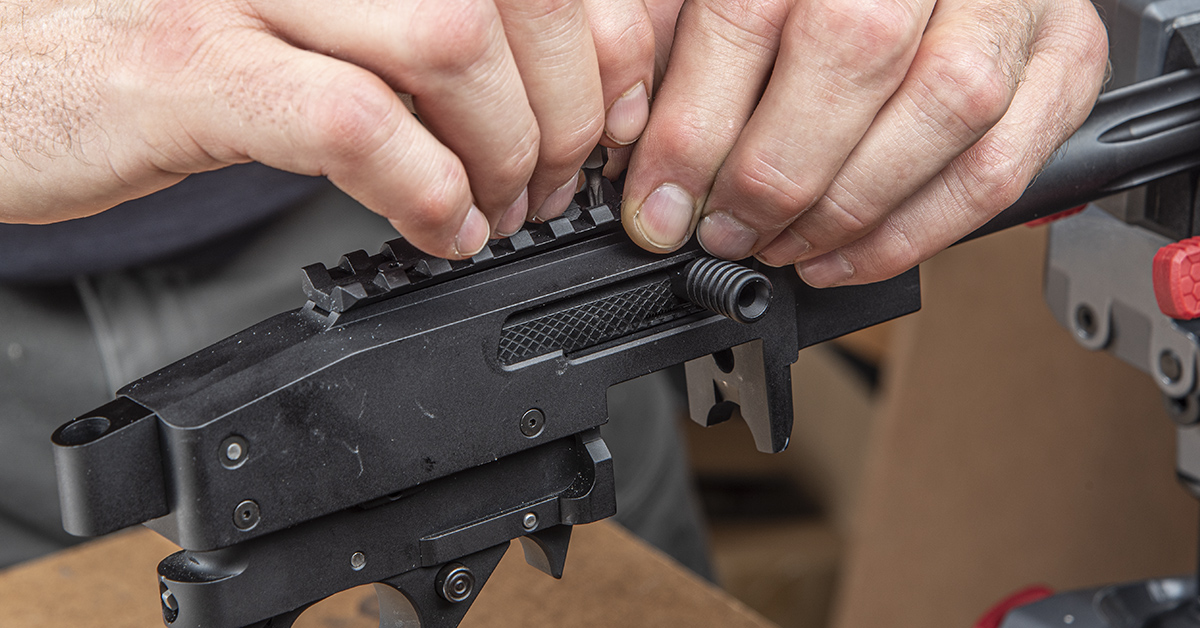
The KIDD Picatinny rail has a tenon on the bottom that engages a recess across the top of the KIDD Supergrade receiver. This makes for a very rigid interface that will certainly stay in place.
What we are going to do next is an optional step but something we prefer to do when mounting a scope. Our line of thought is that once installed, quality scope mounting components such as these are not going to be disassembled for years, if ever. Throughout its years of intended use, the rifle will be occasionally subjected to rough handling. A JB Weld bedding adds a little insurance that our rail will stay rigidly attached to the receiver for the long haul.
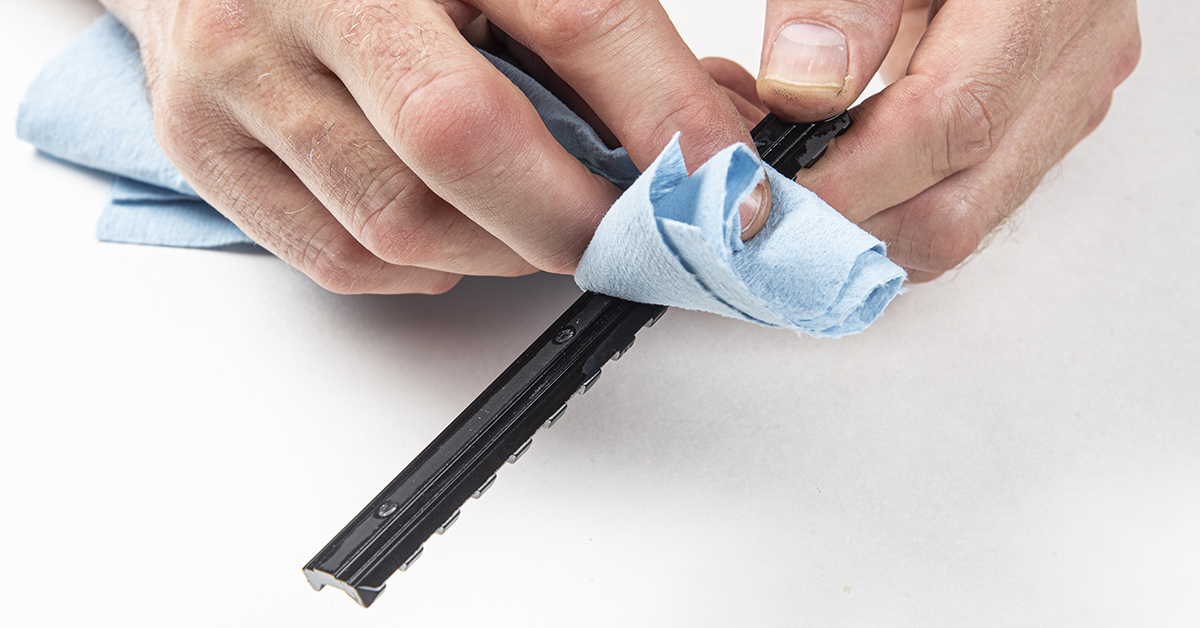
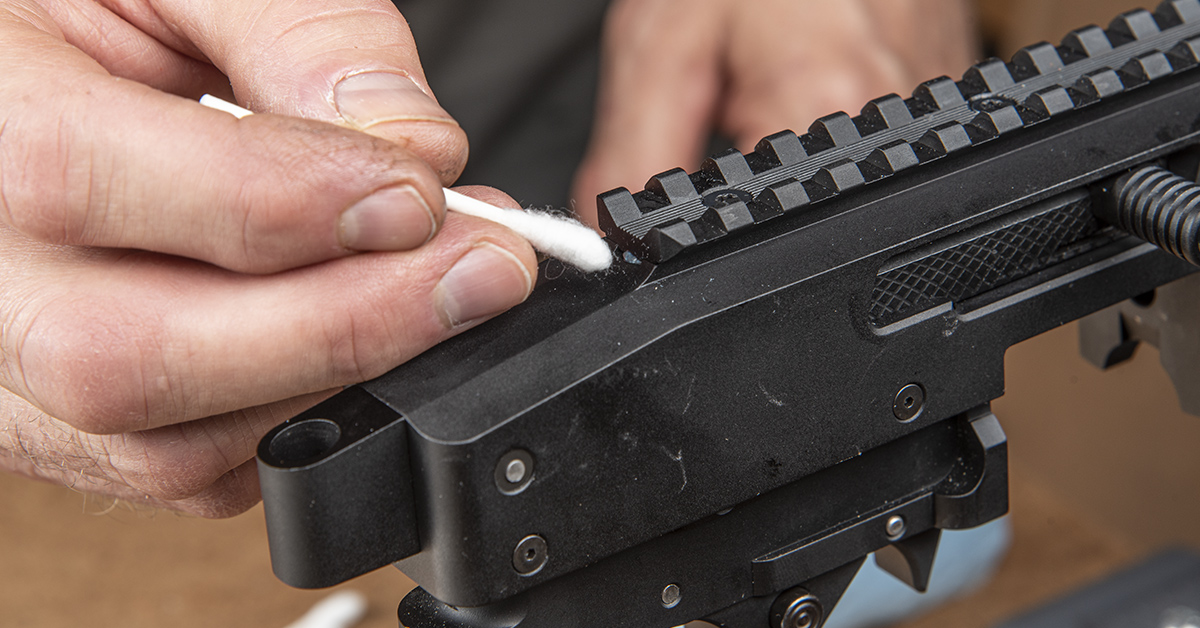
We begin by degreasing the bottom of the rail with denatured alcohol.
Use denatured alcohol to degrease the top of the receiver.

Mix equal parts of JB Weld. We added a touch of black dye from a Brownells Acraglass kit.
Apply a light coat of JB Weld into the bottom of the recess on the receiver that will accept the Picatinny rail tenon. During application, stop short of the rail mounting holes.

Degrease the rail screws and apply a drop of blue Loctite 242 to the threads.
Holding the rail just above the receiver and, not allowing it to contact the JB Weld, start threading each of the rail screws into the receiver. Work each screw a little at time, allowing the screws to slowly and evenly bring the rail into contact with the JB Weld. This will let the air escape and ensure even distribution of the epoxy.
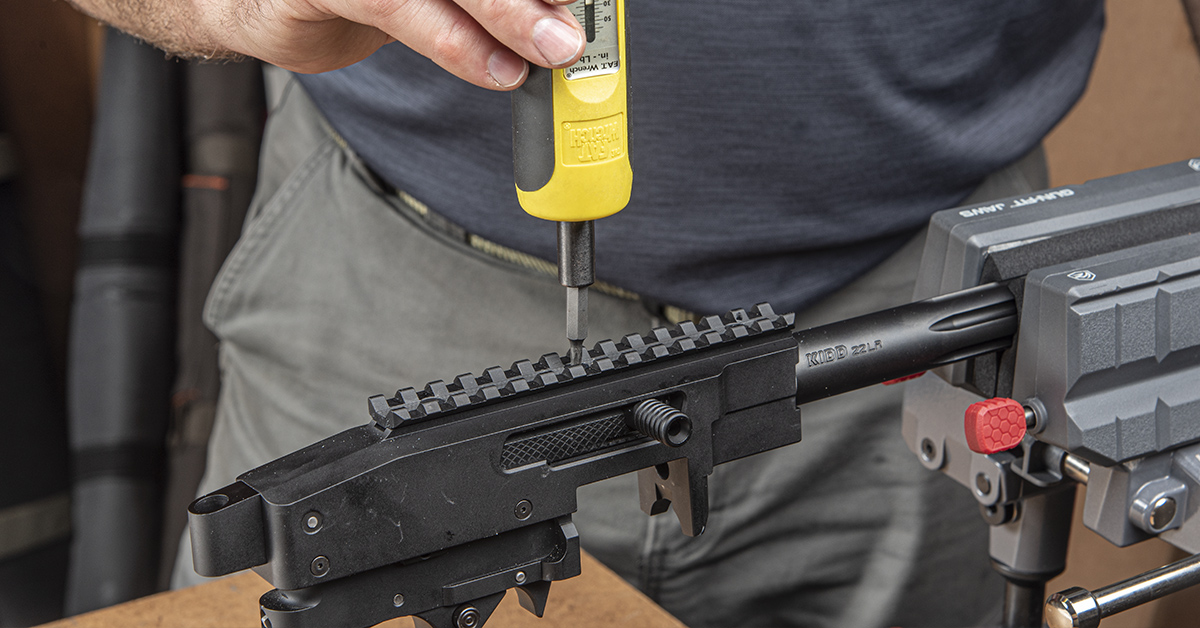
Use a torque screwdriver to tighten the screws to the manufacturer’s specification.
Clean up any excess epoxy that may have flowed out beneath the rail. Allow the epoxy proper time to cure. Chances are, the rail will never need to be removed; however, if for some reason it must be removed, a little heat from a heat gun will release the epoxy and not harm the anodized finish of the receiver or the rail.
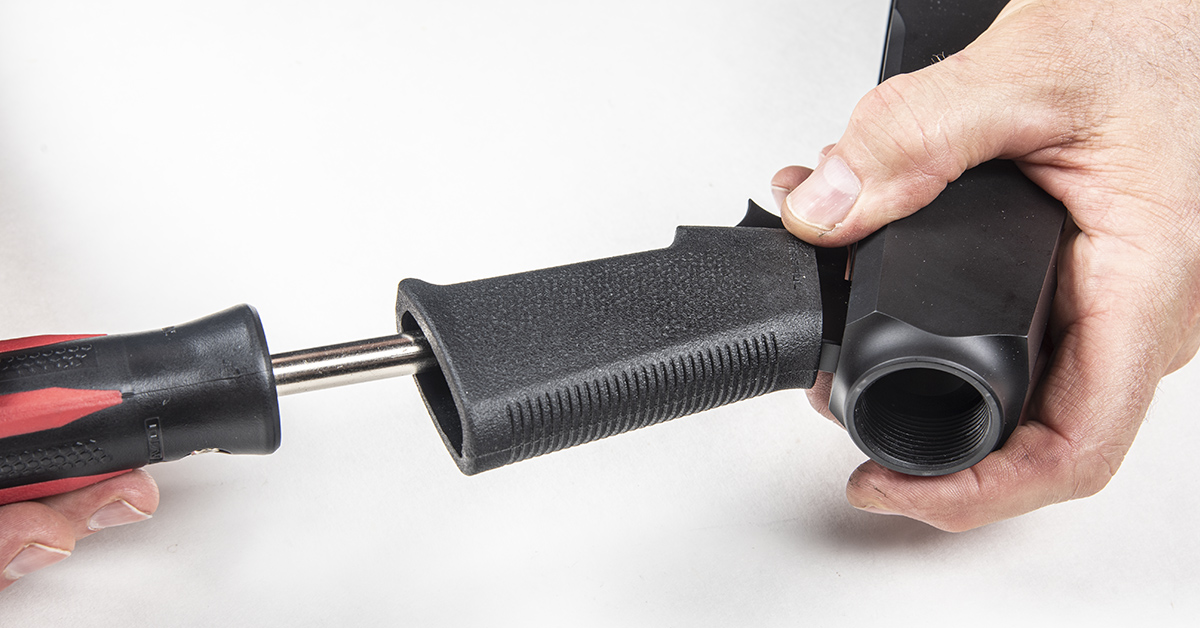
Install the pistol grip onto the chassis.
When the KIDD chassis is used with a KIDD Supergrade receiver, this screw is not used since the rear of the receiver is secured in place with the KIDD tang. This chassis can also be used with other 10/22 platform rifles. If this is the case, this screw is then tightened to further stabilize your receiver within the chassis and must be tightened prior to installing the buffer tube. Prior to installing the Supergrade barreled action, loosen this screw to ensure that it does not interfere with proper installation.
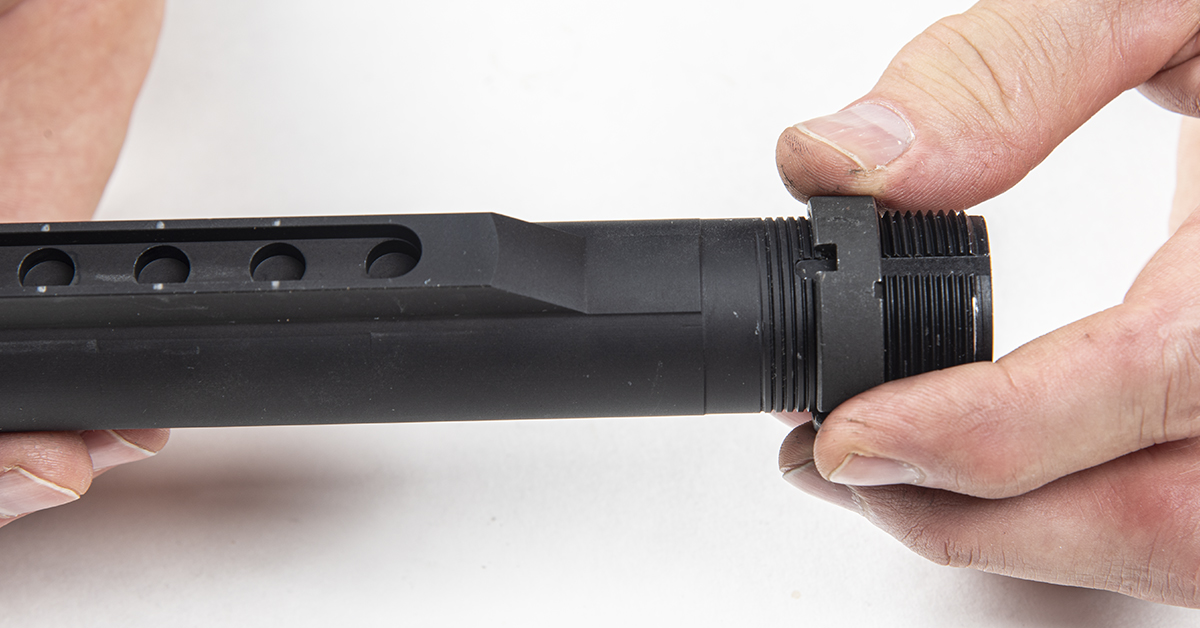
Thread the castle nut onto the buffer tube as shown.

Install the buffer tube onto the chassis.
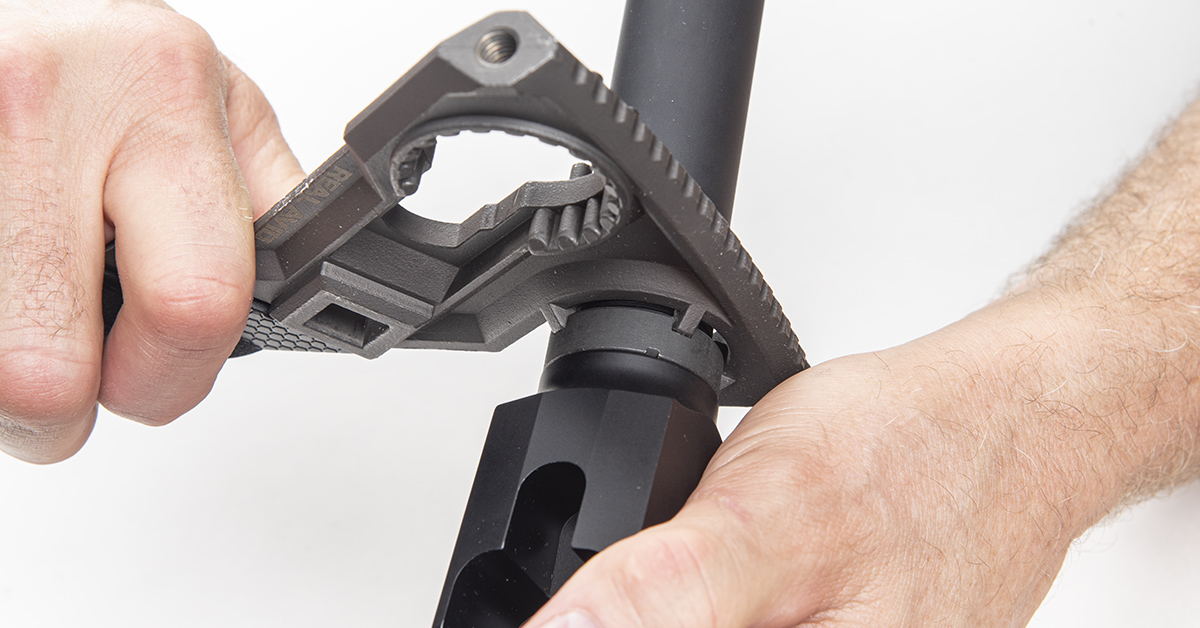
Properly orient the buffer tube with its adjustment holes centered at the bottom and then tighten the castle nut with a spanner wrench.
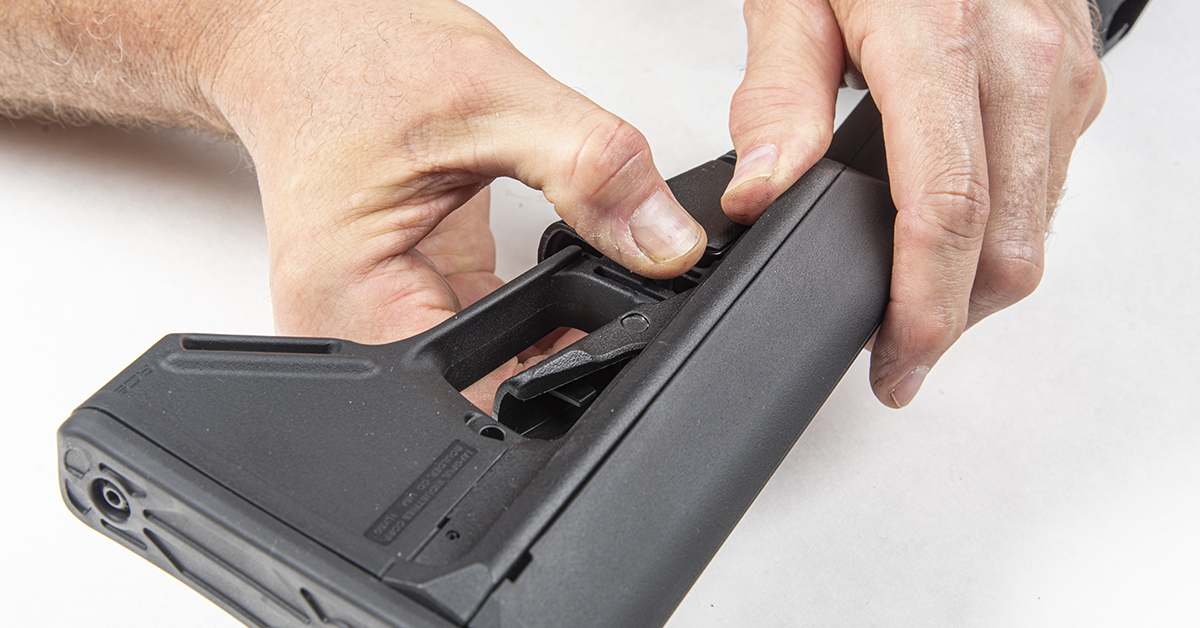
Grasp the release pin on the stock, pulling it downward and sliding the stock onto the buffer tube.
Center the safety button.
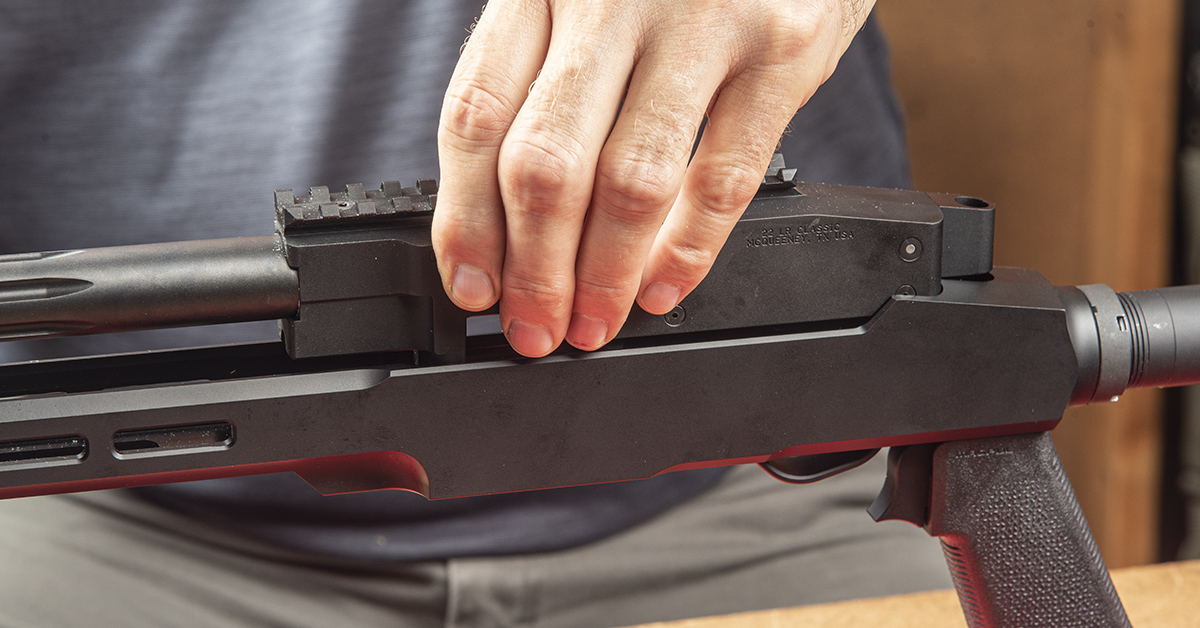
Install the barreled action into the chassis.
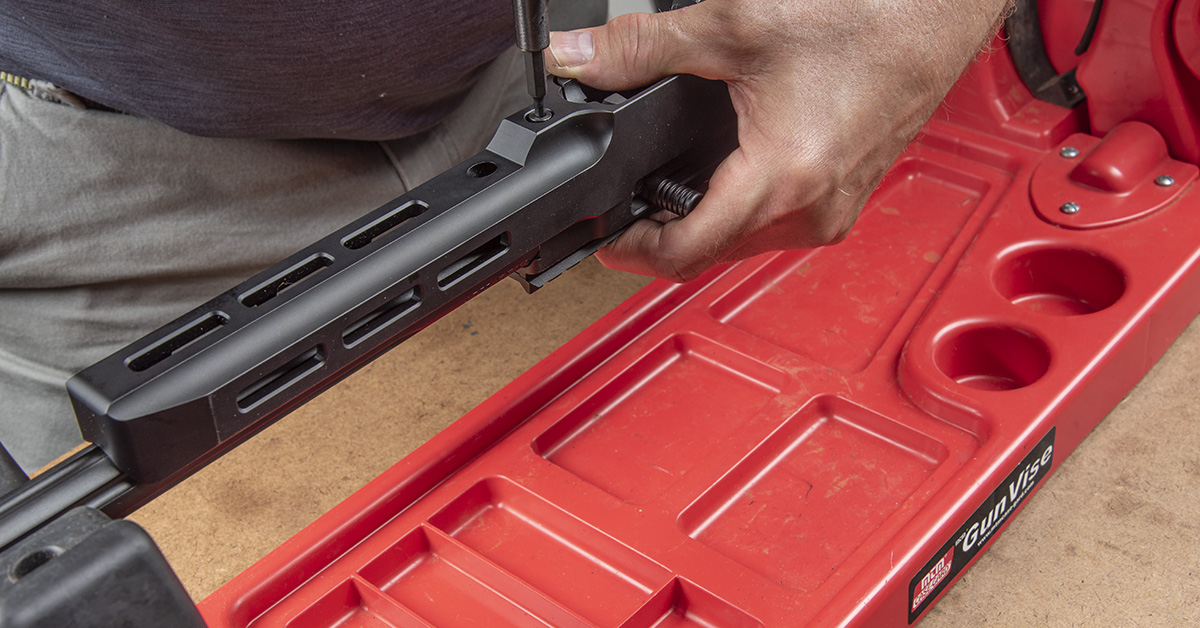
Tighten the action screw to 10 in/lbs. We have found MTM’s Gun Vise to be especially handy for supporting long arms when installing barreled actions and optics.
Tighten the rear tang screw to 10 in/lbs.

Once proper eye relief has been established, tighten the ring screws to the manufacturer’s specification.
With the build complete, our first thought was we can’t get to the range fast enough. We didn’t waste any time getting there, but before we talk about how it went, a word about the build experience is in order.
Simply put, this was easy. Following the directions supplied by KIDD, everything went together “unexpectedly” as described. I say unexpectedly because many, like myself, who have been doing this for a very long time know all too well that when a new gun part says “drop-in fit” it usually doesn’t. And if it’s labeled “gunsmith fit” then look out!
Refreshingly, that was not the case here. The instructions provided by KIDD were clear and easily understood. Everything went together as described — enjoyable and with no hassle.
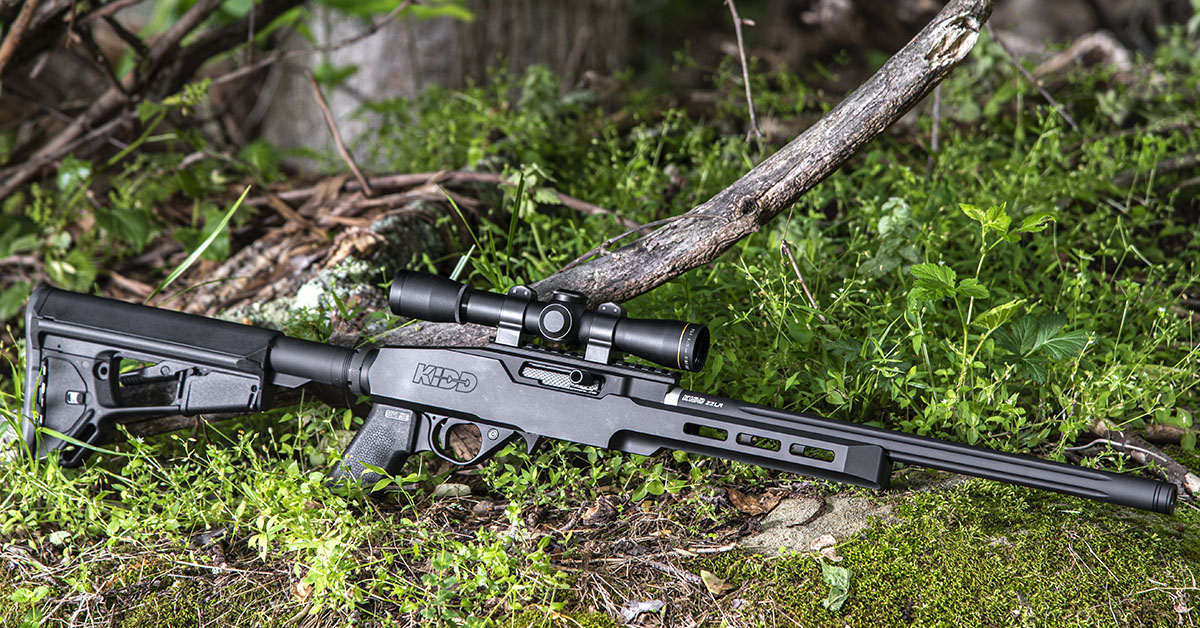
Our first impression of the assembled rifle was that the KIDD chassis certainly sets this 10/22 clone apart from the crowd. This is one sharp-looking rifle that feels good in the hand. Also, the Supergrade rifle accepts standard Ruger 10/22 magazines.
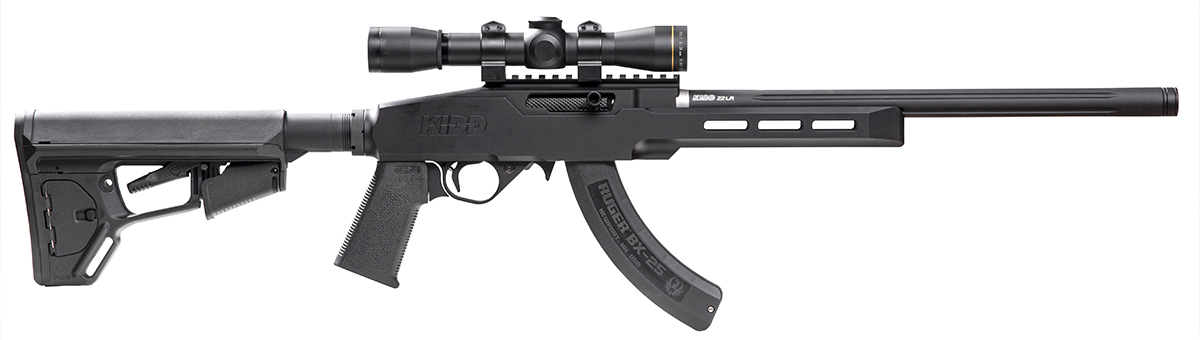
KIDD offers several trigger options for 10/22 platform rifles, both in single- and two-stage designs. We opted for the more traditional single-stage trigger, which arrived with a factory-set pull weight of 1.5 lbs. In operation, we found this trigger to be creep-free, very predictable, and it makes this rifle a joy to shoot. This trigger is also a drop-in fit for any 10/22 platform rifle.
The bolt handle is 1/4-inch longer than the traditional factory bolt handle. The extra length makes it much easier to grasp and to operate the action. The guide rod is precision ground to a tolerance of 2/10,000-inch over its entire length. With a surface hardness greater than a file, this, combined with the KIDD bolt that is CNC-machined from a billet, and polished and radiused for effortless cycling, makes for the smoothest operating 10/22 we have ever experienced.

The KIDD rear tang assembly provides some needed rigidity to the rear of the action.

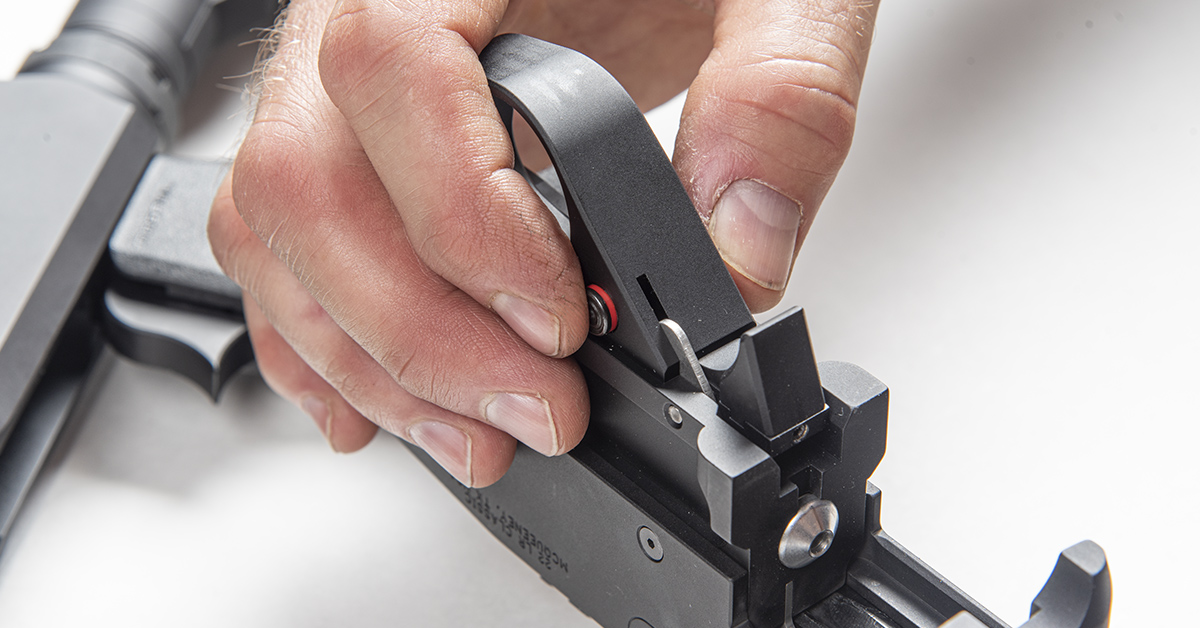
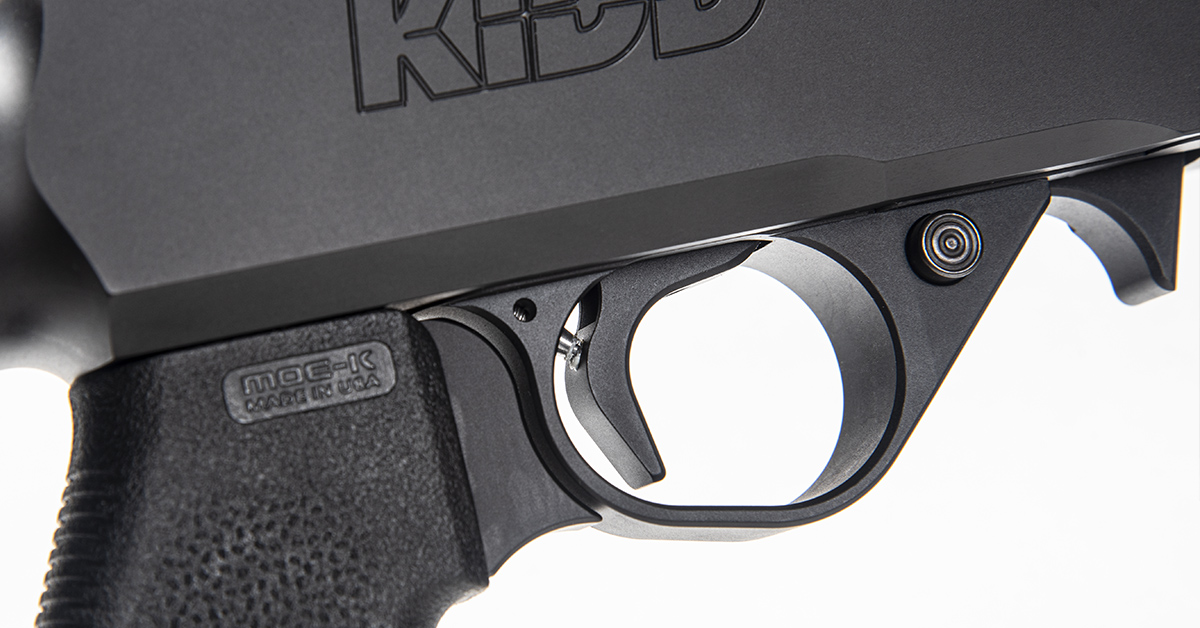
One of the features of the KIDD trigger assembly is the ability to change the length of the magazine release lever. Pictured here is the medium-length lever. Also available is the longer speed lever, which is ideal for target shooting, and the shorter sportsman lever, which is perfect for field use as it is tucked away to prevent accidental release of the magazine. All it takes is the turn of a set screw to change from one lever to another. This system is also available for factory Ruger triggers.
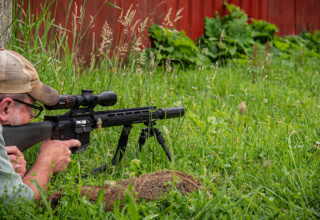
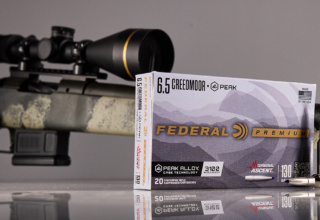
With a Leupold fixed power 4×28 rimfire scope mounted atop of our Supergrade rifle, we began our range test at the 50-yard mark with the heavy barrel installed. Testing several different loads from various manufacturers, the rifle shot each of the different loads well and functioned flawlessly. Of course, some ammo grouped better than others, but there didn’t seem to be anything that this rifle didn’t shoot reasonably well. Norma TAC-22 was the most accurate load we tested, with Eley Match not far behind. Standard velocity CCI and Federal also shot very well.

KIDD promises an accuracy guarantee of a 5-five shot group to be a half-inch at 50 yards. On the range, we found that five shots within half-inch at 50 yards was easily obtainable even with our bifocal glasses and a fixed 4X scope. The rifle zeroed easily and quickly began producing the kind of groups we expected. This was with the heavy barrel. How would the lightweight barrel perform and how much would the point of impact shift following the barrel change?
To find out, we took the target pictured above and placed it back at the 50-yard mark before swapping barrels at the shooting bench.
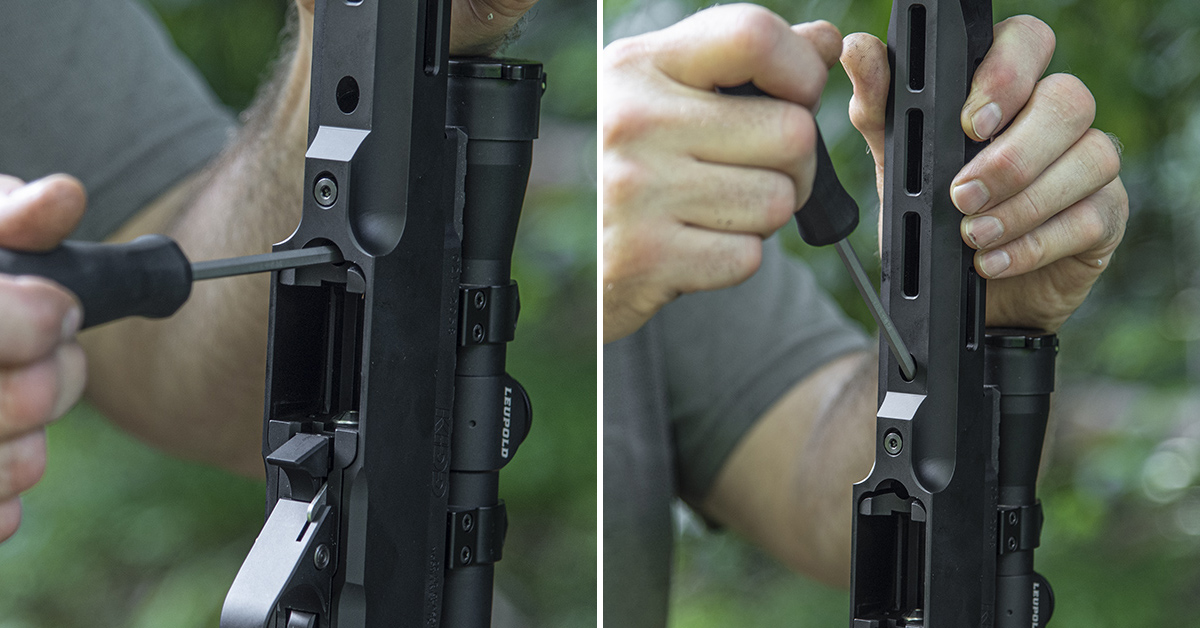
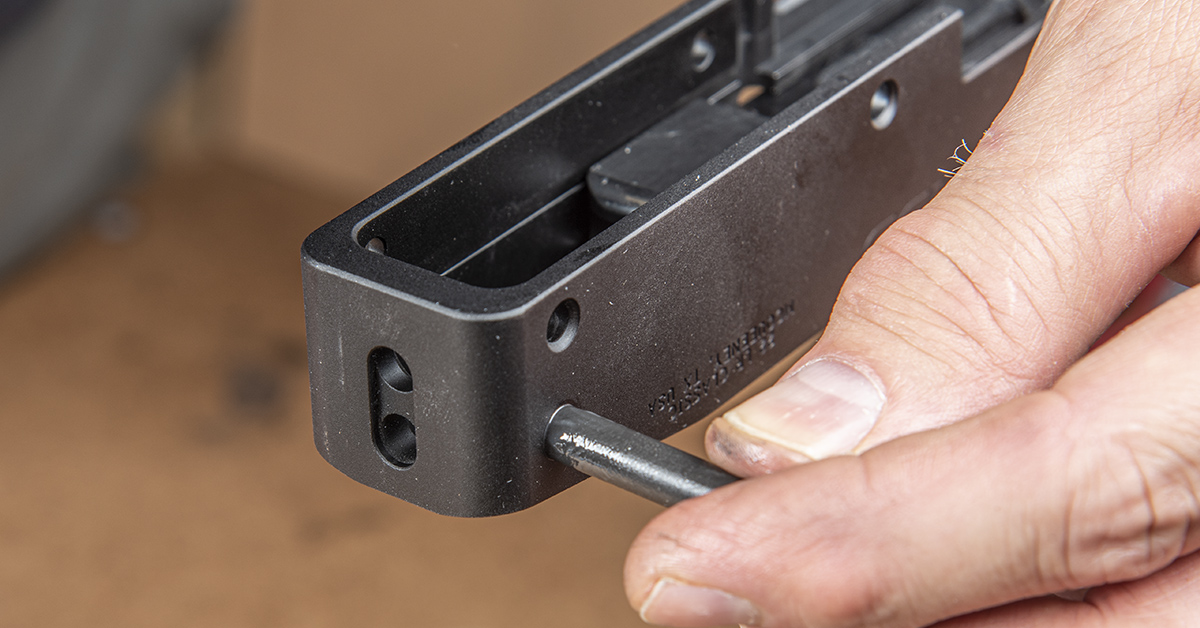
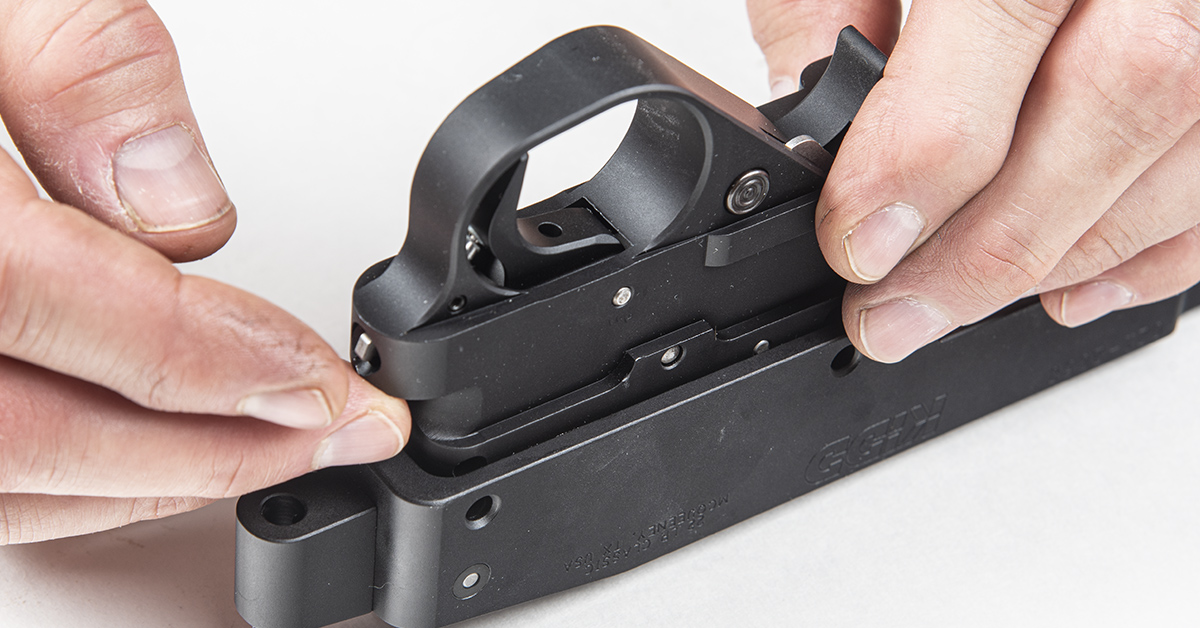
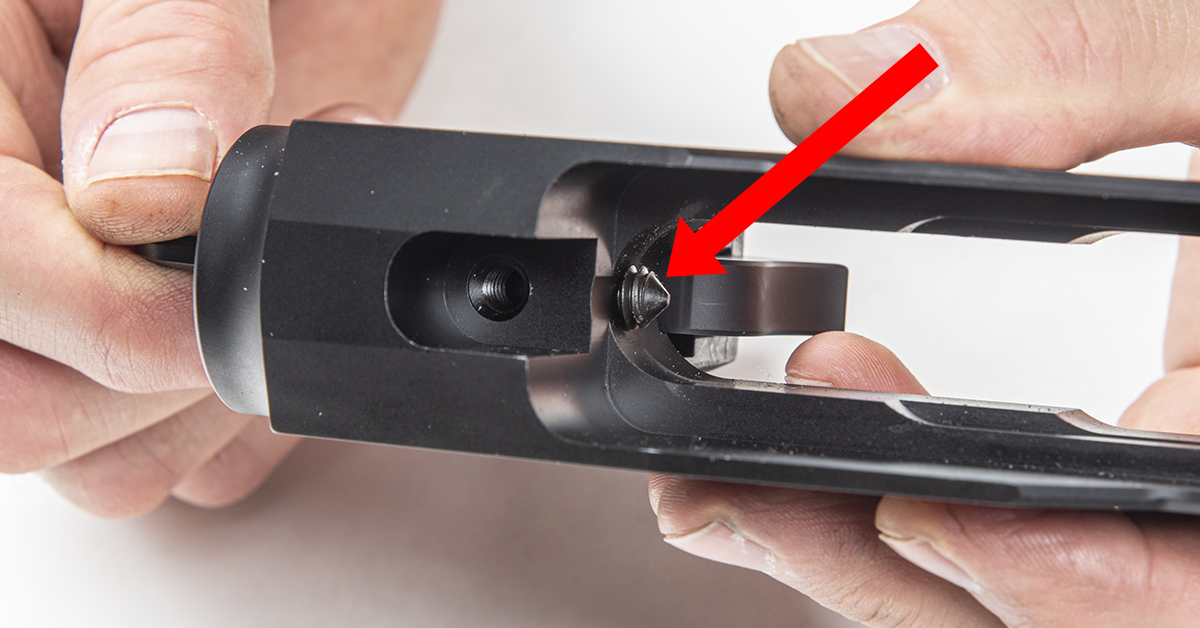
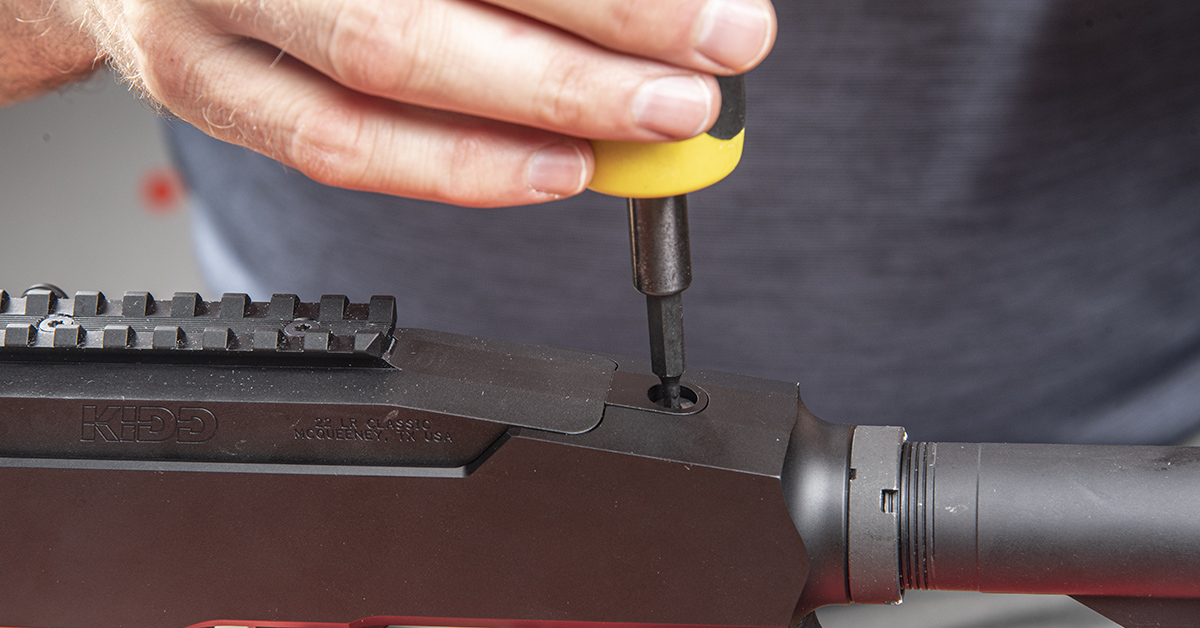
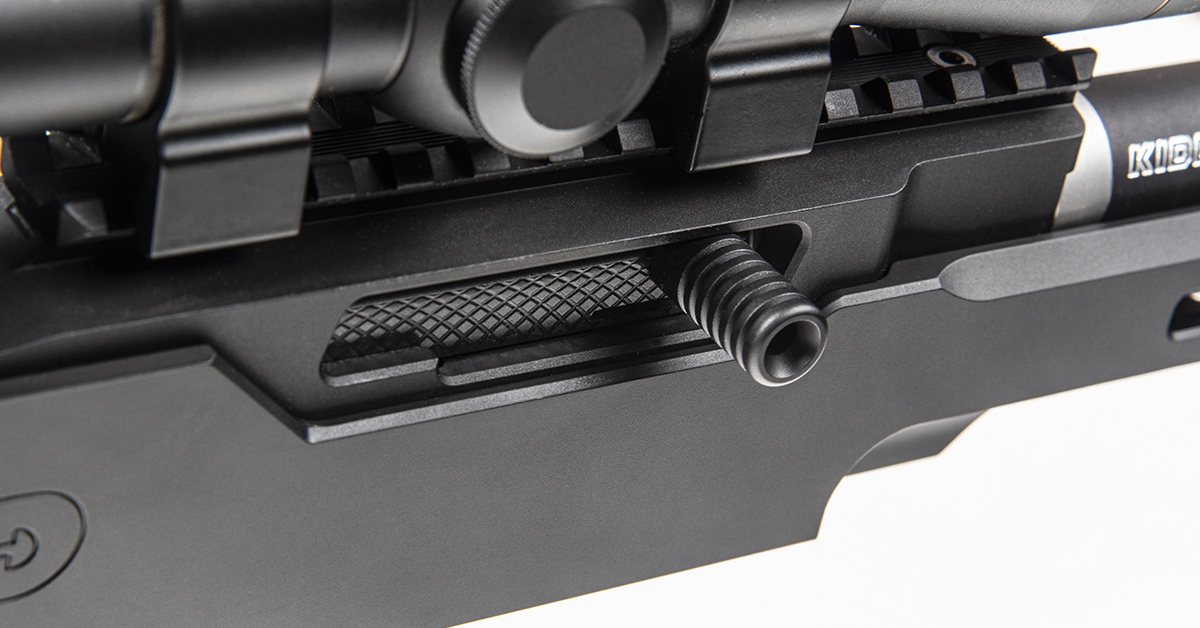
The KIDD chassis provides easy access to the barrel mounting screws. This allows for a barrel swap to be done in seconds without having to remove the barreled action from the stock. Using the KIDD recommended torque screwdriver, loosen the barrel mounting screws.
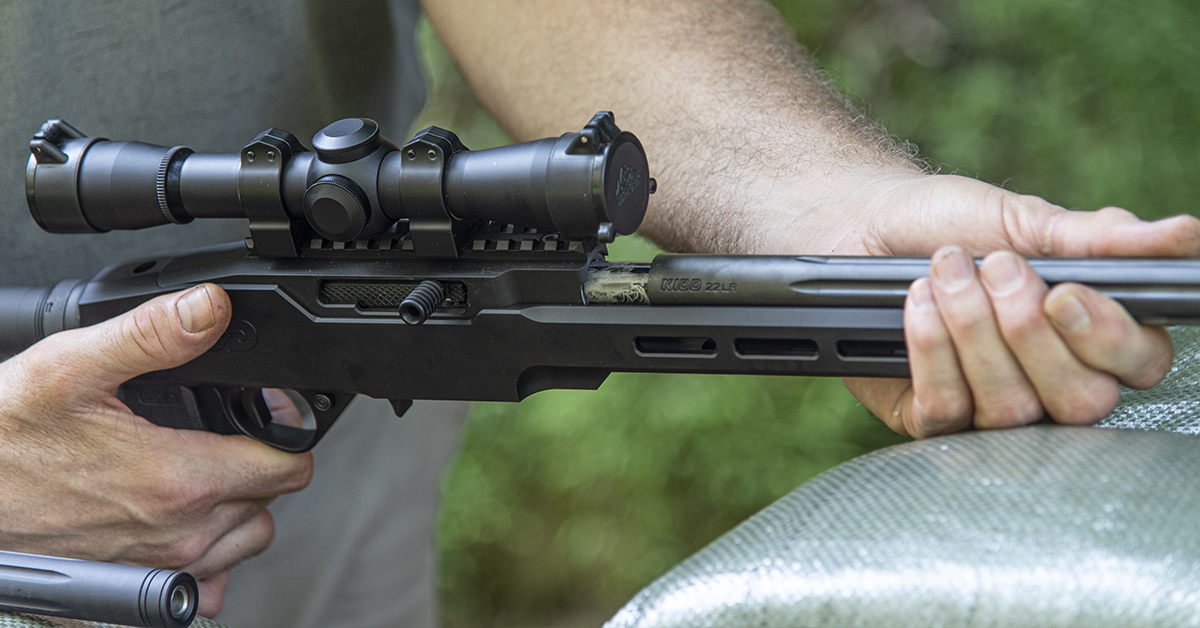
Slide the barrel forward and out of the receiver.
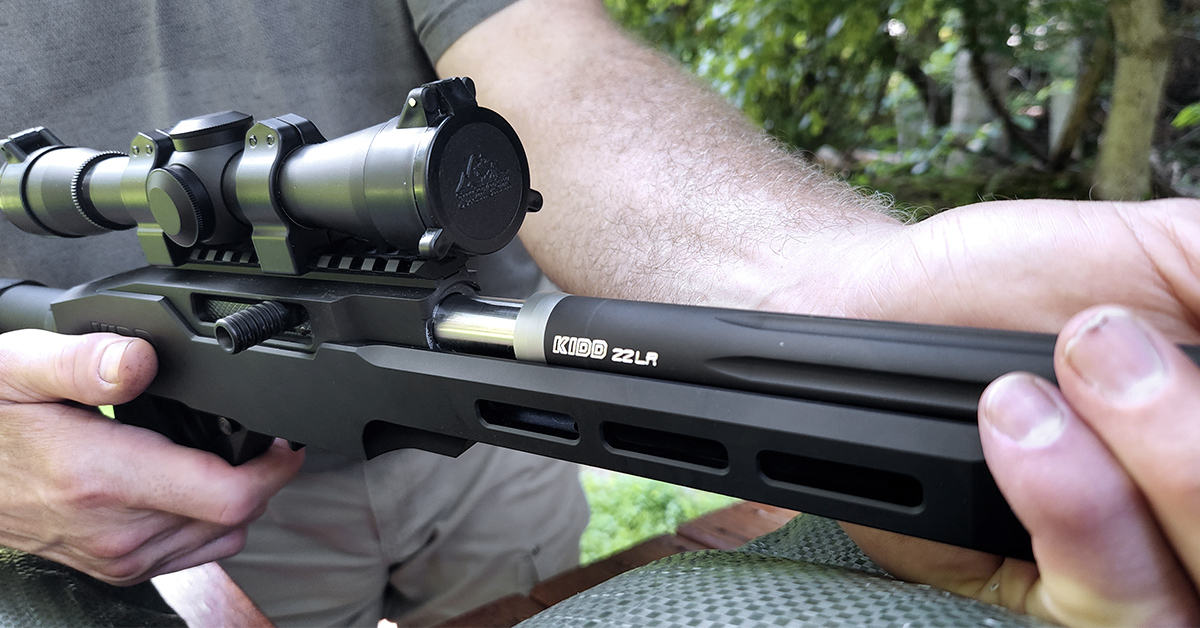
Slide the new barrel into the receiver. The indexing flat will ensure that it is in the proper position with the extractor slot in correct alignment.
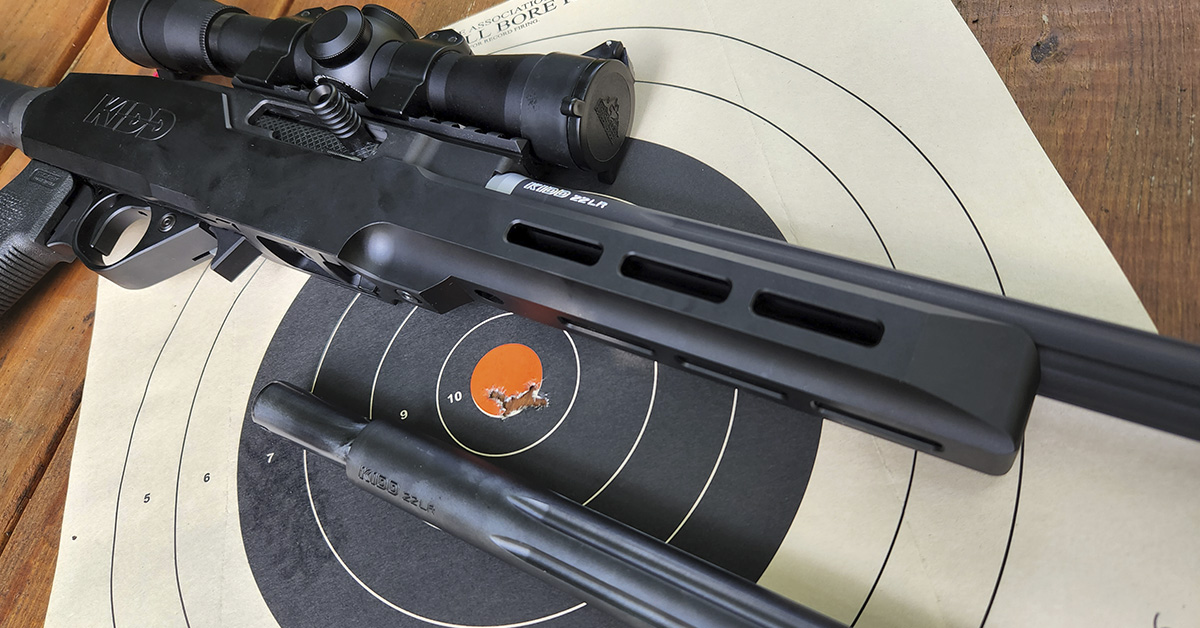
Immediately following the barrel swap, we fired five rounds of the same ammunition as used for the first 50-yard group. All five rounds fell into the previous group, producing a 10-shot group measuring .612 inches from two different barrels with no sight adjustments!
This all started with a phone call to KIDD Innovative Design. From that initial phone call and moving forward through the build process, we found this to be an enjoyable, hassle-free project that culminated at the range with our rifle performing better than expected.
KIDD Supergrade 10/22 Rifle Build Components
- Single-stage trigger unit set at 1.5 lbs.
- Extended (medium target) magazine release lever
- .22 LR bolt, black scalloped
- Bolt handle charging assembly with guide rod and springs (black ring)
- Supergrade ultra lightweight barrel, fluted, .870 diameter
- Supergrade bull barrel, fluted, .920-barrel diameter
- .22 LR bolt buffer
- Threaded receiver pins
- Supergrade receiver
- Takedown screw, black
- Receiver rear tang attachment, black
- Paramount torque limiting screwdriver
- Tactical Chassis
- Magpul ACS-L buttstock with buffer tube and castle nut
- Magpul Grip MOE-K AR-15