Developed for middle-ground centerfire pistol chamberings, Ruger’s RXD910Ti suppressor gives you options, and it inspired our wicked lever-action makeover
by Rob Reaser
Those of you who keep your ears to the ground for all things firearms recall that Ruger introduced two branded suppressors last year. The Ruger RXD series suppressors, developed in conjunction with Dead Air Silencers, debuted with two models — the RXD22Ti for small-caliber rimfire applications (such as Ruger’s vaunted 10/22 platform) and the RXD30Ti (a 30-caliber variant ideally suited for Ruger and Marlin’s bolt and lever-action models).
Ruger developing its own suppressor line makes sense given the exploding popularity of suppressors and the rising consumer demand for regular-production firearms that feature barrels threaded at the factory for expedited suppressor installation.
Last year, I spent considerable time testing out the RXD22Ti as part of a custom 10/22 build. Loved it. Reliable cycling, pinpoint precision, and exquisite sound suppression made for a pleasing shooting experience on the bench and in the field in pursuit of squirrels.
This year, Ruger expands its RXD suppressor series with a unit that addresses the needs of those with a penchant for pistol-caliber arms — specifically, 9mm and 10mm guns.
I liken the new RXD910Ti as a crossover-type titanium suppressor. As mentioned, it is built primarily to optimize sound suppression for the 9mm and 10mm pistol calibers, yet it is also rated for such cartridges as the 5.7x28mm, 38 Special, 357 Magnum, and even the 300 Blackout and 400 Legend rifle cartridges. Further, this suppressor, with its 10mm bore diameter, is full-auto-rated for 9mm, 10mm, 5.7x28mm, and 300 Blackout subsonic rounds.
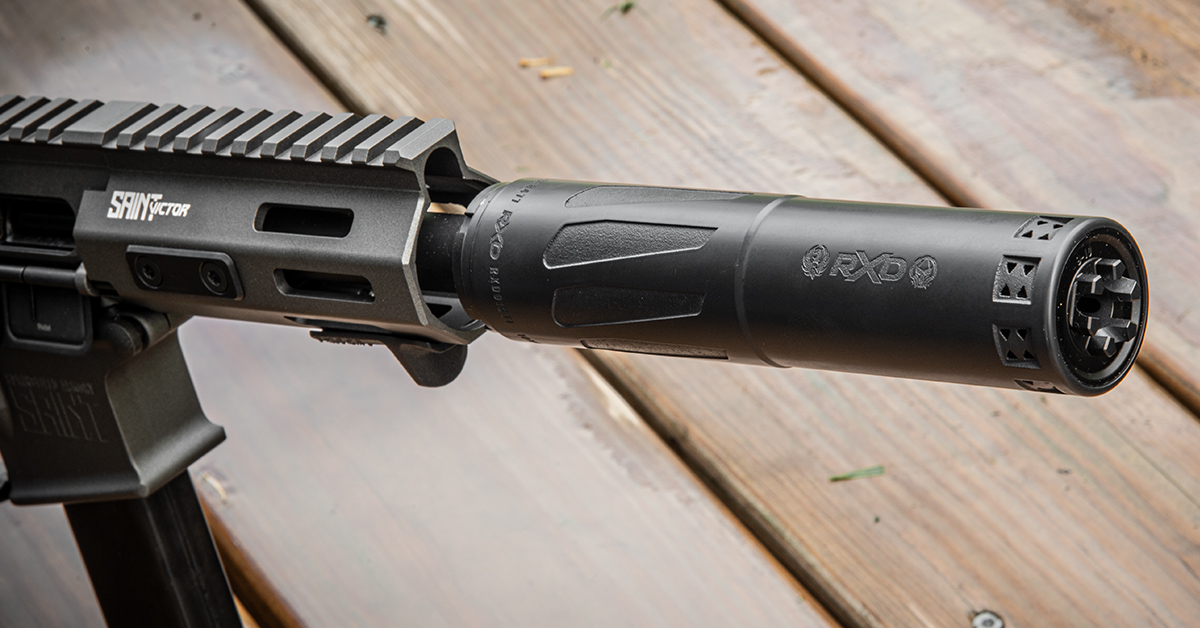
My first run with the RXD910Ti came when I fitted it to Springfield’s Saint Victor 5.5 PDW. With its short 7.7-inch length, the suppressor proved ideal for the close-quarter defense environments for which the PDW excels, and it certainly boosted the aesthetics of the gun’s diminutive barrel and handguard configuration.
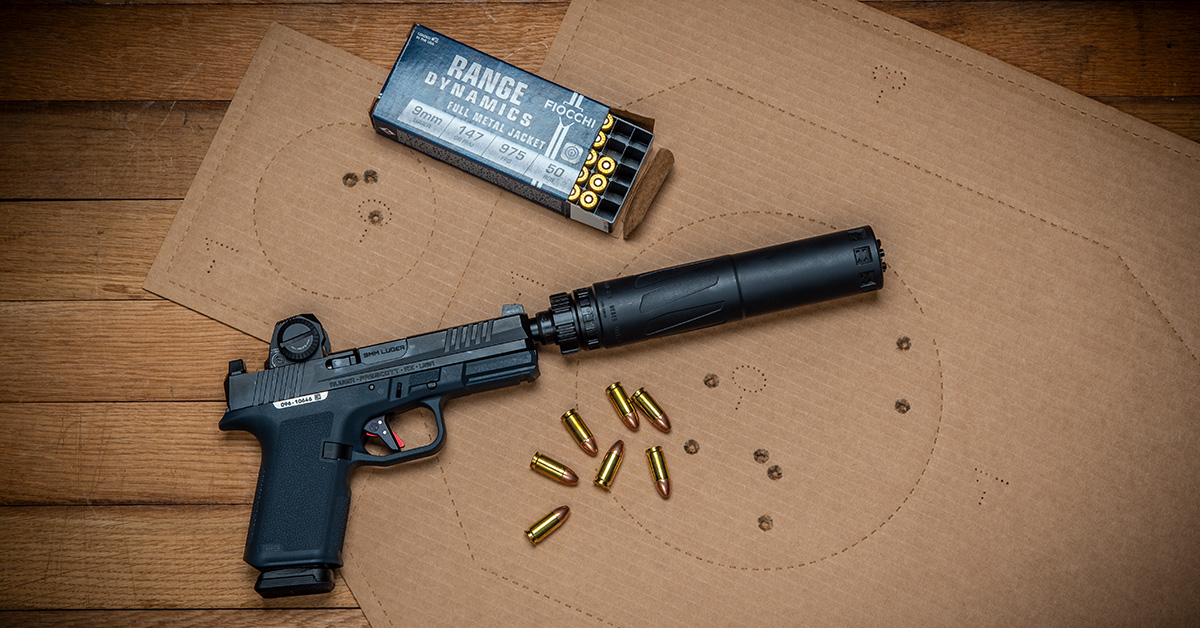
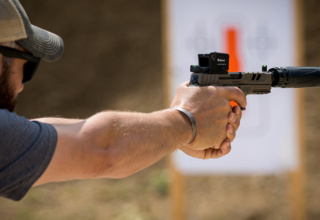
My next fling with the RXD910Ti occurred while testing a couple upgrades to my Ruger RXM 9mm: Timney’s Alpha Competition Replacement Trigger and Steiner’s new MPS-C Micro Compact Enclosed Emitter red dot. Here is where the advanced construction techniques, design, and materials comprising the RXD910Ti truly shined. At 11.3 ounces by my scale and as long as the RXM pistol with the booster/piston (Neilsen Device) installed, the RXD910Ti was barely noticeable. Credit for this ultralight suppressor design goes to the suppressor’s 6AL4V titanium material and Dead Air’s efficient 3D-printed Triskelion gas management system. Simply put, this suppressor is remarkably light for its size with no compromise in noise management. I ran the RXM with several Fiocchi Range Dynamics loadings and, with the booster in place, never experienced any cycling issues.
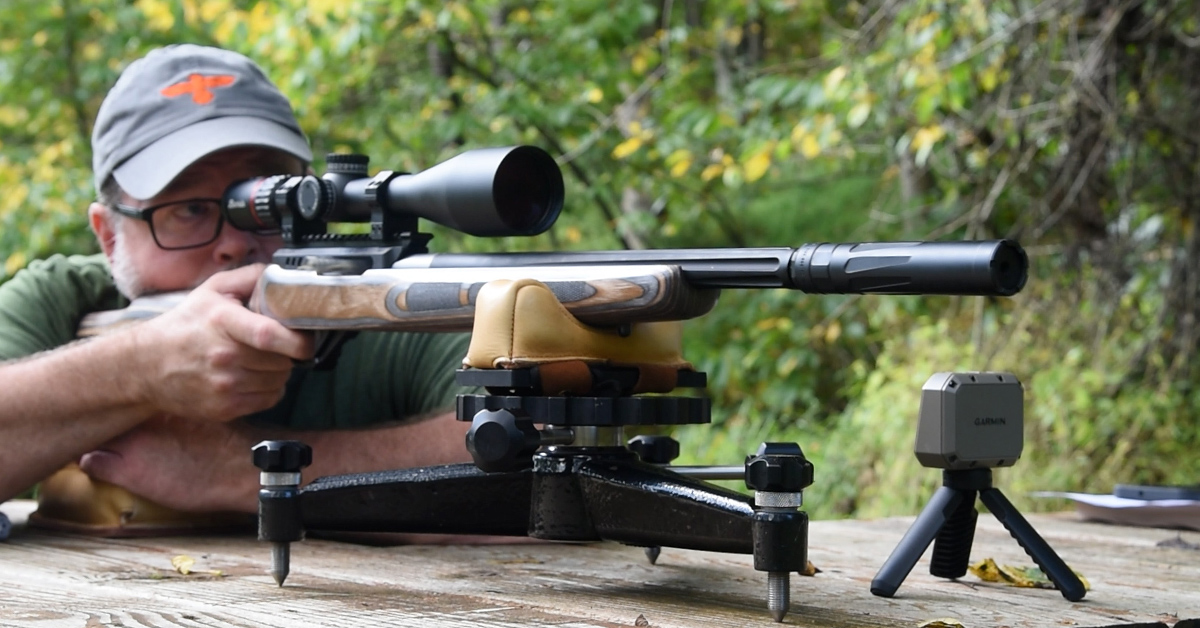
So, with the RXD910Ti proving itself on PDW and pistol platforms, that naturally got me thinking about pistol-cartridge lever-actions. I have more than a passing affection for hunting medium-sized game with pistol/straightwall cartridges in lever guns. Having a couple modified 44 Magnum Henry and Rossi rifles with which I like to hunt deer, I thought it high time to see how a suppressed 357 Magnum would fare in the whitetail woods this fall.
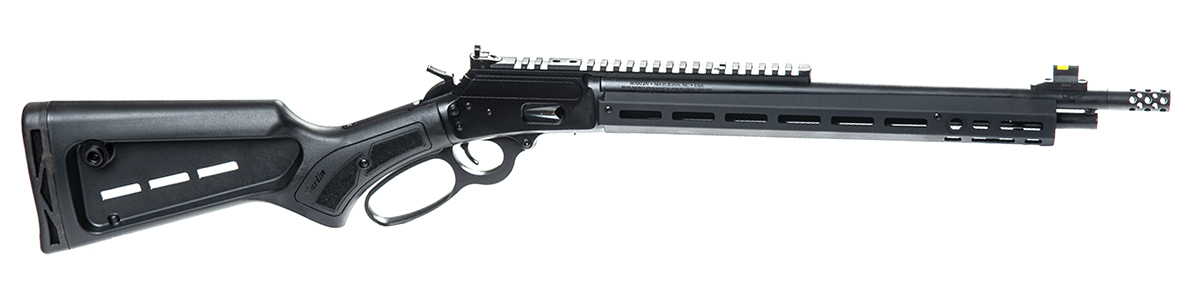
Since Ruger owns the Marlin brand, I decided on a Marlin 1894 Dark Series as my project rifle. Although no one would sneeze at the factory configuration, I wanted this build to be a bit more “neo retro” in terms of appearance. This would mean ditching the factory polymer stock and aluminum handguard for something a bit more “woody” along with a leather rifle sling, upgrading the trigger system, dropping on a quality 2X scope, and, of course, topping it all off with Ruger’s RXD910Ti suppressor.
Selected Upgrades
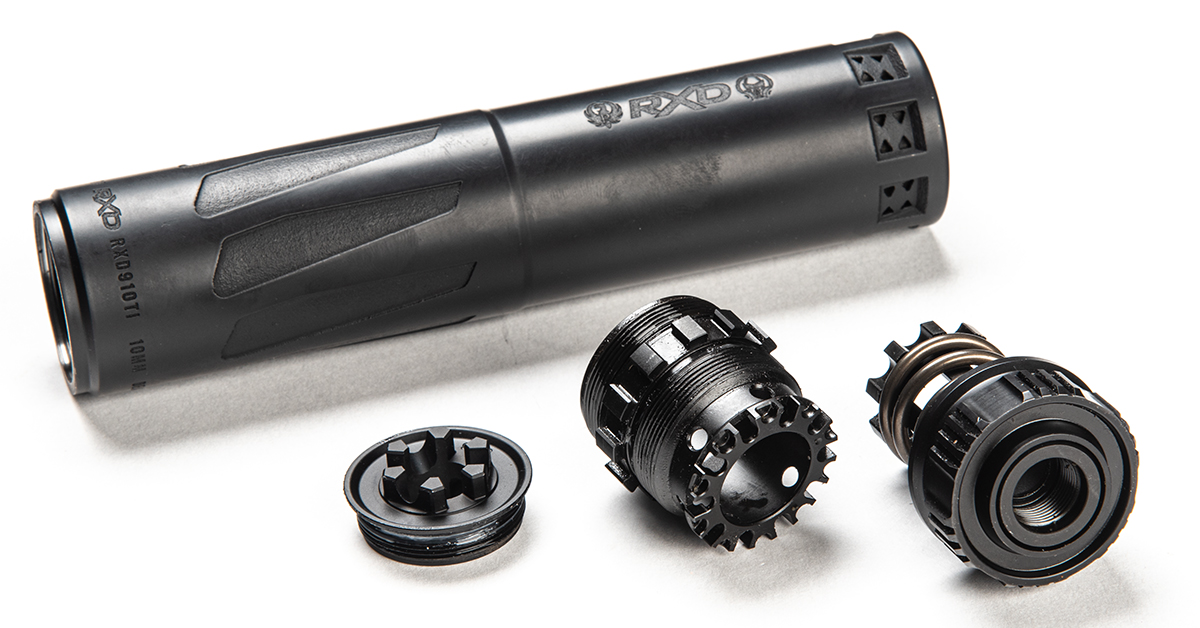
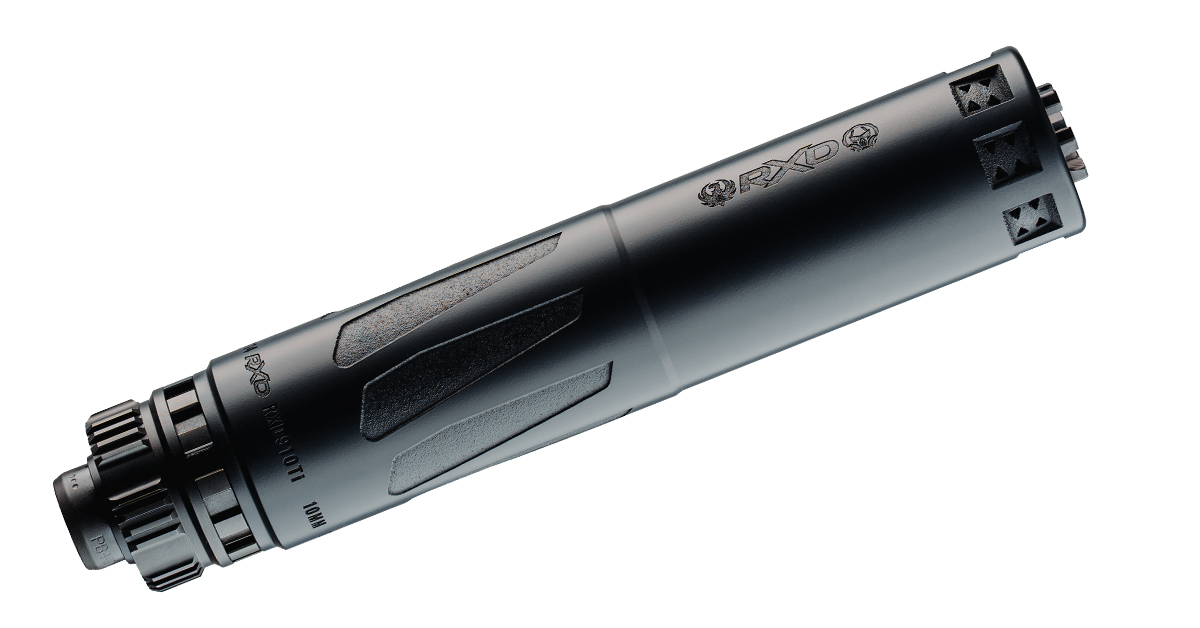
Suppressor – The impetus for this entire project, as mentioned, was Ruger’s RXD910Ti suppressor. Optimized for 9mm and 10mm guns yet suitable for everything from 5.7x28mm to 400 Legend, the RXD910Ti is a diverse suppressor that gives you options. It comes with a piston assembly, making it suitable for tilt-barrel pistols, or remove the assembly for direct-thread applications via a HUB-mount adapter.
Trigger – As we always say, the first and arguably most important upgrade to any firearm is a high-quality, precision trigger. Anything you can do to minimize shooter-induced shot disturbance is going to translate to increased accuracy potential — and that’s something for which we should always strive.
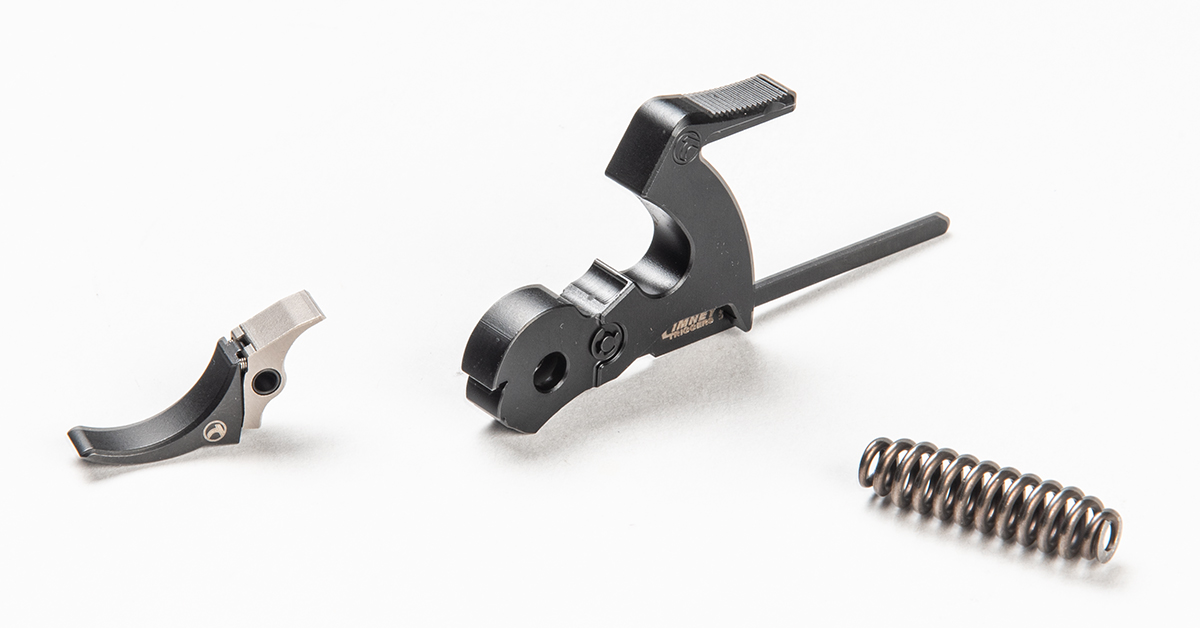
Timney makes an excellent upgrade trigger for post-1983 Marlin lever-actions. The kit comes with a new trigger shoe/sear assembly, hammer and strut assembly, and hammer spring. The single-stage pull weight is set at the factory to around 3-3.5 pounds.
Furniture – A few months ago, we were introduced to Woox gun stocks, installing the company’s Gladiatore High Grade Walnut Stock Kit onto a Mossberg 590 shotgun. Talk about a transformation — so eye-popping that we knew this was the kit we needed for the Marlin 1894 project.
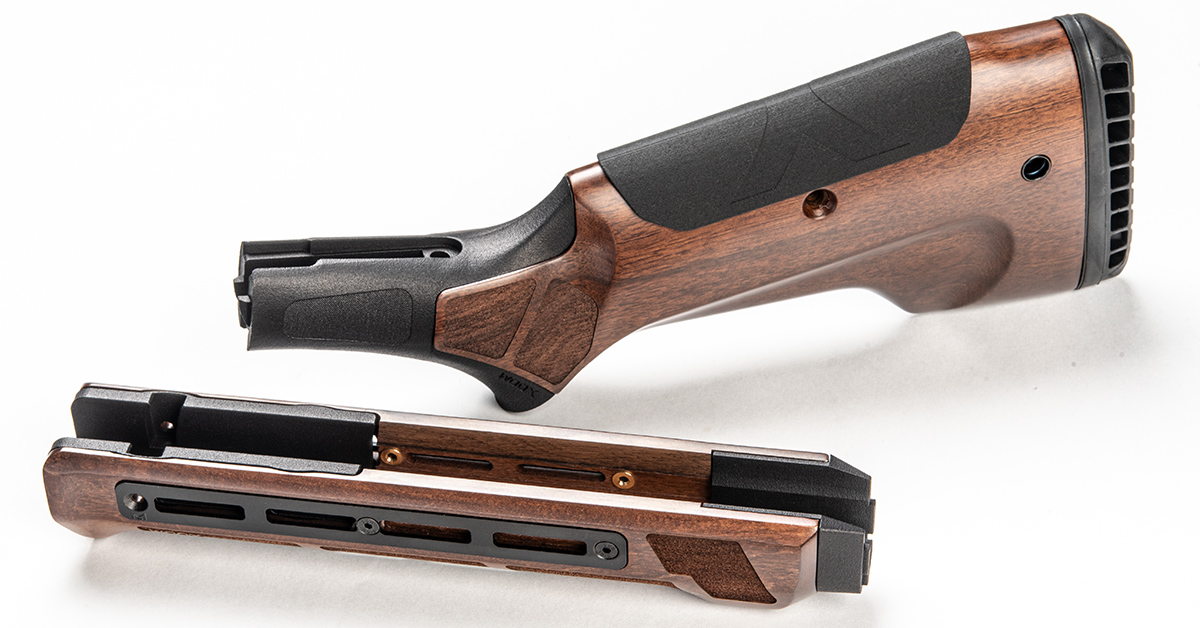
This time, we went with the new Woox Bravado stock and handguard kit, which is made of elegant, Claro-grade American walnut that is hand-selected and machined in Italy and then hand-finished by skilled craftsmen at the company’s Hickory, North Carolina, manufacturing facility. Highlights of the stock kit include a five-position adjustable cheek riser, plush recoil pad, left and right QD sling mount cups in the buttstock, three M-LOK slot rails along the handguard, and an M-LOK slot on the right side of the buttstock to accommodate a cartridge quiver.
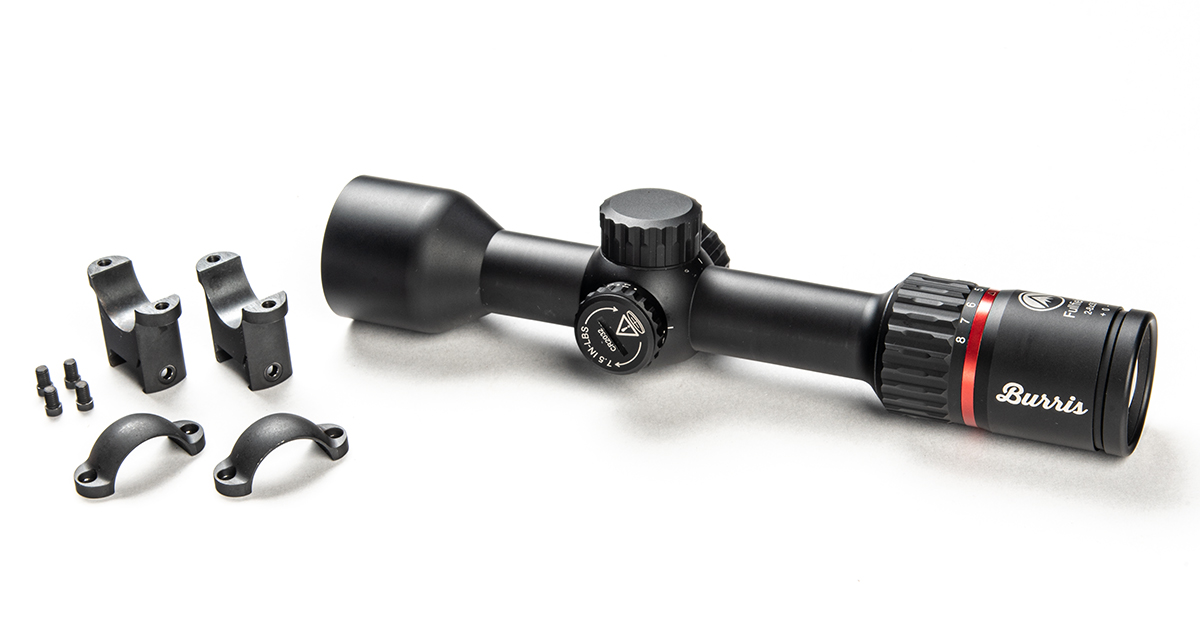
Optic – Ever since Burris introduced their new-generation Fullfield riflescopes, we’ve been taken by their price-to-performance ratio. Their clean design, improved ergonomics, high-quality glass, and reasonable price point makes the Fullfield series a top contender in the mid-range optic category.
For a pistol-caliber carbine destined for woodland hunting duty, the logical choice was the 2-8x35mm model — the same scope I run on my 44 Magnum Henry. I like this one because it provides all the magnification I’ll ever need for a rifle chambered for a straightwall cartridge. The low 2X range is perfect for hunting in brushy country, where shot opportunities tend to stay within 100 yards.
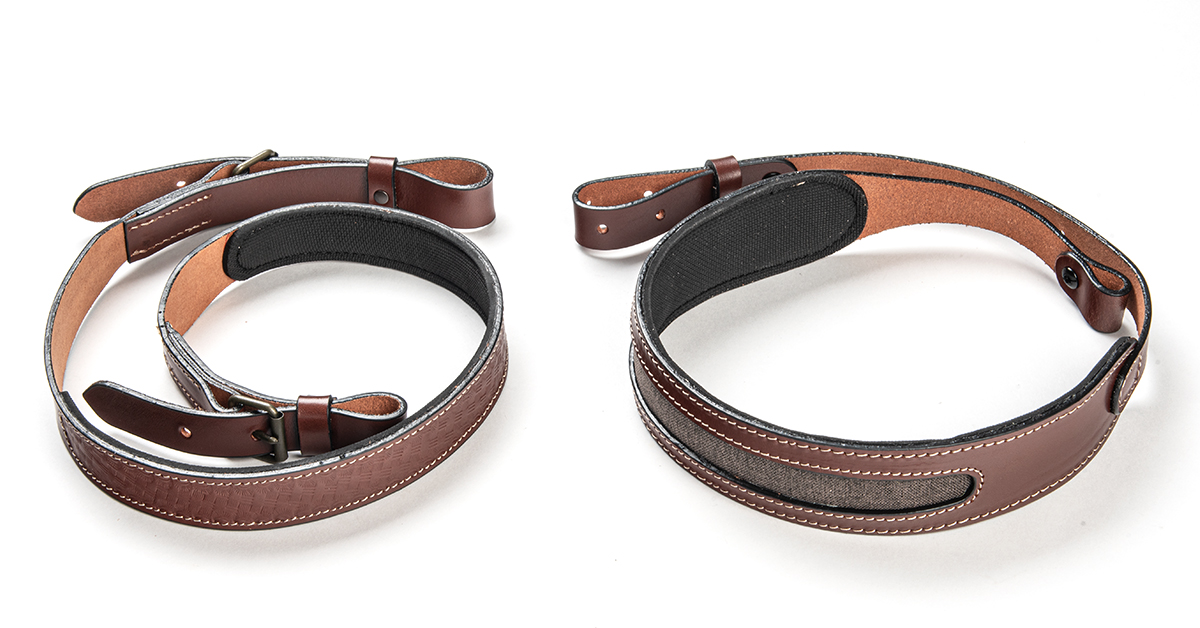
Sling – Nothing compliments blued steel and fine walnut furniture like a leather sling. Although I trend toward the old-school cotton web G.I. slings for most of my guns, Falco Holsters had a couple that really caught my eye — the S202 adjustable and the S209 with the stabilizing cutout.
With both slings in hand, I chose the S202 for this build. I like the narrow 1 3/16-inch width because it better grabs onto my shoulder, and buckles at the front and rear of the sling not only provide adjustability, but they also offer refined aesthetics that work with the overall gun presentation.
Furniture Swap
Installing new furniture on a Marlin lever gun is about as easy as it gets. We’ll show you how easy over the next eight steps. If, though, you intend to install a new Timney trigger, I’d recommend doing so after removing the factory buttstock but before installing the factory forend. This just prevents the possibility of a workbench accident damaging that exquisite walnut.
As always, be sure to render the firearm safe (no ammo in the chamber or magazine) and be sure all ammo is removed from the work area before proceeding.
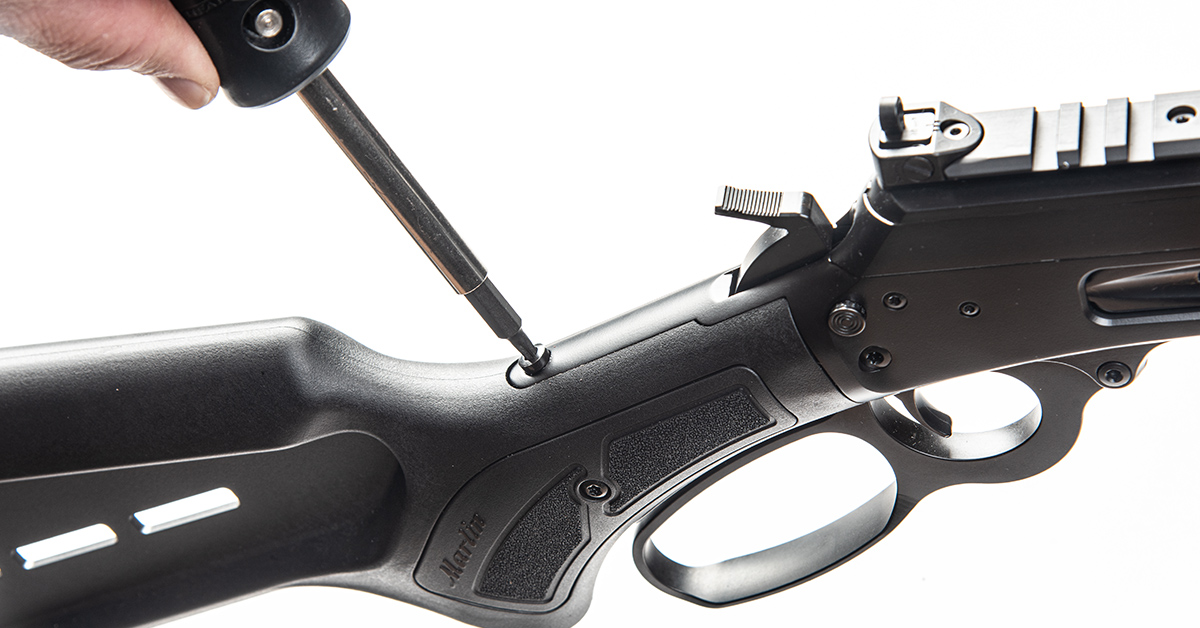
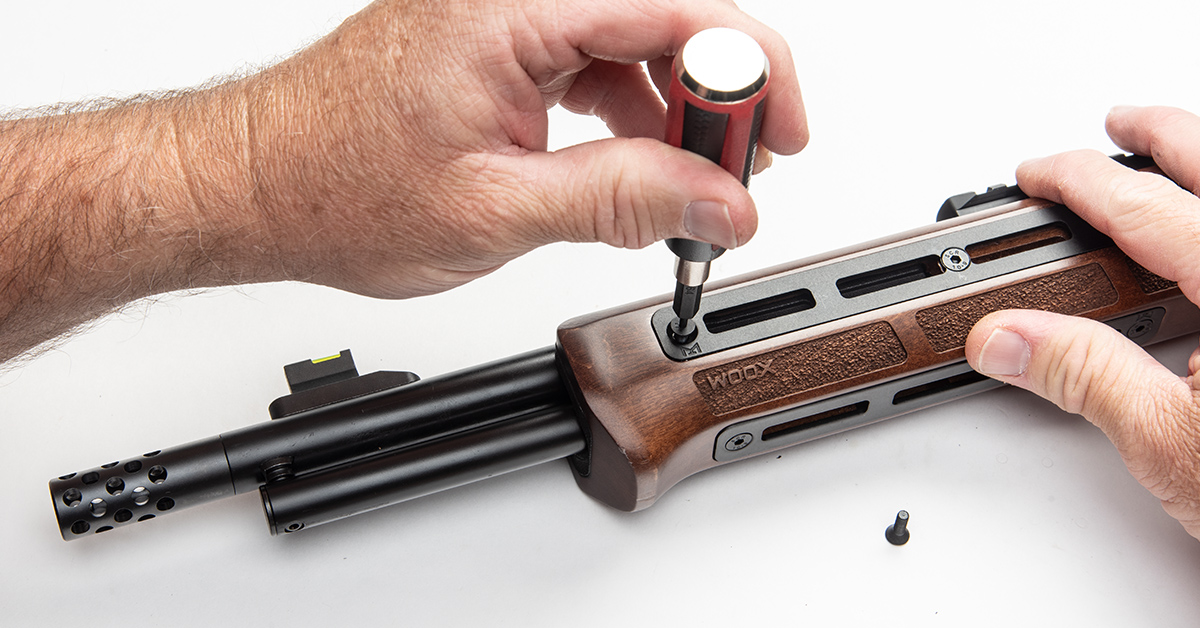
With the appropriate driver bit, remove the stock tang screw.
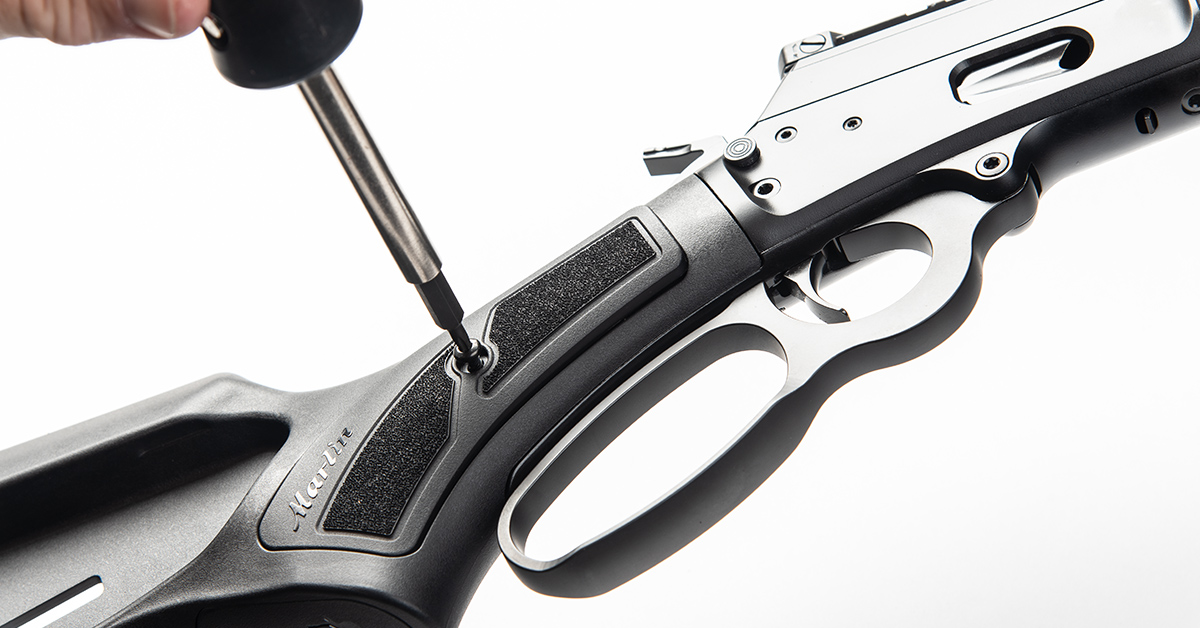
If your gun has a side screw, remove it as well.
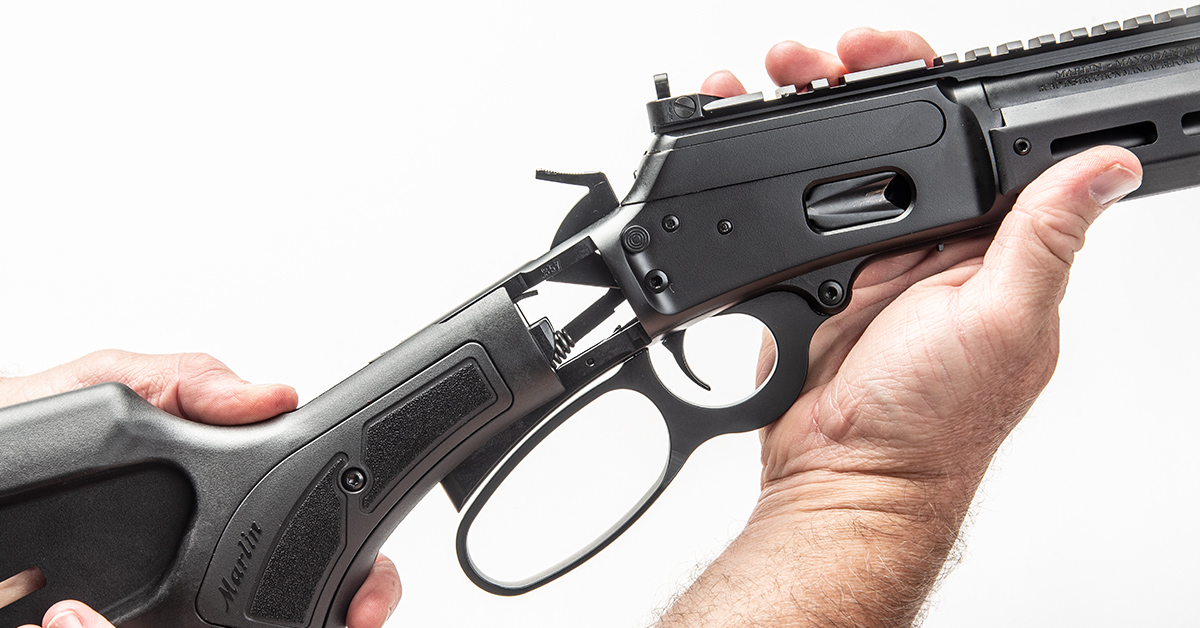
Pull the stock off the receiver.

The new stock installation is simply the reverse of the disassembly.
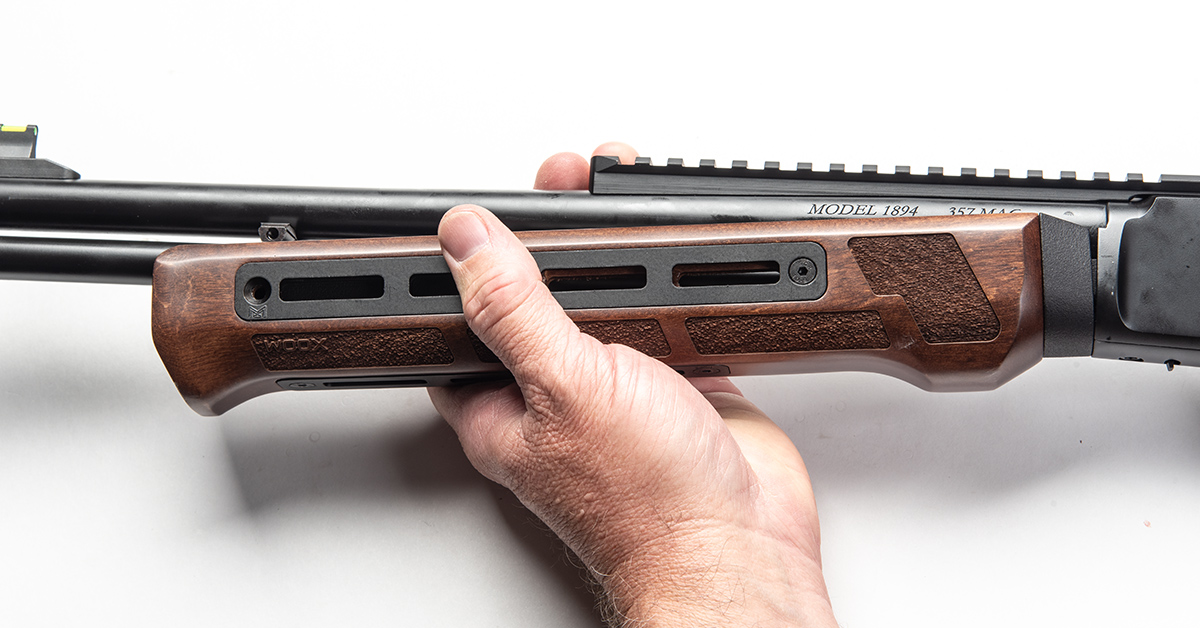
One of the things that really stands out with the Woox furniture I’ve now installed on two different firearm platforms is the precision tolerances and superb fit. The tolerances are close and the fitment lines run true to the host gun.
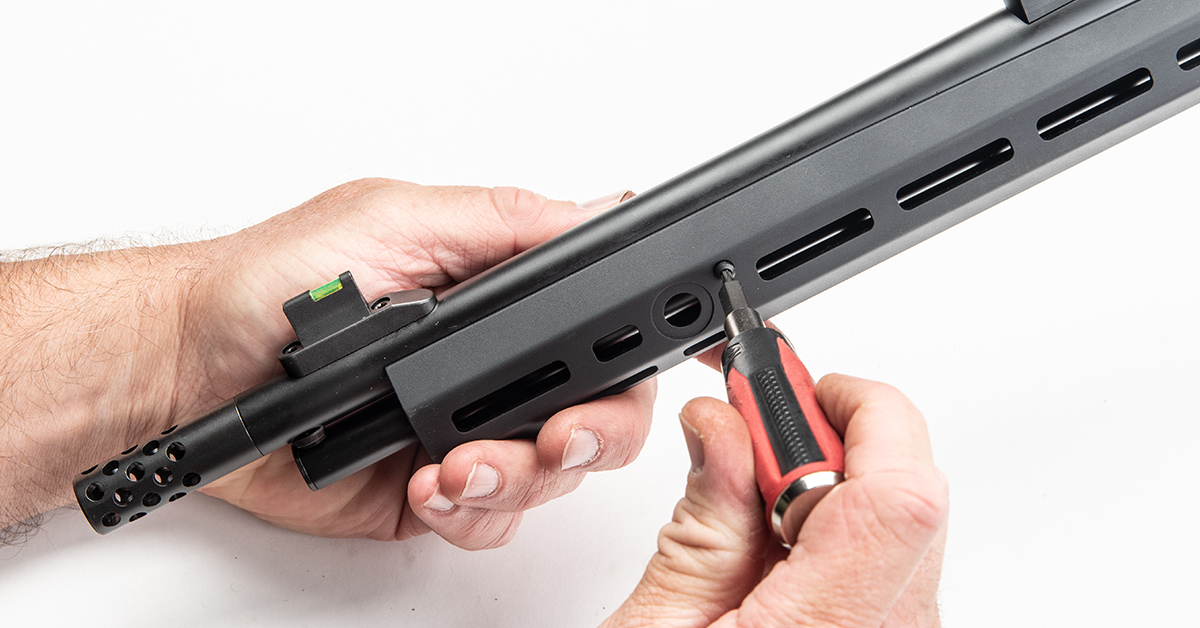
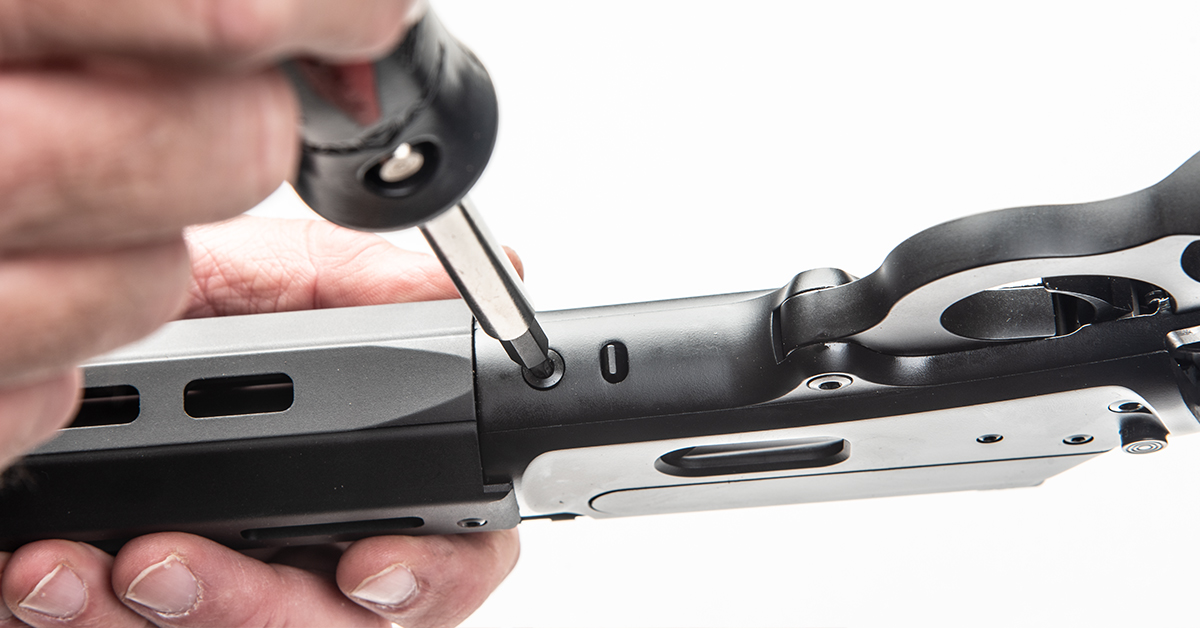
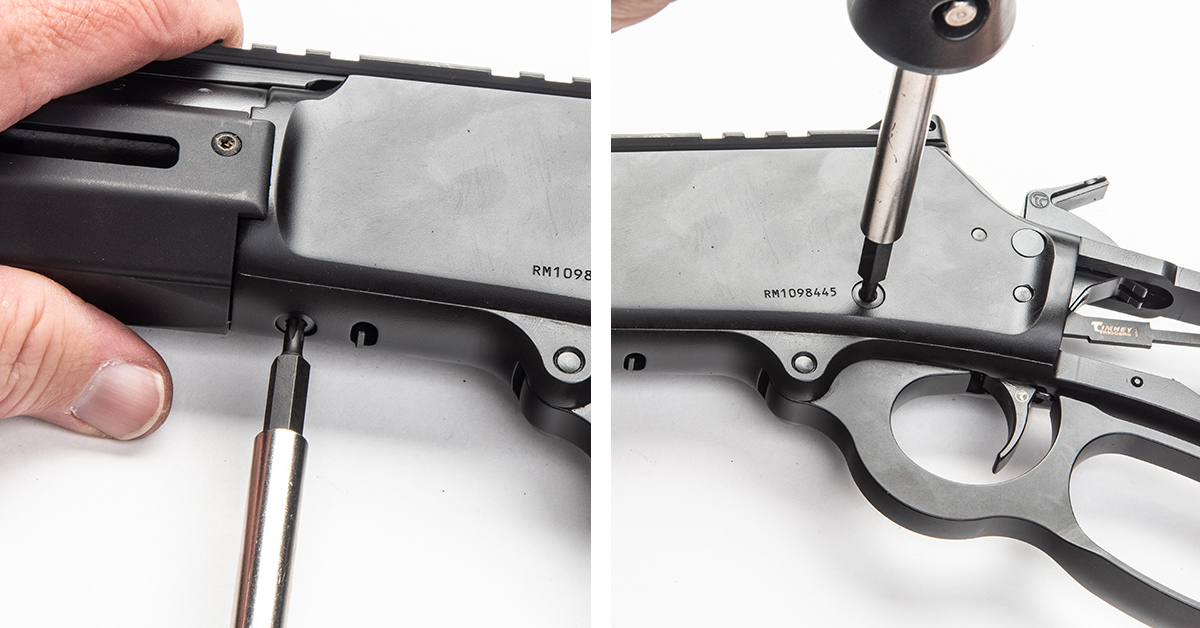
The forend removal process will depend on the type that came from the factory. This aluminum handguard ties into the barrel/magazine tube tenon at the front and a mounting block in the rear. In this case, remove the two front handguard screws…

…and the rear handguard screws. You can now slide the handguard from the barrel/magazine assembly and remove the mounting block.
Again, installation of the new handguard is the reverse of the disassembly. Slide the back of the forend into the receiver…
…and secure with the two supplied tenon screws.
Trigger Swap
It may sound like a scary proposition for some to tear into a lever-action’s internals. Fortunately, replacing the trigger and hammer assembly is easy enough provided you use the right tools. The right tools mean driver bits that are sized to precisely fit the gun’s screw heads and are the correct shape. Some Marlin rifles (like this Dark Series) use Torx-head screws; others use slot-head screws. Whichever is the case, use the correct size and shape driver and NEVER use a tapered flathead screwdriver on a slot-head screw. You’ll only damage the screw head and possibly the work piece.
I use Real Avid’s Smart-Torq & Driver Master Set to ensure I have the right driver for the job.
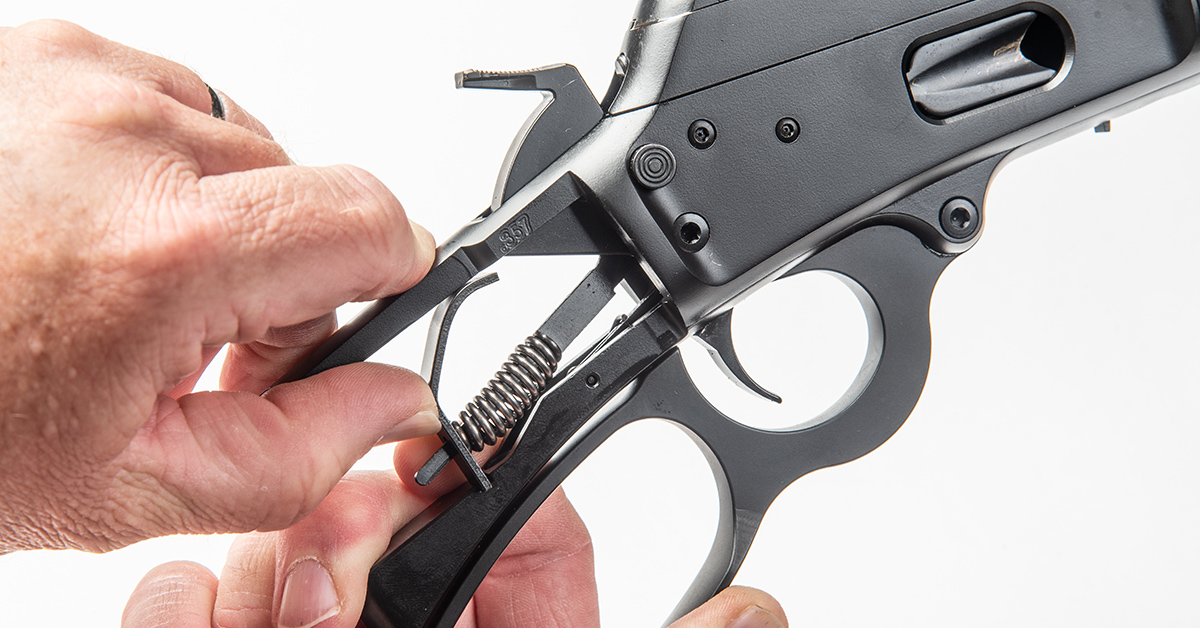
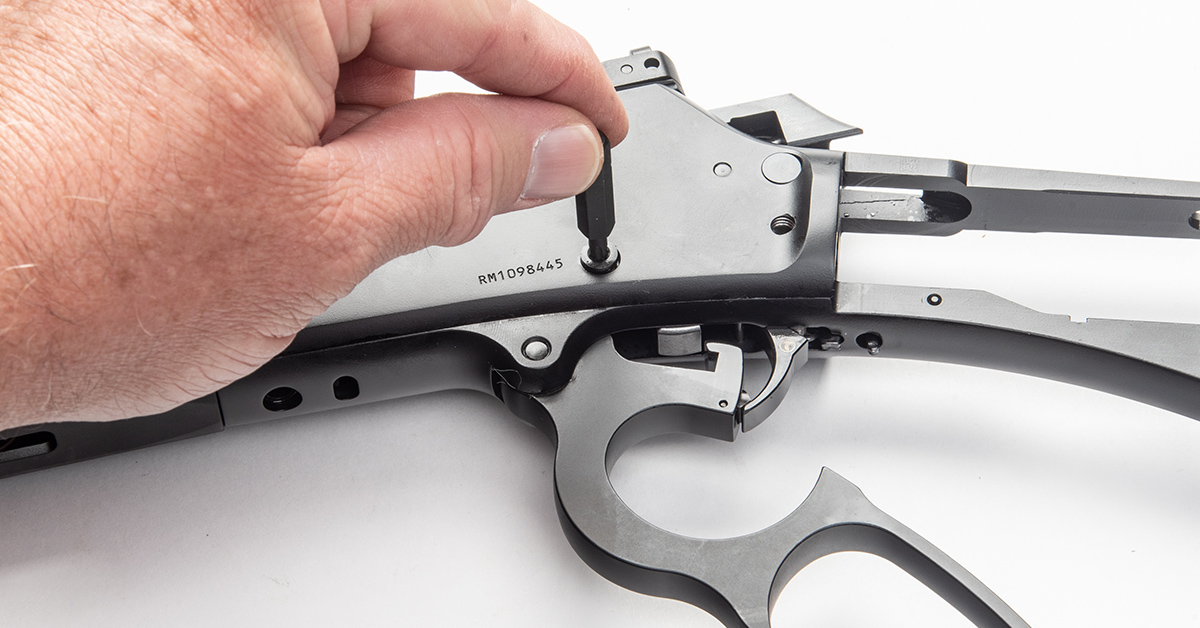
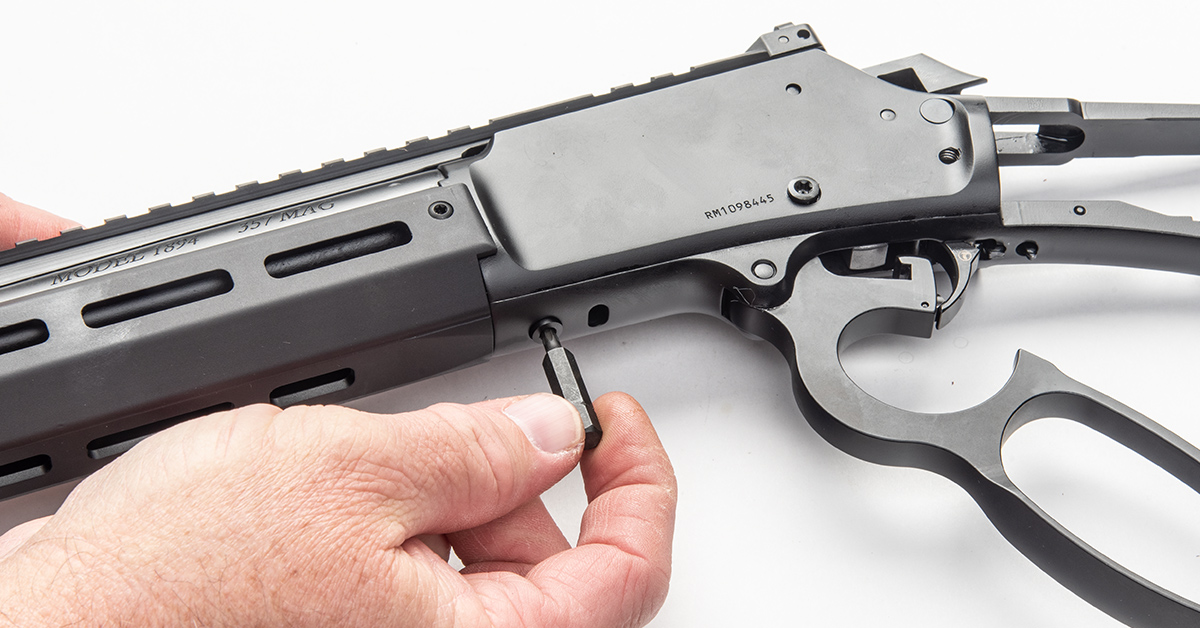
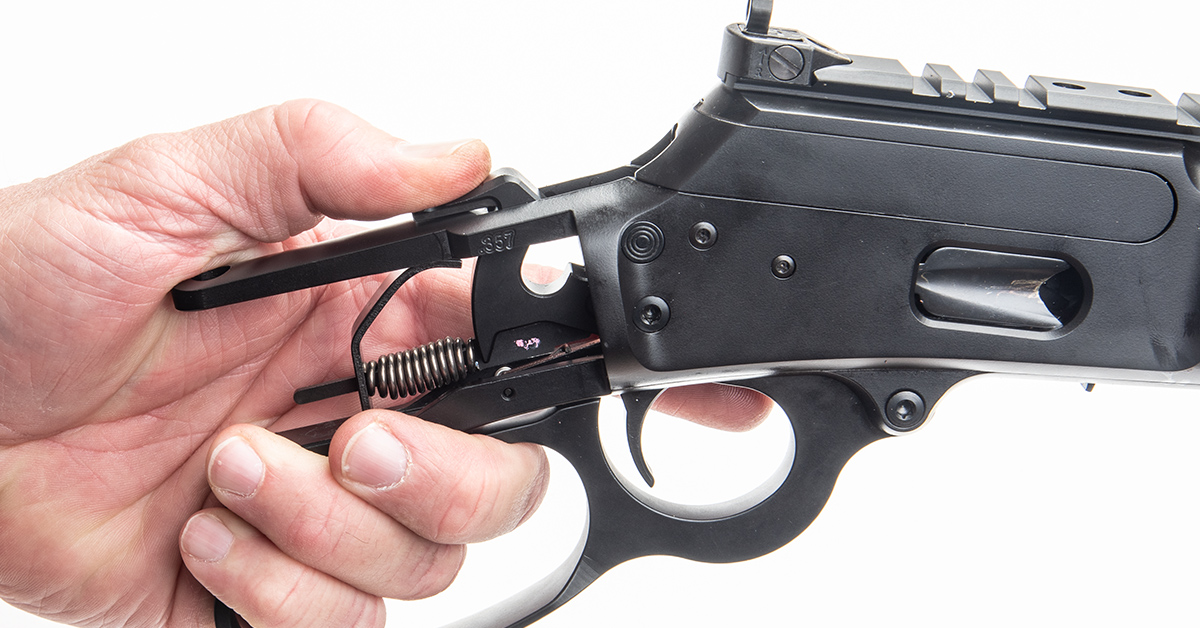
With the buttstock removed, begin by removing the hammer adjusting plate. To do this, push in on the plate (against the hammer spring pressure) and slide the plate out of its slot in the trigger guard plate.
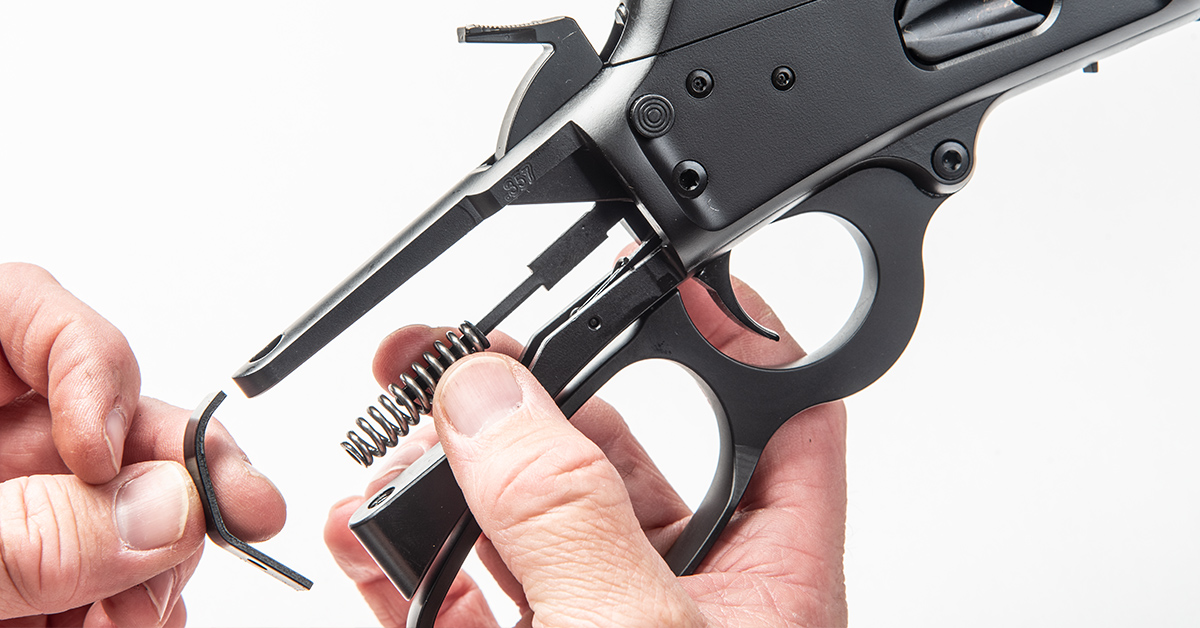
Remove the adjusting plate and remove the hammer spring from the hammer strut.
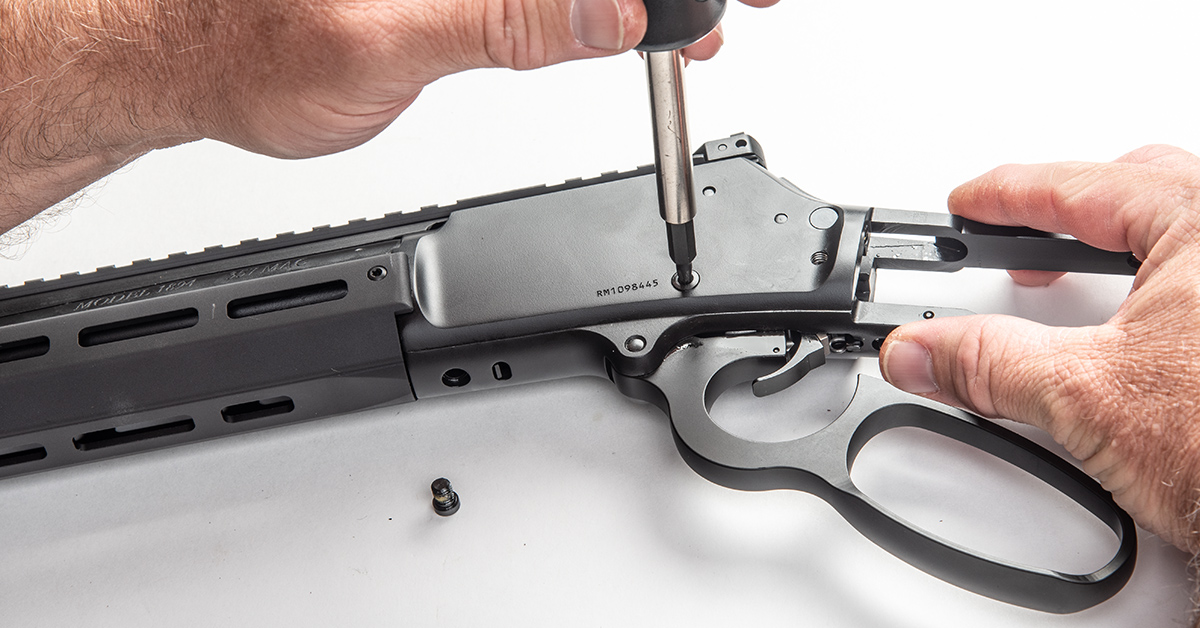
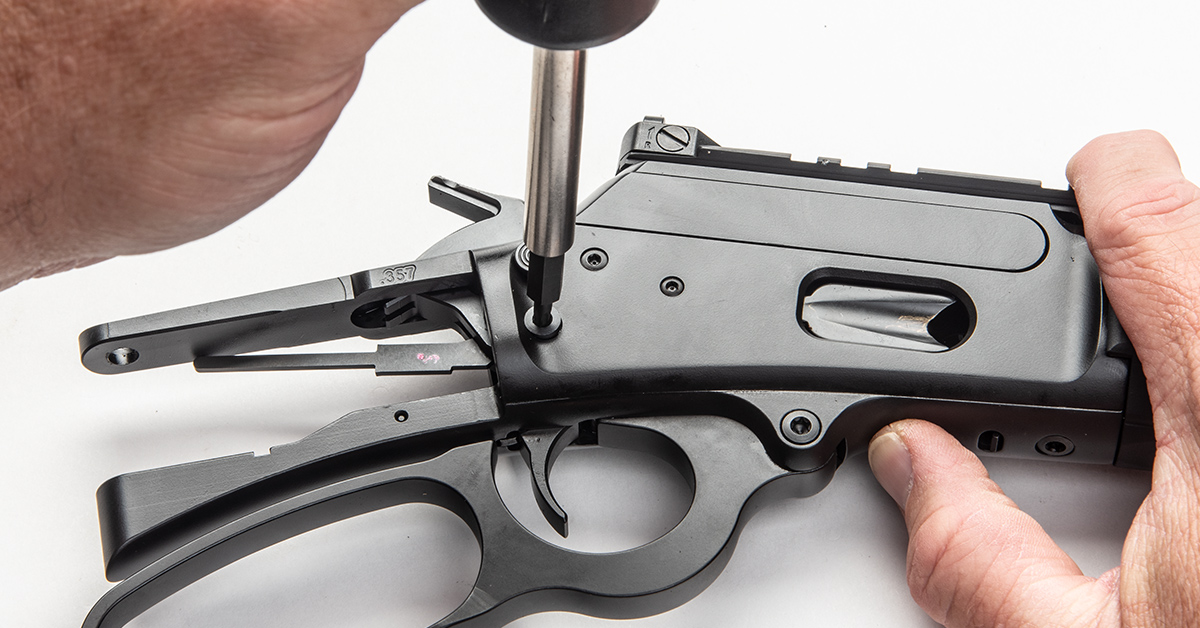
Loosen by a few turns the trigger guard plate screw. Do not yet remove this screw.
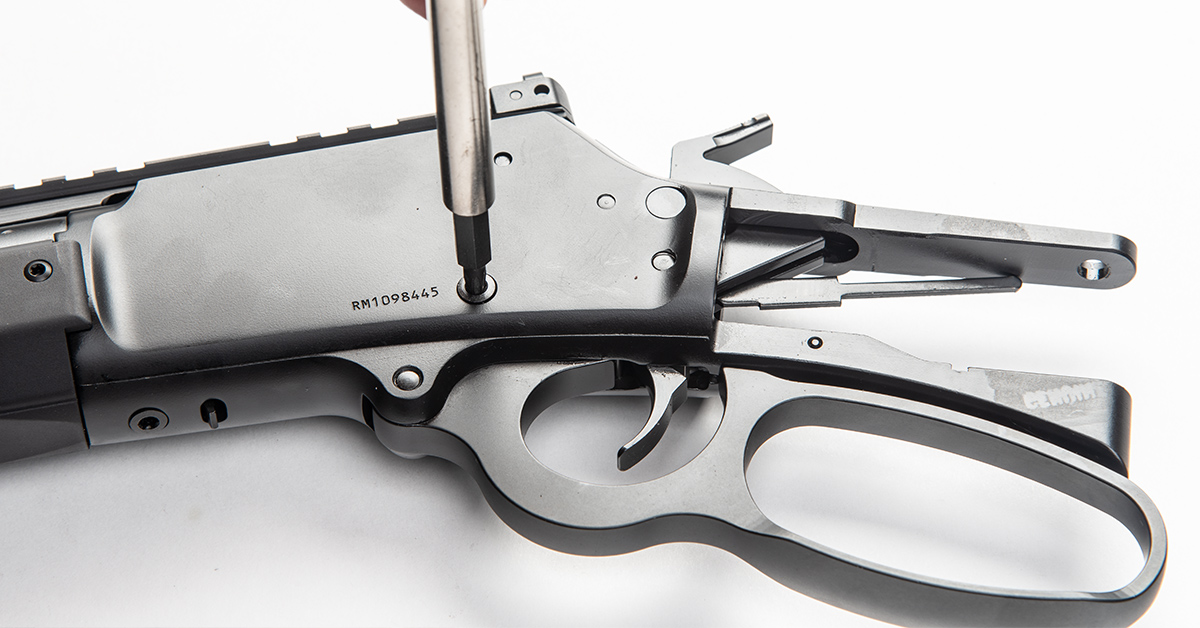
Again, loosen but do not remove the trigger guard plate support screw.
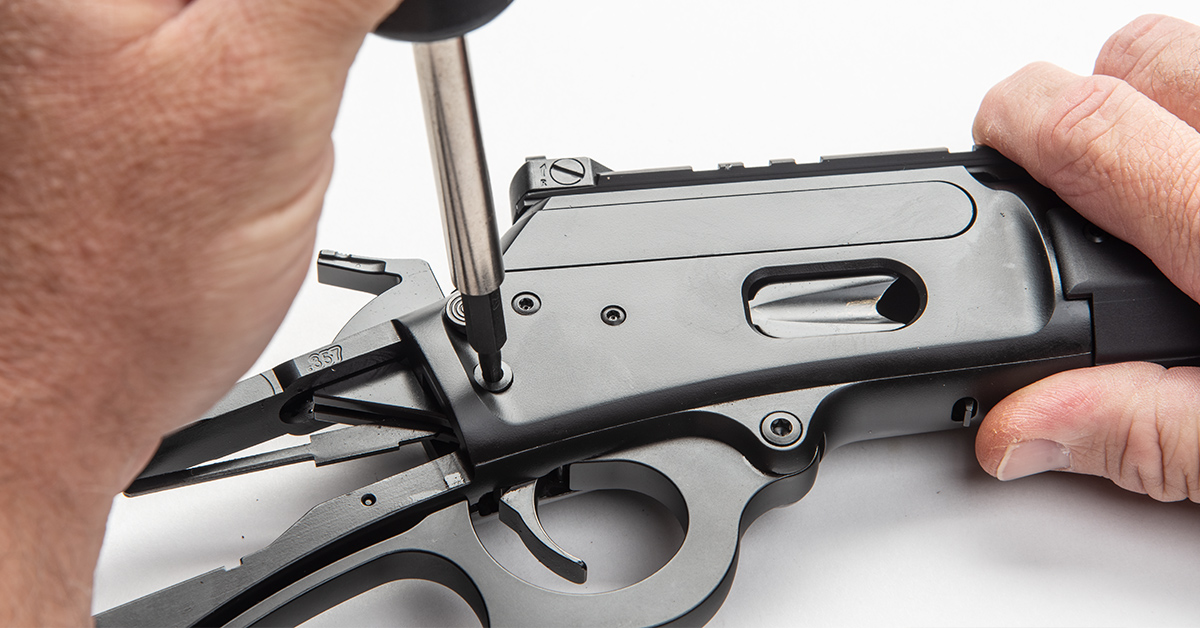
Remove the hammer pivot screw.
You can now remove the hammer and strut assembly from the receiver. You may need to pull back on the trigger to remove the hammer.
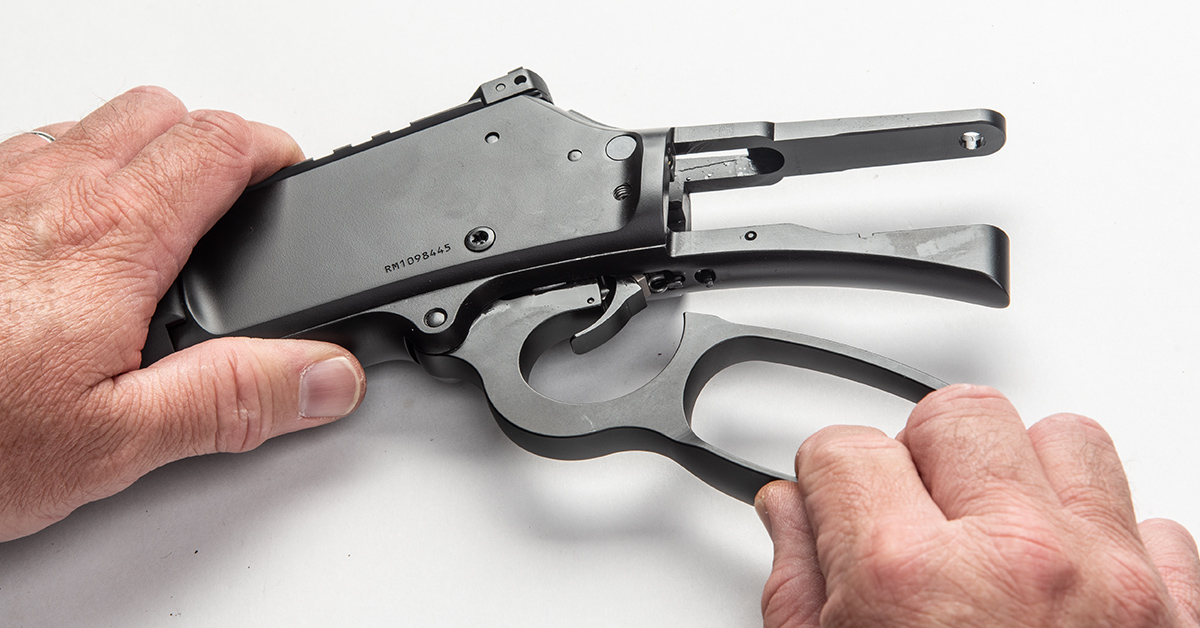
Partially pull down the lever.
You can now remove the trigger guard plate screw and the trigger guard plate support screw.

Note the size difference between the trigger guard plate screw (left) and the trigger guard plate support screw (right). Timney provides a helpful tip in their instructions: S (side) + S (short).
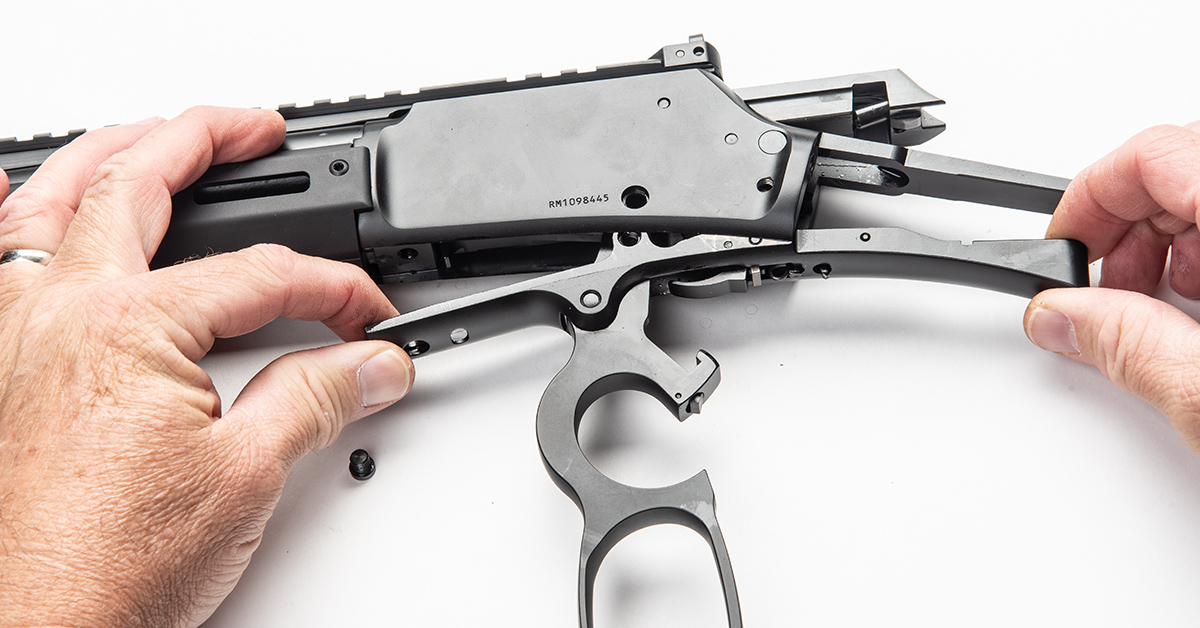
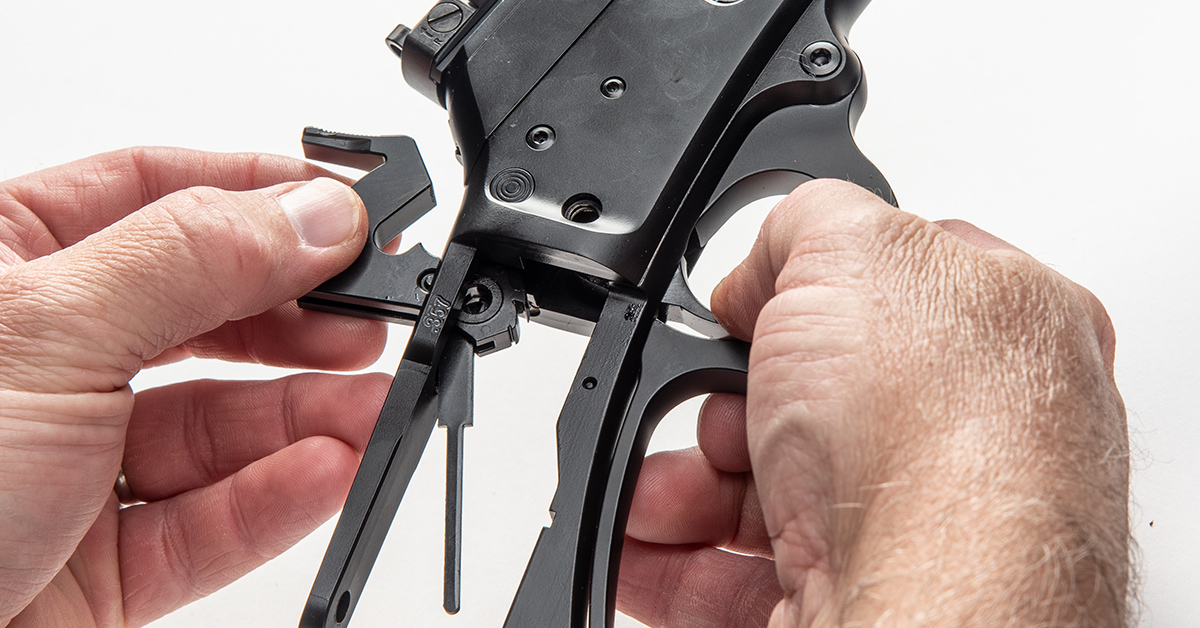
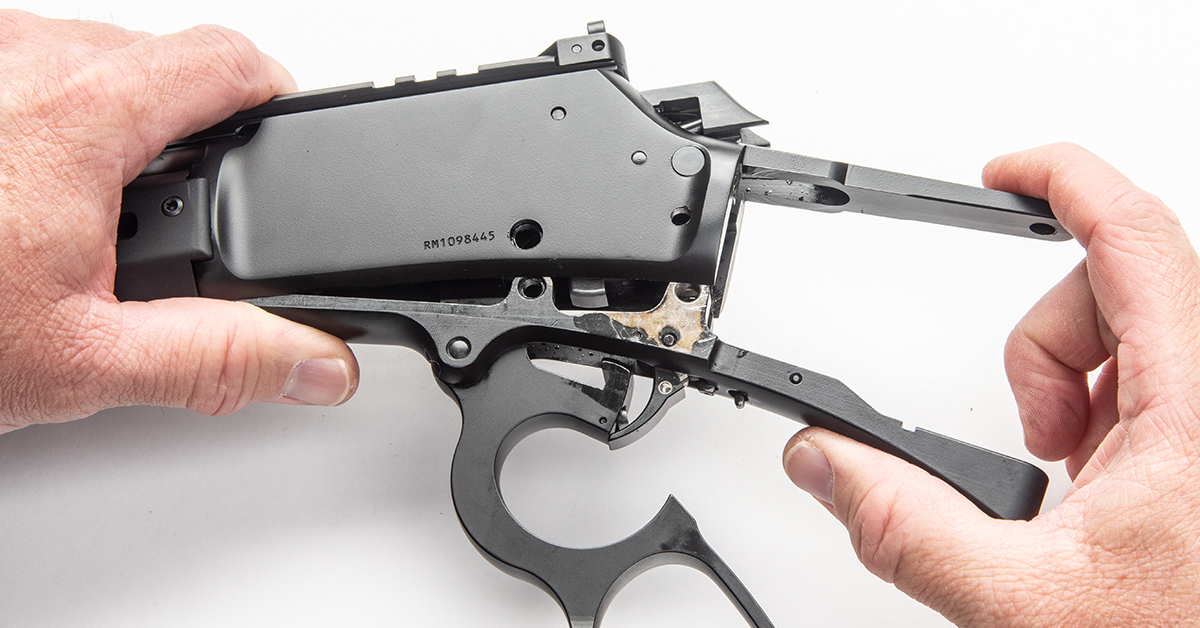
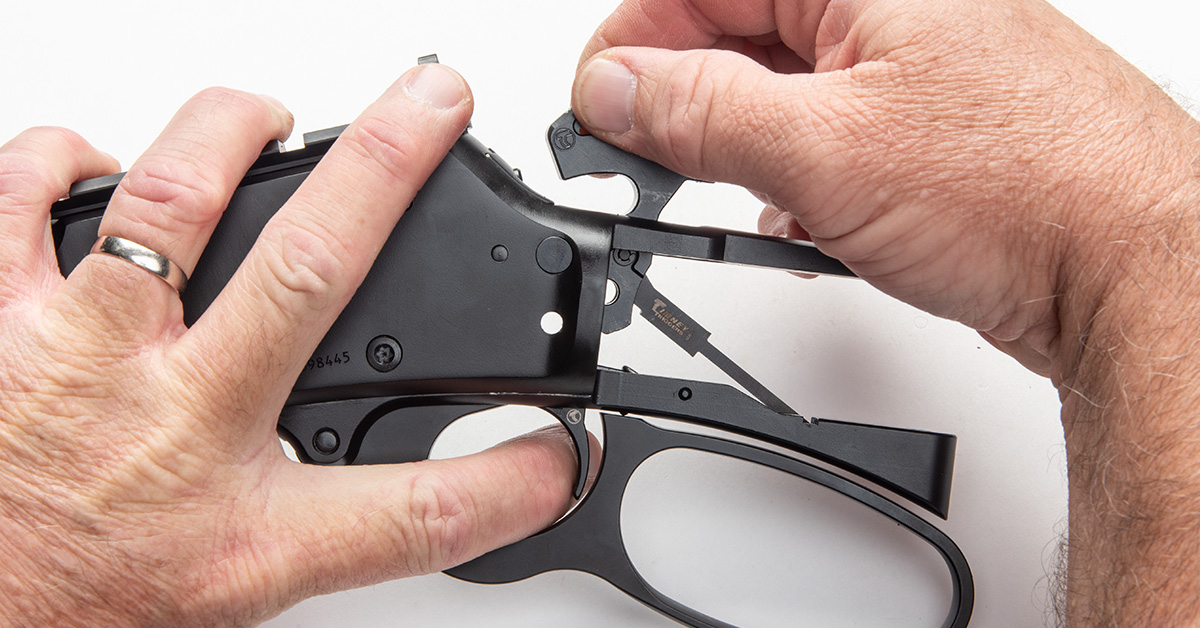
Pull the lever fully down and remove the lever and trigger guard plate assembly from the receiver.
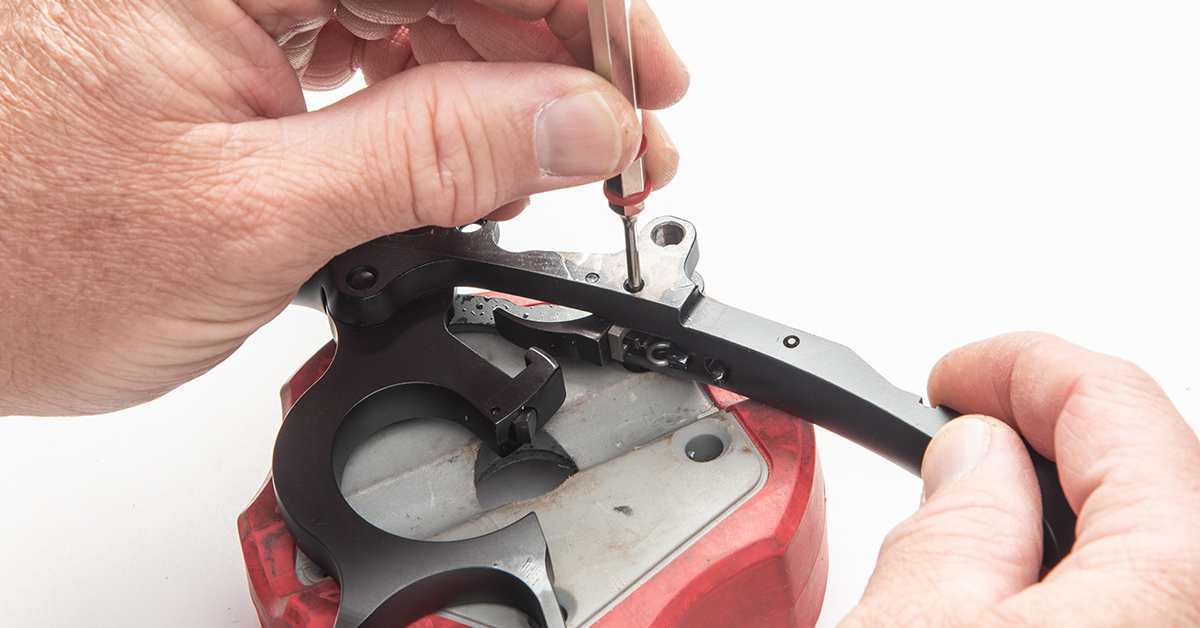
Use a bench block and a punch to push out the trigger spring pin.
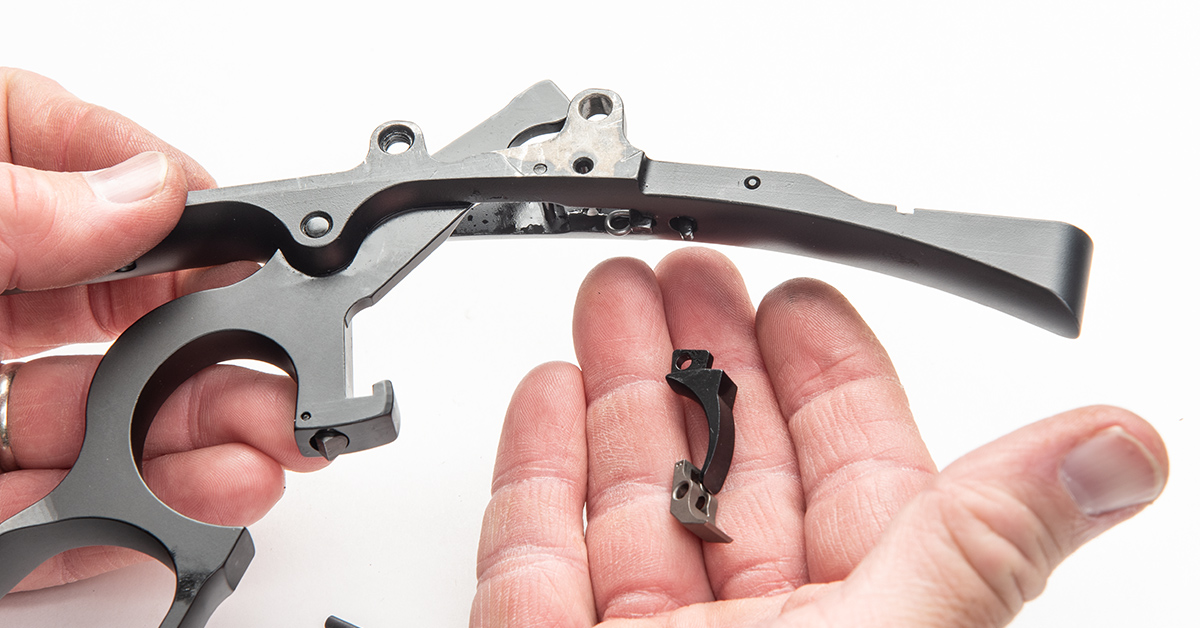
The trigger shoe and sear will fall out of the trigger guard plate.
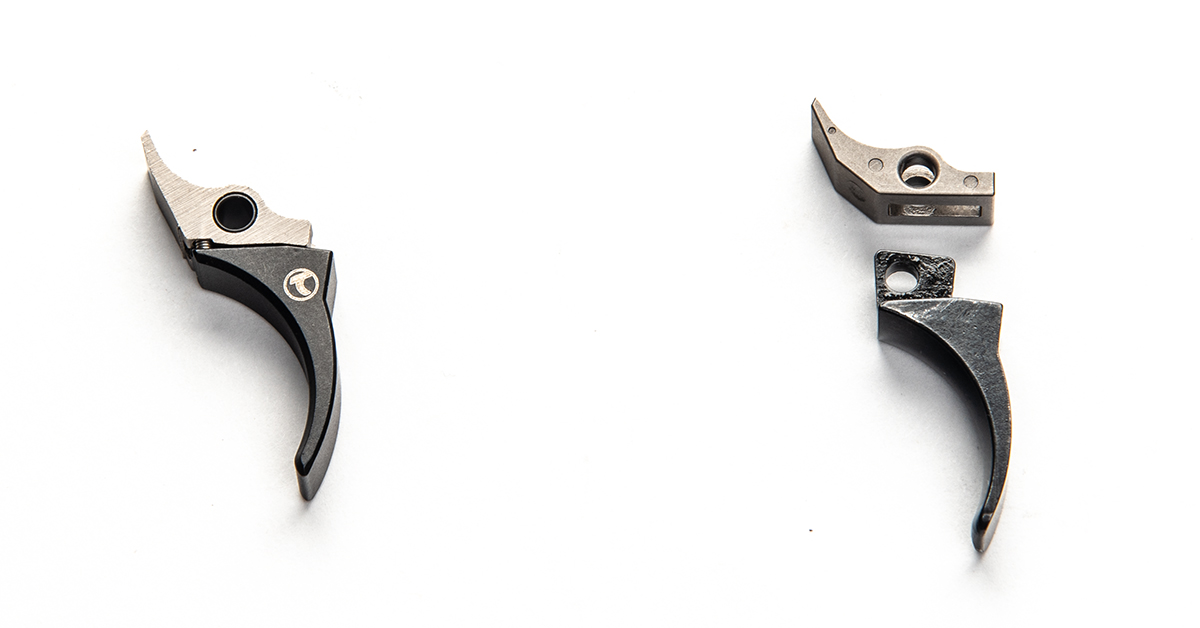
Note the differences between the Timney upgrade trigger (left) and the factory trigger assembly (right). Both the Timney trigger shoe and sear boast significantly different geometry than the OE trigger. It also features a one-piece construction, with the trigger shoe and sear joined at the factory in the spirit of a drop-in-style trigger cartridge. There is even a small tension spring between the Timney’s sear and trigger shoe to prevent the annoying “trigger flop.”
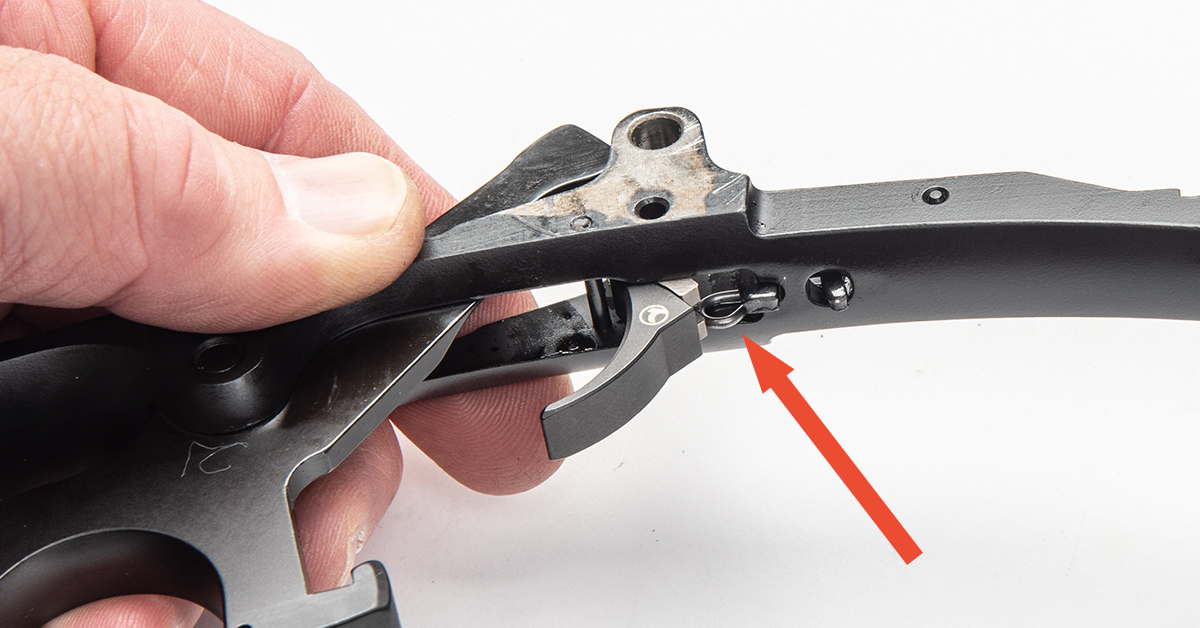
Install the trigger into the trigger guard plate as shown, pushing the trigger past the trigger spring (arrow).
Align the pin holes and reinstall the trigger spring pin.
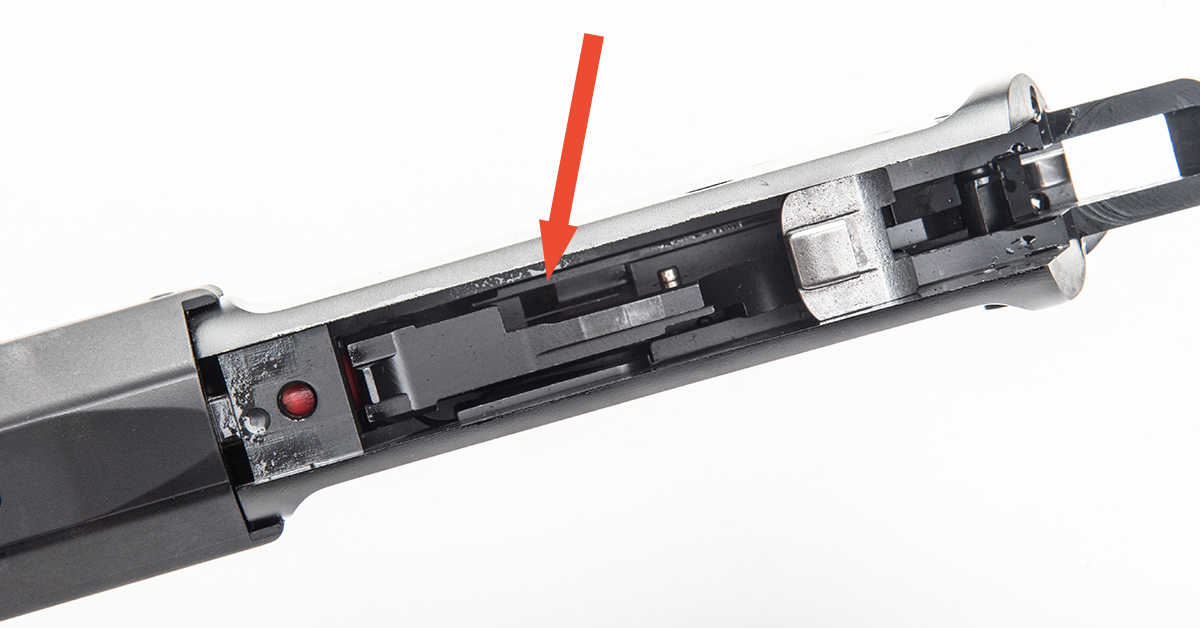
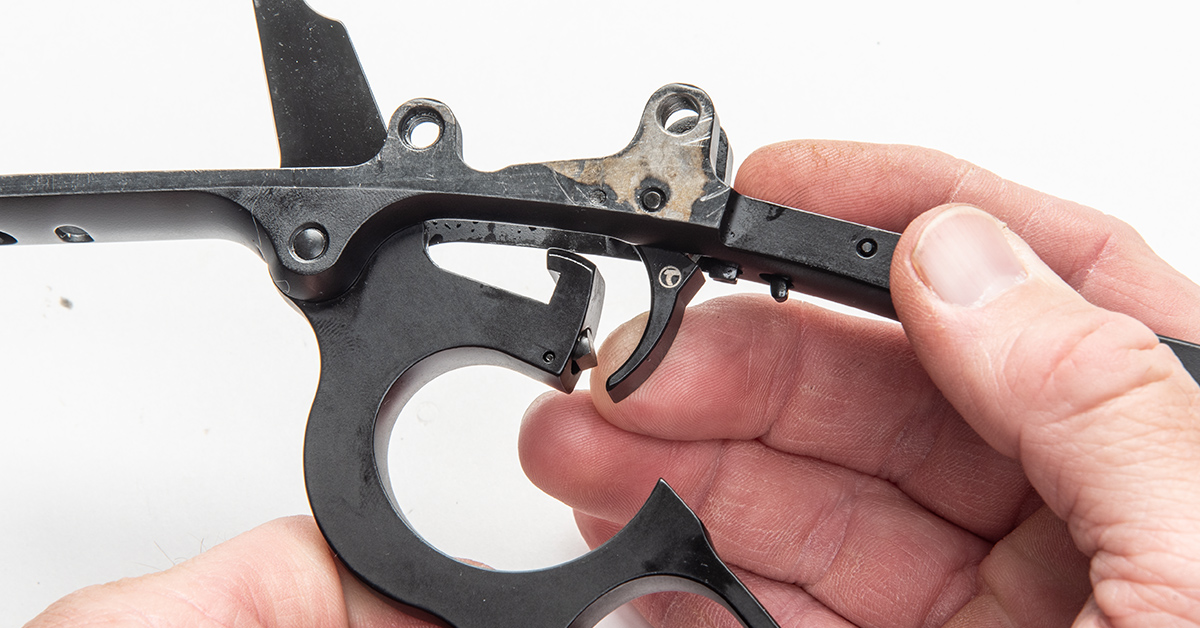
The lever arm, which cycles the bolt, engages the bolt via this slot (arrow).
Position the trigger guard plate and lever assembly into the bottom of the receiver, being sure to engage the lever arm in its slot in the bolt. Once aligned, press the assembly into the receiver.
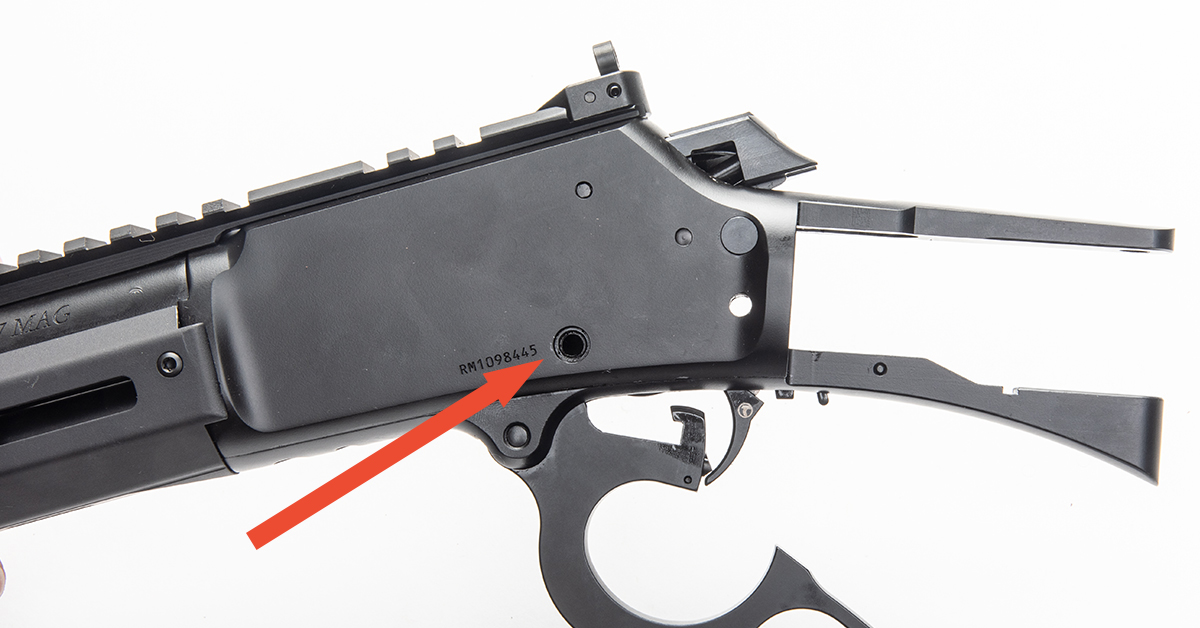
Check to ensure the trigger guard plate assembly is fully seated in the receiver and that the trigger guard plate support screw holes (arrow) are correctly aligned.
Loosely install the trigger guard plate support screw. Remember…this is the short screw.
Next, loosely install the trigger guard plate screw.
Reinstall the hammer into the receiver. Pull back on the trigger to provide clearance for the hammer assembly.
Install and tighten the hammer screw.
Final torque the trigger guard plate and trigger guard plate support screws.
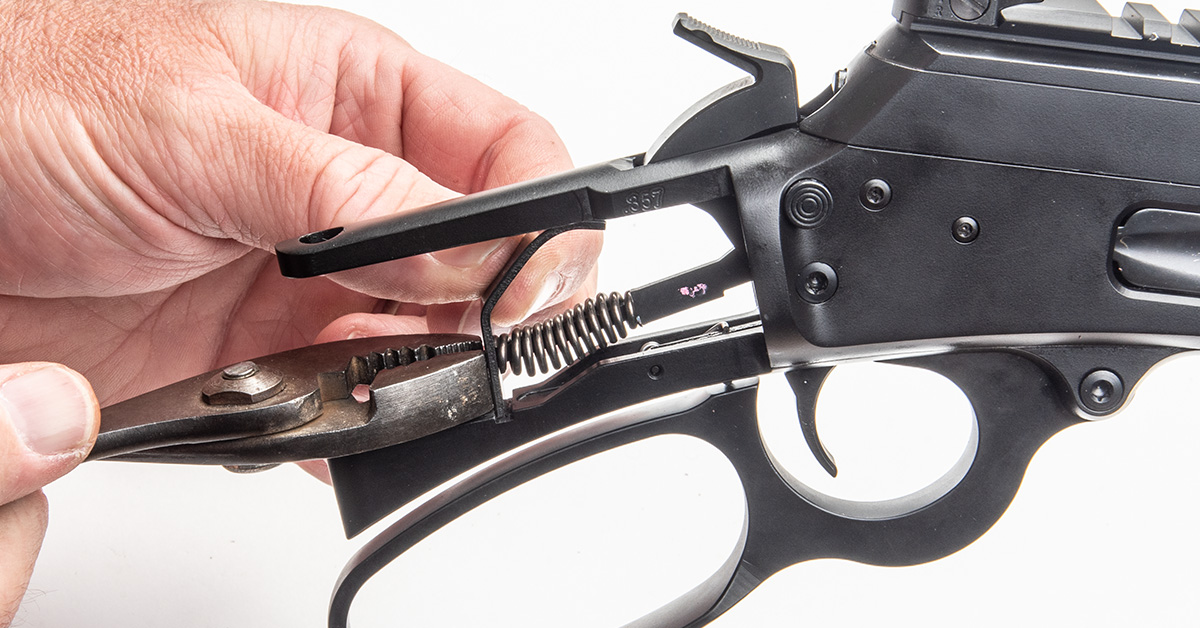
Now comes the fun part. Install the new Timney hammer spring onto the hammer spring strut and position the hammer adjusting plate onto the strut as shown. This is a high-tension spring, so it is a bit challenging to compress the assembly far enough for the adjusting plate to slide into its slot on the trigger guard plate. The trick I use is to push against the back of the adjusting plate with a pair of pliers and then slide the pate into its slot. Whatever works best for you, go for it.
Test the function of the trigger and hammer as well as the safety to ensure all are working correctly.
With the trigger upgrade complete, you can now install the buttstock and forend.
Scope Installation
Installing a riflescope is a fairly simple process, but there are some nuances to the operation that will make for a more durable, functional, and accuracy-inducing installation. Rather than walk you through the process here, check out this video for the step-by-step installation and to learn how to perfectly align your scope’s reticle relative to the rifle bore.
Sight Removal and Hole Fill
Although it is not usually essential to remove a gun’s open sights when installing a scope, I prefer to keep the gun as clean as possible. So, for this project, I wanted to remove the front sight to give the barrel a sleek profile.
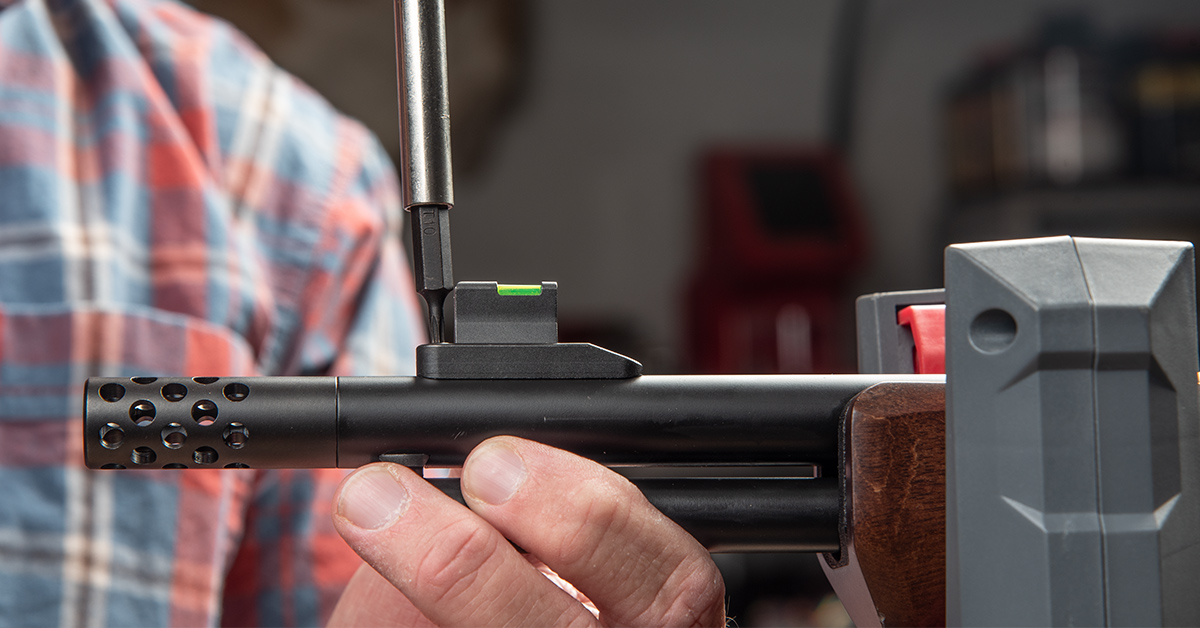
What’s great about this Marlin (and most modern rifles) is that the front sight uses a screw-and-pedestal mounting system rather than a drift-adjustable dovetail mount. Removing the front sight is as simple as removing the sight’s mounting screws.
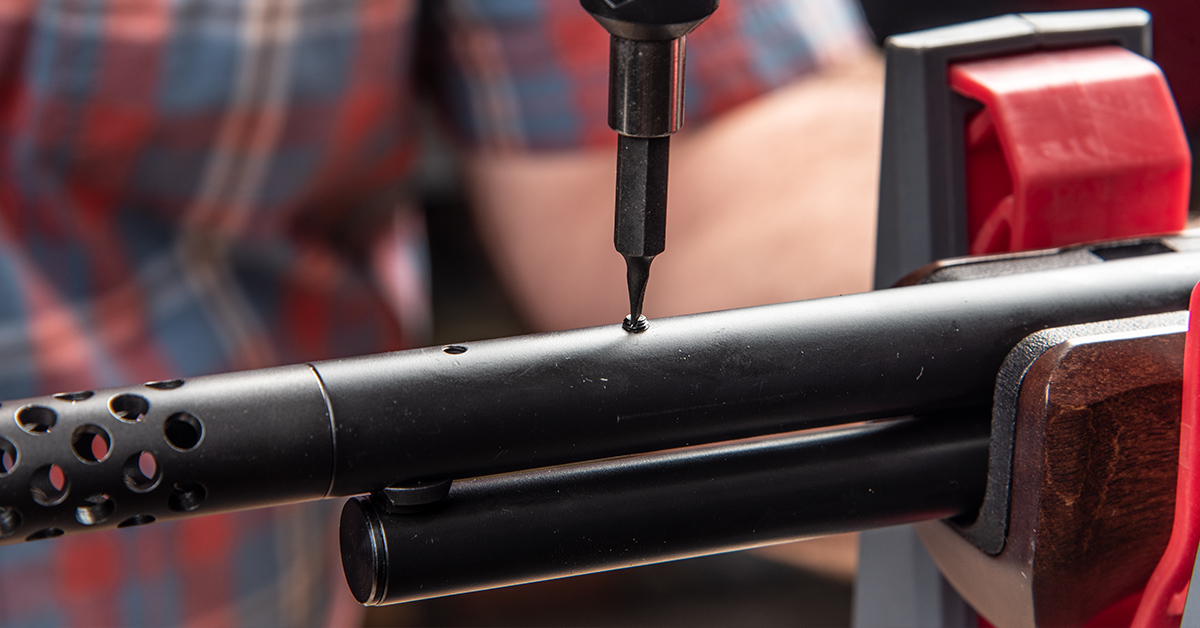
The thing is, with the screws removed, you’re left with one or two empty threaded holes in the barrel that should be filled for a couple of reasons. First, it will make the gun look better if you don’t have empty holes in the barrel. Second, those exposed, threaded holes will invite debris build-up and rust over time, and you don’t want that.
The solution is to cover the holes with plug screws. You can buy these at Brownells. Just match the thread pitch and install…sort of.
The depth of the screw holes may not exactly match the length of the plug screws. That was the case with the 6-48 screws I had on hand for the Marlin. Installed, the plug screws stood proud of the barrel. That’s a no-go. I needed to shorten the screws by taking off material from the bottom of the screws in order for the screws to sit flush with the barrel.
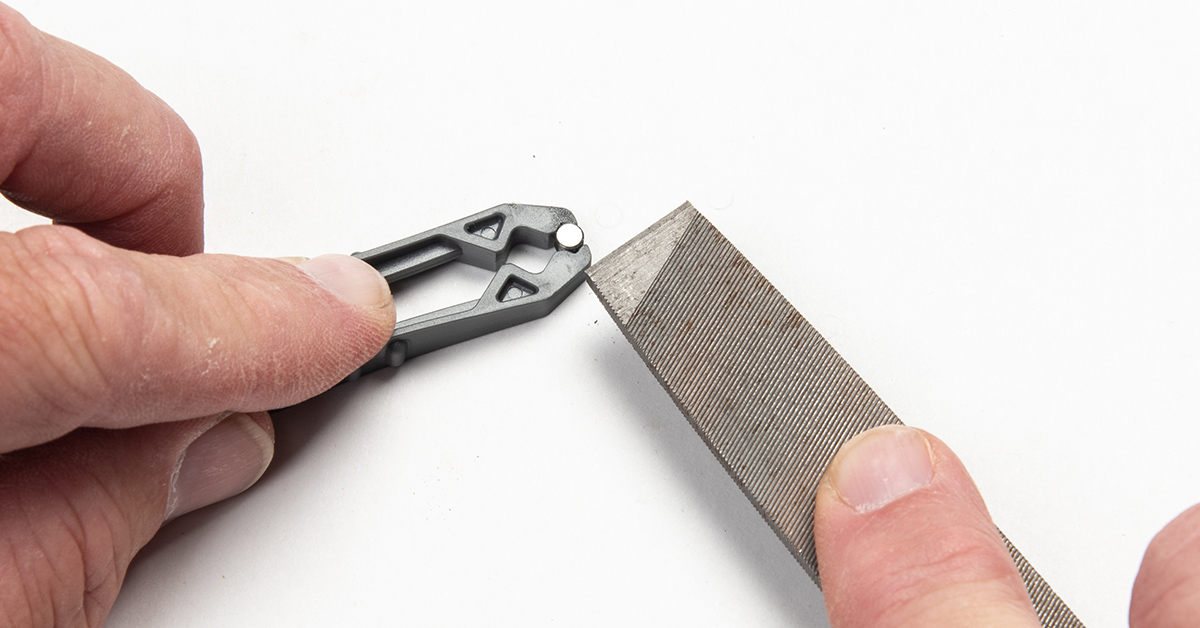
There are several ways you can do this. Choose whatever works best for you. I secured the screws in a pin holder and filed them down with a flat file to the correct length. It’s an aggravating process but keep at it and take your time.
Suppressor Installation
Installing the RXD910Ti suppressor is a cakewalk, but you’ll first need to remove the included booster for the rifle application. This is done by simply unscrewing the booster assembly from the back of the suppressor and installing a HUB-mount adapter in its place.

For this install, I used Dead Air’s P-series fixed mount (DA410) with a 1/2-28 thread. With the Dead Air Mojave booster removed from the can, the P-series mount screws right into its place.
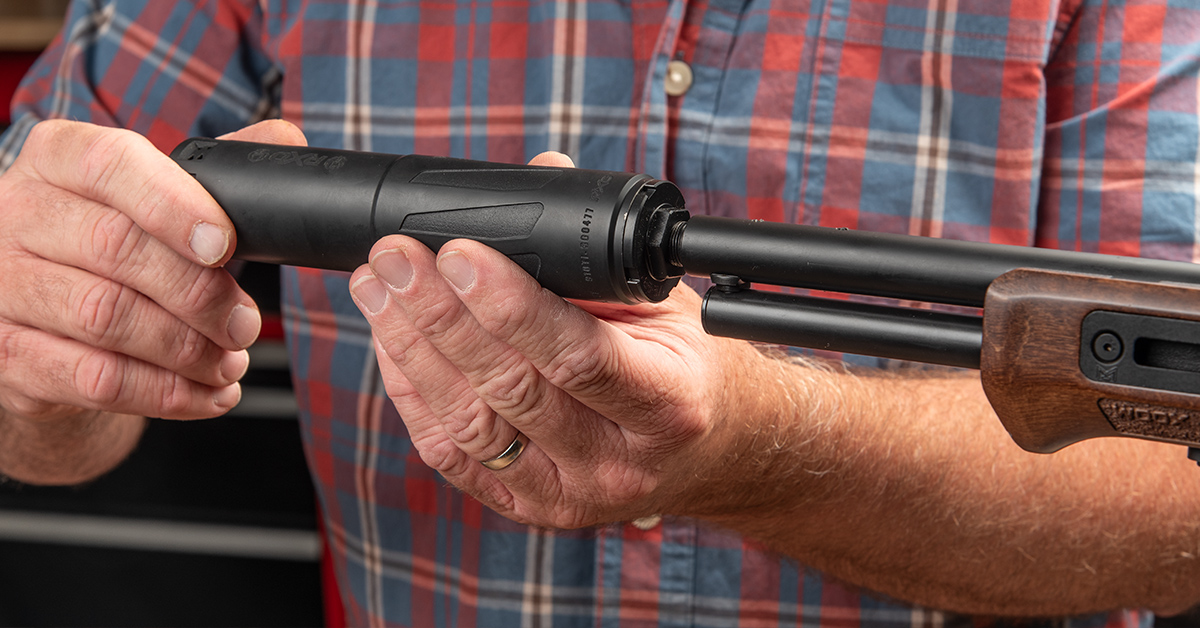
Now, the RXD910Ti can thread directly onto the barrel. It’s that simple. Just be sure to read the suppressor owner’s manual for lubrication and assembly/disassembly details.
Sling Install
Adding the Falco adjustable leather sling was the final topping of this tasty rifle build.
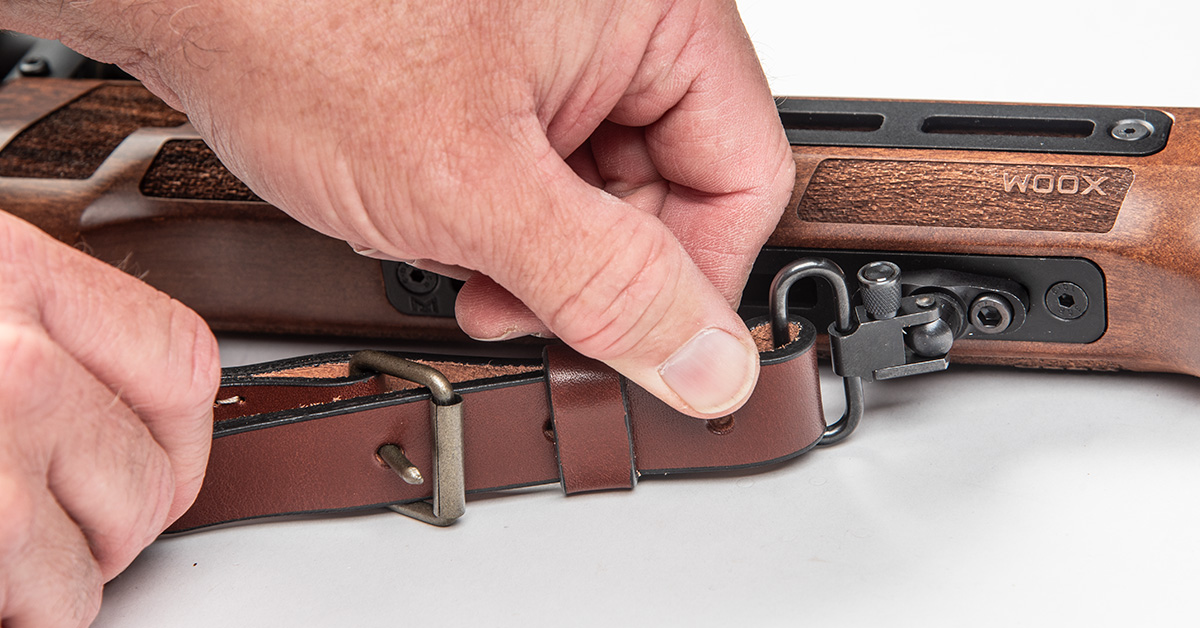
For the front attaching hardware, I used Grovetec’s Flanged Stud Mount M-LOK and secured the sling to the bottom Woox forend M-LOK rail via a locking sling swivel. On the back, I installed a Magpul QD sling swivel to the sling and secured it in the right-side QD cup of the buttstock.
I really like this sling. It is light, thin, adjusts to the perfect length for me, and looks part-and-parcel with the rest of the gun.
Grand Finale
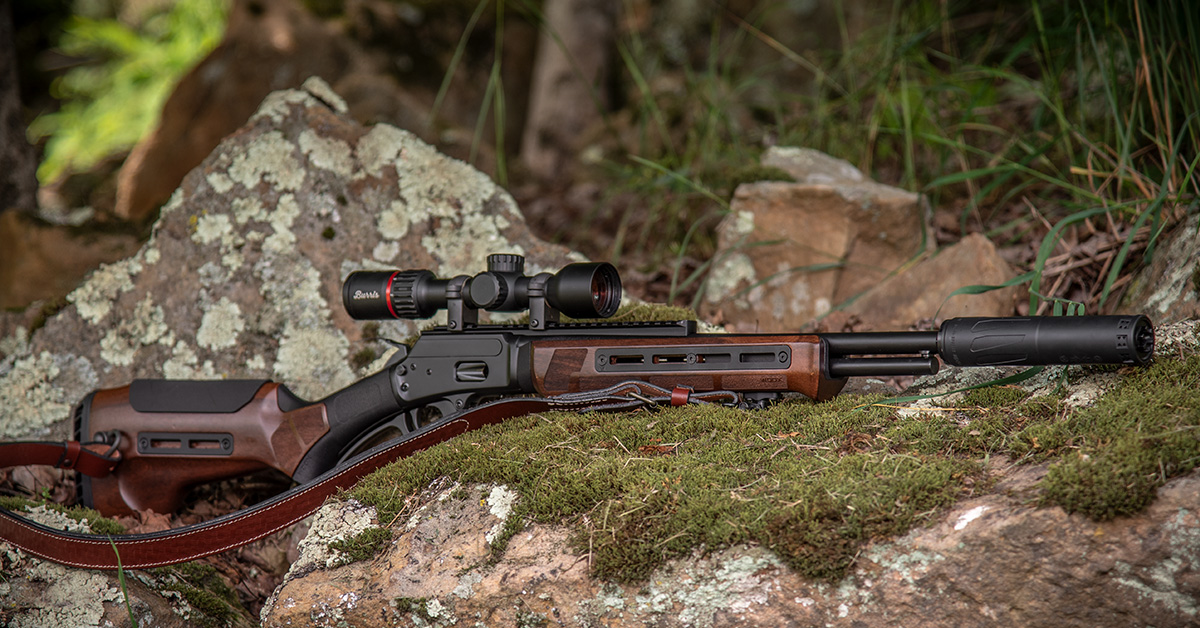
As you can see by comparing it to the factory 1894 picture at the beginning of this article, this lever-action has completely transformed both in form and in function. The Woox furniture and Falco sling are an ideal match for the rifle’s black oxide metal finish. The Burris Fullfield provides a smart accent with its red ring motif and compact size, and the RXD910Ti suppressor gives the barrel line a much-needed extension while delivering the sound suppression performance that is the point of it all. Of course, the Timney trigger upgrade offers crisper, more precise trigger sear action and cleaner shots that translate to smaller groups downrange.
In sum, these select modifications present a classical-styled lever-action worthy of heirloom status while giving up modern performance that begs for the hunting fields.
Next stop…load development.
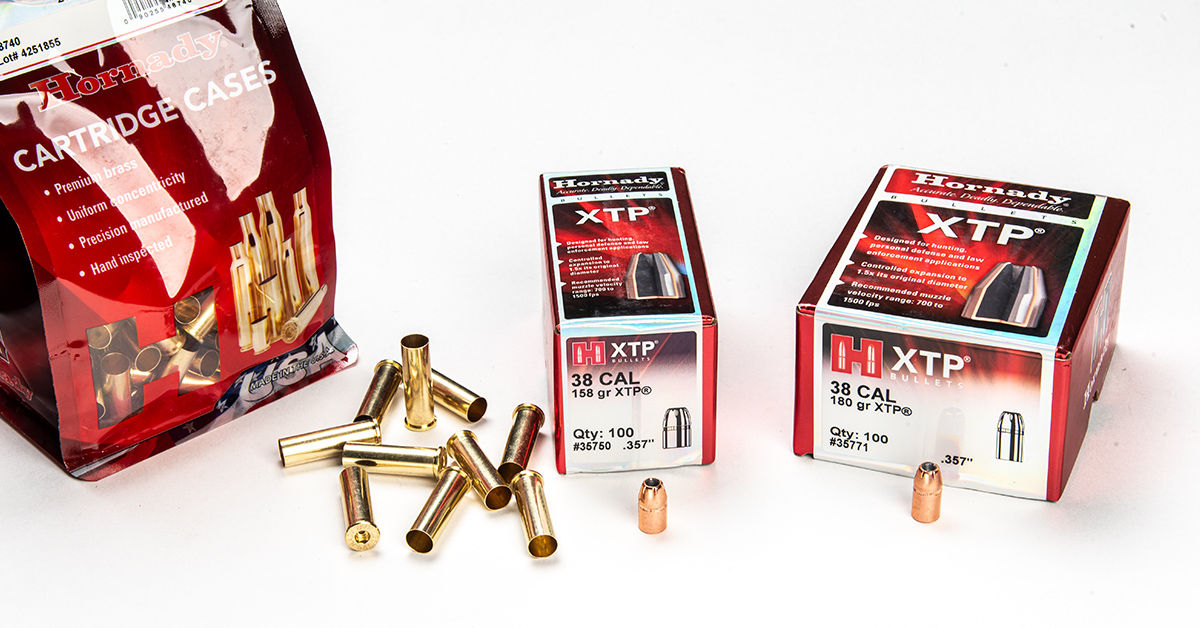
Having had great terminal success with Hornady’s XTP-series bullets in my 44 Magnum, I decided the best course of action was to stay with this projectile and noodle out the optimal weight and powder charge for this rifle. Stay tuned for the upcoming load development article…