Prop up a rifle, take aim, and fire? Not quite. Understanding the nuances of shooting from a bench rest will help put more bullets in the bullseye from ANY shooting position.
by Lou Patrick
Just so no one misunderstands, this is NOT an article on how to win a bench rest match. What we want to discuss here is how to properly support and shoot your rifle from a bench rest.
It is proven (and only logical) that a quality bench rest is the ideal support for properly zeroing a rifle and for testing ammunition because the utmost stability is required when performing these tasks. Lacking solid support, it is difficult to impossible to be accurate (defined as repeatable point of impact). Introduce variables such as poor shooting form or an unstable rest and you will never be sure if your scope is properly aligned or if the ammunition you developed is working with your setup.
A solid bench rest, correctly used, thus leads to improved accuracy. Only when you are sure of the hardware can you confidently move on to developing or maintaining your marksmanship skills by shooting in the various positions you will encounter in the field.
So, everything begins at the bench.
Aside from a sturdy a bench, little is needed beyond a front rest and a rear bag.
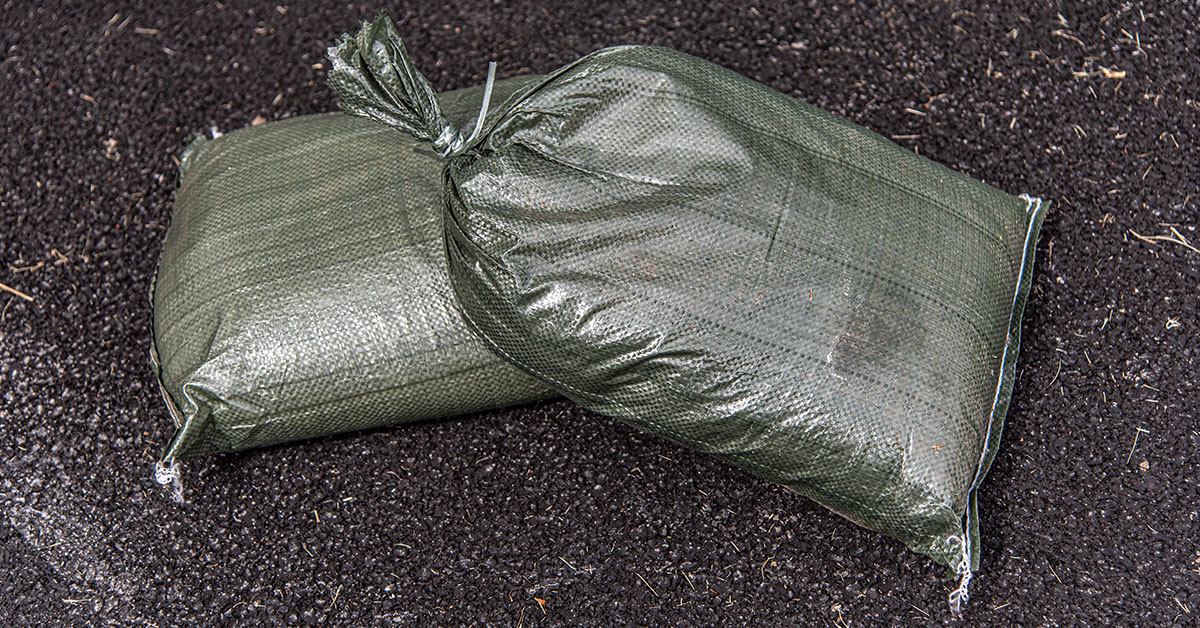
Sandbags (such as the military-style top-tied polypropylene bags) are fine examples of good support for a rifle. They are inexpensive, easily filled with fine sand (also inexpensive), and have the mass and conformability to work on the bench or when practicing shooting prone. One or two bags stacked atop each other is usually sufficient.
An adjustable front rest is, of course, the better option as it allows you to fine-tune rifle/shooter positions for maximum comfort and alignment. Such a rest is also more complicated than a bag of sand and costs a whole lot more. Serious shooters, however, find the investment in a high-quality adjustable front rest to be worth every penny. And we agree.
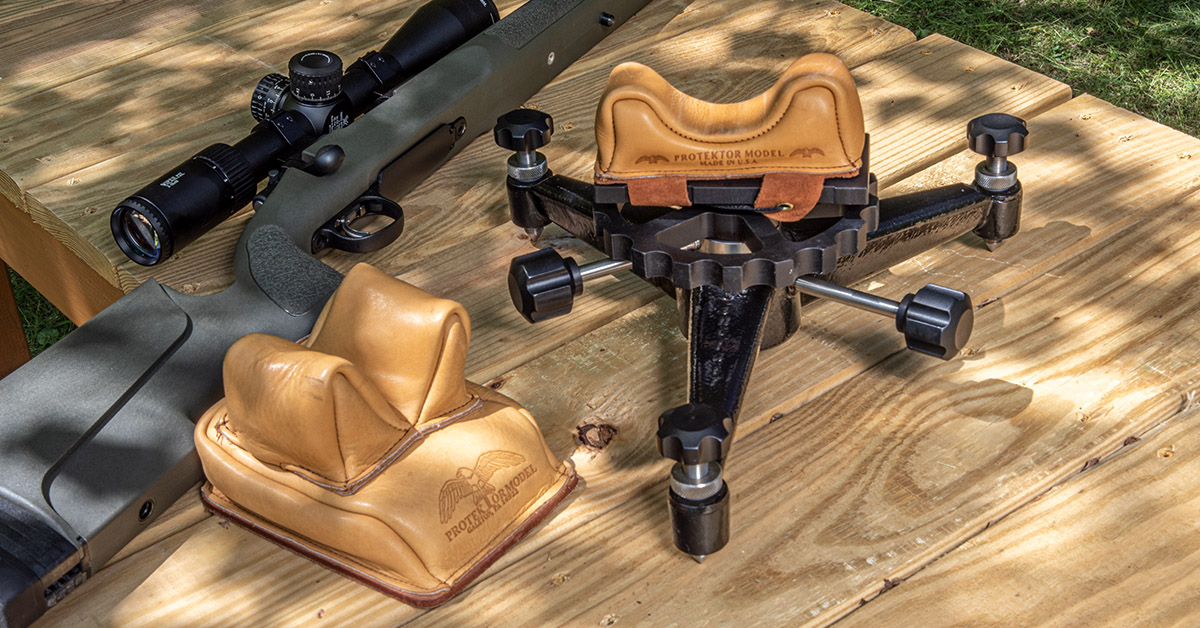
When purchasing a front rest, look for one with a heavy, cast iron base and a wide footprint—essential elements for maximum stability. The rest should also be made to accept a bag for the rifle’s forearm to rest on, and you’ll want a rear bag to support the rifle stock.
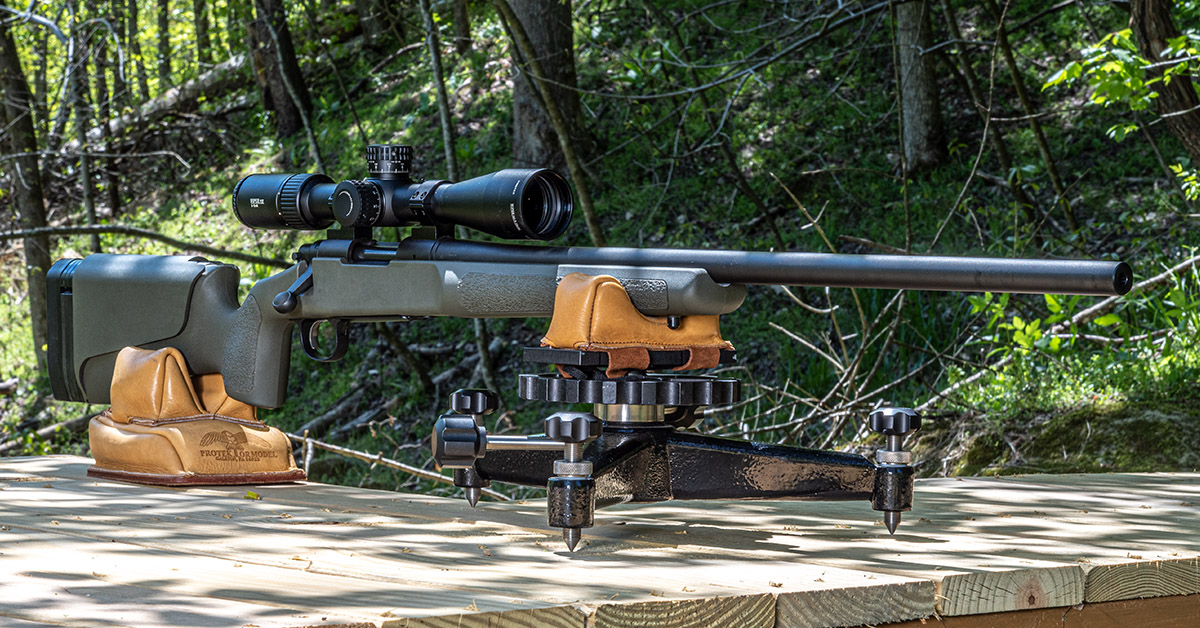
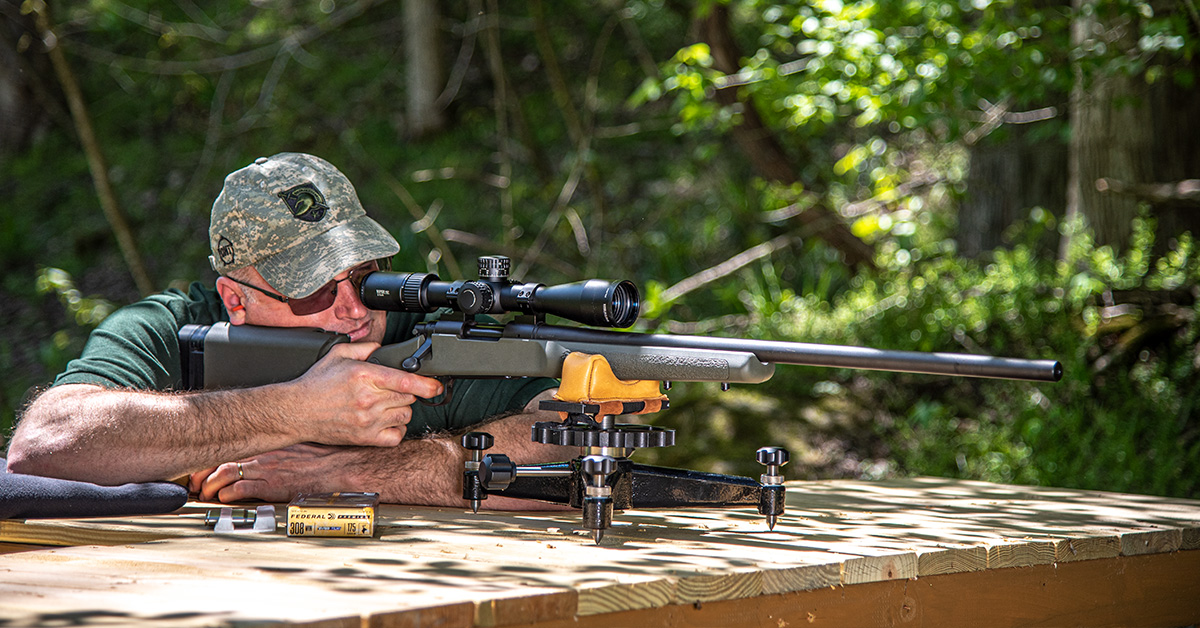
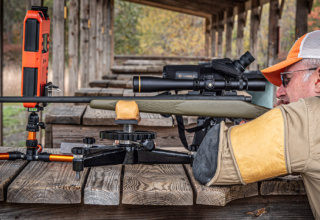
Pictured above is the Sinclair Basic Top Heavy Varmint Rest (Brownells part number 749-013-870WB) we use for our work here at Shoot On. The bags are Protektor models, also available from Brownells. The Small Owl Ear bag secures to the top of the rest to support the forearm. These type bags are made in assorted dimensions to accommodate different width forearms. Get the one that will work for the widest forearm you have and it will work fine for the smaller forearms. The Rabbit Ear Rear Bag is used to support the buttstock.
When purchased new, the bags are simply that—empty leather bags that must be filled with sand and packed as tightly as possible (additional sand will need to be added as the leather stretches). Once filled, simply place the rear bag and rest on the bench and fire away, right?
Well, not necessarily.
Not knowing any better, that is what I did years ago, and what most people do. Since then, I have learned that there is a better approach—slight considerations that, when applied correctly, will help shrink your groups and make your overall shooting experience more enjoyable and productive…
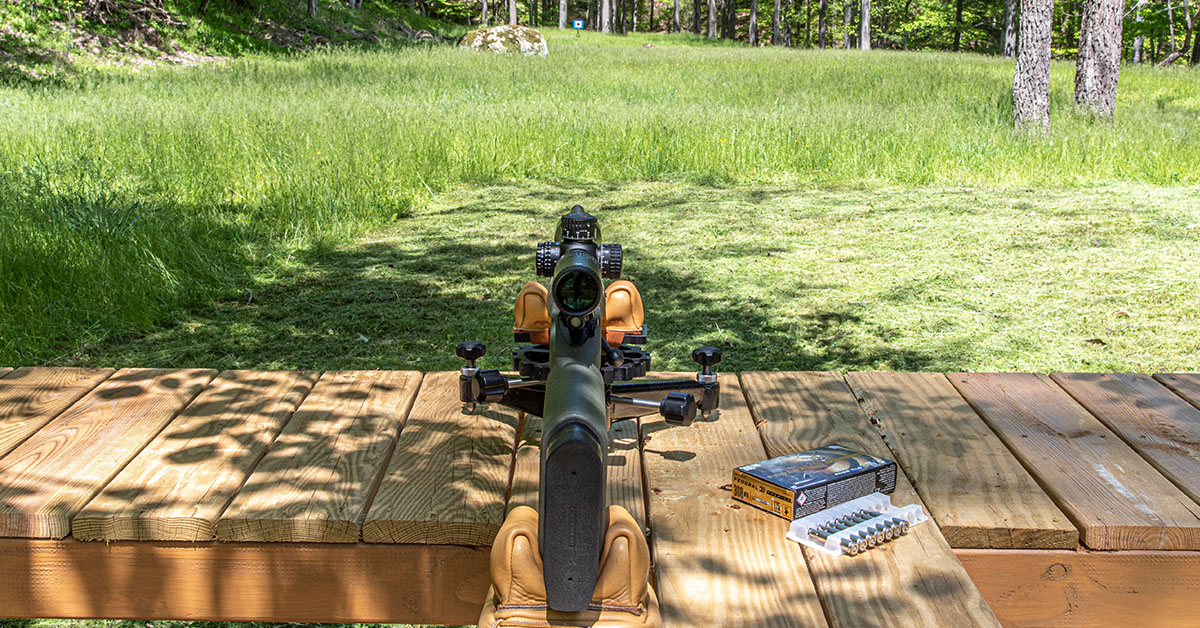
The front rest is placed on the bench in direct line with the target. The rear bag is placed to the rear and in direct line with the rest. The rifle is then positioned on the rest and the rear bag.
Without touching the rifle, look through the scope. The goal is to have the rifle naturally pointing on target as it sits in the rest. Everything should be in one straight line, from the target to the front rest to the rear bag, with the rifle straight as it sits in the rest and on target. This may seem a bit challenging at first, but once you do it a couple times, it becomes easier. Having everything in a straight line with the rifle naturally pointing on target helps provide that repeatability that is essential for accuracy.
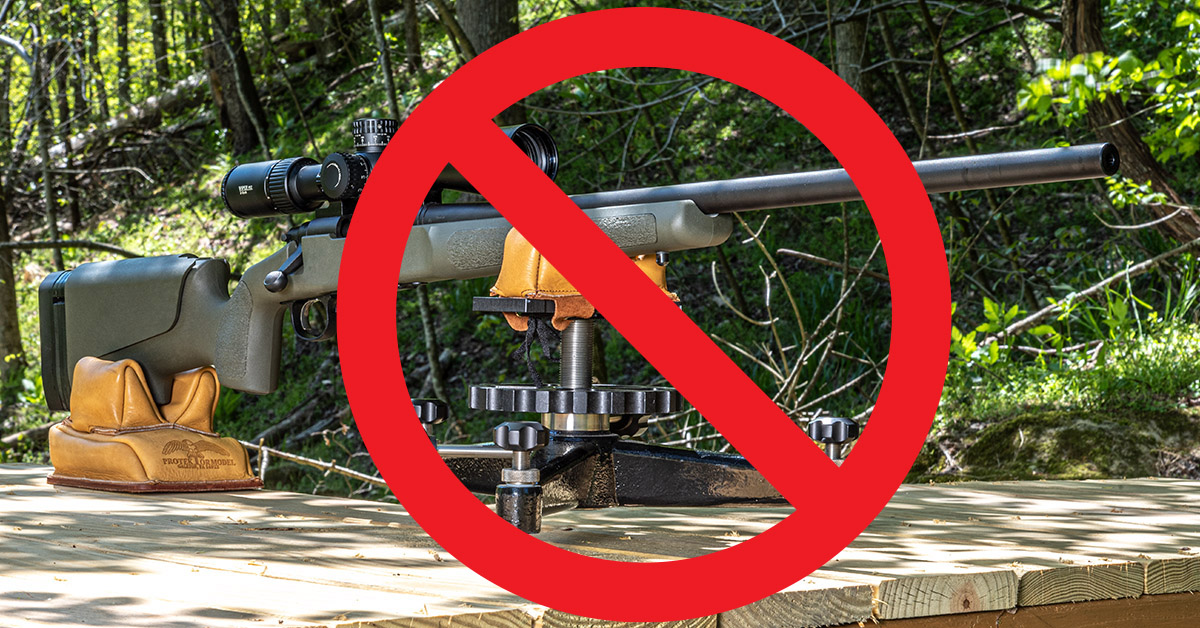
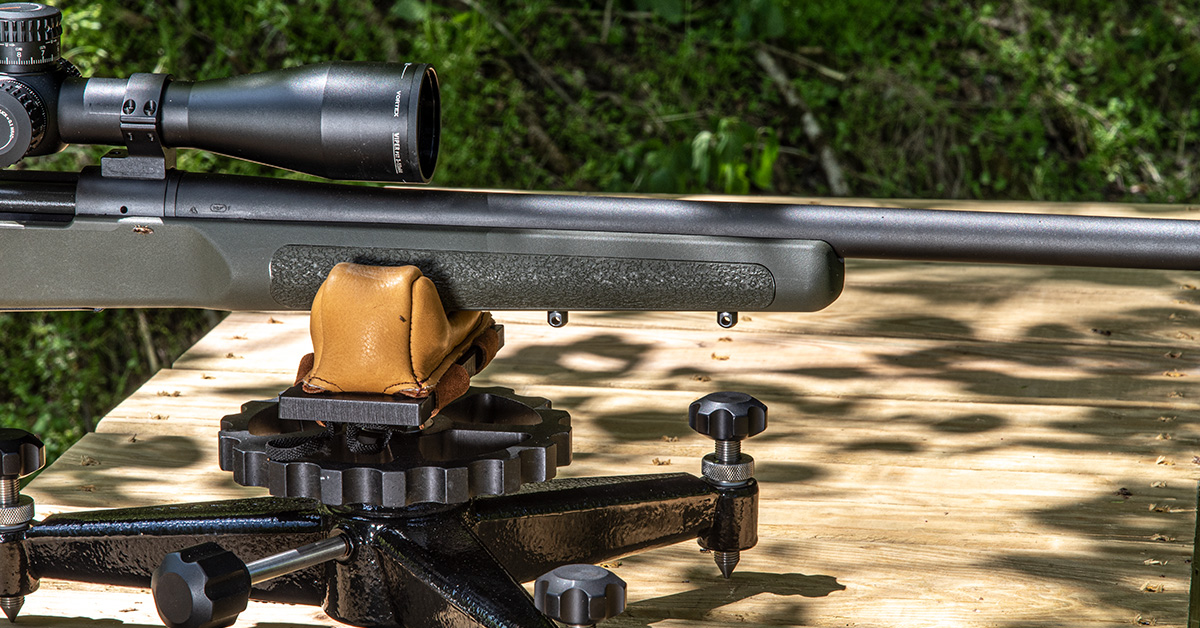
Look at the center column of the rest in the above photo. It is much too high. Avoid this during the initial set up, if possible. It is better to gain needed height by adjusting the feet on the rest instead of elevating the center column.
The lower we are, the more stable the rest will be. The goal is to be as low as possible.
Once fired, the rifle will recoil and “ride” the bags rearward. The aim is to have the rifle move directly rearward under recoil from shot to shot. Sling swivels and studs can interfere with this, which is why we never place them on the front bag. Remove the sling and ensure the front swivel stud is in front of the front bag and will not contact it during recoil.
The same goes for the rear swivel and stud. If present, remove them.
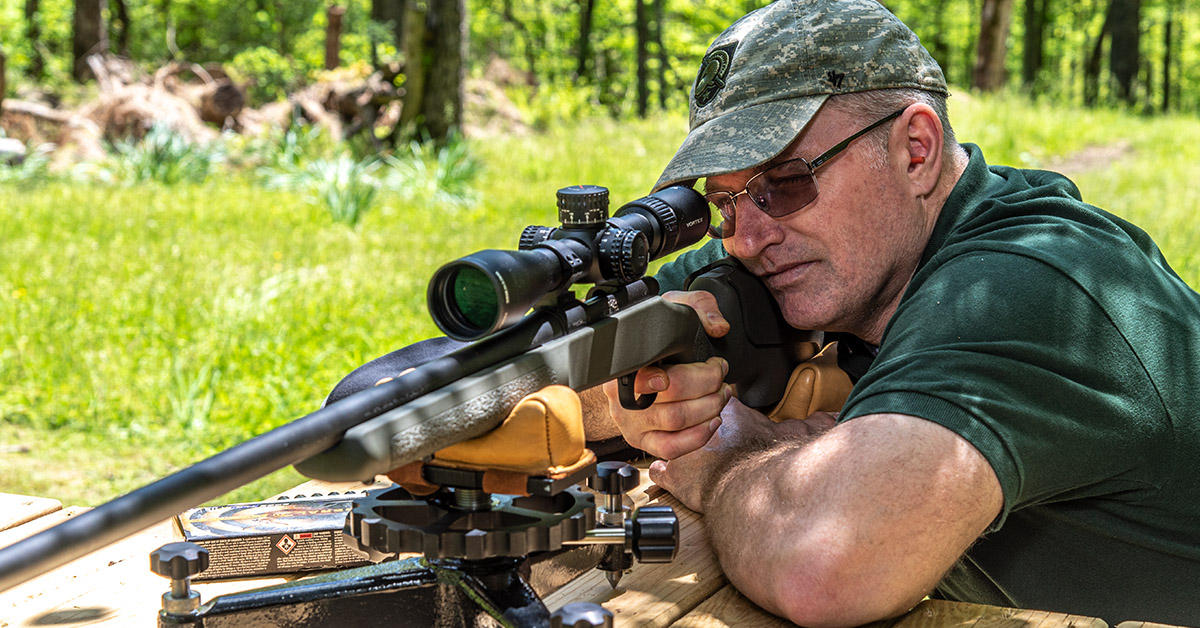
Once the rifle, rest, and rear bag are correctly positioned and aligned with the target, take your seat and position yourself behind the rifle. Firmly grasp the rifle grip with the firing hand and pull directly rearward, firmly seating the buttstock into your shoulder pocket. Do not grip or pull so hard that you cause yourself to shake or tremor. The buttstock should be comfortably, yet firmly, seated into the shoulder pocket and that pulling or seating motion should be directly rearward. Maintain this during firing and you will minimize felt recoil. The rifle will also “ride the bags” under recoil in a straight line and remain somewhat on target, making the next shot that much easier to line up. The firing elbow rests on the bench and will get sore after a few shots (or maybe even after one shot!). It is a good idea to place a folded towel or other soft item under your firing elbow for padding.
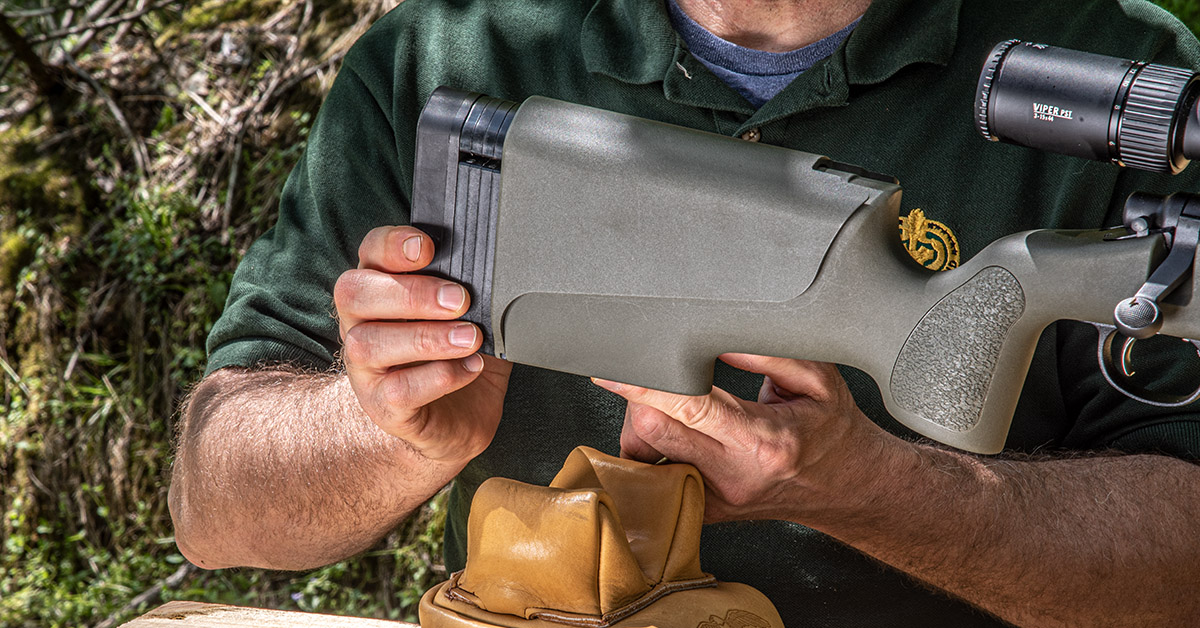
The non-firing arm should rest comfortably and relaxed on the bench. Additional padding under this elbow is not necessary. The non-firing hand thumb and forefinger should lightly grip the base of the rear bag “ears” as seen here.
Now that we are in the proper position and have done everything correctly, our reticle should be on target or close to it. Subtle sight corrections are to be expected and are easily made. Make small changes in elevation by squeezing or relaxing your grip on the rear bag ears. Minor windage changes are made by slightly shifting the rear bag left or right. Once on target, hold that position and apply the proper marksmanship techniques of breath control and trigger squeeze.
A key element to proper bench shooting is comfort. When everything is properly positioned, you should be relaxed and comfortable. Done correctly, you’ll find this method to be stable, accurate, and, with the rifle directed perfectly rearward, easily repeatable for the next shot.

