In this installment of our expansive series on reloading, we put the focus on the particulars of bullet seating and establishing the desired cartridge overall length
by Lou Patrick
We finished Part 8 of our reloading series, having completed the resizing and trimming of our cartridge cases. The cases are now ready for reloading. The next step in the process is to install the new primers in each of the cases. This is then followed by adding the correct amount of powder to each case, which is immediately followed by installing the new bullet.
Bullet installation is commonly referred to as bullet seating. The bullet is held in place within the neck of the cartridge case by friction. This “friction” is also referred to as neck tension, as the neck/mouth of the case is a slightly smaller diameter than the bullet. Bullet seating is the act of pressing the bullet into the case mouth/neck with a reloading press and a bullet seating die. Cartridge overall length (length of the assembled cartridge) is commonly measured from the tip of the bullet to the cartridge case head. This, of course, means how far you press the bullet into the cartridge case will have a direct impact on the overall length of the loaded round.
Cartridge overall length is yet another aspect of reloading that allows you some flexibility in customizing your ammunition for use in your rifle. Done properly, there is some accuracy to be gained here. So, before installing primers and powder in your cartridge cases, it’s a good idea to establish the proper cartridge overall length for use in your rifle and to adjust your bullet seating die accordingly. Once this is accomplished, reloading becomes no more than the assembly of the components, which can then move along seamlessly.
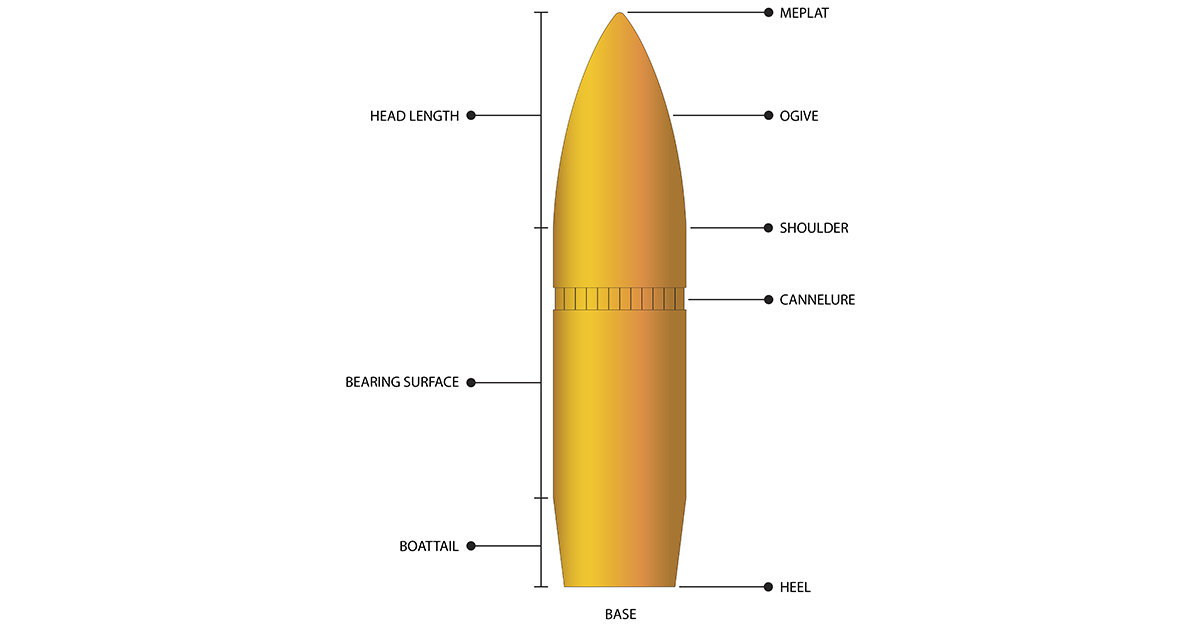
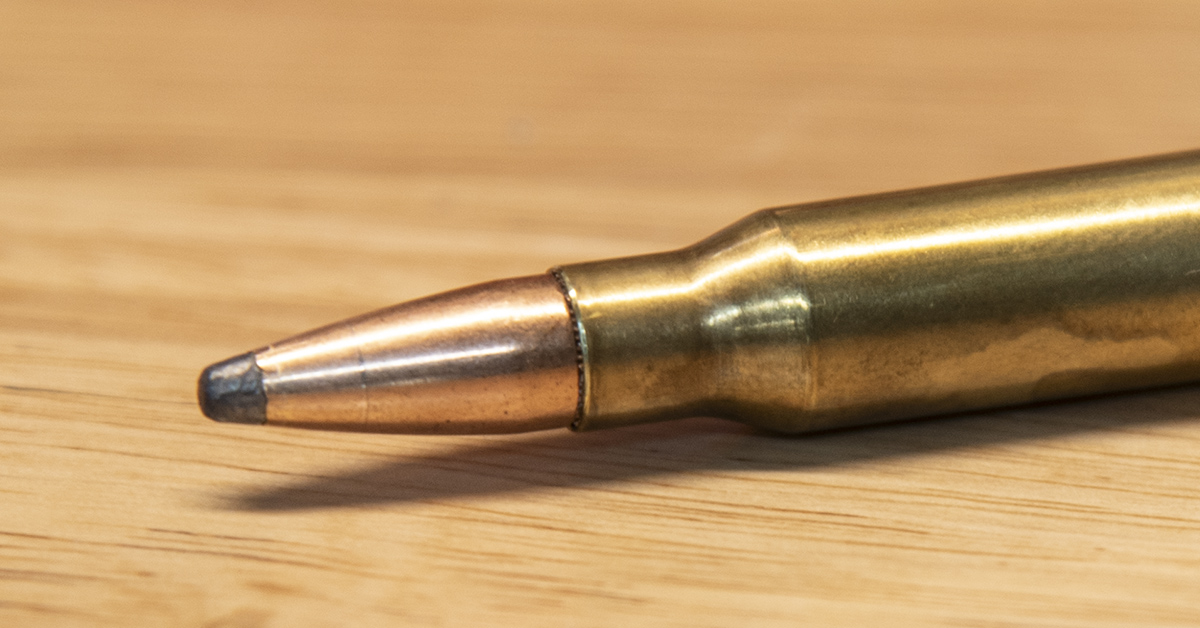
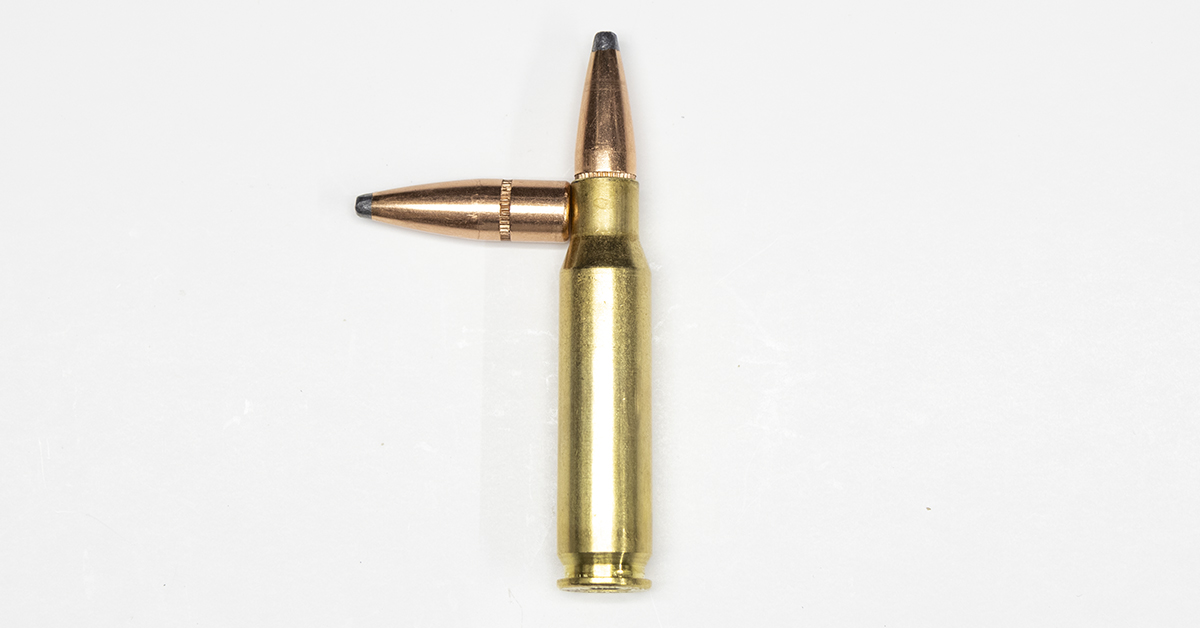
The external profile, or shape, of the bullet is comprised of several different design features. Some of these features, such as the boattail, are designed primarily to enhance the aerodynamic capabilities of the bullet. Others, such as the cannelure, are more mechanical in nature. The primary features that you are concerned with at this moment are the meplat, ogive, shoulder, cannelure, and bearing surface.
Meplat – Often, the meplat of hunting bullets is soft exposed lead. This can result in a slight deformation of the meplat if the bullets bounce around in the box during shipping. This minor deformation of the meplat is not detrimental to accuracy; however, it does make taking reliable cartridge overall length measurements rather difficult, if not impossible.
Ogive – This is the slight radius that leads from the meplat to the bullet’s shoulder. The ogive, being a smaller diameter, does not contact the rifling.
Shoulder – The shoulder is where the major bullet diameter begins, and it is the first part of the bullet to contact the rifling.
Cannelure – This is also commonly referred to as the “crimp groove.” Not all bullets will have a cannelure, nor do all bullets need to be crimped in place. If you plan on crimping, though, my advice is to use a bullet with a cannelure.
Bearing Surface – It is the friction between the bullet’s bearing surface and the case neck that secures the bullet in place. The bearing surface will be in full contact with the rifling. Not all bearing surfaces are of the same length. For example, a .30-caliber, 150-grain boattail spitzer will have a shorter bearing surface compared to a .30-caliber, 150-grain flat base spitzer.
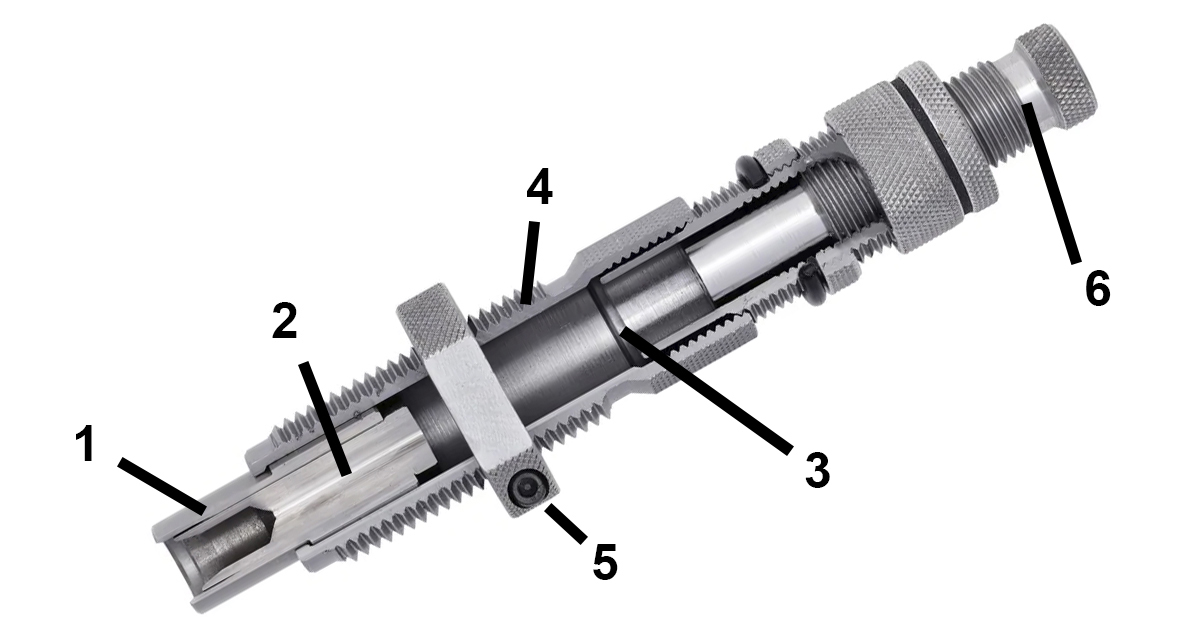
The Hornady standard seating die features a floating bullet alignment sleeve (#1). This sleeve will position the bullet and case neck in alignment with the seating stem (#2) before the bullet enters the mouth of the case. This die is also capable of crimping the bullet (3) in place. Crimping is optional and depends upon how far the die body (#4) is threaded into the reloading press. Once the die body is properly positioned in the reloading press for bullet seating (with or without a crimp), the lock ring (#5) is then tightened to preserve this adjustment. Once the lock ring is secured, the die may be removed from the press and reinstalled without further adjustment.
For our purposes in this article, we will not be crimping the bullets in place. How far the bullet is pressed or “seated” into the cartridge case is a function of the seater adjustment screw (#6).
Turn the seater adjustment screw clockwise and the bullet will be pressed deeper into the cartridge case. This will make the cartridge overall length shorter. Turn the seating stem counterclockwise to keep the bullet from pressing as far into the cartridge case. This will result in a longer overall cartridge length.
The challenge arises from the fact that the standard seater adjustment screw is absent of any reference lines. This makes bullet seating with this die somewhat of a trial-and-error affair. Nevertheless, this method is effective. I have used it successfully for many years and there is no need to readjust unless you change bullets or wish to change your cartridges overall length. This method can be somewhat of a hassle if you are loading several different bullets for the same cartridge.
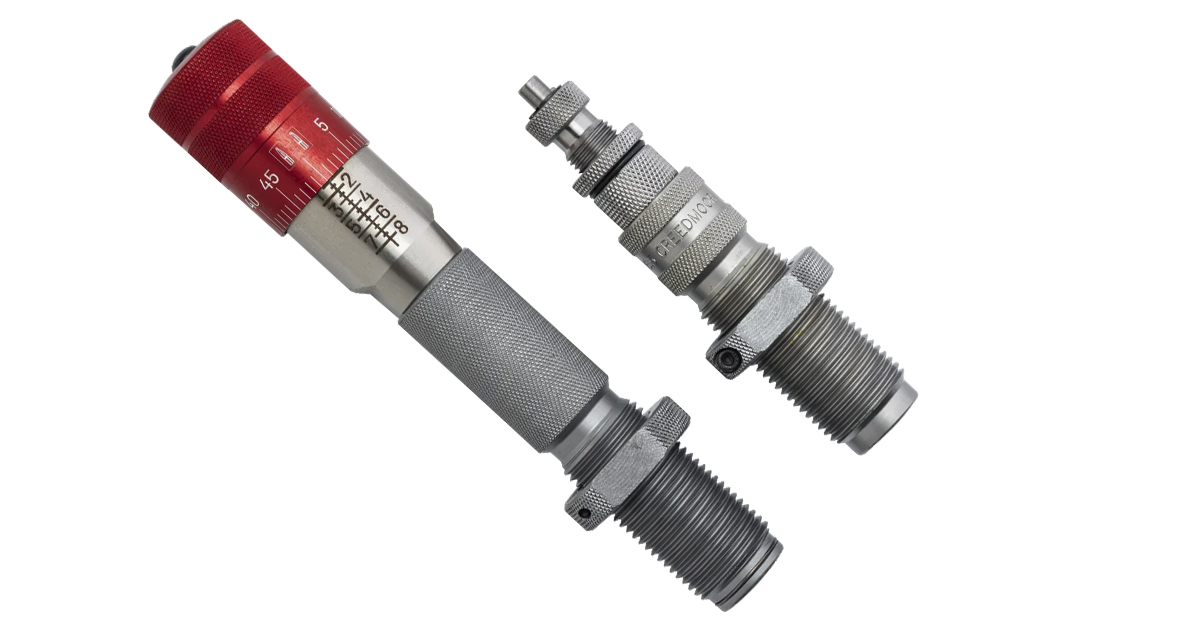
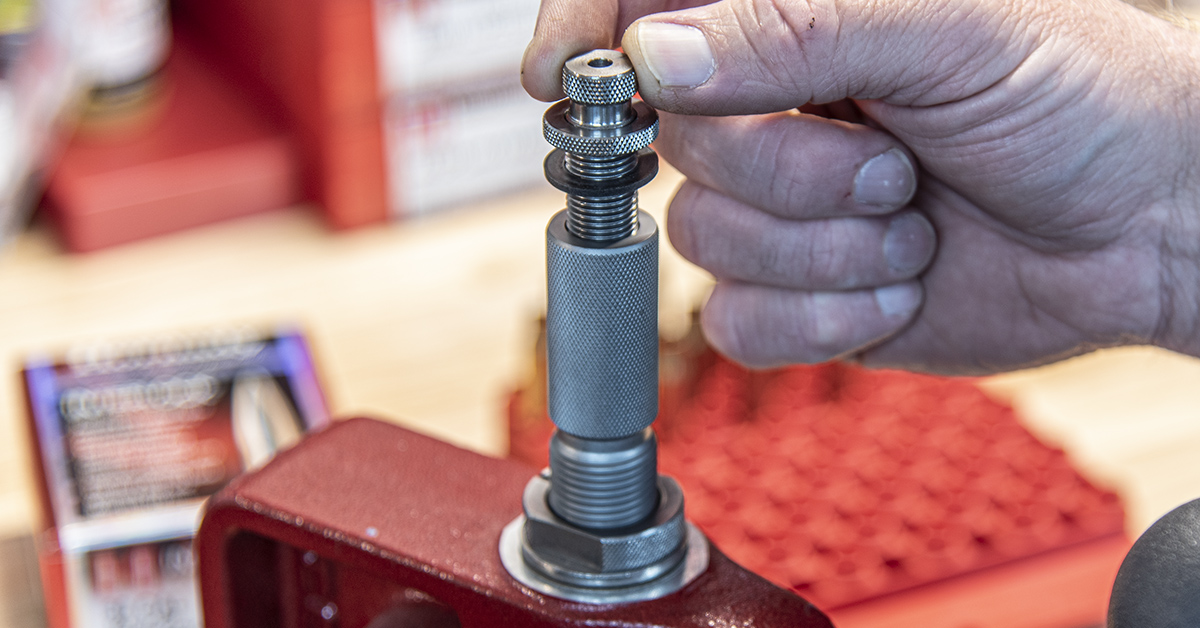
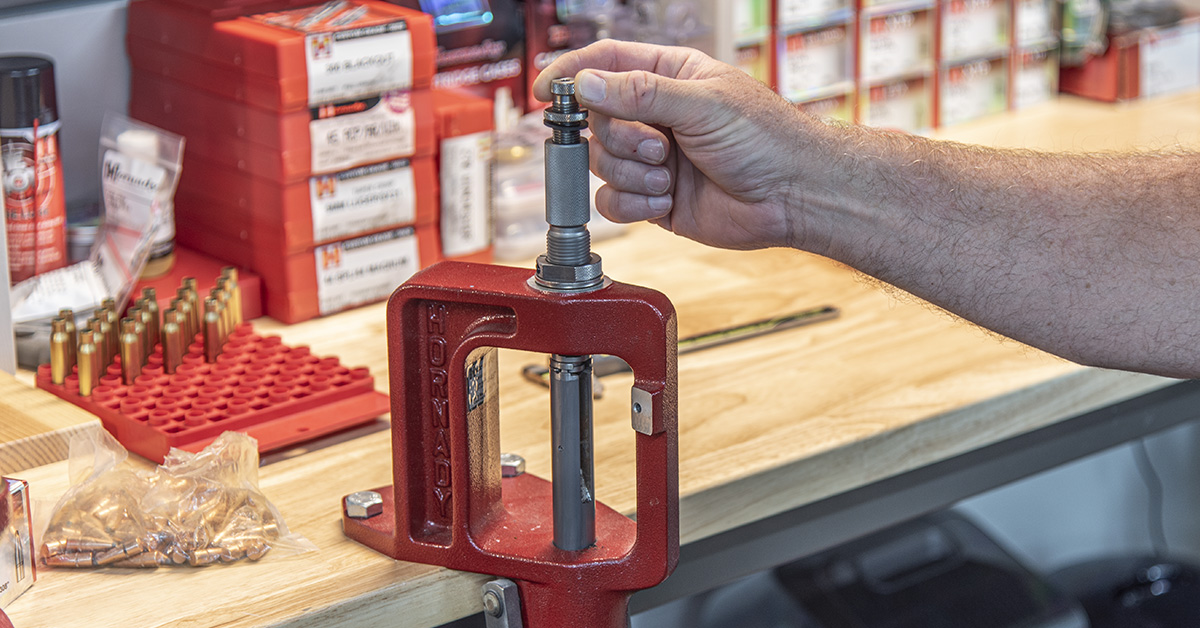
The Hornady-Click Adjust Bullet Seating Micrometer (shown above, left) is a direct replacement for the standard seater adjustment screw. Simply remove the standard seater adjustment screw from the die body by turning it counterclockwise then install the bullet seating micrometer by threading it clockwise into the die body. In my opinion, this is a worthwhile upgrade. The bullet seating micrometer provides reference lines and a tactile feel, allowing you to reliably make .001 changes to bullet seating depth.
The floating alignment sleeve used in the Hornady seating die will hold the case and bullet in proper alignment prior to the bullet being seated into the case. As the bullet is being pressed or “seated” into the case, the alignment sleeve is pressing against the ogive of the bullet and not the bullet’s tip (meplat). Using the ogive as the engagement surface provides for greater repeatability and prevents meplat deformation during the seating operation.
Following the manufacturer’s instructions, our seating die is installed in the reloading press with the die body adjusted to seat bullets without crimping. The lock ring is tightened into position to preserve this adjustment. The seater adjustment screw is adjusted all the way up by turning it counterclockwise. The seater adjustment screw is temporarily adjusted in this fashion since we do not currently know what the desired overall length of our cartridge will be. Adjusting the seating stem all the way up makes the initial adjustment of the die easier because you can only adjust down from this position.
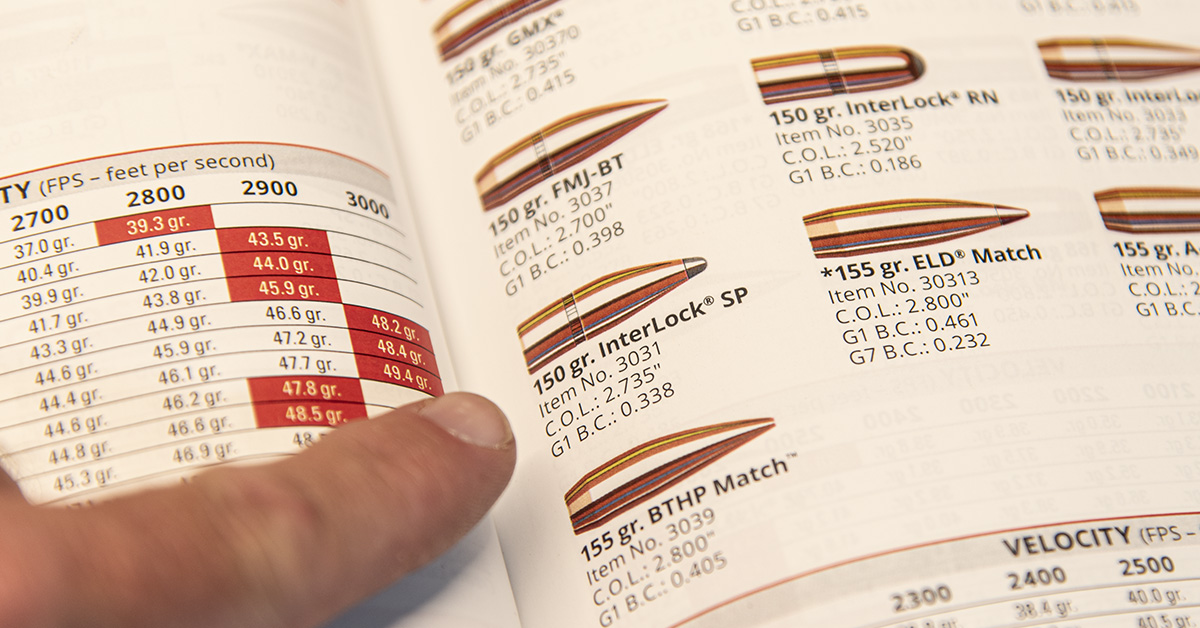
Before further adjustments of the bullet seating die can be made, you must determine the desired overall length of the cartridge. This information can be found in the reloading manual and is abbreviated C.O.L. for “Cartridge Overall Length.” Loading your cartridges to the published overall length will provide you with an easy means to load safe, accurate ammunition. Although you may be leaving a little accuracy on the table, as it has long been established that cartridges loaded with the bullets closer to the rifling (longer C.O.L.) tend to shoot more accurately.
We tested factory ammunition in Part 5 of this series using Hornady American Whitetail .308 Winchester loaded with a 150-grain Interlock bullets. As we are duplicating this load at the reloading bench, this test provides us with an accuracy baseline from which we can make comparisons when we test our reloads. With this in mind, I also find it best to examine the factory ammunition. The information gathered can then be compared with the reloads.
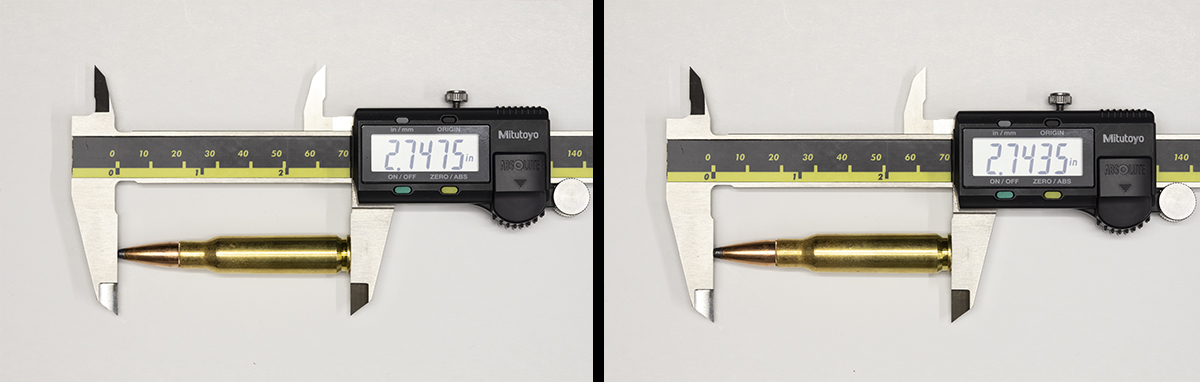
When reloading a .308 Winchester cartridge using a Hornady .30-caliber 150-grain Interlock bullet, the reloading manual lists a C.O.L. of 2.735 inches. The C.O.L. of two factory Hornady American Whitetail .308 Winchester cartridges (pictured above) measured 2.747 and 2.743, respectively. The .004 difference in length is most likely due to deformation of the exposed soft lead meplat. I don’t know why this represents an .008-.012 thousandths difference from their published data.
The exposed soft lead meplat often found on hunting bullets is easily deformed. Considering that C.O.L. measurements are typically referenced out to the third place to the right of the decimal point, it doesn’t take much deformation to affect your C.O.L. measurement. As a reloader, you want all the cartridges to be of the same overall length. This is practically impossible to do when using the bullet’s meplat as a point of reference. Because the bullet seating die presses against the bullet’s ogive, you’ll gain far more consistent C.O.L. measurements if you use the ogive as a point of reference.
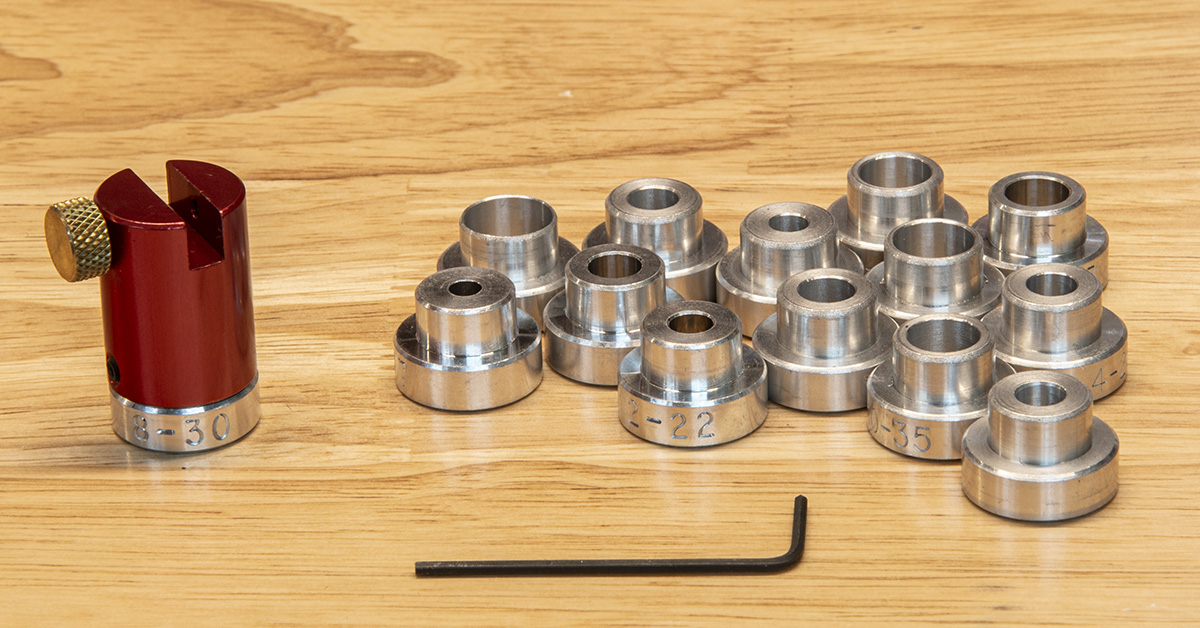
The Hornady Lock-N-Load Bullet Comparator and Insert Kit attaches to your caliper, providing you the means to measure C.O.L. using the bullet’s ogive as a refence point. Of course, this means that your C.O.L. measurements will be somewhat shorter than the listed C.O.L. in the reloading manual since the bullet’s ogive is behind the meplat. This is of no concern because we are going to establish our own C.O.L. using the bullet’s ogive as a point of reference.
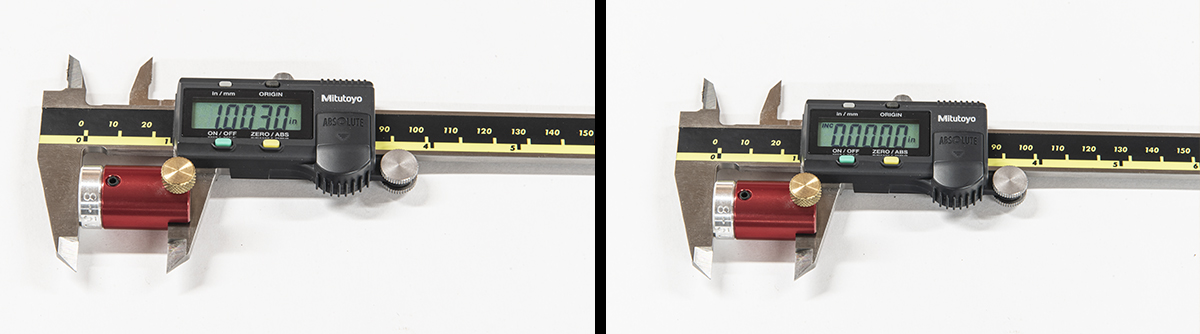
Following the manufacturer’s instructions, install the bullet comparator on your caliper. Once installed (left), your caliper will measure the length of the bullet comparator. Before use, you must zero the caliper with the comparator installed. For digital calipers, simply press the zero button. If your caliper is like mine, you’ll need to do this each time the caliper is turned on and off.
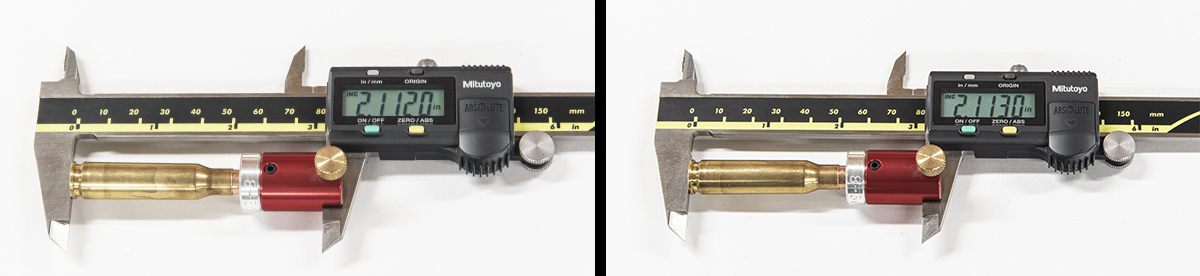
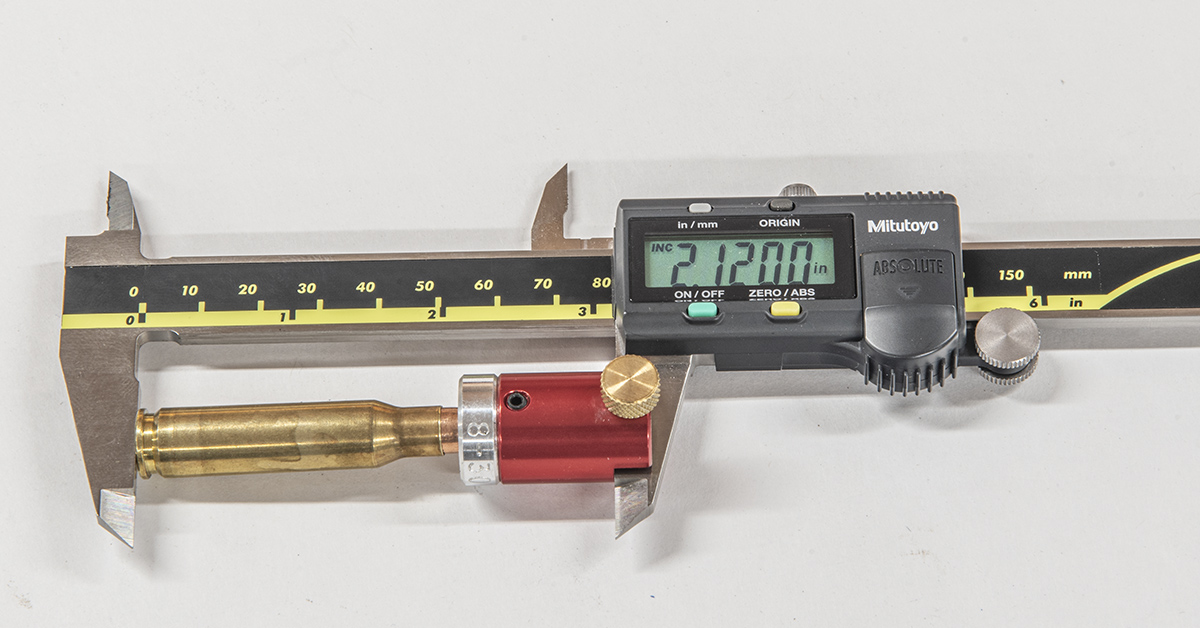
When these two cartridges were previously measured using the standard bullet meplat-to-case head method, this revealed a .004 difference in the overall length between the two cartridges. Using the bullet comparator and measuring these two cartridges from the bullet’s ogive to case head, the difference is only .001. While .001 is not much of a difference, it is a difference; however, using the bullet comparator and measuring cartridge overall length from the bullet’s ogive is much more reliable than using the meplat as the reference point. As I measured the remaining rounds in the factory box, I found that most measured 2.112 in length. This will be the length used when referencing the length of this factory load. Of course, while seating the bullets, your primary goal will be for every cartridge to be of identical length.
The .001 difference in length of the two factory cartridges measured may be due to a slight difference in the bullets — emphasis “slight” — as .001 isn’t very much. Using the bullet comparator, measure the length each bullet in a new box of bullets. You’ll find that they are not all identical.
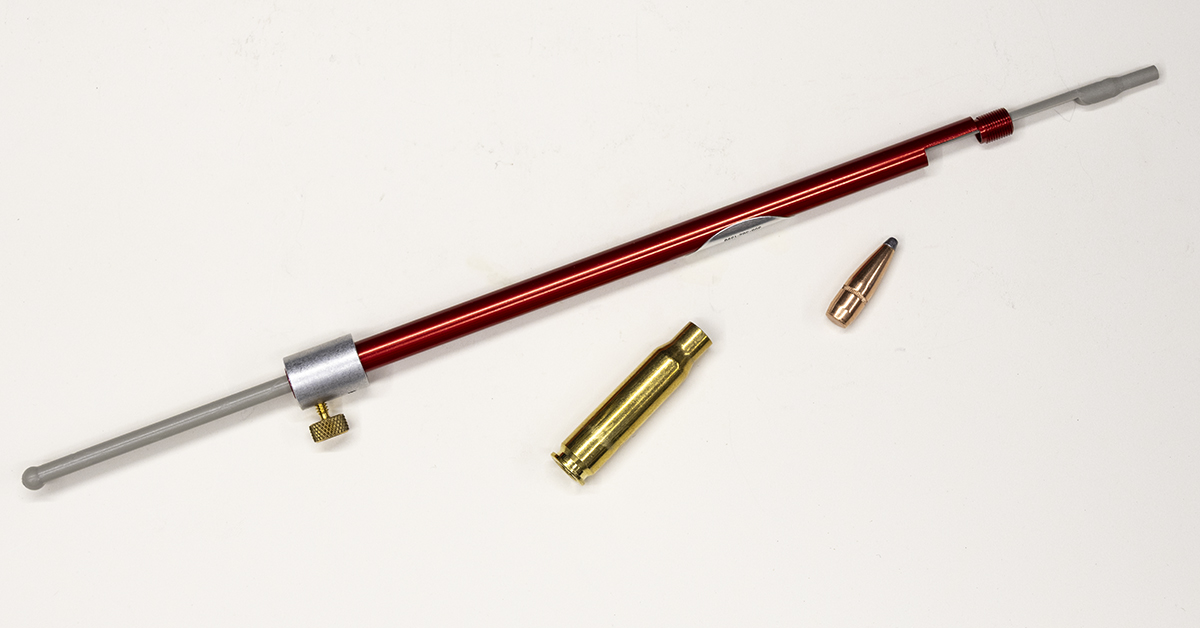
The Hornady Lock-N-Load O.A.L. Gauge provides the means to measure your rifle’s chamber and to then establish a safe C.O.L. for that rifle. This gauge uses modified cartridge cases that attach to the gauge and allow a bullet to easily slide in and out of the case neck. When using this gauge, it is important to use the same bullet that you will use for reloading. The C.O.L. that will eventually be established will only be good for that particular style and weight of bullet from that manufacturer. Change to a different bullet or a different manufacturer and you’ll need to take new measurements using the new bullet.
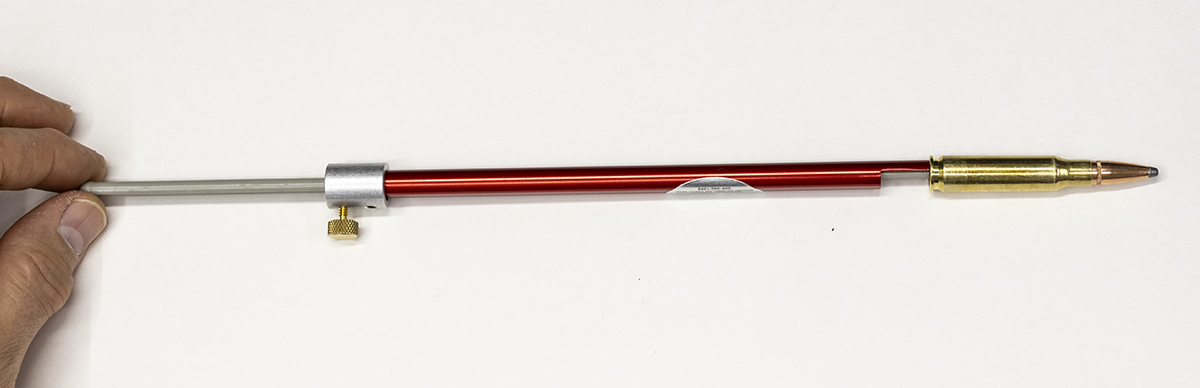
Attach the modified case onto the end of gauge by simply threading it in place. Next, place the bullet you are using into the case mouth. Looking at the left side of the picture above, as I move the adjustment rod to the right, the bullet will also move to the right, effectively creating a transfer gauge that easily measures your rifle’s chamber length.
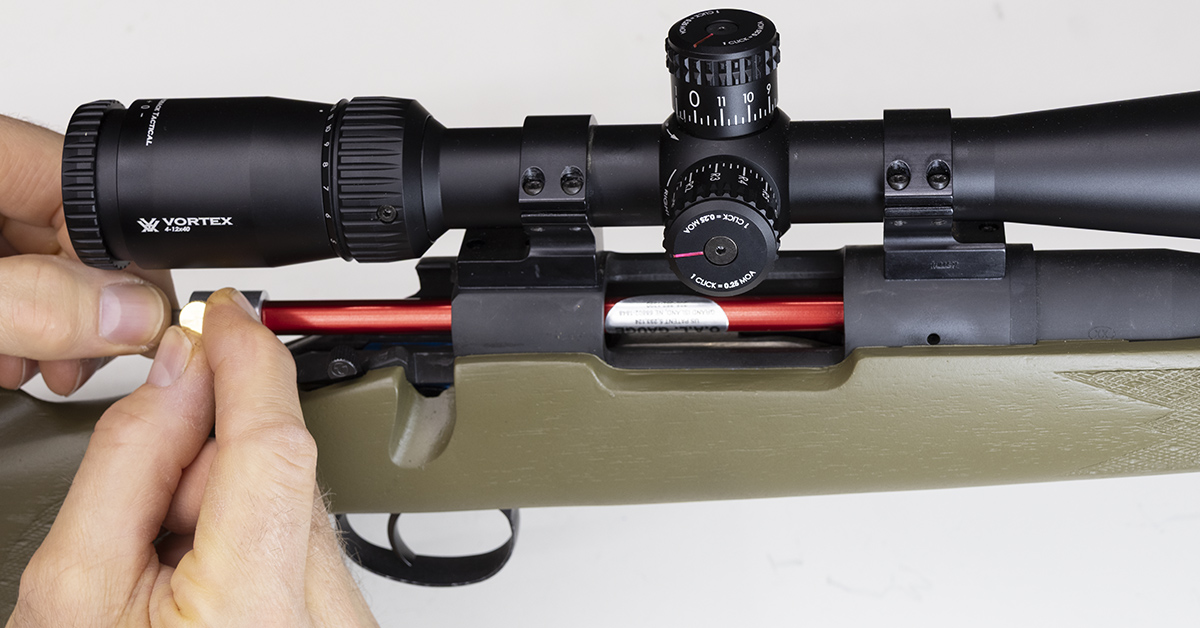
Following the manufacturer’s instructions, slide the gauge into the rifle’s chamber. Gently push the adjustment rod, moving the bullet forward until you feel it contact the rifling. Emphasis here is on “gently.” You do not want to force the bullet into the rifling; you only want it to lightly contact the rifling. Once you feel the bullet contact the rifling, tighten the locking screw while holding the adjustment in place and remove the gauge from the rifle.
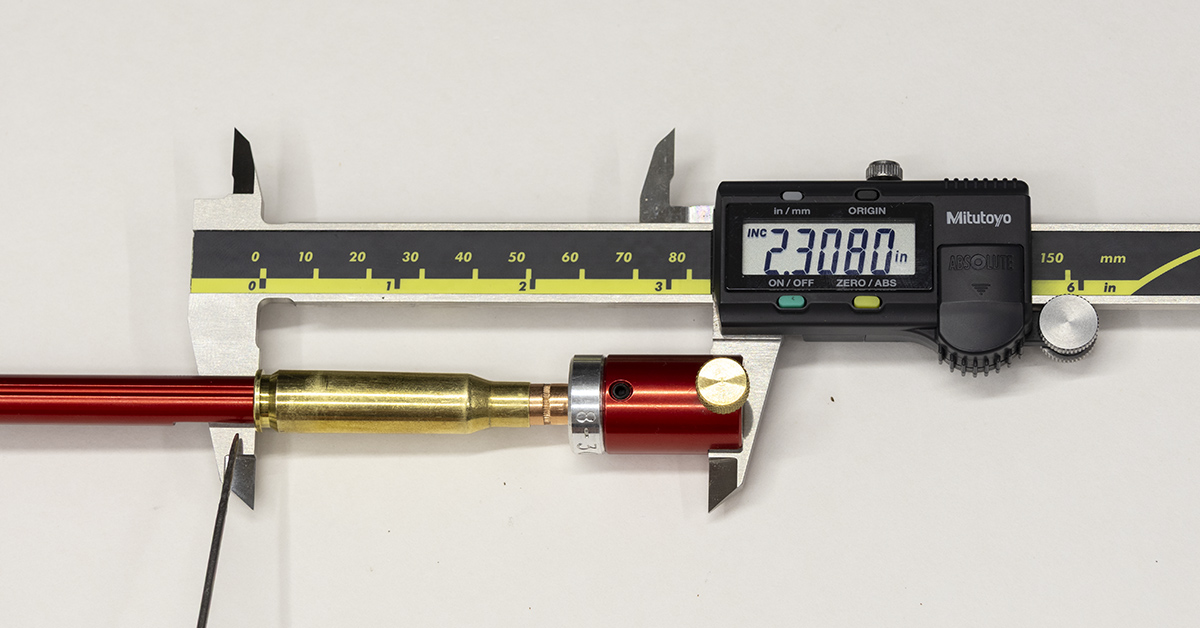
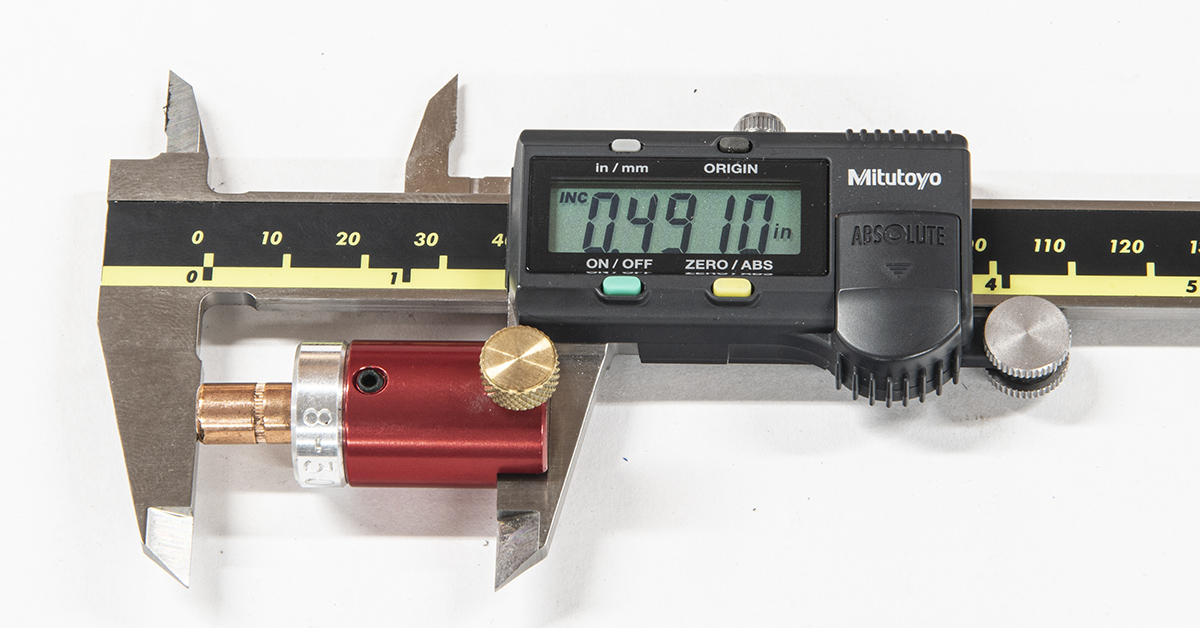
The O.A.L. gauge measures 2.308, which reflects the maximum length cartridge that will fit within the rifle’s chamber. Keep in mind that this length places the bullet in contact with the rifling. Loading ammunition to the maximum length is undesirable — particularly for the hunter. The first concern is that of chamber pressure. With the bullet already touching the rifling, this is certainly going to cause an undesirable and possibly dangerous spike in chamber pressure when fired. If a round loaded to this length was chambered and not fired, attempting to unload the rifle may result in a bullet stuck in the barrel and powder spilling within the rifle’s action.
Yes, unfortunately, I’ve witnessed a few people experience this very problem over the years. Looking closely at the picture above, you can see that the cannelure is rather far forward of the case mouth. This is a good indication that this cartridge is not going to fit within the rifle’s magazine. Often enough, for the hunter, the greatest limiting factor to the cartridge’s overall length is that of the magazine. The goal is to create a somewhat longer cartridge that will tend to shoot more accurately while also maintaining the full function and safety of the firearm.
We currently know that the cartridge must be shorter than 2.308 to safely fire in this chamber. This begs the question, “how much shorter?” Subtracting .020 from the maximum length measured will provide some much-needed clearance between the bullet and the rifling. How far the bullet should be away from the rifling is a source of great debate among reloaders. Some will say that .020 is too far from the rifling and prefer .010, while others may prefer .005.
When reloading for a factory hunting rifle, I prefer a somewhat different approach. Yes, we do want to minimize the distance the bullet travels before it contacts the rifling, but we also want the bullet seated into the cartridge case as straight as possible. Further, we also want the bullet to stay in place within the cartridge case. This is why I advise that the bullet should be seated into the cartridge case a minimum of one caliber (bullet diameter) deep. This means that a .30-caliber bullet should be at least .308 deep into the case. Looking at the picture above, you can see that when the bullet is seated to a depth of one caliber, the case mouth is now positioned over the cannelure. As the bullet is seated deeper into case (within certain limitations, of course) it will tend to be seated straighter within the case and it will also tend to stay in place. Both attributes serve as an aid to accuracy.
While I do advise seating the bullet to a minimum depth of one caliber, this is not cast in stone. A few thousandths shy of this mark will not harm anything. It’s difficult to place an exact number on this since the rifle’s magazine will most likely be largely determining the C.O.L.
When establishing the overall cartridge length for a factory hunting rifle, my preference is to do the following:
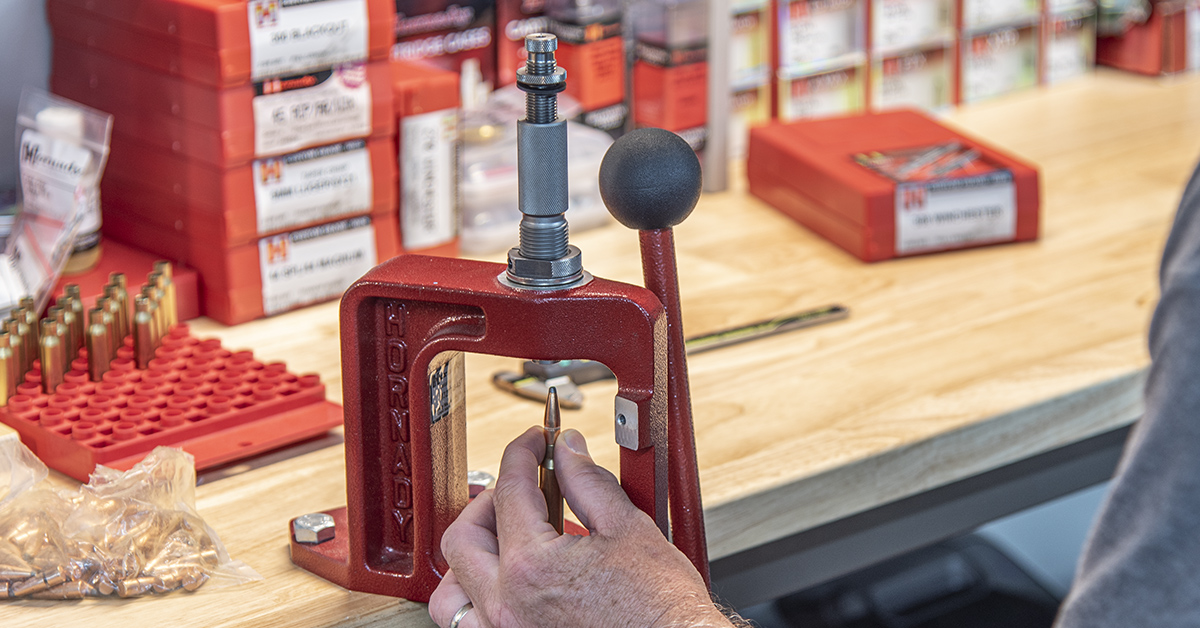
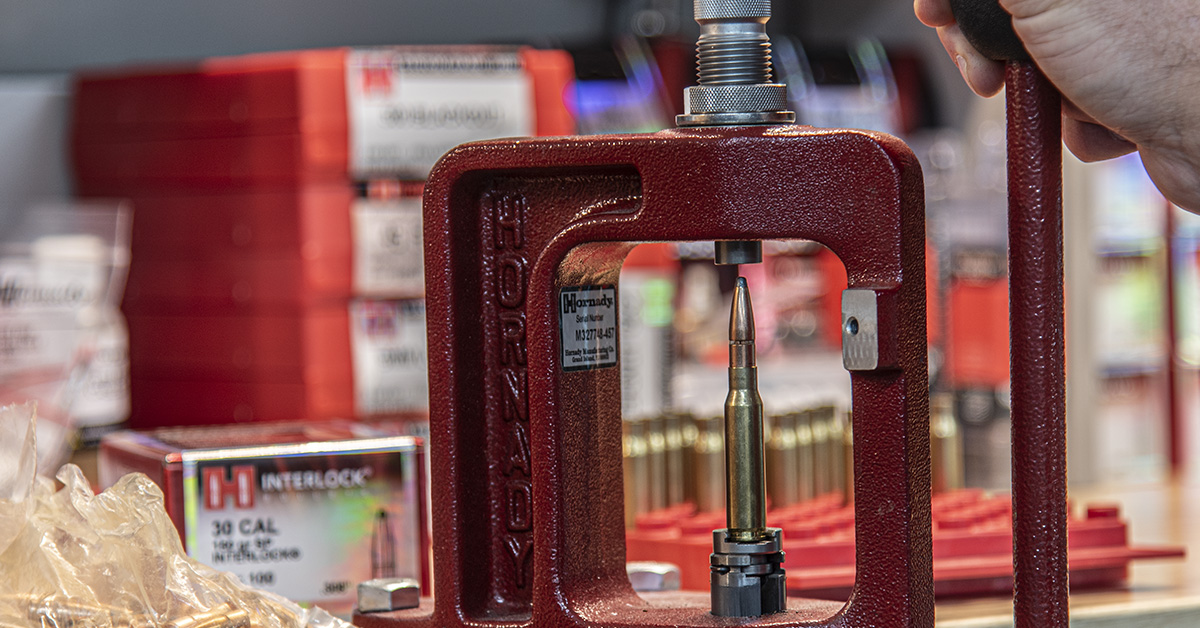
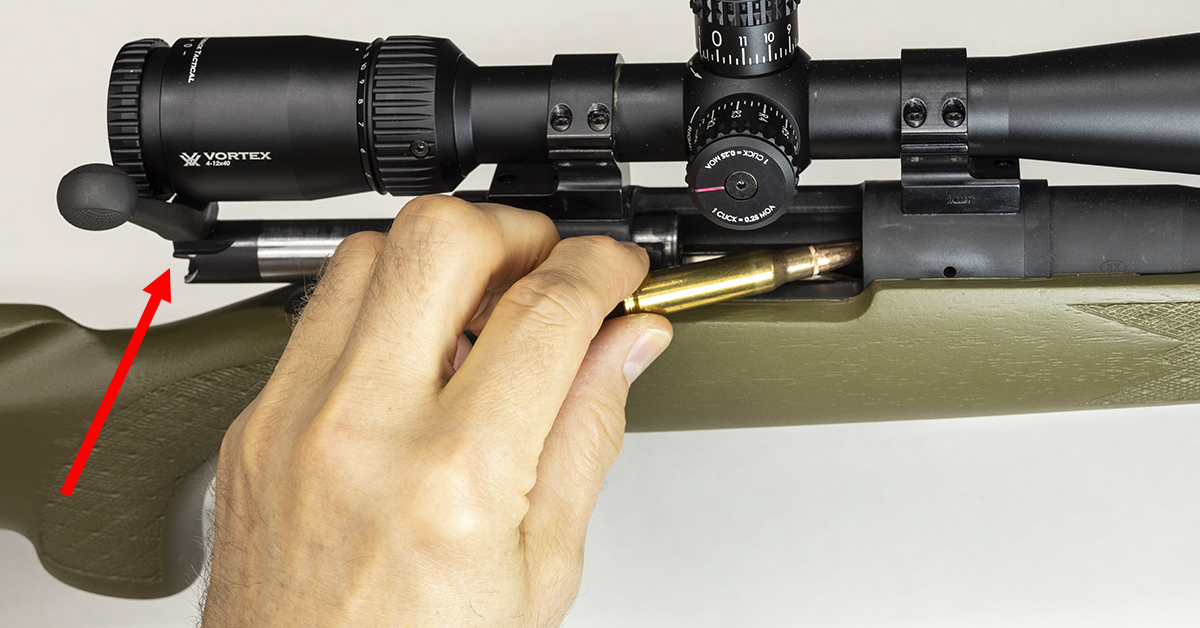
Load a dummy round, meaning ABSENT of powder and primer, to the maximum chamber length measured by the overall length gauge. In our example, this is 2.308 inches as measured from the case head to the ogive. Using an empty cartridge case that has been prepped as discussed in Part 7 and Part 8, position the cartridge case in the reloading press shell holder and place a bullet in the case mouth as pictured above.
Lower the press handle, raising the bullet and case into the bullet seating die. We had left off our seating die adjustments with the seater adjustment screw all the way up (counterclockwise). Turn the seater adjustment screw down (clockwise) until you feel it come in contact with the bullet. Raise the press handle slightly to provide some clearance between the bullet and the seating stem and turn the seater adjustment screw clockwise about 1/4-1/2 turn. Lower the press handle and the bullet should now be seated into the cartridge case deep enough to hold it in place.
Currently, the bullet is barely seated in the cartridge case. Measure the overall length at this time. Turn the seater adjustment screw clockwise 1/2 turn. Place the cartridge case in the shell holder and seat the bullet once again. Remove the cartridge and measure the overall length. Subtract this from your previous measurement and you now know how far 1/2 turn of the seater adjustment screw will affect the bullet’s position within the cartridge case. This procedure will be repeated until the maximum chamber length of 2.308 is achieved.
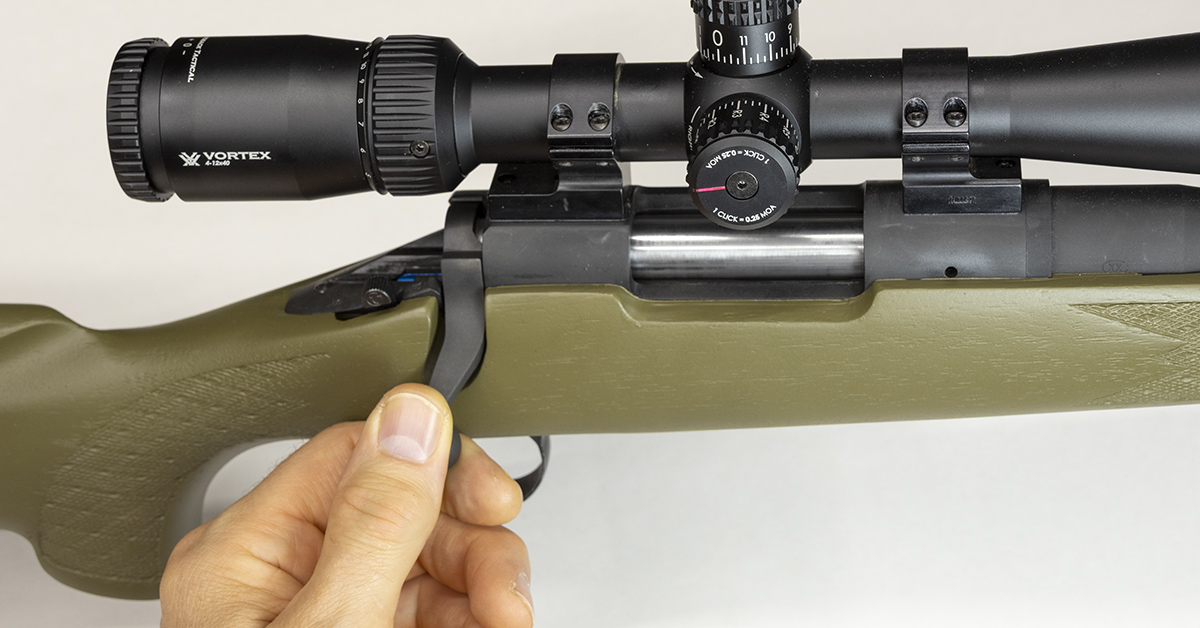
Using the rifle for which you are reloading, ensure that it is unloaded and, preferably, the firing pin spring assembly is removed (arrow), as this adds another layer of safety and eliminates the spring tension placed on the bolt, allowing the bolt to operate more freely. Try to load your dummy round into the magazine. As expected, our 2.308-inch-long dummy round will not fit within the magazine. This is now very much a trial-and-error thing at this point.
Seat the bullet a little deeper and test to see if it will fit in the magazine properly. The goal here is to have the cartridge as long as possible, which will place the bullet as close to the rifling as possible while maintaining a cartridge length that fits within the magazine.
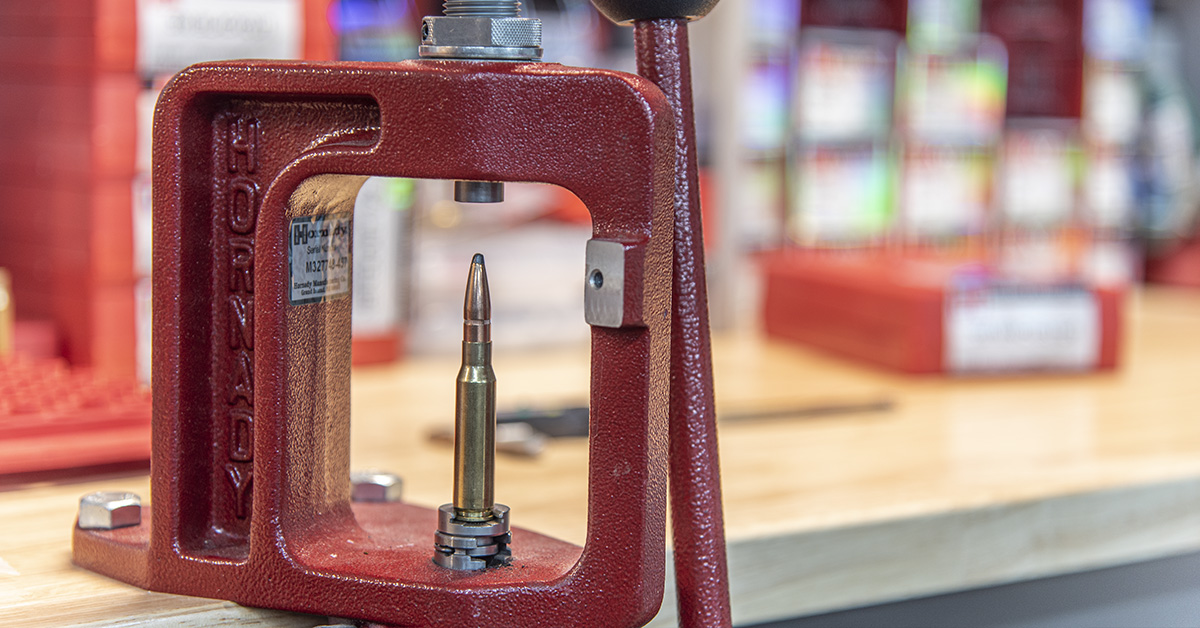
When the cartridge fits into the magazine without any interference, push the bolt handle forward, feeding the cartridge into the rifle’s chamber. Next, rotate the bolt handle downward into its locked firing position. The bolt should close easily on your dummy round — so easily that you cannot distinguish a difference between this test and the test you performed when checking your brass in Part 8.
Having performed the brass fitment test in Part 8, any fitment issues that arise now are isolated to the bullet seating operation. If you skipped the brass fitment test and the cartridge does not fit into the chamber at this time, what’s the problem? Case resizing or bullet seating?
The final overall cartridge length that fits and functions through our rifle’s magazine is 2.120 inches long as measured from the case head to the bullet’s ogive. This is quite a bit a shorter than the measured chamber length of 2.308. We are far from the .020 or .010 thousandths of an inch away from the rifling, as is so often discussed. With .188 clearance between the bullet and the rifling, we certainly should not have any problems with excessive chamber pressure. I know — .188 sounds excessive — but not to worry. We are not doomed to inaccuracy. Our cartridge is only .008 longer than the Hornady factory ammunition (2.112) used during the factory ammunition test.
At this time, our brass is prepped, the overall length of the cartridge has been established, and our bullet seating die is adjusted properly. Once we get our components in order, reloading is now no more than the assembly of the components, which will move along seamlessly.
We will continue in Part 10, where we will walk through the complete cartridge assembly process.
- Shoot ON Reloading Series Pt. 1
- Shoot ON Reloading Series Pt. 2
- Shoot ON Reloading Series Pt. 3
- Shoot ON Reloading Series Pt. 4
- Shoot ON Reloading Series Pt. 5
- Shoot ON Reloading Series Pt. 6
- Shoot ON Reloading Series Pt. 7
- Shoot ON Reloading Series Pt. 8