In Part 8 of our ongoing reloading series, we discuss the importance of case length and the tools to get you there
by Lou Patrick
In Part 7 of our reloading series, we discussed cartridge case resizing. As you measure the overall length of each cartridge case, you will likely find that they are of varying lengths. Don’t be overly concerned with the different lengths of your cartridge cases — they simply are not all going to grow in a uniform manner. Eventually, through use and a couple reloadings, you can get them all to a uniform length after trimming. But after the first firing, in my experience, most likely not.
As far as accuracy is concerned, I doubt that you will see any difference with cases that vary a thousandth (.001) or two in length. After the first firing and subsequent resizing, you may find that some of the cases will need to be trimmed to the correct length while others may not need to be trimmed at all. Perhaps you get lucky and none need to be trimmed.
Of course, this begs the question, “When should I trim my cases and to what length?”
The answer is not as easy as it seems, as there is an aspect to case length that is in the reloader’s hands to decide. Of course, you must stay within certain parameters when making this decision.

To determine the proper case length, begin by looking at the reloading manual for the cartridge with which you are working. The picture above is from the Hornady Reloading manual 11th edition. Looking at the column on the right, second to the bottom lists the maximum case length for the .308 Winchester cartridge as 2.015 inches. Directly below that lists the case trim length or, more accurately stated in my mind, is the case trim to length of 2.005 inches. These two specifications provide the parameter that you must stay within when deciding when to trim and to what length. The most obvious choice being if the case measures 2.016 inches, then trim it to a length of 2.005 inches. Easy enough. As far as safety is concerned, there certainly isn’t anything inherently wrong with following this method.
Our cases do not, though, all grow at a uniform rate. Allowing for a .010 difference between minimum and maximum case length will result in a box of loaded ammunition that is anything but uniform. While I do not believe that you will see an accuracy difference with a variation of a .001 or .002 in case length, I do not find it wise to allow for a potential .010 variation. Consistency leads to accuracy as well as good workmanship. In my opinion, the ultimate goal for the reloader should be for all the cases to be of the same length and to get them there as soon as possible. With this in mind, it is my preference to trim all cases after resizing to the trim to length as stated in the reloading manual. Using the shortest permissible length as our working parameter allows all the cases to get to the same length as quickly as possible. It also means that I’m probably trimming cases a little more often than most. When to trim and to what length is entirely up to you, provided that you stay within the proper guidelines.
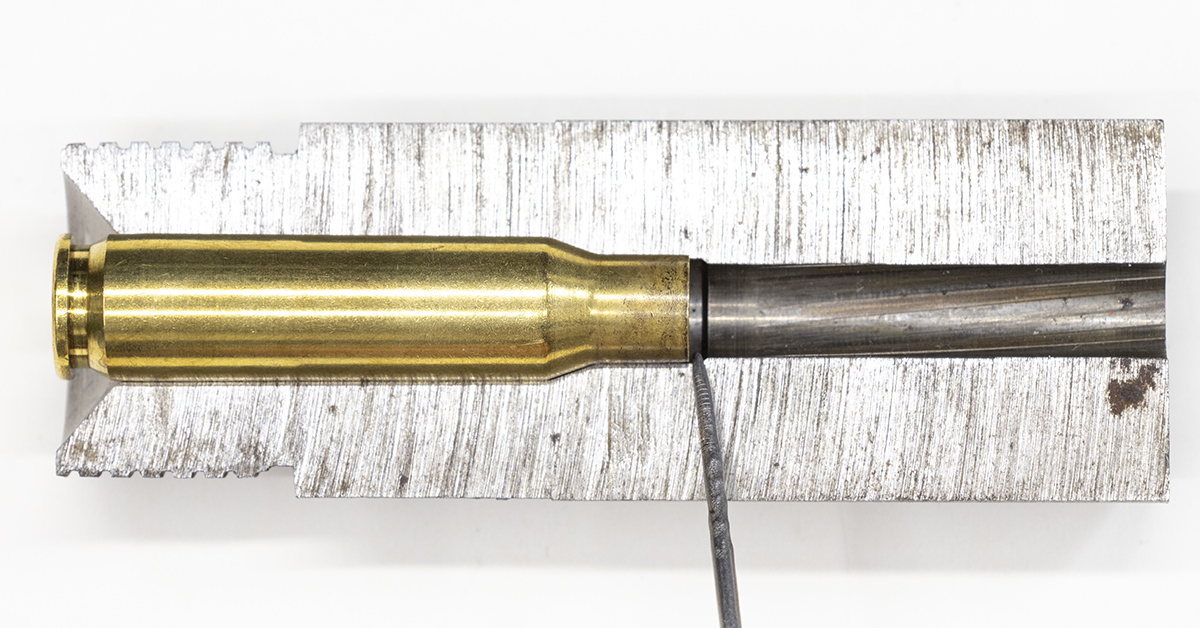
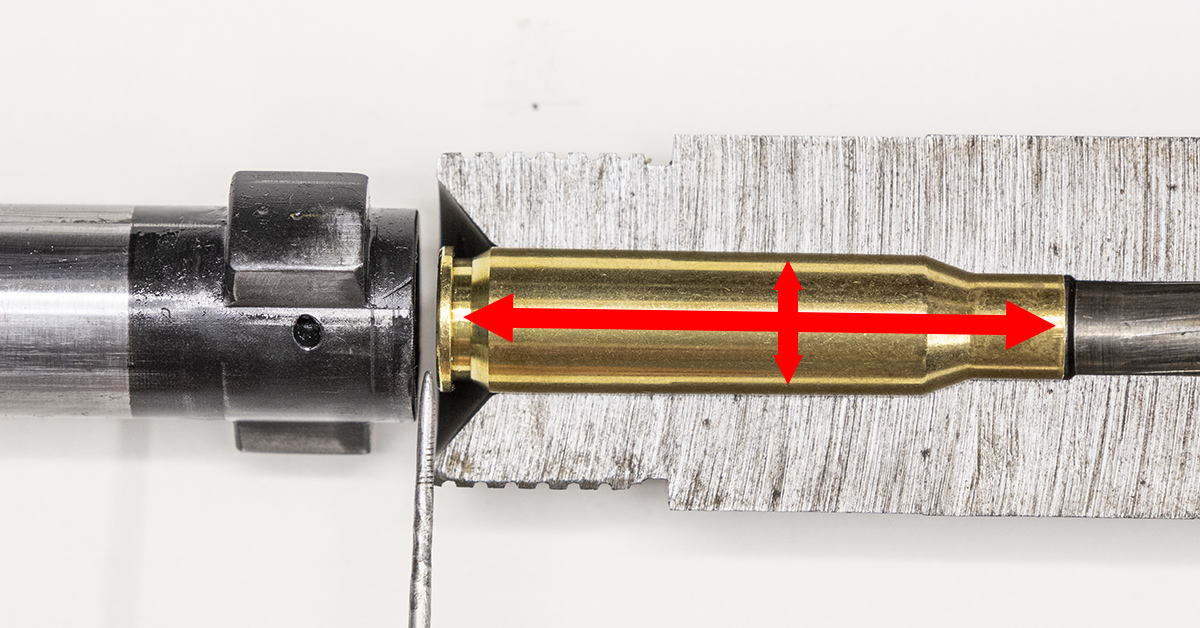
Regarding case length, staying within the guidelines as stated in the reloading manual is vital to the safe operation of your firearm and ammunition. The case neck should not extend past the point as indicated above. Look closely at this cutaway chamber. You can see a distinct recess for the case neck and that this recess has a definite end with a relatively sharp corner. To the right of that corner the chamber diameter is much smaller. A case that is too long and extends into this area of the chamber results in the neck being compressed into the bullet upon chambering, gripping the bullet much more tightly than designed. This will result in a dramatic, potentially dangerous, increase in chamber pressure. Because of this, cases should always be measured and trimmed within the guidelines as stated in the reloading manual. This is yet another reason why I prefer to trim my cases to the minimum required length.
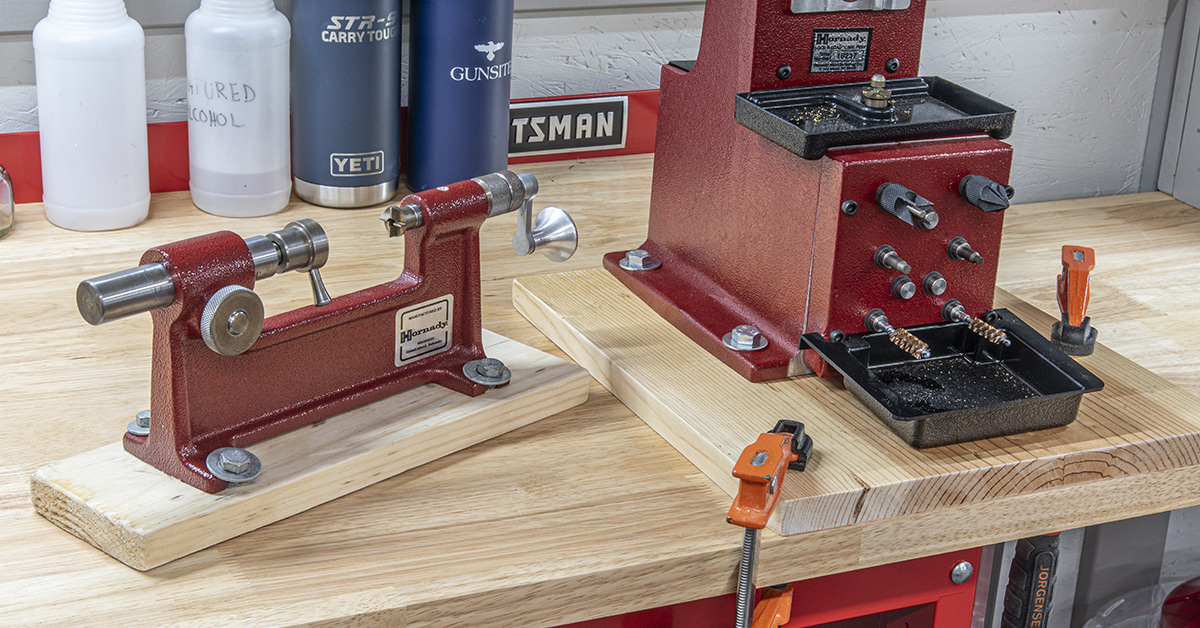
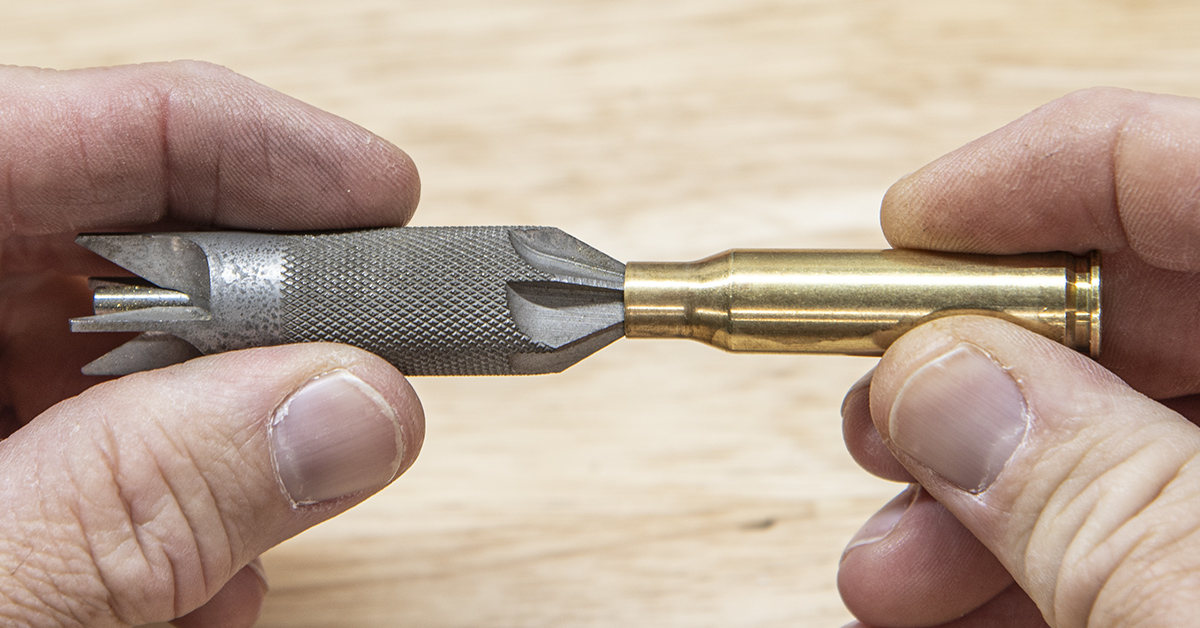
There is a wide variety of cartridge case trimming tools from which to choose from, all of which basically fall within one of two categories. First are the traditional hand-operated tools. Second are power tools. Both are quite capable of accurately trimming the cartridge case. Of course, the advantage of the power tools is speed; however, there is another advantage of trimming under power. For those who are having problems with hand or wrist pain, such as arthritis or carpal tunnel syndrome, trimming under power is certainly the way to go. Regardless, if you are using a manual trimmer or a power trimmer, proper operation demands they be securely mounted to the reloading bench.
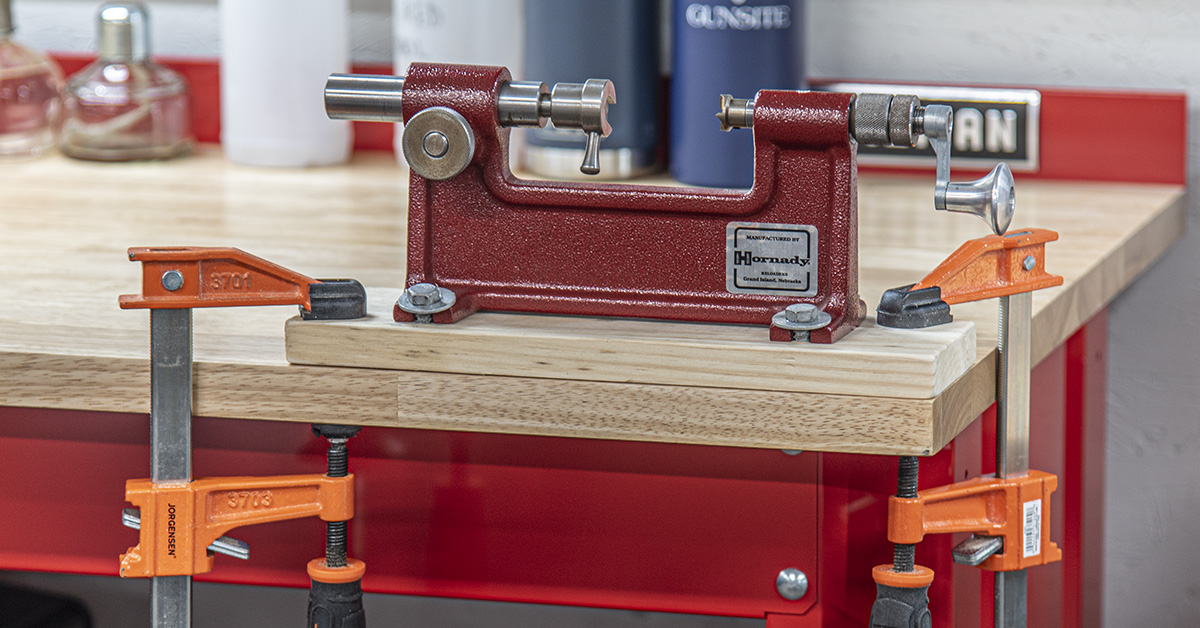
If you have limited workspace or do not wish to drill holes through the top of your reloading bench, attach your case trimmer to a separate piece of wood and clamp the wood to the bench top, securing your trimmer in the desired location. Once the trimmer is mounted on the reloading bench, follow the manufacturer’s instructions for adjustment and use.
During the initial adjustment of the trimmer’s cutting length, it’s a good idea to have a few pieces of culled (meaning slightly damaged) brass on hand. Since these are cases that can’t be reloaded anyway, if you were to make a mistake during the initial adjustment of your trimmer, this prevents you from potentially ruining good brass.
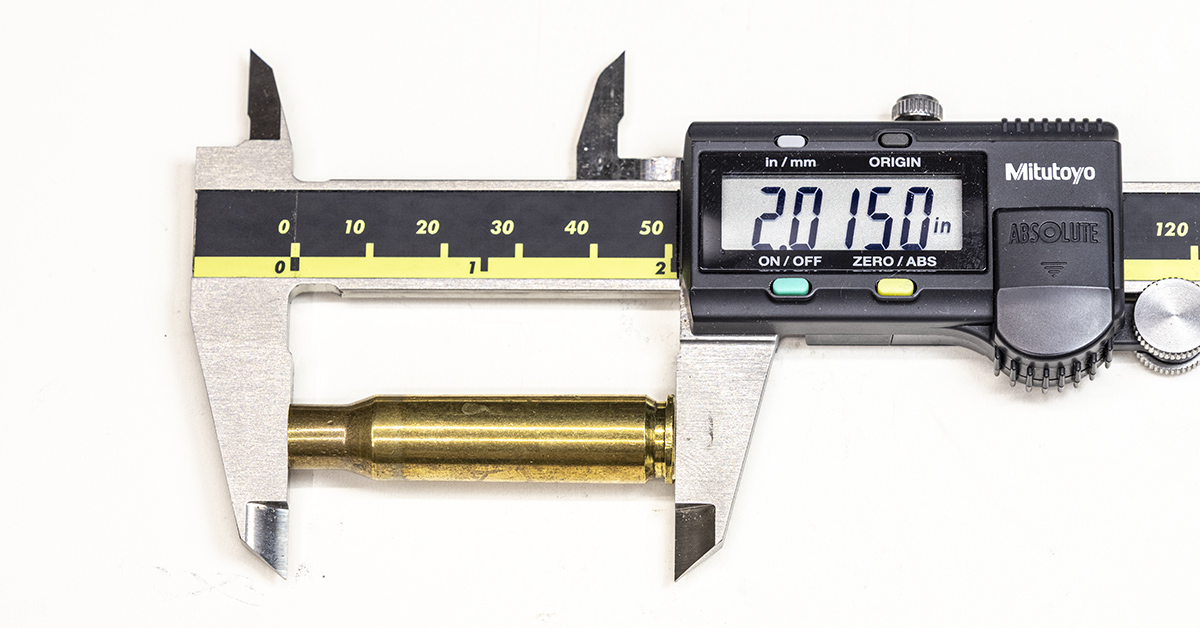
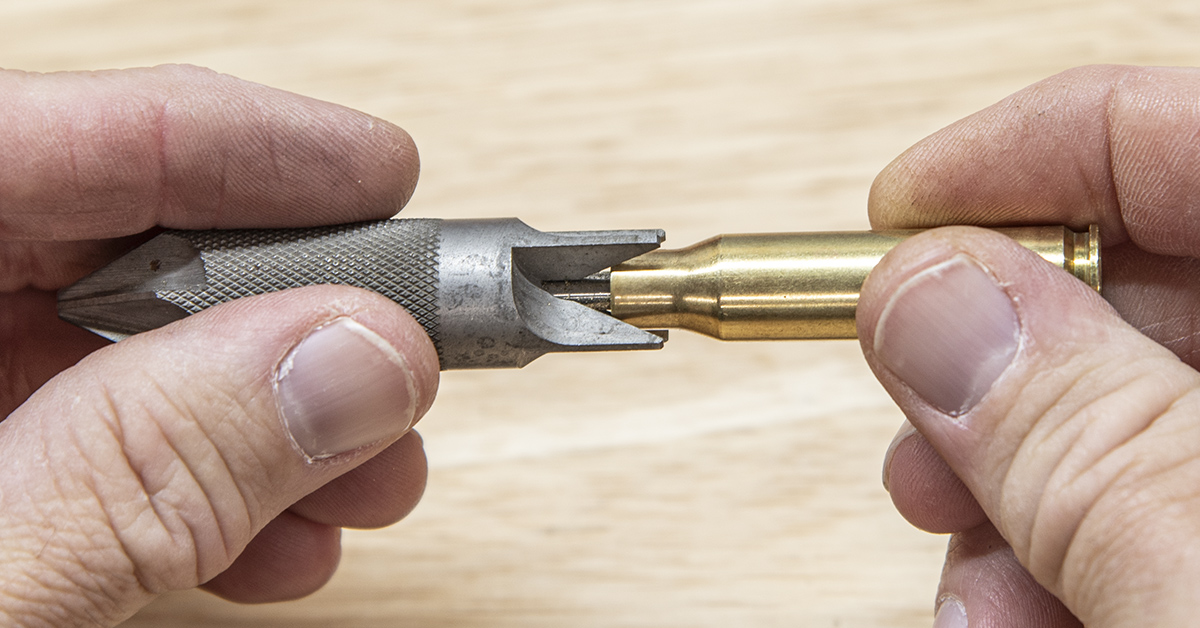
In our current example from the end of Part 7, our .308 Winchester case measures 2.015 inches in length. This places it right at the maximum allowable length for a .308 Winchester case. This case is safe to reload without trimming as it does not exceed the maximum length; however, I do caution against the use — especially the routine use — of maximum length cases. Remember that they do expand when fired. As such, I find it advisable to be somewhat under the maximum length.
It is my preference that all the cases longer than the published trim to length of 2.005 be trimmed to 2.005. In practice, I find that establishing a case length that falls within the guidelines of the minimum and maximum case length serves to eliminate confusion and to aid in streamlining the process. Write this length down in your reloading logbook for future reference, then always use that case length when reloading for that particular cartridge.
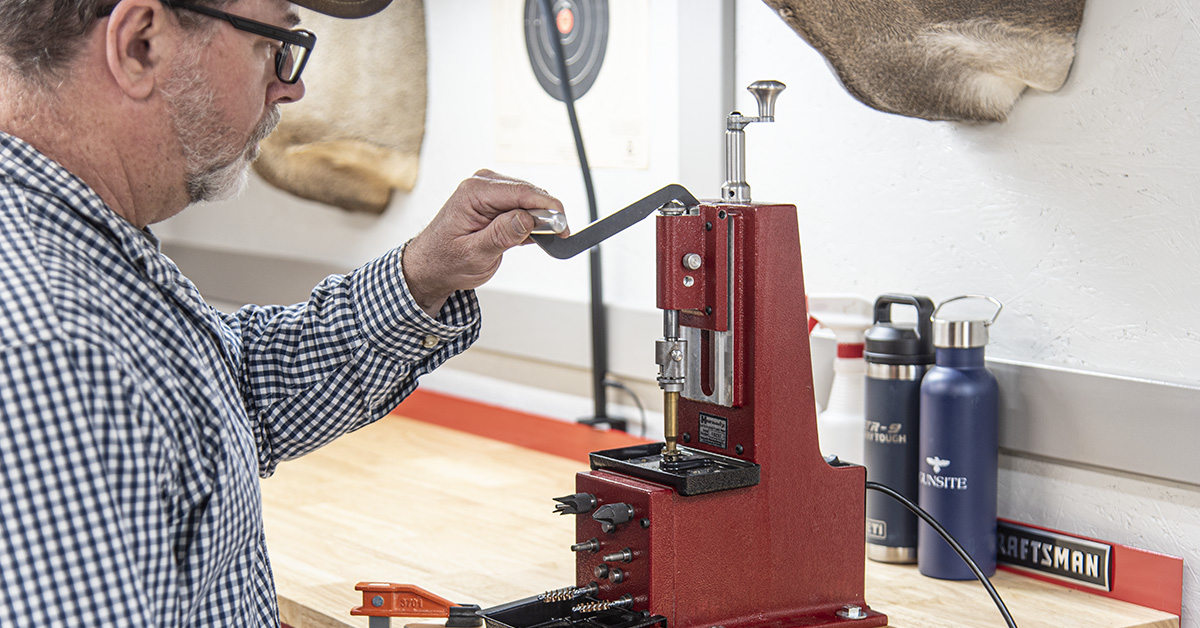
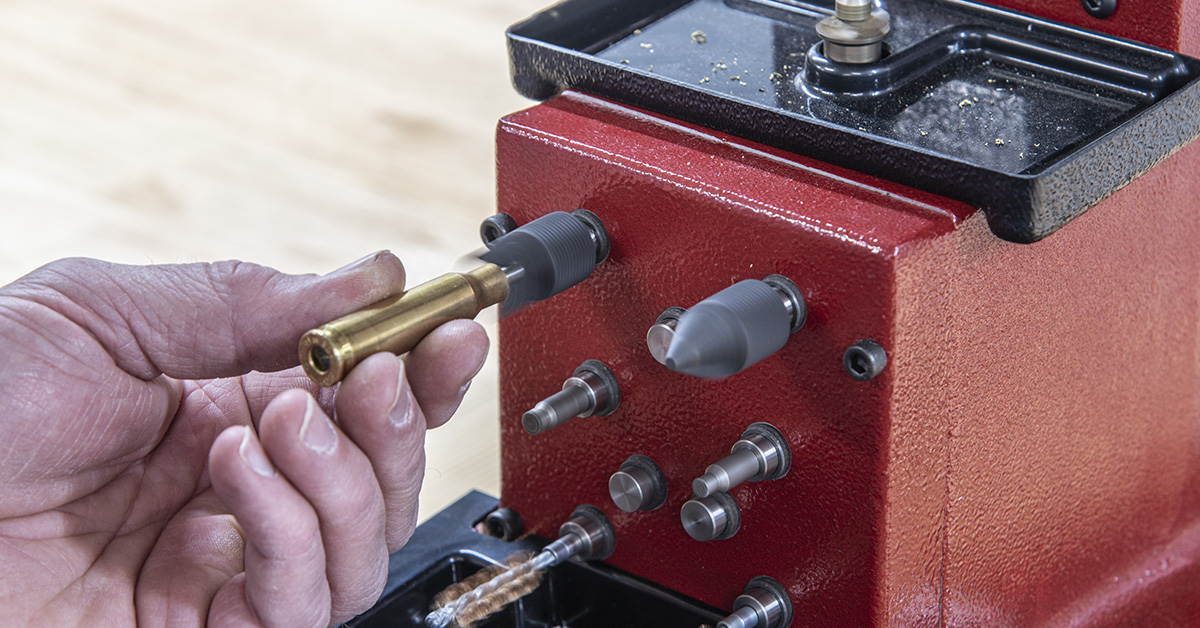
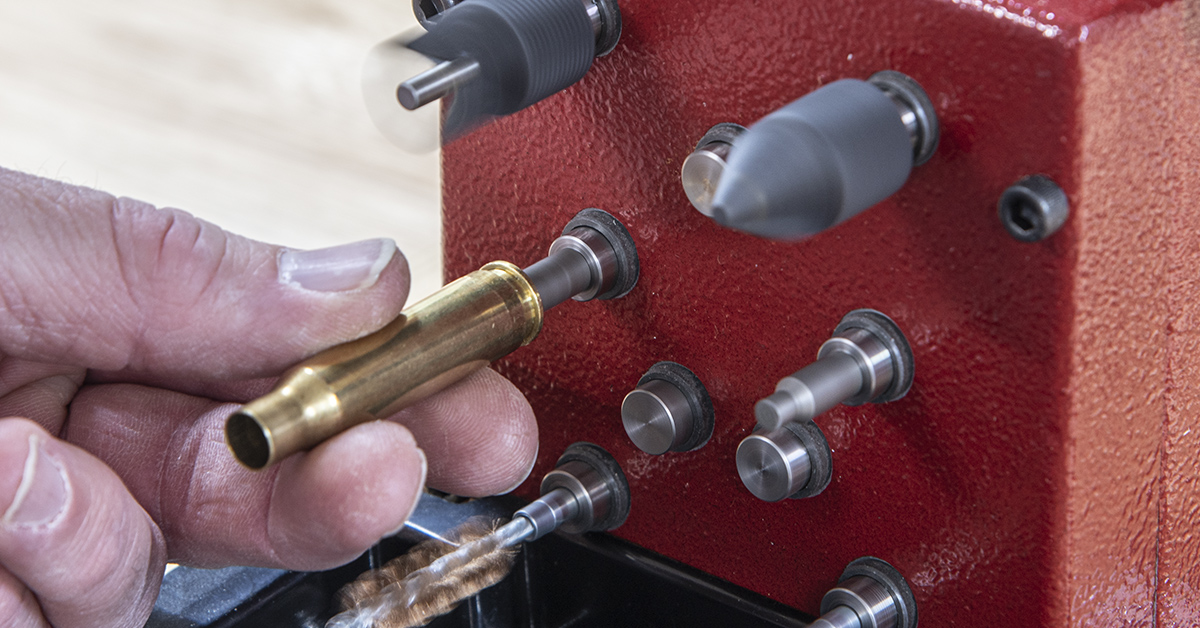
Before trimming, measure a small sample of cases in order to gain an idea of their overall length. With the Hornady Power Case Prep Center or manual trimmer already set up to cut the desired length, all that is needed is to cycle all the cases through the trimmer. If the case is too long, it will be trimmed accordingly; if it’s shorter than the desired length, no cutting action will occur. Once all the cases have been cycled through the trimmer, measure a small sample of the cases to ensure the accuracy of your work. For the novice reloader, I recommend that you measure all your cases before and after trimming. As you gain experience, you’ll be able to trust more in your skill and equipment and will only need to measure a small sample to spot check uniformity.
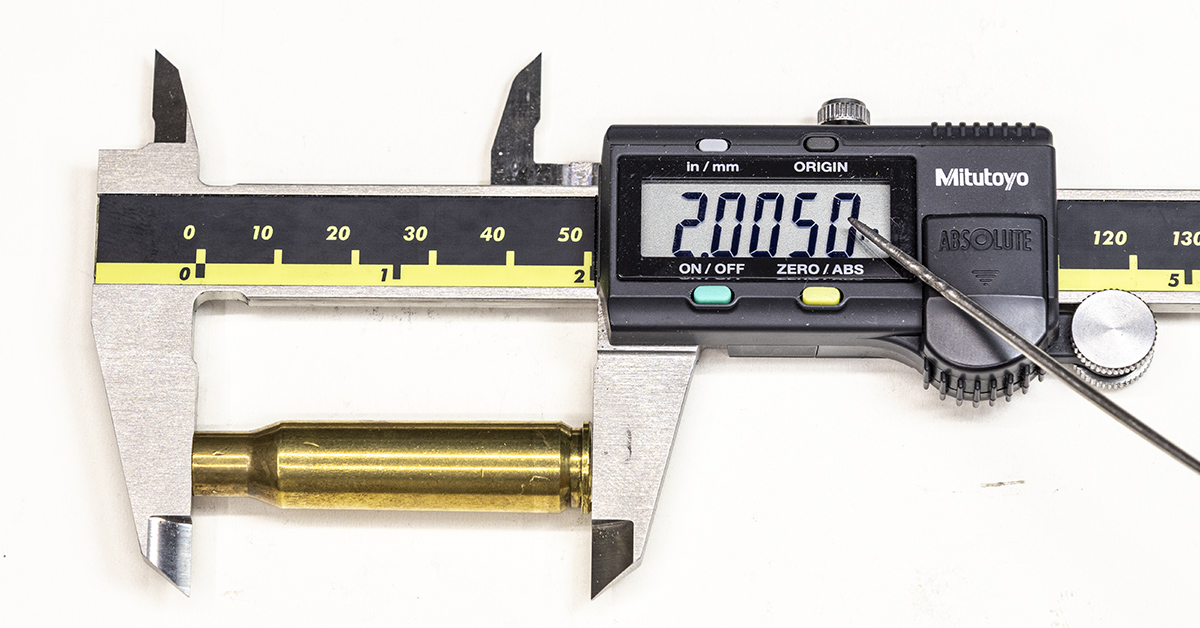
After trimming, most of our cases now measure 2.005, with just a couple at 2.003 and 2.004. Subsequent reloadings of these cases will most likely bring them all to the desired 2.005 case length. When using a digital caliper, there is no need to be concerned with the fourth place to the right of the decimal. If you find this distracting, place a piece of black electrical tape over it. You’ll never realize any difference in the quality of your work or in the accuracy of your ammunition when reloading and trying to hold your measurements out to the fourth decimal place.
After trimming, the inside of the case mouth will be left with a very sharp square edge and possibly a burr that can interfere with the proper seating of the new bullet. Chamfering the inside of the case mouth will break this sharp edge and provide a slight angle that will more easily guide the new bullet into place. Insert the chamfer tool as shown into the case mouth and turn it a couple times around the inside circumference of the case mouth. Do not press too hard on the case as you are not trying to remove much material. Just a slight chamfer inside the case mouth is all that is needed. Do not skip this step! This little chamfer can be directly related to accuracy (see Hornady Podcast #071).
Turn the chamfer tool around and debur the outside of each cartridge case mouth. Remember, you are not trying to remove much material. You need only to remove the burr created during the trimming operation. Case mouths do not need to be cookie cutter sharp.
While the manual hand tool works fine for the chamfering and deburring process, doing these operations under power is much faster. In similar fashion to case trimming, if you suffer from any hand or wrist pain, doing these operations under power is certainly the way to go.
With the cases resized and trimmed to the desired length, now is the time to deburr the flash holes and then uniform the primer pockets. As discussed in Part 6 of this series, these two operations are completely optional. While I cannot directly attribute any increase in accuracy to flash hole deburring and/or primer pocket uniforming, I continue to perform these two operations as I feel they contribute to the overall quality of my work. This is also combined with the fact that the Hornady Power Case Prep Center makes it easy to perform these operations.
Our rifle cases have been resized, trimmed to the desired length, the case mouths are chamfered and deburred, primer pockets are uniformed, and the flash holes are deburred. The cases are now ready for powder, primer, and bullets, correct?
Well, yes, but not so fast. As mentioned earlier in this series, your rifle’s chamber should be clean and oil-free. This is often stated within the firearm owner’s manual. The reason for this is bolt thrust. When the cartridge is fired, the expansive cartridge case will expand in all directions. The entire case will also want to move or “slide” rearward (thrust). The bolt, being locked rigidly in place by the locking lugs, absorbs this energy. This movement of the cartridge case towards the face of the rifle’s bolt is referred to as bolt thrust. The energy absorbed by the bolt during firing is not to be taken lightly. Don’t let the size of the cartridge fool you, either.
As a general rule, you can expect to generate between 50,000-60,000 PSI when firing a centerfire rifle cartridge. That’s a lot of energy being placed on the bolt while your head is directly behind it. Bolt thrust is obviously best kept to a minimum. When the walls of the rifle’s chamber are oily (lubricated), friction between the cartridge case and the chamber wall obviously decreases. This allows the cartridge case to more easily move rearward towards the bolt, increasing bolt thrust. When the rifle’s chamber is oil-free, friction between the case and the chamber wall increases. The cartridge case is now more capable of clinging to the chamber wall. This reduces its rearward motion and bolt thrust.
This is the reason why firearms manufacturers will often state in their owners’ manuals to keep the chamber clean and oil free. Likewise, a lubricated cartridge case will increase bolt thrust while an oil-free cartridge case will decrease bolt thrust. Keeping bolt thrust to a minimum not only increases the safety level of your firearm and ammunition, it’s also easier on your firearm, leading to a longer, more trouble-free service life.
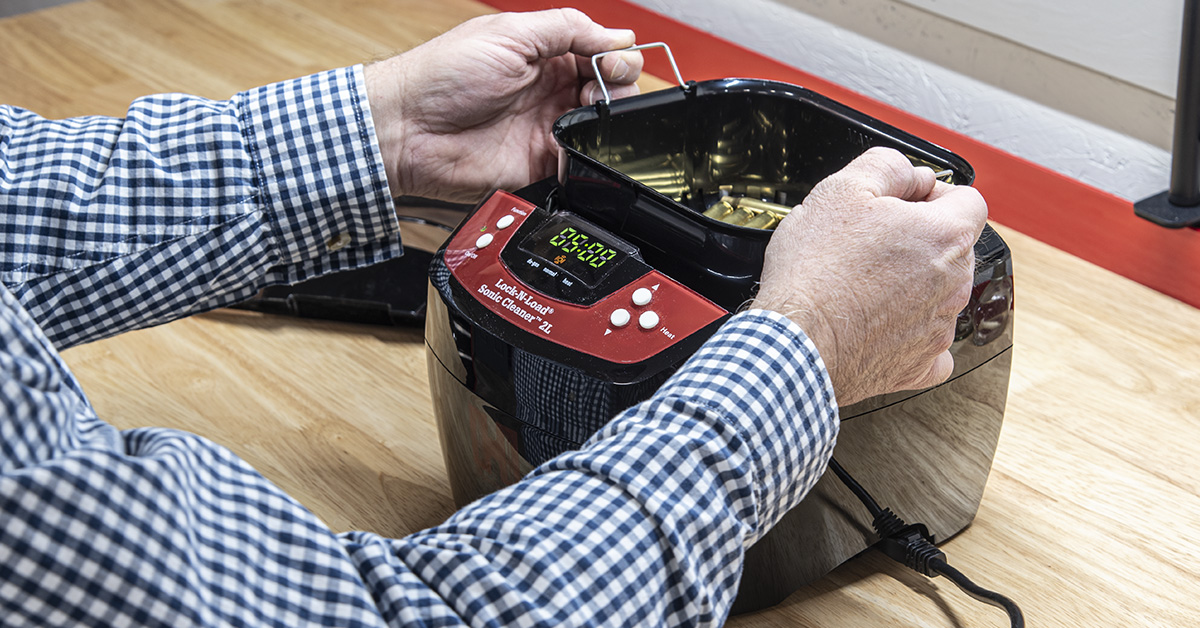
It is because of bolt thrust that I recommend cleaning the cartridge cases a second time following resizing since we now have cases that are somewhat oily. Yes, following resizing we wiped off the excess lube, and that’s just what it was in my opinion…excess. Most likely there are still traces of lube on the cartridge cases. For the second cleaning, I do not recommend the rotary tumbler, as the rotary function with the brass and pins colliding with each other may deform the newly resized case necks. This time, it is best to use a Hornady Lock-N-Load Sonic Cleaner, as this eliminates the tumbling motion yet will remove all traces of any case lube that may be left behind.
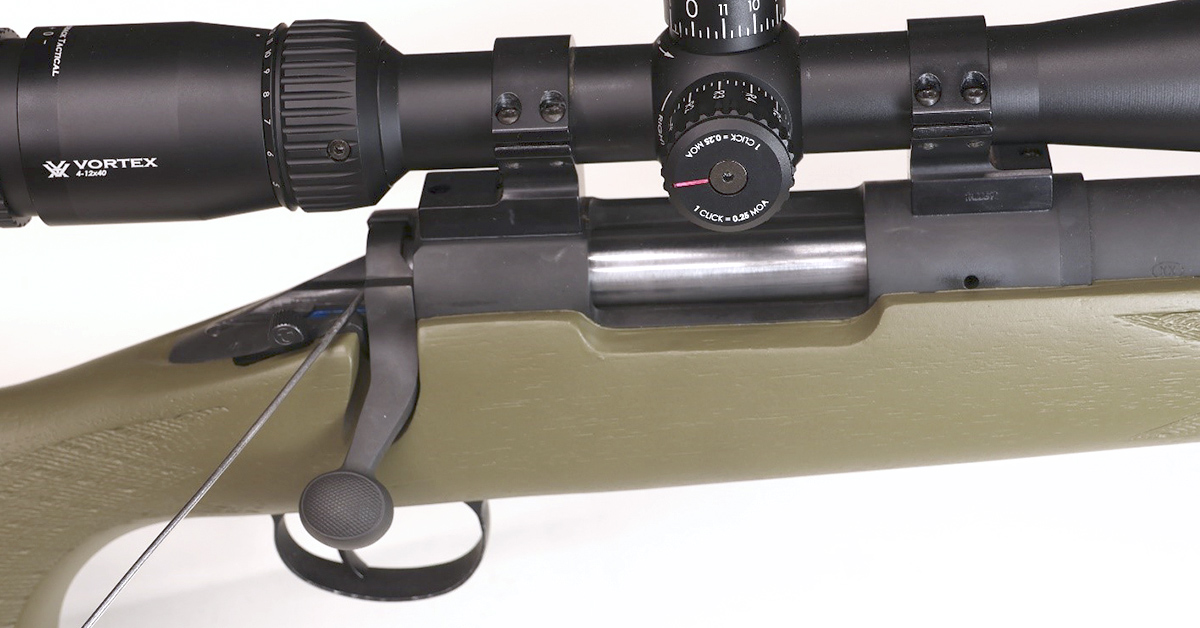
The cases are now clean, oil-free, and are ready to accept powder, primer, and bullet. Rather than continuing with reloading the cartridge cases, I recommend at this time, especially for the novice reloader, to check your work. It’s far better to find out now if something is amiss rather than driving to the range and finding out that you have a box of reloaded ammunition that will not chamber in your rifle. Yes, I’ve had gunsmithing customers with this very problem. Using the rifle the cases will be used in, ensure that the gun is unloaded. Remove the firing pin assembly as indicated because the tension of the firing pin spring may interfere with this test and could provide erroneous feedback.

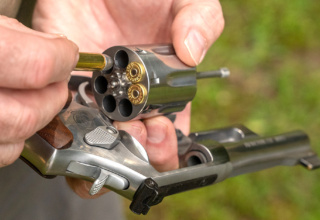
Insert a newly resized and trimmed case into the chamber. If you’re new to reloading, you should check each case. As you gain experience, this will decrease to checking a small sample and eventually this step will no longer be required.
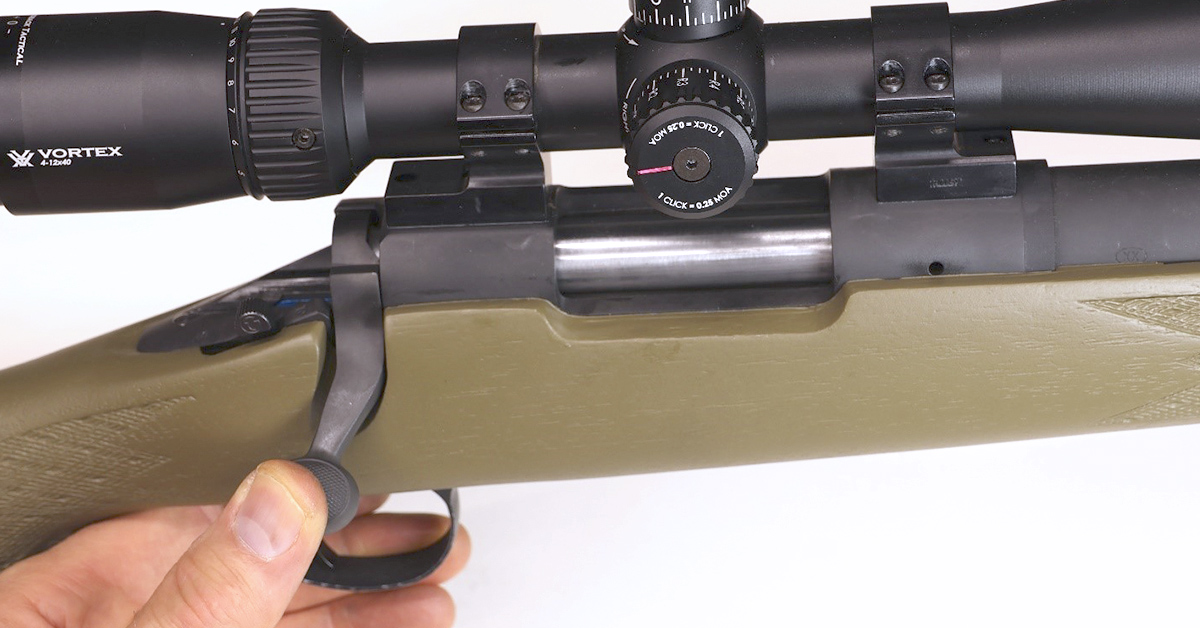
Close the bolt handle, it should close easily as if on a new cartridge. If not, check the case length and/or resize as needed.
The cases are ready. Time to start seating primers, right?
Once again, not so fast. Before you start adding components, you need to determine what the overall length of the loaded cartridge will be. This information is, of course, available in the reloading manual; however, this is yet another phase of reloading that allows you some flexibility and requires you to make some decisions.
We will continue in Part 9 of this series determining the cartridge overall length and adjusting the bullet seating die.
- Shoot ON Reloading Series Pt. 1
- Shoot ON Reloading Series Pt. 2
- Shoot ON Reloading Series Pt. 3
- Shoot ON Reloading Series Pt. 4
- Shoot ON Reloading Series Pt. 5
- Shoot ON Reloading Series Pt. 6
- Shoot ON Reloading Series Pt. 7