After hunting season, most folks just put their rifles on mothballs and never think about them again until the next year. Here’s how to store your hunting rifles the right way.
by Lou Patrick
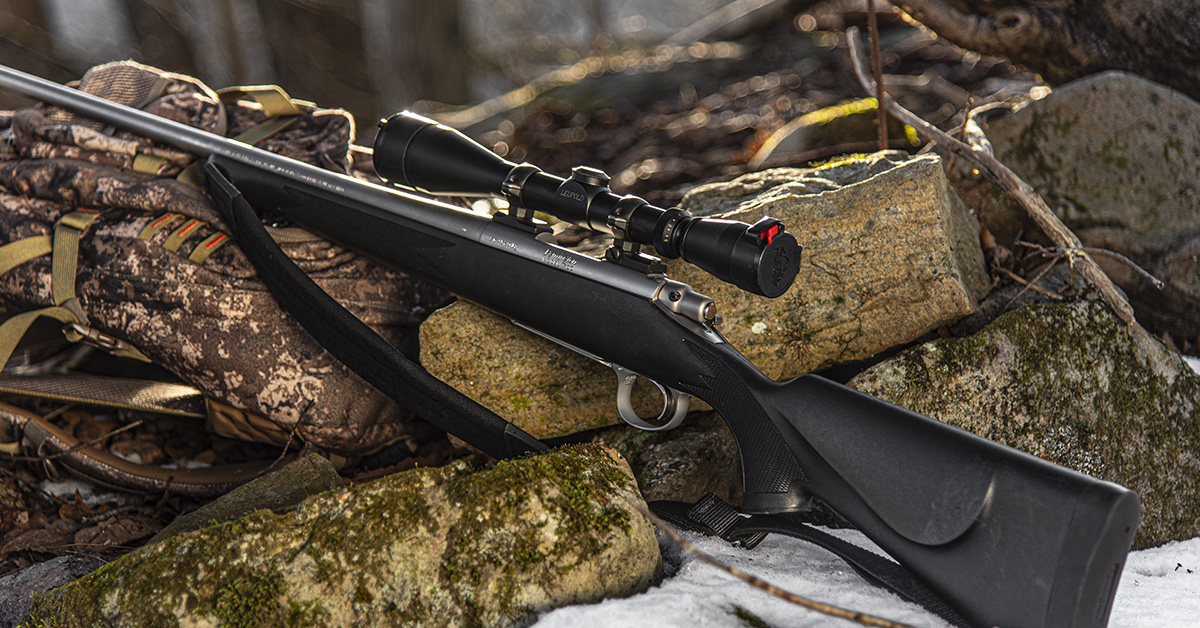
The hunting season is over for most of us. While winter offers many opportunities to go afield—particularly with shotguns and small-bore rifles—our centerfire big game rifles are largely ready for that long rest until next season.
I find this to be the perfect time to thoroughly clean and inspect my hunting rifle. Doing so now ensures that it is stored properly during the off-season and that it will be ready next year without any unwanted “surprises.”
Years behind the gunsmith bench has shown me that many rifles see little to no attention between winter and fall, as evidenced by the many rusted bores and dirty scopes I’ve seen. In fact, that “offseason neglect” is probably the number one source of eventual failures among hunting rifles. I say “eventual” because it is the cumulative effect of neglect season after season, with the rifle and its performance slowly degrading over time.
It doesn’t have to be that way, of course. A little post-season PMCS—a military acronym for Preventative Maintenance Checks and Services—will have your hunting rifle performing as new for many years to come.
The Obvious “First”
Off-season, long-term storage of a hunting rifle begins with a thorough cleaning. During this cleaning phase, we will also be inspecting the rifle for any abnormalities or possible problems that could develop down the road. After cleaning and inspection, we then lubricate as we reassemble the rifle. While we present this from the perspective of a hunter using a bolt-action rifle, these basic principles apply to all firearms.
Before you begin, ensure that your firearm is unloaded and that no ammunition is present within the work area.
For our purposes, proper cleaning and inspection for long-term storage will begin with disassembly of the rifle. The reason for this is two-fold. First, it allows us to properly inspect our rifle. Second, it serves to establish a baseline for all of us to follow, as some readers will have rifles that are relatively new while others may have a rifle that is several decades old. I’m also aware that many will be hesitant to remove a barreled action from the stock of a rifle that is perfectly zeroed; however, to ensure a long service life and long-term accuracy, it is worth it. It is also important to note that if the rifle is shooting well, it will be easy to zero prior to next season and zero must be confirmed anyway, correct? We also must consider the hunter that has been afield during rain and heavy snow. Rifles exposed to these conditions should be disassembled and cleaned as soon as possible to eliminate rust potential.
The Barreled Action
Remove the bolt from the rifle. Next, remove the action screws and separate the barreled action from the stock. Scope removal at this point is dependent upon how the scope was originally installed. If you’ve done it the right way, you can leave it mounted to the barreled action. If not, now is the time to remove and re-install your scope and possibly upgrade to a better grade of scope mounts and rings, like those made by Talley. Check out our video on proper scope mounting procedures for more info.
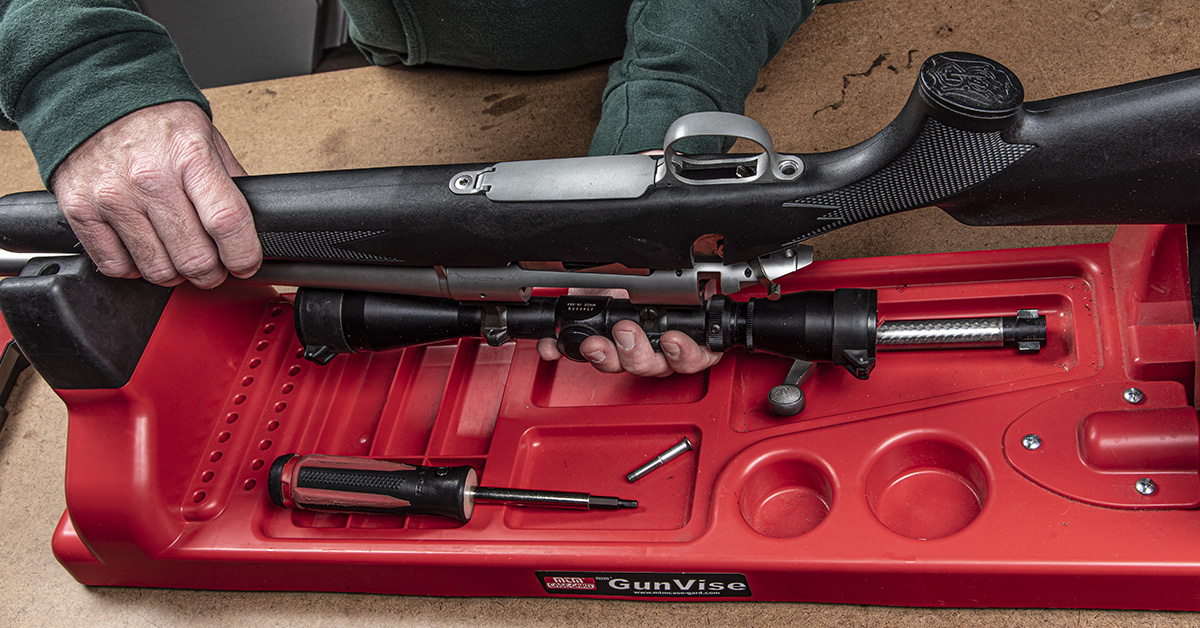
Secure the barreled action in a padded bench vise and begin cleaning the bore using a bronze bore brush. At this time, I will usually allow the cleaning solvent to soak in the bore as I turn my attention to the bolt.
Most bolt action rifle bolts I have examined over the years are rarely, if ever, disassembled, detail cleaned, and lubricated. Years of neglect will allow all sorts of gunk and rust to build up within the bolt, the result of which can be a firing pin that can no longer move fast enough forward to reliably detonate the primer or a plunger style ejector that can no longer eject the fired case.
I’ve seen these problems more than once, and as usual, Mr. Murphy is correct—these problems will often occur at the most inopportune time.
The season is over, the rifle has been fired throughout the year and it has been exposed to harsh elements afield. Thus, I find it wise to disassemble and clean the bolt for long-term, off-season storage.
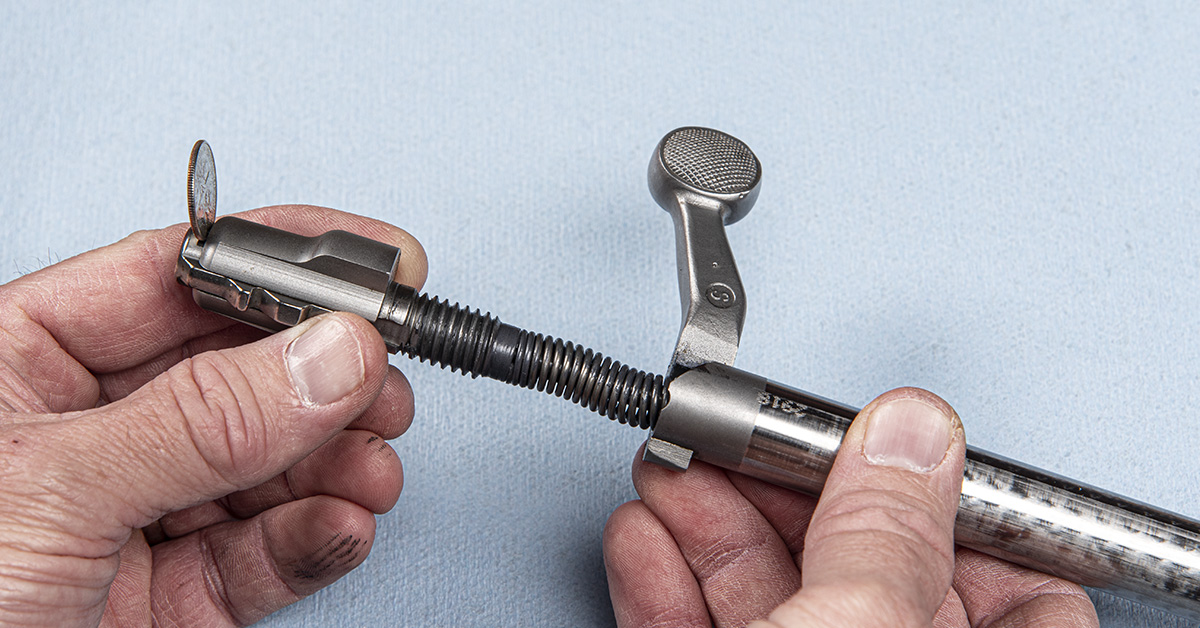
Most bolt-action rifle bolts are going to need some specialty tools for disassembly. Fortunately, these tools are readily available from Brownells.
Once disassembled, clean each individual part of the bolt assembly. With the bolt disassembled and clean, I then return to cleaning the barreled action. If you haven’t tried cleaning your rifle’s bore with Kroil and JB bore paste, now is the perfect time to give this a try. Check out our video on how to do it!
Once the barreled action is clean, inspect the bore for any abnormalities. This is also a good time to ensure continued safe operation of your rifle by checking headspace with caliber-specific headspace gauges.
Examine the exterior surface of the barreled action for any damage to its protective finish. Any damage found to the protective finish of the barreled action should be repaired at this time otherwise rust is soon to follow.
For most hunting rifles, that means damage to the bluing, which is easily repaired with one of the readily available cold bluing formulas on the market, such as Brownells 44/40 or Birchwood Casey’s Perma Blue.
With cleaning and inspection of the barreled action complete and with long-term storage in mind, it is my preference to coat the bore with Rig. Rig, being a lightweight grease, stays in place and provides better protection than oil. You must be careful, though, because Rig MUST BE REMOVED prior to firing the rifle. For this reason, I place a small tag on the trigger guard to remind me to remove the Rig prior to firing.
Now that the barreled action is taken care, we can return our attention to the bolt. With the bolt components cleaned, all that is needed is to lightly lubricate and reassemble. As you are doing this, inspect each part for any abnormalities. For example, are all the coil springs straight? If your rifle has a plunger style ejector, such as the Remington 700, is the ejector straight? Is there a nice, clean radius at the end of the firing pin? Are the edges around the firing pin hole in the bolt face clean and crisp? Small parts that are damaged are easily replaced; however, a damaged firing pin or a bolt face that is showing erosion around the firing pin hole is best left to a gunsmith to correct. For those hunting with rifles that are 20 years old or older, it wouldn’t hurt to install a new firing pin and ejector spring at this time.
The Stock
Remove the sling swivels and the butt plate or recoil pad from the stock. If your rifle has a recoil pad, put a bit of Rig, grease, or Vaseline on the screwdriver shank to help it slide more easily into the recoil pad during screw removal.
Clean the stock and all components as needed. This usually just involves brushing or wiping off dirt. Apply a light coat of oil to the butt plate/recoil pad screws and sling swivels.
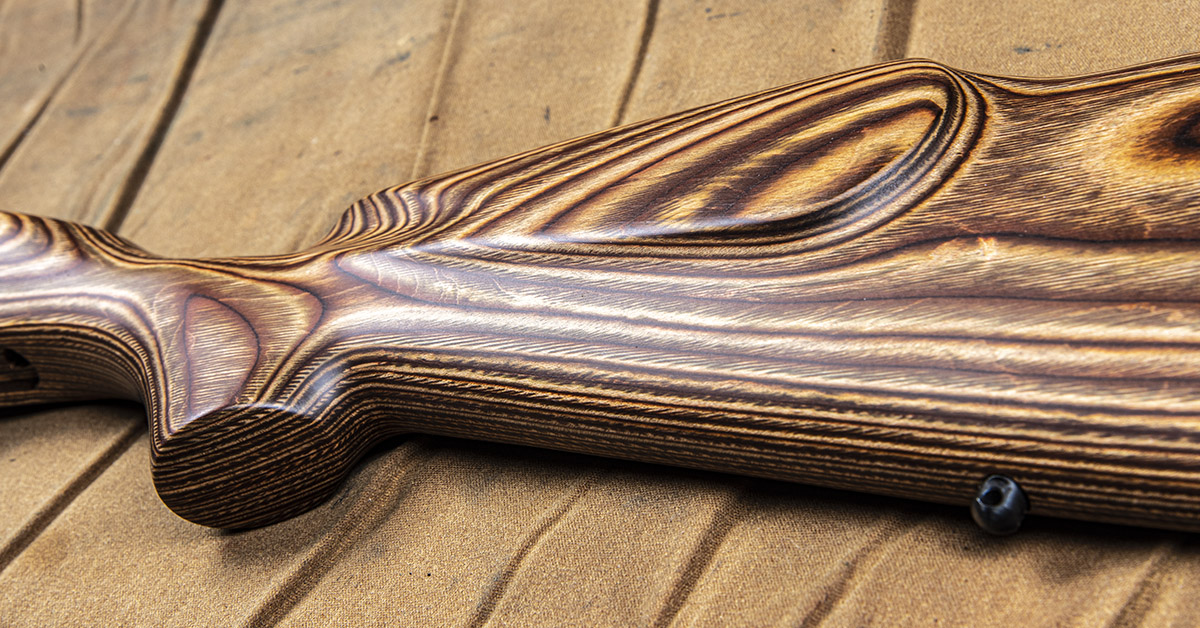
To ensure proper performance (accuracy) and years of good service, a wood stock must be sealed properly. Sealing the stock properly means that it is sealed and protected against moisture, inside and out. Inside means the inletting for the barreled action and beneath the butt plate or recoil pad where there likely is no protective finish and instead is just raw wood. Birchwood Casey’s Tru Oil is perhaps the best product to use in sealing the stock, but since it is rather thick, we recommend thinning it with mineral spirits at a 50/50 ratio. The thinner product will be more readily absorbed by the wood, and this is what we are after. Our goal is to get the Tru Oil as deep into the wood as possible. The mineral spirits not only thin the oil but acts as a carrier that evaporates quickly, leaving behind the Tru Oil. The drawback to the thinner mixture is that it will take several coats to seal the wood properly. How many? This depends upon the dryness of the stock. Prior experience says that usually 2-3 coats is all that is typically required.
Inspect the inletting for the barreled action and the wood beneath the recoil pad. You’ll probably notice some dry spots. Most factory stocks will be somewhat dry at the inletted surfaces and beneath the butt plate. The wood will absorb moisture into the stock at these dry, unprotected spots, and you don’t have to be hunting on a rainy day for this to happen because the wood will absorb moisture from the atmosphere. This absorption and ultimate release of moisture as the climate changes can lead to accuracy problems, so sealing your wooden stock is a worthwhile endeavor.
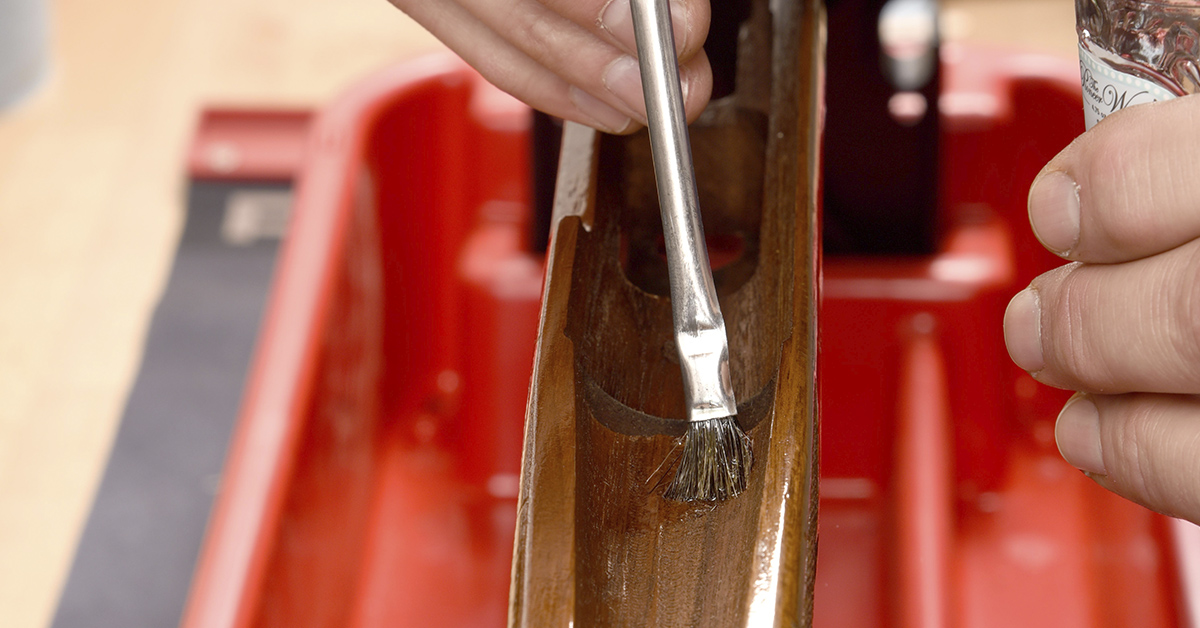
Using a plumber’s acid brush, apply a thin coat of the 50/50 mixture of Birchwood Casey Tru Oil and mineral spirits to the inletted surfaces of your stock. My preference is to cut about half the length off the acid brush’s bristles because this shorter length is easier to work with. As you apply the Tru Oil, you may notice some spots are absorbed into the wood more quickly than in other places. Apply a little extra oil to these areas. Once the inletting appears to have an even coat of sealer and the absorption has slowed, allow the mixture to dry as is. Do not remove the excess since the wood may continue to draw it in as it dries. Once the sealer has dried, if it has a uniform and somewhat shiny appearance, you are done. If not, repeat the above process until you see a uniformly shiny surface. Don’t forget to get some oil down into the screw holes for the sling swivels and butt plate.
Next, inspect the exterior of the stock and seal any exposed wood.
Finally, untreated recoil pads will eventually become dry and hard. To prevent this, apply a light coat of Armor All or similar product on your recoil pad. The key is to apply only a light coat so the rubber won’t become overly slick and oily. Use just enough to darken the rubber and help keep it soft.
Slings and Sling Swivels
Front sling swivels are usually held in place with an escutcheon nut that is pressed into the forearm of the stock. The front swivel stud simply passes through the stock and threads into this nut. This works fine; however, it can be prone to failure. If it fails in the field, your rifle is going to fall off your shoulder and may just hit the ground scope-first.
Using denatured alcohol, degrease the front stud and the escutcheon nut that should have remained in the stock. Once degreased, apply blue Loctite onto the threads of the front stud and install the stud.
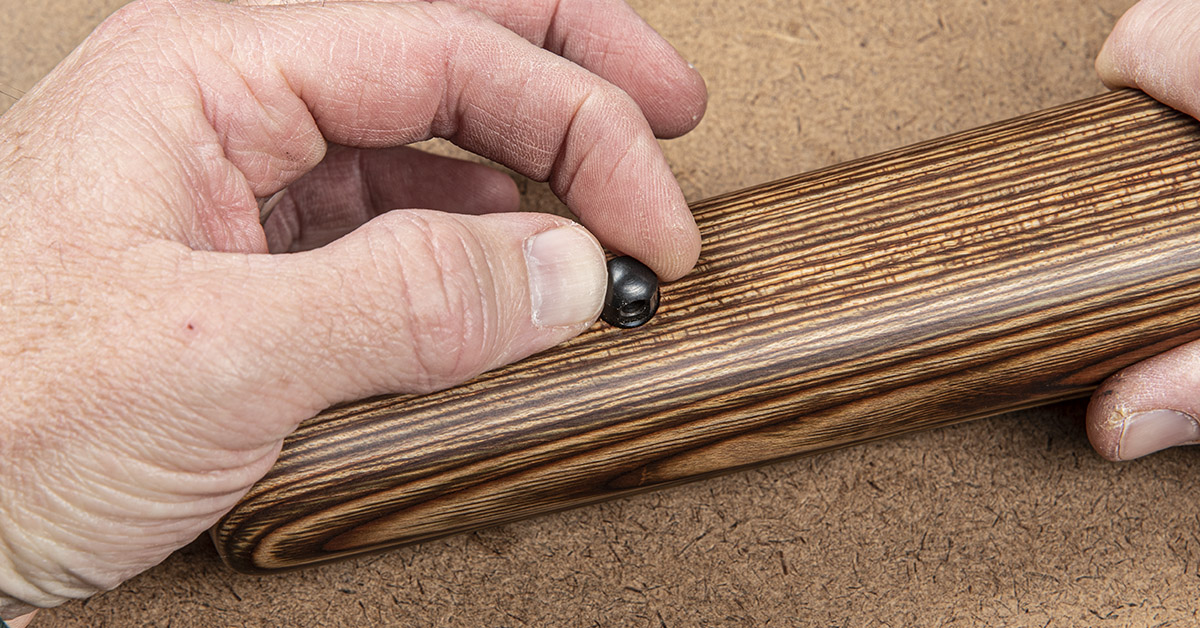
If the escutcheon nut is loose or fell out upon removal of the front stud, use a hand drill and an appropriately sized drill bit to slightly oversize the escutcheon nut hole. Drill only as deep as the thickness of the nut. Use JB weld or Brownells Acraglas and epoxy the nut in place. Thread the swivel stud in place before the epoxy cures but only until in contacts the stock (DO NOT overtighten) and is properly oriented. This will ensure that the nut is properly centered and at the correct depth. Once the epoxy has cured, install the front stud as described above.
Leather slings should be cleaned and then treated with a proper leather dressing, such as mink oil.
The barreled action can now be placed back into the stock.
Iron Sights and Scope
Although not as popular as they once were, iron sights are still in use by modern hunters—particularly those who favor still hunting in tight confines.
Iron sights work best when they are a uniform, flat black color. Any gloss or bright spots can cause a glare, which distorts the apparent shape and size of the front sight and will cause aiming errors. Treating the sights with Birchwood Casey’s Sight Black will eliminate this.

Hunting success often occurs just before sunup or just prior to sundown. In other words, poor light conditions. Combine this with dirty scope lenses and you may not be able to make the shot. To keep your scope at maximum clarity, routinely clean the lenses following the manufacturer’s recommended method. Flip-open scope caps are an easy way to help keep the scope lenses clean when afield yet allow for quick sighting access when needed.
Wrapping it Up
Most people will maintain a light coat of oil on the metal surfaces of their rifle to keep it protected from rust. In similar fashion, it is wise to keep a light coat of wax on wooden stock firearms. Brownells has firearm stock-specific wax available; however, any furniture wax is acceptable for use on your wooden stock. Just “smell” before you buy. The scent of some furniture wax can be quite strong—not a good thing for a hunting firearm.
Attach the sling to the rifle and your work is complete. Your rifle is now prepped for long-term storage and will be ready for next season.
And Finally…
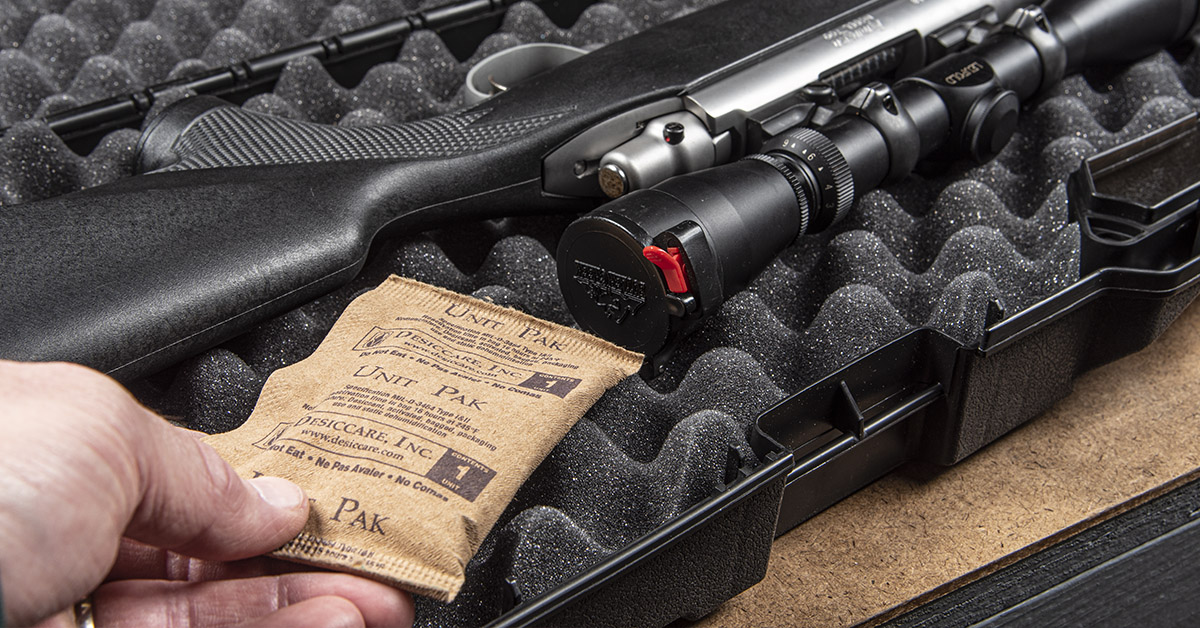
You can’t beat an environmentally controlled gun safe for firearm storage. The reality, though, is that, as a percentage of hunters and shooters, few actually have them, and most folks instead rely on hard or soft gun cases to keep guns snuggly safe between use. The best bet of the two is always a padded hard case with good foam inserts. These protect guns from the inevitable bumps and bangs in the home and serve well for transporting guns to and from the field and range. Toss in a desiccant pack or two to help control moisture and you’ll be good to go until next season.

MTM Case-Gard has a long gun cases that is ideally suited for both in-home off-season storage and for transportation—the Single Scoped Rifle Case. Made in the U.S., this case is constructed of high-impact plastic and features four snap latches with padlock points so it can be securely locked. High-quality foam padding keeps the gun safe from bumps and shifting. The case holds a scoped rifle up to 50 inches long. For more info on this and more gun and ammo storage solutions, head over to MTMCase-Gard.com.