For a few bucks and a few minutes of your time, you can merge your Remington 870 shotgun into the fast-and-accurate lane with these DIY upgrades
by Rob Reaser
Remington 870 shotguns are legion. The relatively new owners of the Remington firearm brand, RemArms, claim, in reference to this legendary model, “11,000,000. Built exactly like no other shotgun ever.”
The Remington brand has had a rather volatile go of it over the last several years. You can find out the “what” and possibly the “why” with a little sleuthing, but we sincerely hope that all the Big Green drama is now behind us and we can look forward to a lasting resurgence of this treasured American brand.
One of the things that gave us great hope with the ownership change was a fresh lease on the popular 870 pump-action shotgun. So, when “new” 870s finally began to roll out of the factory once more, we put Shoot On‘s resident shotgun guru Larry Case on the case (sorry!) to give the base 870 Fieldmaster a shakedown review. Larry’s extensive testing proved the reemergent 870 Fieldmaster earns two thumbs up.
With that endorsement, I decided to buy one for myself with the hope of eventually finding an 18-inch barrel for it and converting it to a defensive shotgun — a mate, if you will, for my decked-out Mossberg 500 home defender. In the meantime, I wanted to set this gun up for some coyote and turkey action. To that end, I needed a sighting system that would deliver a tight payload of #00 buckshot or #7 tungsten with authoritative precision and, of course, a trigger that would surpass the factory unit.
The Sight
Saving my ghost ring/tritium sight system for the defensive conversion, I looked to HIVIZ for the immediate aiming solution — specifically, their C-Series Magnetic Turkey/Deer Sight Set. The C-Series sights are designed to work with rib-barreled shotguns like the Remington 870. There are three sizes offered: Ultra Narrow (C200-2) for ribs .171 to .265 inches wide, Narrow (C300-2) for ribs .218 to .328 inches wide, and Wide (C400-1) for ribs .328 to .427 inches wide. The Remington 870 rib being .295 inches wide, I went with the Narrow C300-2 model.

The kit includes both the front and rear sight assemblies with green fiber-optic LitePipes for the rear sight and green and orange LitePipes for the front sight. The latter allows you to choose which color works best for your eyes and shooting conditions.
What I like about this sight set is that it is not permanent and requires no modifications to the gun, like drilling and tapping or gluing. Everything locks on tight for aggressive field use, but the mounting system allows for easy removal should you want to go with a different sighting system down the road or swap it onto another shotgun. And at $32.35, this sight set is an easy buy-in that you can use on any shotgun with a compatible rib width.
A practical advantage of the C-Series sight is its extreme visibility. I’ve never liked traditional front bead sights in the best of conditions. Add in low light and things only get worse. HIVIZ sights use expansive light-gathering fiber-optic elements that really pop in dim light, so those early morning or late evening shots can be lined up with confidence.
Some may still ask why employ front and rear sights on a shotgun. Yes, a front bead has worked for millions of shooters for years. But better shotshell load technology and smart choke application means that, today, we can enjoy tighter pellet patterns at longer distances than ever before — especially when shooting Tungsten Super Shot. Too much fudging on the aim with these loads, though, quickly translates to downrange misses. A front/rear sight combo solves that problem handily.
The Trigger
Right up there with a good sight system for tight-shooting shotguns and improved accuracy is a good trigger. Does a shotgun need a trigger on par with that used in, say, a precision long-range rifle? No. That also doesn’t mean that a shotgun’s accuracy potential cannot be improved with a trigger that delivers the same short pull and crisp sear break we increasingly expect from a quality bolt rifle. The same rules apply, whether we’re talking about rifle, shotgun, or pistol platforms: a smooth, precise trigger means reduced shot disturbance, better trigger control, and a greater chance of achieving point-of-aim/point-of-impact.
I’ve dropped several Timney triggers into my Remington 700 rifles and AR-15s, and I am a big fan. The company has been in this game since 1946 and has proven its engineering and manufacturing prowess on everything from hunting to top-end competition firearm platforms. Naturally, Timney has looked into the 870 trigger system and devised an upgrade that not only improves sear travel and disengagement when compared to the Remington factory trigger, but also offers broad adjustability to really dial-in the performance you need to match the mission.
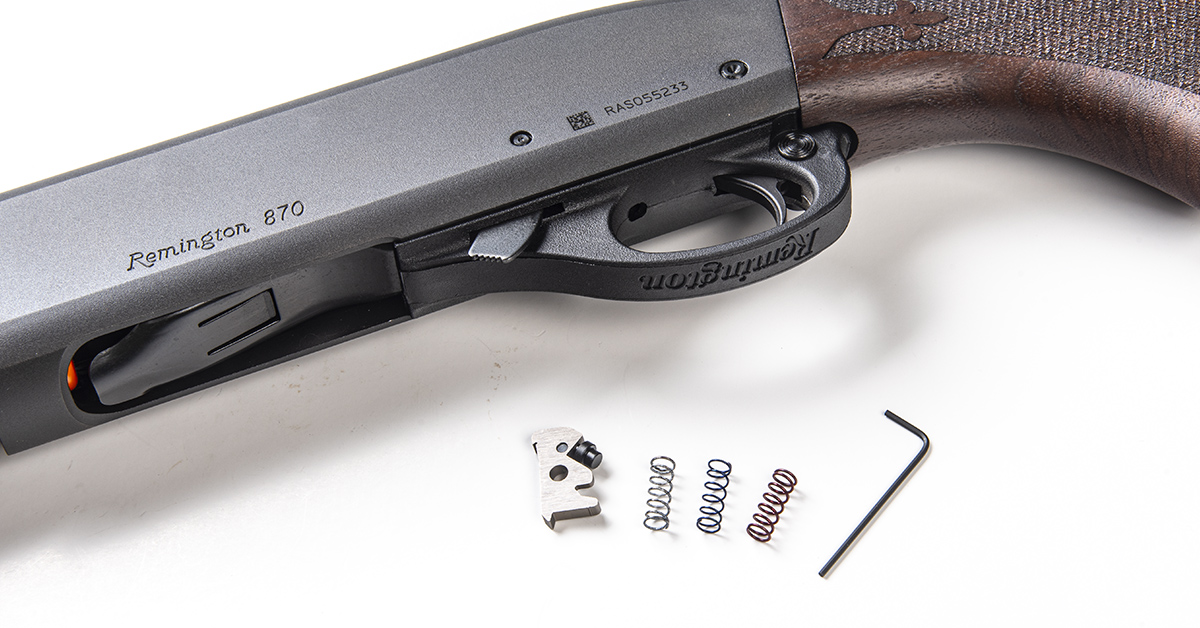
The Timney Remington 870 Trigger Fix (straightforward name, that) replaces the factory trigger sear with a redesigned and adjustable unit. Additionally, the “fix” includes three different sear spring weights (light, medium, and heavy). Between your choice of spring and the ability to adjust the spring preload by up to one pound, you can fine-tune the pull weight to suit your needs.
Installing the 870 Trigger Fix is a simple job that is certainly worth the effort. We’ll show you the step-by-step process shortly, but first, let’s see how easy it is to upgrade the 870 with the HIVIZ sight kit.
Installing the HIVIZ C-Series Magnetic Turkey/Deer Sight Set

As the name implies, magnets are part of this sight group. The front sight uses three strong magnets to secure the sight body to the barrel rib. A spring steel base further grips the rib to ensure the sight is not going anywhere.
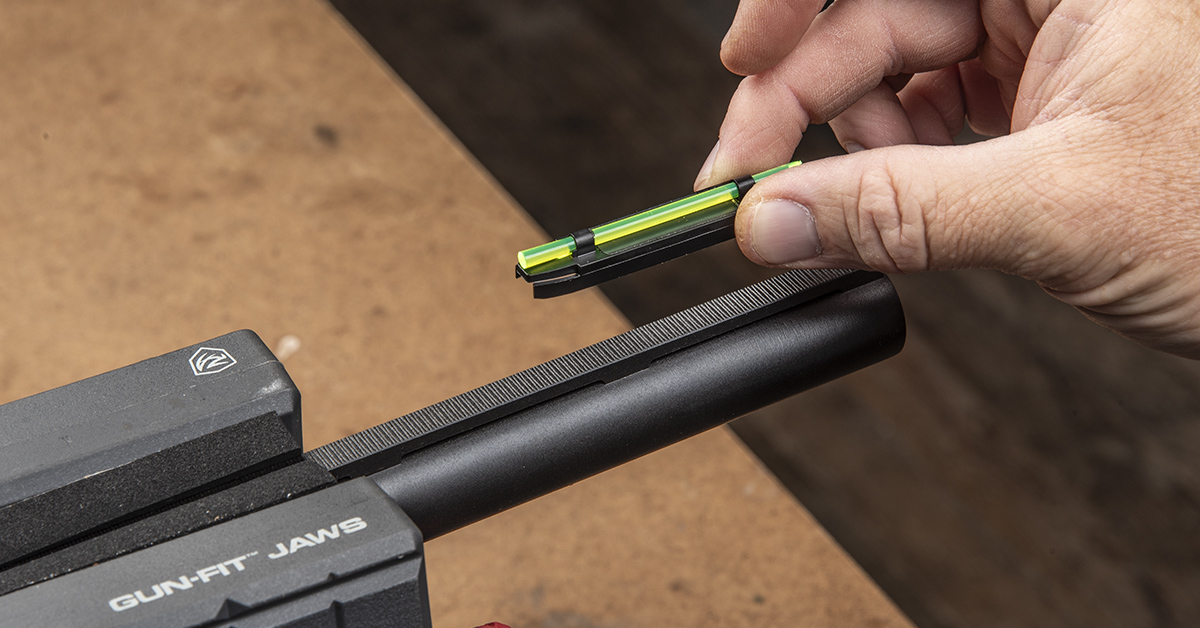
To install, simply place the sight, with the square-cut end of the LitePipe oriented toward the receiver, onto the barrel rib.
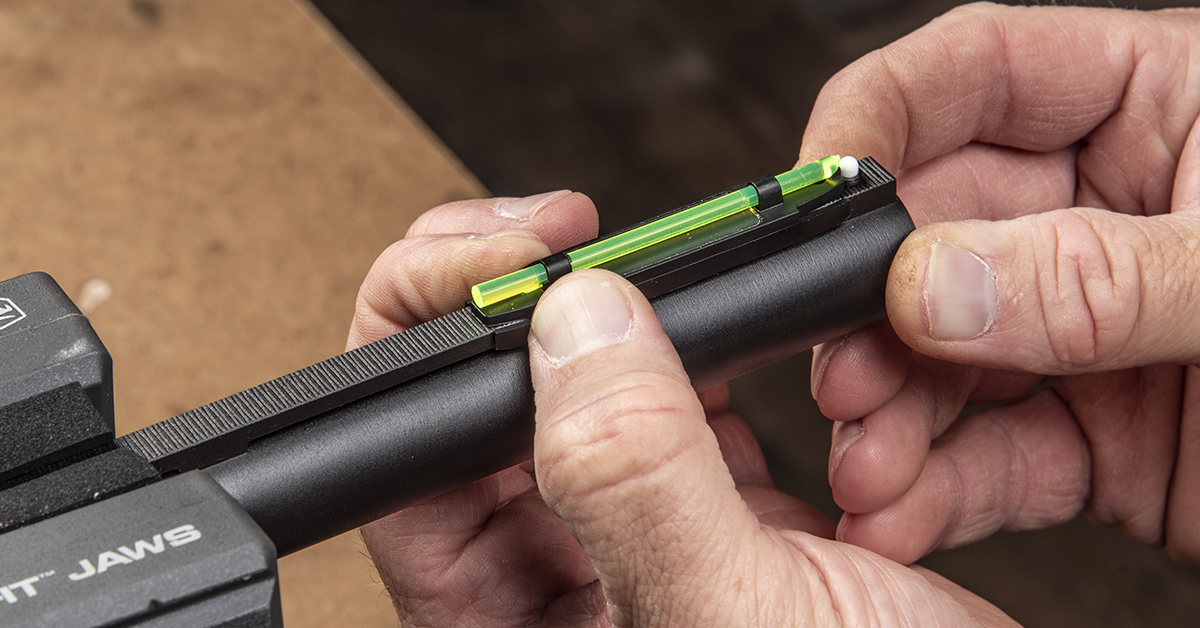
Slide the sight forward until it stops against the factory bead. That’s it. If you don’t want to use a rear sight and are simply looking for improved aiming visibility, HIVIZ sells several styles of their magnetic front sights suitable for the Remington 870.
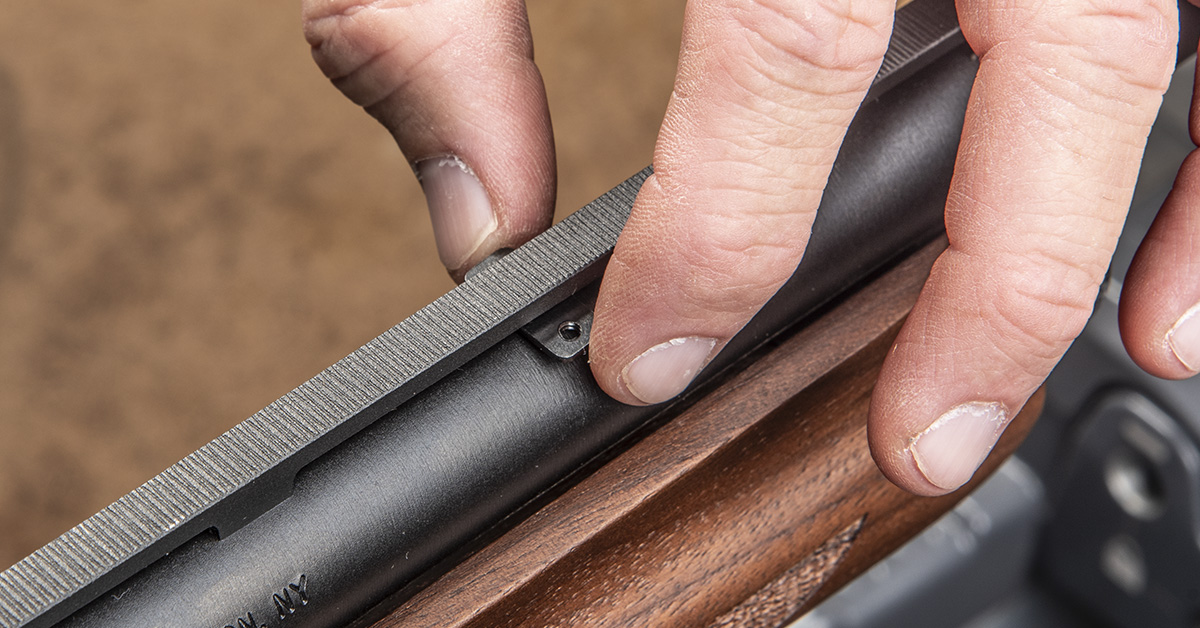
The rear sight is comprised of several pieces, including a base, threaded and non-threaded mounting plates, screws, sight, and elevator. Begin by positioning a threaded plate beneath the rib so that the sight will sit 1/3 the distance between the receiver and the muzzle.
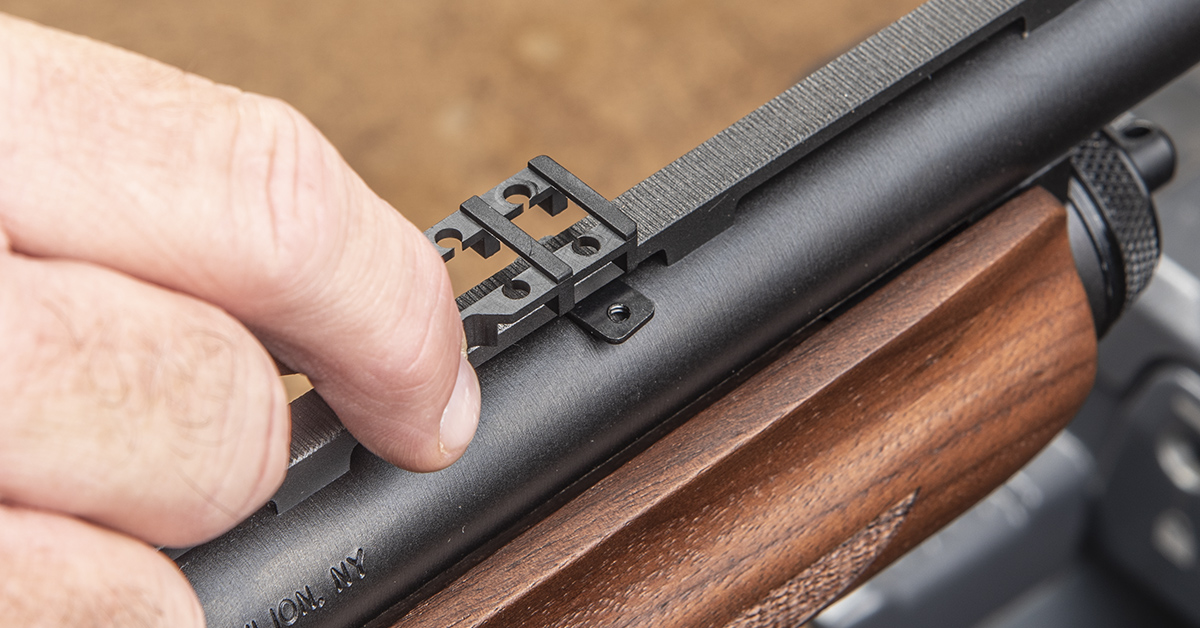
Position the base over the rib and align the two forward holes with the threaded plate underneath.

Place the non-threaded plate over the base.

Secure the base and plate assembly with two supplied screws.
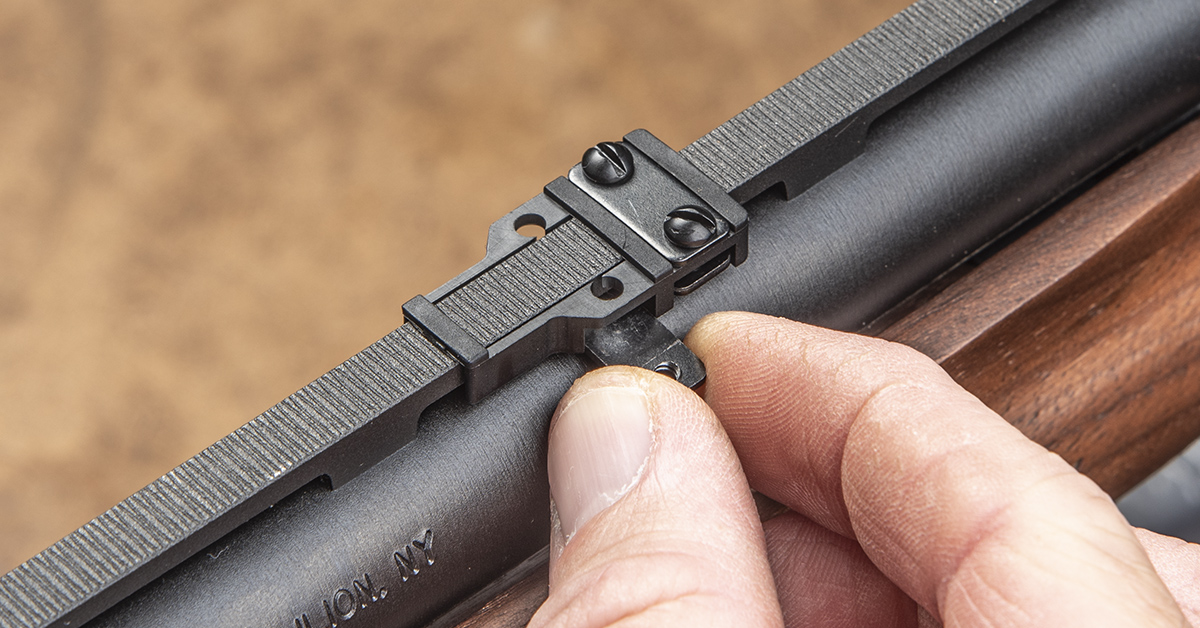
Install the second threaded plate beneath the base.

Lay the sight atop the base with the holes aligned.
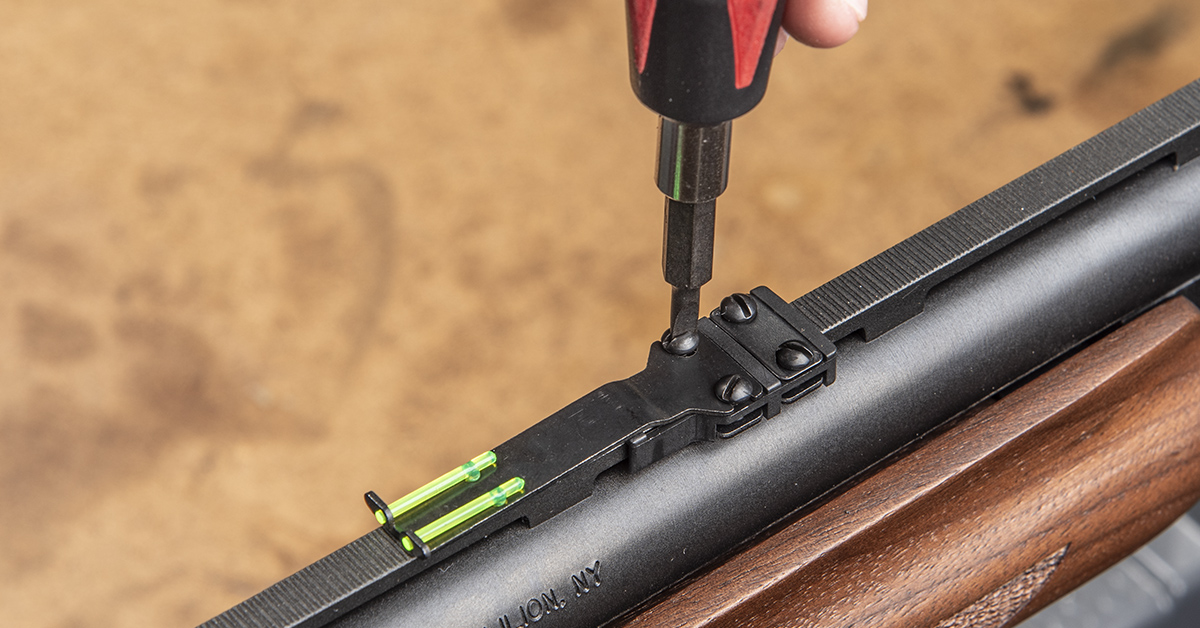
Secure the sight with two supplied screws.
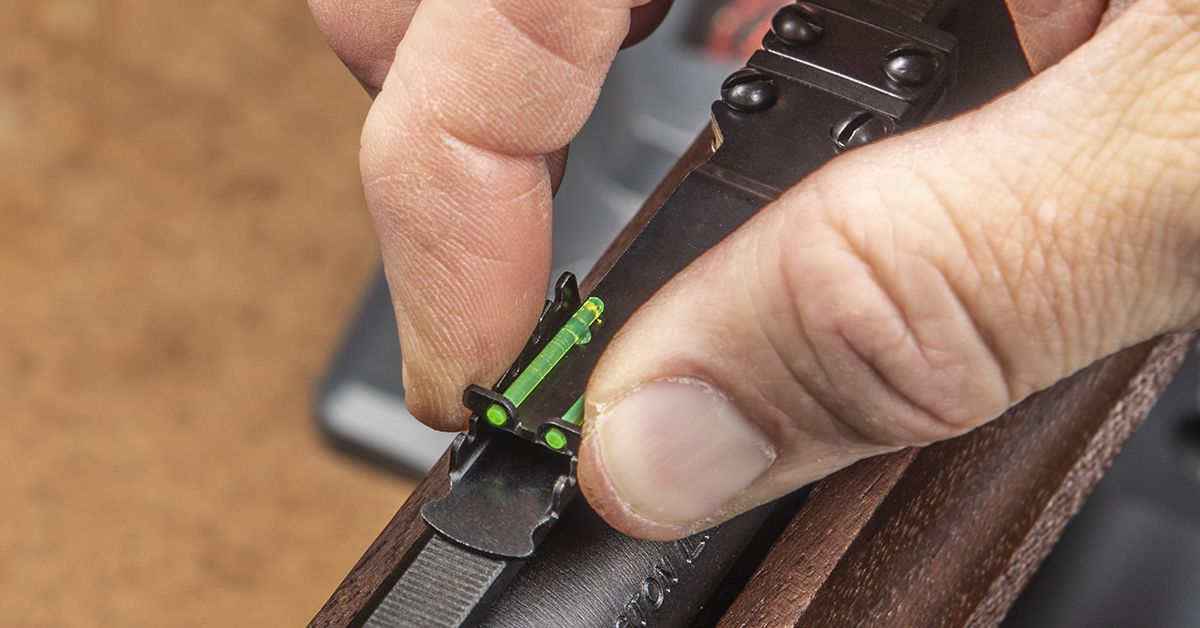
The elevator is secured between the rib and the sight by the sight’s spring tension. To install the elevator, lift the sight and slide the elevator into place. This process is a bit painful on the fingertips, so you may have to slightly loosen the sight screws to move the elevator into position. Just remember to retighten the screws if you do this.
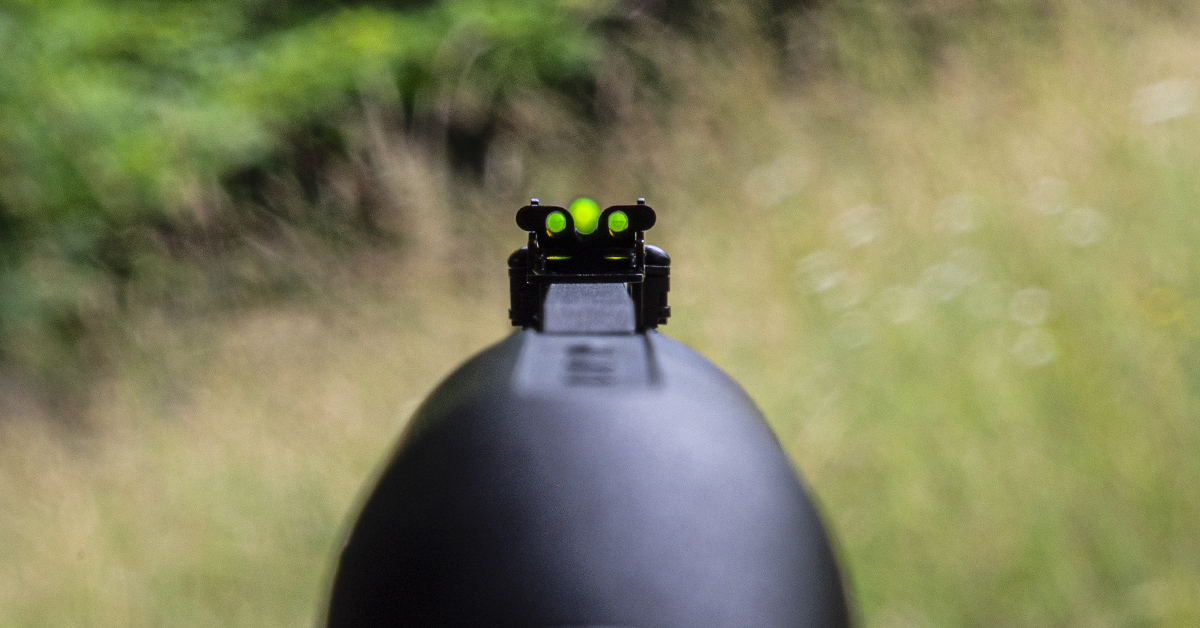
The HIVIZ C-Series Magnetic Turkey/Deer Sight Set delivers a bright sight picture and is a perfect way to add a fully adjustable front and rear sight system to most ribbed shotguns without modification to the firearm. It’s an ideal solution for any Remington 870 destined for turkey hunting, slug shooting, or defensive applications.
Installing the Timney 870 Trigger Fix
While not necessary for this installation, it is easier to work on the bench with the barrel removed from the receiver. To do this, ensure the chamber is empty and that there are no rounds in the magazine tube.
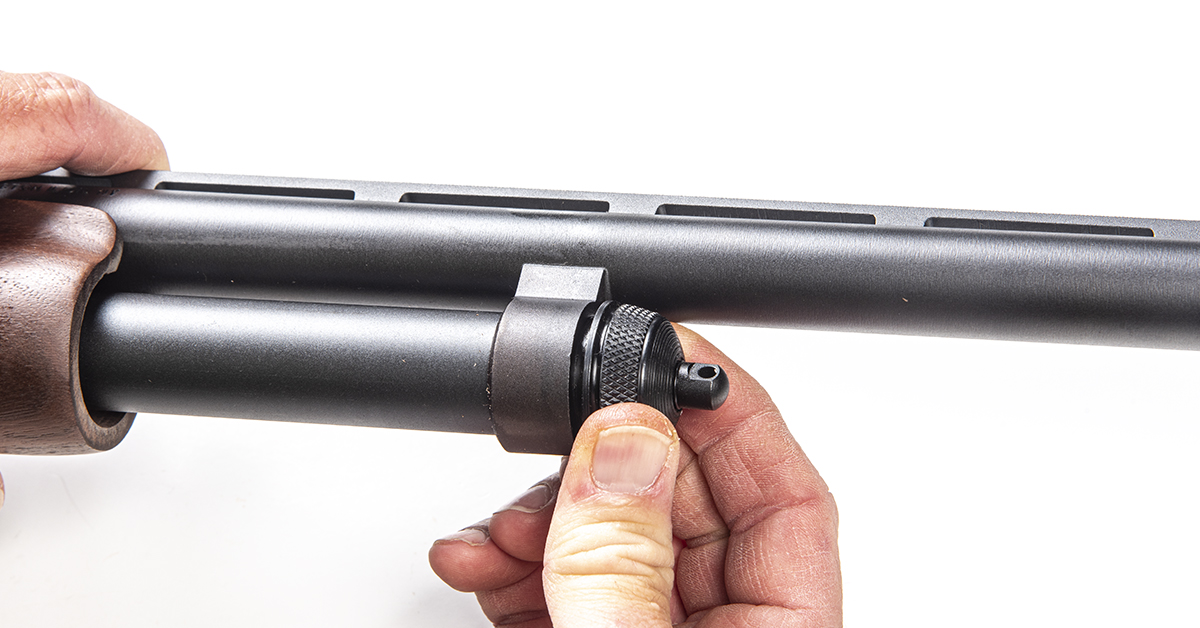
Unscrew the magazine cap.

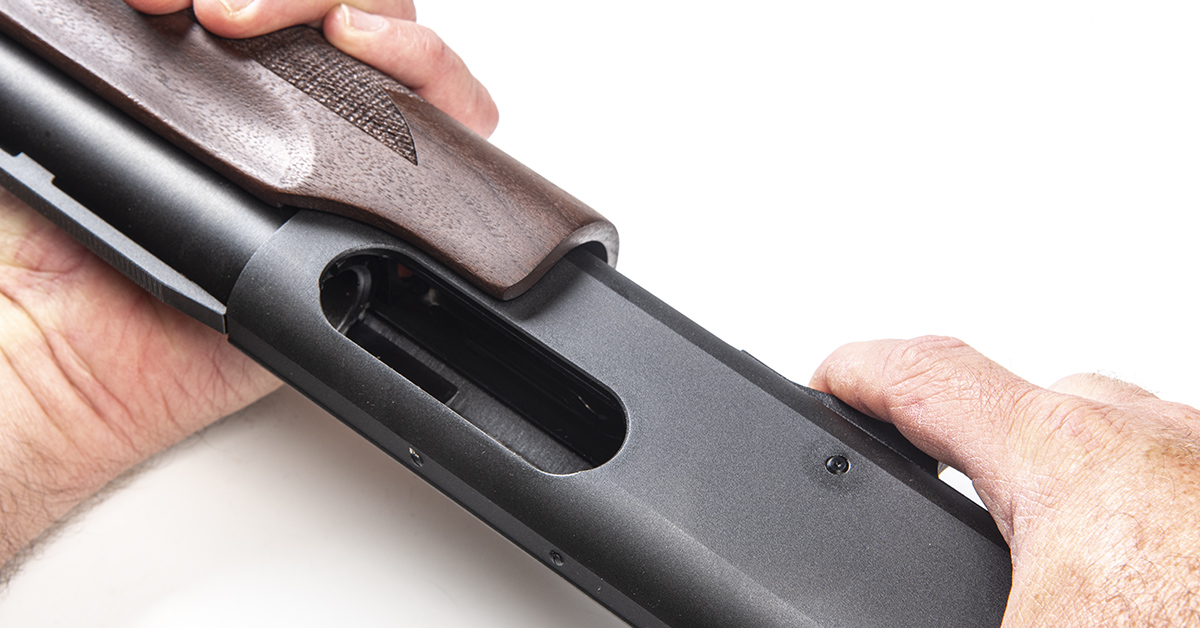
Separate the barrel from the receiver.

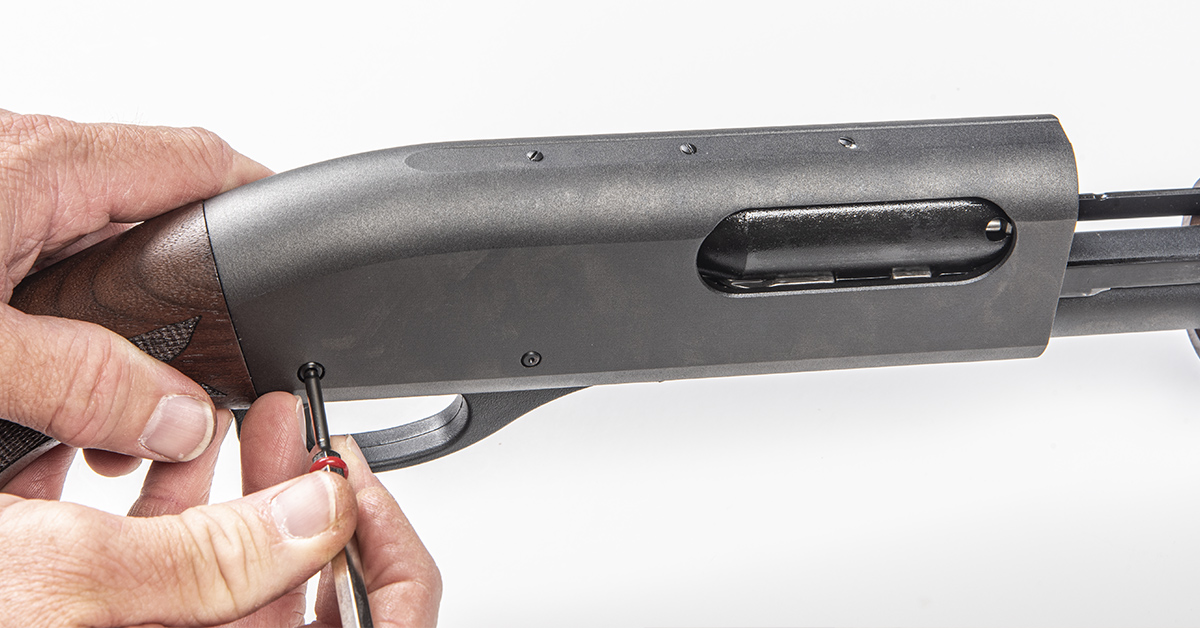
With the hammer cocked and the safety engaged, place the receiver on a bench block to prevent damaging any components and remove the two receiver pins. An appropriately sized punch and light hammer taps will get the job done. Here, I’m using Real Avid’s Accu-Punch Master Set and Smart Bench Block.
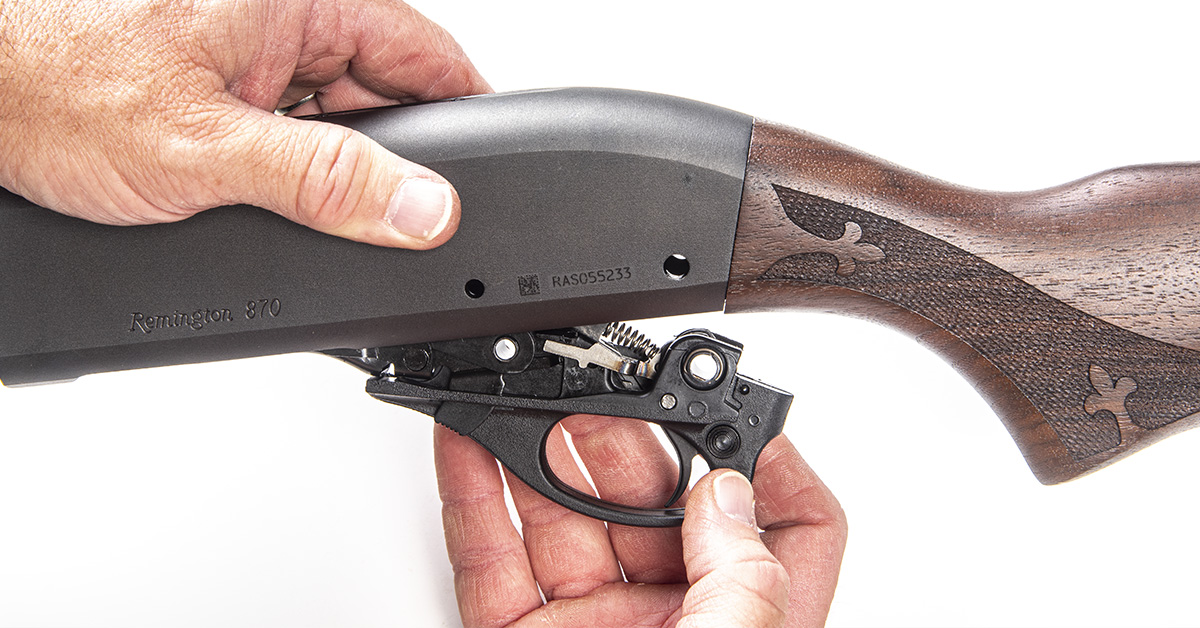
With the pins out, the trigger assembly can be removed from the receiver.
Hold your thumb firmly against the hammer face, move the safety to fire, and carefully pull back the trigger. Maintain control of the hammer while you lower it to the fired position. With the hammer in the fired position, remove the trigger plate bushing by pushing it from right to left. Note the spring clip on the end.

Remove the sear spring.

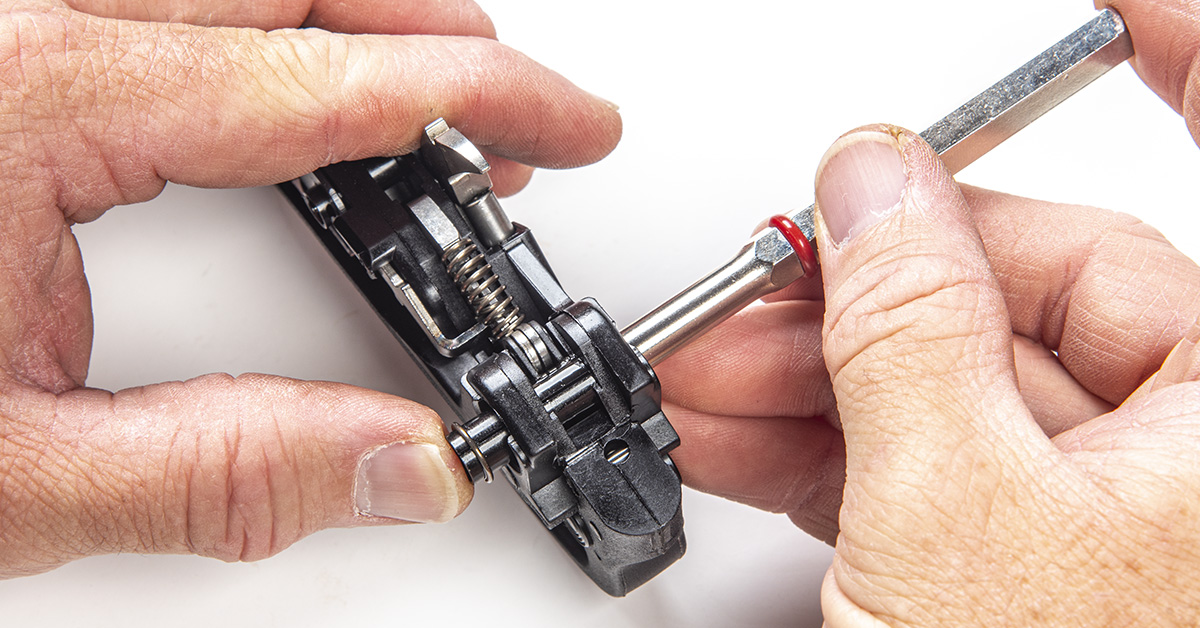
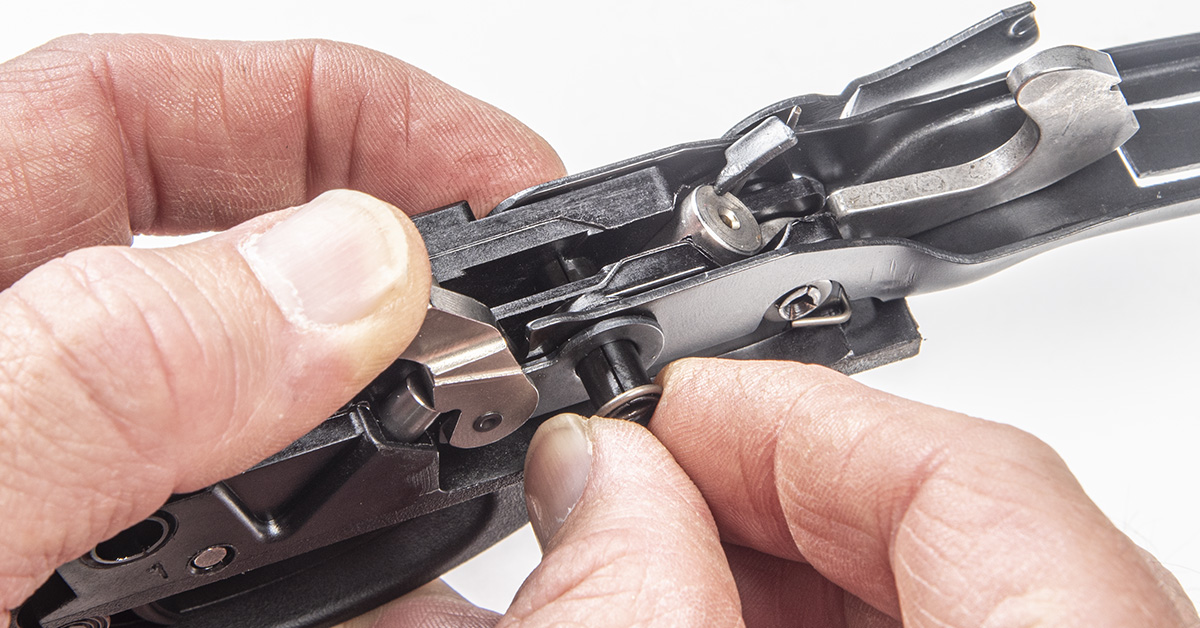
With your thumb, depress the carrier dog to maintain control of the carrier dog follower and spring. With the carrier dog depressed, pull out the carrier pivot tube from left to right. Note the spring clip on the end.

While continuing to maintain control of the carrier dog follower and spring (under thumb), remove the carrier assembly.

Remove the carrier dog follower and spring.
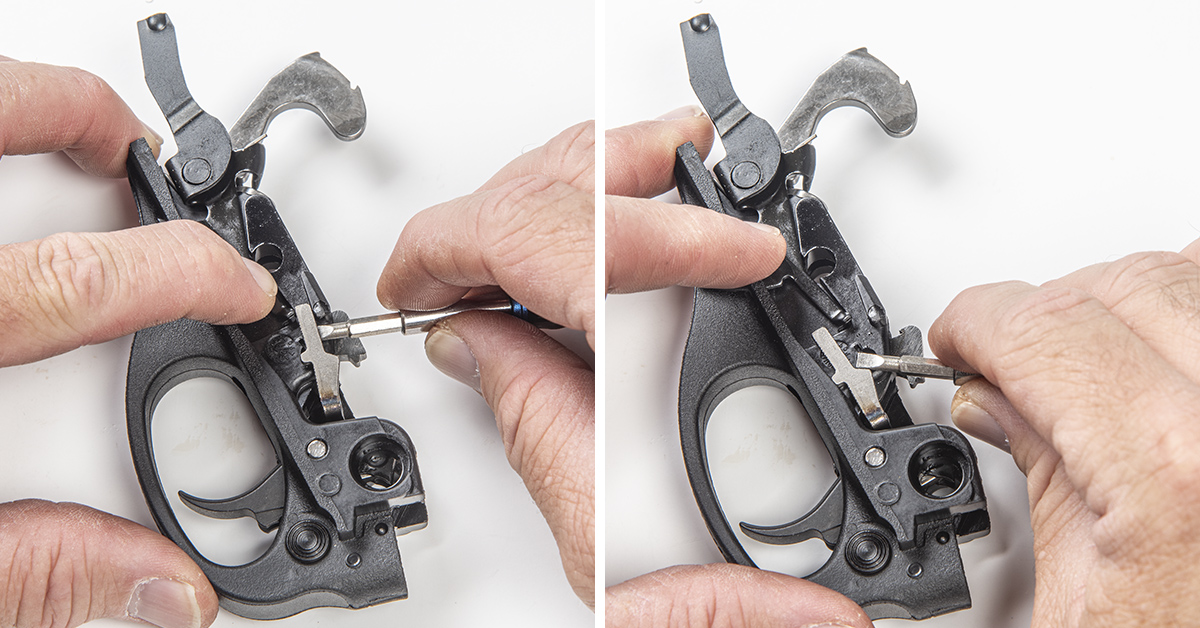
Use a small, flat blade screwdriver to slightly lift the connector (left) and move it below the action bar (right).
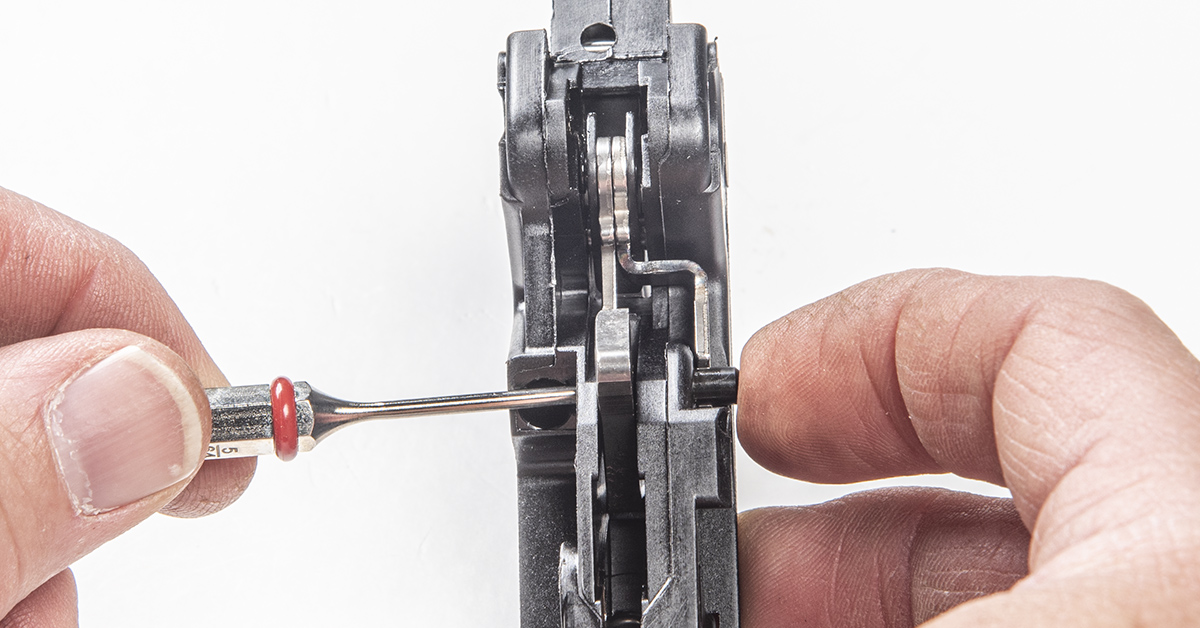
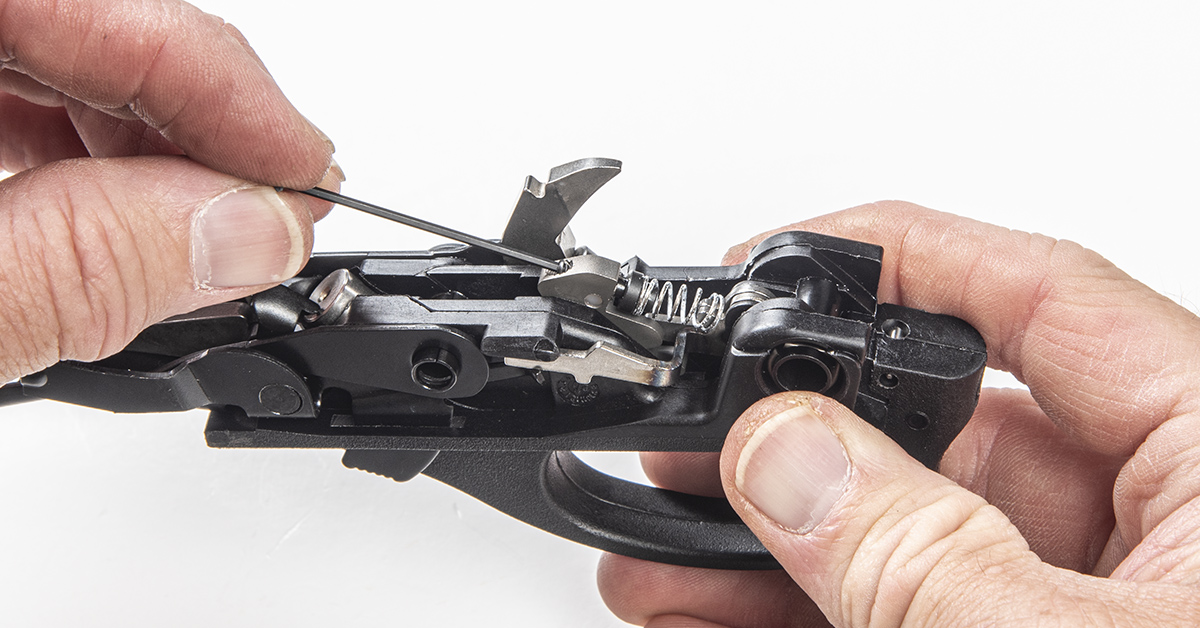
Use a small pin punch to push out the sear pin. It is not necessary to completely remove the sear pin as I did. You can move it just enough to release the sear, if you like.
Remove the sear from the trigger housing.
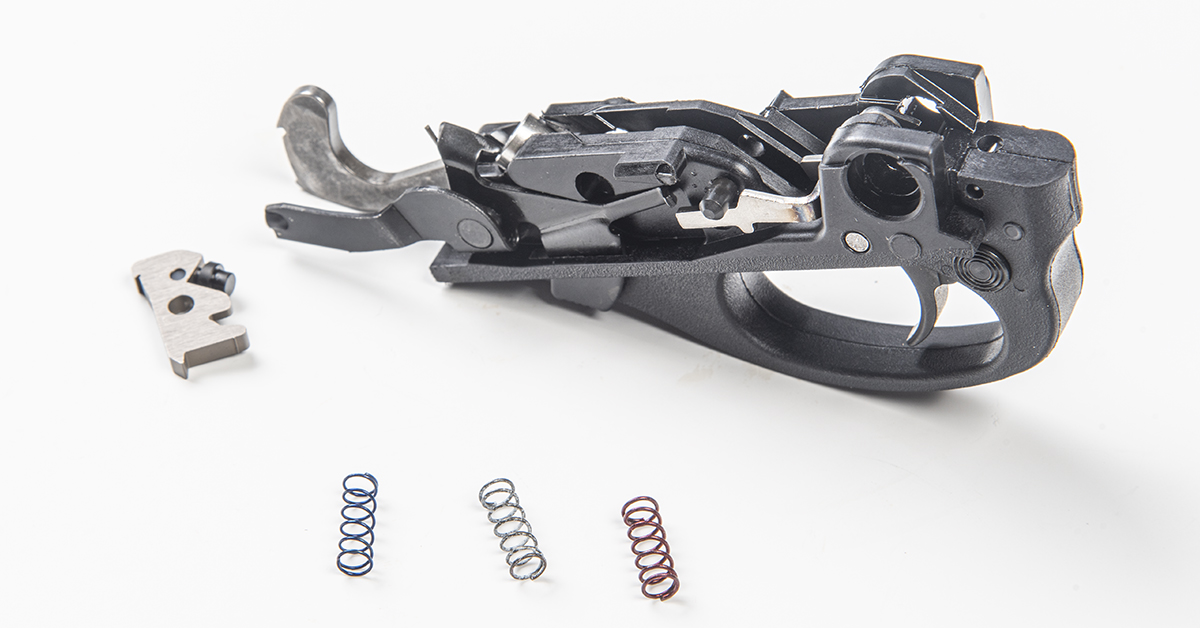
As mentioned earlier, the Timney 870 Trigger Fix comes with an upgraded and adjustable sear assembly plus three sear springs of different weights. The blue spring offers the lightest trigger pull weight (1 lb. 9 oz., approx.), the white spring is medium weight (2 lbs. 9 oz., approx.), and the red spring gives the heaviest pull weight (3 lbs., approx.). I chose the medium-weight spring because I was concerned that the light spring would be too easy to trip when wearing gloves.

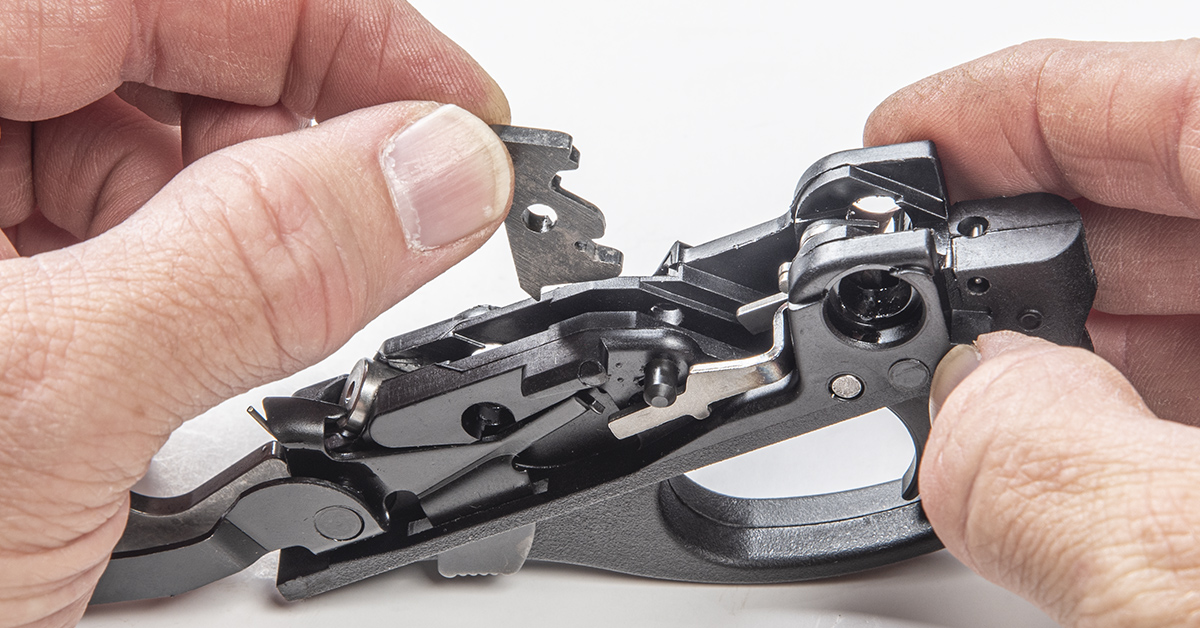
On the left is the Timney sear; right, the factory piece. The profile is generally the same, but the key to the Timney’s more precise operation and better feel is the sear engagement surface on the back side, top left. This “hook” is what holds back the cocked hammer at its engagement surface. As you can see, the Timney engagement surface is significantly shorter than that of the stock unit. Half or more by my eye. That means a shorter trigger travel between the time you begin rearward trigger movement and the moment the trigger sear engagement releases the hammer. Combine that with the higher-quality materials and manufacturing process of the Timney sear and the fine-tune adjustability of the sear spring weight and you can understand how the Timney upgrade leads to overall improved trigger performance and accuracy potential. Even in a shotgun, that’s a big deal.

Insert the new Timney sear along with your choice of spring and secure with the sear pin.

Return the connector to its place above the action bar.
Reinstall the carrier dog follower and spring.
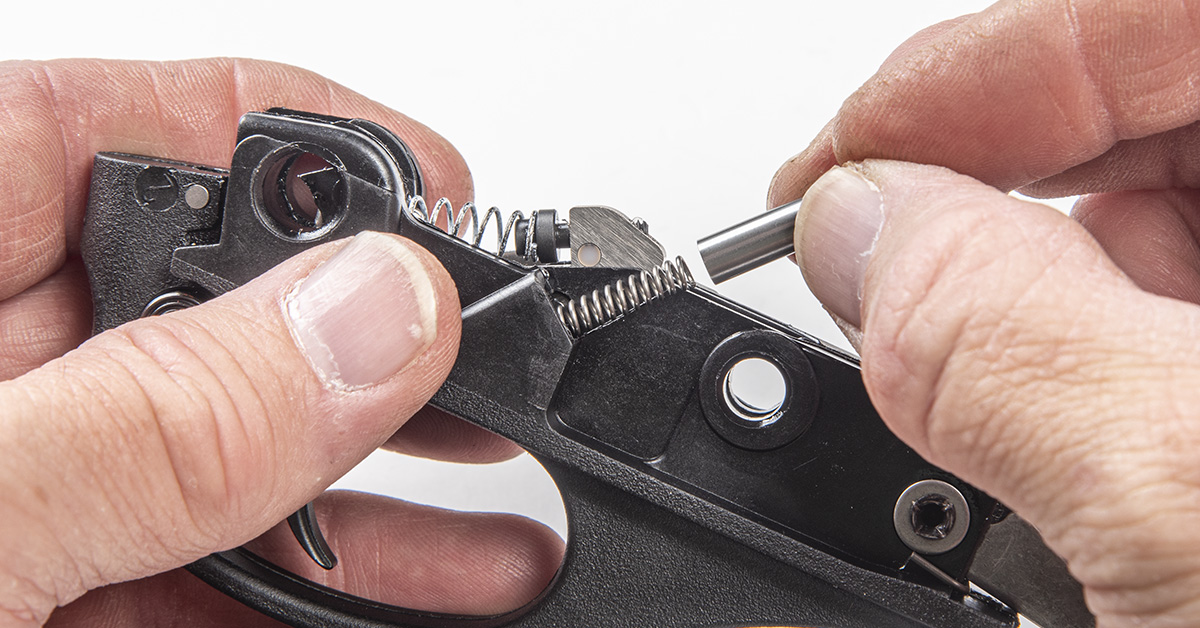
Depress the trigger to make clearance for the trigger plate bushing and reinstall the bushing from left to right (the bushing spring clip will be on the left side [shown] in the same orientation as it was removed).
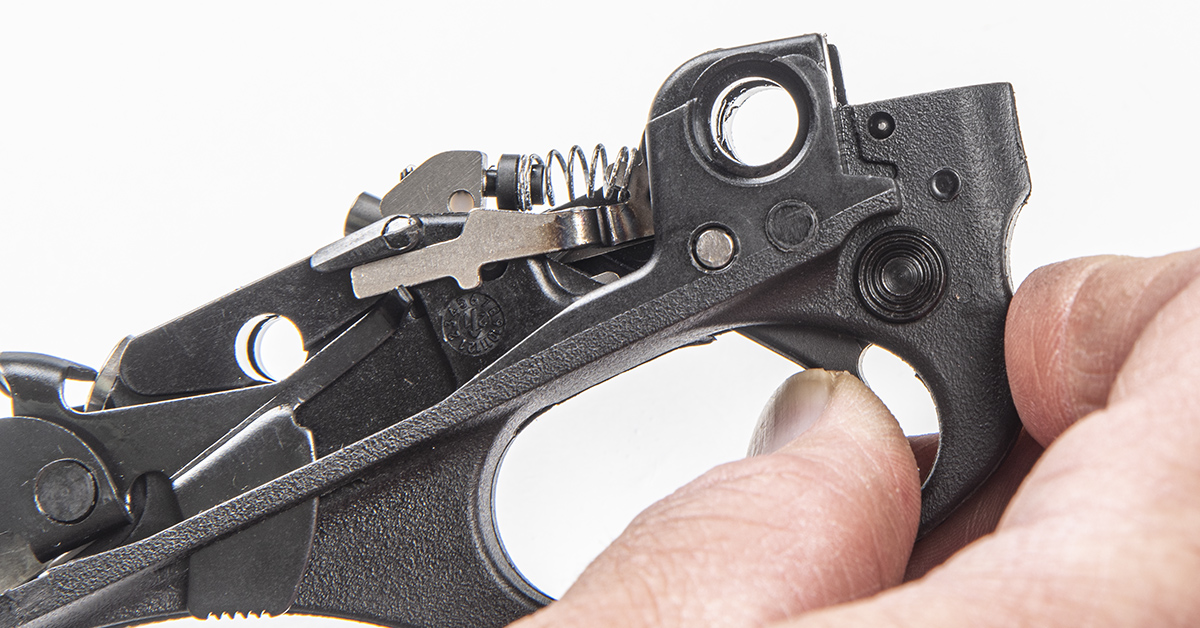
Place the carrier back into position on the trigger housing, capturing the carrier dog follower underneath the carrier dog, as shown. Reinsert the carrier pivot tube from right to left, as shown, with the spring clip on the right side in the same orientation as it was removed).

Apply a couple drops of light lubricant to both sides of the sear.

With the trigger reassembled, perform a function check. Making sure to not allow the hammer to fall forward under spring pressure, push the hammer back until it engages with the trigger sear. Move the safety to fire and, while continuing to maintain control of the hammer, pull back on the trigger and allow the hammer to move forward a short distance to verify that it released from the trigger sear. Next, allow the trigger to move all the way forward and again push back on the hammer to cock it. Move the safety to the safe position. Maintain control of the hammer while pulling back on the trigger. The trigger sear should not release the hammer. Be sure to perform this function test again after reinstalling the trigger assembly into the receiver.
The sear spring preload is adjusted by turning the set screw in the sear with the supplied Allen wrench. Four rotations equal about 1 lb. of adjustment. Timney warns not to make more than four turns.
Once you have the trigger pull weight set to your liking, reinstall the trigger housing into the receiver and secure with the receiver pins. Reinstall the barrel to complete the project and perform a final function check.
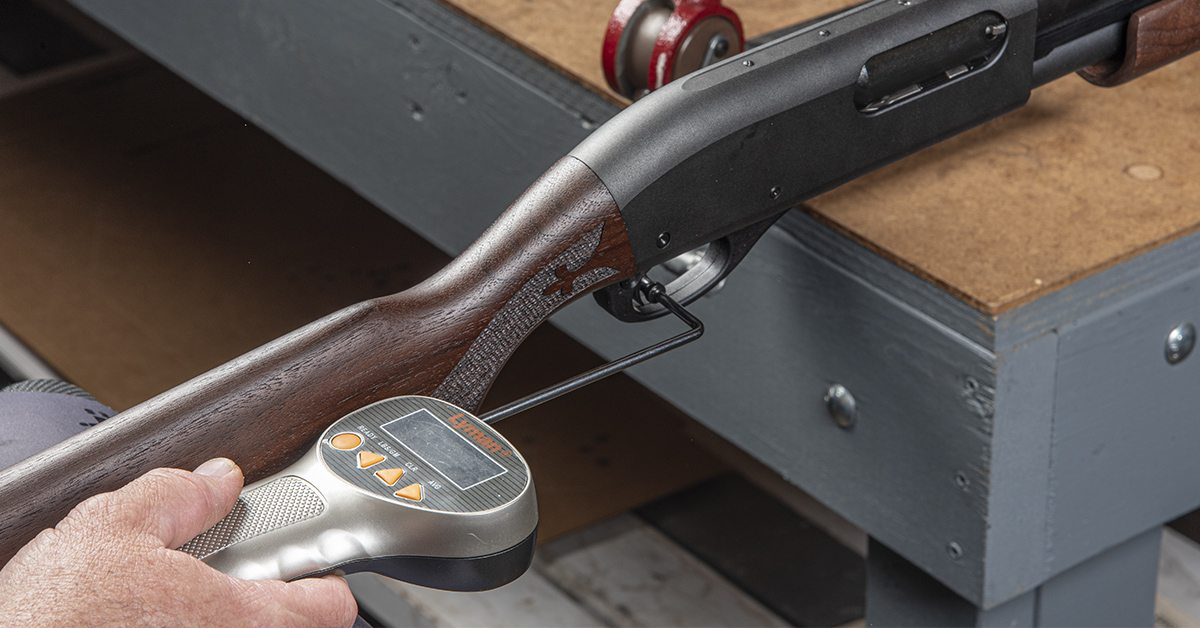
Before installing the 870 Trigger Fix, I measured the factory trigger pull weight at an average of 3 lbs. 1.4 oz. Not terribly heavy, as factory triggers go, but certainly lacking in the smoothness department. Following the upgrade, I performed the same test (10-pull average) and recorded a trigger pull weight of 2 lbs. 1.1 oz. The medium (white) sear spring dropped the pull weight by about one pound, and that was with no adjustment to the spring preload.
Overall, the upgrade proved well worth the few minutes it took to swap the trigger sear. The pull is now lighter (and could go lighter still) and way shorter, and the break is clean and sharp — exactly what you want for maximum shot placement control. Add in the HIVIZ system, and the result is a shotgun that delivers the kind of sight alignment and trigger performance that significantly outpaces that of a factory production 870.
So, if you have a “new” or a legacy Remington 870 and wish to bring it up to modern ammunition and accuracy expectations, the HIVIZ C-Series Magnetic Turkey/Deer Sight Set and Timney’s Remington 870 Trigger Fix are DIY upgrades you should try today.