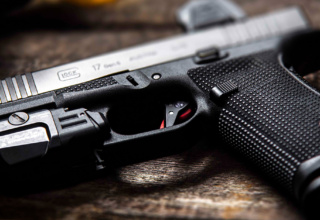
The AP53 we recently covered is an exceptional large-format pistol, but it’s even better as the rifle it was originally intended to be. The actual mechanics of converting one into a rifle are simple, but the barrel is about half the of minimum 16” length at which a rifle becomes a short barreled rifle (SBR) that requires ATF approval. So we start the job not with metal, but paperwork.
Getting Approved
There are two ways to get an SBR: you can either have one transferred to you by a dealer with the correct license (usually called an SOT), which requires a Form 4, or make it yourself with a Form 1. Both applications are similar, and both require ATF approval before the transfer or making.
Once a paperwork-intensive task requiring local law enforcement approval and a lengthy wait, the ATF’s creation of an eform application system has dramatically shortened the process. Silencer Shop has shortened it even further. Once you have your fingerprints and a photo on file (which is as easy as visiting one of their kiosks and taking a selfie with their app), you create an account with the ATF and fill out the application on the Silencer Shop website. Silencer Shop charges $50 for its Form 1 service, which is the correct option since we’re talking about making the SBR.
The application requires demographic information and gun data such as barrel length, which is measured from the breechface to the muzzle, with any muzzle devices removed. That’s easy enough to do with a cleaning rod.
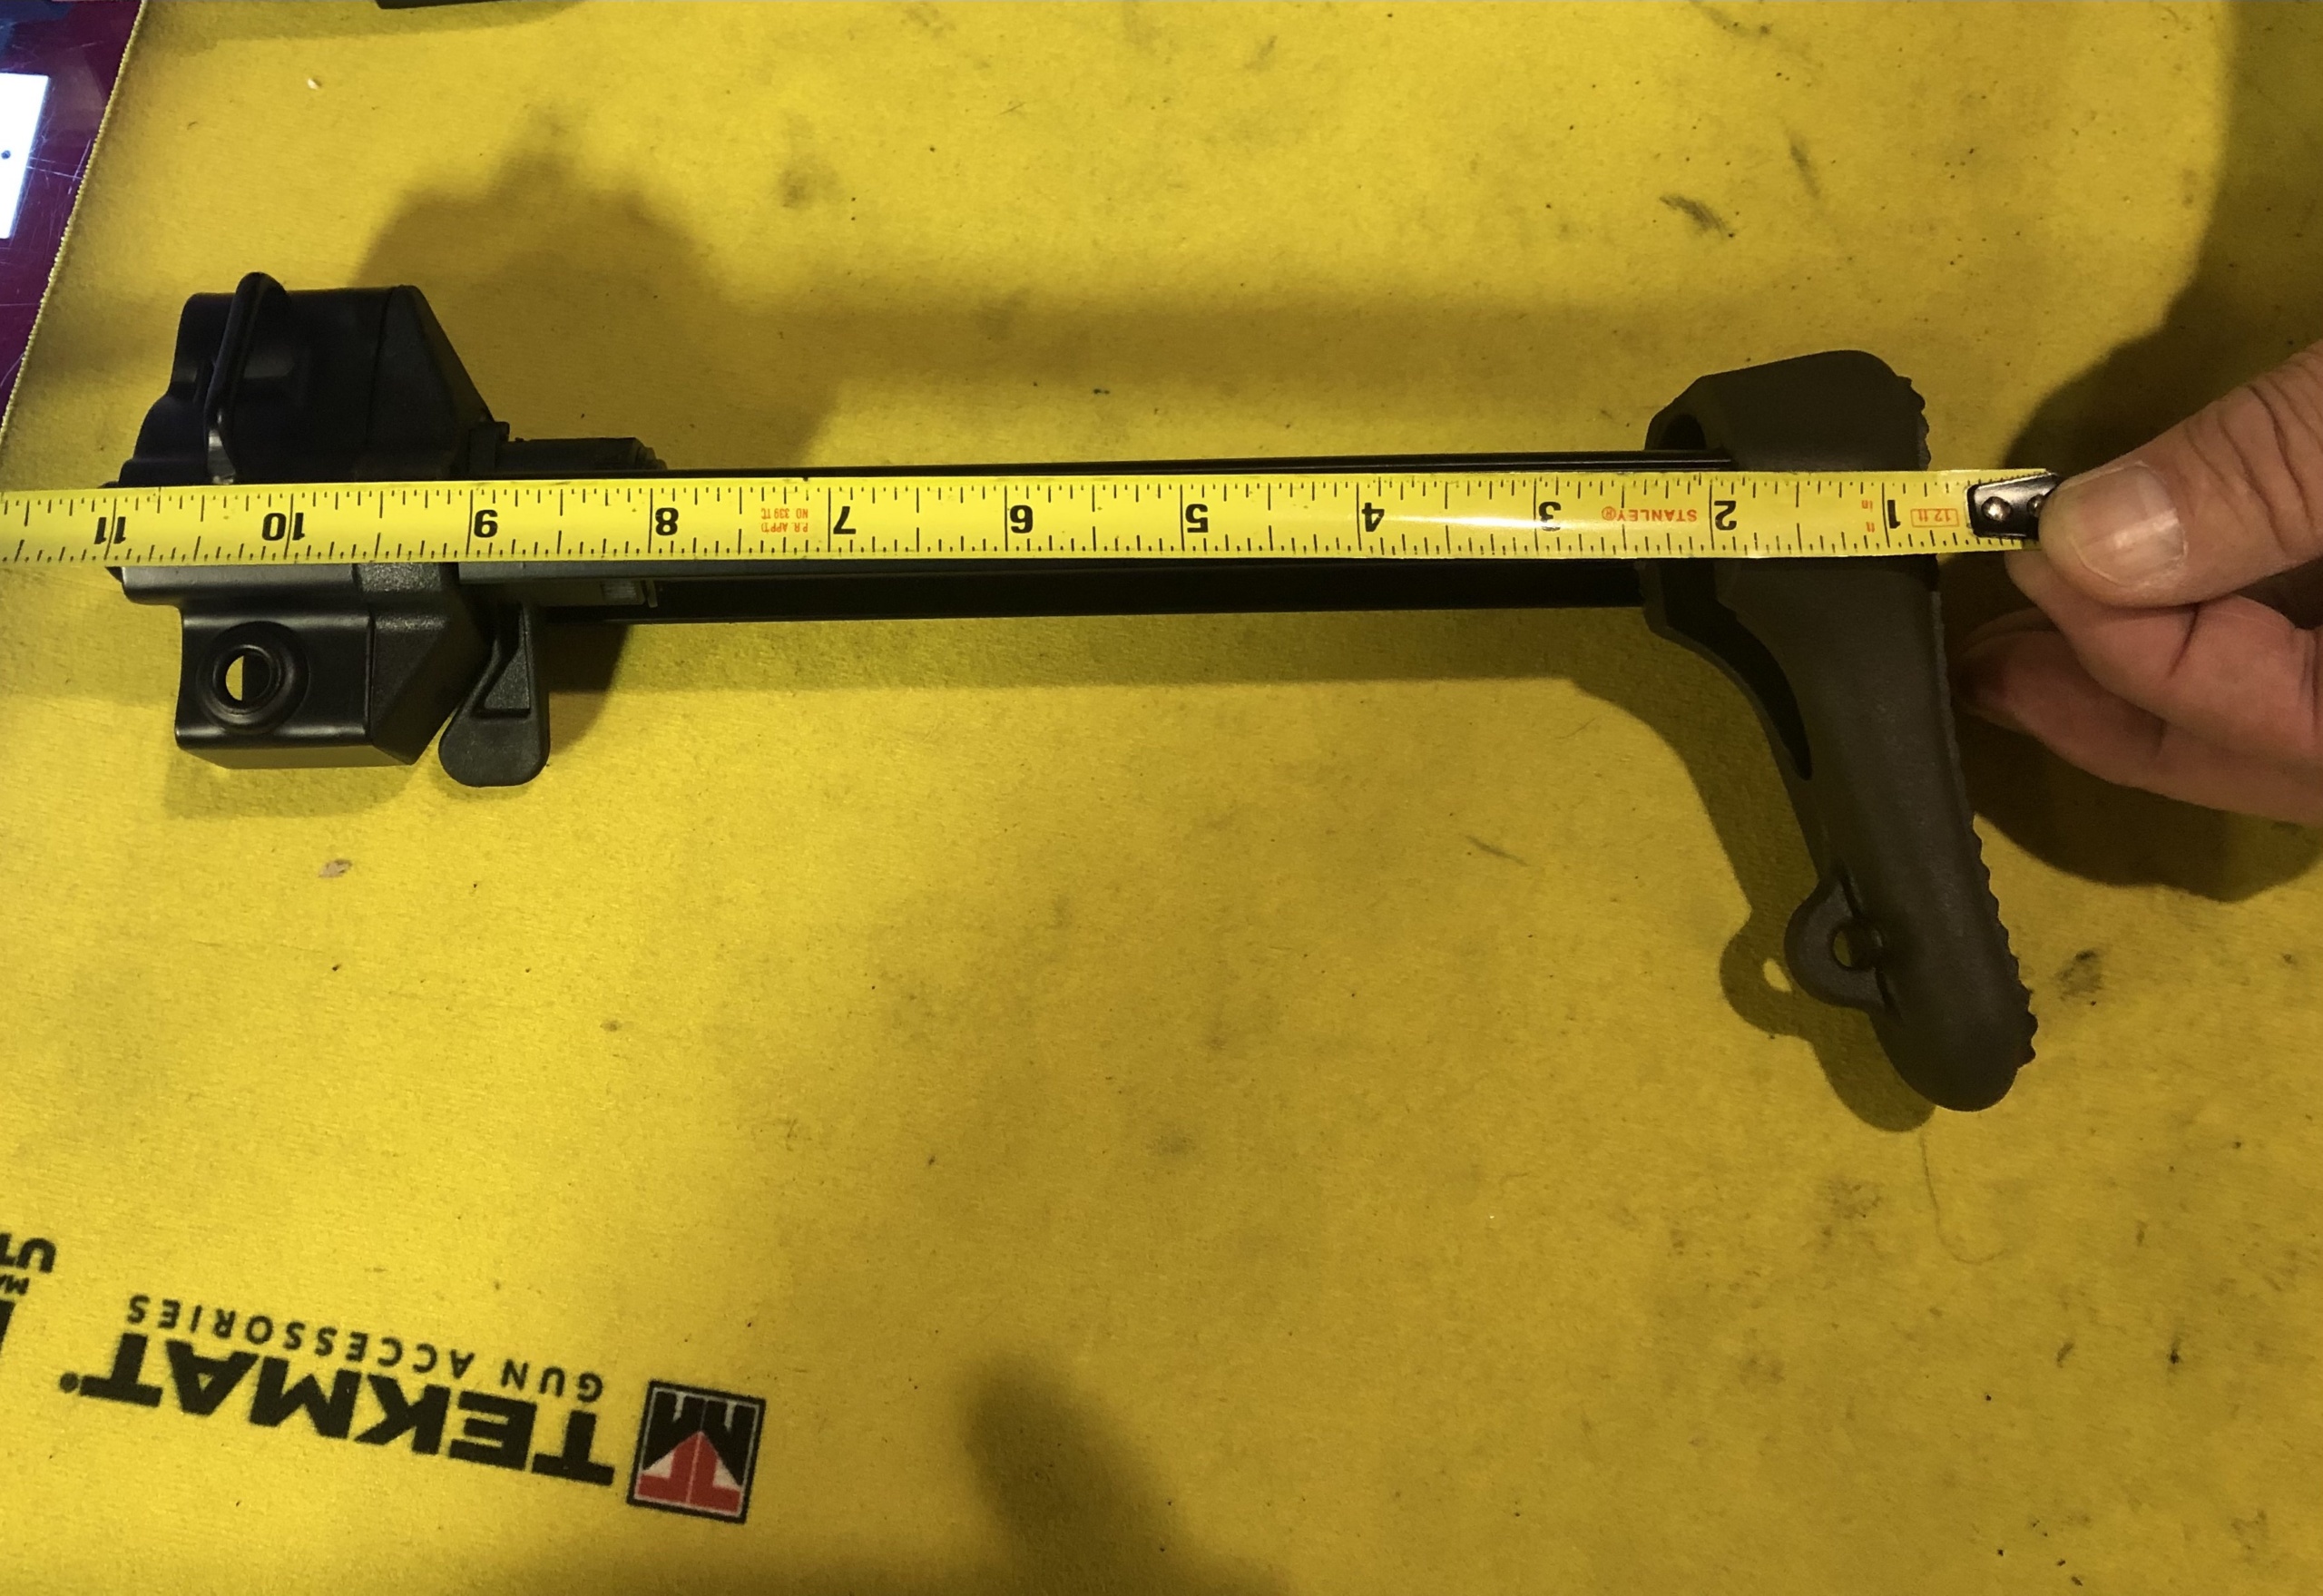
You’ll also need to know the overall length of the gun you want to create. If you’re using a folding or collapsing stock, measure with the stock fully extended. This leads to an obvious question of how to measure something you haven’t built yet. If you’re recreating a factory-produced gun, such as the HK53 we’re interested in, you may find the information online. The other option is to measure from the muzzle (again, with any attachments removed) to the rear of the gun where the stock attaches, measure the stock separately and add the numbers. It’s not wise to possess both the stock and the gun you want to put it on prior to getting approval, so when I ordered a stock, I had it shipped to the local SOT and went there to measure it.
Silencer Shop will review the application to make sure it appears correct and notify you it’s time to certify it. That process includes logging into both Silencer Shop and your ATF eforms account, swearing to the accuracy of the information in the application and submitting it. I’ve done two this year: the first took two days before I received a pdf of the approved application from the ATF, the second, three. While that may lengthen with the expected flood of new applications that don’t require a $200 tax, the process is still pretty streamlined.
Once approved, the gun must be marked on the receiver with your name, city and state, since you are now the manufacturer of the newly-minted SBR. Many SOT’s engrave in house and know how to meet the minimum size and depth requirements for the lettering. If they give you a funny look when you ask what those are, I’d politely go someplace else. And don’t forget to touch up the engraving with a little cold blue: that bright silver lettering looks good right up until it rusts.
The Build
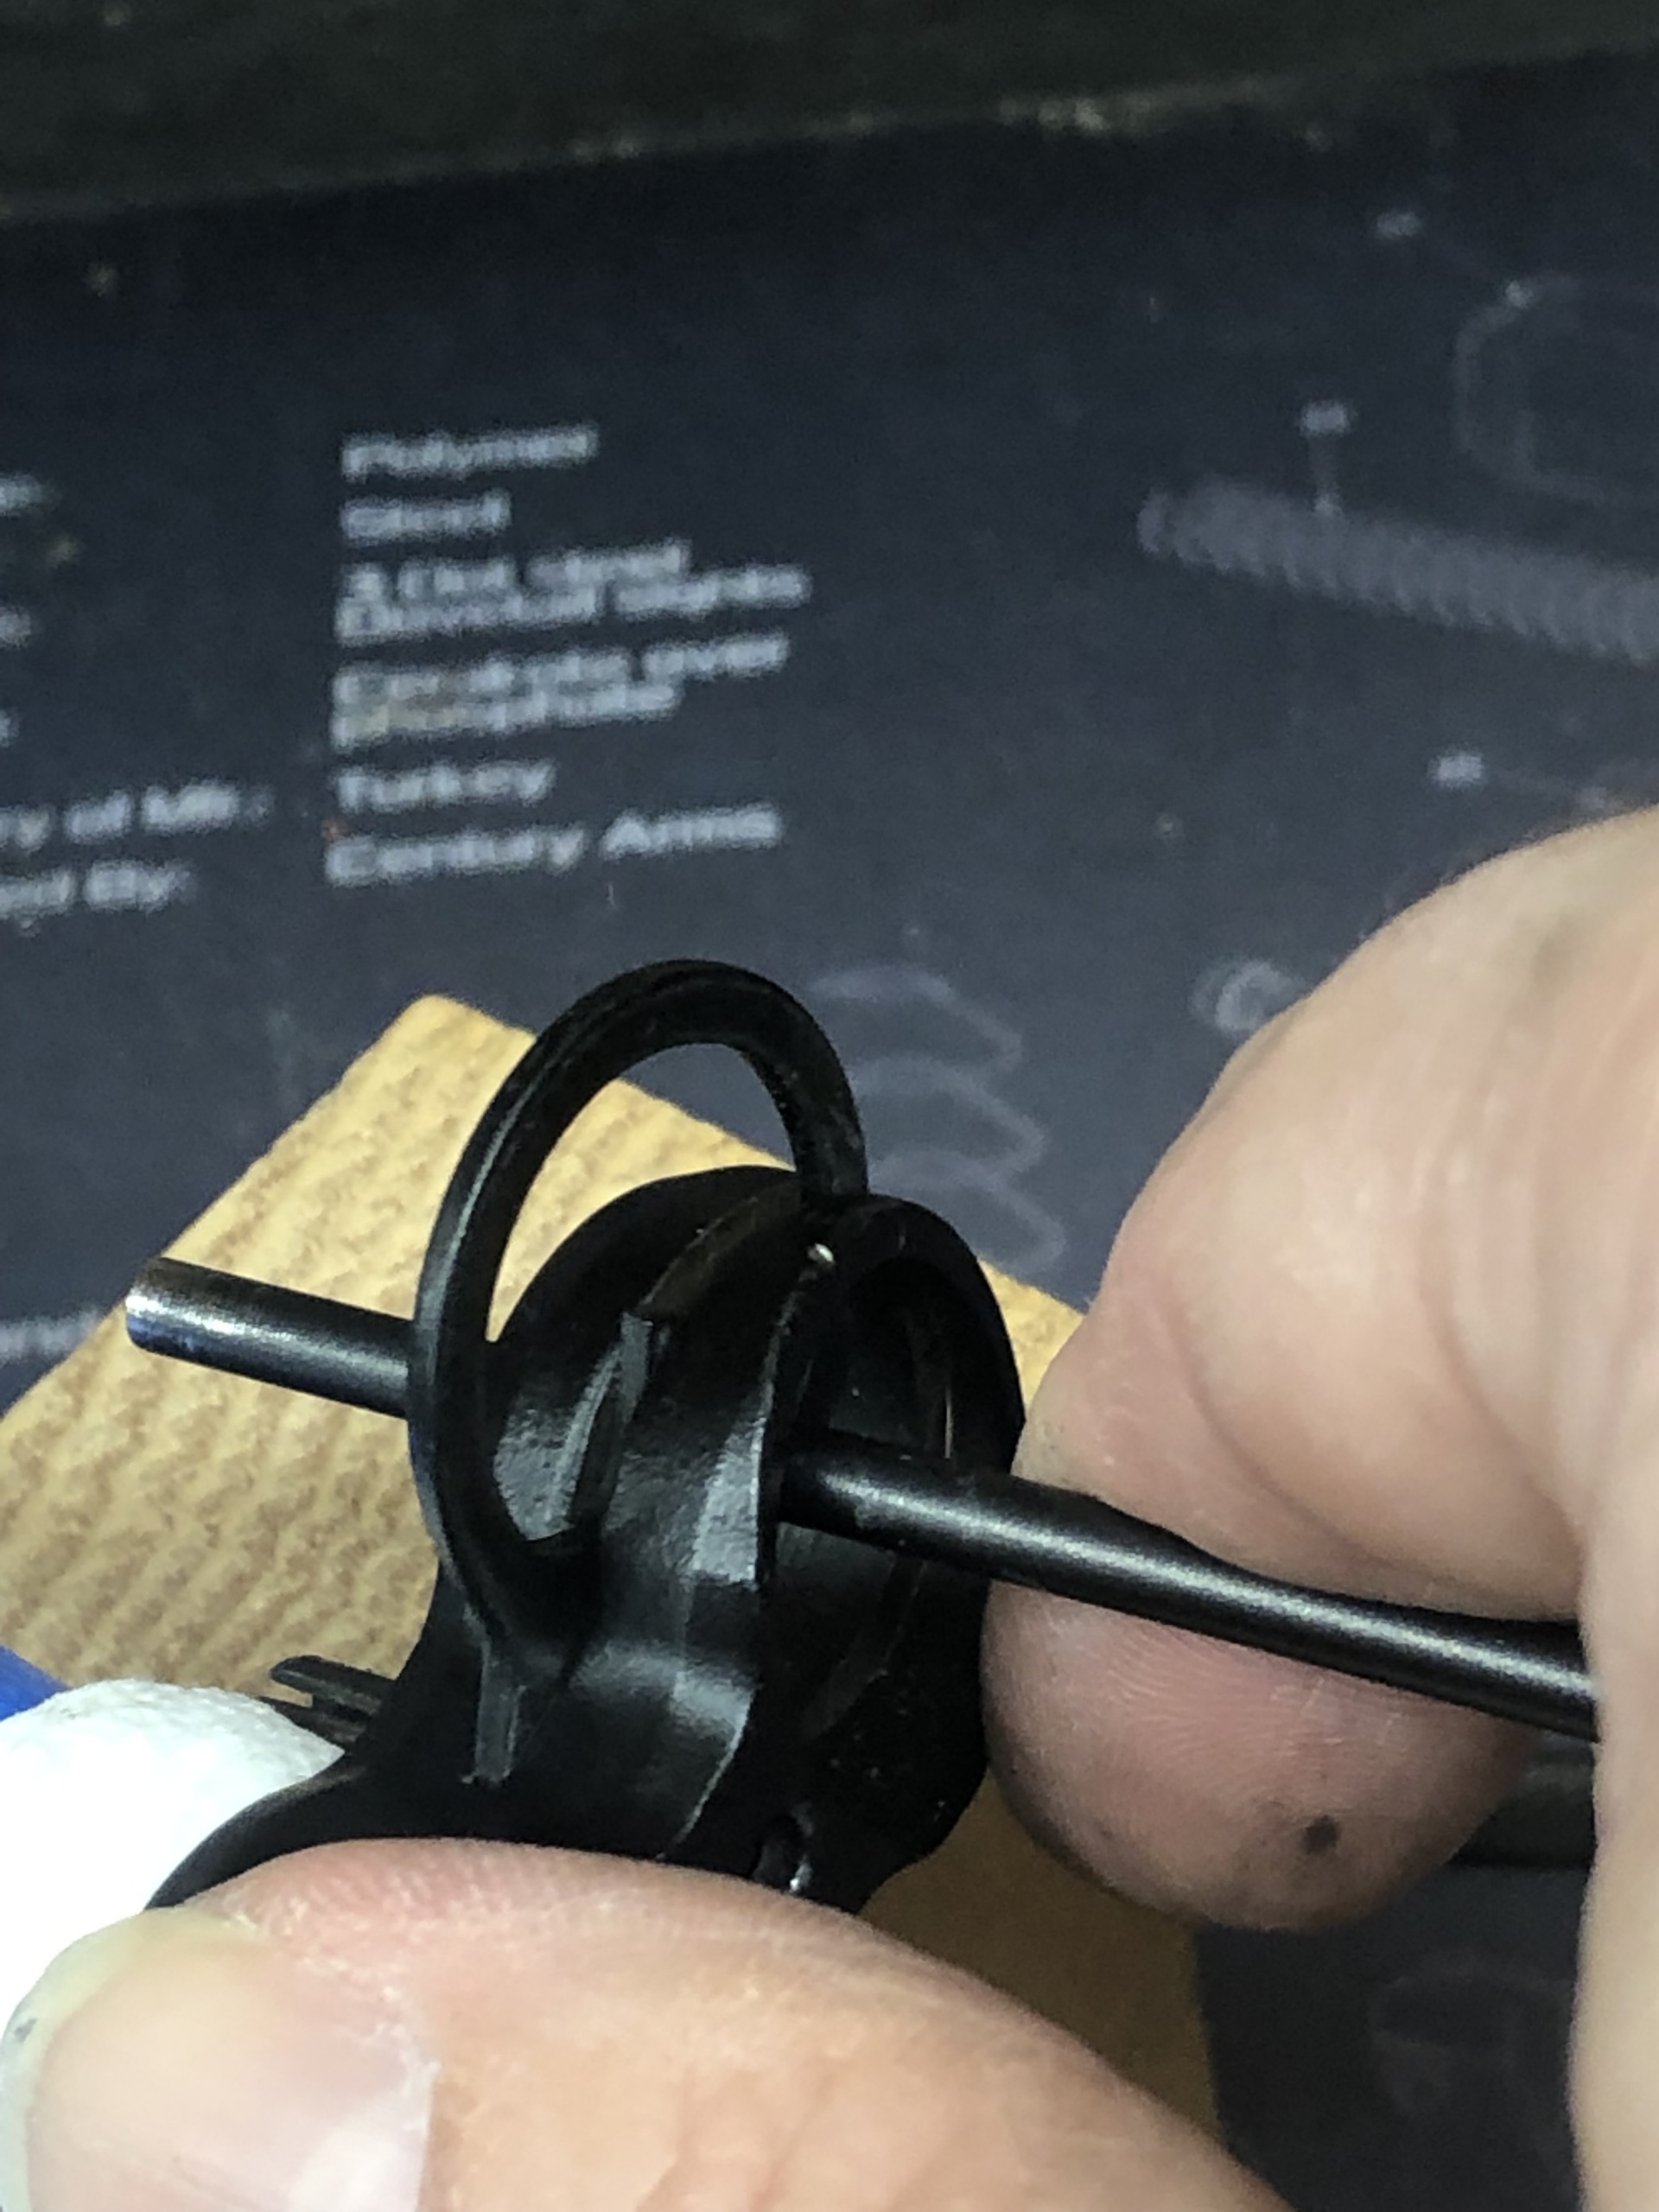
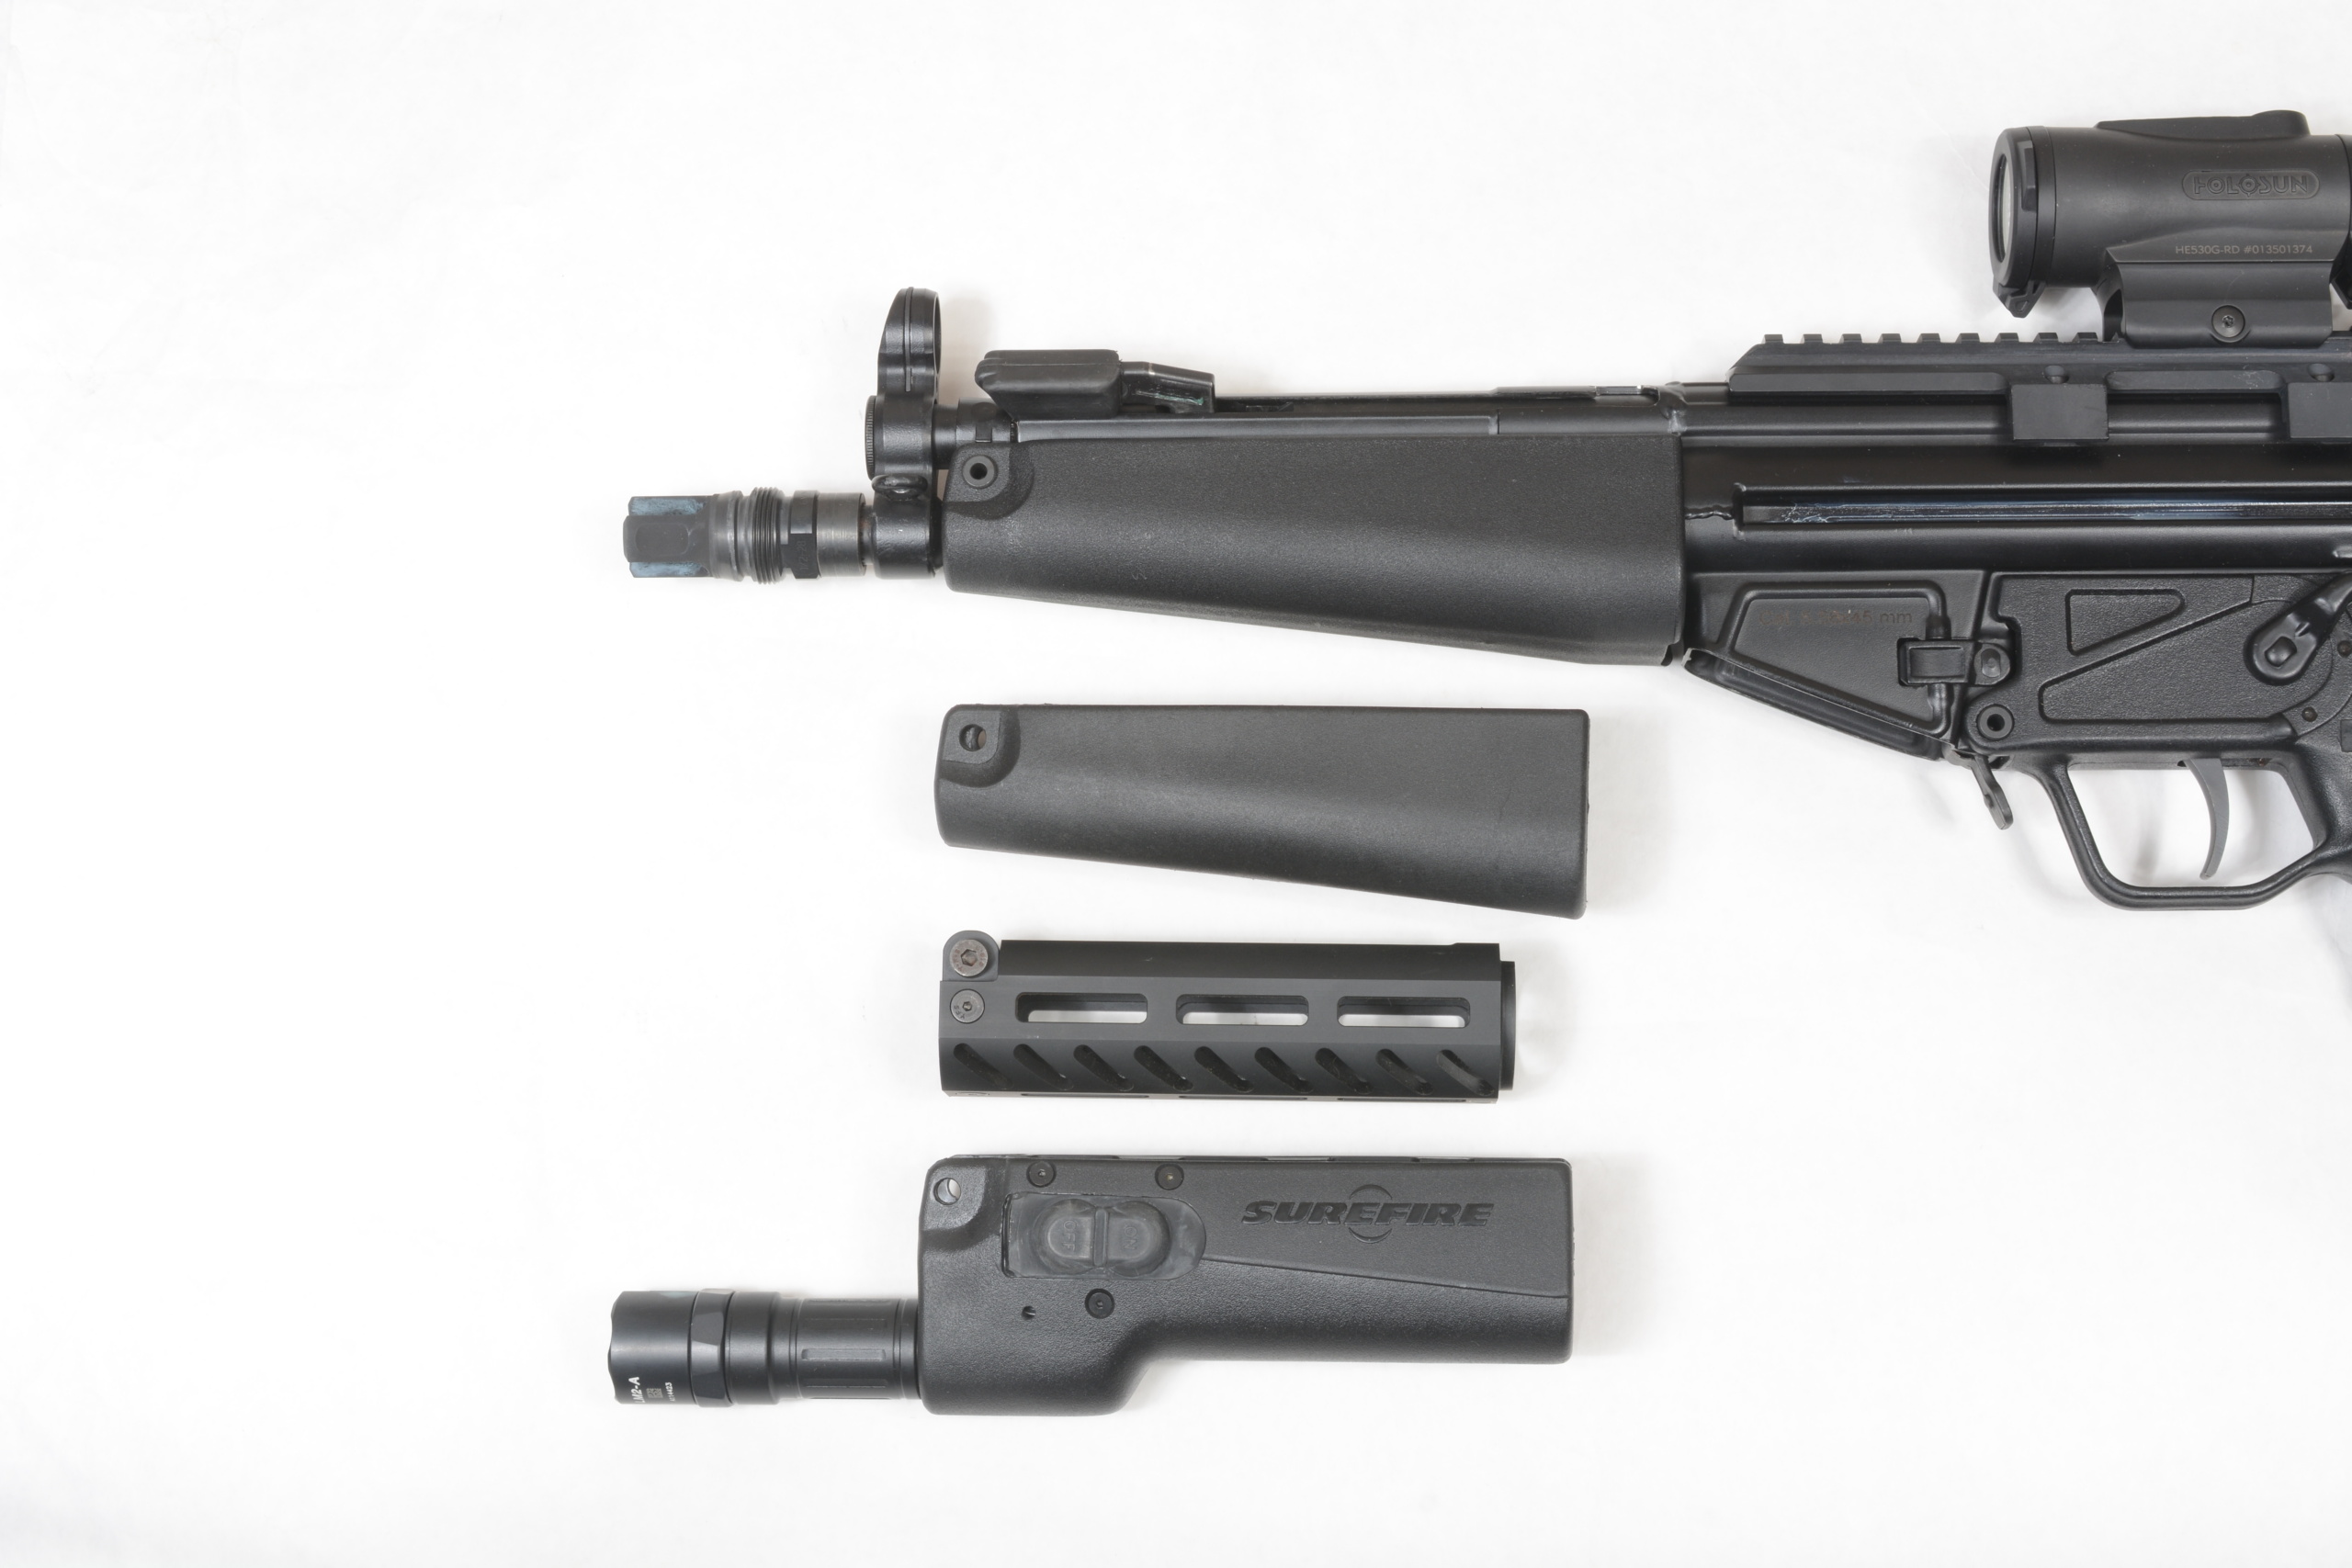
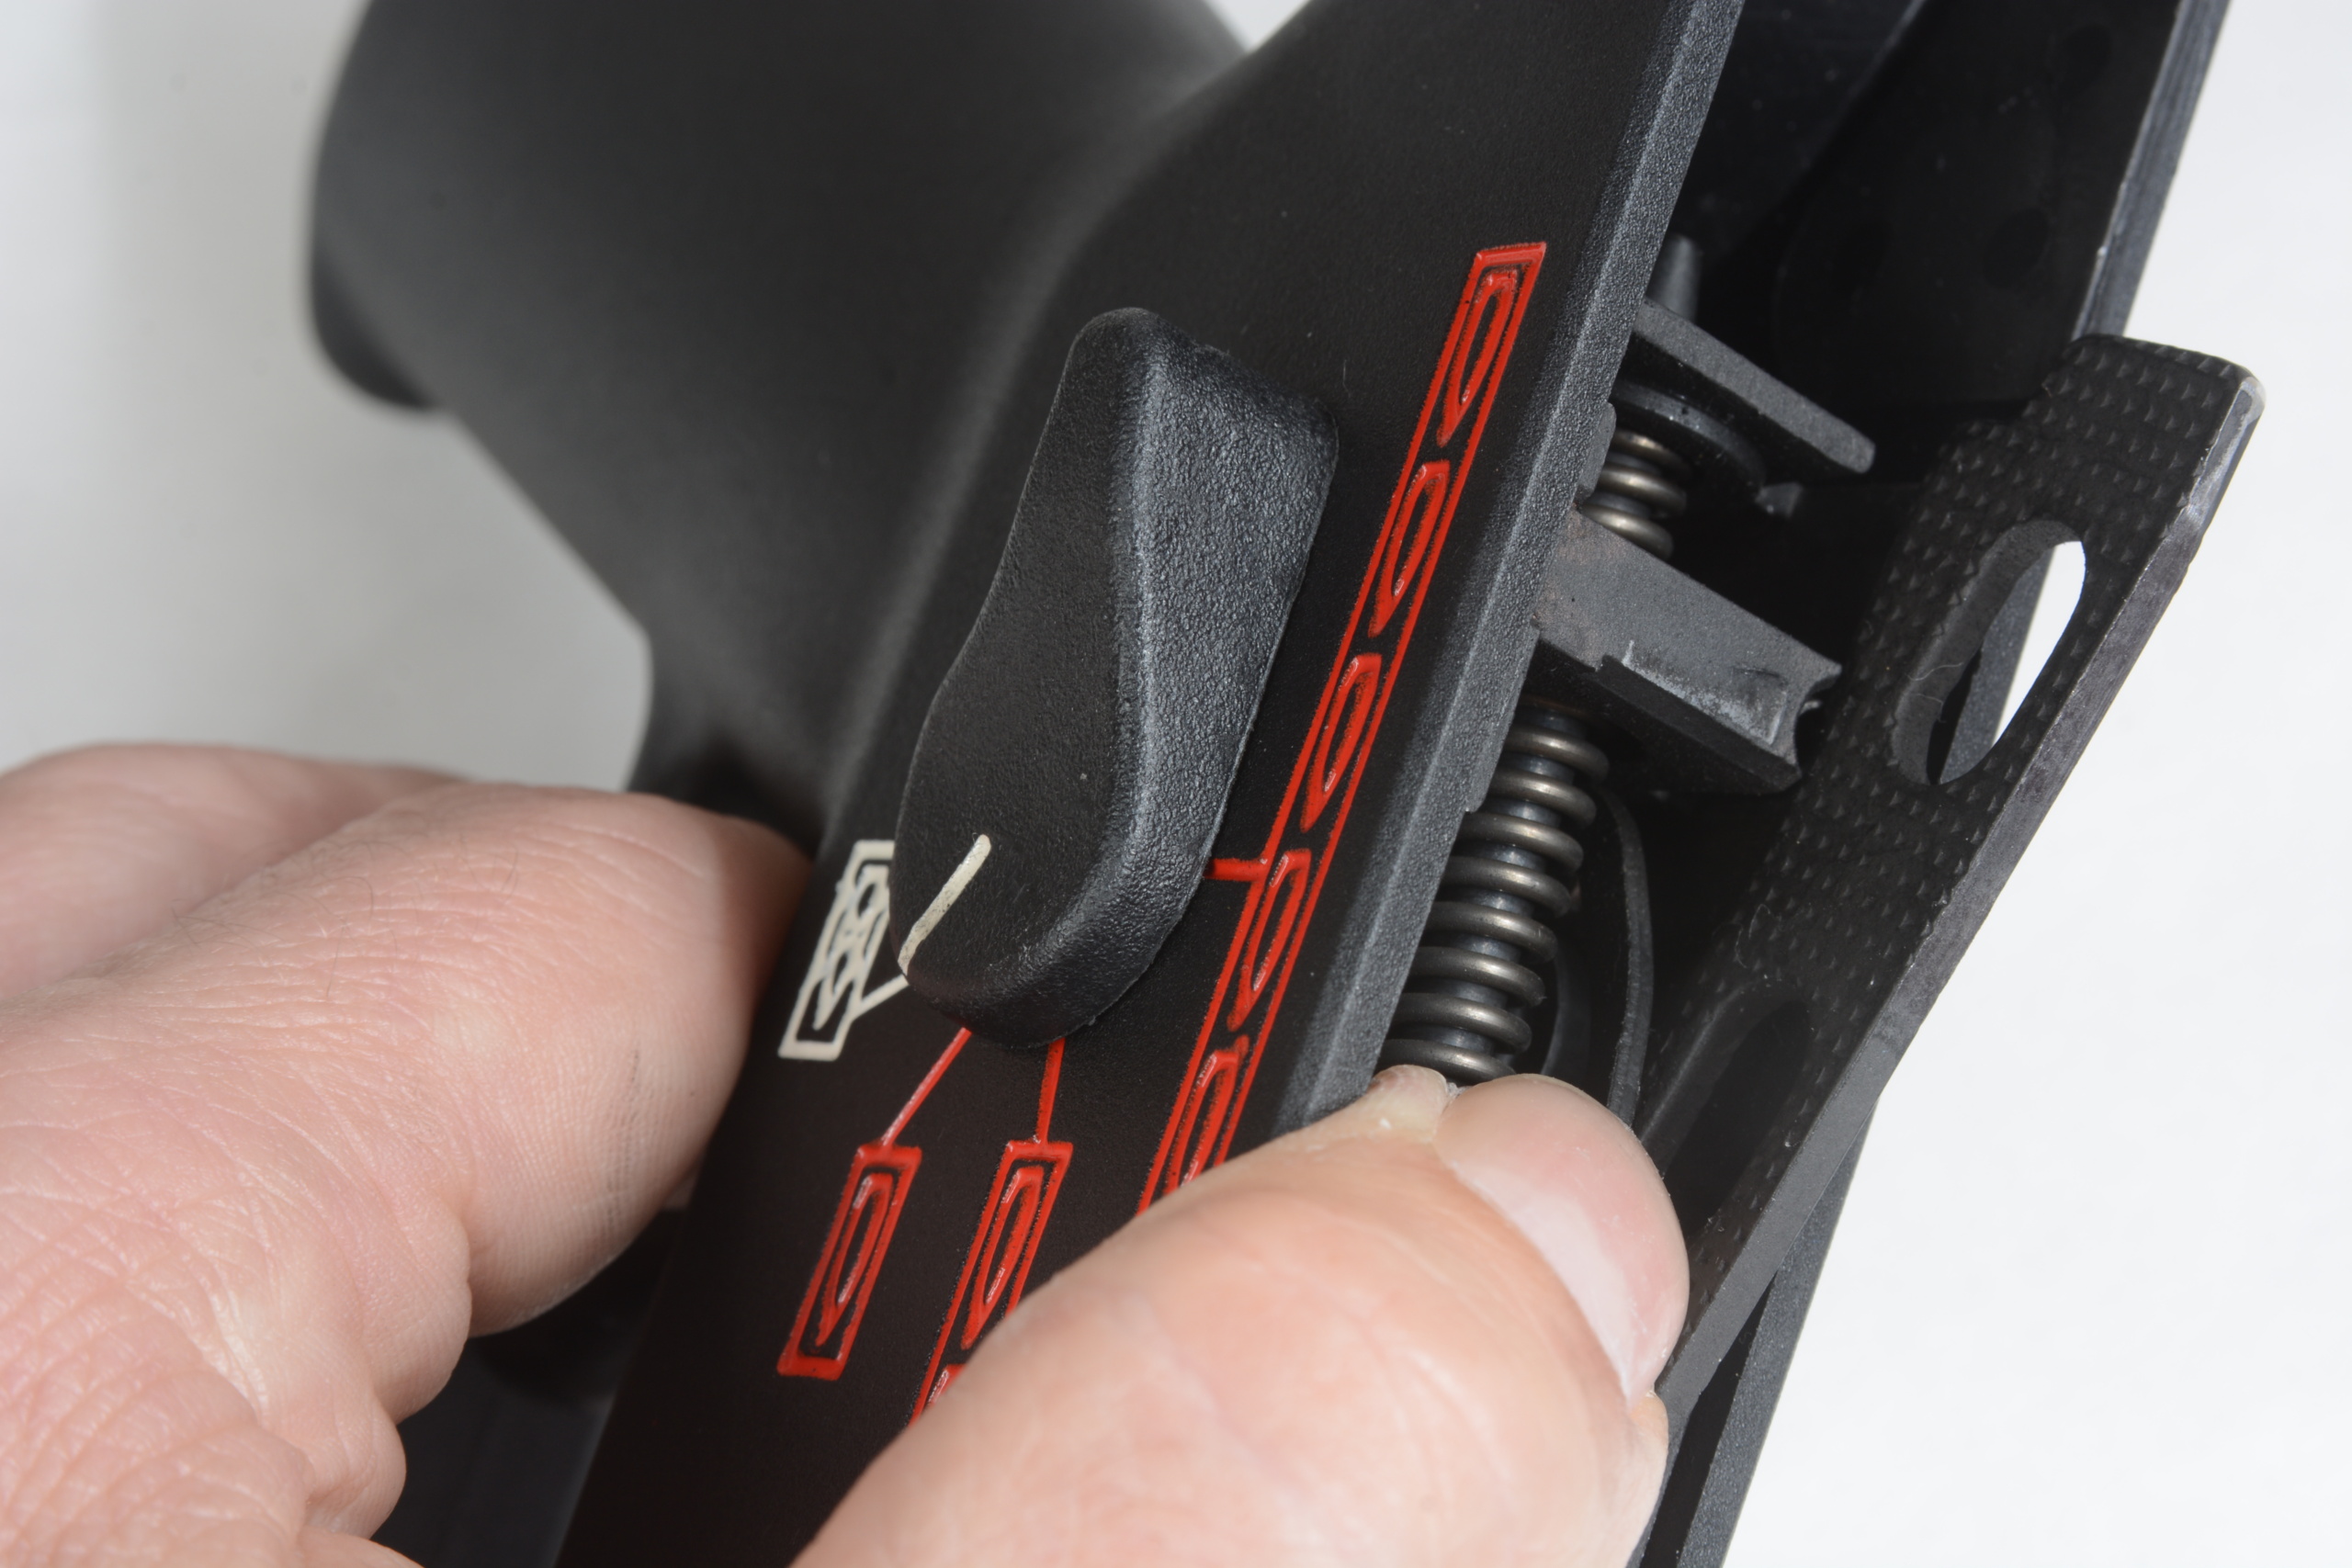
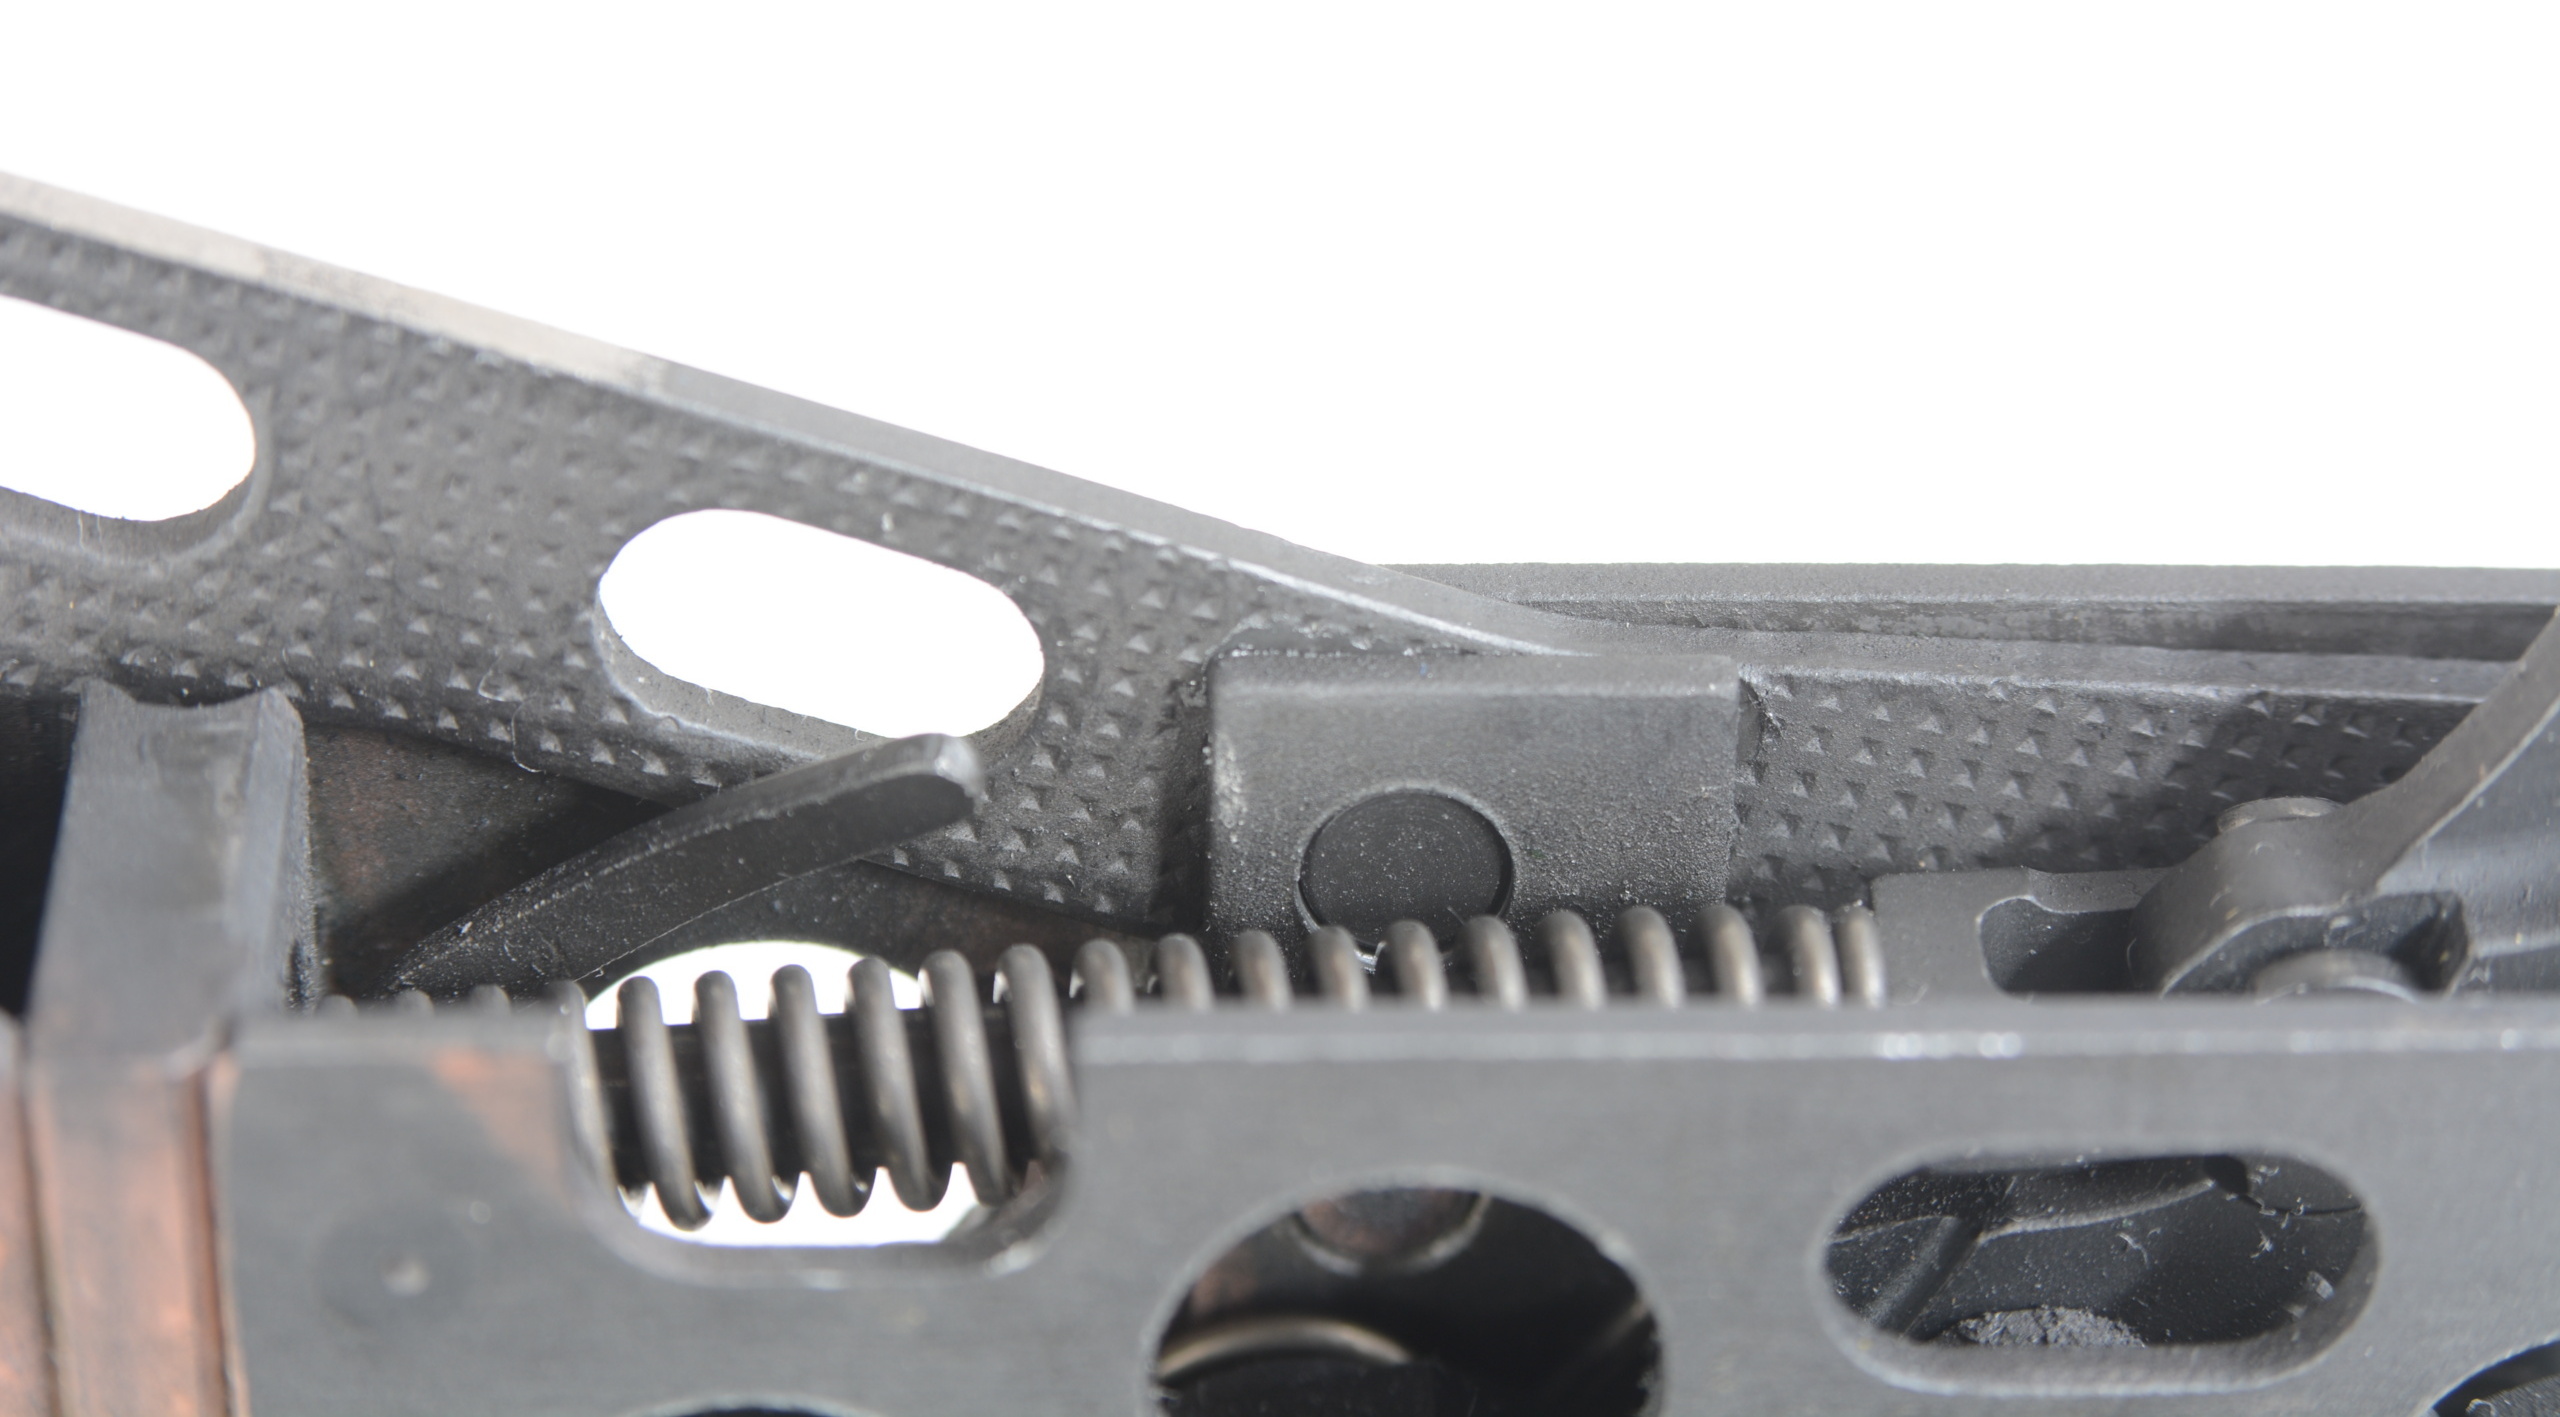
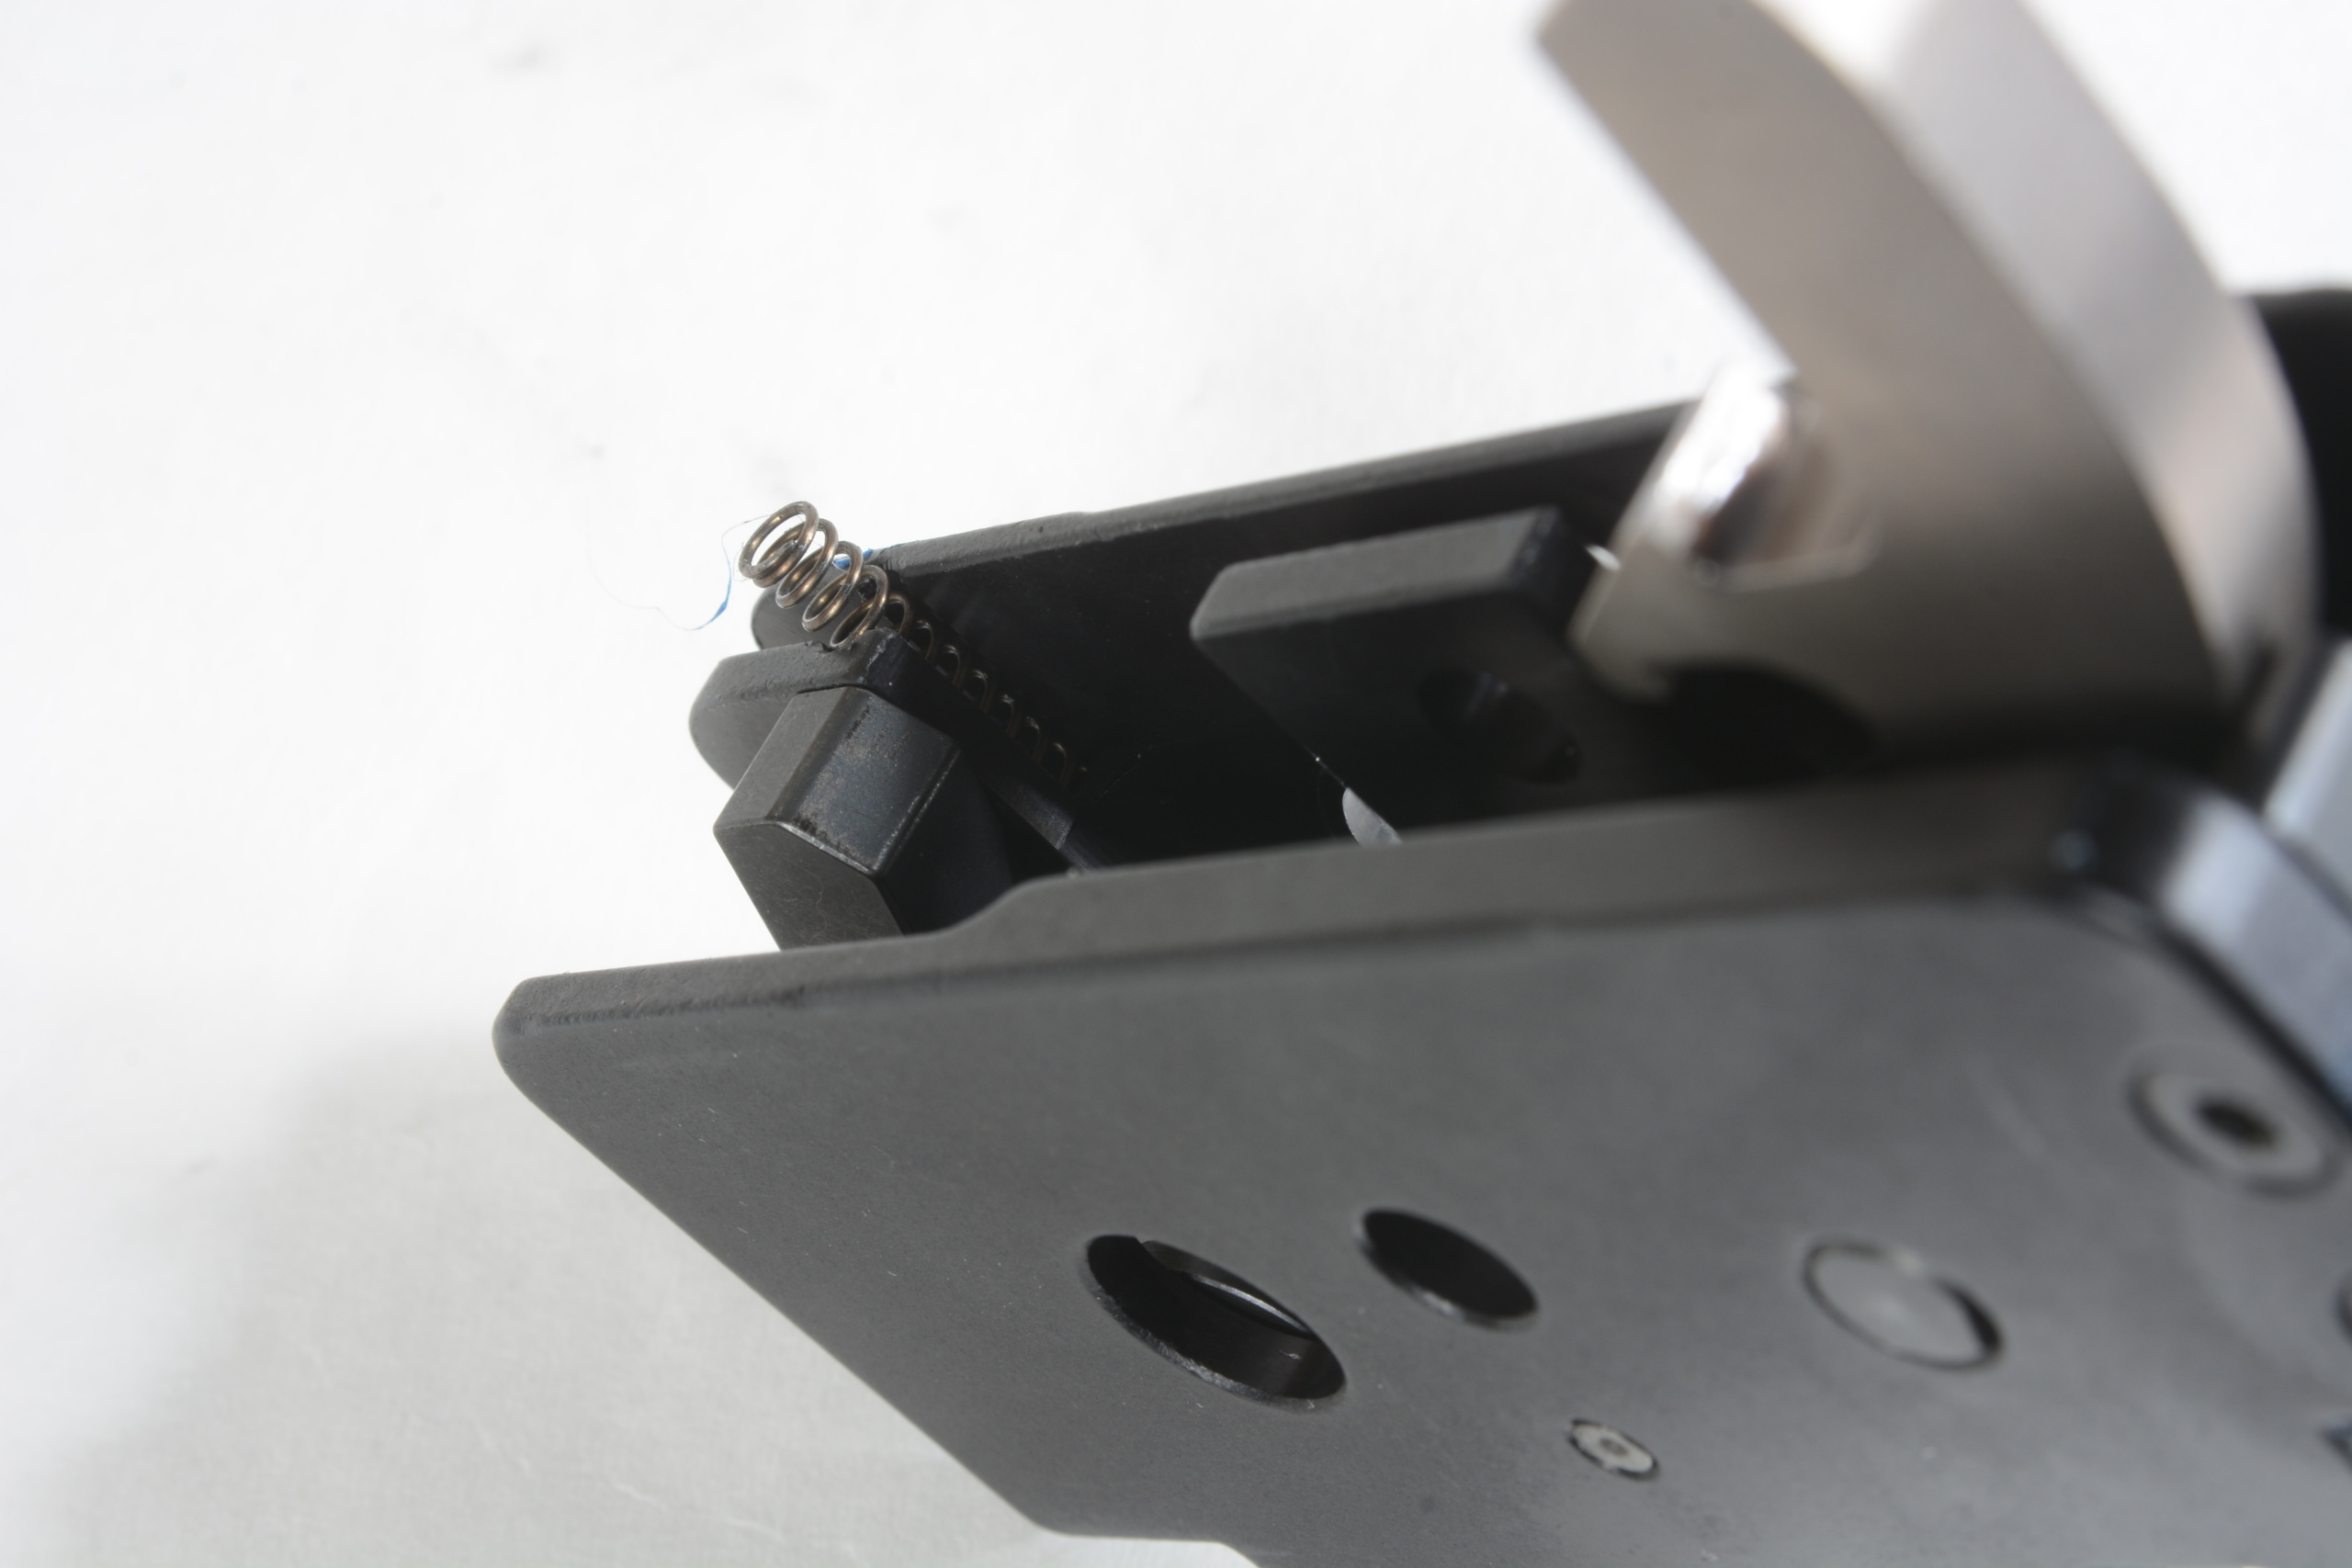
Adding the stock is quite simple: remove the single pushpin holding the endcap in place, pull it off, slide the stock on and replace the pushpin. Selecting the right stock, though, may be complicated. There is no end to HK stock variations—Spuhr, Magpul, Clubfoot and Choate are just the beginning. For a truly compact weapon, I know of nothing more seamlessly integrated or shorter than the collapsible A3, which made it my only choice. Whichever seems best for your project, two critical components to consider are the buffer and recoil spring.
MP5 and 53-style stocks may look identical and fit on one another, but they have very different recoil buffers. The 9mm guns have an H-shaped rubber buffer, while centerfire rifle stocks have a stout spring-loaded post that sticks forward from the back plate below the recoil spring rod. A 9mm one may fit, but the total inadequacy of the little pad will quickly lead to major, likely irreparable damage to the firearm.
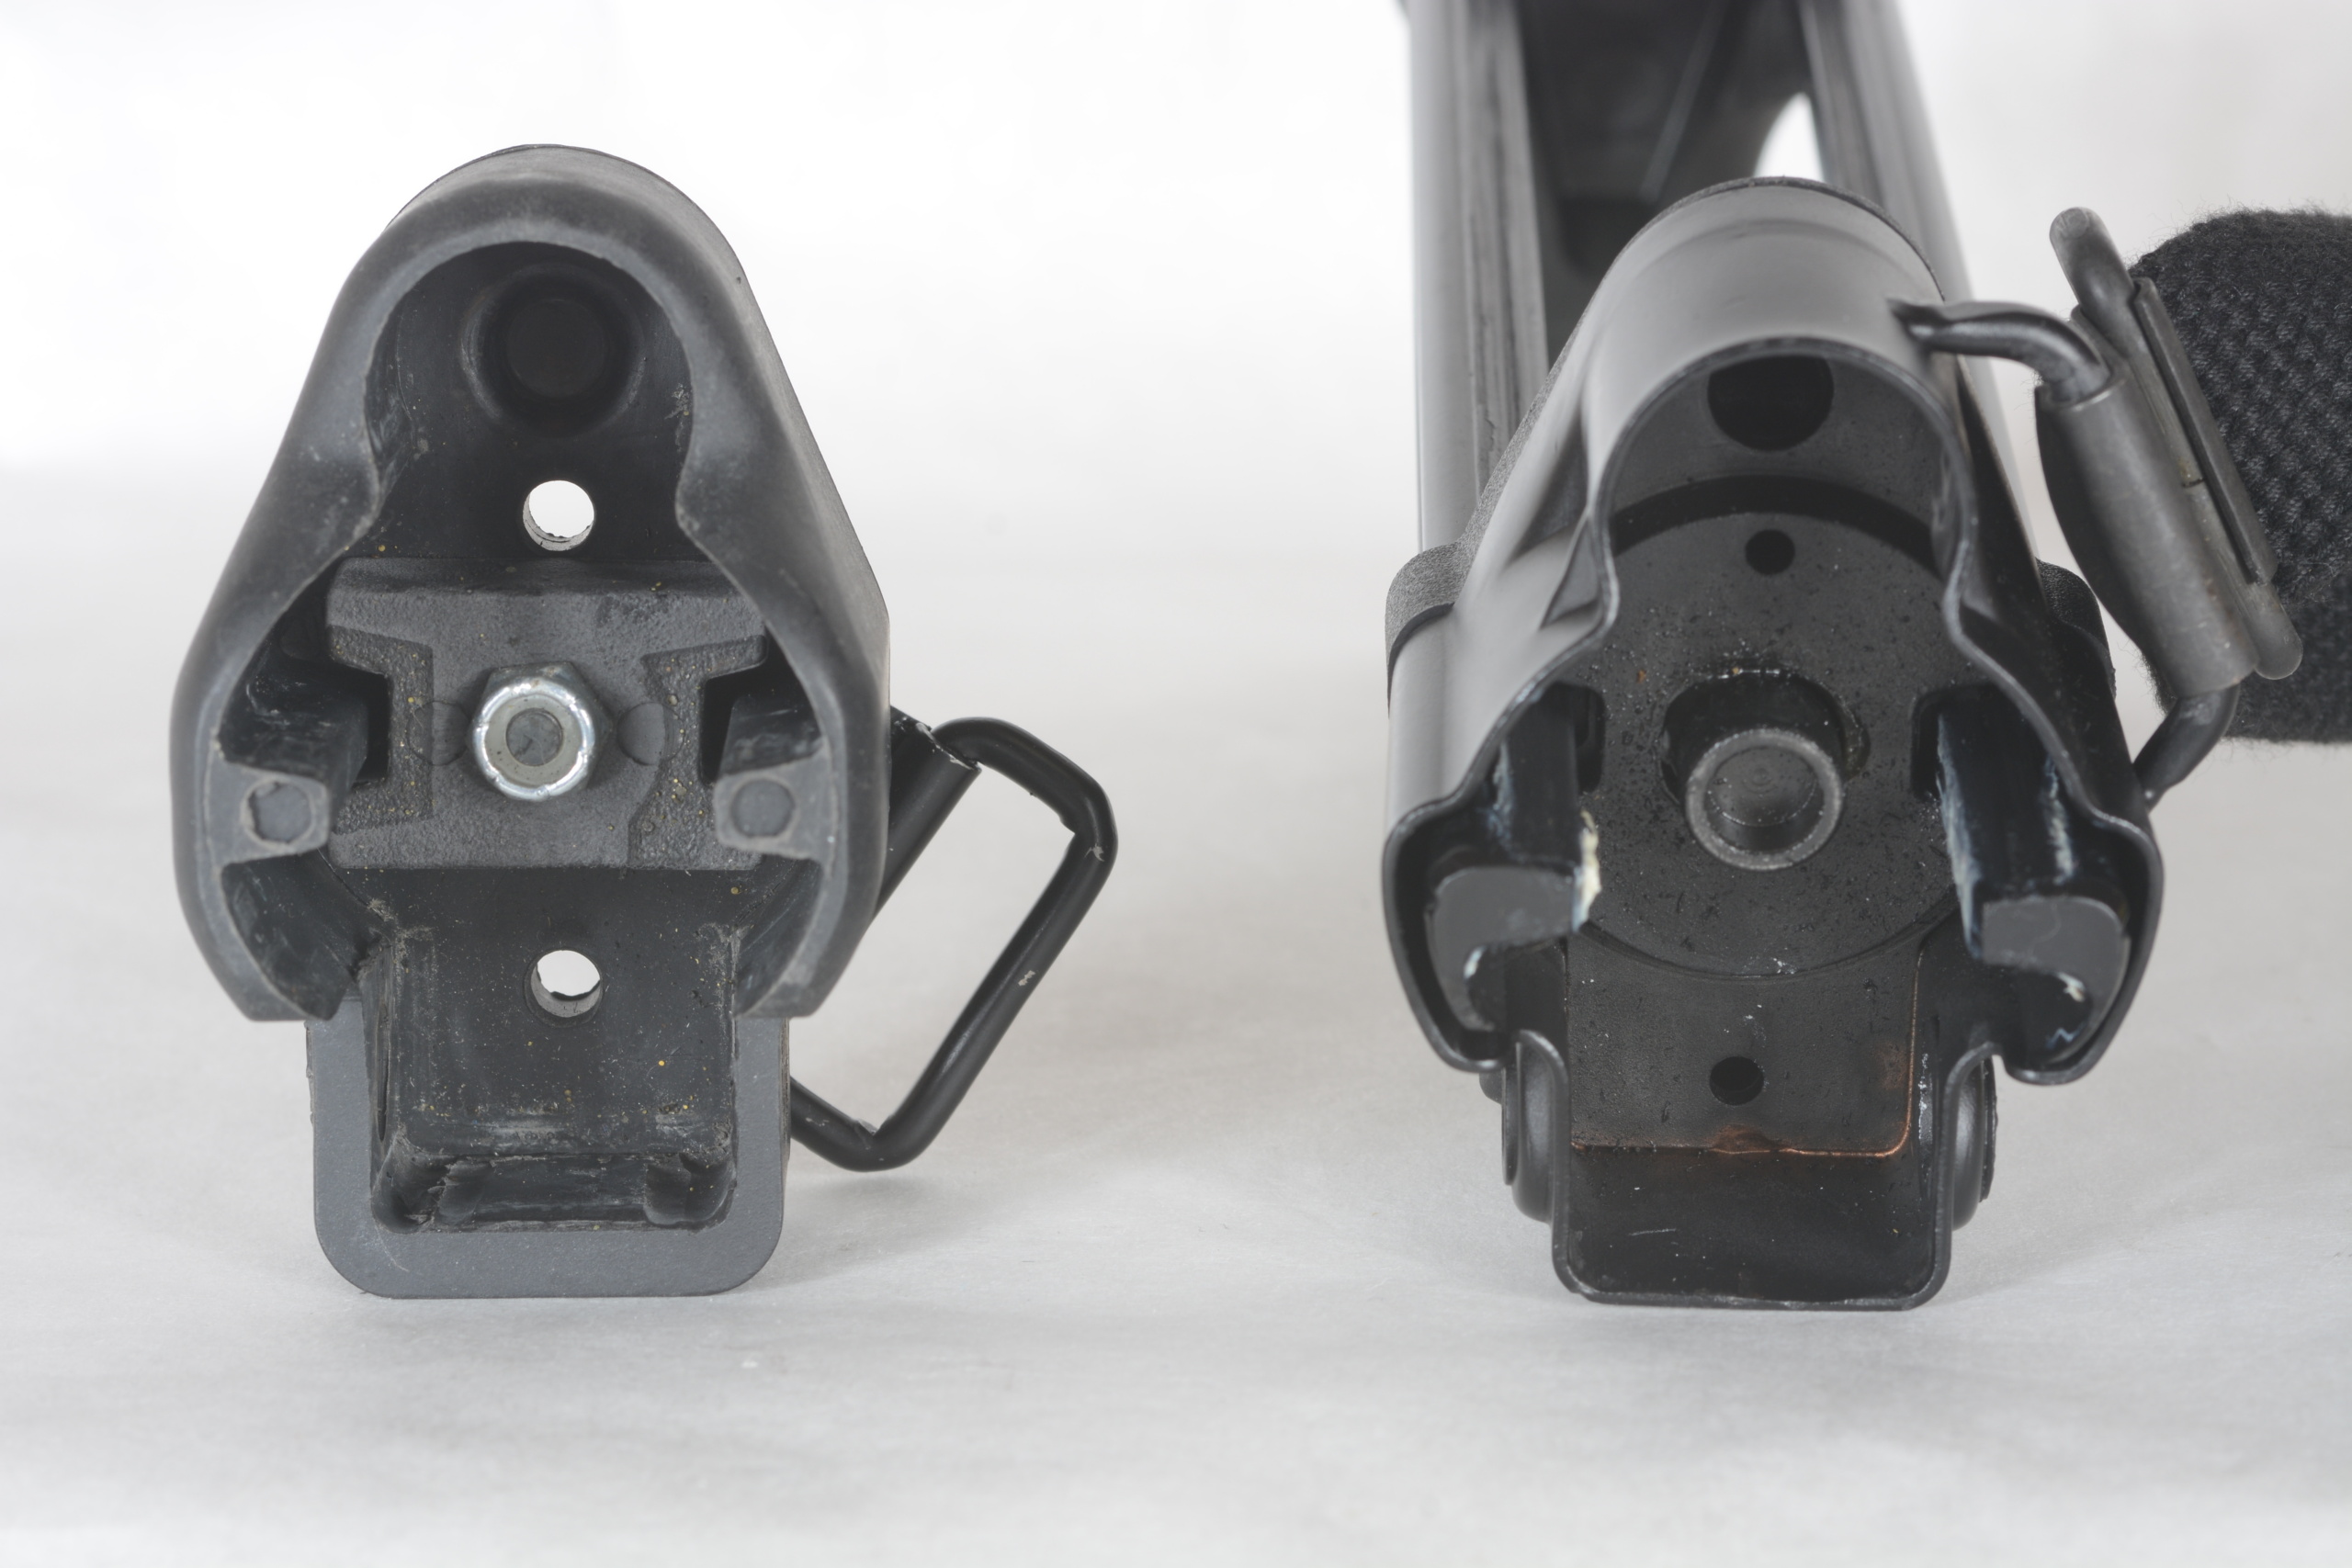
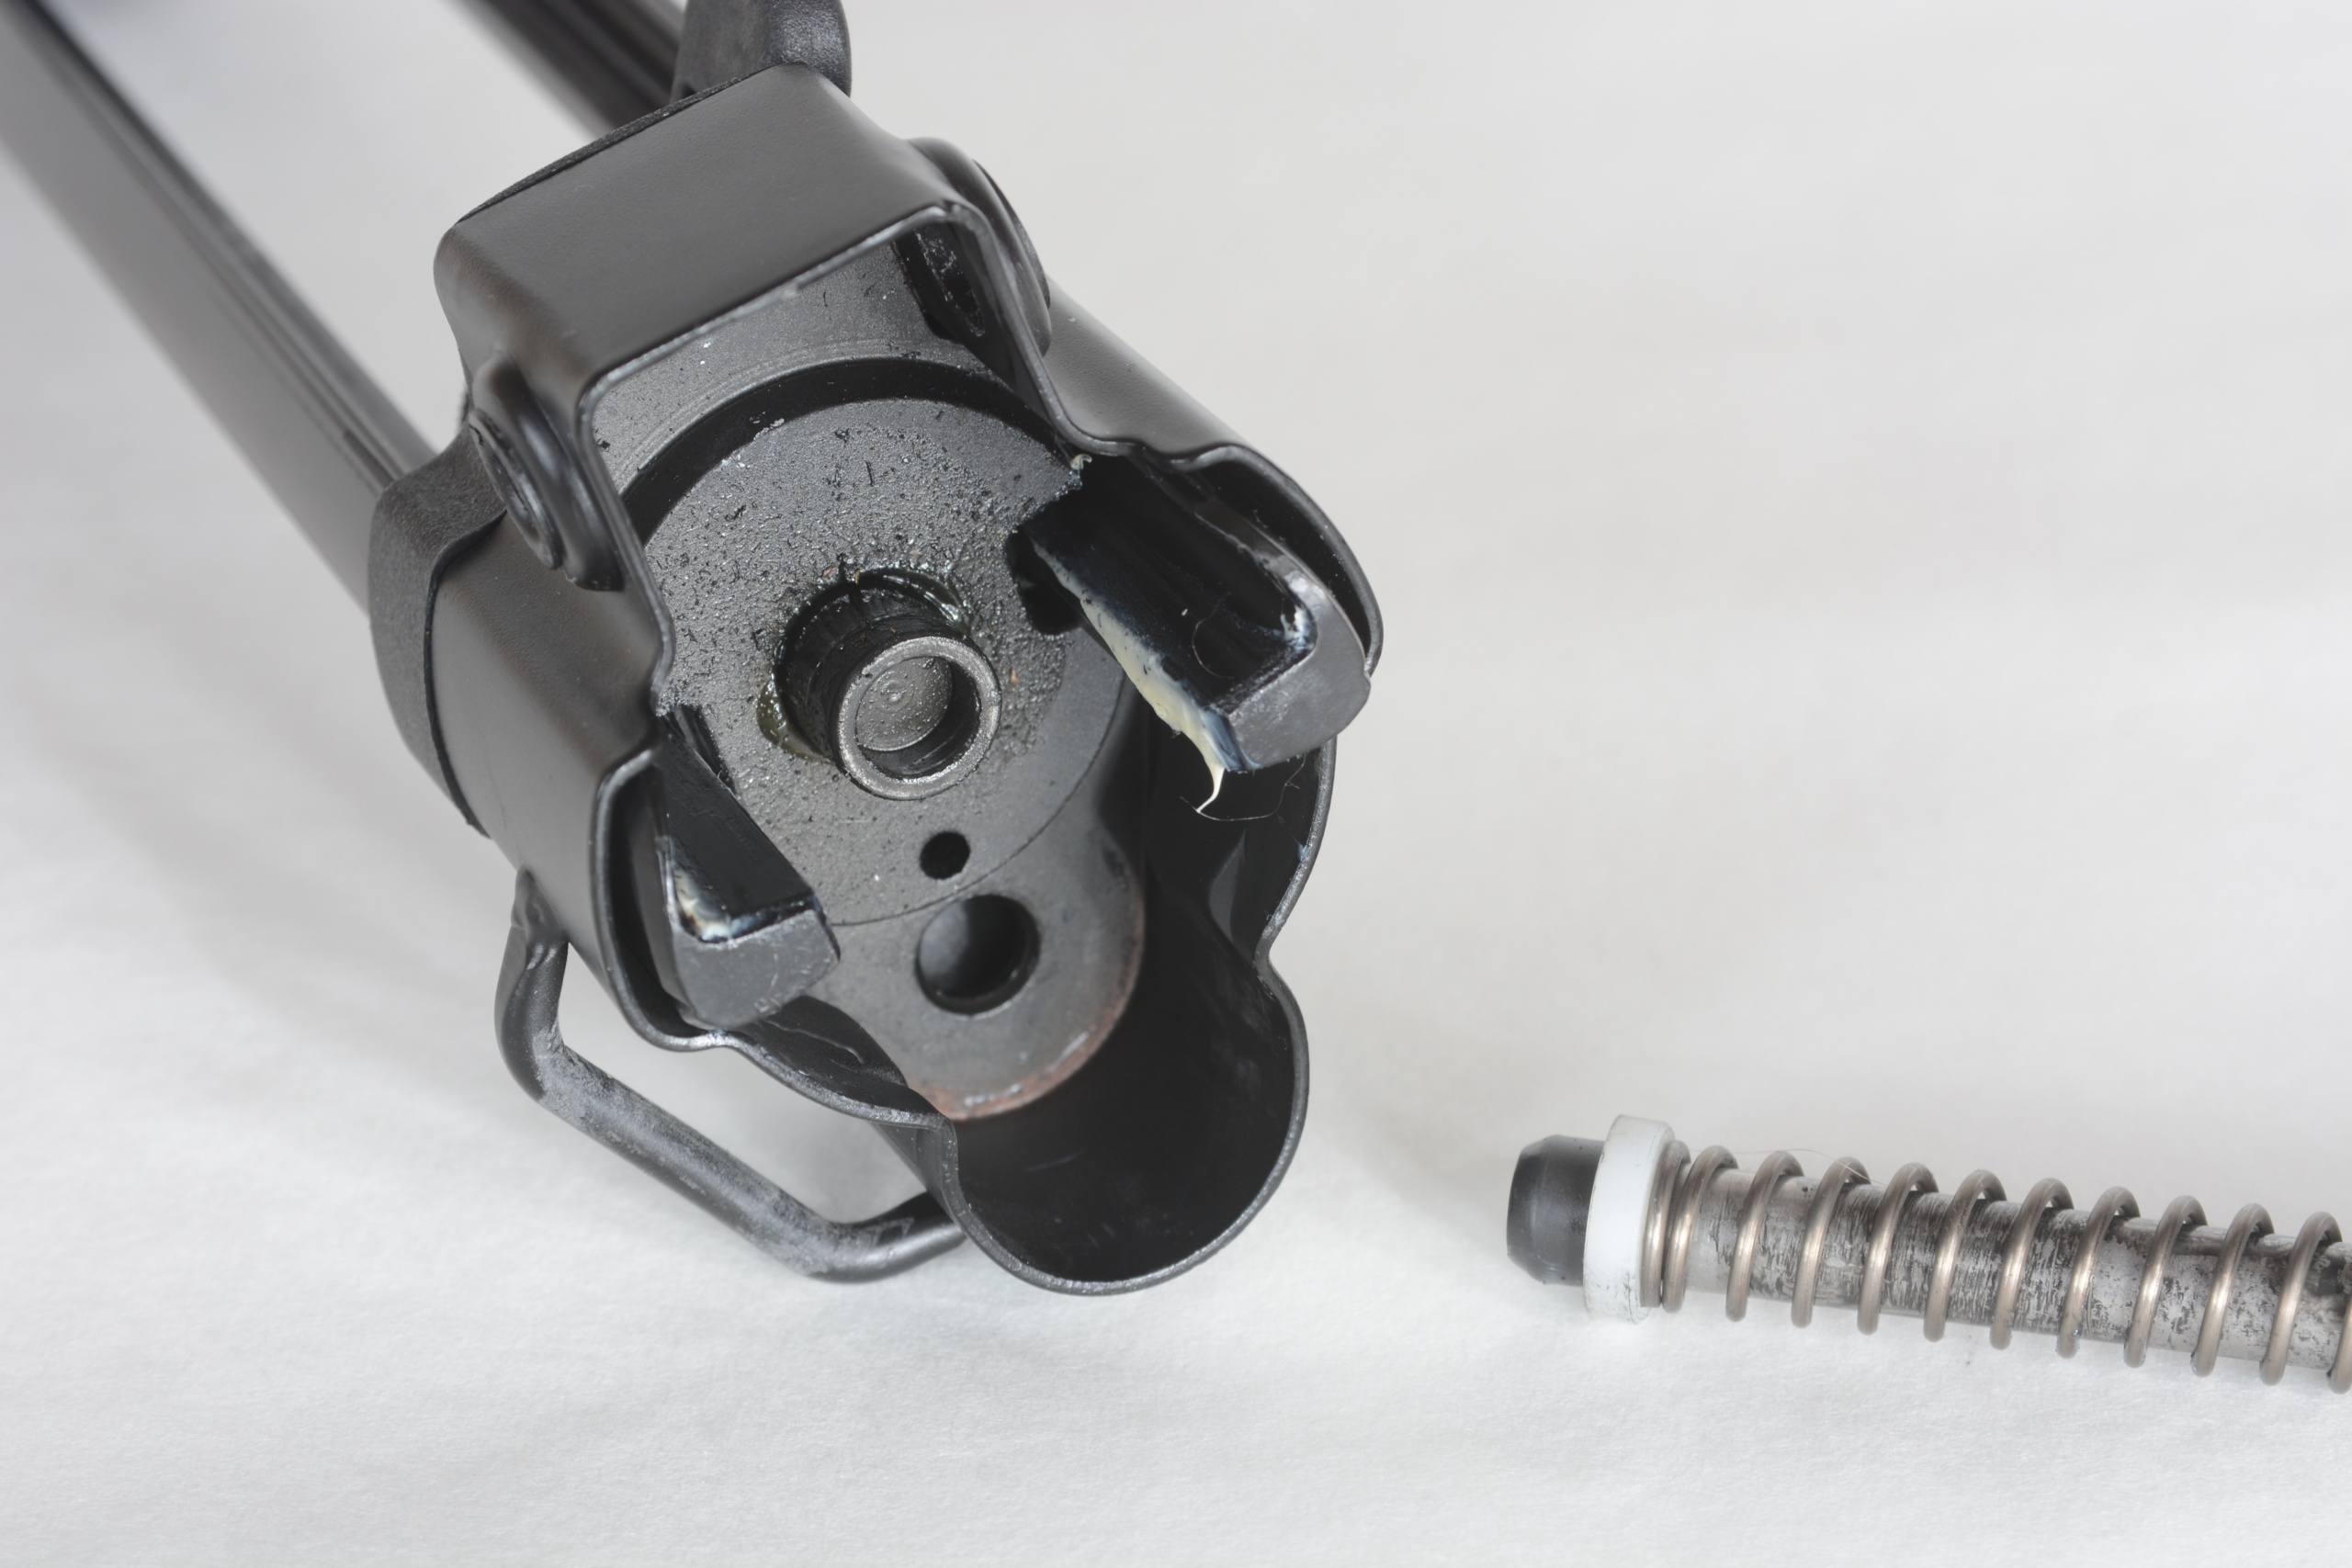
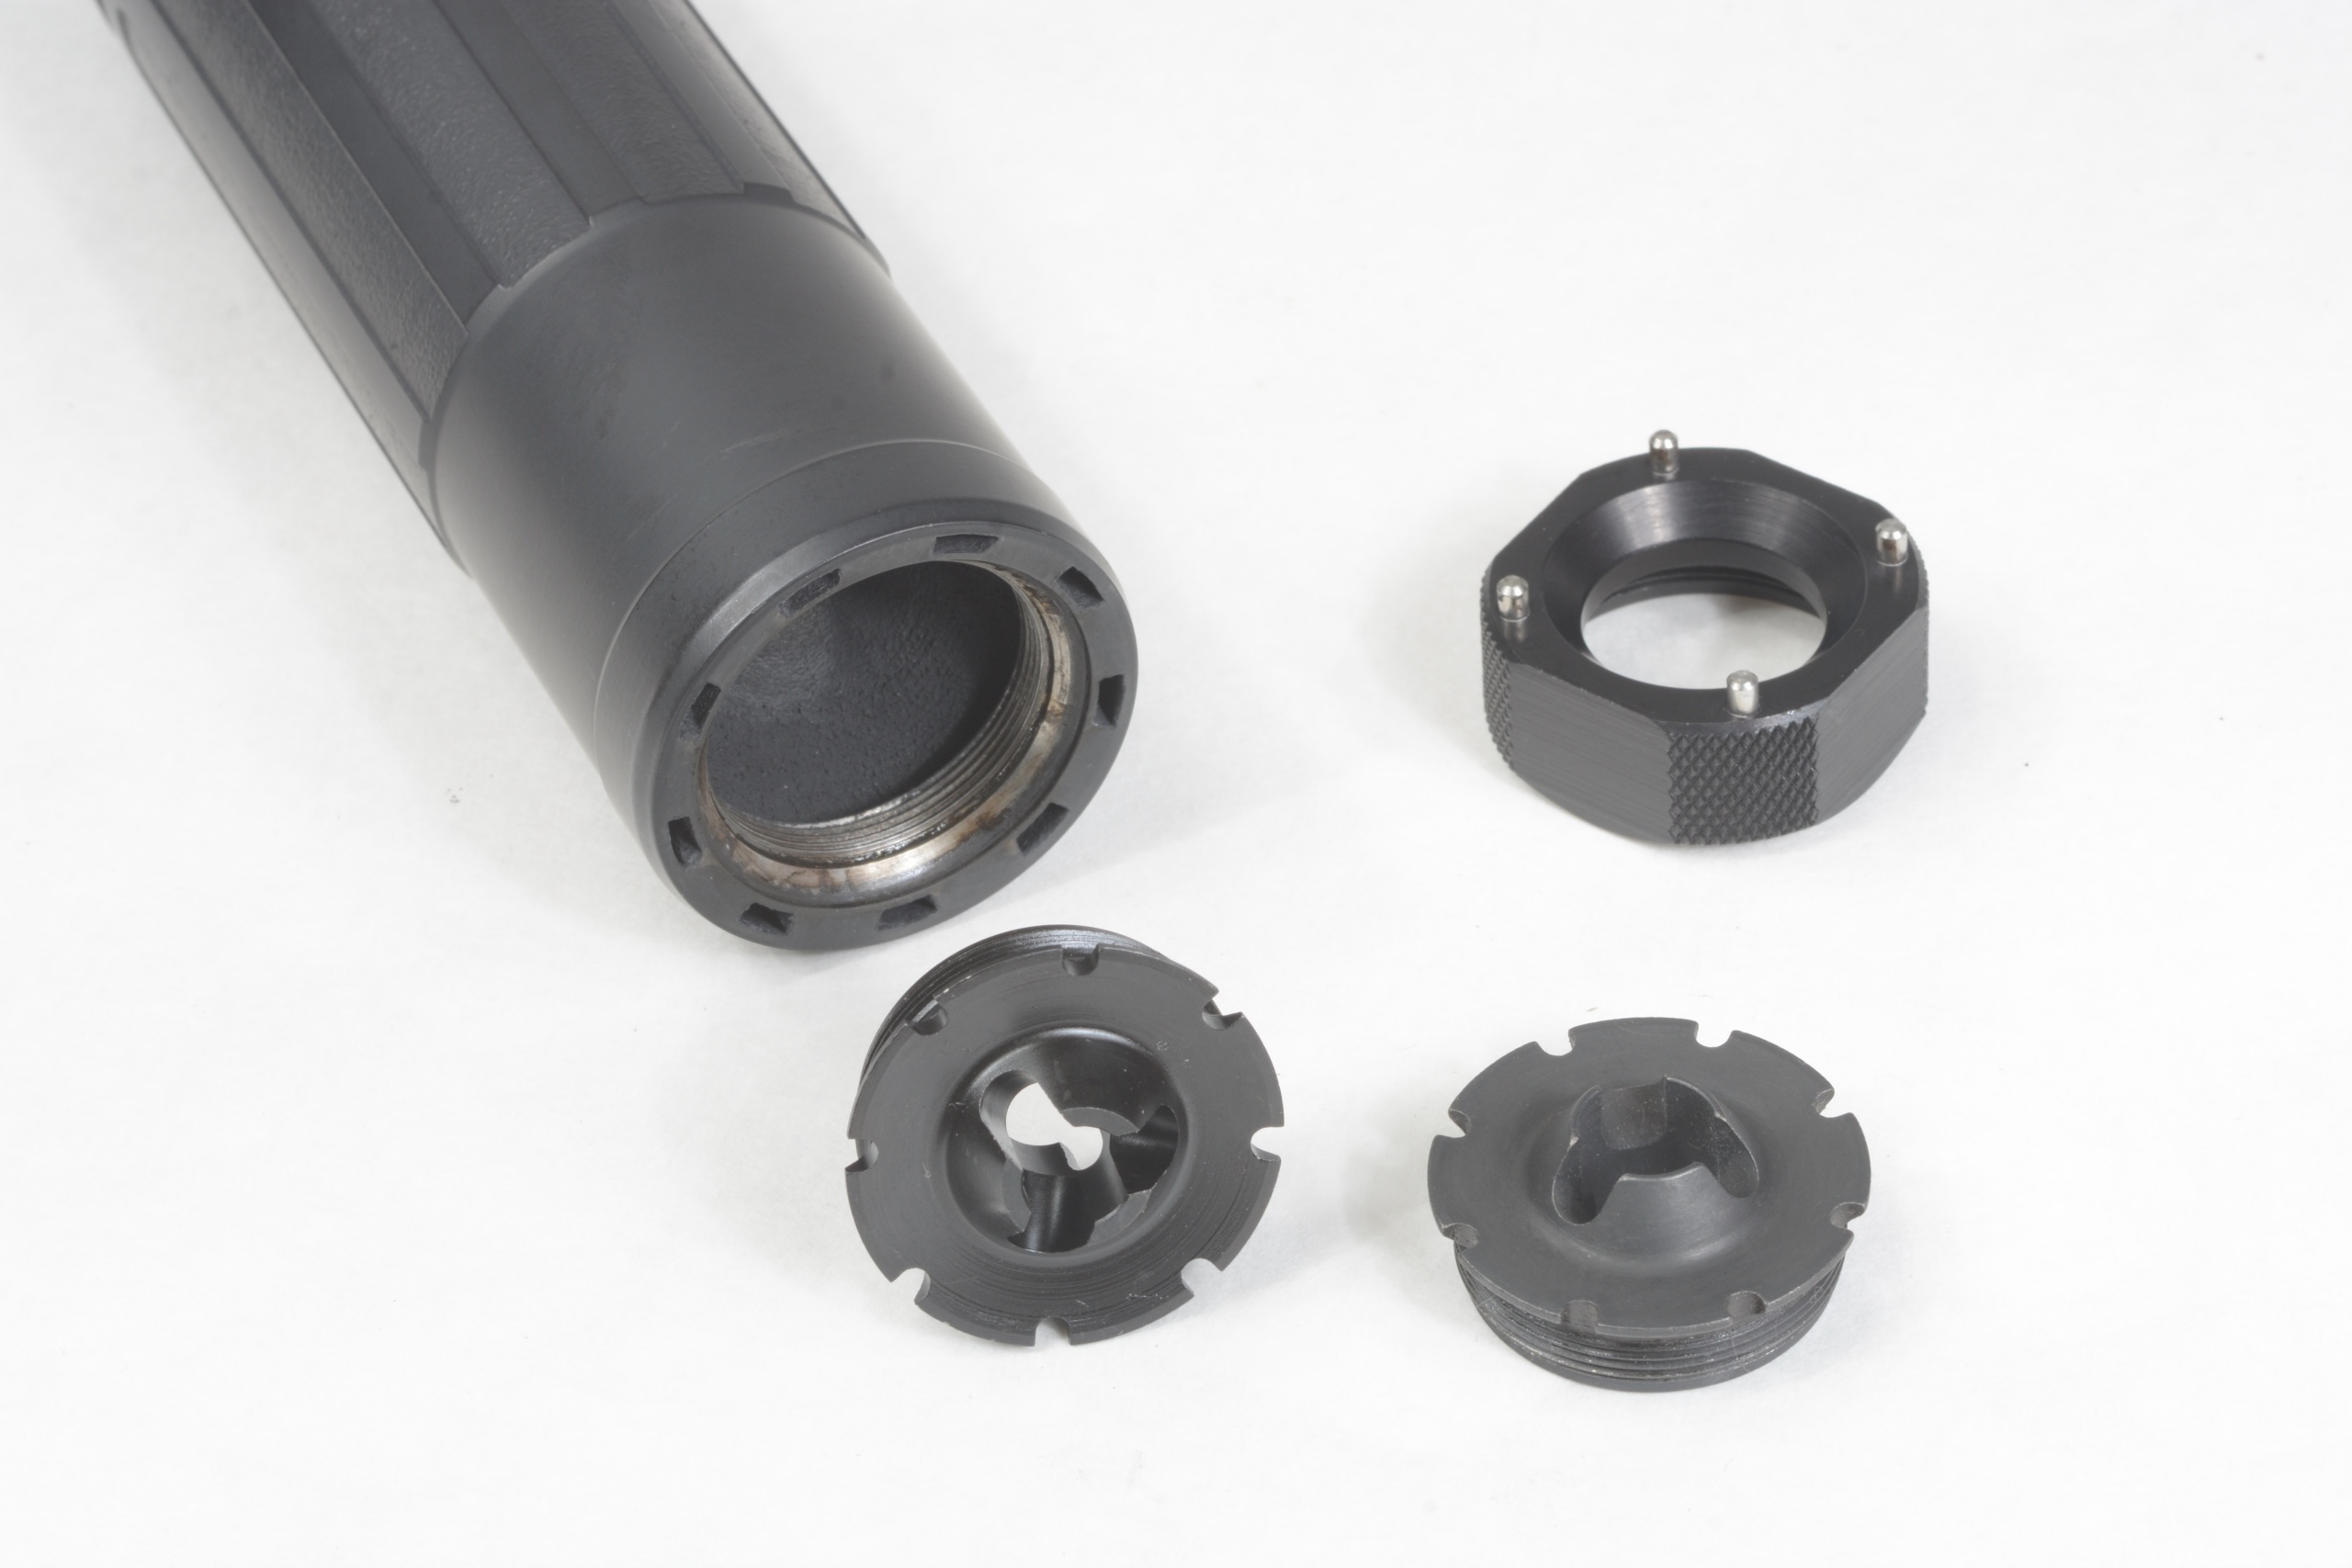
The AP53 comes with a recoil spring captured on a rod welded to the steel endcap, just like a G3. MKE A3 stocks come without it, as do MP5 stocks. It’s possible to remove the recoil spring, cut the guide rod off and re-weld it to the new stock, but the easier way is to purchase a self-contained recoil system from HKParts.
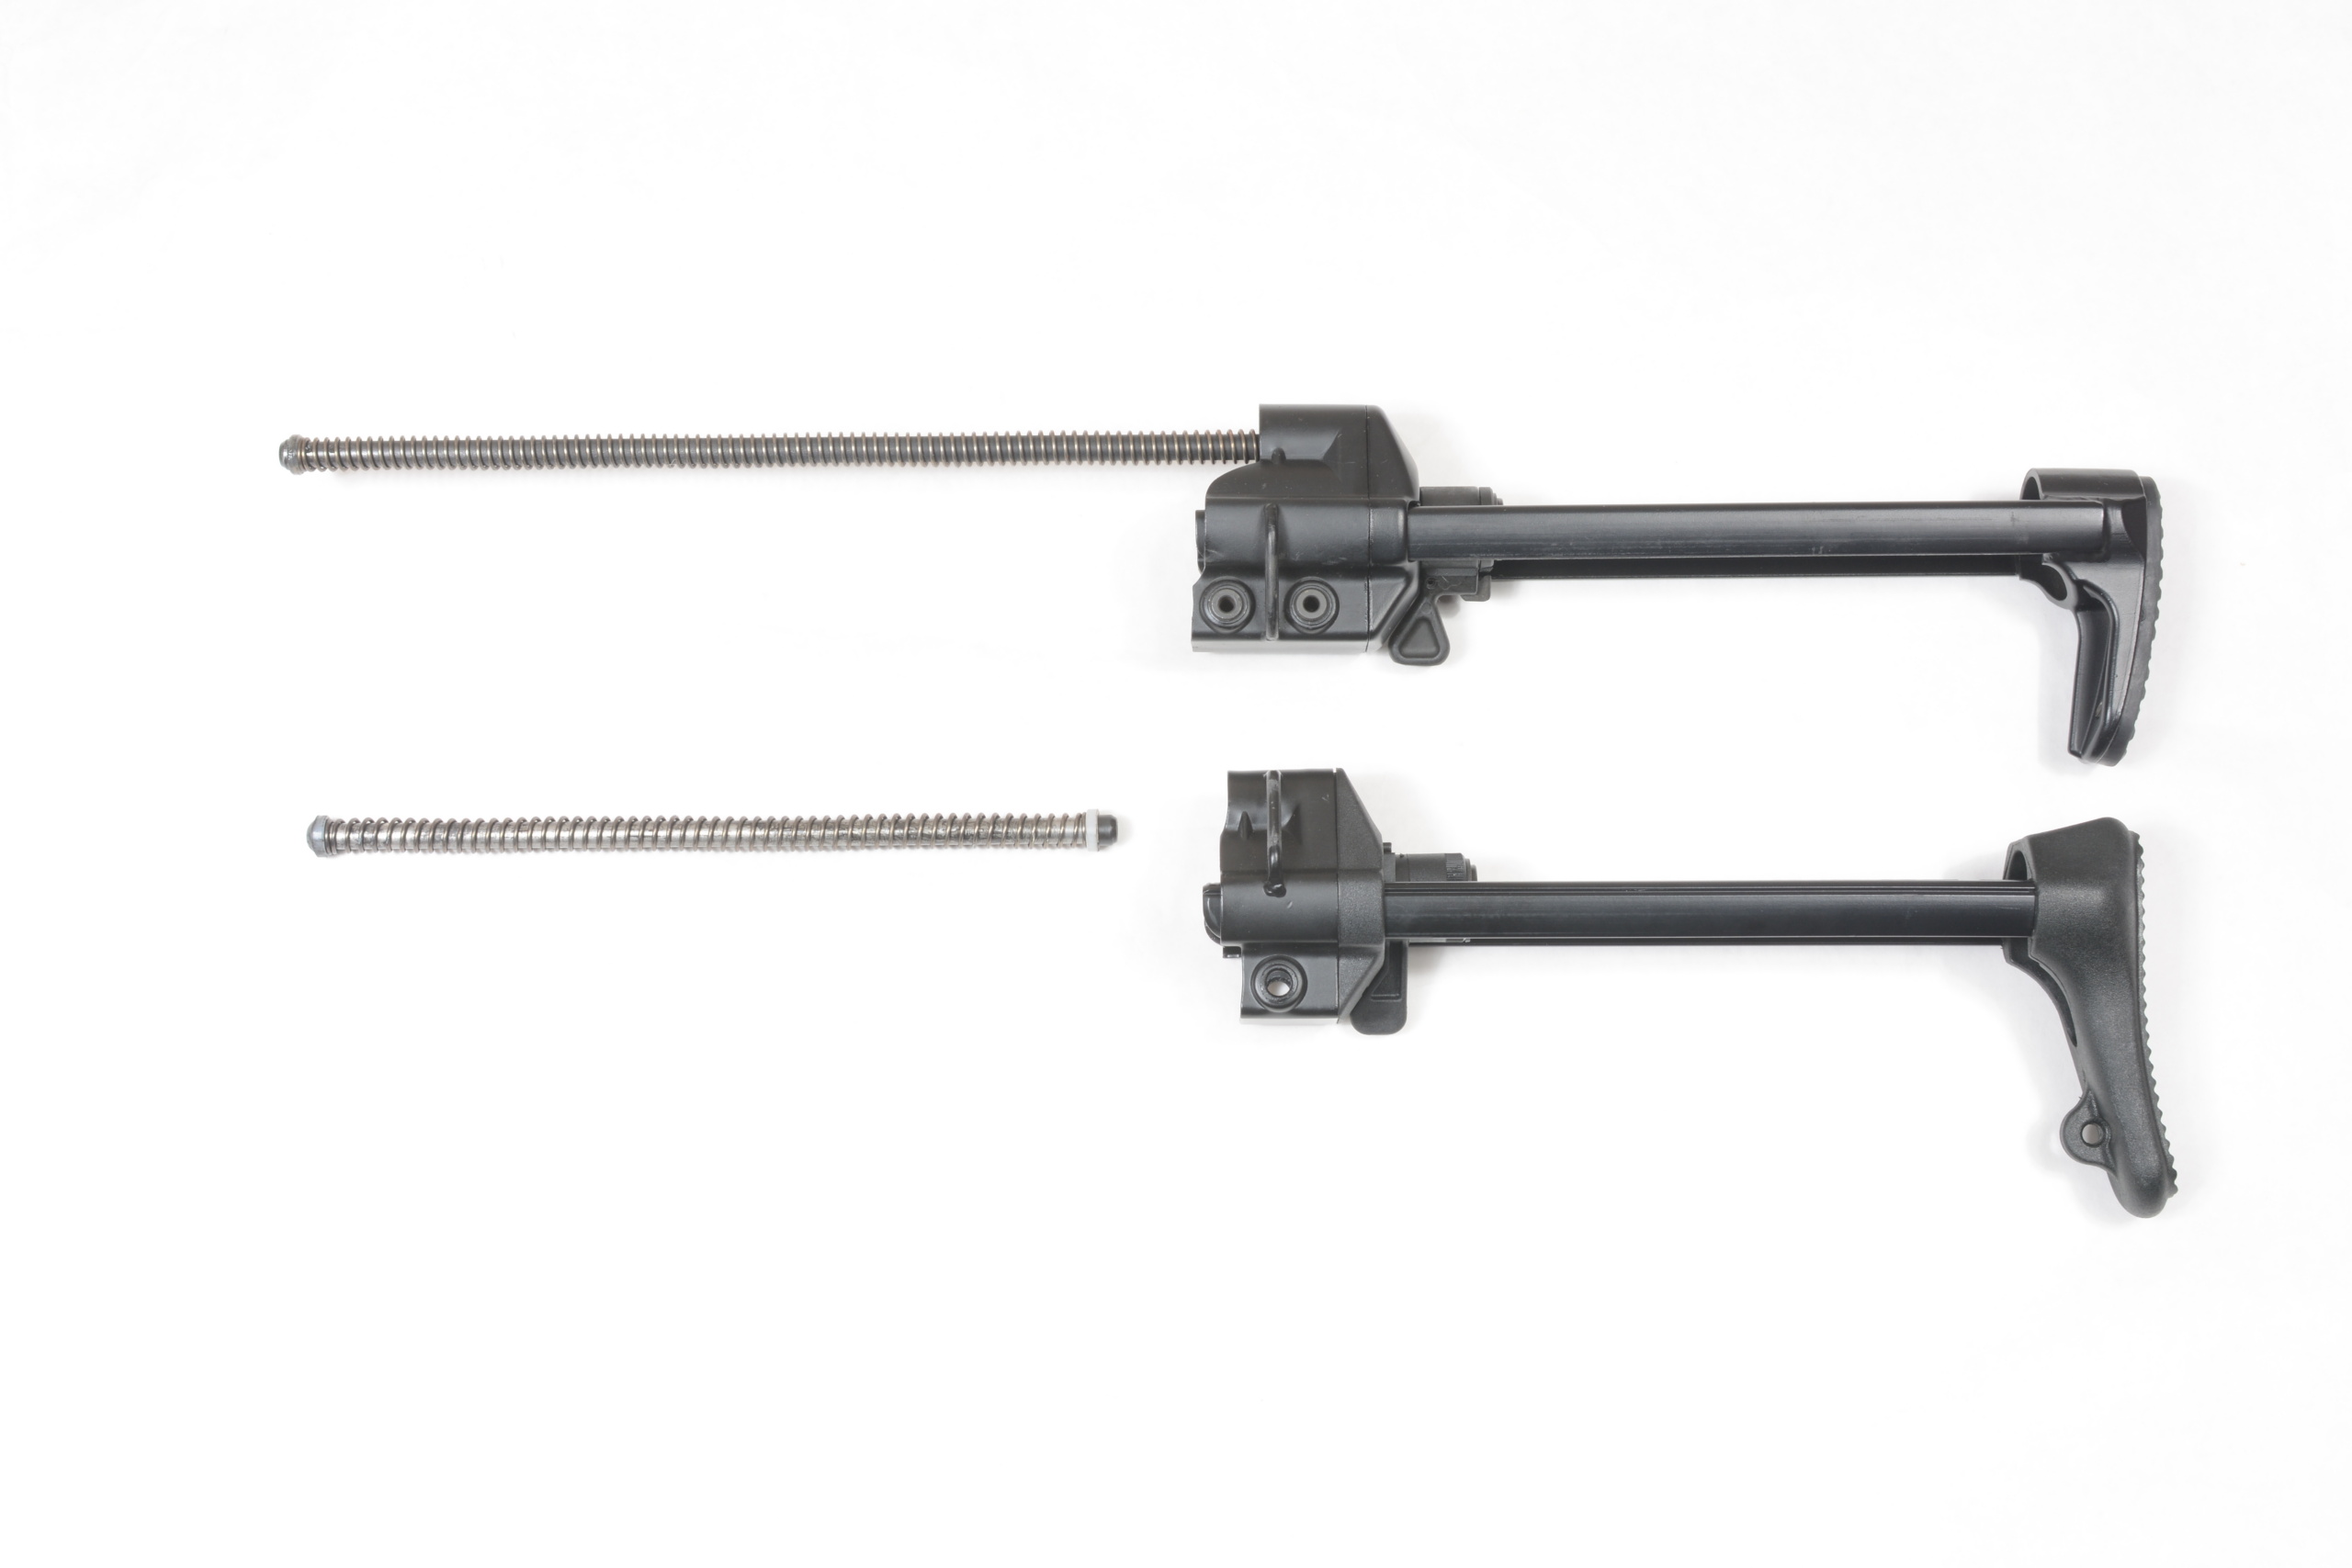
The longer steel end goes into the hole inside the A3 stock endcap, while the front (identical to the factory one) is inserted into the rear of the bolt carrier. Maintaining alignment during assembly can be a bit of a trick, but keeping pressure on it with the changing handle works. A3 stocks are also easier to install in the collapsed position, which seems to help align the legs in their grooves in the receiver. Mine was a bit sticky, but a little white lithium grease helped, and the stock locks up firmly when extended.
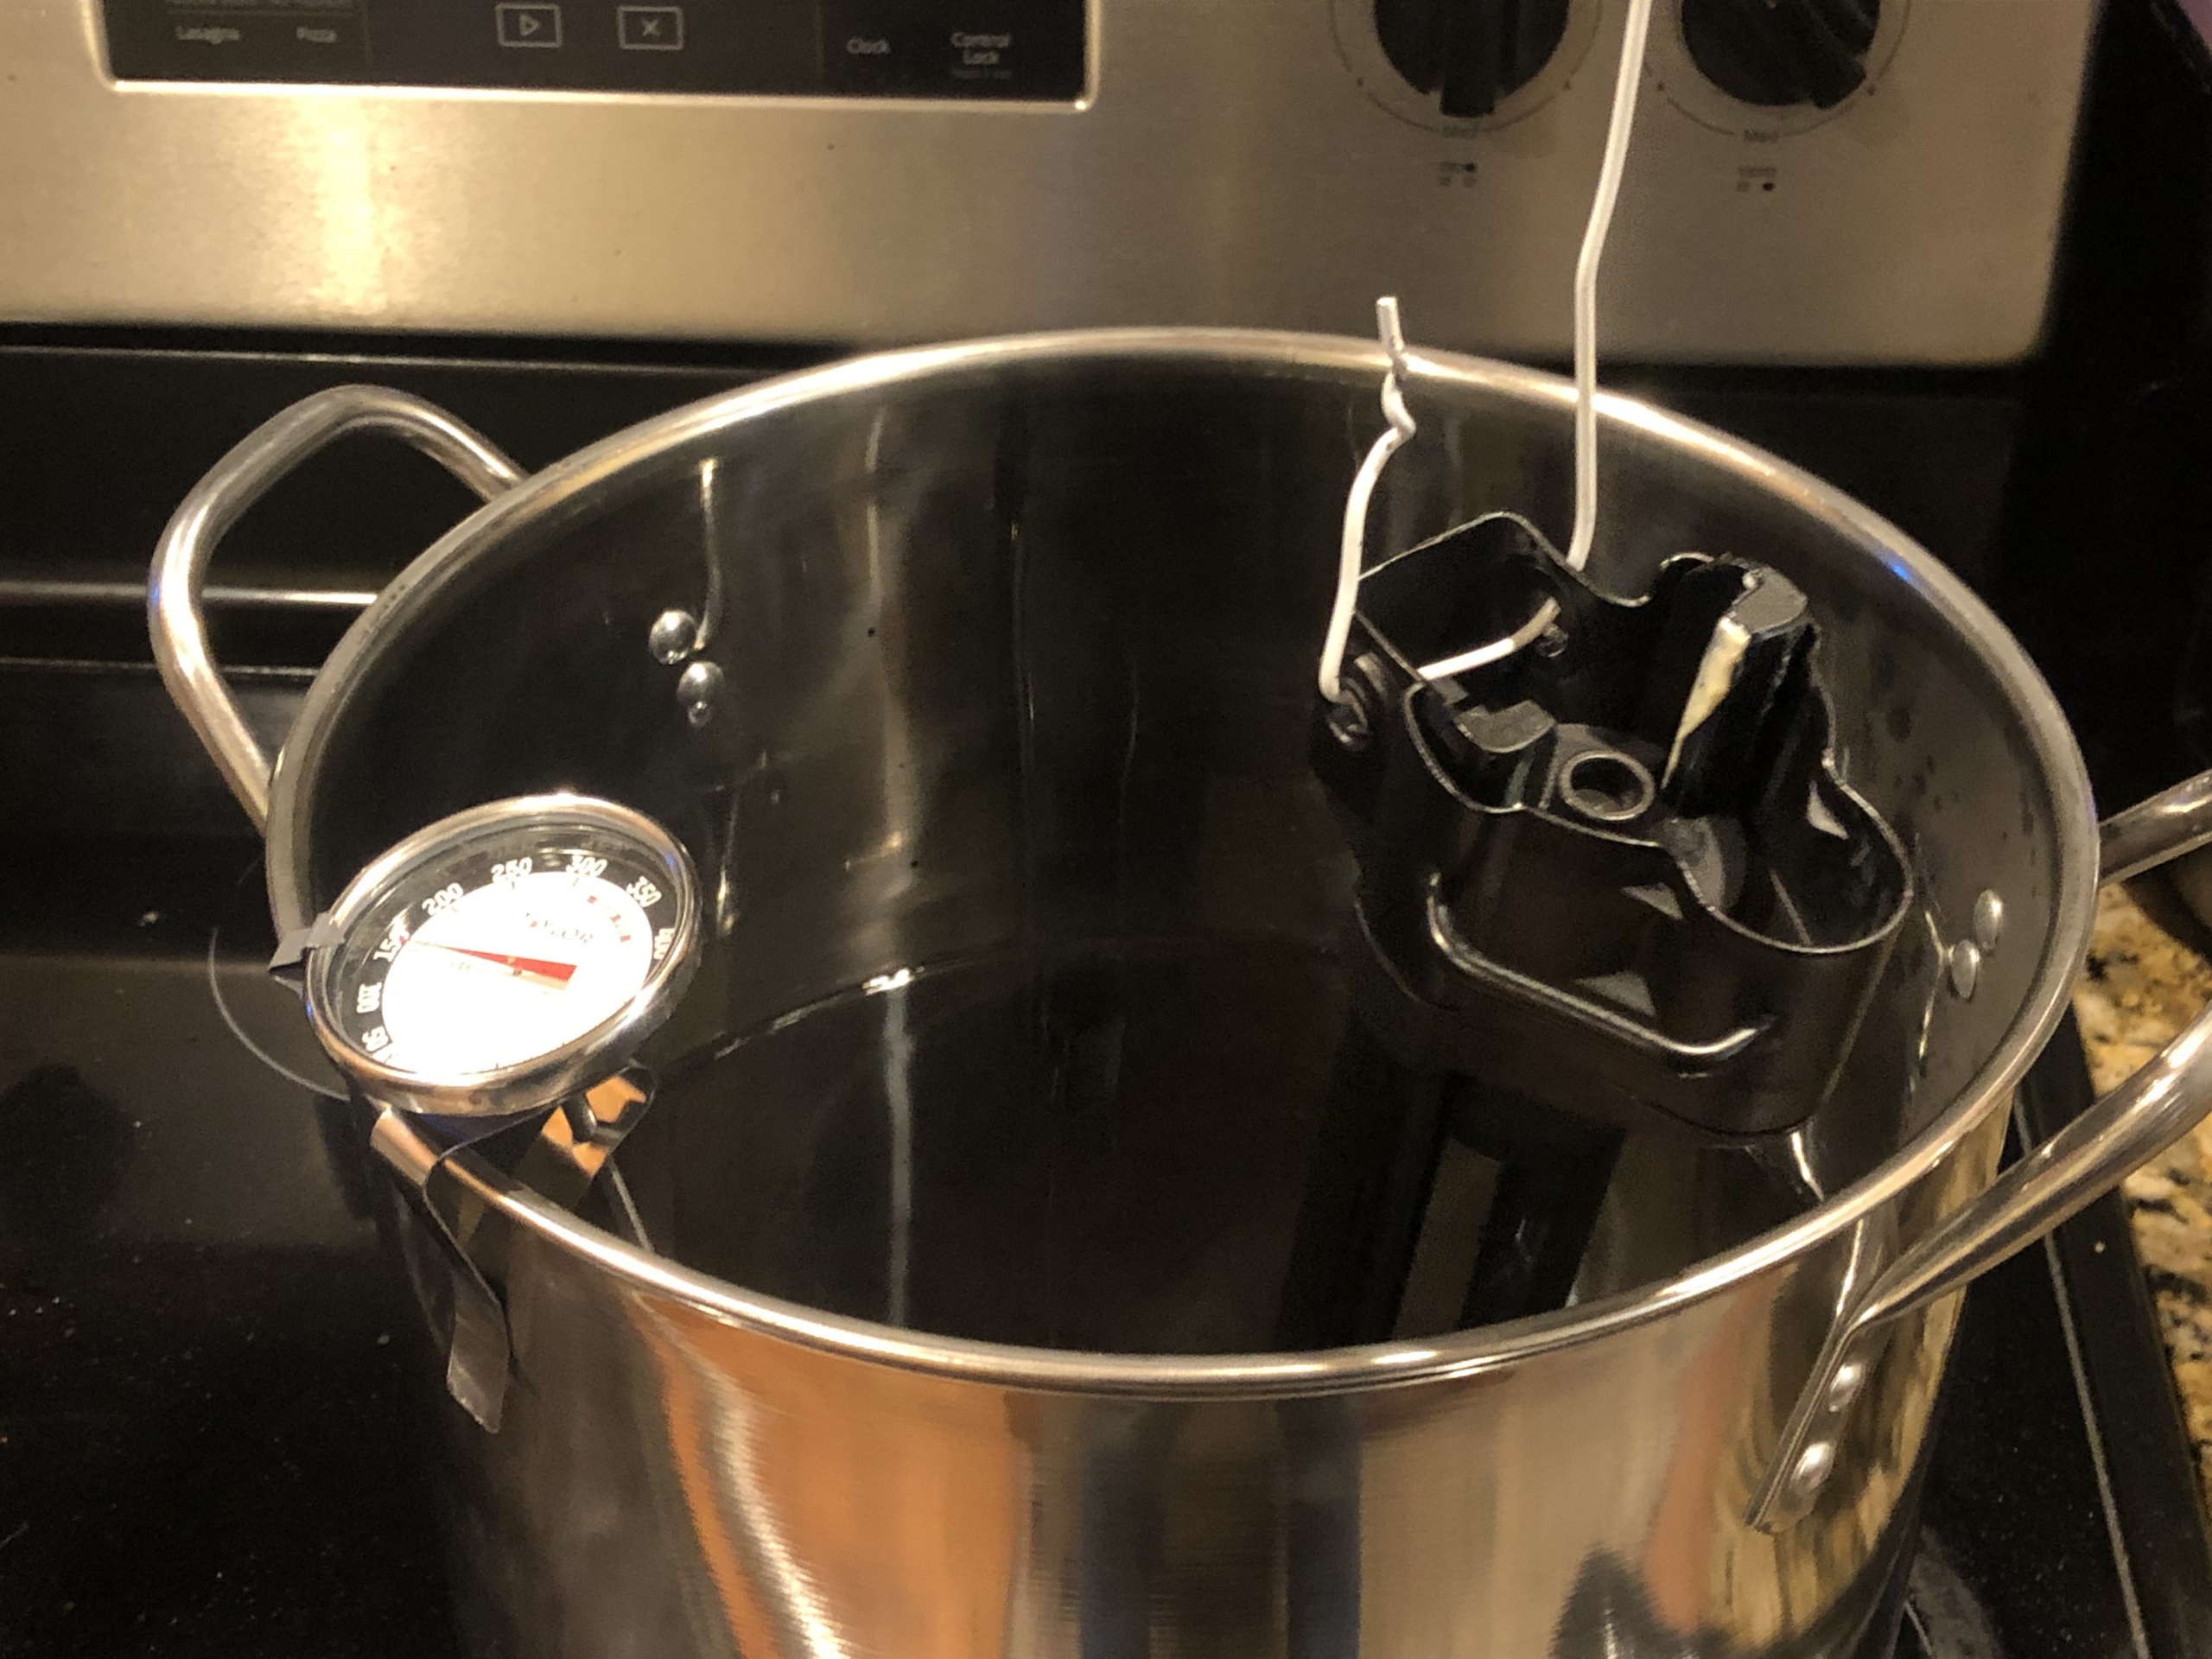
The other issue is the green color of the buttpad on the MKE stock. After a little homework on the HKPro forum (hat tip to users jbntex and rickj1nd, whose posts I relied on) I dyed mine.
I added two bottles of black Rit Dye to a gallon and a half of water, brought it to 140-150 degrees, and suspended the stock in it for ten minutes or so, lazily swirling it from time to time. After putting some oil on it and an overnight curing, it’s now black.
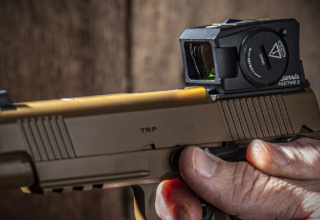
We already covered adding Holosun’s titanium bodied HE530G-RD dot to the AP53. With some 775 rounds downrange since the AP53 arrived, the optic works fine and makes the gun far more shootable than the factory irons. The mount, however, can be rocked a little with enough force. This is a common problem with HK-style claw mounts. Dressing down the top of the mounting tabs will reduce that: go slow, though, and keep the flat surface, flat. I used a pillar file from Brownells.
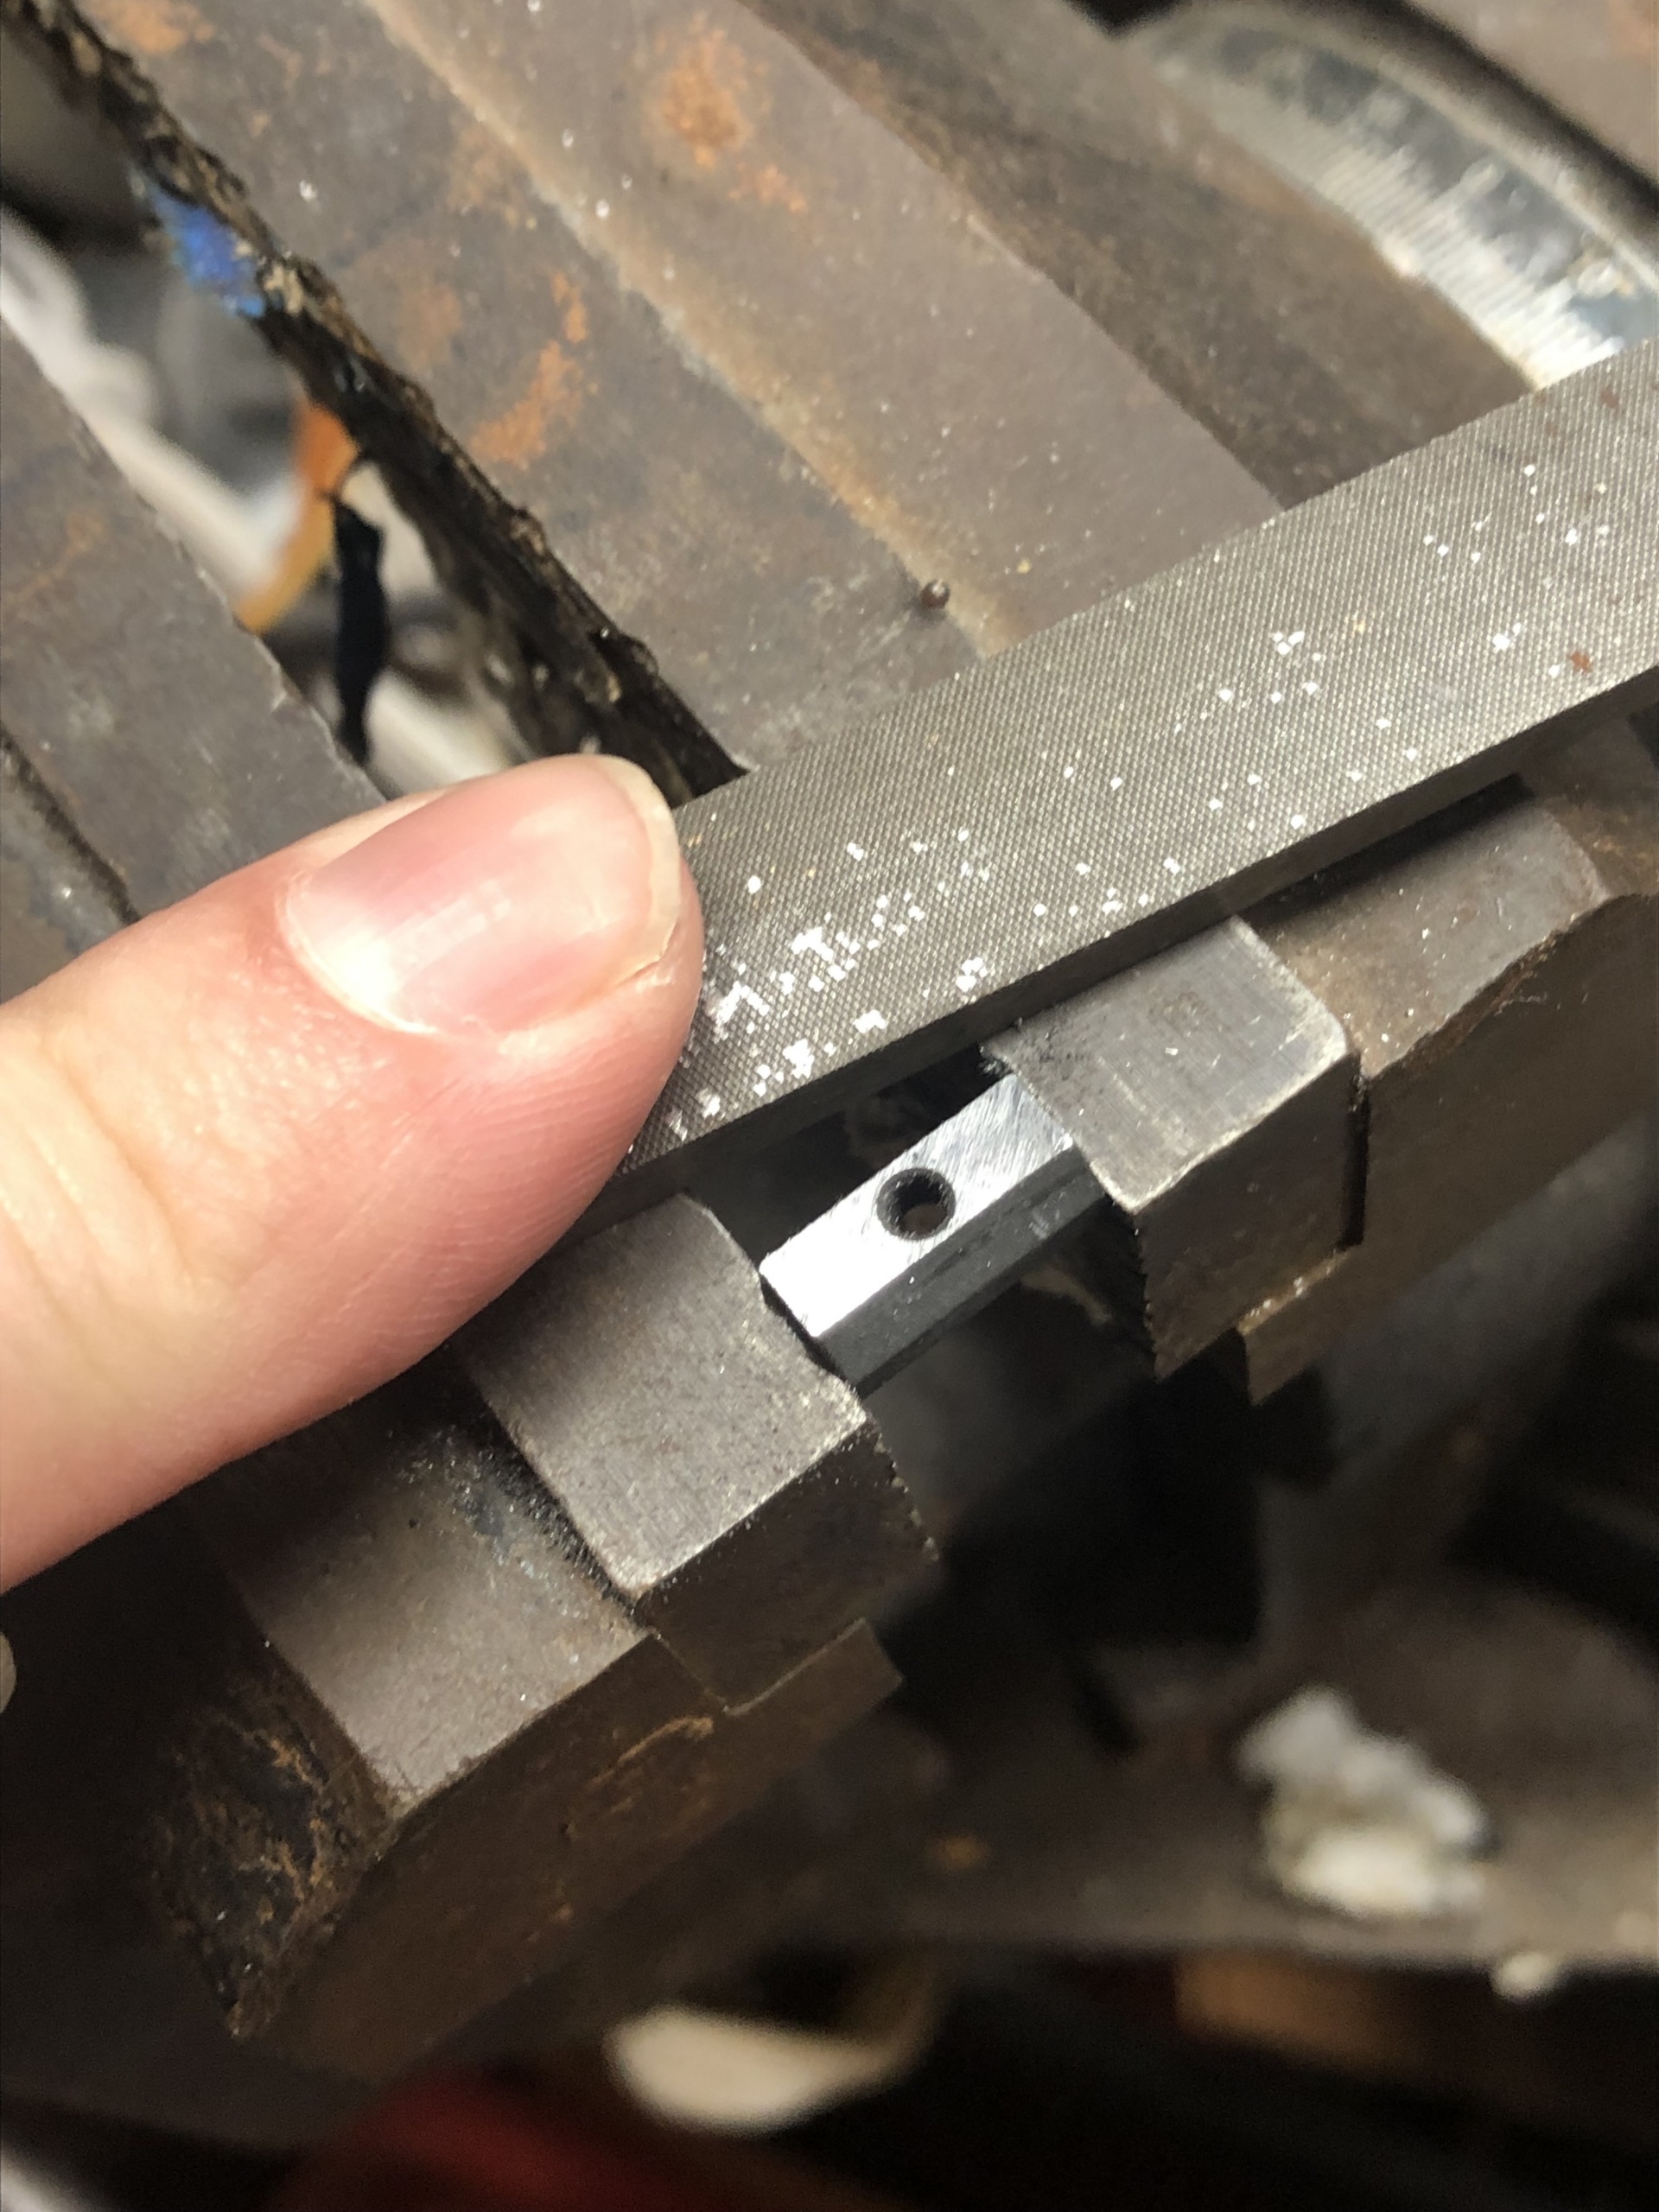
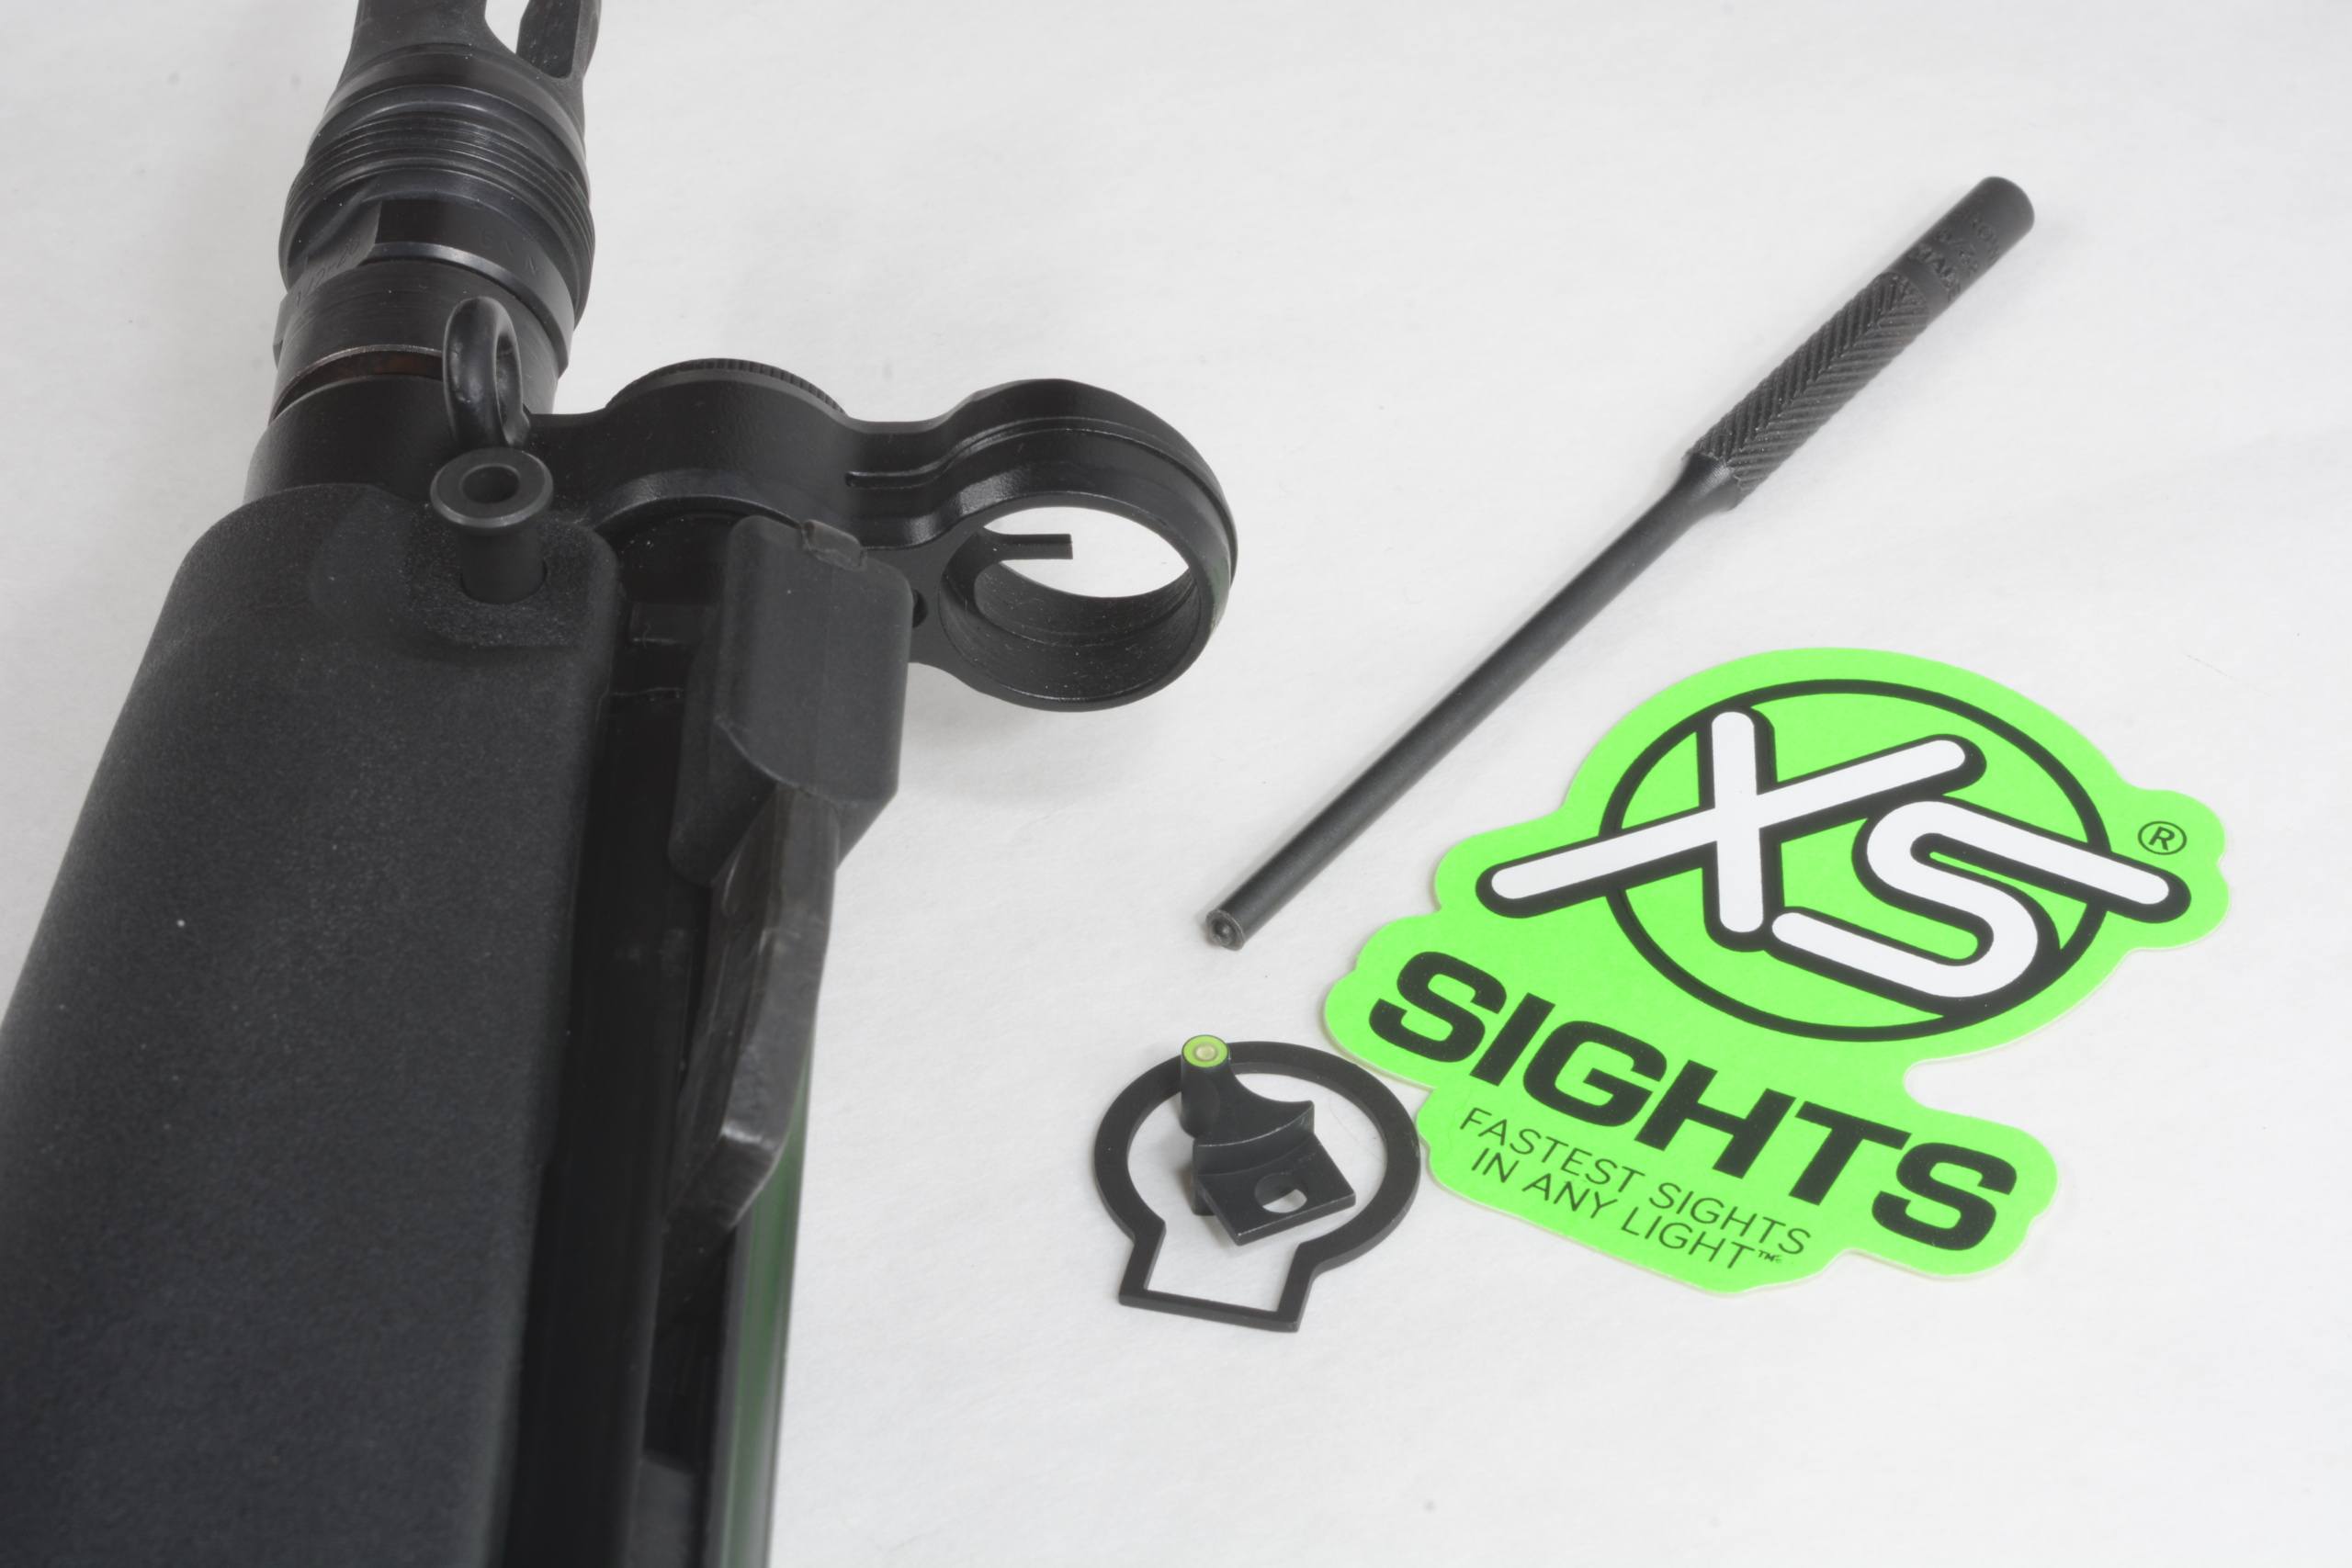
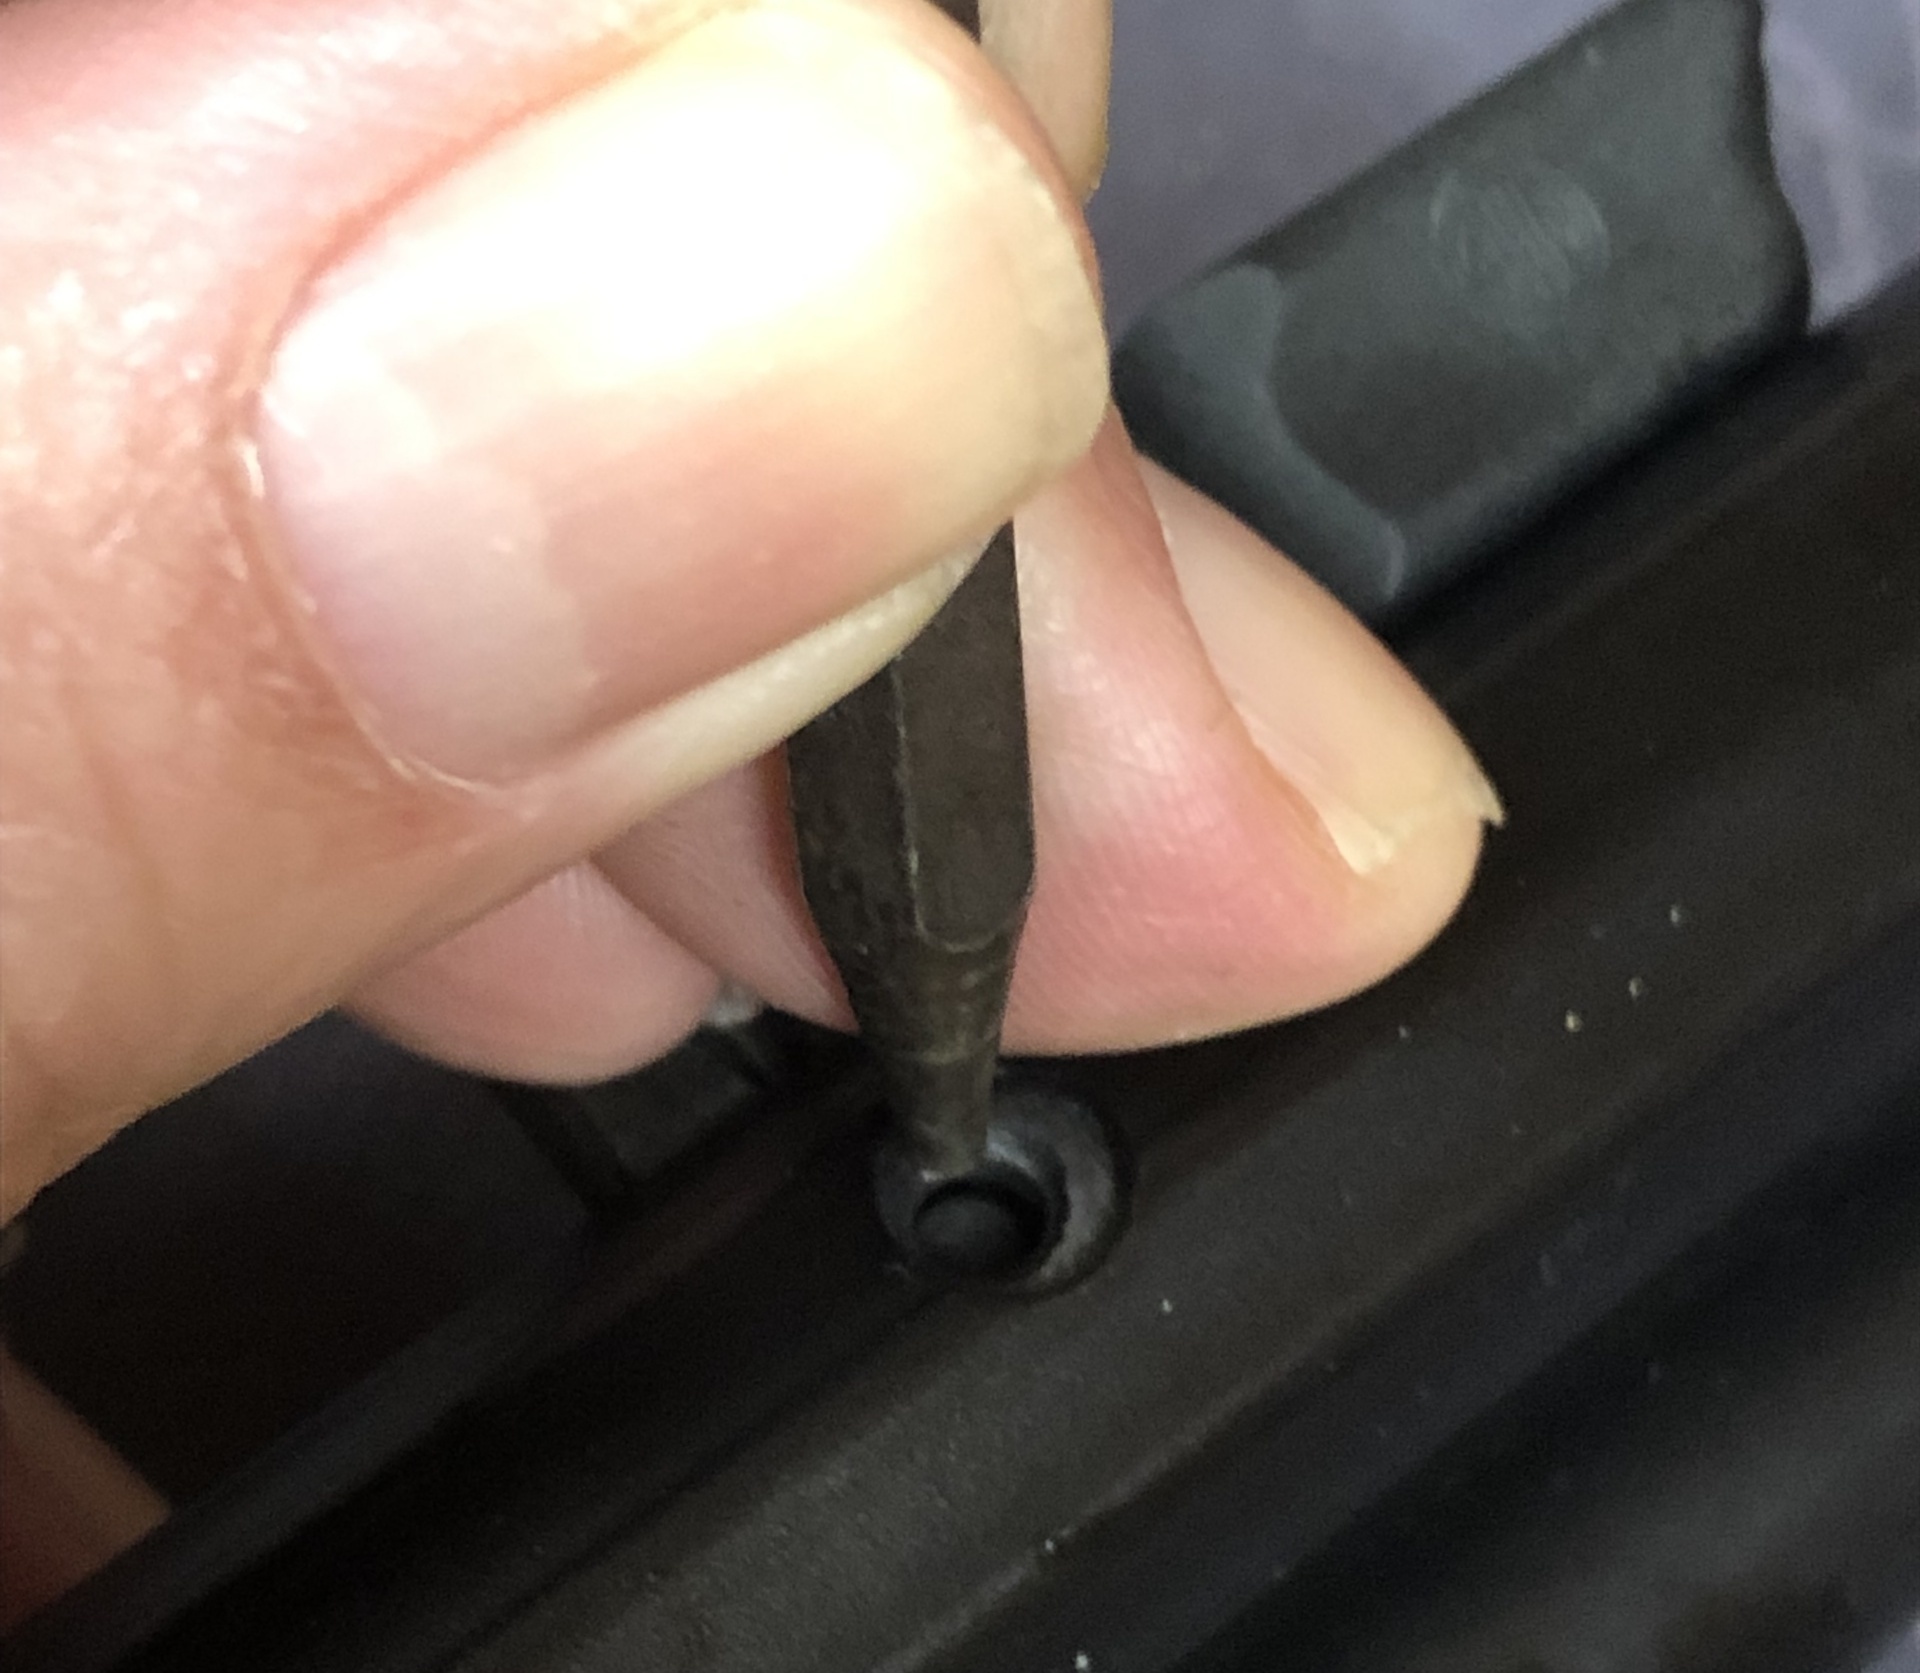
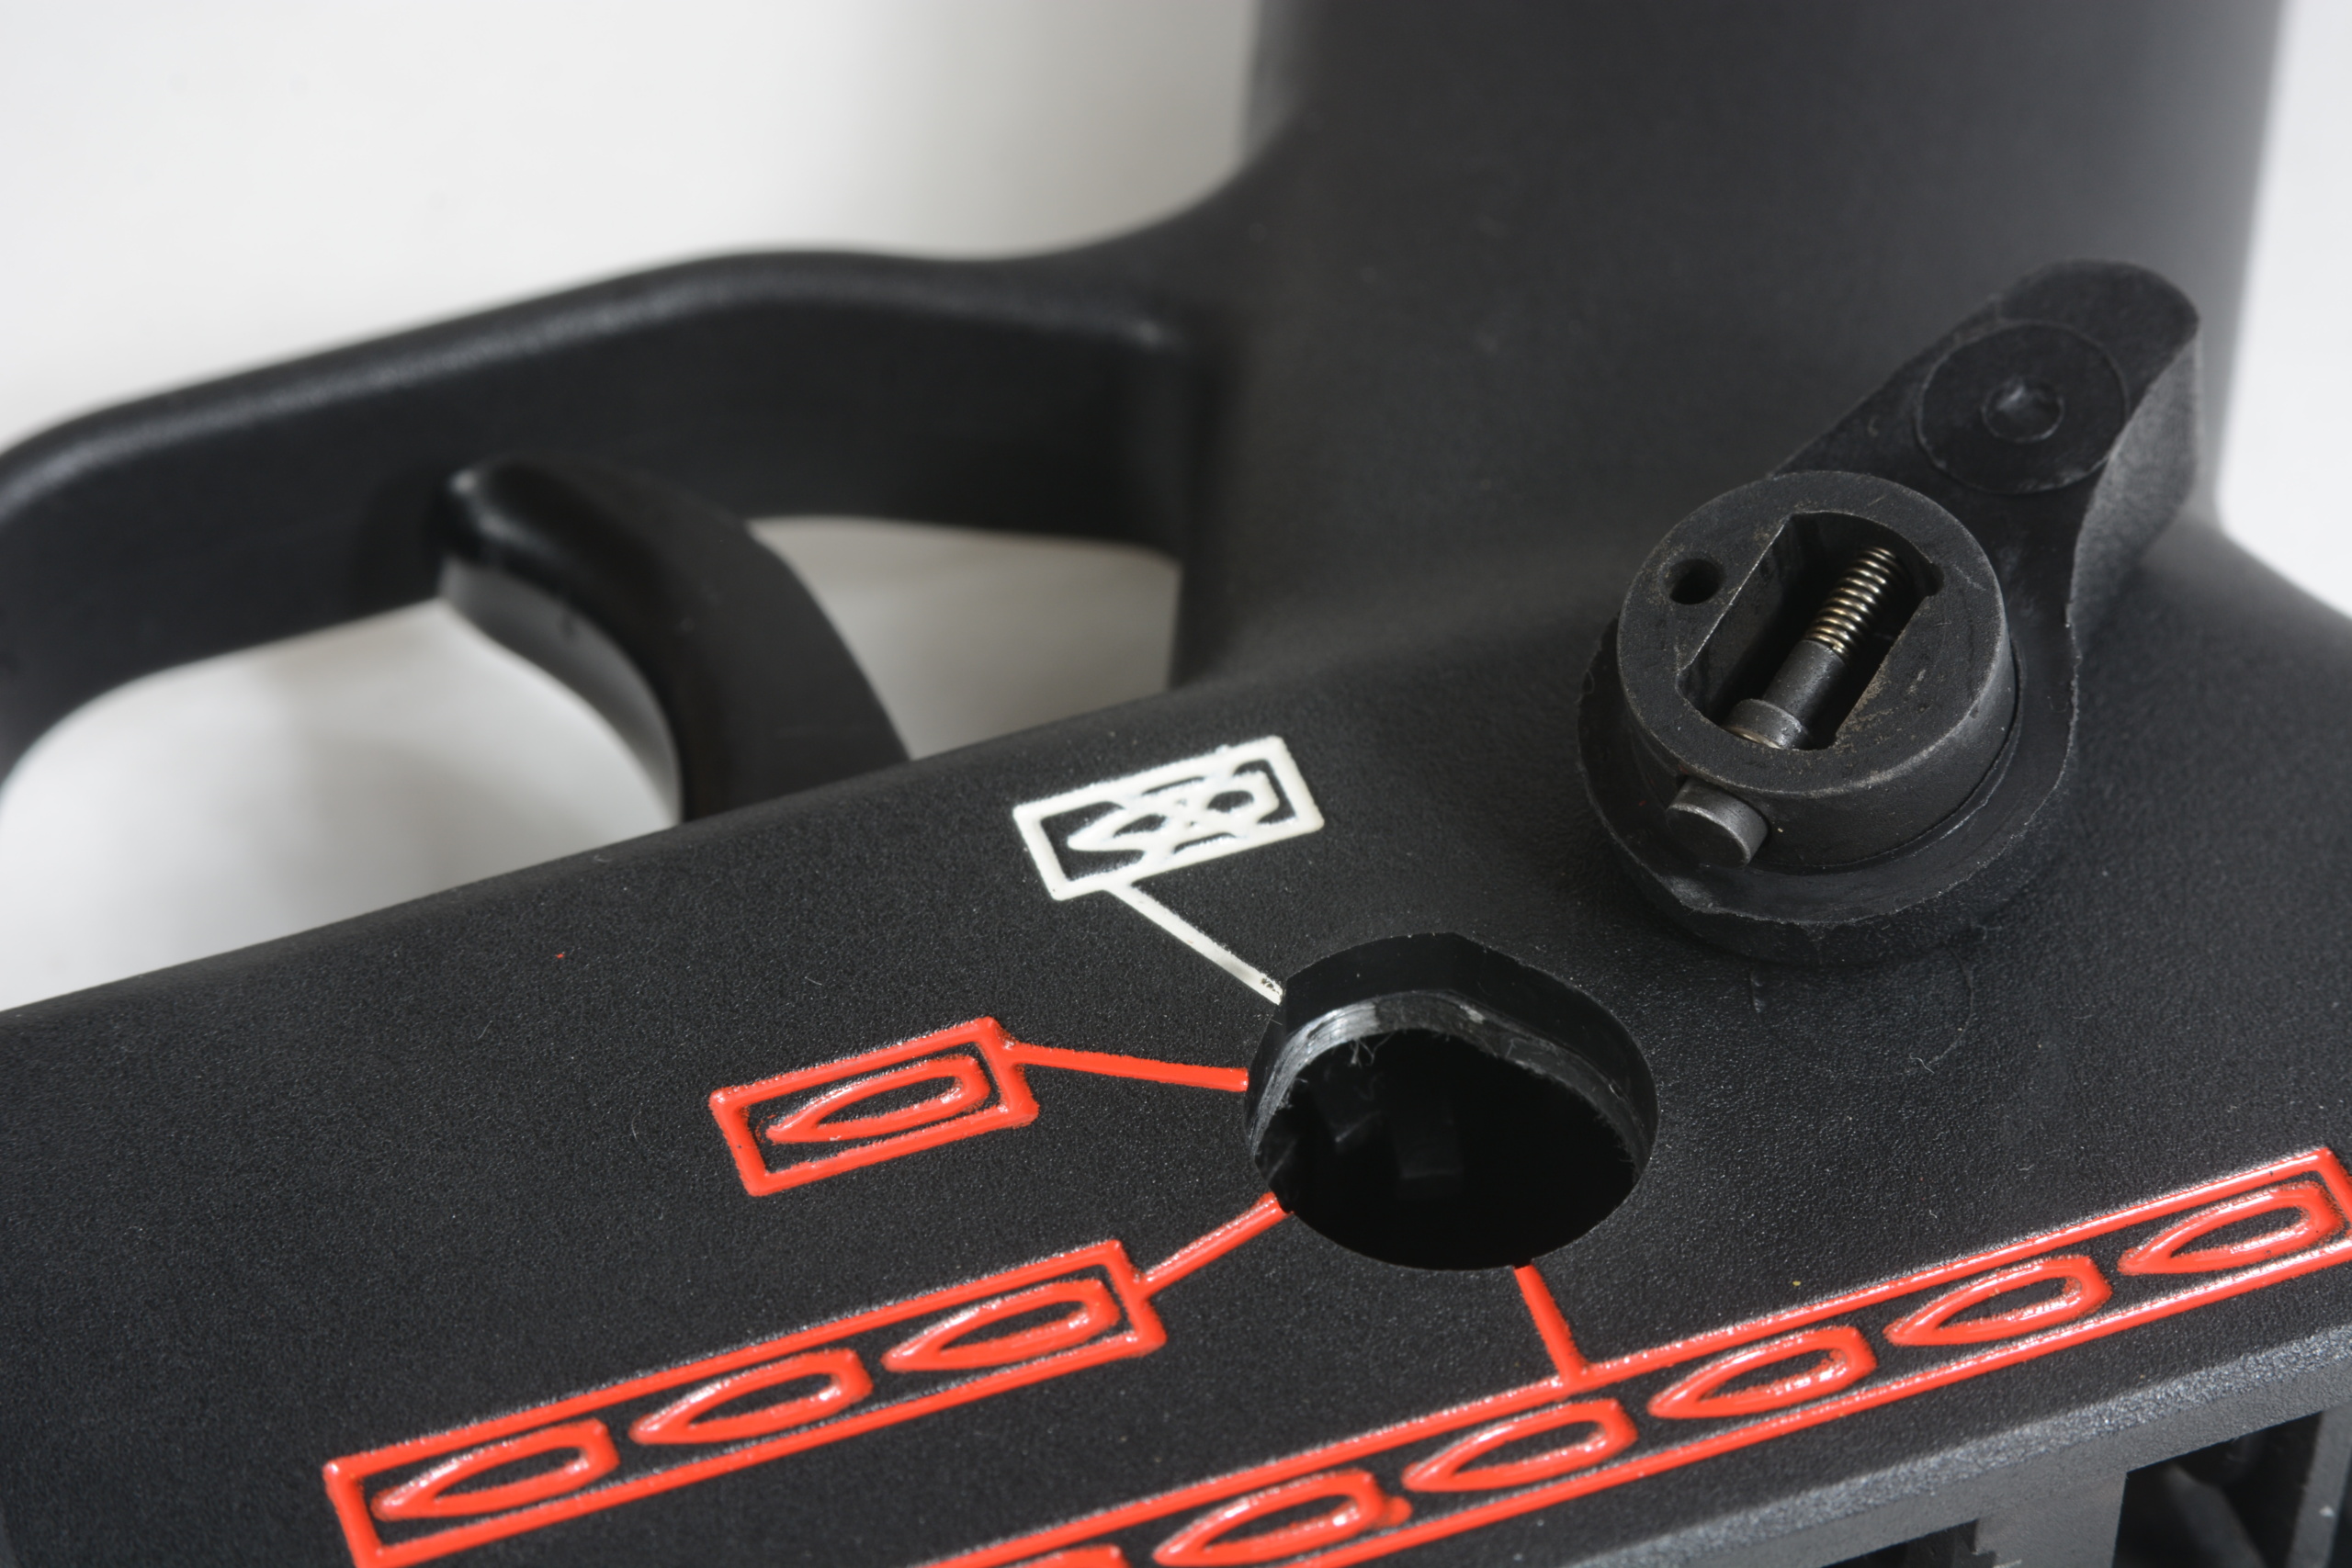
I also added a tritium front dot from XS Sights to provide a low-light backup that’s helpfully still visible beneath the Holosun. The factory front sight blade is a flat sheet metal piece held in with a roll pin visible below the bottom of the front post.
On some roller locks, the hole in which the roll pin sits is narrower towards the rear than the front, which provides you an excellent chance to beat the pin to death from the front when it can’t move. Helpfully, the AP53 hole is a constant diameter and can be driven out from either side.
I prefer to do sight work with all the furniture removed because it’s less bulk to deal with—or damage. Support the rear of the sight base (aka “triple tree”) with a wooden block and pad it with a piece of leather to keep from flatspotting the tapered rear of the sight ring (ask me how I learned that). I used a roll pin punch from Brownell’s to gently drive the pin out until the front sight blade was free, stopping before I knocked the pin all the way out.
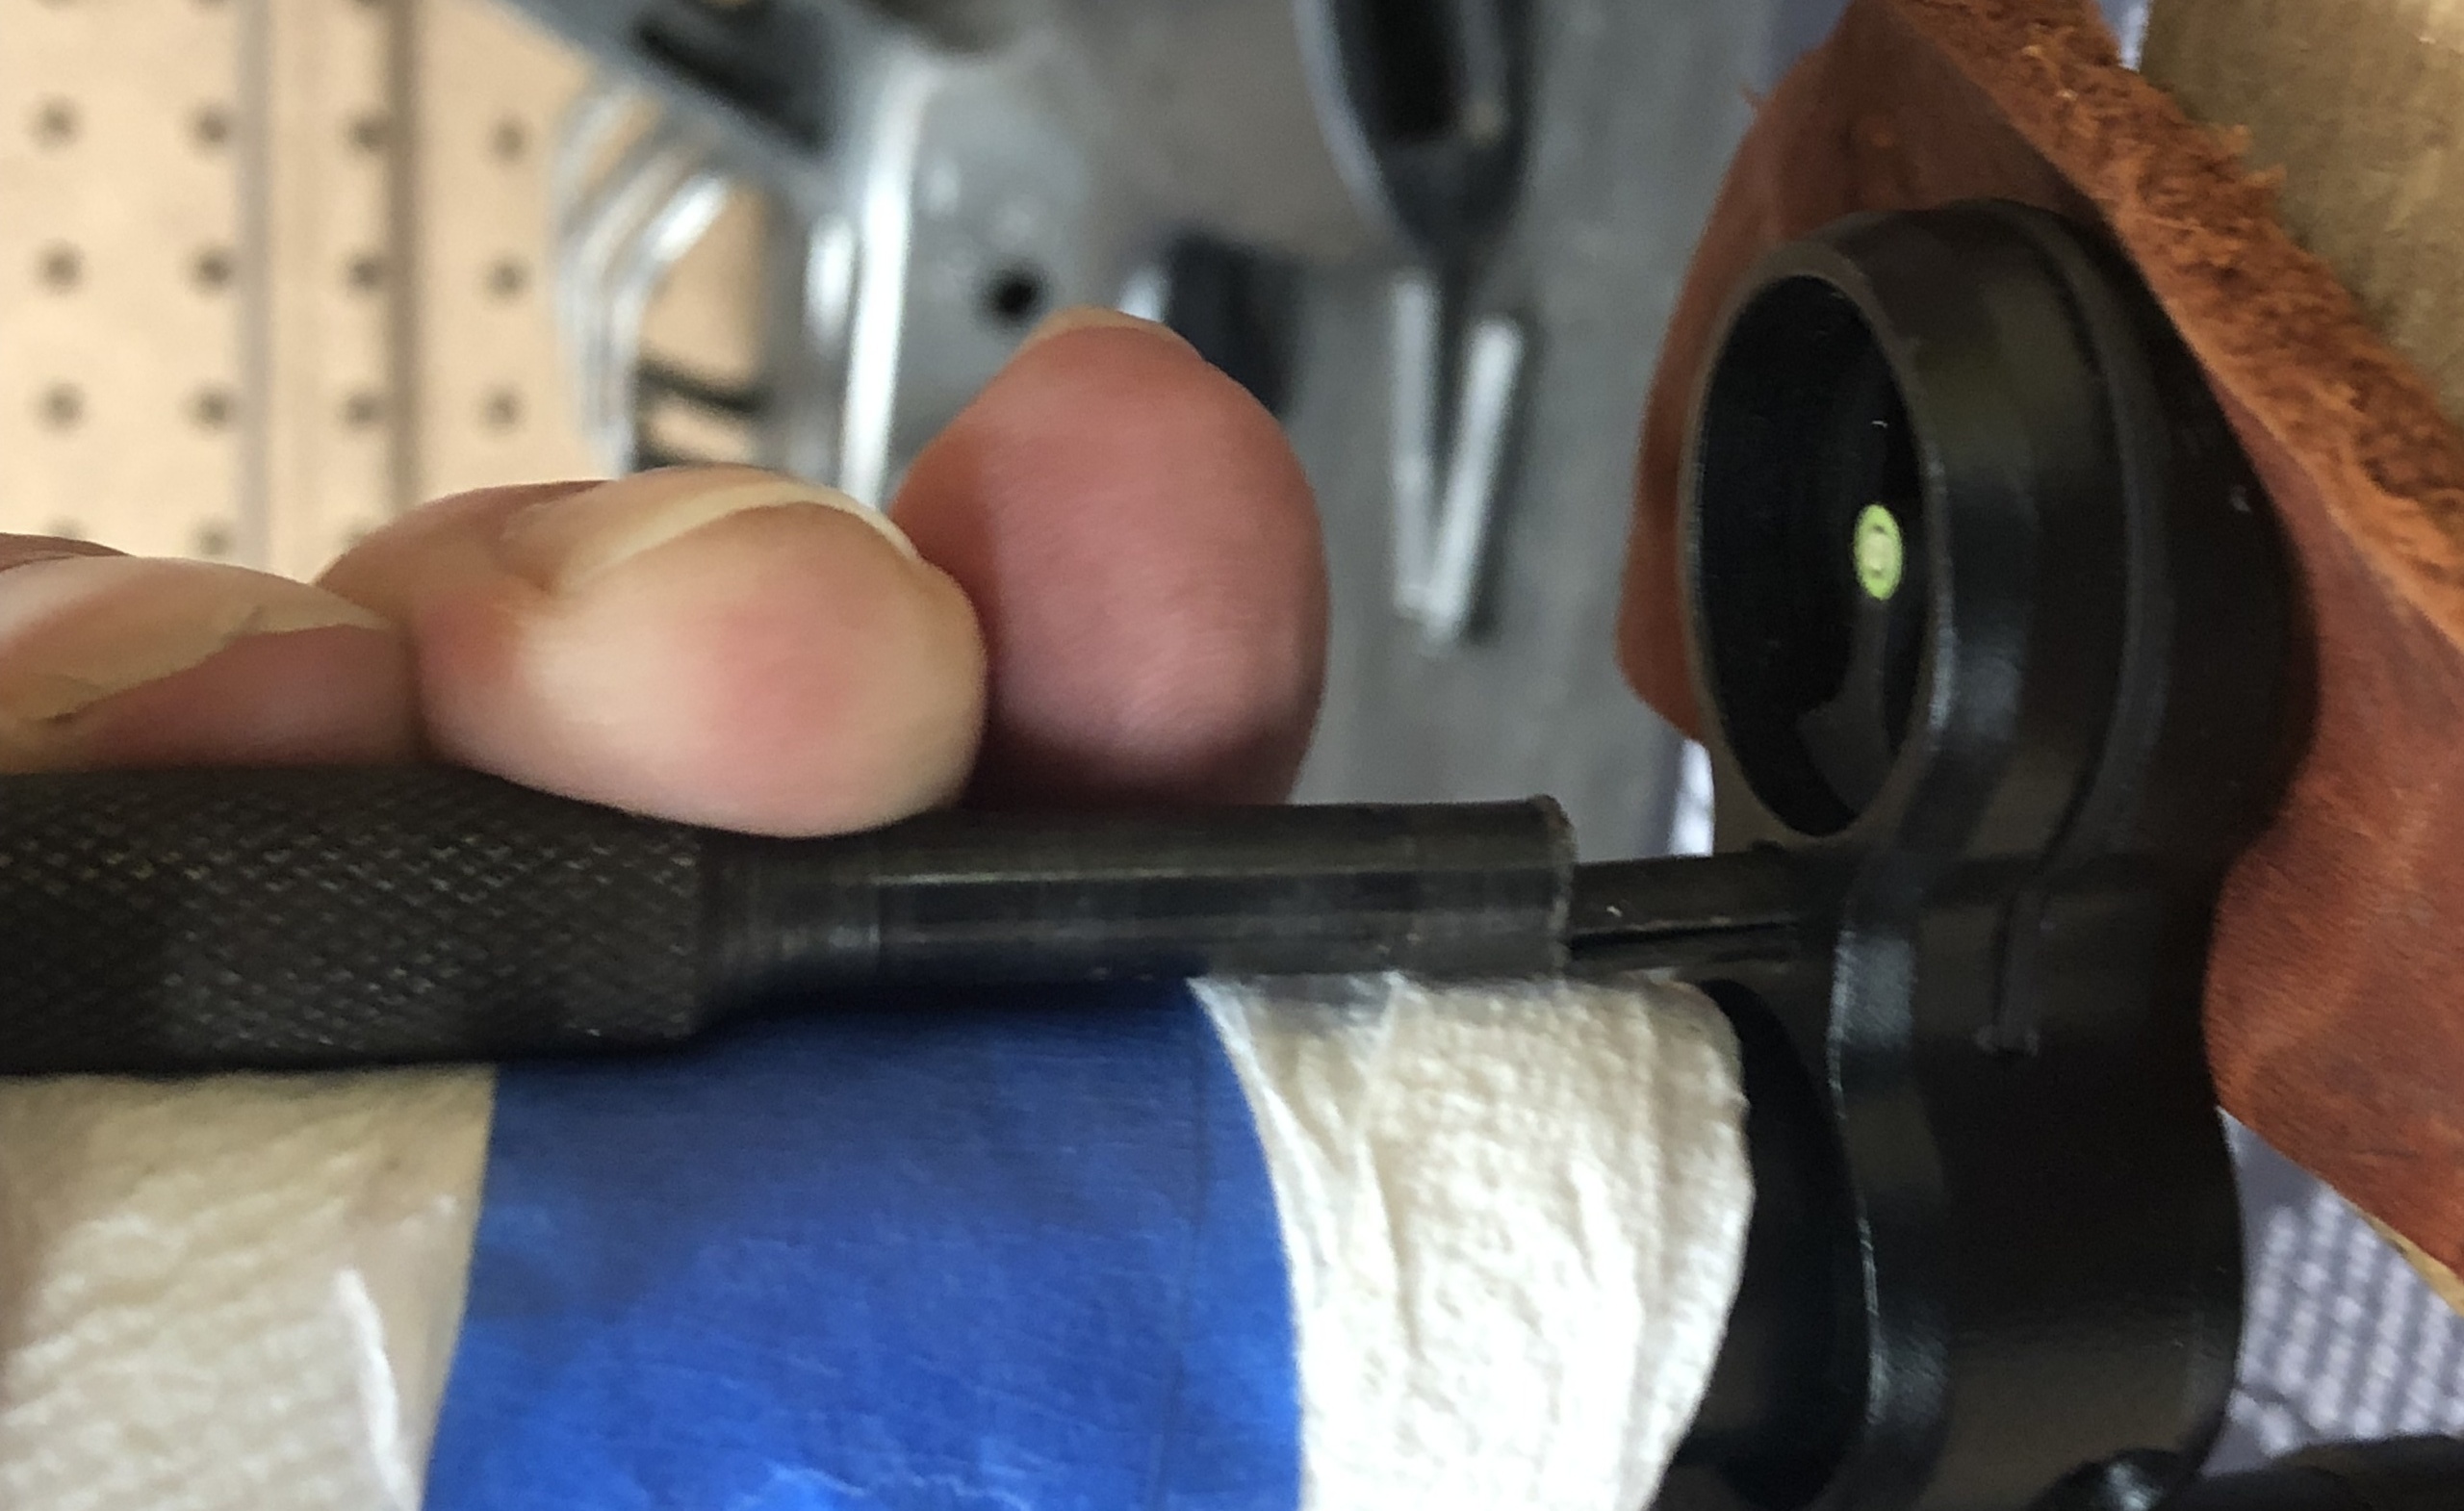
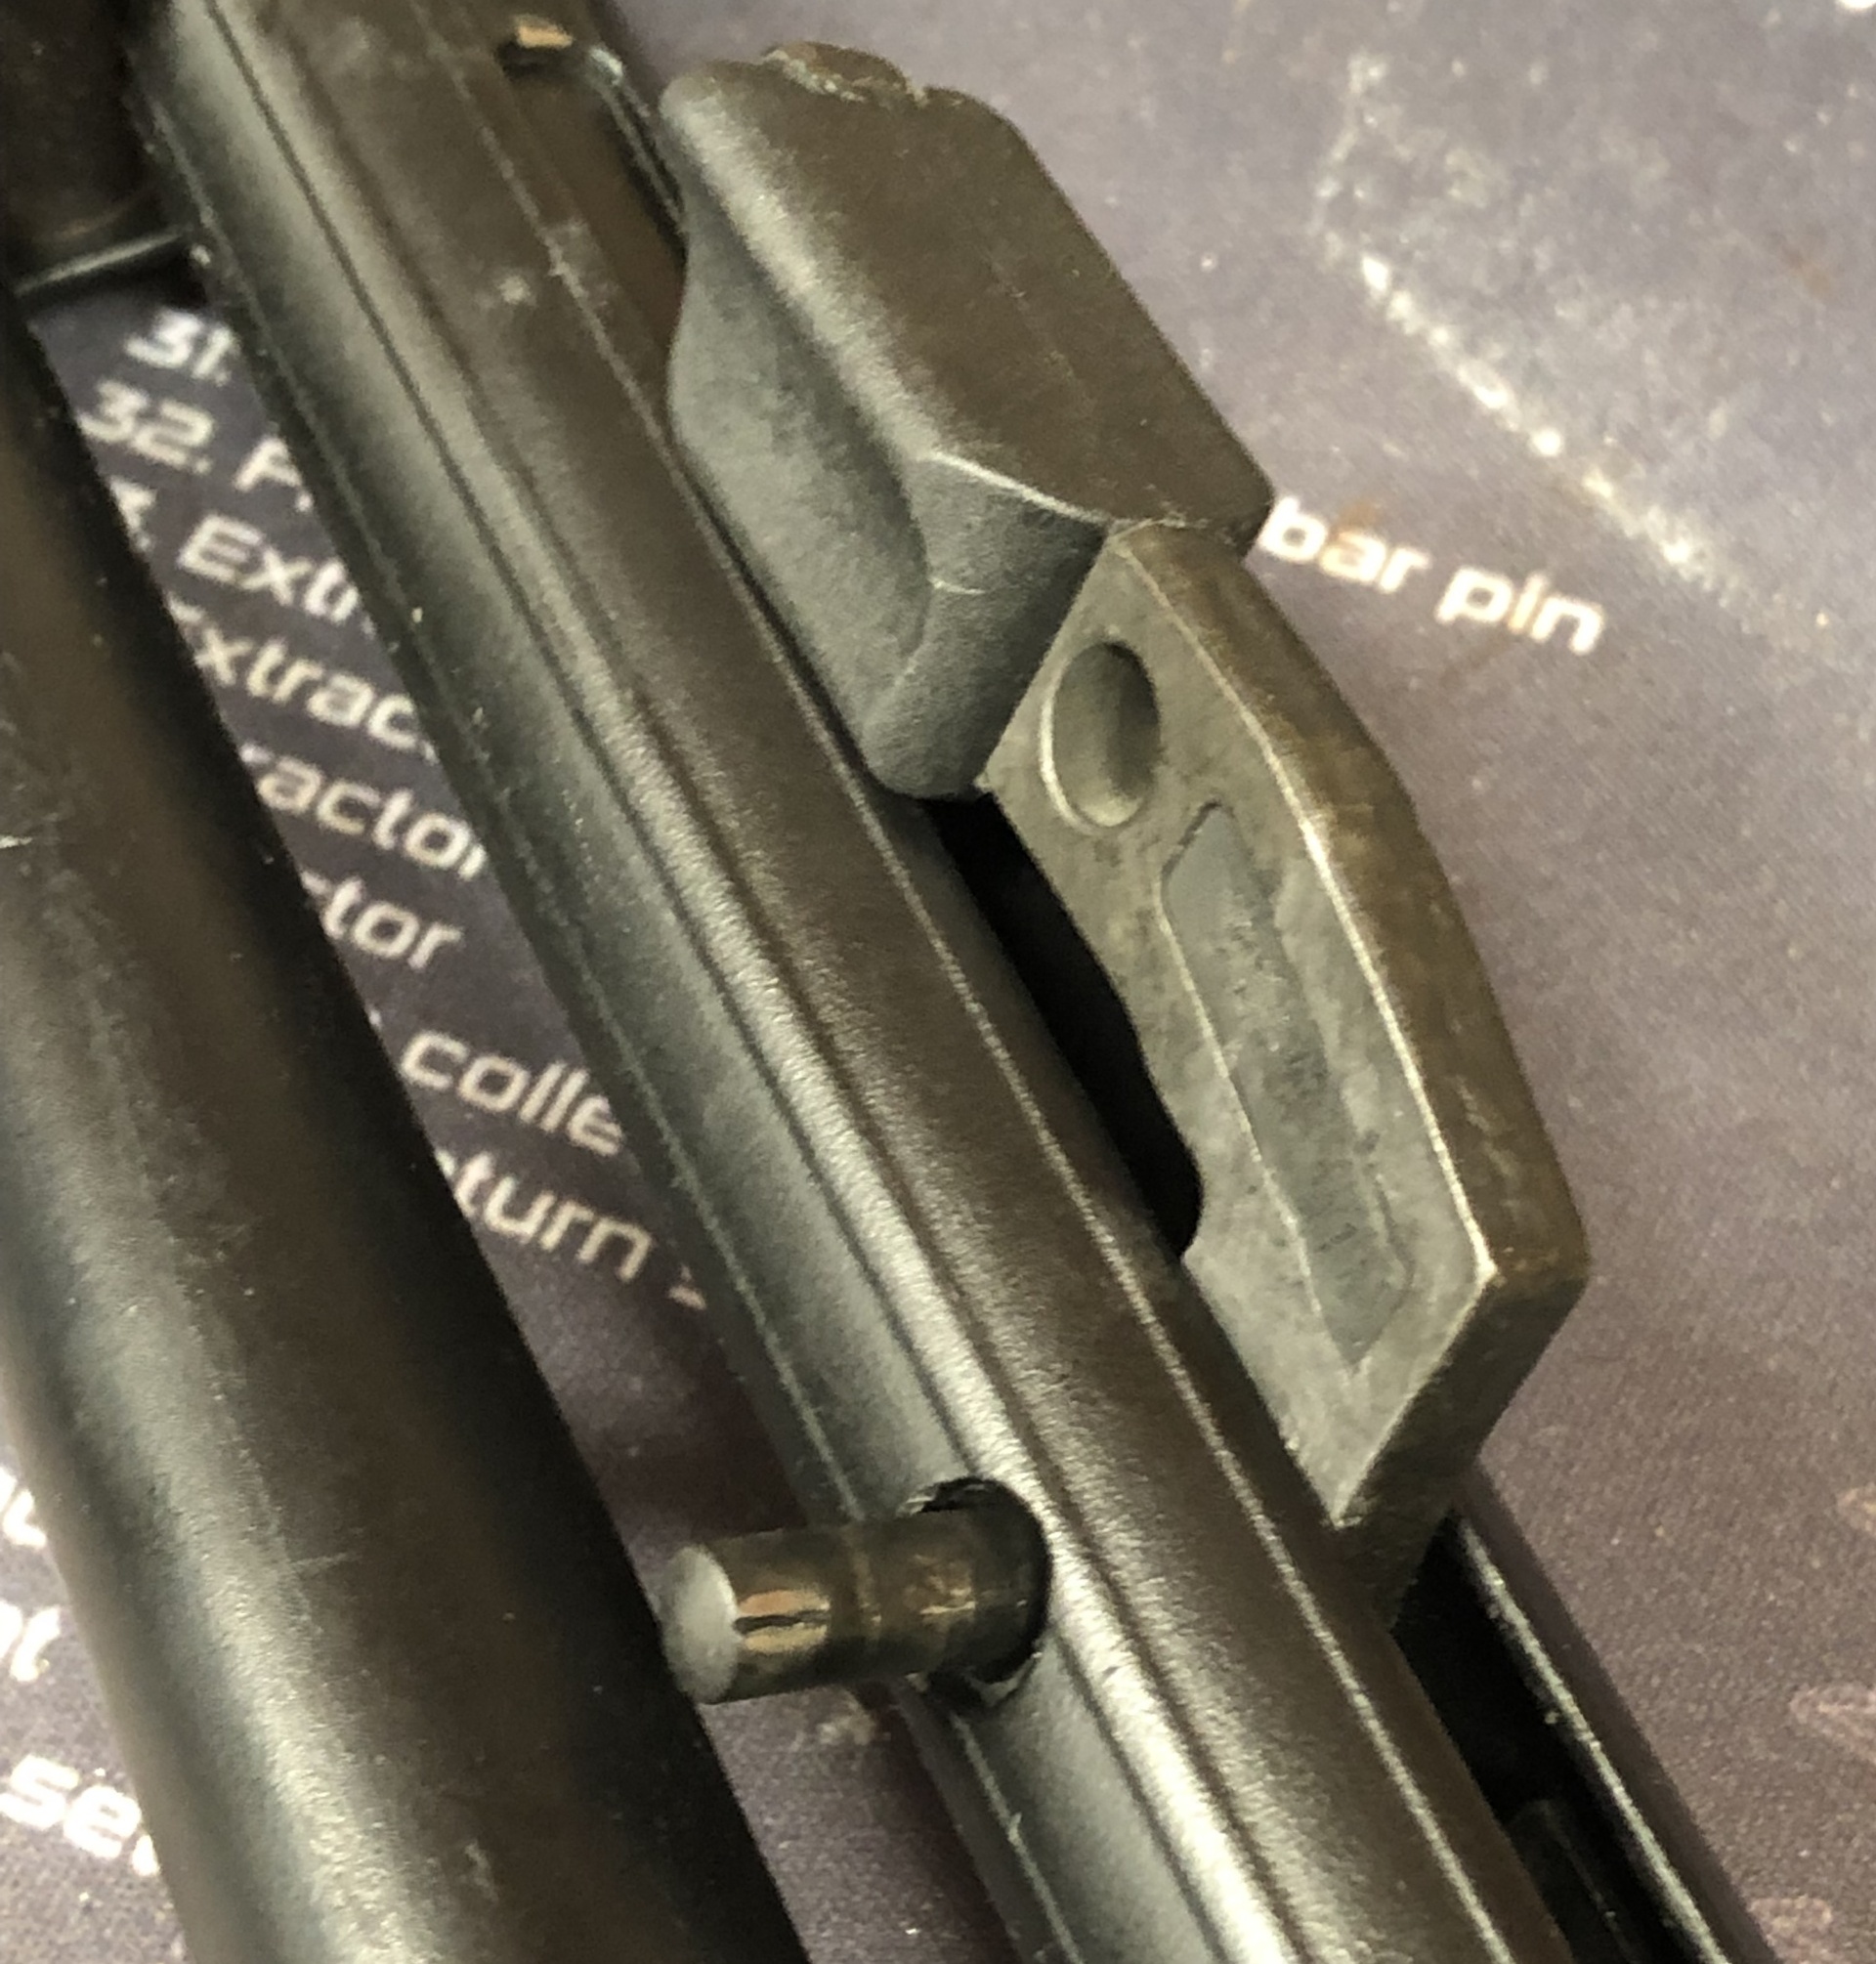
Roller locks are often painted after the sights are installed, so the front sight is functionally glued in place. Don’t expect it to just fall out. I rested the body of the punch against the side of the sight post and pulled on both ends to pivot it out. Install the new sight and reassemble in reverse, but do cover the cocking tube with something so you don’t hit it with the hammer or punch while driving it back in.
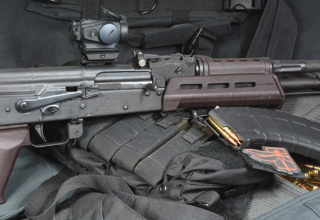
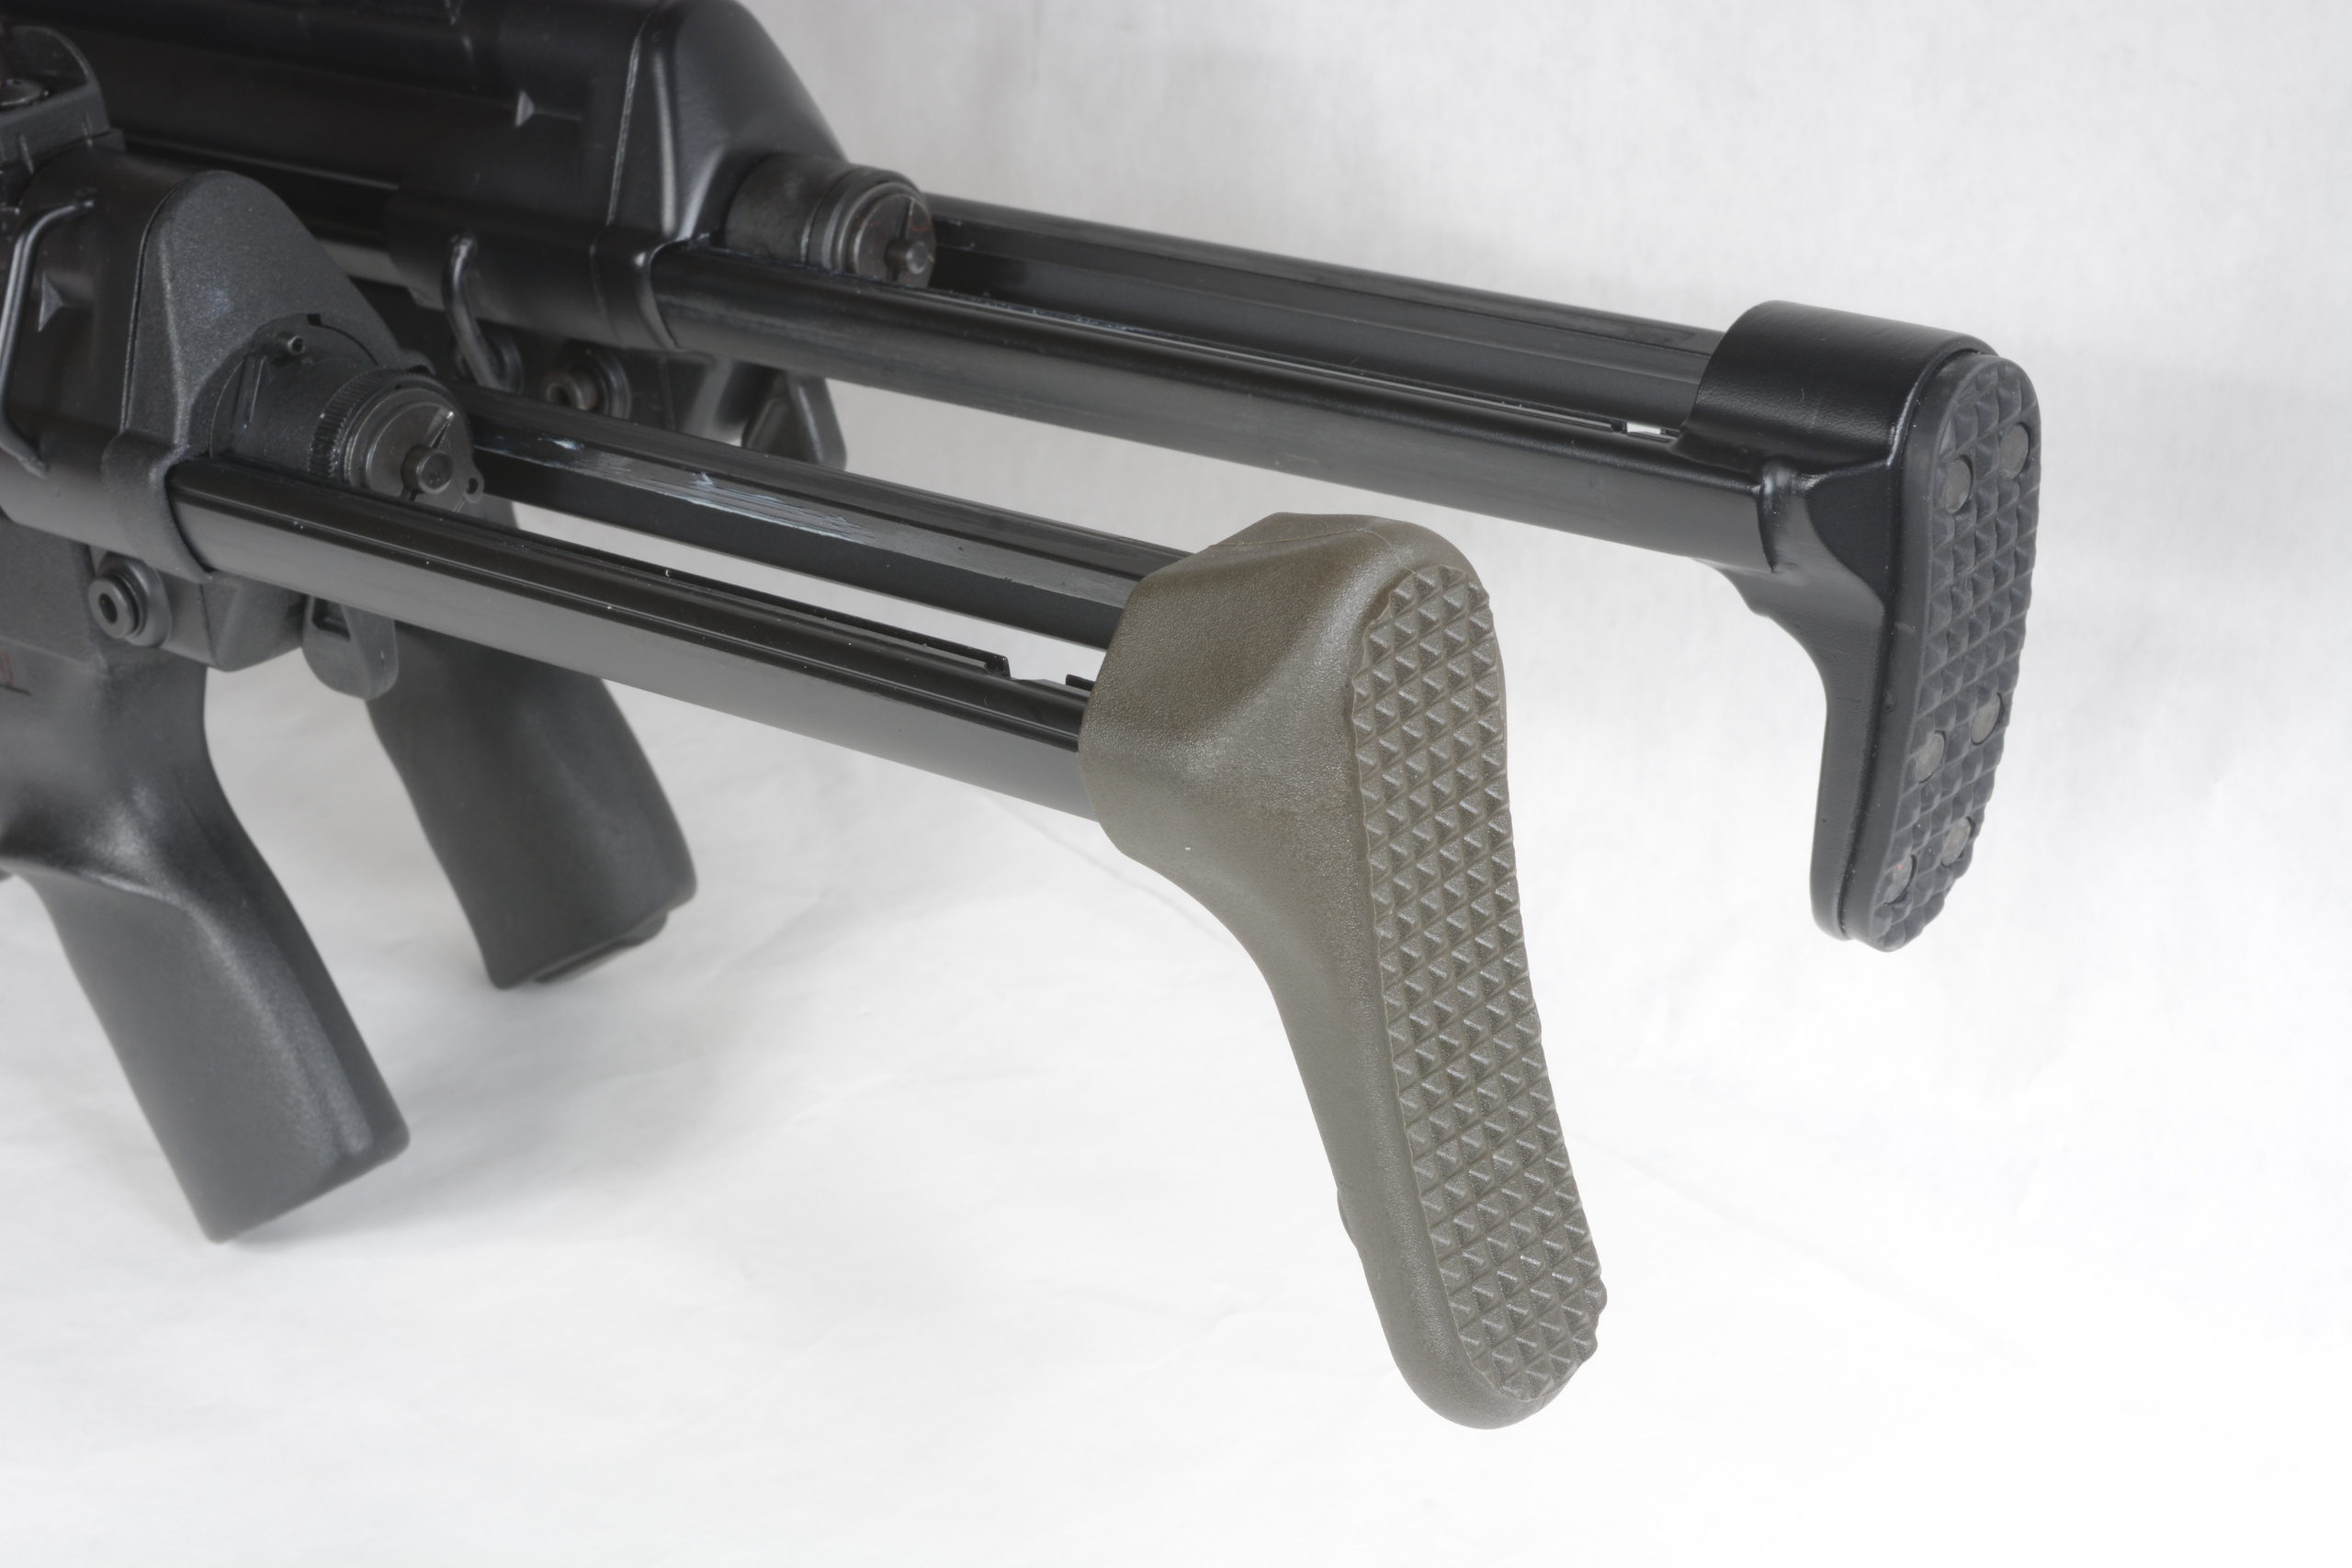
There’s nothing wrong with the stock forend—and, like the buttstock, there are many other options—but it’s a bit shorter than the original one on HK53’s, which stretched noticeably closer to the magwell. Along with the A3 stock, the addition of a longer one from Gatewood Supply gives the gun more of the the classic look of the early SAS guns.
Those who have swapped parts on imported guns will be familiar with 922(r), the Federal law that governs how many US-made parts have to be in a firearm in order for it to be legally assembled. That number varies by firearm (as do which parts are counted), but the magic number for a roller lock like the AP53 is “seven.” This is complicated a bit because pistols are not subject to 922(r)—which means the AP53 need not have any US parts to be legal as imported. But once you make it a rifle, the rule applies.
The Dead Air Xeno muzzle device we added for the initial test is US made, as is the long forend.
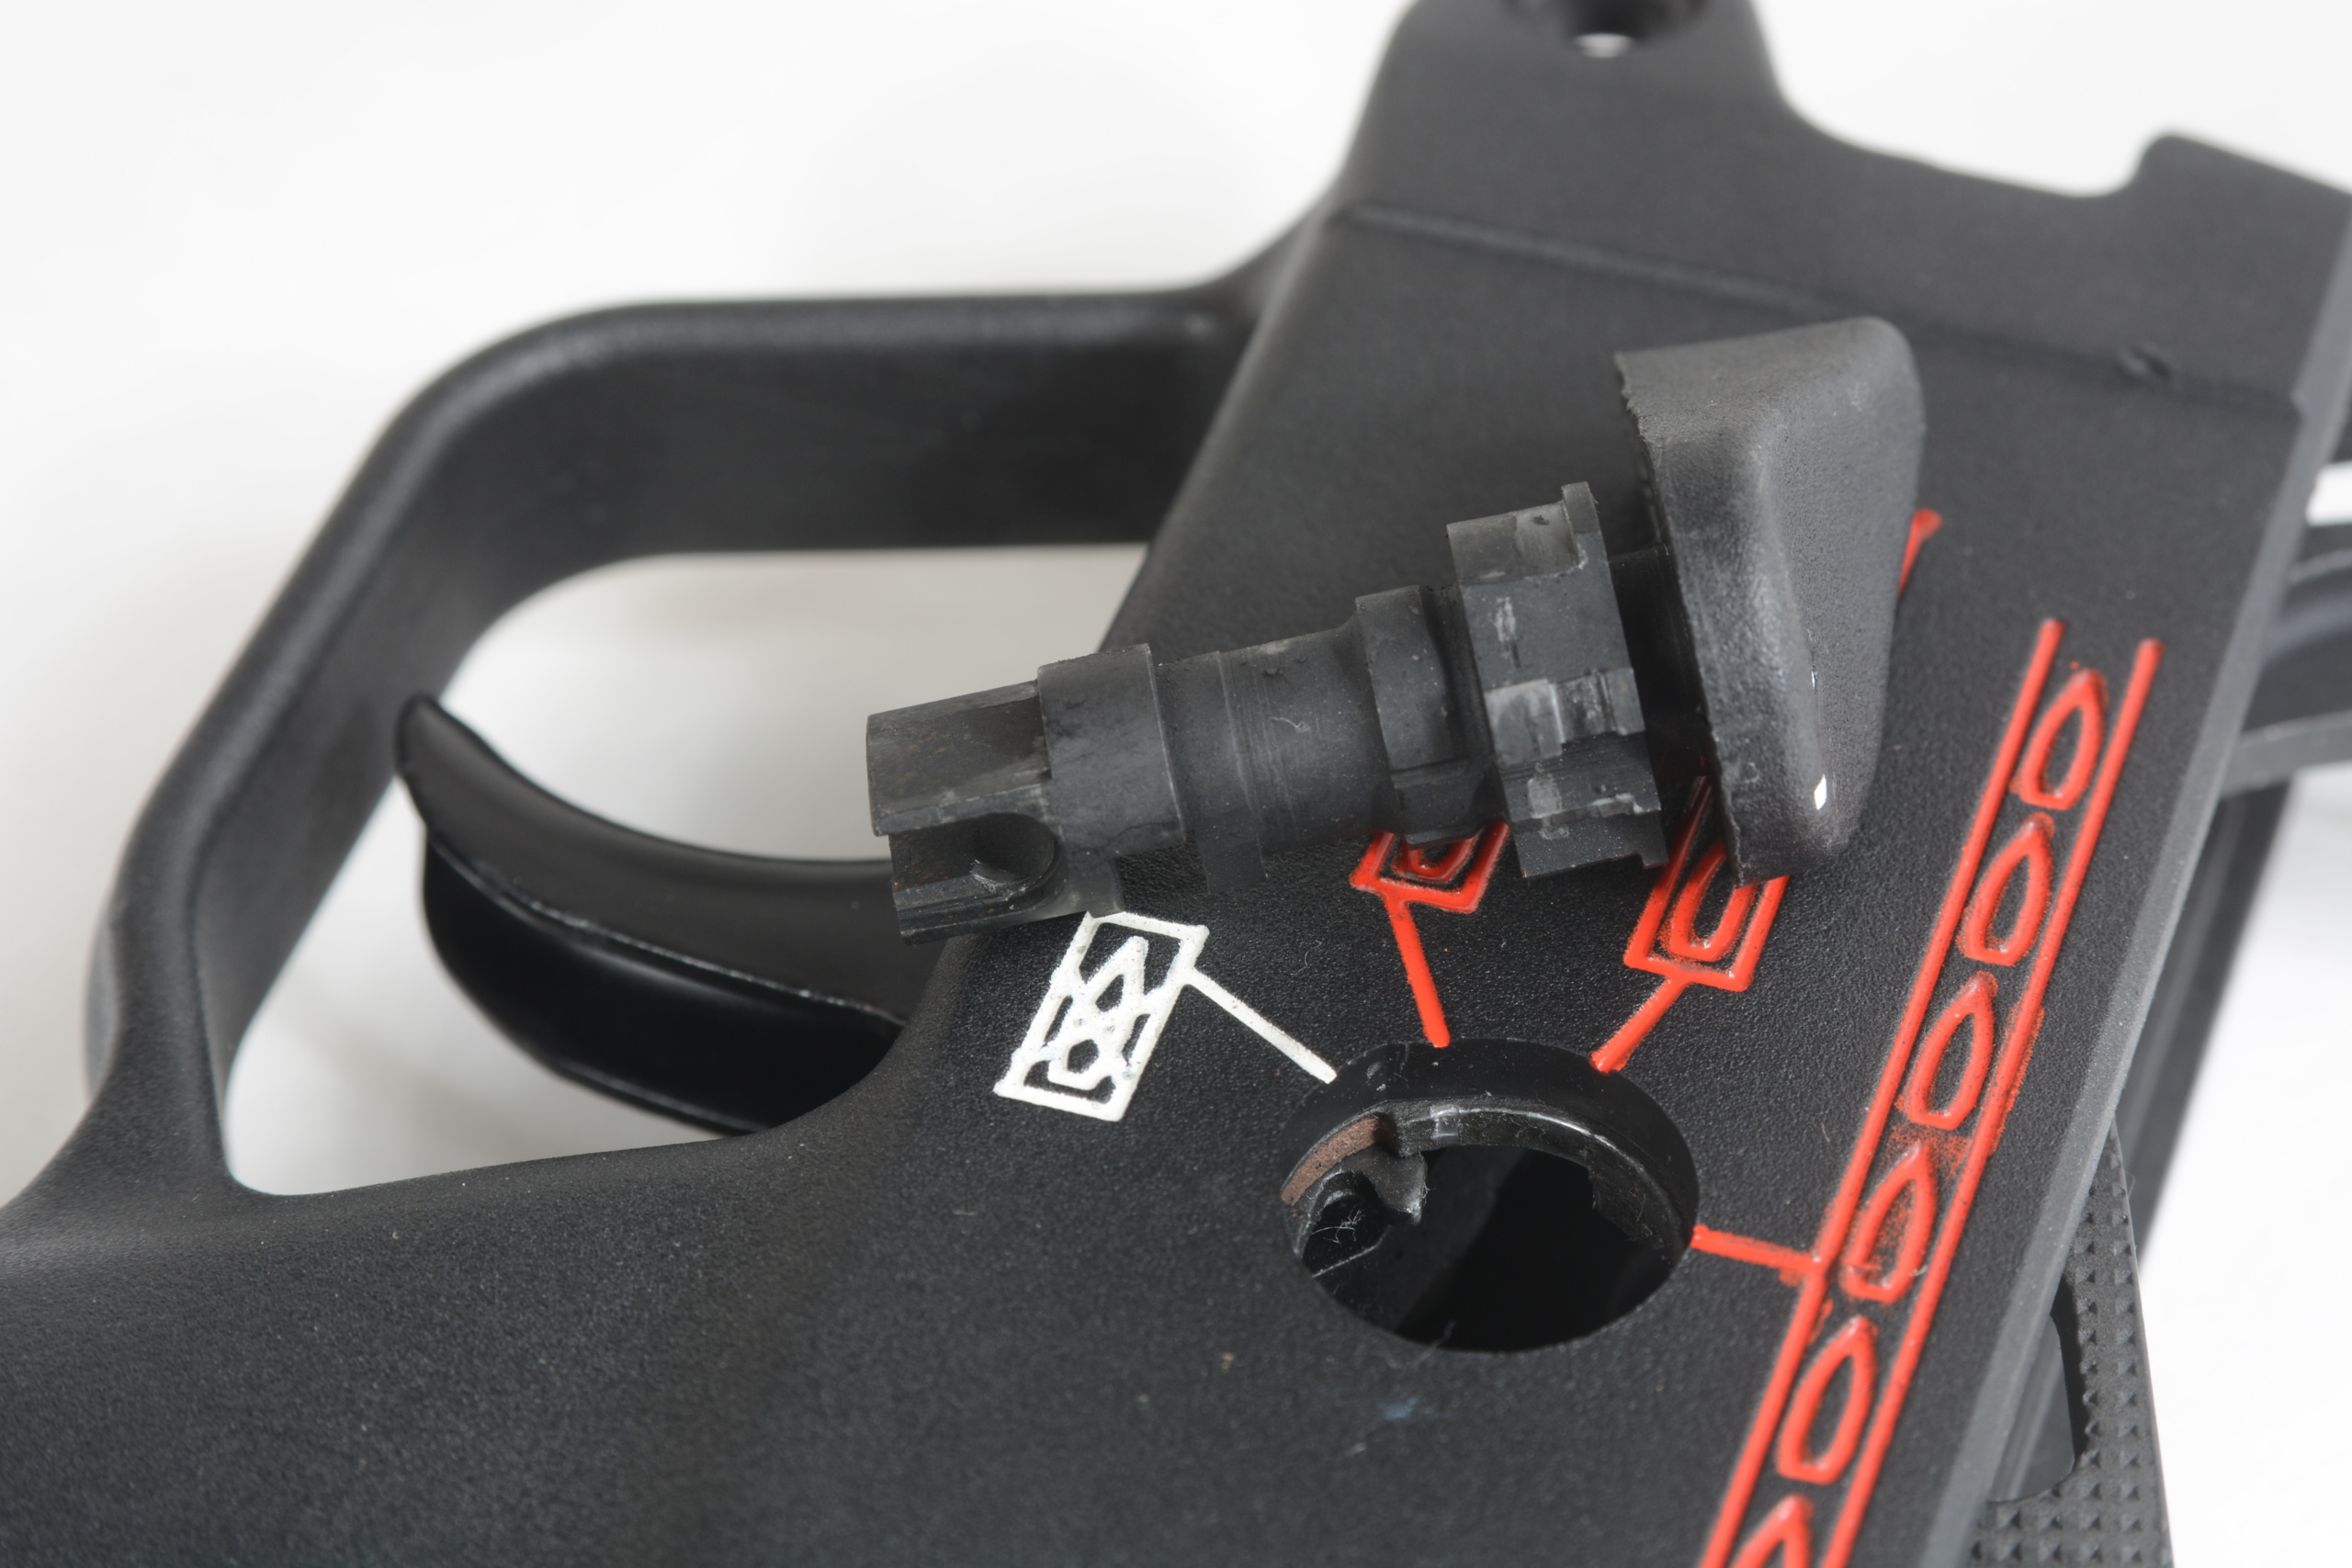
I have a bad habit of putting extended cocking handles on my .308’s, so I had a spare US-made one laying around. Installation requires field-stripping the gun and moving the cocking handle back until the pivot pin is visible through a hole in the cocking tube.
Driving the pin out is a one-way-only affair —top to bottom. It often requires some force, making it very easy to damage the cocking tube in the process, but I was pleasantly surprised to find this one required but a single brisk whack with a punch to get it moving.
Also note that the AP53 cocking handle is a G3-style, not the expected .223 style one found on 93/33 rifles. These three parts still leave us four short, bringing us to one of the most functional improvements you can make to a roller lock.
The G3 is a battle rifle, so it and its progeny have battle rifle triggers. It’s a long, generally smooth roll that breaks close to the same weight as a really good double action revolver. This one measured just under 8 1/2 pounds, which isn’t terrible, but doesn’t begin to compare with an AR trigger.
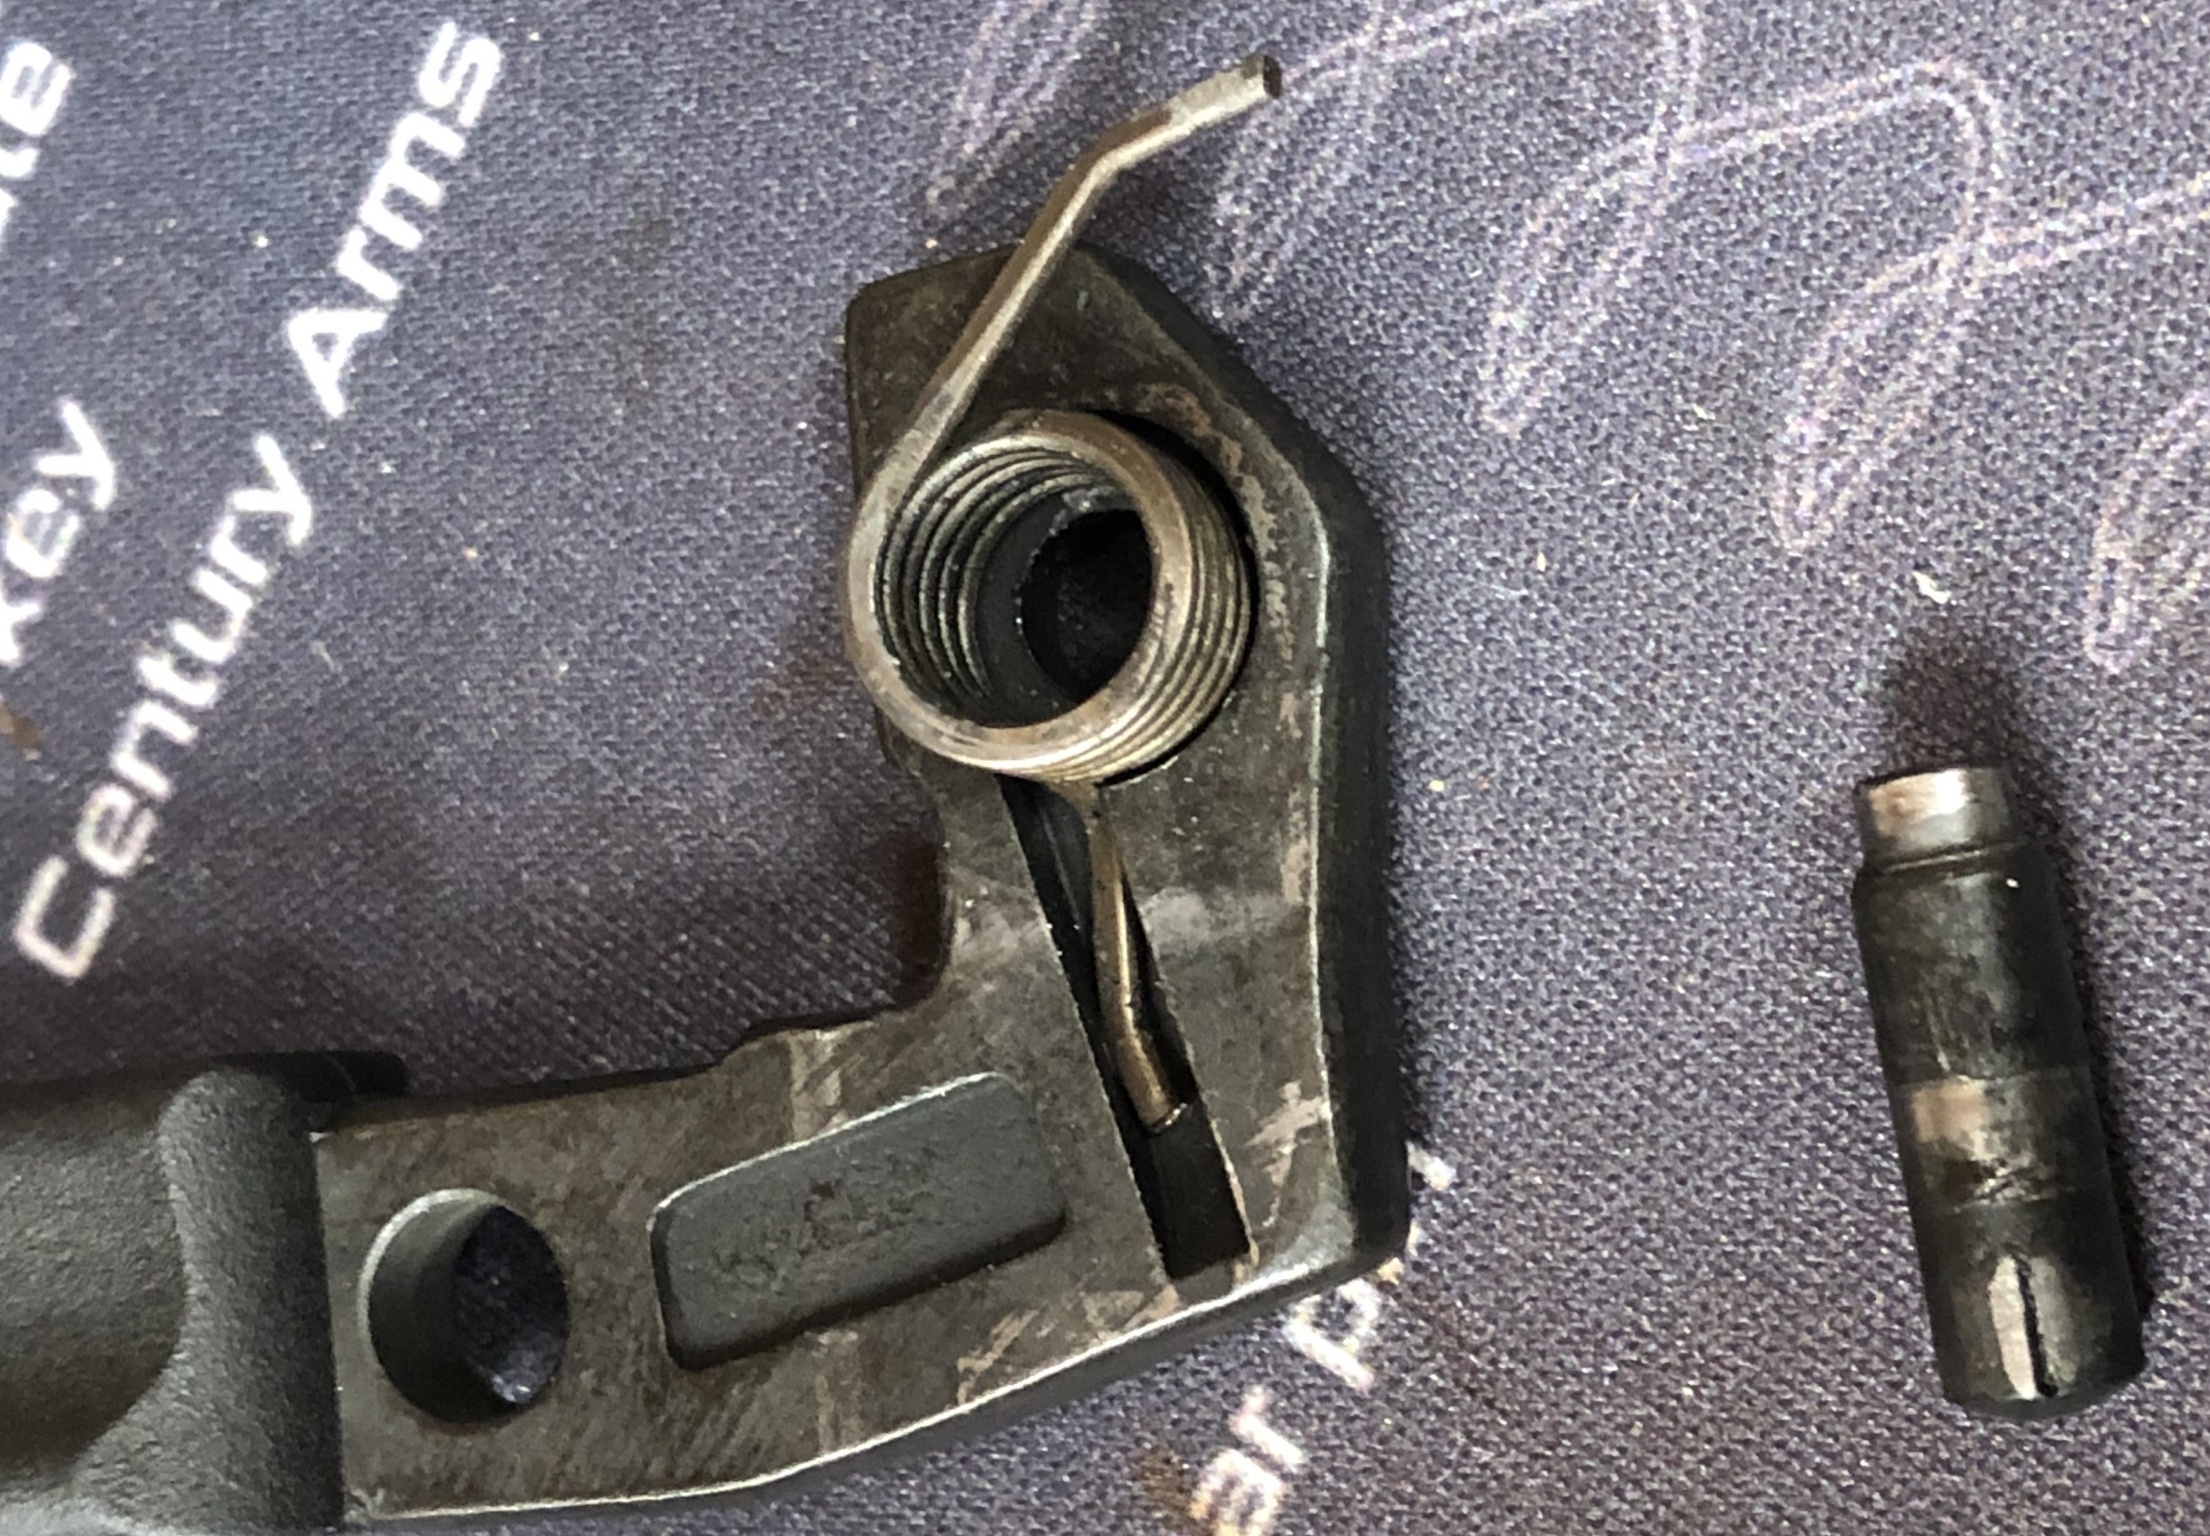
Enter Timney, well known for improved triggers for sporting rifles and even Glocks. Marketed as an MP5 trigger, the semiauto-only Timney unit comes with a Tootsie Pop (a charming bit of customer appreciation that’s a bit of a trademark) and without an ejector. There’s a good reason for this. HK designed the roller lock series guns to be modular, and the trigger packs (sometimes called “cassettes”) interchange among models and calibers.

Add the correct ejector for your chosen caliber (as well as its spring and axle pin) and install. I just moved over the parts from the factory trigger pack after adding a dab of grease to the friction points.
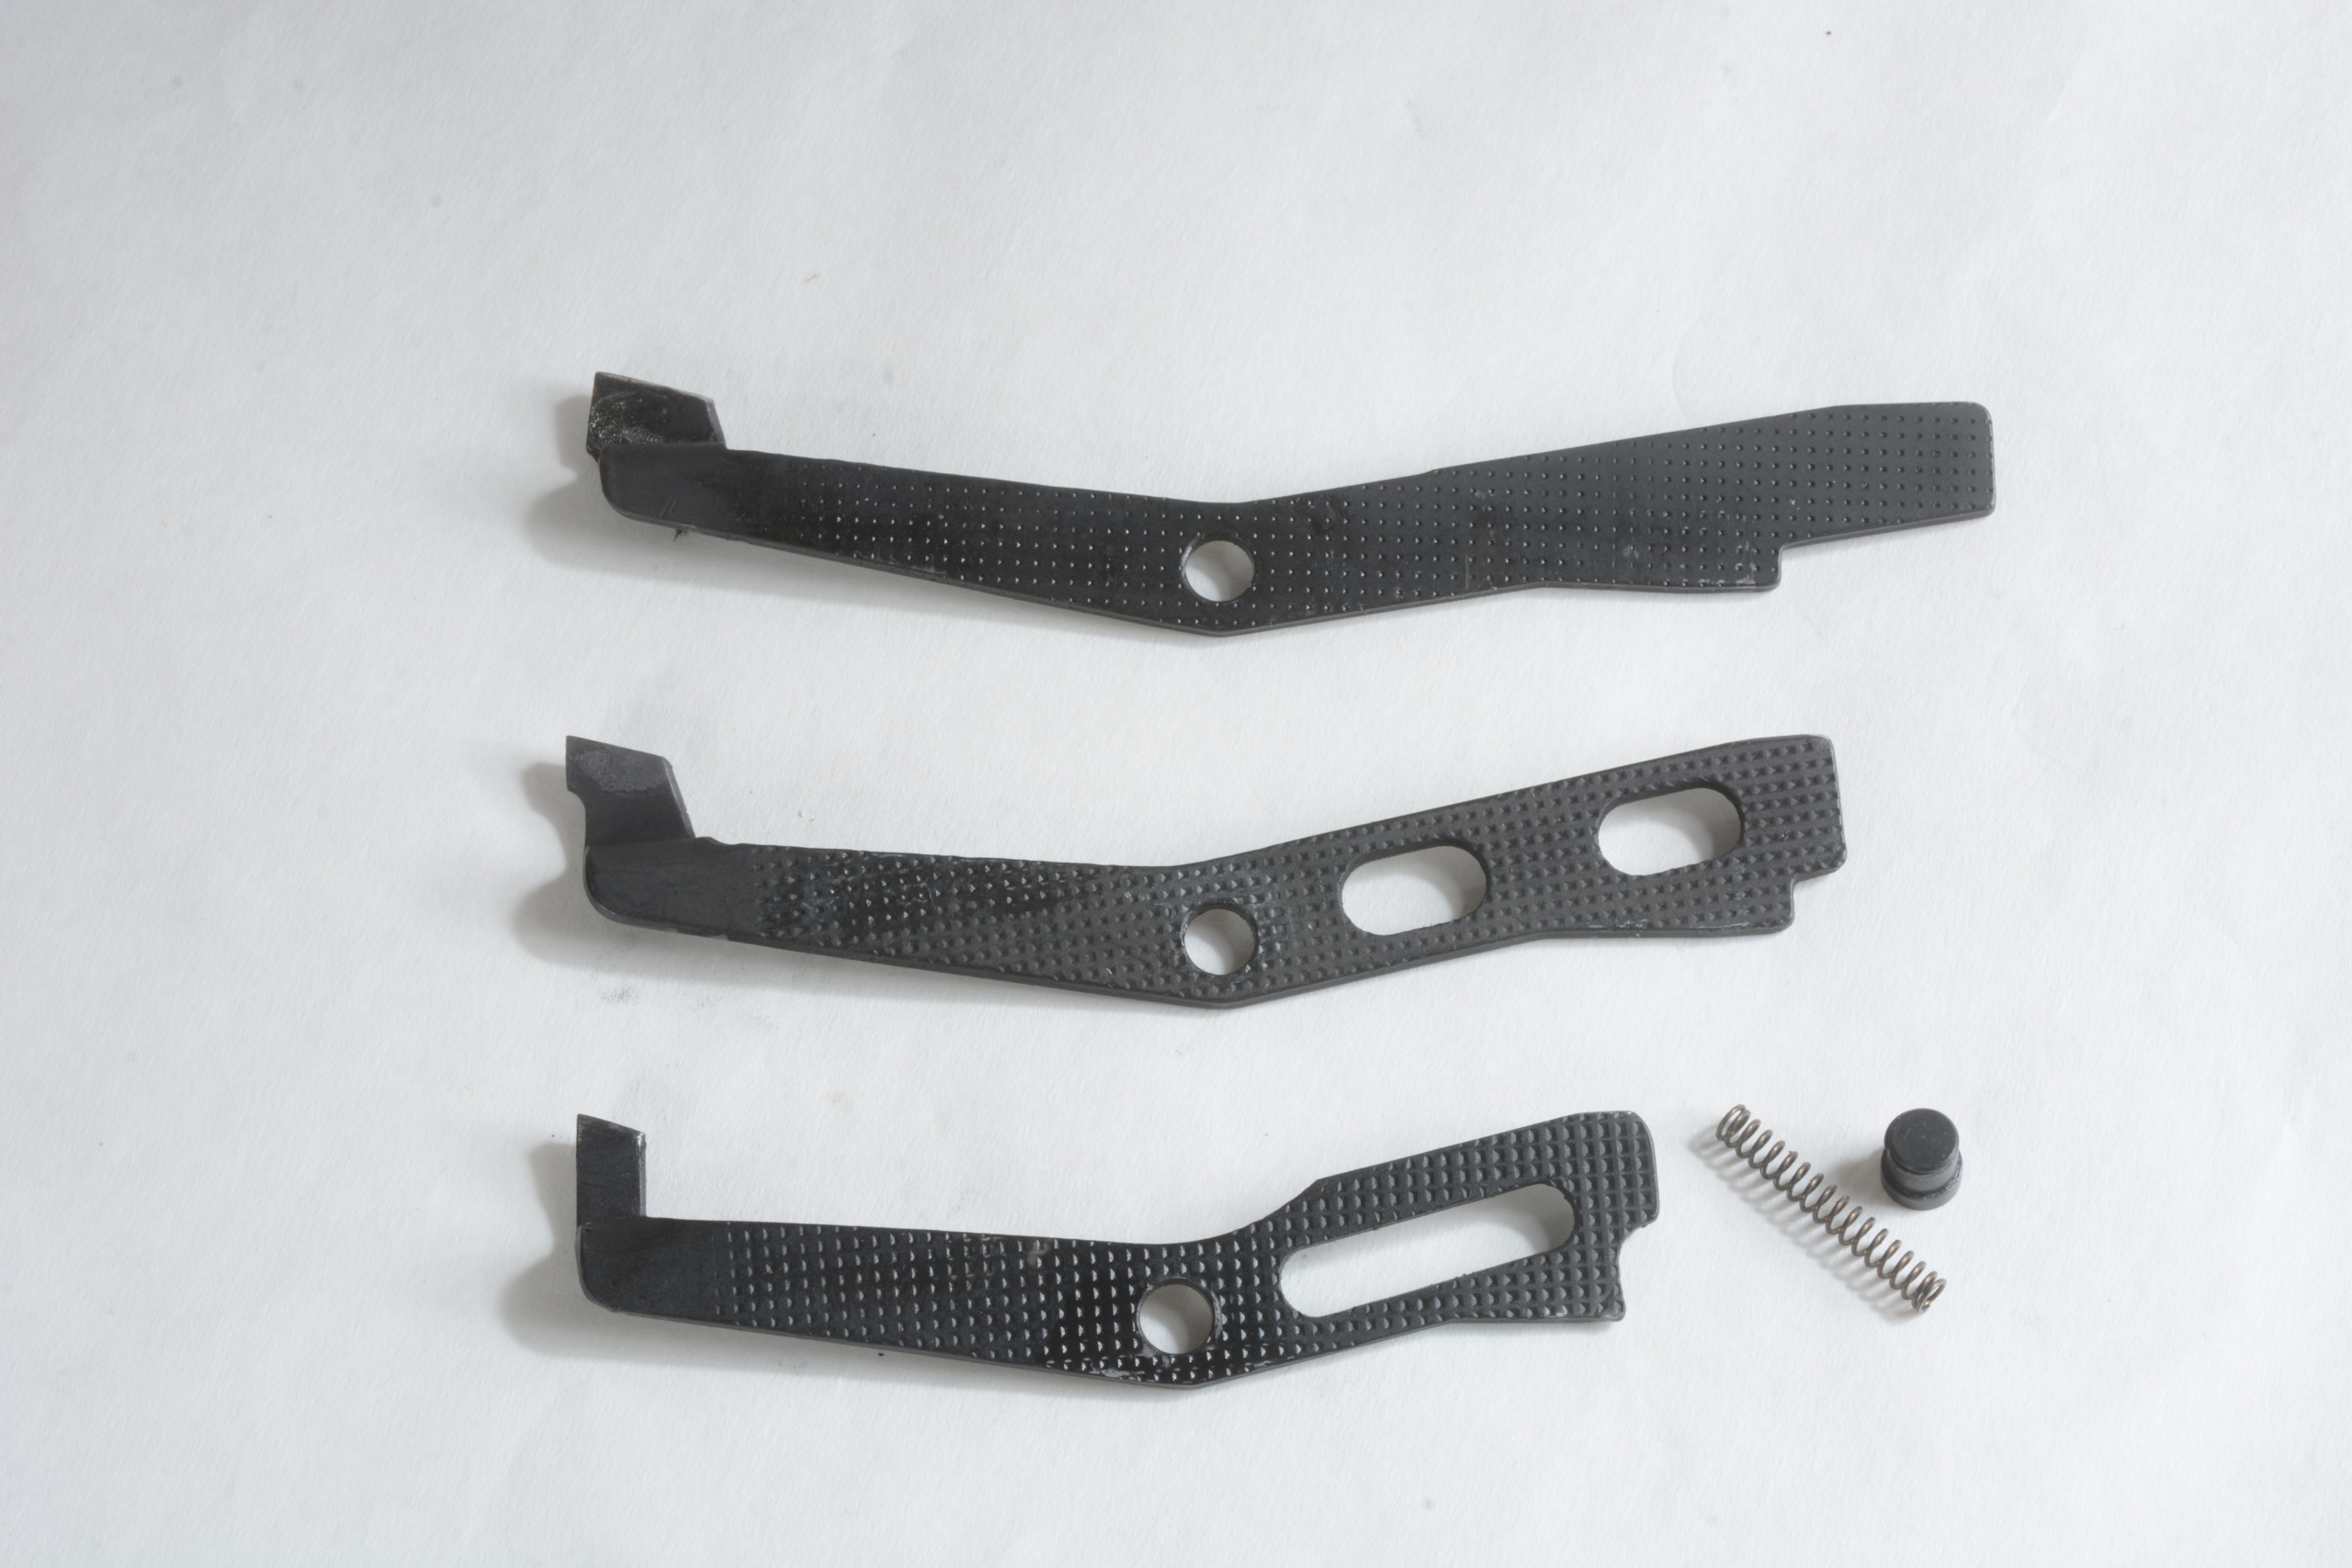
Two other things to consider with changing a trigger pack are the trigger housing and selector, which will not interchange across every variation of trigger pack. Some selectors will not render the gun safe when combined with some packs, and some housings do not have the selector detents in the right location for the safety to work correctly. Steel and polymer trigger housings both require a different axle length for the selector, and polymer housings come in a dizzying array: ambi, pictograph, contoured, etc. I replaced the four-position housing that came with the gun in favor of a contoured SUO one from Gatewood which has the correct selector locations and to me, simply looks better. Magpul makes a more modern-looking trigger housing and selector (I’ve used the latter on another project), but I went with a polymer-housing selector made of steel to keep with the early aesthetic. Slide the trigger pack down and in, align the selector tab with its notch in the trigger housing, and push it in. You’re done.
Final Thoughts
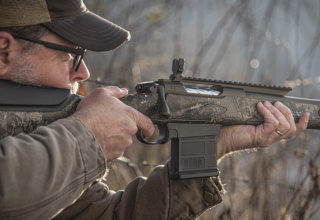
Shooting the AP53 in SBR form makes it immediately clear why its inspiration was preferred by the SAS and other elite units. It’s compact, especially with the collapsible A3 stock, which extends smoothly and locks solidly once extended. It’s reliable and more accurate than it has any right to be, shooting as well as the full-size G3 it’s patterned after, and just a few modifications make it even more user friendly. I don’t know how long Century will be importing this particular model, but I hope it’s for a long, long time.
- Making the Century AP53 a Short-Barreled Rifle - June 3, 2026
- HUSH 101, Part 2: Suppressors for Rimfires - April 29, 2026
- TESTED: Century Arms’ AP53 5.56mm Pistol - March 2, 2026