We’ve covered a lot of ground in our reloading series designed to help the first-time reloader to get in the game. Now, we cover a few more of the essentials tools and show how to make your first reloaded cartridge.
by Lou Patrick
In Part 2 of our extensive reloading series, we left off having full-length-resized all of our cartridge cases. Now, we pick up the trail with case trimming, as this is the next step in reloading, and we’ll bring the basic reloading process and tool overview to completion with a reloaded round of ammunition.
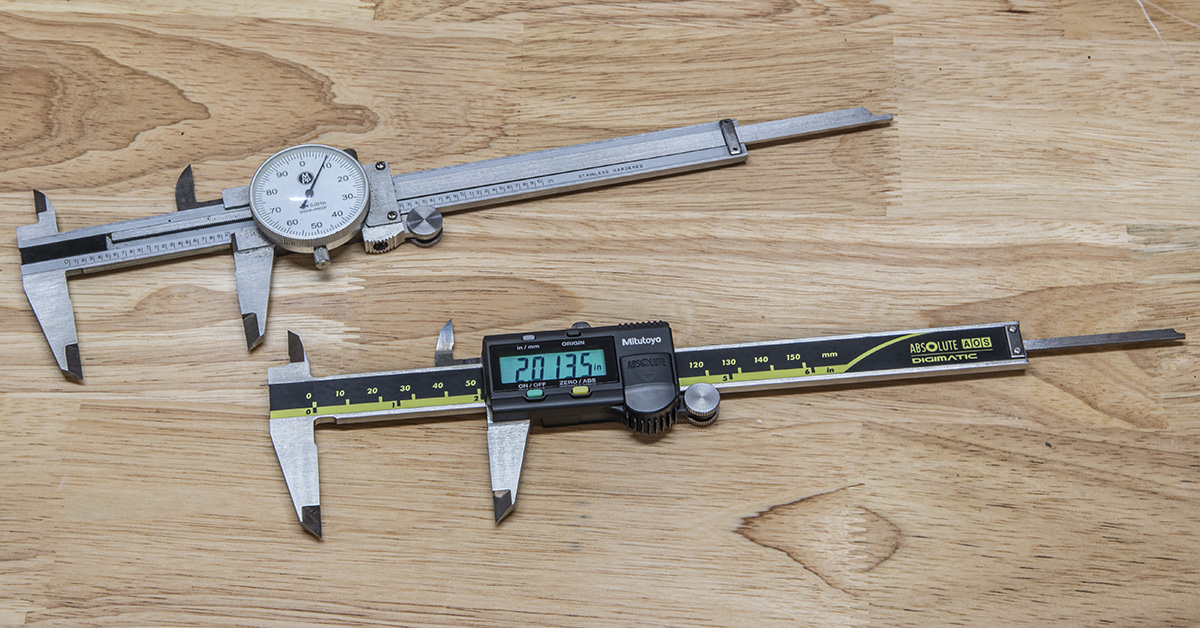
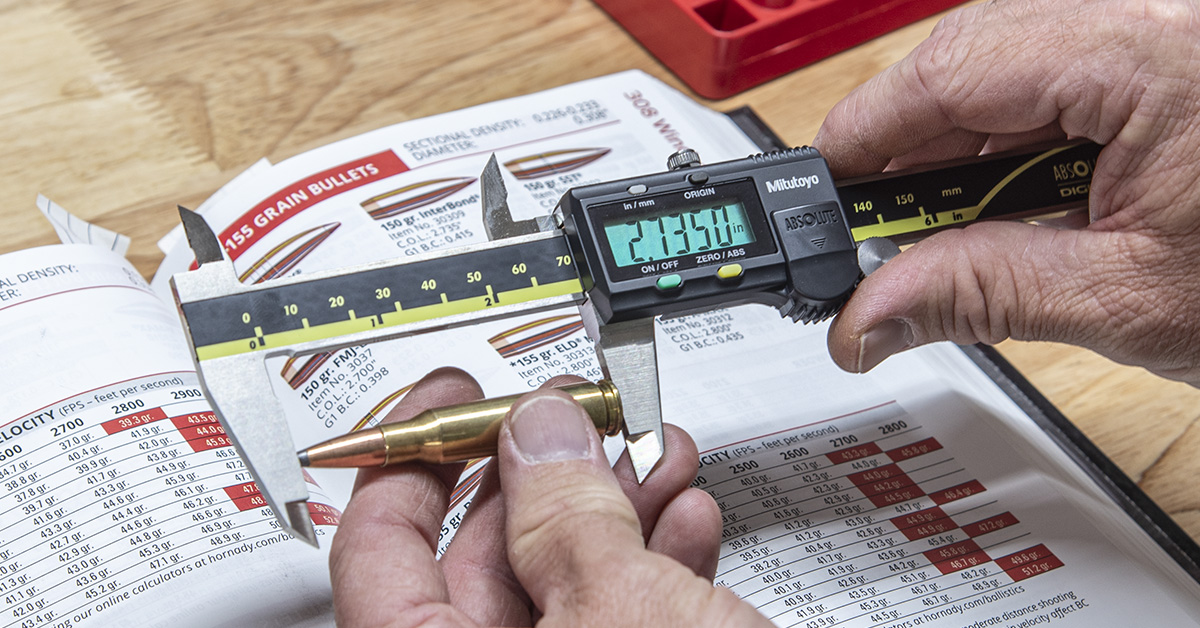
A six-inch dial or digital caliper is needed to measure case length and cartridge overall length. My preference for calipers includes those that are available from either Starrett or Mitutoyo. The only true advantage of a digital caliper is that it is somewhat easier to read, although this does create a battery dependency. If you go digital, it’s wise to have a spare battery on hand.
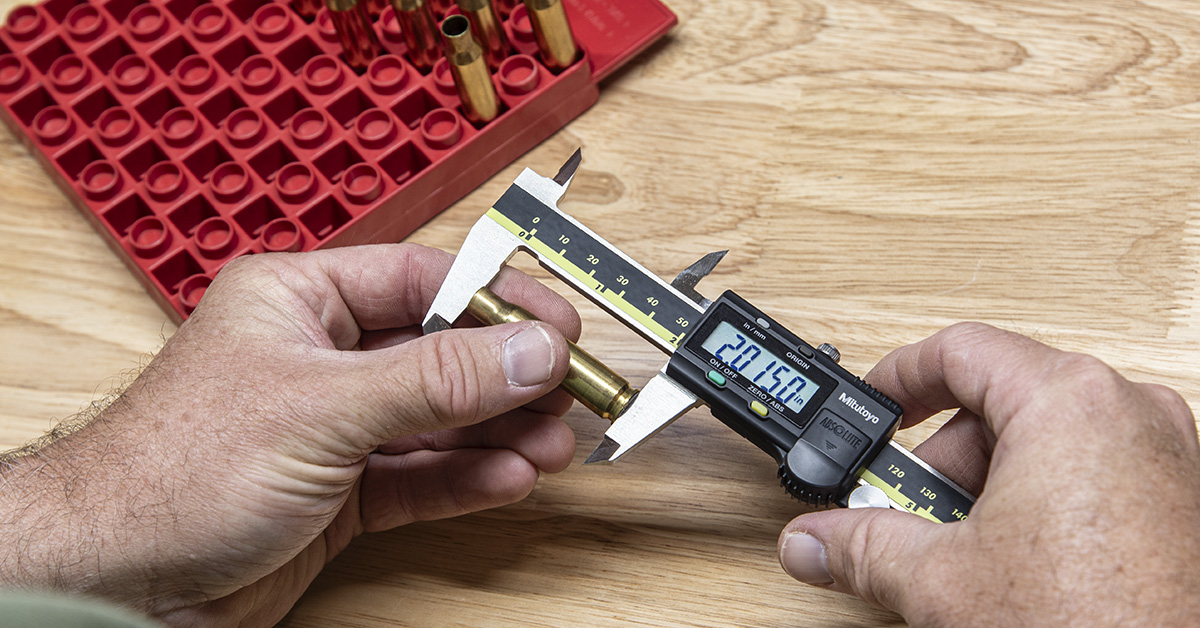
After resizing, the cases are measured to determine their length.
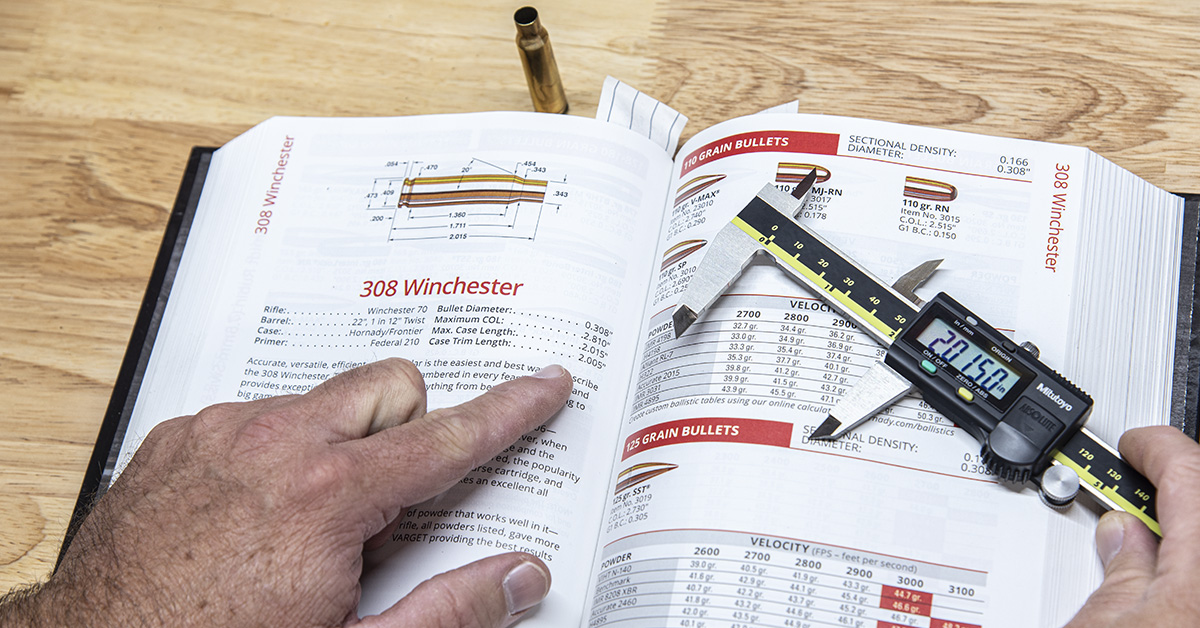
This length is then compared to the case trim-to length found within the reloading manual for that particular cartridge. Case length should not exceed the trim-to length found in the reloading manual — an unsafe condition can result by using cases that are too long. This .308 Winchester case is .010 longer than the trim-to length of 2.005 inches and therefore must be trimmed to 2.005.
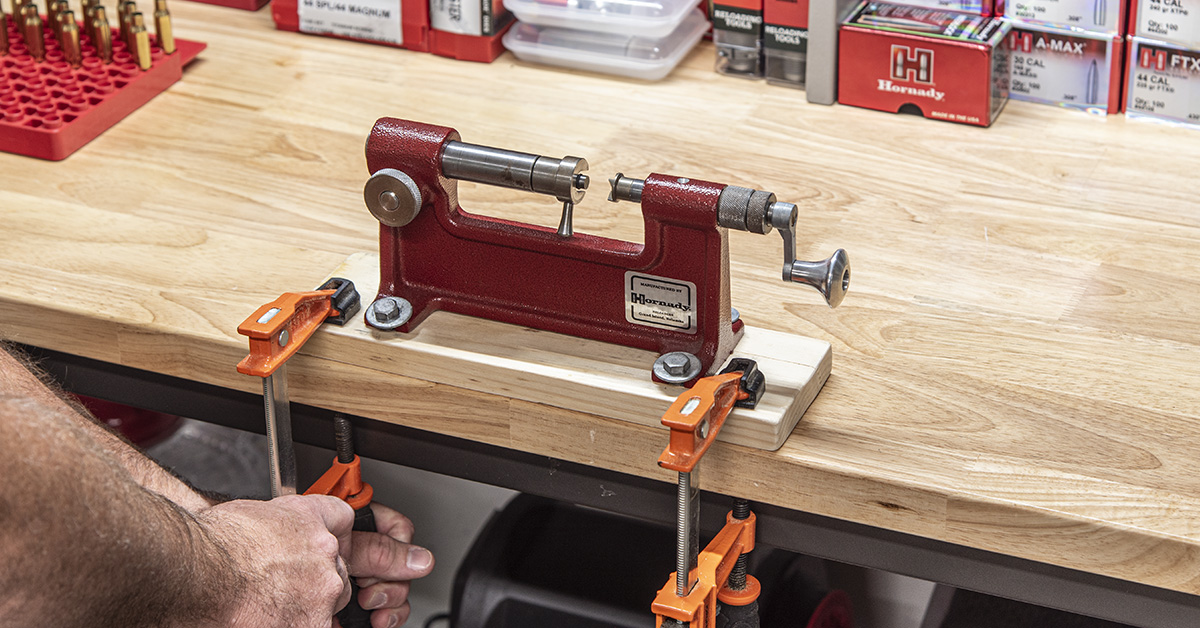
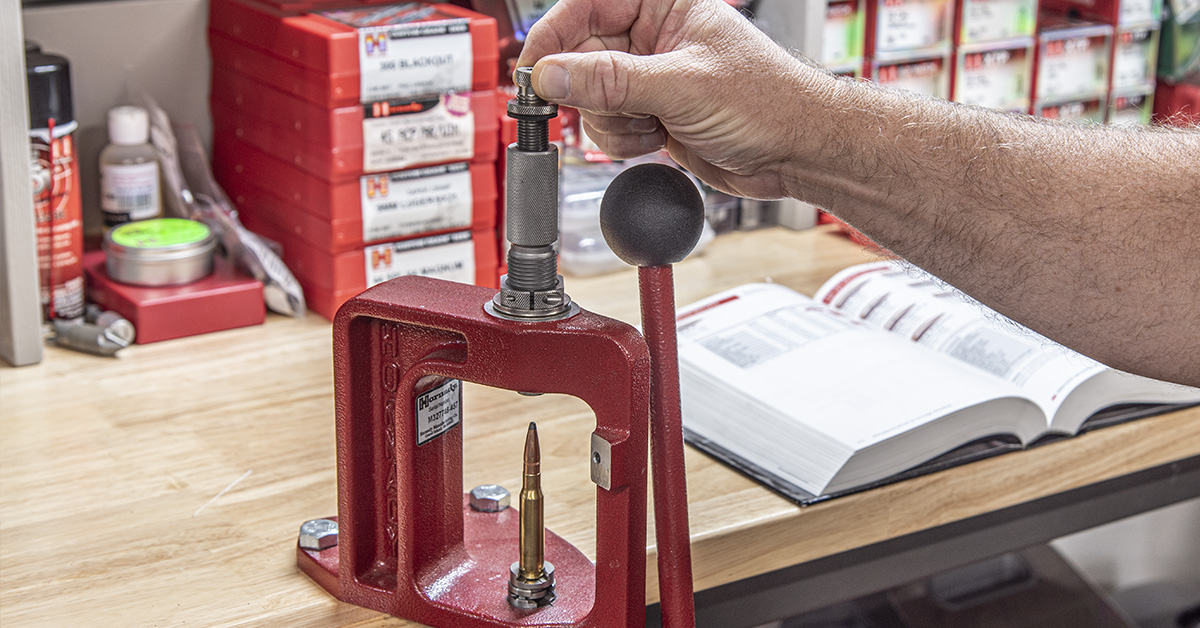
The case trimmer needs to be securely mounted to the reloading bench. This can be easily accomplished by bolting the trimmer directly to the bench. If you’d rather not put additional holes in your bench or find that the trimmer may be in the way when doing other operations if permanently mounted, a portable mount can be created by bolting the trimmer to a short piece of wood. When needed, the trimmer can then be clamped to the edge of the reloading bench as pictured.
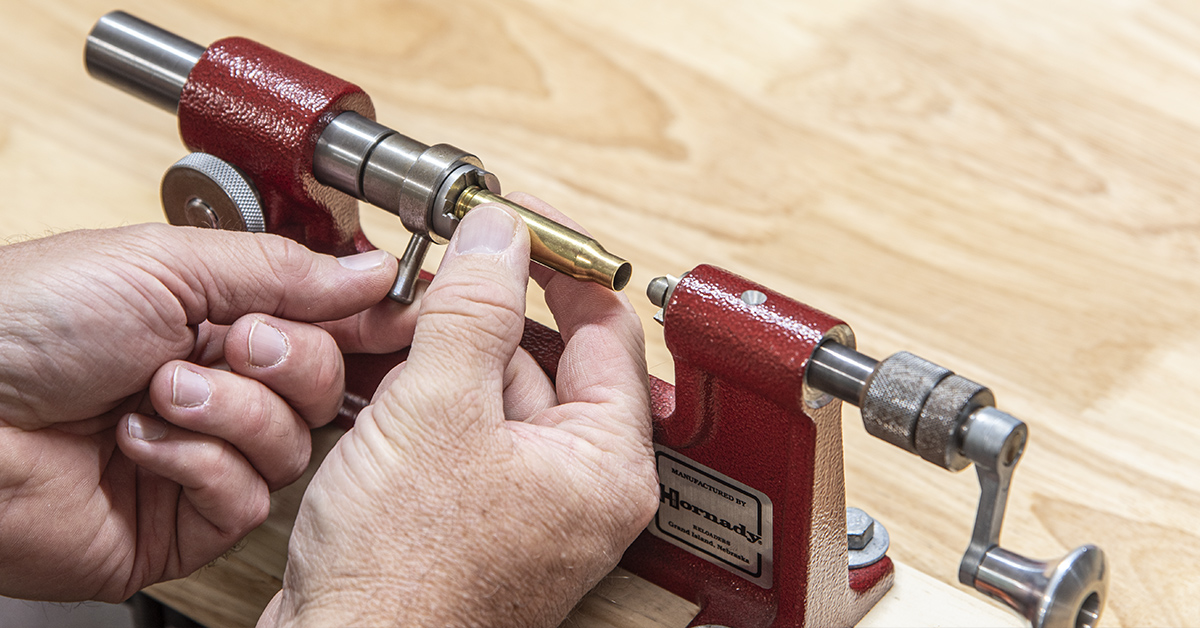
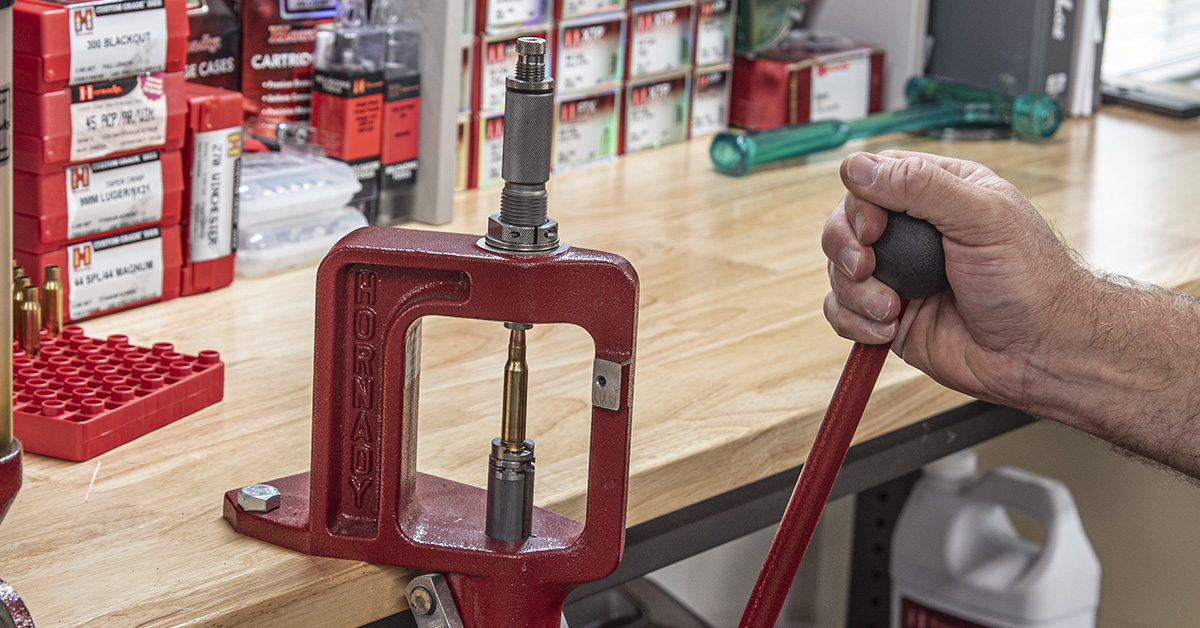
Adjust the case trimmer to produce the desired cartridge case length and trim each case accordingly.
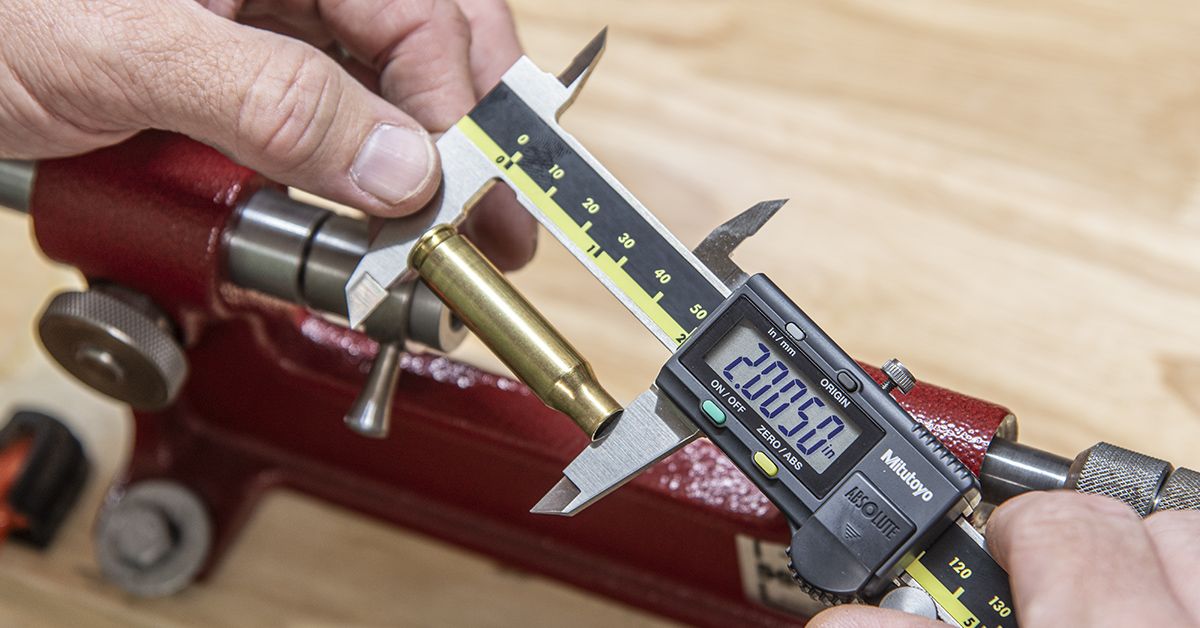
Our .308 Winchester case has been trimmed to the 2.005-in. trim-to length and is ready for the next step in the reloading process. When using a digital caliper, do not concern yourself with the fourth place to the right of the decimal point. You are only concerned with making measurements out to the third decimal place. If you find the fourth-place distracting, then cover it with a small piece of black electrical tape. There is no advantage in attempting to measure to the fourth decimal place.
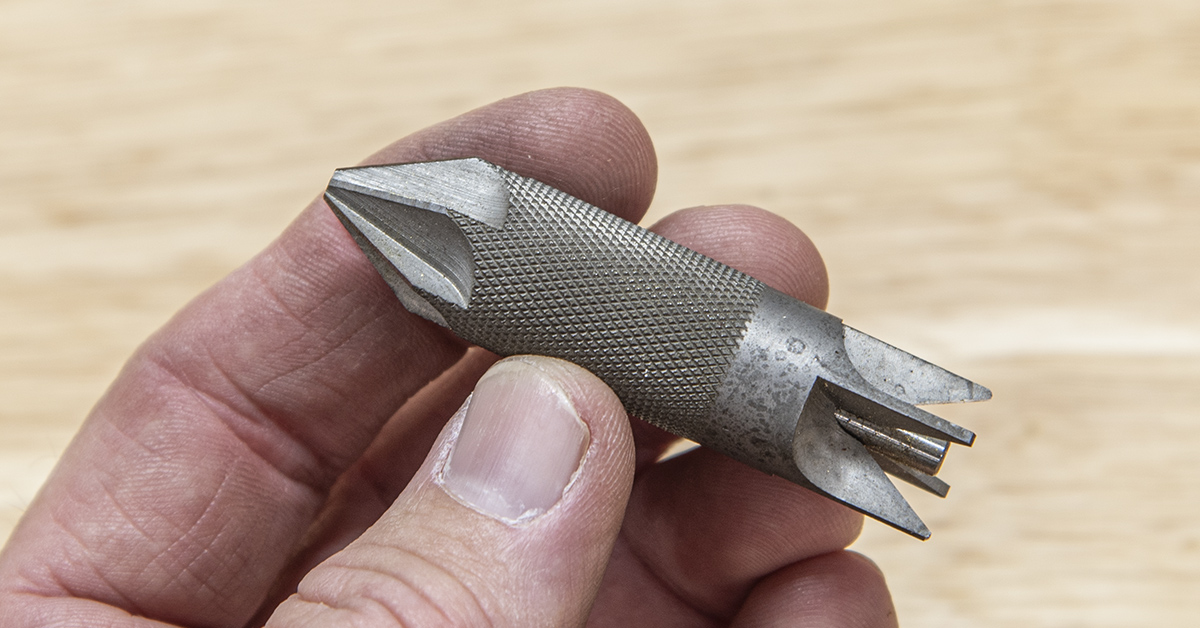
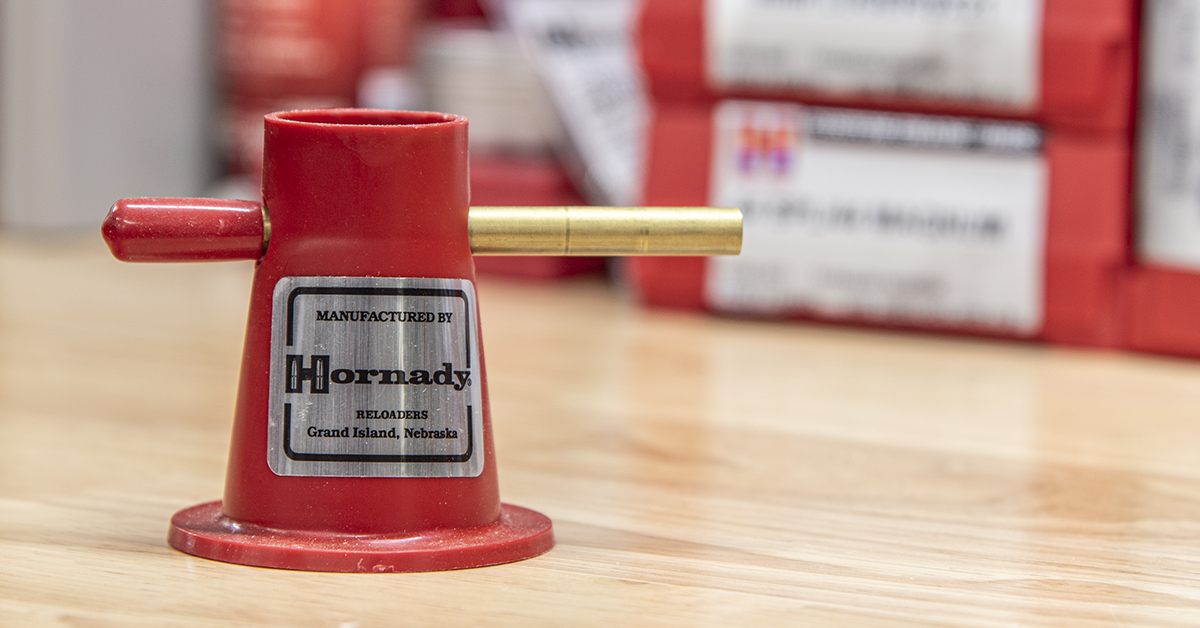
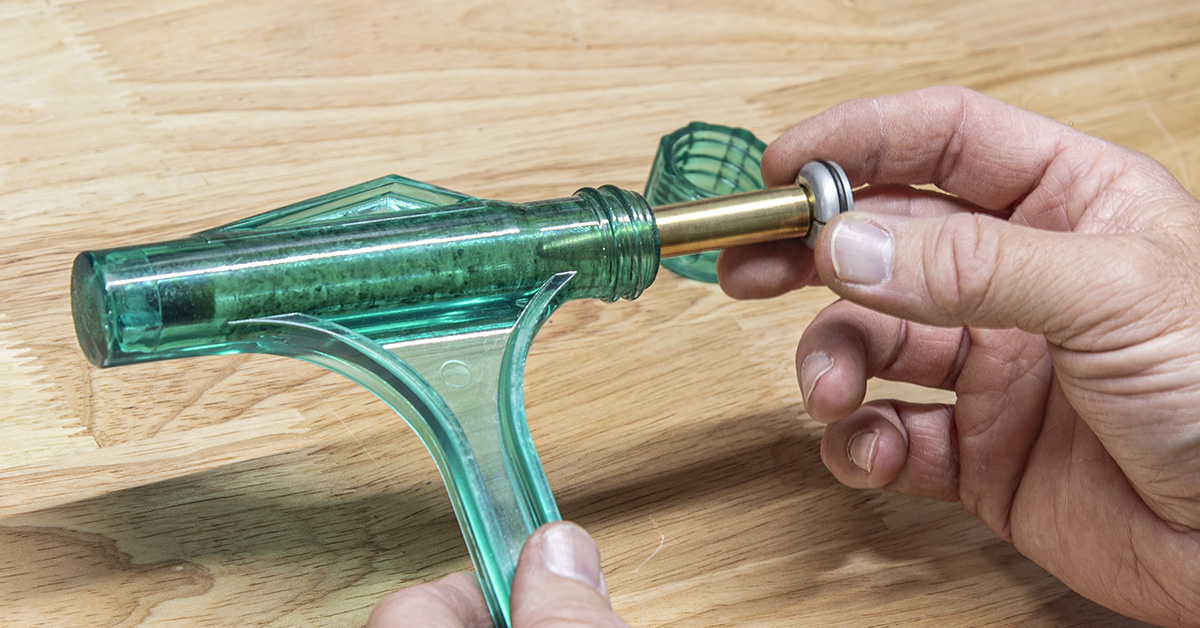
Following the case trimming process, most likely there will be a burr or somewhat of a rolled edge around the inside and outside of the case mouth. There is also going to be a square sharp edge leading into the case mouth. This sharp edge could lead to problems during the bullet seating operation. The chamfer/deburr tool pictured above is used to remove any sharp edges and burrs left behind from the trimming process.
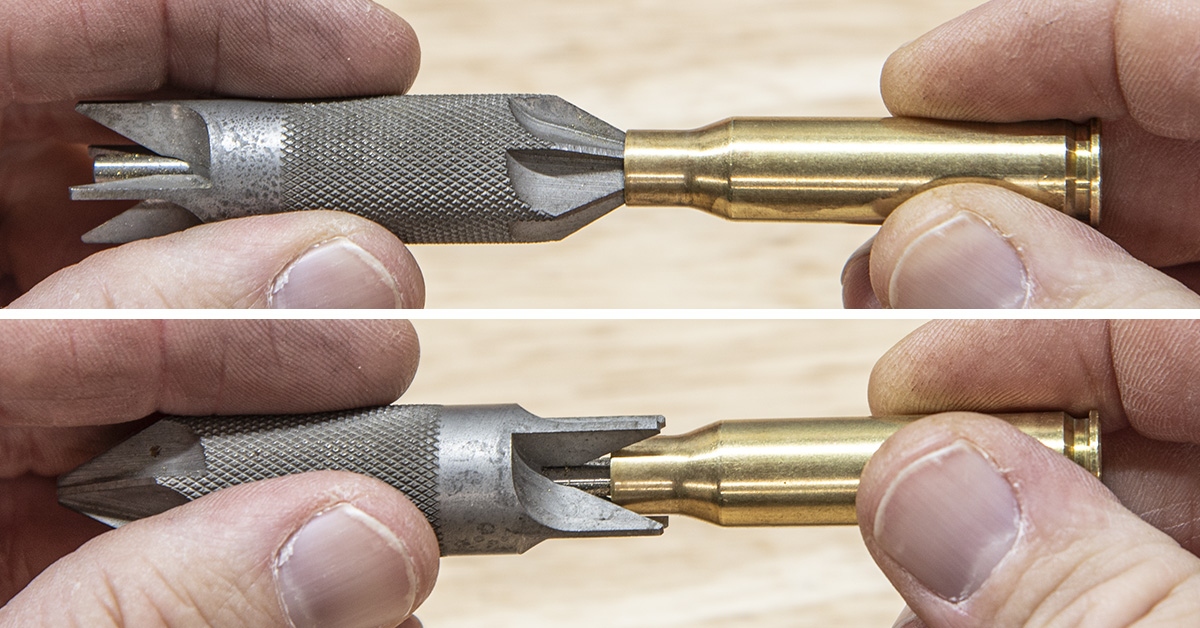
The chamfering end of the tool (top) is inserted into the mouth of the case, held straight, and rotated, cutting a slight chamfer (angle) into the mouth of the case. This effectively removes any burrs from the case trimming and provides a chamfered (angled) edge that helps to guide the bullet into place when bullet seating. The opposite end of the tool (bottom) is then used to deburr the outside of the case mouth. It doesn’t take much pressure to perform these tasks, and it only takes a twist or two of the tool to complete the task. You are not trying to make the case mouth cookie-cutter sharp.
The case trimmer and chamfer/deburr tools discussed thus far are manual tools. When I first started reloading, I don’t remember any other options available. Years later, I remember adapters becoming available that allowed these tools to be driven by a power screwdriver. The point is that the manual tools work fine and are quite capable of doing accurate work. These tools are still on my reloading bench, and I continue to use them quite often. The only potential downside of the manual tools is that of speed. They can also be somewhat difficult to use for those who have problems with their hands or wrists.
The Hornady Lock-N-Load Power Case Prep Center, while not a necessity, probably represents the greatest time-saving tool that you can bring to the reloading bench. Trimming, chamfering, and deburring under power can speed up the process a great deal and makes the job much easier. The Power Case Prep Center is also capable of performing several other tasks, such as primer pocket cleaning.
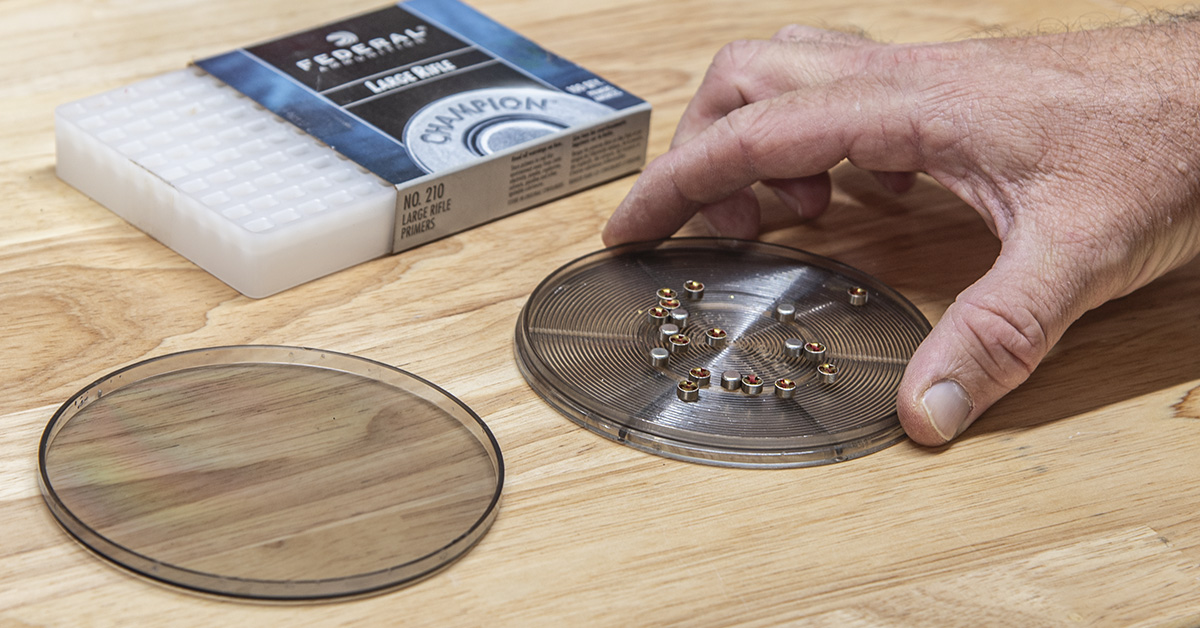
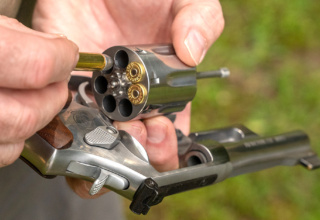
In preparation for priming, the appropriate number of primers are placed on the priming tray. Here, we are using MTM Case-Gard’s Primer Flipper. Gently shake the priming tray left and right and the grooves on the surface of the tray will properly orient the primers with the anvil side up.
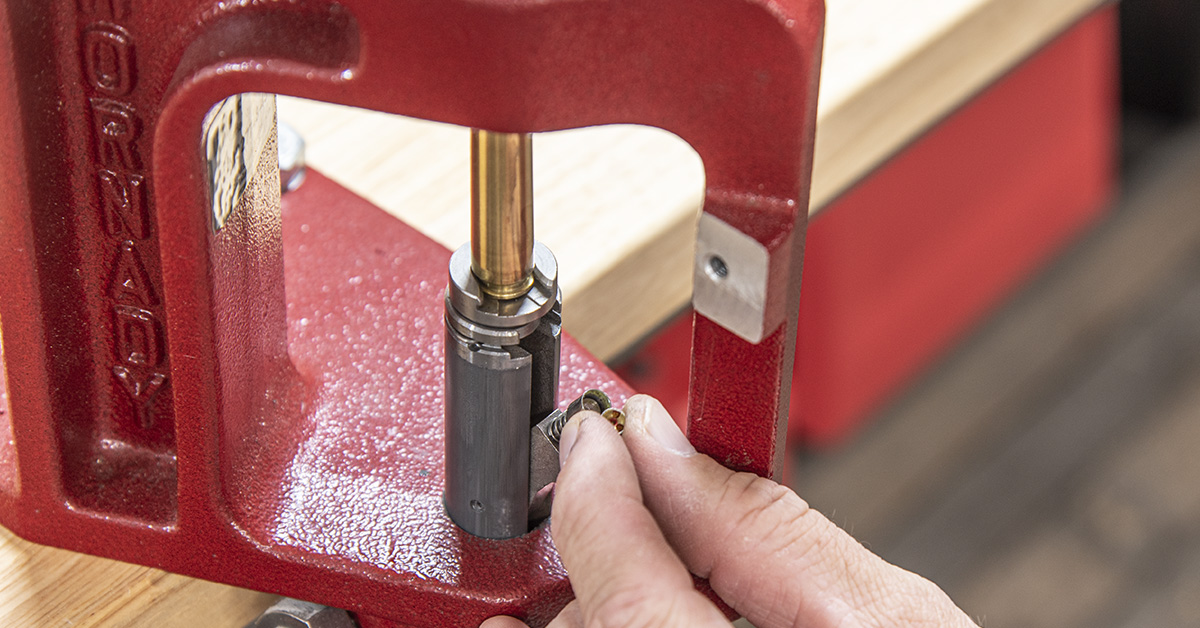
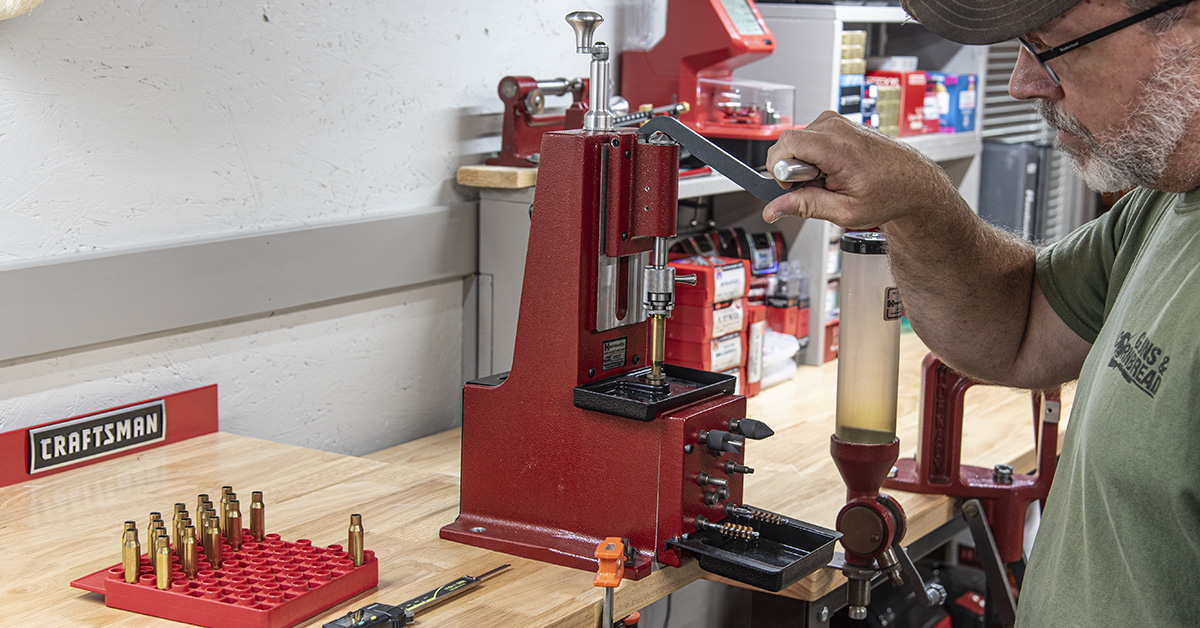
For our purposes, priming will be accomplished on the reloading press. Primers are available in different sizes. Install the proper size priming ram on your press according to the manufacturer’s instructions. To install a new primer, insert a case into the shell holder and raise the press ram, rotate the priming arm into position, and insert a new primer with the anvil side up into the priming arm.
Lower the press ram, pressing the primer into the primer pocket. It will take moderate pressure to fully seat the primer. Pay attention to the “feel” as you seat the primer. You should feel a definite stop when the primer is in place.
Once completed, the primer should be level with or slightly below the case head. Repeat this process until all the cases are primed.
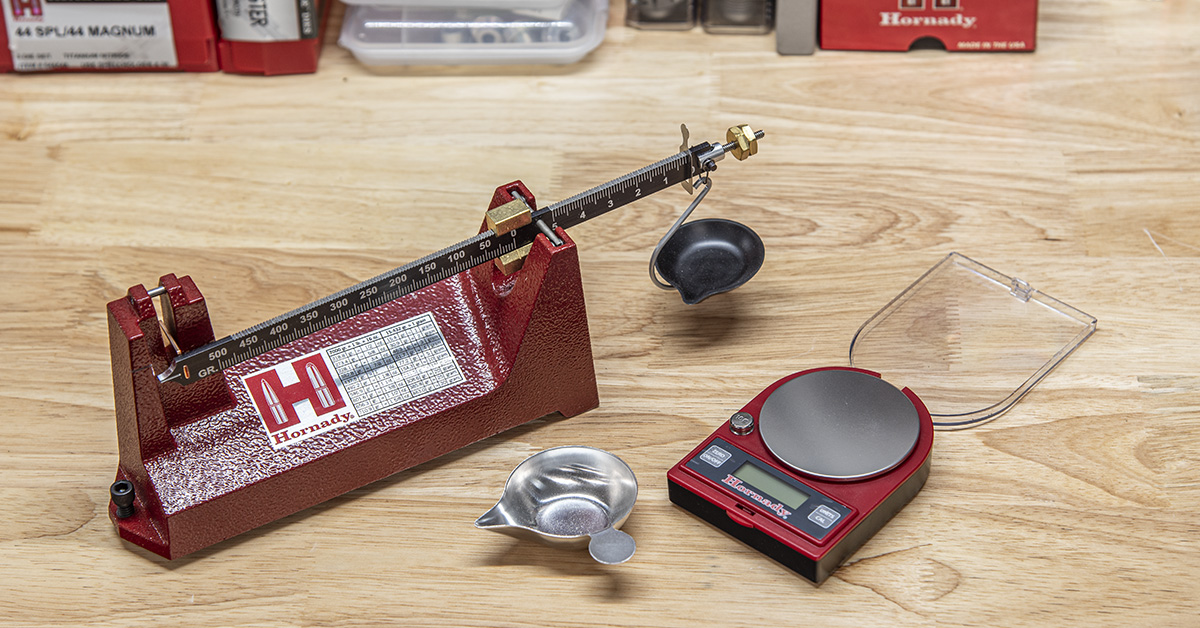
Powder scales are available in a balance beam version (left) or a digital version (right). The scales are used to precisely weigh the powder charge but can also be used to weigh bullets and cases. Although digital scales have pretty much taken over these days, my preference remains with the balance beam scale. I like its simplicity. The weight either balances or it doesn’t, and it’s not dependent upon electricity. The digital scales do tend to be somewhat faster and easier to read — simply place the digital scale on your bench, zero it, and you are ready to go. This is not the case with a balance beam scale. Place it on the bench and you’ll find yourself on your knees in order to read it properly. For proper use, a balance beam scale needs to be at eye level. When using this type of scale, you may want to make a riser or a shelf of some sort to get it up to eye level when in use.
The powder trickler holds a small amount of powder and is used to add small quantities of powder to the scale’s pan. The trickler gives you complete control over how much powder is added and it is quite capable of adding only one kernel of powder at a time.
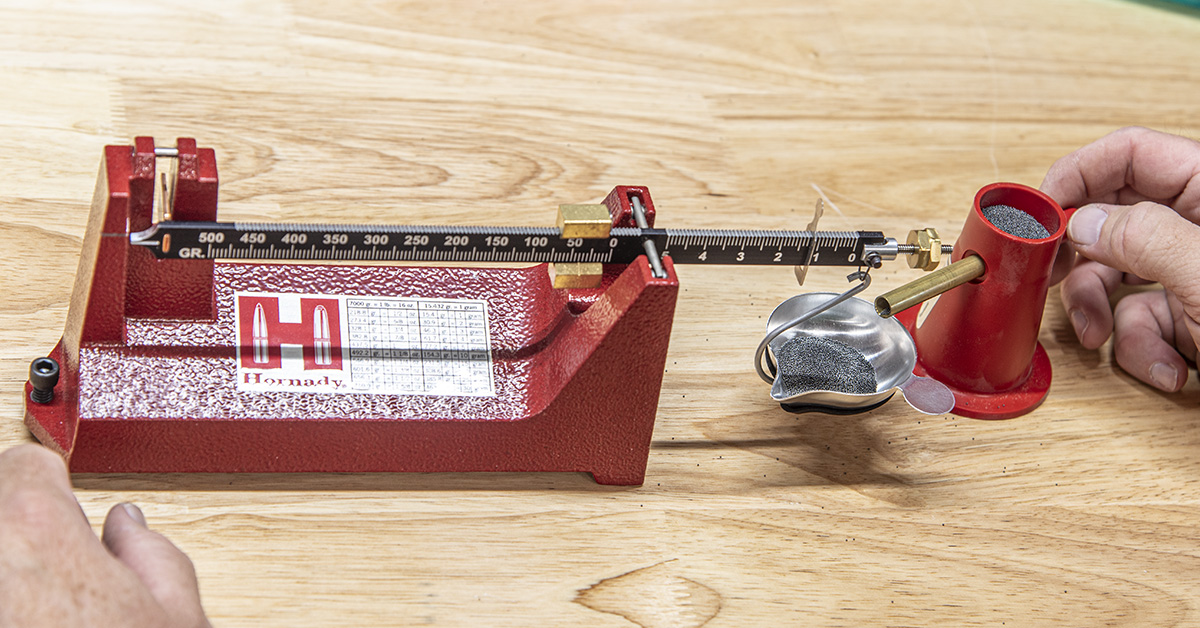
When used, the trickler will be to the side of the powder scale with its spout directly above the powder pan. While the trickler does need to be close to the scale, ensure that it is not so close as to interfere with the operation of the scale.
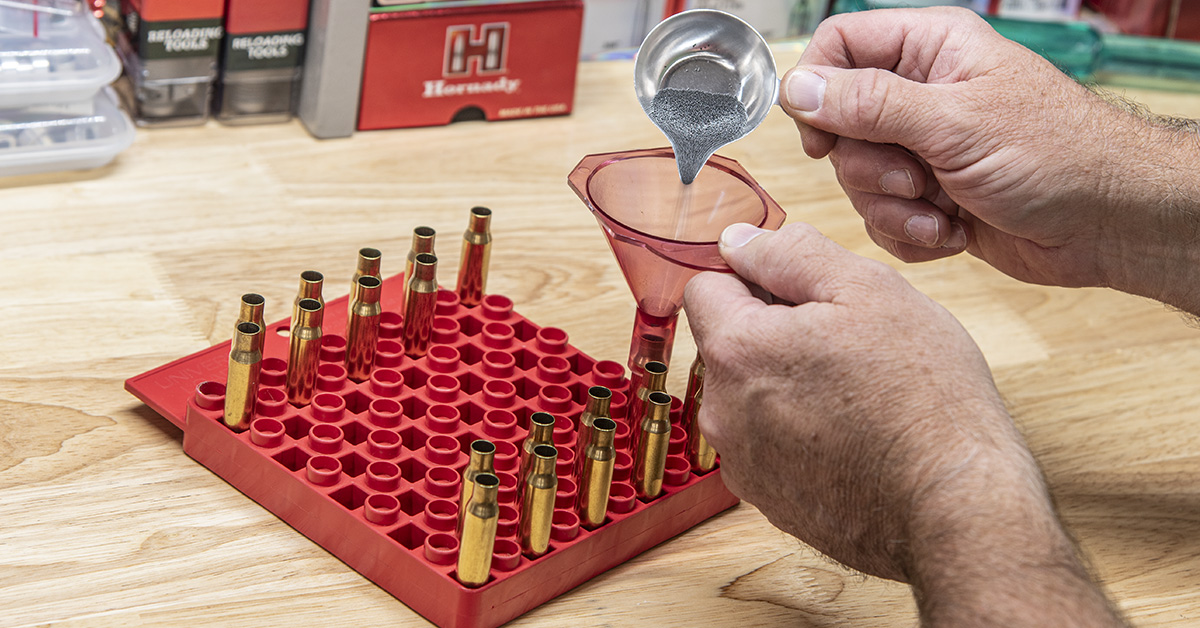
Once you have obtained the proper powder charge, the powder funnel is placed over the cartridge case and the powder is then added to the cartridge case. Once powder is added to the case, move it forward in the loading block. (MTM Case-Gard makes these funnels and universal loading block, along with several other molded plastic tools and accessories for the reloader). This is perhaps the most important step when it comes to the proper use of the loading block and tracking your work. While it is pretty much impossible to double-charge a rifle cartridge case with powder, an attempt to do so can leave you with a potential mess on your hands. It is, though, possible to miss charging a case. Always work carefully and methodically, using the loading block to track your progress.

The powder measurer does not weigh the powder charge; it meters the powder charge via an internal adjustable chamber. Initial adjustment of the powder measurer is accomplished with the powder scale. A charge is then “thrown” from the powder measurer into the scale pan and weighed. The measure is then adjusted accordingly, then another charge is thrown into the scale pan and weighed to verify that it is throwing the proper charge.
The initial setup of the powder measurer can be somewhat of a back-and-forth affair of weighing and adjusting. Once you have done it a few times, you’ll find that it isn’t difficult to adjust. The powder measurer is typically used by reloaders in two different ways — one is to throw a close but somewhat light powder charge into the scale pan, which is then placed on the scale and trickled up to the desired weight.
Once properly adjusted, many reloaders will throw the desired powder charge directly into the cartridge case as seen here. The main function of the powder measurer is to help speed up the process of charging the cases with powder. As such, it is not absolutely necessary to have one in order to reload a cartridge, although I wouldn’t want to reload without one.
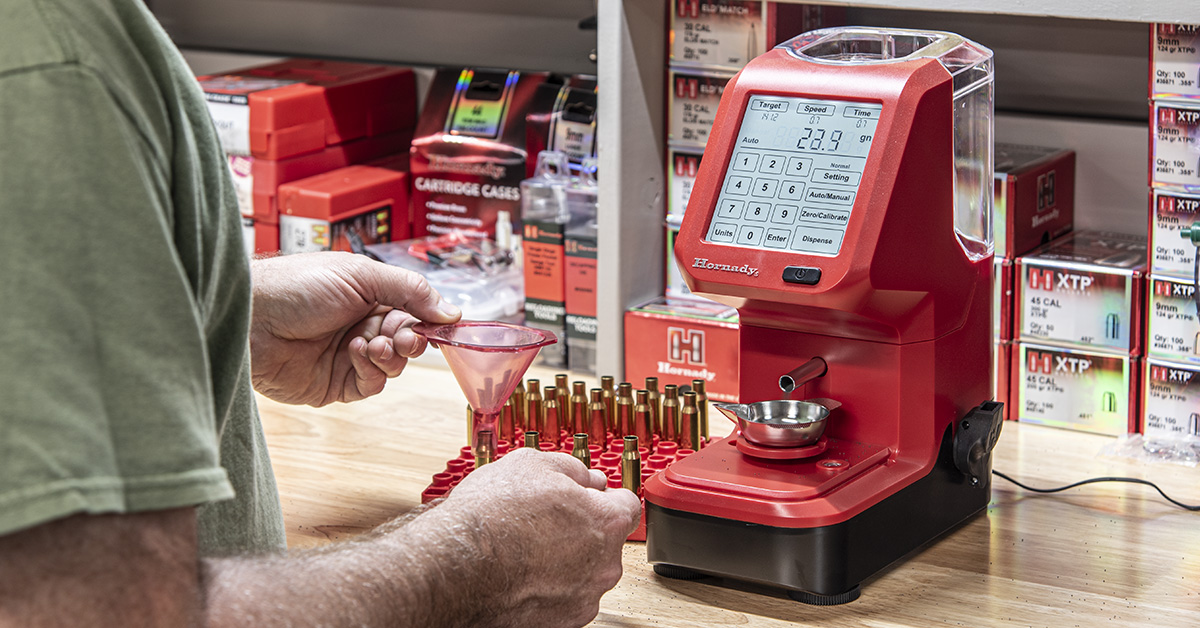
The Hornady Auto Charge Pro effectively combines the digital powder scale, powder trickler, and powder measurer into one easy-to-use automated unit. When it comes to speeding up and/or simplifying the reloading process, this is second on my “time saver/ease of use” list behind the Power Case Prep Center.
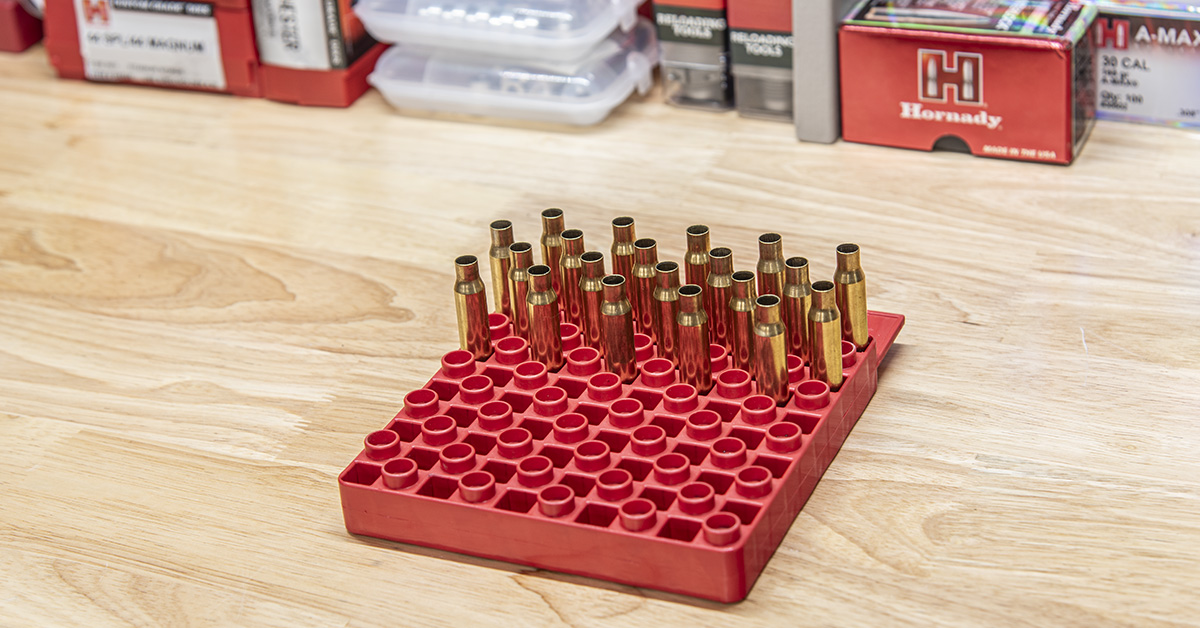
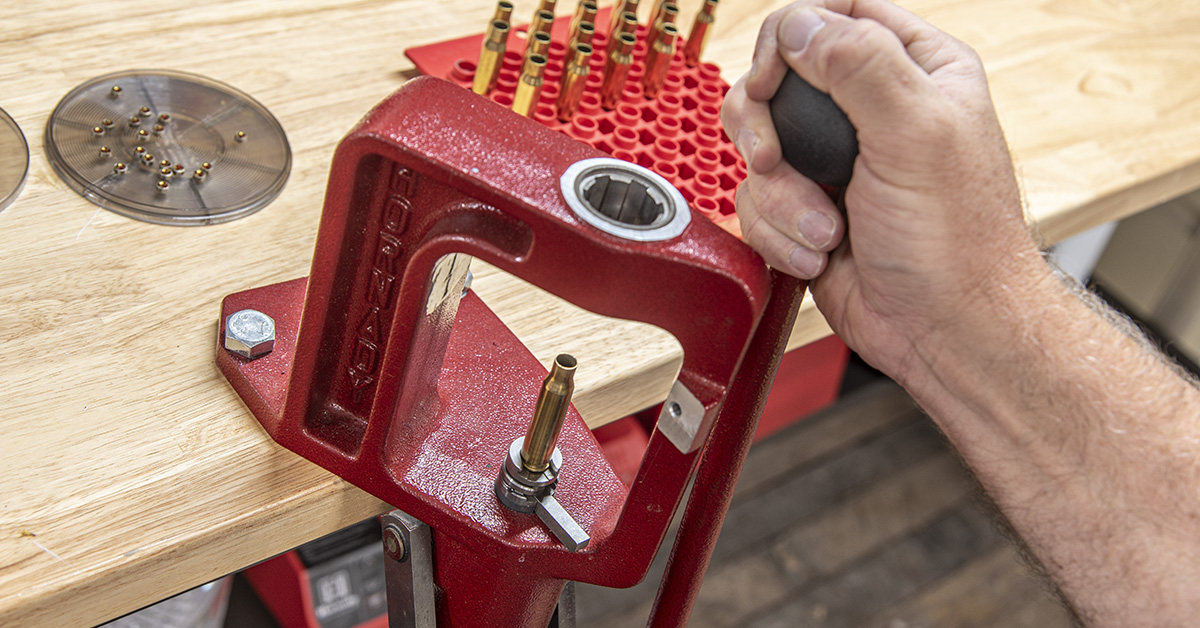
At this point, all your cases should be charged with powder and grouped together on the far side of your reloading block. The next step is seating the new bullets in place. Prior to bullet seating, take a moment and look carefully into each case. Does each case appear to contain the same amount of powder? They should! If one case appears to be different than the others, dump the powder and recharge accordingly. If the powder column within several cases appears to be at varying heights, my advice is to dump them all and start over.
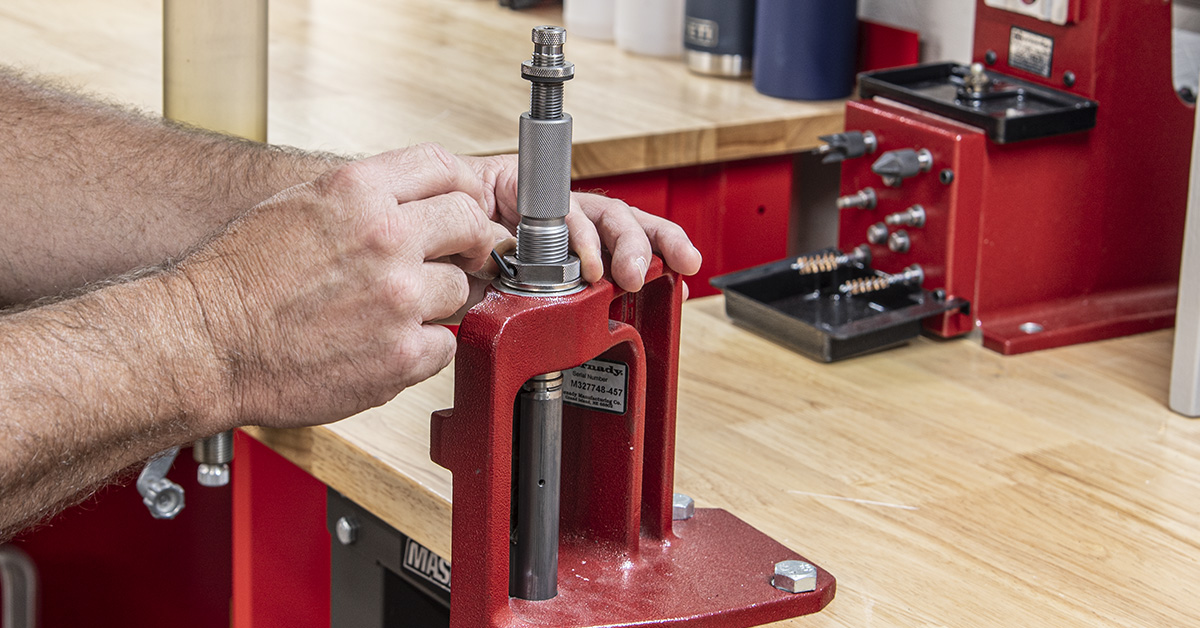
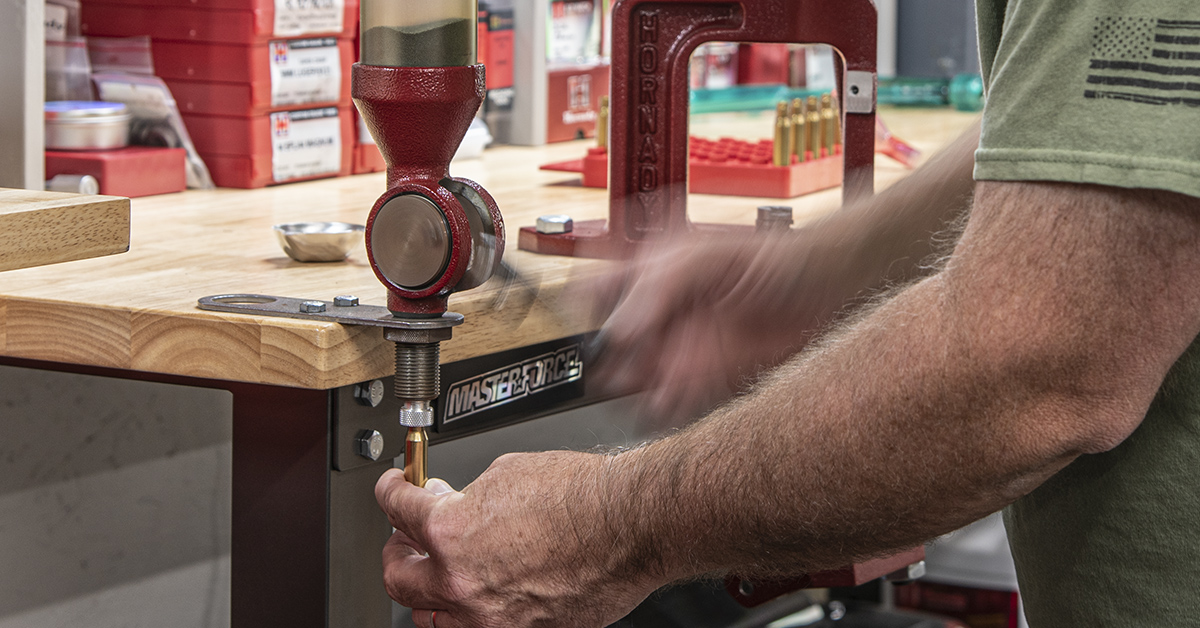
Install the bullet seating die in your reloading press and adjust it according to the manufacturer’s instructions. The bullet seating stem of the seater die is also adjustable. The position of the seating stem within the die has a direct impact on how far the bullet seats inside the case. Likewise, the bullet position within the case has a direct impact on the overall length of the cartridge.
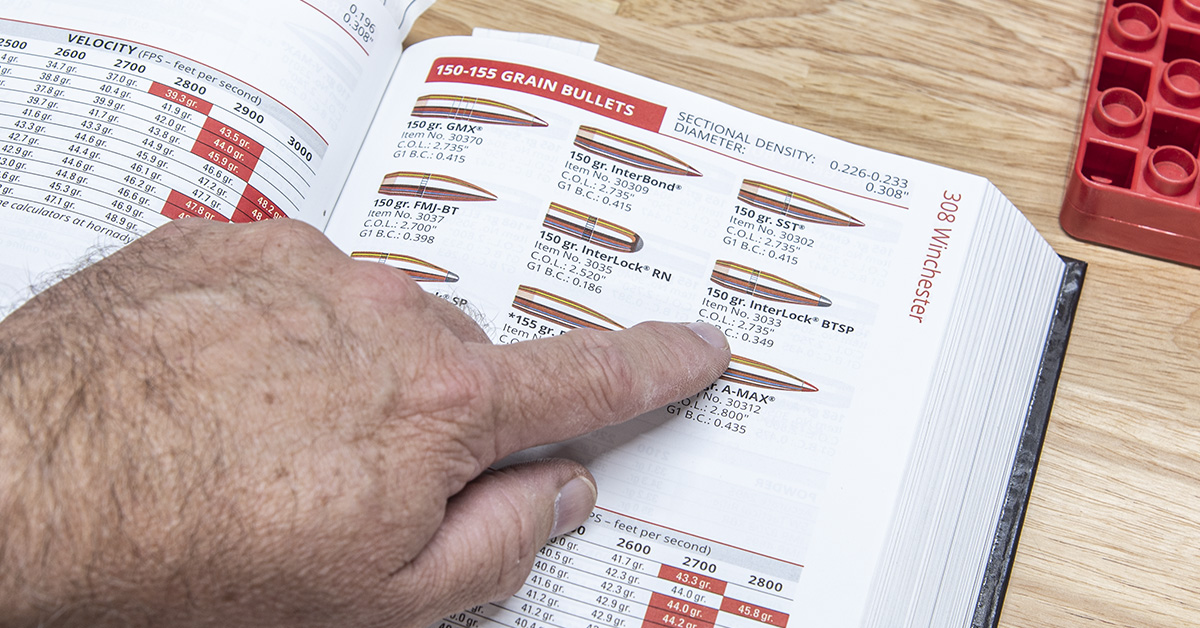
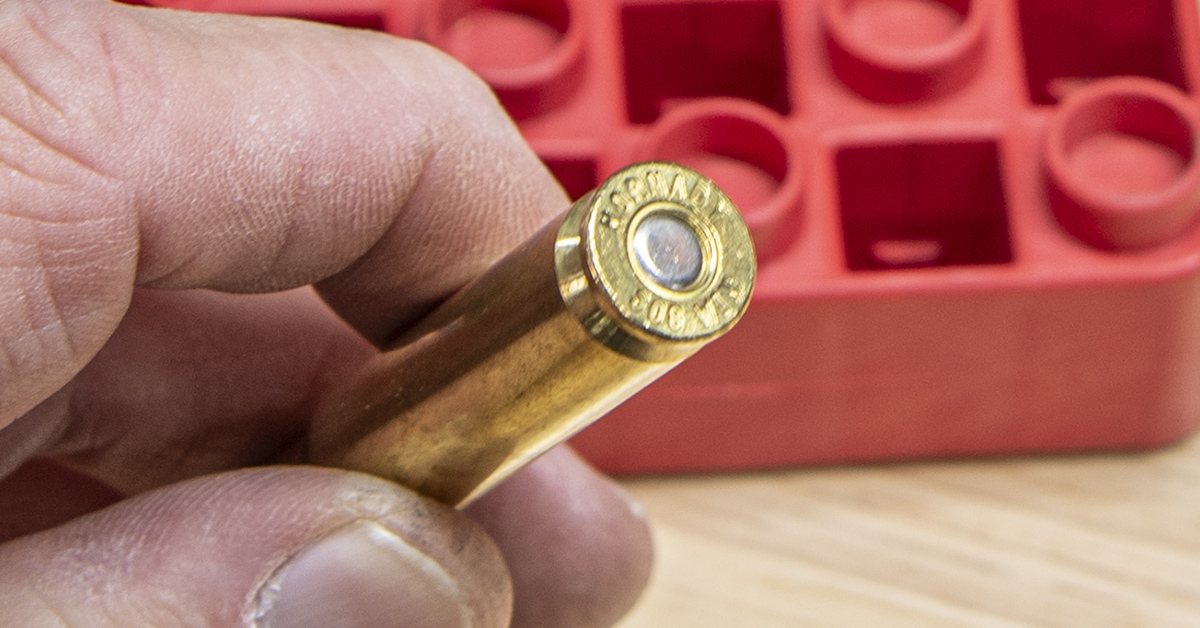
For proper adjustment, you must first determine what the correct overall length of the cartridge is supposed to be. Cartridge overall length (C.O.L) can vary depending upon bullet style and weight. This information can be found in the reloading manual.
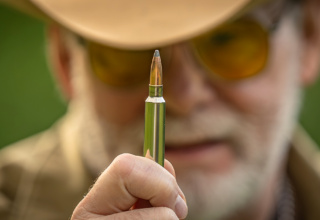
We are currently loading .308 Winchester ammunition using a Hornady 150-grain Interlock BTSP bullet. Use of this bullet in a .308 Winchester cartridge will result in a cartridge overall length of 2.735 inches. The seating stem needs to be adjusted to produce a cartridge of the correct overall length. This adjustment is best made prior to seating bullets in cases containing powder. The information accompanying your die set will detail the necessary adjustment methods.
Adjust the seating stem accordingly using the desired bullet and a cartridge case absent of powder and primer. Once the seating stem is adjusted properly and producing cartridges of the desired overall length, proceed to seating bullets in the cases containing powder.
Insert a cartridge case into the shell holder. Place a bullet on top of the case mouth, raise the press ram to move the bullet and cartridge case into the bullet seating die. You will feel some slight resistance as the bullet is pressed into the cartridge case. Lower the press ram and remove the loaded cartridge to measure its overall length.
After seating the bullet in your first cartridge, measure the overall length of the cartridge to ensure that your seating die is properly adjusted. Once this is verified, repeat the process with the remaining cases.
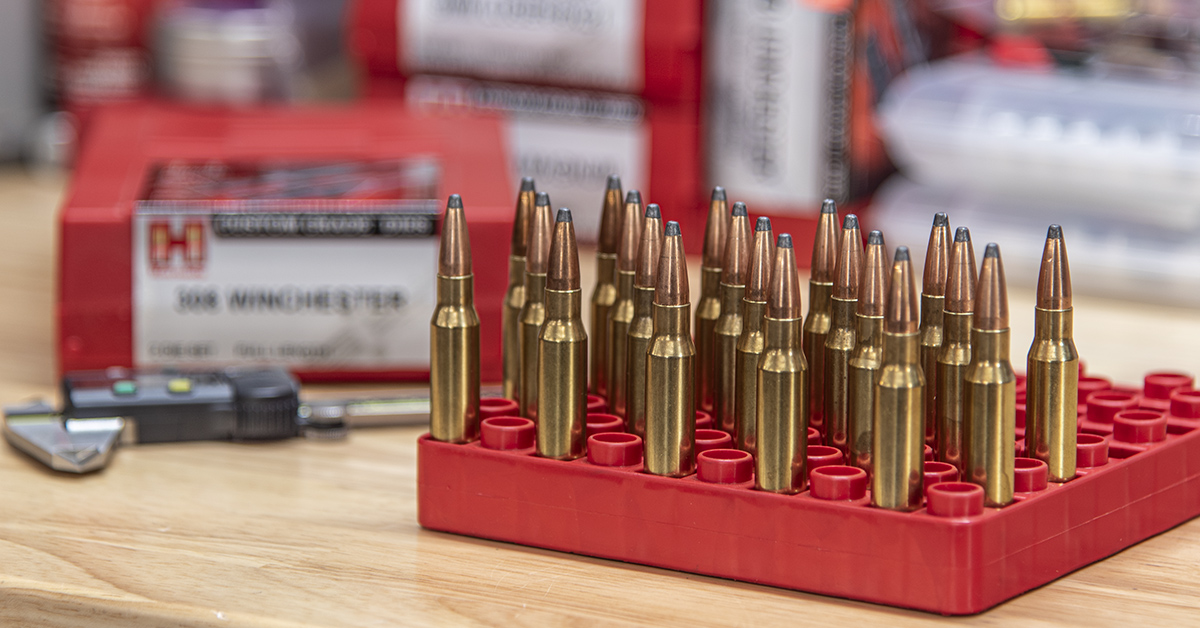
For the novice reloader, I suggest measuring each cartridge as it comes out of the press. As you gain experience, this will gradually become more of a spot check to ensure uniformity. Place the loaded cartridges in a properly labeled ammunition box and you are ready to go to the range and test your first reloads!
More Tools!
A kinetic bullet puller is mostly used when setting up your bullet seating die. It is also used when a mistake has been discovered after the bullet has been seated. The bullet puller will allow you to safely pull bullets from loaded ammunition without damaging the bullet while also neatly capturing the powder charge.
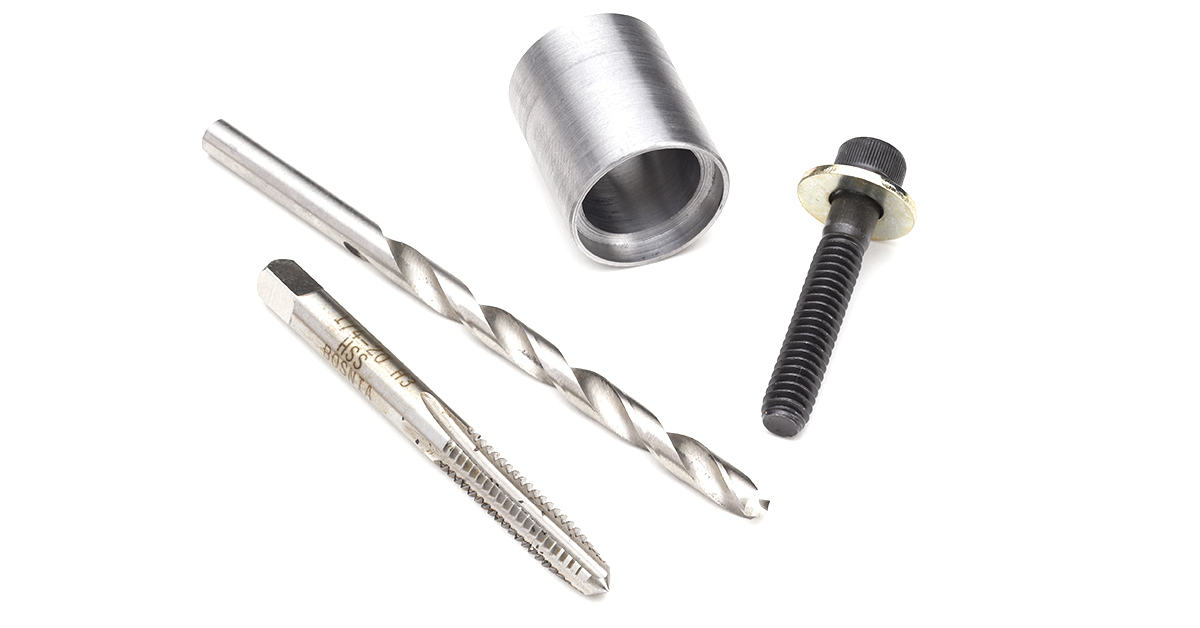
An item that is not a must-have but quickly becomes a must-have when needed is a stuck case remover. This tool will allow you to easily remove a cartridge case should one become stuck in your resizing die. This is an item, that if you reload often enough, you’ll most likely eventually need. Of course, it’s one of those deals when you need a stuck case remover, you need it now. It doesn’t hurt to have one of these on hand before the need arises.
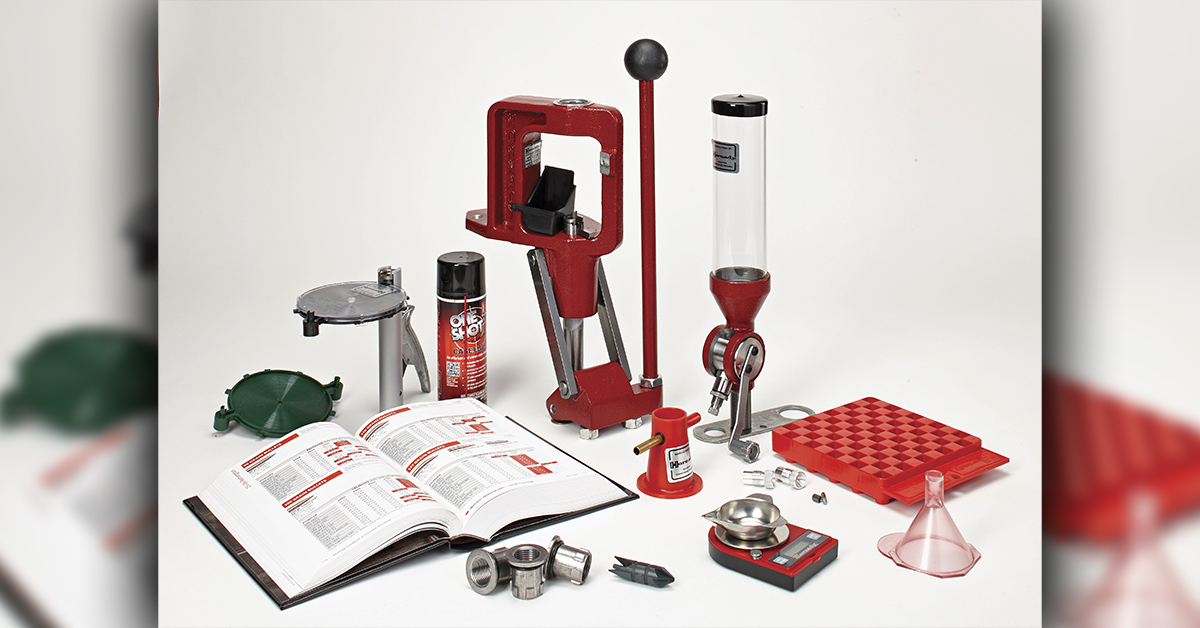
The Hornady Lock-N-Load Classic reloading kit has all the tools the beginning reloader needs neatly packaged in one handy kit, along with a few extras/upgrades to help speed up and simplify the process.
Purchasing a kit such as this usually offers somewhat of a discount compared to purchasing each item individually. It also makes the initial set up of your reloading bench much easier. Add a set of reloading dies, shell holder, dial caliper, bullet puller, tumbler, and a stuck case remover to this kit and you’re ready to reload.
To learn more about the reloading kits and the foundations of reloading, check out Hornady podcast episode 61.
OK…your reloading bench, rifle, and shooting gear are now in order. While it has been a lot of work, it’s been enjoyable, not very difficult, and you’ve been learning a lot along the way. Perhaps the founder of Hornady Manufacturing Inc., Joyce Hornady, said it best: “Accuracy just doesn’t happen, you have to make it happen.”
In our next article in this series, we’ll start you on the process of making accuracy happen.