Rival Arms can turn your factory GLOCK into a semi-custom competition slayer.
by Robb Manning
The GLOCK G17 is one of the most prolific handguns, worldwide, of the last two to three decades. Statistically, there’s a pretty good chance you own one. Maybe now you’re thinking about mounting an optic on yours for target shooting or for competition but aren’t sure which direction to go. The Gen5 GLOCKs come with an optics cut (a cutout in the top of the slide that accepts an optic), but if you own a Gen3 or Gen4, it’s not as easy.
Many have sent their GLOCKs out to get an optics cut on the slide. But that’s not for everyone. It’s pricey, and the cut is permanent. Some might be using their GLOCK for multiple applications and don’t want an optic mounted for home/truck/self-defense but they do want an optic for recreational shooting. In other words, a “dual-use” GLOCK.

Rival Arms offers a one-stop solution for turning your GLOCK into a multi-purpose pistol with their complete upper assembly kits. I’ve had previous experience with Rival Arms when I tested their G19 slide and parts for my book GLOCK Reference Guide, 2nd Ed from Gun Digest. I’ve been impressed with the quality and precision manufacturing in everything of theirs that I’ve used.
[Before I get into it, a bit of a disclaimer: Rival Arms sent me the parts/accessories mentioned in this article to develop this piece. TRUGLO sent me the red dot optic that’s also mentioned here. Neither company has paid me to say what I say. Following is my opinion based on my testing and experience using the products.]
For this project, I have a G17 Gen4 that I use as my “floater” gun. “Floater,” as in it doesn’t have an assigned task like my other GLOCKs—such as CCW, nightstand gun, bug-out bag gun, truck gun, et cetera—so it floats from task to task. Sometimes, it will be my truck gun, other times my backpacking gun, and occasionally I’ll use it for concealed carry.

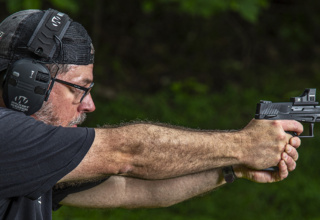
I wanted to set up a GLOCK for target shooting and possibly some competition shooting. To me, the best tool for that job is the G34. It has a longer barrel and slide than does the G17 and thus a longer sight radius. The good thing is that the G34 uses the same frame as the G17, so my G17 Gen4 would work perfectly. Aside from the frame, trigger assembly, and some assorted small frame parts, Rival Arms makes everything else needed for a complete semi-custom GLOCK, and everything is designed to be pretty much “drop-in.”

Rival Arms sent their G34 slide, drop-in precision barrel, stainless steel guide rod assembly, slide completion kit, MOS height night sites, and two-piece magwell. All the Rival Arms products that I received are marked Made in the USA, the exception being the Swiss Tritium used in the sights (the sights themselves are made in the USA).
The Rival G34 slide comes in two models, depending on which optic cut you want. One is for the Trijicon RMR while the other is for DOC-compatible sights, which includes Doctor, TRUGLO, Meopta, and others. I knew I’d be using TRUGLO, so Rival Arms sent me the DOC model.

Using the Rival Arms G34 set-up allows me to go back and forth between the G17 and G34 (with a red dot) as needed. It’s just a simple matter of changing out the slide/barrel/spring assembly. The optic stays mounted to the G34 slide, so I don’t have to re-zero it whenever I want to use the target set-up. Another important factor for me is I don’t like aftermarket parts on my carry/defense guns (I get into details of “why” in my book), so this set up allows me to keep my G17 completely stock while having a target/competition gun with custom part upgrades.
Starting with your GLOCK G17—it doesn’t matter if it’s a Gen3 or Gen4—remove the slide assembly and set it aside.
ASSEMBLY
If you’ve never done it before, assembling the slide on a GLOCK is fairly easy. I’m a certified GLOCK armorer, but you, by no means, need to be to accomplish this. I’m not going to get into the step-by-step here. See our previous article on how to do this. (You can also take a look at my book, where I devote an entire chapter to detailed assembly/disassembly along with some tips and tricks I learned at the GLOCK Armorer’s course).
Whether or not you have assembled a GLOCK slide before, you might not have installed the firing pin channel liner. The Rival Arms slide includes one in the kit, but you’ll need to install it. Before you start, a couple of tips: make sure the channel is bone dry. You don’t want CLP, oil, solvent or anything else in there, so make sure it’s clean and dry. As long as you leave it as-is out of the box, it should be fine.

Second, install the liner by inserting the beveled end first. Be careful not to scratch or damage the slide channel. It’s got the same tough surface as the rest of the GLOCK slide, so you shouldn’t, but be mindful. Also, don’t scratch or damage the inside of the channel liner, which is the more likely thing that could happen. Push it in with your finger as far as you can, then push it the rest of the way with a channel liner installation tool. Optionally, you can use either the plastic cleaning rod that comes with every GLOCK pistol or the GLOCK Front Sight Tool. Push it in until you can’t see it anymore. You’ll know it’s in far enough because if it’s not, the firing pin assembly won’t fit all the way in, and you won’t be able to get the slide cover on.

Once the channel liner is inserted, and the slide is assembled using the Rival parts kit, it’s time to mount the sights. Both front and rear sights are CNC machined from stainless steel billet, and use Swiss Tritium. Since I am planning on mounting a red dot, I chose the MOS height sites. The model I used is model TG-H3.

To install the sights, TRUGLO was also kind enough to send me their GLOCK Sight Installation Kit ($106). It’s all-steel and built like a tank. It includes a front sight tool as well. It installs, removes, and adjusts GLOCK OEM and aftermarket sights (not just TRUGLO sights). I’ve used it to remove one GLOCK OEM sight and install 3 sights (two aftermarket, one OEM), and it works very well. It only works with GLOCK handguns though. If you have another brand, it won’t work.

Again, installing the rear sight is pretty straight forward, and if you are using the TRUGLO install kit, they give detailed instructions on how to do it. I use calipers to measure if the sight is centered. I press a firm, flat object—such as the MOS slide cover plate—up against the slide to give the calipers something to index. Repeat for both sides, and if need be, use the installation tool to adjust until it’s centered.
OPTICS
For the red dot optic, I’m installing the TRUGLO TRU•TEC Micro Open Dot 3-MOA Sight. Actually, it’s a green dot, not a red dot. With this sight mounted on the Rival Arms slide, there’s no need for an adapter plate because the TRUGLO unit mounts directly to the slide.

When installing the TRUGLO optic, I recommend using Loctite on the screws. I’ve had a red dot fly off a handgun while I was shooting it and it hit me in the forehead. It didn’t feel good but, thankfully, I have a thick forehead and had shooting glasses on. Just make sure to not use permanent Loctite because you must remove the sight when installing batteries.
One thing I really like about this set-up is that the tall sights co-witness with the red dot. I normally don’t care for tall sights, but with an optic, the tall sights work perfectly. Having iron sights co-witnessed with the red dot optic gives peace of mind that whatever happens, you’ll always be able to place accurate shots.

The TRUGLO TRU•TEC sight performed excellent. This article isn’t a review of the optic, so I won’t get into details, but a few key points. It adjusted very bright, down to very dim. I didn’t test it for ruggedness, but from what I saw, it looks to be solid. I didn’t have any issues with the reticle shifting at all during the testing. In all, this is a very good optic for the price.
THE RESULTS
The Rival Arms DIY build delivered excellent performance. It’s competition-ready out of the box (as soon as you put it together). I had zero malfunctions to report, and accuracy was very good. At ten yards, I tested it with both the iron sights and the red dot for comparison. The average group size for all four loads with iron sights was 1.9 inches and with the red dot it was 0.97 inches. Having the red dot shrunk my group sizes by half. At 25 yards, I only tested with the red dot, and across all four loads the average was 2.9 inches. For me, that’s good.

Rival Arms is a relatively new name and the company isn’t quite as well-known as some of the other GLOCK aftermarket accessory/parts companies. They make excellent products, though, and are definitely worth checking out.
COST BY MSRP (Not including G17)
- Rival Arms GLOCK 34 Slide with optics cut = $471
- Rival Arms GLOCK 34 3rd & 4th Gen Standard Barrel = $212
- Rival Arms GLOCK 17/19 Tritium Night Sight MOS Height= $106
- Rival Arms Slide Completion Kit = $142
- Rival Arms GLOCK 17 Stainless Steel Guide Rod = $36 – $59
- Rival Arms Two Piece Magwell GLOCK 17/22/34/35 = $95
- TRUGLO TRU•TEC Micro Sub-Compact Open Red Dot Sight = $236
- TOTAL: $1321
PERFORMANCE
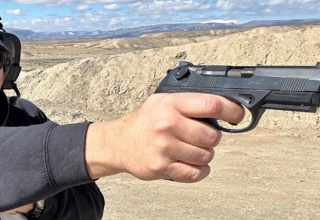
Rival Arms custom GLOCK G34 with TRUGLO red dot.

NOTES: “Gr” is weight, measured in grains. Accuracy is a 5-shot group, measured in inches, using iron sights or red dot (R-D) optic, as indicated above. Velocity is the average of five shots measured in fps. “ES” is extreme spread measured in fps. “SD” is Standard Deviation, measured in fps.
MantisX10 Elite: Take your training up a notch
To become a proficient handgun shooter, you must spend time shooting on the range. But not just random, sloppy shooting; it must be purposeful shooting. MantisX has been a great companion to help with shooting skills, both at the range and dry firing in your home. It analyzes gun movement during firing and uses that data to tell you what you’re doing wrong and/or what you can do to improve.

The device is about the size of a small weapon-mounted laser aiming device and mounts on the accessory rail. Just download the free app to your smartphone, mount the MantisX, and sync it with the app. It works with handguns, rifles, shotguns, and it can be used with live fire, dry fire, and CO2 guns. You can set up training modes, drills, courses of fire, et cetera. The coaching tips help you improve, and performance improvements are tangible because they’re tracked over time and saved for you to compare.
MantisX recently upped their own game with the release of the X10 Elite, and I’m a fan. It does everything that it did before, but now provides holster draw analysis. A new adapter plate mounts the device to the magazine baseplate, so you can train using the same holster you use for carry. Other impressive new features include recoil analysis (measures how you manage recoil and get the gun back to the original aiming point), archery analysis (requires a separate free app, MantisX Archery), and shotgun analysis. More training features will be added soon via a free app update, and will include: multi-target analysis, shooting on the move, and rapid fire.
For the price of a couple hours spent with a shooting instructor, you can have a personal shooting instructor that will coach you 24/7. It’s a great data-driven training aid that keeps getting better.

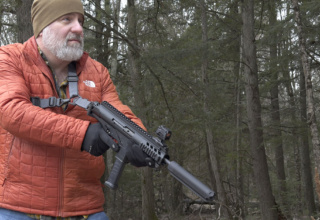
- TESTED: Beretta PMXs 9mm Pistol - July 26, 2024
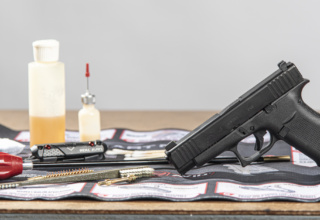
- The Correct Way to Clean a GLOCK - January 15, 2024
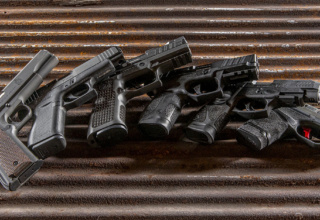
- Concealed Carry Guns: How Important is Ergonomics? - December 11, 2023