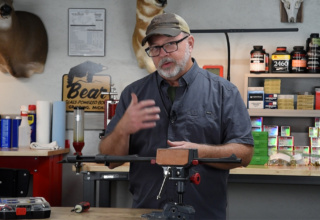
All the money and gadgets in the world won’t deliver the consistent long-distance shot groups you’re looking for unless you build your rifle on a solid foundation. Here’s how to make it happen.
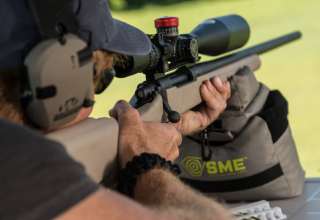
There is no hotter trend in the firearm segment today than long-range shooting. It represents the logical next step in skill and equipment development and is a game that continues to challenge.
Most hunting rifles set up for under-300-yard precision are great…for hunting. Once you have discovered the load that shoots best out of your rifle, range time pretty much becomes an exercise in stacking holes in paper. Sure, it beats a day in the office, but the fun factor often diminishes with each shot string.

As you begin to extend your shooting distance, though, the challenge returns. That sub-MOA group you managed at 100 yards suddenly doesn’t look so impressive at 400 yards. Every slight variable and “not quite right” deviation in your gear begins to stack up. You now must factor in bullet drop compensation, along with wind, temperature, and barometric pressure. Inconsistencies in ammunition also become glaringly apparent.
When you add it up, those are a lot of cats to herd. Can it be done? Absolutely. Many of our best shooters from both the military and civilian worlds prove it every day.
“But,” you say, “they’re shooting custom rifles that costs thousands of dollars.”
That may be true, but here’s something to consider—the fundamentals for creating an accurized rifle platform are the same whether you are working from a premium, custom-machined barreled action or an off-the rack factory production rifle.

Focusing exclusively on the rifle, the starting point is a barreled action with a proven accuracy potential. Many manufacturers know how to get the job done, but among the crowded field, it’s hard to go wrong with the familiar Remington 700. The design is simple and effective, and it enjoys the largest aftermarket and custom support of any other firearm platform.
If your intent is to build a dedicated long-range rifle and you can’t spend $4,000 to $5,000 on a custom rifle, a Remington 700 with a robust Sendero/varmint contour is an excellent choice. The action is a known quantity. As for the barrel, you’ll want something like this that’s beefier than the traditional sportier contour typically used for hunting. Generally, a heavier-weight barrel is more resistant to oscillating forces and it minimizes the chance of the shooter upsetting the shot with breathing, heartbeat, trigger squeeze, or any number of influences that can pull you off target.
While a good production barreled action can certainly deliver impressive long-range performance, no matter how many modifications you make in building your rifle, the barreled action can be the make or break factor. In other words, you can only take the pursuit of accuracy so far until you must make the jump to a precision (read “high-dollar”) barreled action. Still, you may be amazed at just how much accuracy you can wring out of a good production barreled action if your foundation is solid.
Selecting a long-distance rifle should begin with an understanding of the relationship between bullet weight and rifling twist rate. The heavier the bullets you wish to shoot, the faster the barrel twist rate must be in order to stabilize them.
Something else to consider is bullet stabilization. Bullets must remain stabilized throughout their flight. If not, they will tumble and possibly veer off-target. Bullet stabilization comes from the rotational force induced by the barrel’s rifling twist rate. The twist rate required to stabilize a bullet is directly related to bullet weight and the velocity at which it leaves the barrel. It is essential to know the bullet weight you intend to shoot and buy a rifle with a twist rate that will stabilize bullets in that weight range.
For example, most long-range bullets are longer and heavier than those used for typical hunting distances. Our .308 Remington SPS Varmint rifle has a 1:12 twist. That means it will stabilize bullets up to 175-grains weight. If we wanted to shoot 180-grain bullets, though, that 1:12 twist would not be adequate with the load’s muzzle velocity of 2,600 fps. We would need a barrel with a 1:10 twist rate.
On the other hand, if you already have a rifle designated for long-range duty, you need to know the rifling twist rate to know what ammo will remain stabilized for those way-out-there shots.
The Base of It All
It doesn’t matter if you dropped $3K on a specially machined, stainless-steel, cryo-treaded, precision barrel and custom action or are running with a quality factory barreled action, neither will reach their full potential unless they are properly mounted into a strong stock.

The Mc3 Legend Deluxe is a solid polymer stock that comes fully inletted and with pillars installed. Based on the popular McMillan A5 tactical fiberglass stock, the Legend Deluxe offers a solid platform with adjustability in length-of-pull and cheek riser height at a price that fits most budgets.
The first step is to find a stock that offers enough rigidity—one that will not flex under recoil. McMillan fiberglass stocks are the go-to stocks for military and law-enforcement sniper-grade rifles and are commonly found on civilian long-range competition rifles. Their A5-style stock features a wide and flat beavertail forearm to offer a stable support on a field rest and a generous pistol grip that provides a comfortable hand position when shooting prone.
The A5, like all McMillan stocks, is built to the buyer’s specifications, with various levels of inletting available, and is offered in several finishes and accessory options, such as pre-installed pillars, adjustable butt pads, and adjustable cheek risers.
The adjustability of these stocks is important to the long-range shooter because getting the precise fit in terms of length-of-pull and cheek weld is critical. With a proper-fitting rifle, sight alignment and trigger manipulation come more naturally and significantly reduce shot disturbances.
The downside is the usually months-long wait time. Also, stocks of this caliber cost a bit more.
An alternative is the Mc3 stock. This is a new brand under the McMillan umbrella. Rather than custom-made from fiberglass, the Mc3 stocks are constructed of a revolutionary new polymer that delivers a stable, solid-molded stock that comes fully inletted and with pillars installed. Their Legend Deluxe is ready to accept a short- or long-action Remington 700 barreled action and includes spacers to adjust length of pull and an adjustable comb for setting a comfortable cheek weld. Best of all, it ships when ordered and is a budget-friendly $349.
Shoring Up the Foundation
A solid stock platform is key to developing accuracy, but that is just the first step. The goal is making sure the barreled action is locked tight to the stock to prevent any movement. In short, you want a barreled action and stock that function as a unitized assembly. Pillars (which the Mc3 includes) is a necessary beginning. To take that support to the next level requires bedding the full length of the action to the stock.

To ensure the barreled action has nowhere to move on recoil, the best option is to always bed the action to the stock.
Bedding is simply a layer of epoxy placed between the stock and the barreled action, starting from just in front of the recoil lug and extending to the action tang (rear action screw). The purpose of bedding is to make a skin-tight joint between the action and the stock that allows for absolutely no movement of the barreled action during recoil other than the natural oscillation of the barrel (if the barrel is free-floated). Doing this eliminates any variables that could influence the position of the muzzle when the bullet leaves the barrel.
A good bedding job is a costly gunsmith operation ($300-$500 on average), but it is a modification you can do yourself with less than $75 of supplies and lots of patience.
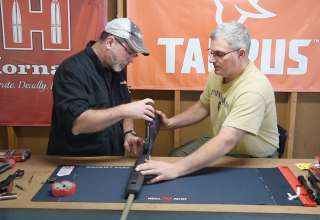
Rifle Bedding the Right Way

Inletting black (available in black or gold, but referred to as inletting black) applied to the bottom of the receiver can reveal the high and low contact areas between the barreled action and the stock.

Here you can see the importance of bedding a barreled action to the stock. The gold inletting black indicates the contact points of the barreled action with the stock. Absence of the gold color transferring to the stock reveals areas where the barreled action is not in contact with the stock, decreasing rigidity, allowing room for unwanted movement, and causing accuracy to suffer. The goal of bedding is to establish full contact between the barreled action and the stock to eliminate the possibility of any movement.

To ensure the bedding material adheres to the stock, it is important to “rough up” the areas of the stock to be bedded. This is preceded by taping off the section of the stock where the chamber resides and at the very end of the tang. In stocks such as the Mc3 Legend seen here, which comes with pillars already installed, the task is to remove stock material to below the tops of the pillars without touching the top of the pillar. This allows the barreled action to sit flush on top of the pillars while the bedding material fills the area below the tops of the pillars.

Once the area to be bedded has been sufficiently rough up to ensure good adhesion, use a scraper or similar tool to clean up loose shavings.

Large voids in the stock, such as these cavities behind the recoil lug, can be filled with cut aluminum nails prior to bedding. This is simply to save on bedding material while providing a rigid material that will not crush when action screws are tightened.

Modeling clay is then formed in the magazine cutout to force the bedding material to flow up and around the action, rather than be pushed out the bottom when installing the barreled action. Bedding material will be applied to the entire area where the barreled action resides in the stock, from the chamber to the tang.

It is essential that no bedding material touches the stock other than where the barreled action and stock come together. This requires taping off all areas of the stock around the bedding area. We have found that electrical tape performs well for this. Be sure to tape along the top edges of the stock, as well as down the sides and at least two inches forward of the chamber.

The barreled action will need to be secured in the stock during the bedding process. To prevent the bedding material from sticking to the action screws, give the screws a liberal coating of grease, such as RIG, including the threads, shank, and head.

Once the action screws are thoroughly lubricated, install the rifle’s bottom metal and insert the actions screws into the stock. Place a piece of tape over the screw heads to keep them in position when you lower the barreled action into the stock. The idea is to make a clean, straight-in drop of the barreled action.

The next step is to fill all the receiver voids with modeling clay to prevent any epoxy from getting into the receiver and creating a mechanical lock. Mold the clay into the receiver so that it is flush with the surface. A razor blade is helpful in achieving this.

If you discover any burrs along the machined areas of the receiver, carefully file them off to ensure a smooth surface.

Tape off the recoil lug along the front, sides, and bottom with electrical tape. This provides a slight clearance of these surfaces of the recoil lug, allowing the lug to move directly rearward under recoil without any unwanted influence from side contact. Only the rear of the recoil lug needs to absorb the recoil energy.

To prevent the bedding material from adhering to the barreled action, the barreled action must be coated with a release agent. Although there are commercially available release agents, we’ve found the easiest, least expensive, and most effective method is to use common Johnson’s Paste Wax (the same wax used for furniture polishing). Apply a coating of wax to the barreled action, making sure to leave no unwaxed surfaces, let dry, lightly buff, then repeat the process for a second application. Two applications are usually enough to provide a smooth, skin-tight, and stick-free bedding job.

The stock and barreled action are now ready for the bedding material, with the front and rear action screws taped into place. We suggest securing the stock in a sturdy bench vise, clamping at the buttstock and supporting the forend with an adjustable support so that the rifle assembly is level.

Follow the manufacturer’s instructions for mixing and applying the bedding material. Here we are using Acraglas gel, which comes in two parts and is measured by equal volume. Included in the Acraglas kit is black and brown dye that can be mixed into the epoxy. Use the color most appropriate for your application. Considering our green stock, we chose black to match the barreled action.

Once the bedding compound is mixed, you need to work rather quickly before the epoxy starts to set up. The goal is to, as evenly as possible, flow the epoxy into the area to be bedded, including into the recoil lug recess and any voids or cavities that may be in the stock. Don’t be afraid to cover the clay. That’s why it’s there. Apply a generous coat to ensure ample epoxy across all contact surfaces between the stock and the barreled action. It is best to apply too much than not enough. The goal is to have the excess flow up and out once the barreled action is lowered into place and secured with the action screws. It is this up-and-out flow that helps ensure a void-free bed job.

It is important to minimize epoxy getting on the pillars. After applying the epoxy, use a small cotton swab soaked in WD-40 and wipe away any epoxy from the top of the pillars.

With the epoxy laid into the stock, it is time to install the barreled action. Be prepared with an action screw driver in your hand. The objective is to cleanly install the barreled action straight down (you’re committed now, down only!) into the stock so that the bedding compound will flow evenly around the barreled action. The point of focus here is the recoil lug and recoil lug recess in the stock. Get these aligned and then carefully and evenly lower the barreled action. DO NOT push the barreled action into the epoxy but rather let it set into place under its own weight.

Moving quickly, start the front and rear action screws into the receiver. Once started, alternate tightening the screws to evenly seat the barreled action in the stock until the screws are lightly snug. Next, place an appropriate-sized driver bit into a torque wrench and torque the screws to 45 in/lbs.

With the barreled action installed and the action screws tightened to specification, it is time to remove all excess epoxy. A square-cut popsicle stick is idea for removing epoxy along the seam between the barreled action and the stock, or a small craft spatula works well. The key here is to remove the epoxy along the seam, providing a “break” so that no thick layer of epoxy rolls over the centerline of the barreled action. If that happens, the epoxy will lock the barreled action to the stock once cured and it will be extremely difficult to separate the two without damaging something. We have seen wooden stocks break from the force of separating the barreled action when too much epoxy rides over the barreled action center. Any excess epoxy above the seam line will easily flake off after curing and the barreled action is removed from the stock.

Some epoxy may enter the chamber area through the front action screw hole. Be sure to check and remove any that may have seeped through. Once this is clear, allow the epoxy to cure per the manufacturer’s recommended time.

Once the epoxy has cured, it is time to separate the barreled action from the stock. Start by removing the actions screws and bottom metal.

Use your fingers to dig out the modeling clay in the receiver. You only need to remove enough to make room for a 5/8-inch diameter wooden dowel to be inserted through the bolt channel.

Now comes the moment of truth—separating the barreled action from the stock. Be forewarned that this can be a challenge due to the tight, almost suction-like fit. The idea here is to pull the barreled action straight up and out of the stock by grasping the barrel at the stock forend and at the end of a 5/8-inch diameter wooden dowel inserted into the bolt channel. The challenge is pulling straight, not applying more pressure to one end of the barreled action or the other. Doing so could break the cured epoxy in the recoil lug recess or elsewhere along the bedding. Considerable pressure will usually be required while you simultaneously pull up on the barreled action and push away on the stock. Have patience and be careful. Eventually the barreled action will separate from the stock.

Now the task is to remove excess bedding material from the stock. This is another step that should not be rushed. Begin by using a flat file to work the excess bedding down to the tape on the stock. Use the electrical tape as a guide. Once you reach the tape, stop filing.

You’ll want to make a clean cut of the forward excess bedding. This is typically about 2 inches in front of the recoil lug recess (under the chamber). Mark the bedding with a straight line perpendicular to the stock. A Dremel fitted with a cutoff wheel can quickly cut the bedding. Stop using the cutoff wheel just before you break through the bedding.

Make the final cut by using a knife blade.

There will be plenty of carving to do in the mag well area. With the modeling clay removed, begin by coring out the center of the excess bedding. A Dremel fitted with a carbide cutter makes short work of the large cuts. Work your way towards the sides of the opening, being careful not to cut into the stock. You do not need to go all the way to the stock since a file will be used to remove the rest of the bedding.

With the bulk of the excess bedding cut away, remove the protective tape from the stock.

Carefully use a flat file to bring the bedding flush with the stock.

Use a scraping tool, such as these from Brownells, to knock down any sharp edges left on the bedding.

There will likely be bedding stuck inside the pillars. Use a 1/4-drill bit to carefully remove by hand any excess material.

After thoroughly cleaning the stock and barreled action of excess bedding and modeling clay, the two are ready to go back together. Know that the bedding process produces a skin-tight fit if done correctly. With such tight tolerances, the barreled action must be installed straight into the stock so that the recoil lug does not damage its recess during installation.

After installing the magazine box and bottom metal, install and tighten the action screws to 45 in/lbs.
Securing the Optic
A quality optic is a given for long-distance shooting. Here is where buying the best you can afford can make a big difference downrange. Price isn’t always indicative of quality in most products, but that and reputation will serve you well in choosing an optic. Clear glass with high light transmission quality and front focus (parallax adjustment) are what you want, along with a fine reticle that allows you to compensate for bullet drop.
In the article “Five Steps to Accurizing Your Hunting Rifle”, we discuss the standard method of mounting a scope to a rifle using conventional scope-mounting tools. That process is suitable for most any hunting rifle setup. When you transition to long-range shooting, though, solid scope mounting and proper alignment become even more critical as the greater distances magnify unwanted variables such as scope movement and misalignment.
For rock-solid mounting, one-piece scope mounts are essential. Next comes achieving as near-perfect alignment of the scope mounts as possible to ensure the scope is aligned with the axis of the rifle bore. Lastly, the scope mounts need to be mounted so there is no possibility of them moving under recoil. This requires applying thread locking compound to all screws, using rosin in the scope rings, and bedding the scope mounts to the receiver.
Yes, you read that correctly.
Scope mount bedding is a little-known technique used by top-level gunsmiths, and it is designed to accomplish two things. First, it allows the scope rings to align perfectly level with each other. Second, it ensures the ring bases will not move under recoil. As with barreled action bedding, scope mount bedding serves to unitize the scope bases and action. Once bedded, the entire rifle assembly is as solid as can be, with no room for movement between the stock and barreled action, or between the receiver and scope bases.
Another important step to mounting a scope for long-range shooting is aligning the scope’s vertical stadia to the bore axis. A scope with a vertical stadia that is not precisely perpendicular to the bore axis can be zeroed only at one distance. Shots taken behind or in front of the zero distance will string progressively left or right—just like shooting a curve ball.
The common method is to use a small level on the rifle and across the top scope turret. This works alright for hunting-range rifles but is a sketchy solution for long-range work because it assumes the turret is level (which we do not know for certain). Plus, the turret is really too small to properly support the level base.
A better way is to use a custom alignment rod that centers in the action via the action screws and to use a distant vertical line (such as a power line pole) to align the vertical stadia when you rotate the scope.
Advanced Scope Mounting Techniques

Bedding scope mounts to the receiver requires minor surface prep in the form of removing any finish. Do this by snugging the mounts in place, outlining their footprints on the receiver with masking tape, and then use a wire wheel to gently remove the finish.

Similarly, remove the finish from the bottom of the scope mounts. The bare, lightly roughened mounting surfaces of the mounts and receiver will promote good adhesion to the bedding epoxy.

Use denatured alcohol to thoroughly clean the scuffed mounting surfaces of the receiver and scope mounts.

Use denatured alcohol to degrease the scope mounting screws.

For scope mount bedding, JB Weld is an ideal epoxy choice. Mix according to the manufacturer’s specifications and apply a generous coat to the bottom of the front scope mount. Leave some space around the screw holes to minimize epoxy intrusion.

Apply Loctite to the front scope mount screw threads.

Insert the screws into the front scope mount. Carefully lower the scope mount until the screw threads are touching their respective holes in the receiver. While continuing to hold the mount up, turn the screws into the mounting hole threads. Doing this will help keep epoxy from flowing into the threads. Continue to tighten until the screws are lightly snugged, then torque them to 20 in/lbs.

Remove the bulk of the excess epoxy with a straight-cut popsicle stick or similar tool. Clean up any excess epoxy with a swab saturated with WD-40.

Apply RIG to the rear scope mount screws. Loosely secure an appropriately sized (30mm or 1-inch) scope alignment rod (precision-ground) onto the front scope mount, leaving room to maneuver the rear scope mount into place. As with the front mount, install the screws in the rear scope mount and, while supporting the mount with one hand, draw it down toward the receiver by threading the screws into the receiver just a few turns. You do not want to screw the mount fully onto the receiver at this time. Leave the mount loose.

Once the rear scope mount screws have started into the receiver, continue to apply upward pressure on the scope mount and move the alignment bar into position as shown. Now install the front scope ring to secure the alignment rod in place. This will simultaneously drive the rear mount down onto the receiver, aligning the rear mount with the front and eliminating the need for base shims or the two-piece (pointer style) alignment rods (with their assemble-check-disassemble-try again method of installation). It also provides a rock-solid base installation all in one easy step, essentially eliminating the need for lapping the rings when quality components are used.
Remove the excess epoxy from around the rear mount and allow the epoxy to cure according to the manufacturer specifications. Once cured, remove the alignment rod. Next, remove one of the rear base screws, degrease the screw, clean out the screw hole, apply Loctite to the screw and install the screw to 20 inch pounds. Repeat this process for the remaining screw.

As you can see, this method of scope mounting ensures perfect alignment of the front and rear scope mounts. Furthermore, the scope mounts are locked solidly to the receiver, with no chance of movement—even from accidental blows.

Prior to installing the scope, degrease inside of scope rings, apply powdered rosin to the inside of the scope rings. This is to provide added friction to the scope once the rings are torqued to 20 in/lbs. This, combined with the preceding bedding procedure, is all that is needed to ensure your scope is secured solidly to the mounts and that the mounts are essentially unitized with the receiver, with no chance of movement except from hard blows that would likely damage the scope in any event.

Key to long-distance shooting is achieving a perfect alignment of the scope’s vertical stadia with the bore axis. The best method to do this is by using an alignment bar that fits inside the receiver and secures via the front and rear action screws. A flat at the back of the rod, milled perpendicular to the action screw holes, allows you to achieve perfect level of the rifle. Once the rifle is level, find a distant vertical line (the further away the better, as this helps combat parallax; a weighted heavy cord works well) to align the vertical stadia by rotating the scope in the mount.

Once the vertical stadia is aligned with the rifle bore axis, apply Loctite to the ring screws and tighten the rings in a crisscross fashion, gradually working to a final torque of 20 in/lbs. This completes the scope installation.
Load Work-Up

Once you have developed a rifle that fits you and you have locked all the systems together so that nothing moves under recoil, the pursuit of accuracy turns to finding the load that will shoot best out of your rifle. This is a long-term endeavor since the possible load combinations are legion. For more on how loads affect rifle accuracy and how to zero in on the load that’s best for you, read the Ammunition Selection section of the article “Five Steps to Accurizing Your Hunting Rifle.”

- Build Your Pistol Marksmanship Foundation - June 29, 2021
- Upgrade Your Long Range Rifle the Easy (and Inexpensive) Way - October 22, 2020
- Your Best Survival Choice if it All Goes South - October 13, 2020