Being a bit “rough around the edges” isn’t always a bad thing, but it is if you’re talking about semi-auto cartridge chambers. Here’s how you fix a too-rough chamber to keep your AR running flawlessly.
by Lou Patrick
If you shoot frequently, chances are you have experienced some sort of a malfunction. Sometimes the malfunction is a mere hiccup, requiring little effort to get the gun running again. Other malfunctions can indicate that a more serious repair is required.
That’s what happened recently to a friend of mine. He had just completed an AR-15 build and went to the range to zero the rifle. Upon firing it, he found that it failed to feed the next round. He cleared the first malfunction, removed and reinserted the magazine, and the rifle did the same thing…every time.
Having built the rifle himself, he knew that it was properly assembled. So, “What could be the problem,” he asked himself “and what is needed to correct it?”
A quick look on the internet reveals much of the same discussions that I have heard for decades concerning AR-15 magazines, anti-tilt followers, and proper seating of the magazine. While these issues are certainly something to be aware of, bargain basement magazines aside, conventionally constructed magazines have all these updates. Thus, in my friend’s case, mags were not causing the failure-to-feed condition.
How do you go about diagnosing a problem like this when there are no obvious indications as to what may be wrong? It all begins with the cycle of operation.
If you enjoy building, modifying, or repairing your own ARs, you need to know the eight basic steps of function that apply — known as the cycle of operation — and how your firearm accomplishes these steps. Here, we offer a condensed version of the cycle of operation as it applies to the AR-15:
- Feeding – The forward-moving bolt strips a cartridge from the magazine.
- Chambering – The bolt pushes the new round into the chamber. (The extractor engages the case rim and the ejector is compressed against the case head at this time.)
- Locking – The bolt locking lugs rotate behind the barrel extension locking lugs.
- Firing – The trigger is squeezed, releasing the hammer, which strikes the firing pin to ignite the primer and thus firing the cartridge.
- Unlocking – Gas travels down the gas tube into the bolt carrier, causing rearward motion of the bolt carrier. This causes the bolt to rotate and disengage from the barrel extension locking lugs.
- Extracting – The bolt’s rearward motion pulls the empty cartridge case from the chamber via the extractor.
- Ejecting – Once the cartridge case’s rearward motion brings it into alignment with the ejection port, the ejector pushes the case out through the ejection port.
- Cocking – Rearward motion of the bolt carrier pushes the hammer to the rear and downward, cocking the action.
Using dummy rounds, the cycle of operation is safely and easily duplicated at the workbench by simply operating the action by hand. While doing so, carefully observe what is taking place and the problem will usually be discovered.
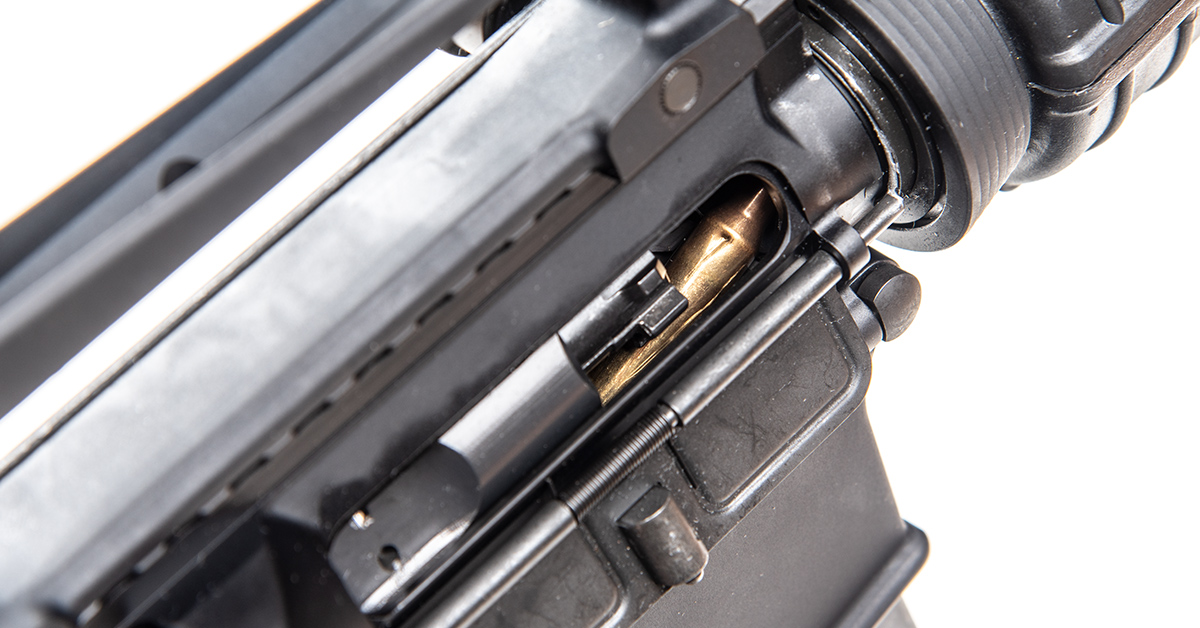
Pictured above is the malfunction that my friend was experiencing with his newly built AR-15. This would occur each time that he attempted to fire it. With the cycle of operation in mind, we see that the bolt carrier is on top of the cartridge with the cartridge still halfway in the magazine. This tells us that the rifle has failed at Step 1 of the cycle of operation — that being it failed to feed. It also tells us that the rifle functioned properly when he manually chambered the first round by operating the charging handle. In short, the rifle failed to automatically feed the second round after firing the first. More specifically, this is a failure to feed the second round.
Loading three Snap Caps (dummy rounds) into the same magazine that he had used at the range and holding the rifle in a horizontal position (similar to the position in which it is fired), I inserted the magazine, pulled the charging handle fully to the rear, and released the charging handle. The rifle properly accomplished 1) feeding, 2) chambering, and 3) locking. This was expected since this is what he experienced on the range.
Next, I pulled the trigger on the dummy round to simulate firing (step 4), pulled the charging handle to the rear to simulate steps 5, 6, 7, and 8 (unlocking, extracting, ejecting, and cocking). All functioned properly.
I repeated this process for the remaining two Snap Caps that were in the magazine. The rifle functioned flawlessly when operated manually; however, I knew it would fail to feed at the range each time after firing the first live round.
Since this barrel was marked 5.56 NATO, I asked about the ammunition he used. My friend confirmed that he was using 5.56 NATO ammo. I then asked to see an empty cartridge that had been fired through the rifle.

Examining the once-fired brass from this rifle’s chamber (top cartridge case), it is apparent that the brass has a cloudy or “frosty” look to it when compared to a new cartridge (bottom). This indicates a rough chamber.
A rough chamber will make it more difficult to extract the fired case from the chamber. This, in turn, will slow down the bolt carrier’s rearward motion and prevent it from going fully to the rear.
In this specific case, the bolt carrier is going far enough rearward to eject the previously fired case but not far enough back to place the bolt behind the next cartridge in the magazine, as is required for proper feeding. Looking again at the first picture detailing this failure to feed, you can see that the bolt is not behind the case head, where it should be. Instead, the bolt is overriding the cartridge case. This is a direct result of a too-rough chamber.

Looking into the chamber (arrow), we can see that it is dark and rough. A light polishing of the chamber should get this rifle up and running. Chamber polishing should ONLY be performed when needed; this isn’t something you would want to do simply to make your chamber “brighter.”
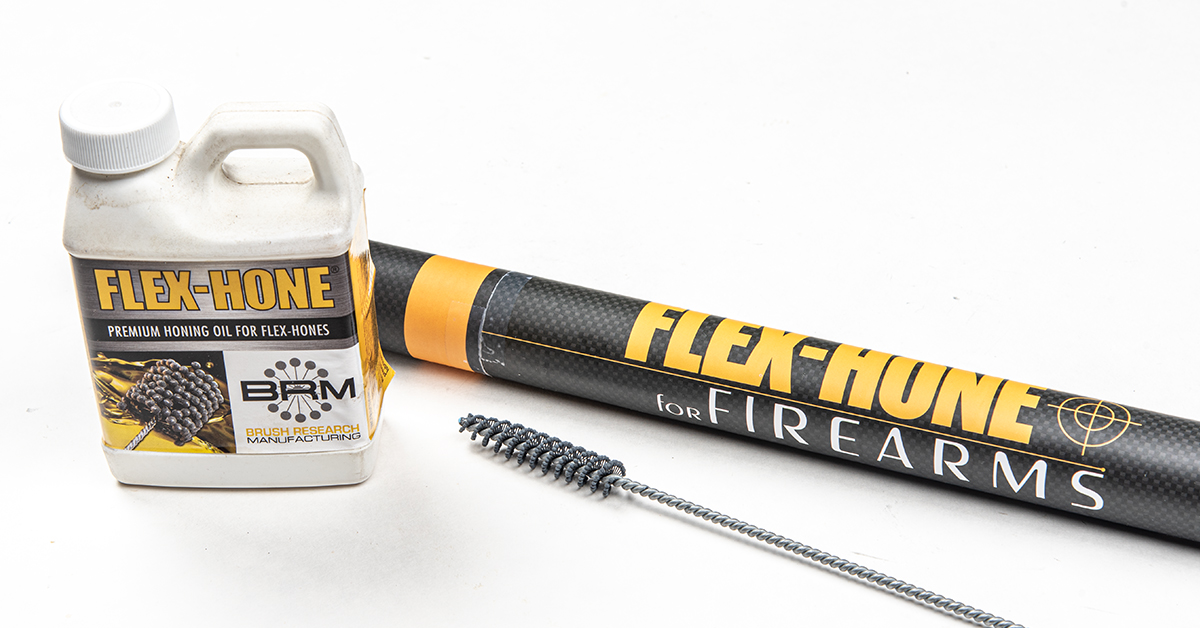
It is important to remember that your rifle’s chamber is a finished product with specific dimensions that have been established to ensure its safe operation. Polishing can and will change these dimensions. As you polish the chamber, it will expand in diameter, and this expansion must be kept in check. The goal is to polish just enough to remove the imperfections (roughness) so the rifle will function properly. With this in mind, we chose to use an 800 grit Flex-Hone to polish the chamber.
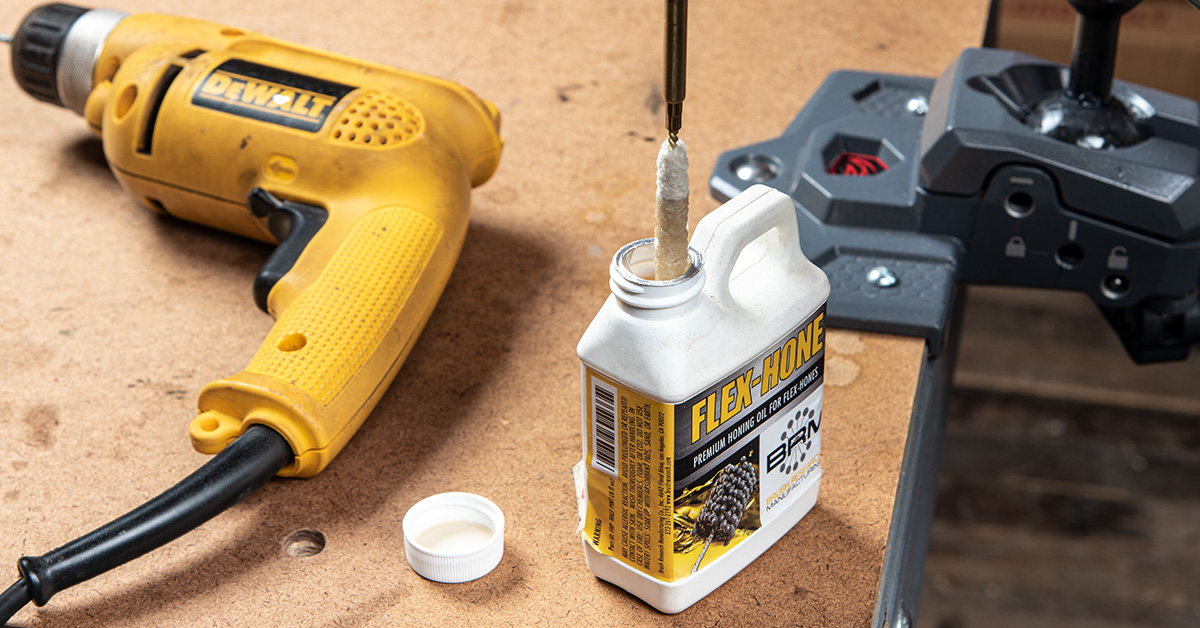
All that is needed to polish your rifle’s chamber is the appropriate Flex-Hone, honing oil, a vise, and an electric drill. The Real Avid Master Gun Vise we’re using here provides optimal support for the upper receiver assembly and the multi-axis design allows you to level the assembly with no hassle.
Clean the bore and chamber prior to polishing. Next, coat the chamber with Flex-Hone honing oil. Here, we are applying oil to the chamber with a bore swab.

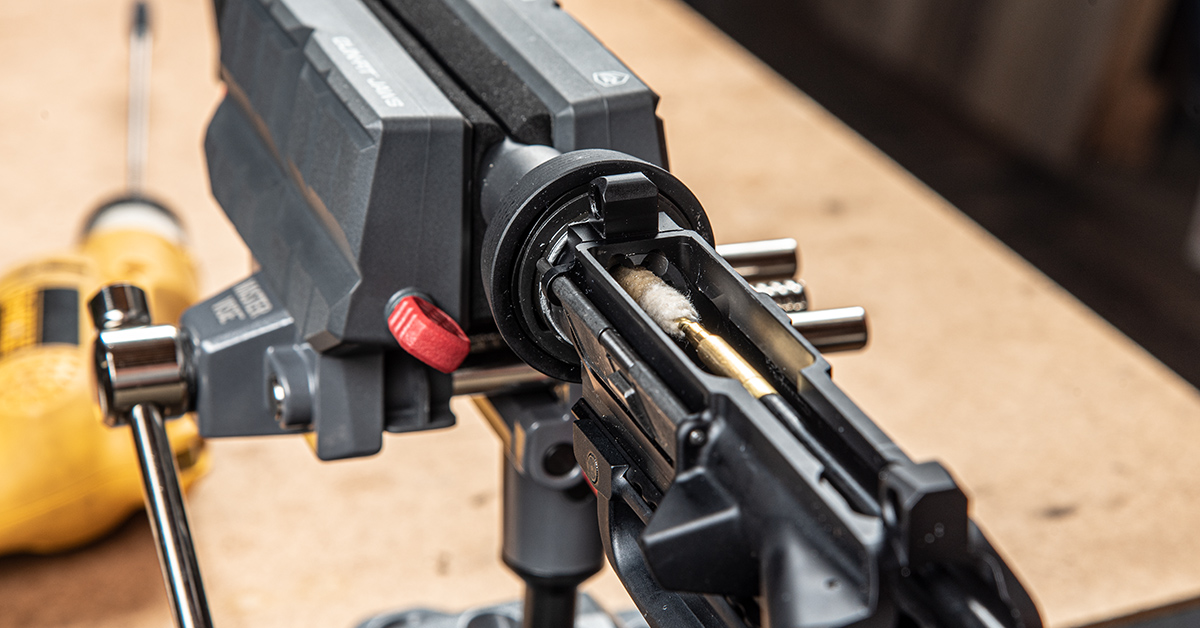
Install the Flex-Hone (these are caliber-specific) into your drill. Secure the barreled action level in a vise and coat the Flex-Hone with honing oil.
Spin the Flex-Hone slowly as it enters the chamber and slowly increase the speed to 800-1000 rpm once it is fully inserted. Stay as straight as possible. Keep the hone moving fore and aft while in the chamber to ensure even polishing. Do not go past the chamber’s shoulder and do not allow the Flex-Hone to contact the shoulder for long. It is best to keep the Flex-Hone off the shoulder since this cartridge (5.56 NATO) references headspace from the shoulder. The honing process will only take a few seconds. Stop to check your work and be careful not to over polish!

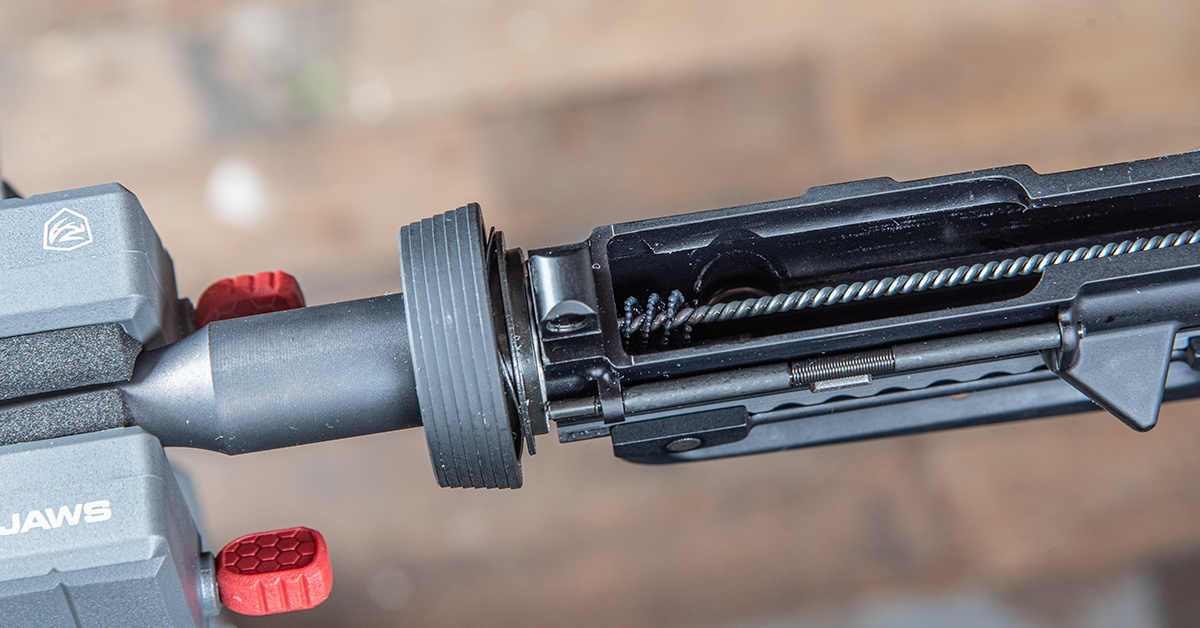
Once the honing process is complete, clean the bore and chamber to remove all traces of the polishing grit left behind by the Flex-Hone.
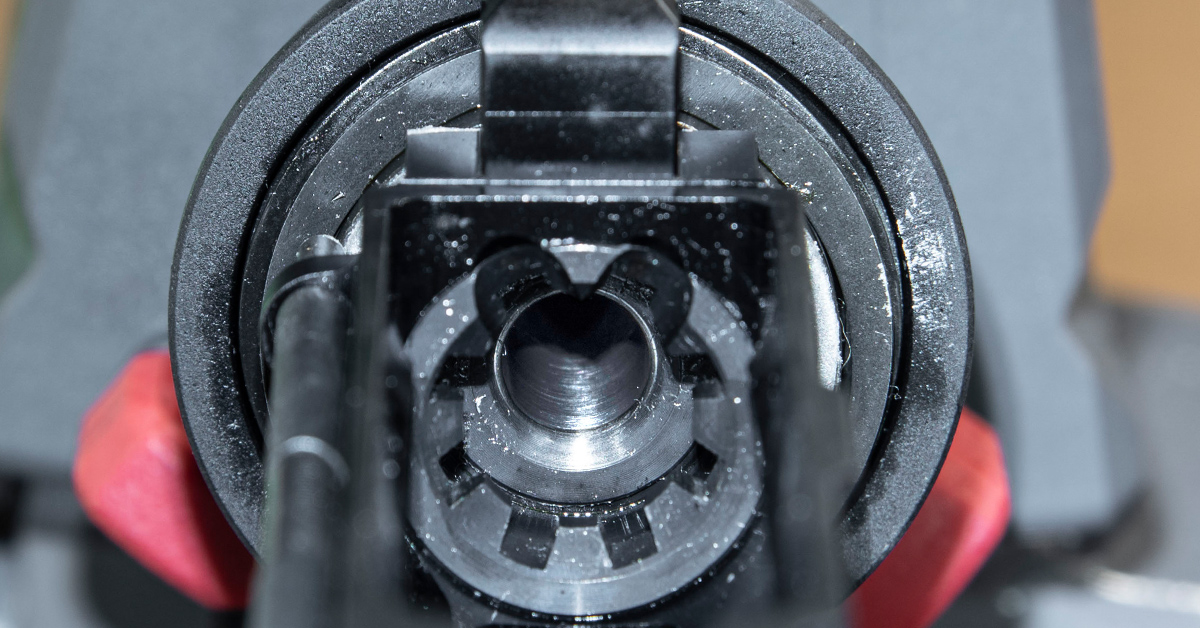
The chamber’s surface finish is now much smoother than before.
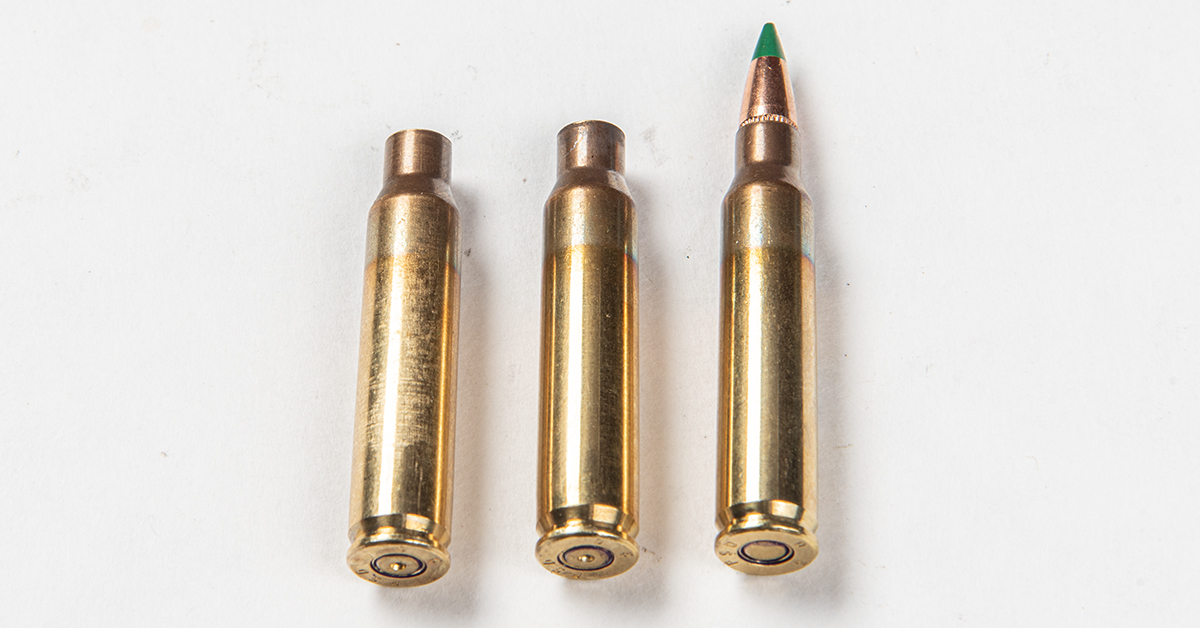
The cartridge case on the left was fired prior to polishing the chamber. The cartridge case at center was fired from the same rifle following the chamber polishing procedure using the Flex-Hone. The difference in appearance between the two is readily apparent. The once-fired case now looks as good as the new cartridge pictured at right and can be extracted smoothly from the chamber.
Simply smoothing out the chamber fixed the failure-to-feed malfunction, and the rifle has functioned flawlessly ever since.