Crossbows are not known for their high customization potential, but there are some improvements you can make no matter what came out of the box.
by Rob Reaser
Hunters — bow and firearm fans alike — have a long history of customizing their weapons to improve performance and customizing to meet individual needs and objectives. There are, however, outliers in the upgrade game, such as crossbows and conventional inline muzzleloaders. The reason? Neither platform offers much wiggle room when thoughts turn to big customizing projects. Both tend to come from the factory ready to roll, and there isn’t huge aftermarket support because proprietary designs and relatively low volume suppress opportunities.
Nowhere is this felt more keenly than with crossbows. Crossbows come with their calibrated optics. Triggers are integrated and model-specific, so there is no fooling with those (doing so also voids warranties). Ditto for stocks, grips, and all the usual avenues of change.
Is that to say the eager crossbow hunter cannot do things their own way? Absolutely not. Here are a few ways you can tweak your hunting crossbow…
Optics
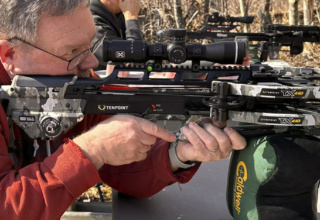
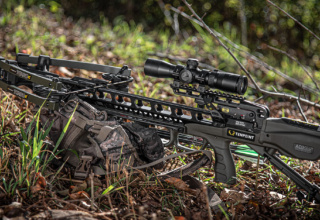
Any crossbow worth your money will be packaged to include a scope, quiver, and at least three arrows with field points, ready to zero and get you going. That scope is supposed to provide point-of-aim/point-of-impact calibration relative to the speed of the crossbow and the arrows supplied with it. This way, you can zero for 20 yards and stay close to the mark when your range extends to 30, 40, and 50 yards.
At least, that’s the way it’s supposed to work. As with most things, results may vary. We’ve seen first-hand how “crossbow packages” sometimes fail to live up to expectations. A cost-saving swap from one arrow to another at the factory without a change in scope calibration can put the shooter frustratingly off-target when transitioning from close- to long-distance. Then there is the “get what you pay for” scenario. Buy an “exceptionally affordable” crossbow package and the included optic might not survive the sight-in phase. Yeah, some of them are that bad.
For these reasons and more, serious crossbow hunters often look to upgrade their “kit” optic with something a bit more substantive, diverse, and reliable.

Another scenario for upgrading from the factory scope is a change in arrow/broadhead weights.
Crossbow scopes are based on a drop compensation reticle. Given the significant trajectory drop of an arrow (versus, say, a bullet) within lethal/ethical shooting distances, it is essential for an aiming solution to be built into a crossbow scope reticle. As mentioned, this is all based on the bow’s speed and the arrow’s weight — the two determiners of trajectory. The same holds true for vertical bows. The difference with vertical bow sights, though, is that they can be independently adjusted for trajectory drop. No so with fixed-reticle crossbow scopes.
So, say you want to boost your crossbow’s penetration potential and impact energy by shifting to a heavier arrow and broadhead combination. All good stuff, and something more and more crossbow hunters are doing these days. If you do that with a fixed-reticle kit scope, your drop compensation will be off. In some cases, WAY off. When you’re dealing in grains of weight, it doesn’t take much change up or down the scale to throw off your point-of-impact.
This is where the beauty of “speed calibrated” crossbow scopes come into play.

Speed-calibrated scopes utilize a first focal plane reticle, meaning the reticle increases or decreases in relative (viewed) size with adjustment to the magnification (or speed) setting. Rather than denote magnification factors on the dial, the crossbow scope denotes velocity. In theory, you simply dial the scope to match the velocity of your crossbow/arrow weight combination (you’ll need to verify this with a chronograph or radar unit) and the reticle should provide the correct aim point for all your effective shooting distances.
That’s the theory, mind you. What you’ll discover is that it will take some fine-tuning to get the drop compensation reticle in perfect synch with your actual arrow drop across the typical distances of 20, 30, 40, and 50 yards. Once you have it, make a slight etch on the magnification/speed ring that corresponds to the alignment mark on the ocular lens bell. This way, you can always make sure the setting is correct. Should you change arrow weights down the road, simply repeat the process for the new projectiles.
Noise Suppression
Even the quietest crossbows aren’t, which is why top-end manufacturers invest in a lot of engineering and research to try and keep the noise down in their models. Most of the good crossbows will come from the factory with some form of cable vibration suppressors. Some work well, others struggle to let you know they’re even on the job.

Aside from good engineering, which is the biggest determiner of how noisy or quiet a crossbow will be, string stops are the most effective devices used to dampen string vibration. If your crossbow manufacturer offers string stops, get some and install them. If they don’t, you can probably forget about it since these also tend to be specific to a manufacturer or bow model. Still, there are alternatives.
The easiest and most common solution is to install string/cable silencers. These are generally universal in fit and wrap around crossbow cables just as they do on the strings of vertical compounds and traditional recurves and longbows. Check with the manufacturer for cable silencer placement. You want to be sure you don’t install them where they will interfere with the cam rotation or cable movement along the barrel.
Arrows and Broadheads
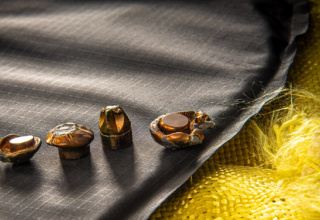
One way to modify the performance of your crossbow has nothing to do with the crossbow itself. Your choice of projectile — meaning the arrow shaft and broadhead — can have a big impact what your crossbow will do.
Consider the ultra-fast crossbows on the market today. We love them for the quick flight, flat-ish trajectory, and superior terminal performance. That said, the fastest of the lot doesn’t enjoy a monumental separation from a crossbow shooting a hundred FPS slower when you are talking about typical (and ethical) hunting distances that are inside 30 yards. In other words, how fast do you really need to go?

If you have all that energy, great. Let’s make better use of it by upping your arrow and broadhead weight. You probably won’t even notice the reduced speed when arrowing a whitetail at 20 yards, but you can be sure that extra arrow mass is going to hit that deer harder, which is what we want to ensure lethal penetration.
Another benefit of a heavier projectile is that the extra weight, as with a vertical bow, is going to absorb more of the crossbow’s stored energy, meaning a quieter shot. The more energy transferred to the arrow, the less energy remaining in the crossbow that must be shed through heat and vibration. It’s simple physics.
Stabilize Your Shot
We use stabilizing aids when shooting rifles — slings, bipods, field rests…whatever we have at-hand that makes sense. Crossbows, featuring the same basic stock platform as a long gun, beg for similar support. The problem is, crossbow limbs extend well beyond the width of the stock (compared to a long gun) and they move, so how you hold and against what you hold a crossbow must be considered.

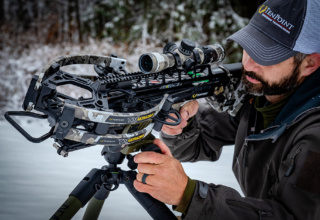
We believe a crossbow sling to be a must-have, not only for field carry but to use as a stabilizing brace when shooting. Another option is to include a collapsible monopod, bipod, or some form of shooting stick that you can use to support the crossbow from a standing, kneeling, or sitting position. If you’ve ever been caught holding a crossbow unsupported while waiting for a deer to stop looking at you and move into a better shooting position, you understand the value of a good support.
At first glance, it may seem that there’s not much you can do to personalize or improve the performance of an out-of-the-box hunting crossbow. Now you know better.


