Ranger Point Precision’s newest hardware can turn the already spicy Henry Big Boy X into a sizzling defensive carbine. Here’s how we did it…
by Rob Reaser
We’re not shy to say that we’re big fans of the Henry Repeating Arms X-series rifles and especially the Big Boy X models with their pistol cartridge chambers. You can check out our review of the Big Boy X in .357 Magnum here. We also have developed a tremendous amount of respect for the products manufactured by the folks at Ranger Point Precision, having recently upgraded a Rossi lever-action with several goodies from the RPP lineup.
As the company name implies, Ranger Point Precision puts a focus on precise, tight-tolerance machine work and innovative designs with all their products — from their replacement small parts and trigger components to their renowned M-LOK aluminum handguards and ingenious adjustable buttstock systems for lever-action rifles.
Since RPP specializes in lever-action upgrade components covering Marlin, Rossi, Winchester 94, and Henry models, it was only natural that we try our hand at bringing these two brands together in our typical Shoot On DIY fashion.
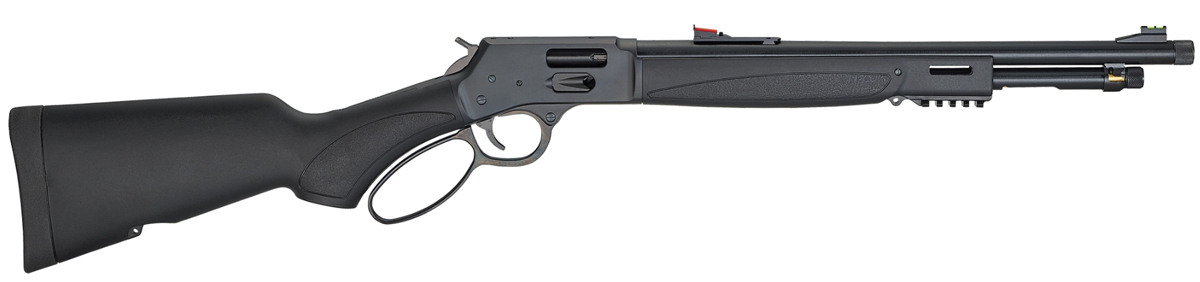
Our platform for this build is the Henry Big Boy X (model #H012X) chambered in .44 Magnum/.44 Special. Boasting a 7-round magazine capacity and a 17.4-inch barrel, it’s a tidy carbine for the home or the truck and more than capable of taking down game animals from hogs and deer to bear when fed a diet of .44 Magnum.
Part of the Big Boy X model’s charm is its nod to the modern shooter’s needs. The polymer forearm has a Picatinny rail on the bottom, side M-LOK slots for accessories, and an integrated sling swivel mounting point. The buttstock also includes an integrated sling mounting point and a comfortable rubber butt pad.
The real star of the show, though, is the barreled action. The gun is accurate, the action smooth, and the fit-and-finish testifies to the quality materials and construction that is evident every time you settle behind the trigger. We also like the fact that the Big Boy X offers two loading options — drop the cartridges into the magazine tube at the front of the rifle or slide your ammo through the side load gate. The latter makes it easy to “top off” your ammo without having to remove the inner magazine tube.
Fine as the Henry Big Boy X is in its factory form, a cool gun like this can be made even more chill with some creatively selected aftermarket components that deliver more function than flair. Here is where Ranger Point Precision comes into view. We got a first-hand look at the possibilities while attending this year’s NRA show. At the Henry booth, RPP (hailing from the outskirts of the NRA’s Houston convention site) brought several of their Henry custom rifles for display. Needless to say, we were impressed and inspired and soon had our order filled and on the way.
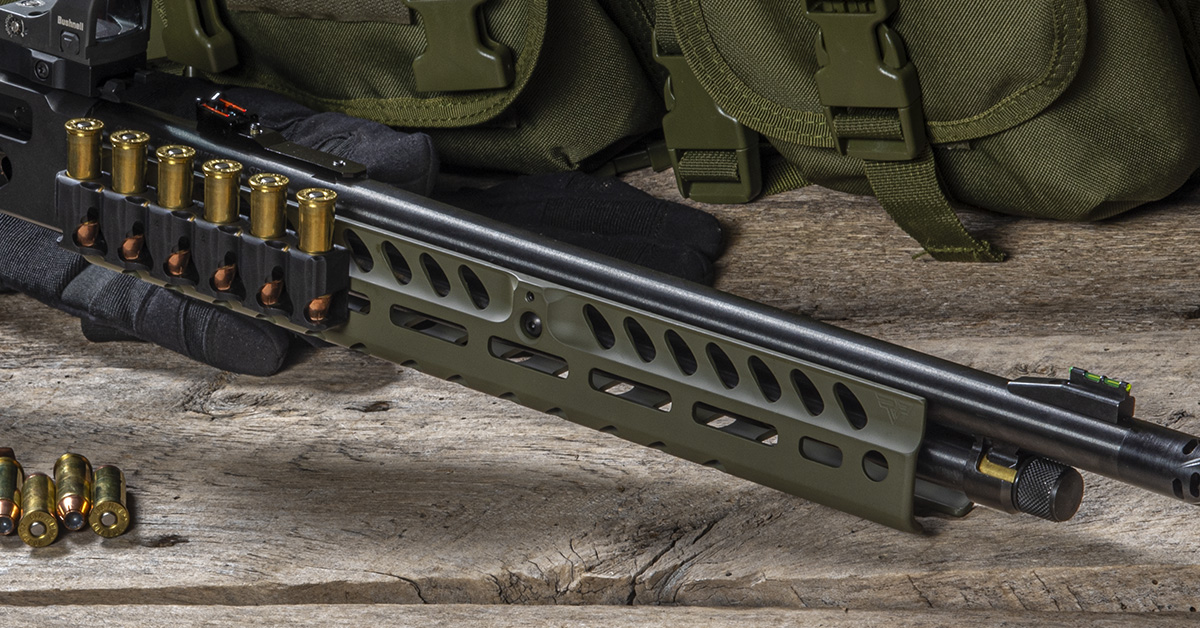
The centerpiece of our build is the Gen 2 Henry M-LOK Aluminum Handguard. This is a monolithic piece machined from solid 6061-T6 aluminum billet and finished in either Type III black anodizing or Sniper Green or Sniper Grey Cerakote (extra charge). We opted for the Sniper Green.
Ergonomically, the Gen 2 handguard exceeds expectations. The handguard features chamfered edges and is deburred and tumbled after machining, making it exceedingly smooth in the hand. The flat bottom profile offers stability for shooting off a field rest or a barricade, and the full-length finger grooves promote a solid grip and good muzzle control. The one-piece design delivers maximum structural rigidity when compared to multi-piece handguards. There is also a cutout in the bottom of the handguard to allow for loading through the tubular magazine.
A total of 24 M-LOK slots (12 per side) provide ample acreage for accessory attachment. The handguard is also machined with four flush cup holes to accommodate quick-detach sling swivels.
The Gen 2 handguard comes with a barrel/magazine tube tenon, two tenon screws and washers, and four set screws. The tenon replaces the factory unit and is built from 17-4 stainless steel — truly an impressive piece of metal for its intended purpose.
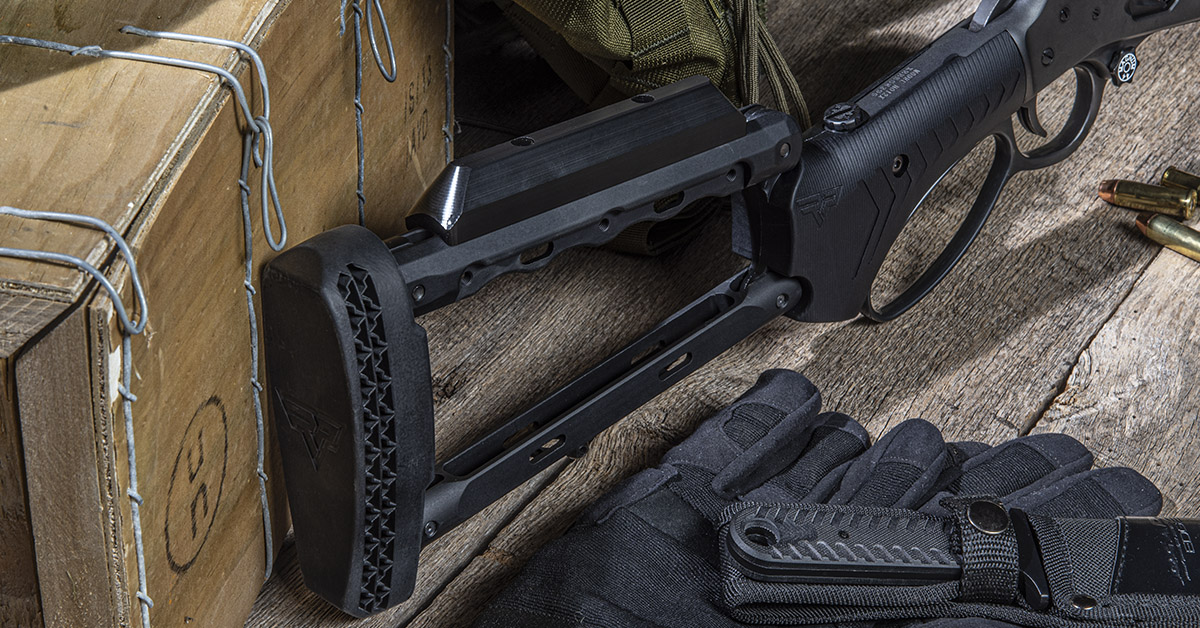
Earning co-star billing is the Henry M-LOK Aluminum Adjustable Butt Stock/Pistol Grip assembly. The frame is made of 6061 Type III anodized aluminum and features a four-pivot-point design that allows you to adjust the comb height to match your sighting system and shooting style. To adjust, simply loosen the four pivot screws, raise or lower the frame as desired, and retighten the screws.
This stock comes with Ranger Point’s Dead Blow recoil pad. The butt plate underneath the pad features an AR-style 6-position design that works with off-the-shelf pads. Length-of-pull can also be extended with 1/2-inch spacers available from RPP.
RPP also offers an optional cheek riser for an extra half-inch of height — a desirable component if you plan to use a red dot or medium or tall scope rings. Another stock option is the Butt Stock Accessory Panel. This attaches to the left or right side of the butt stock frame and incorporates six flush cups for QD attachments and three M-LOK slots for accessories such as an RPP cartridge quiver.
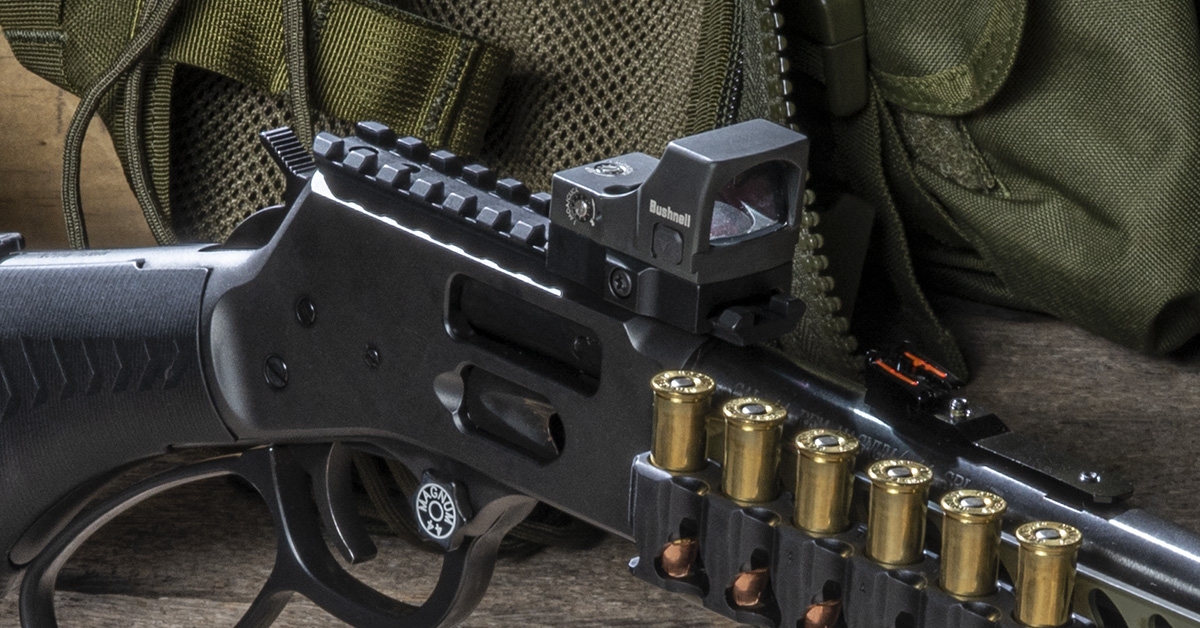
Wanting to take full advantage of the Big Boy X’s inherent accuracy (and to compensate for our aging eyes), an optic is part of our build. The Henry’s side ejection port means we could install RPP’s Rhino 5-inch Picatinny rail mount for Henry pistol-caliber rifles across the top of the receiver. We topped this off with Bushnell’s RXS-250 reflex sight.
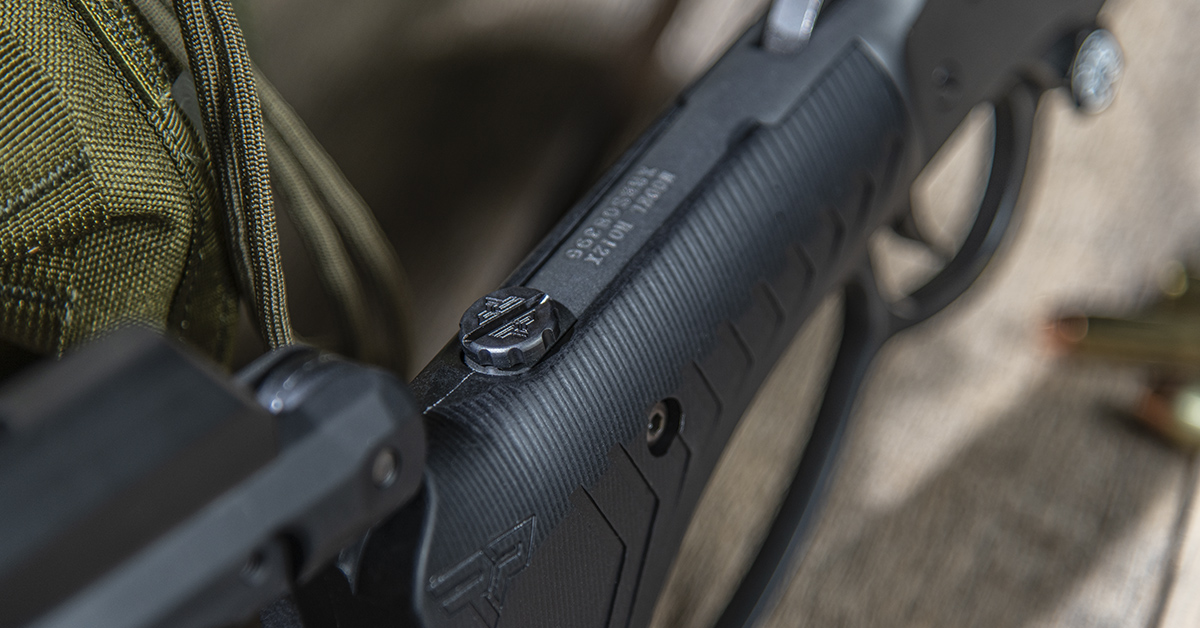
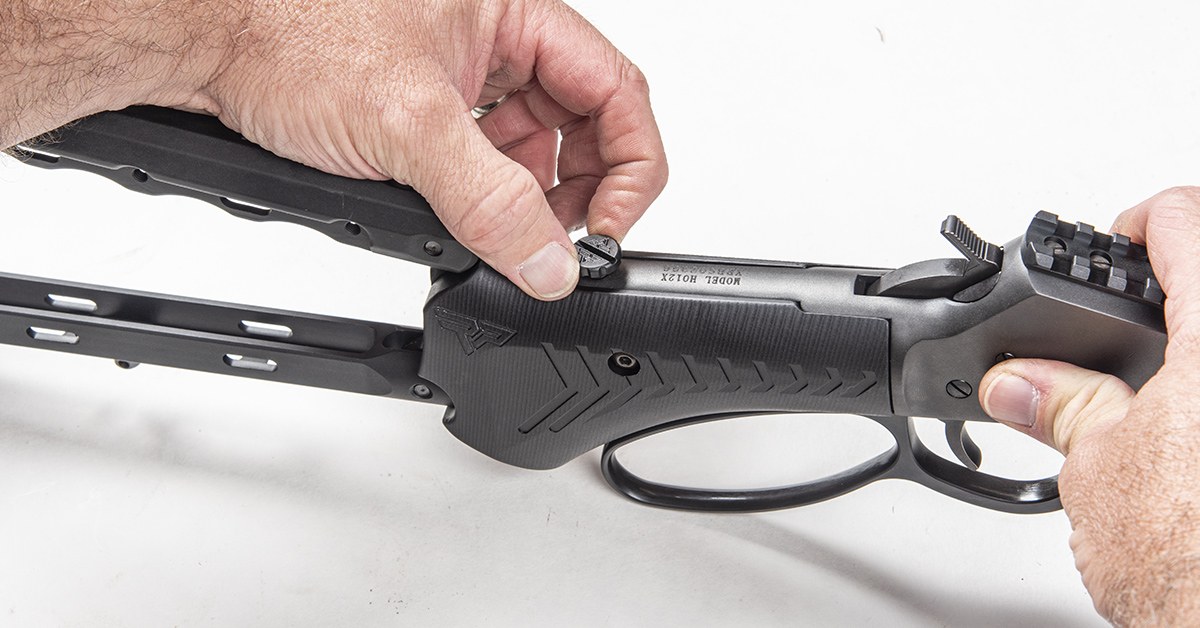
To secure the adjustable butt stock to our rifle, we opted for RPP’s Quick Stock Takedown Screw. This is a neat option because it allows you to quickly separate the butt stock from the barreled action for compact transport. Contoured edging and a generous slot let you remove or install the screw by hand or with a coin.
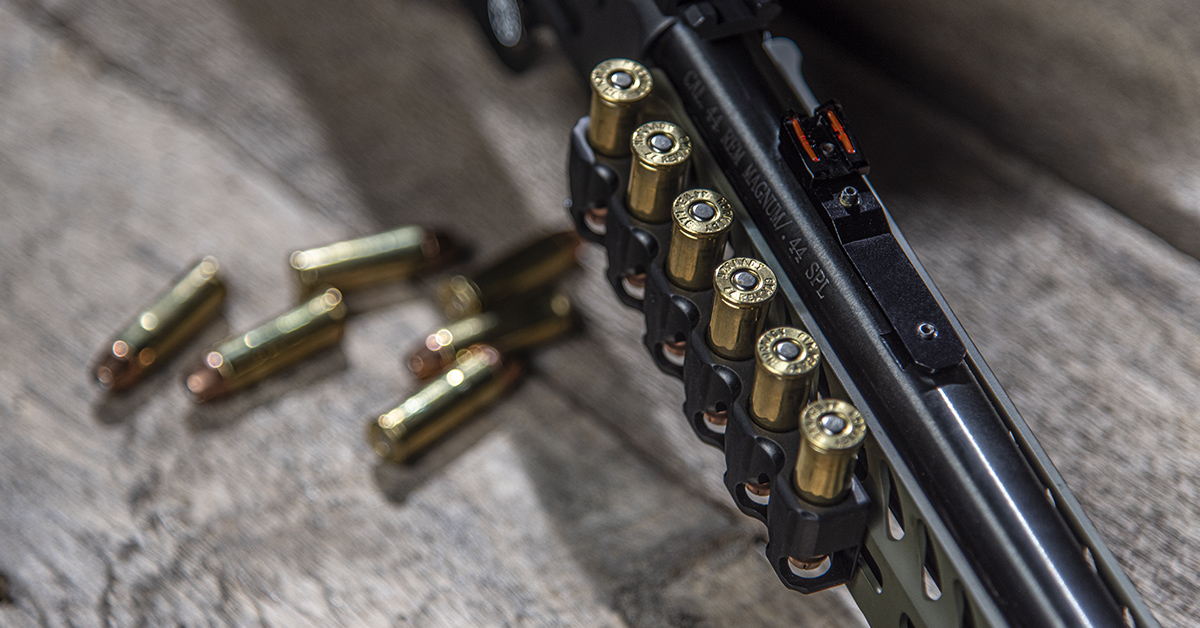
Speaking of cartridge quivers, no RPP conversion would be complete without one. Offered with six-round capacity for the .44 Magnum, the 6061 aluminum quiver with Type III hard black anodizing attaches to either side of the handguard via the M-LOK system.
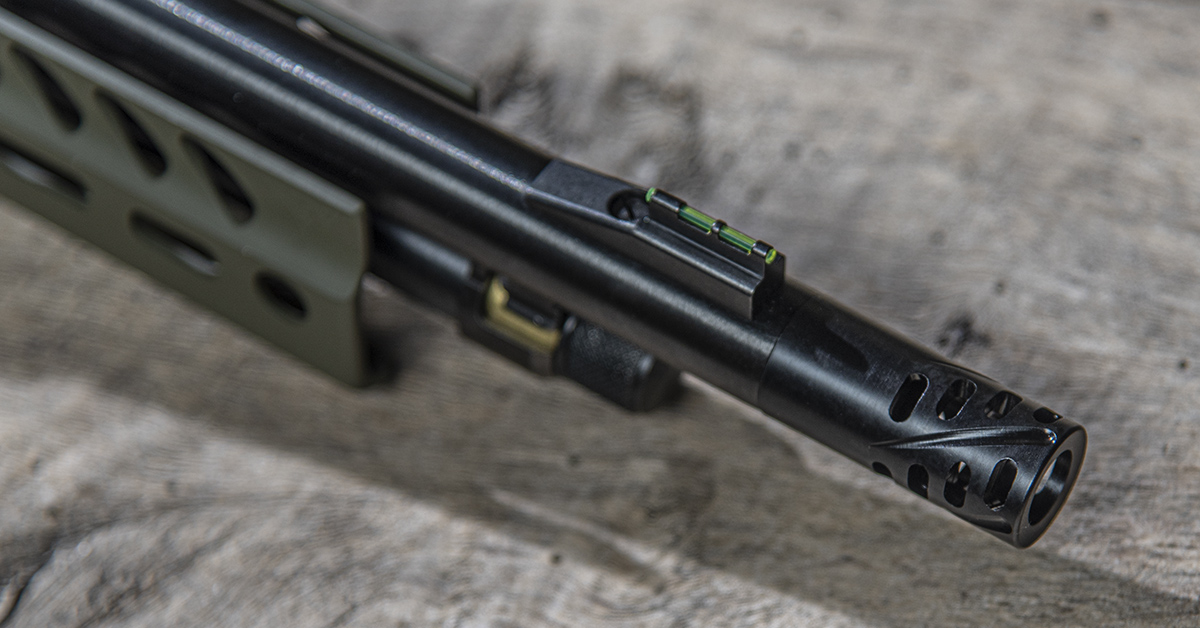
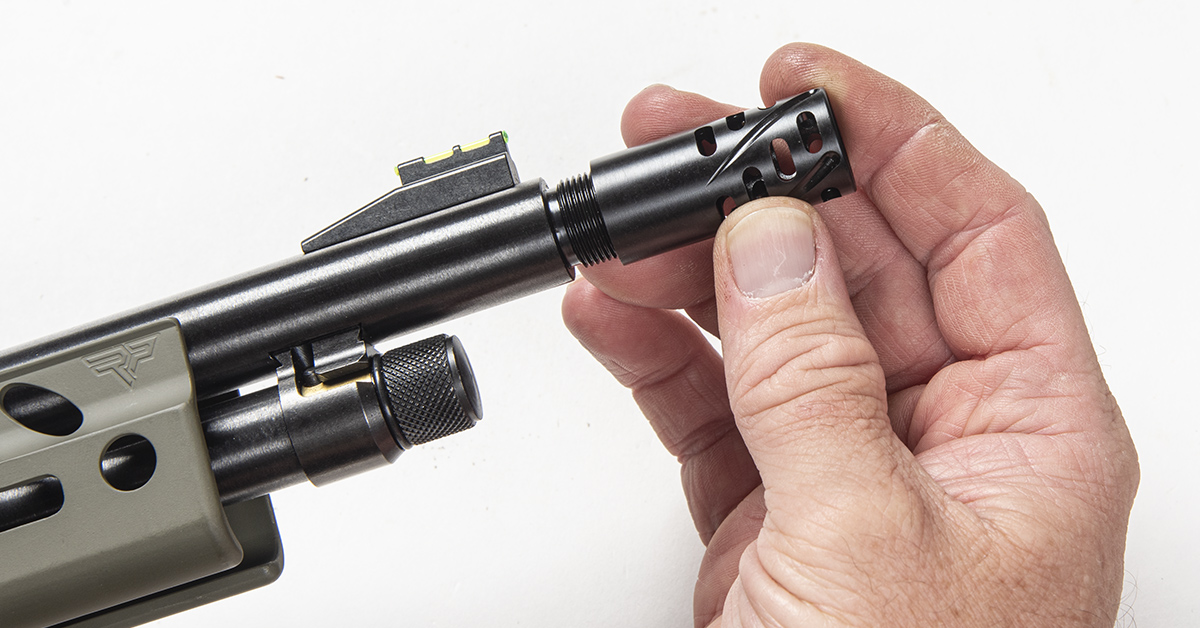
The Big Boy X comes from Henry with a 5/8×24 threaded muzzle. Since RPP also manufactures the stylish and functional Comet muzzle brake, we couldn’t leave the factory thread protector alone. Treated with a black nitride finish and perfectly machined to match the barrel profile, RPP states the Comet brake offers a 25-percent reduction in recoil and muzzle flash. We couldn’t quantify that in the field, but it certainly makes for a welcome addition to our project.

Finally, we threw in RPP’s Lever Quick Takedown Screw. This replaces the factory lever screw so you can remove the screw by hand should you wish to pull the lever and remove the bolt for easier barrel cleaning through the breech end. You can buy these with caliber-specific designations or choose one of RRP’s other custom designs.
To DIY or Not to DIY?
Yep…that is the question you must ask yourself if you want to do a build like ours. That is because the first thing we saw when we opened our handguard package was this little note that said:
“CAUTION: Henry forearms are not made to come apart. You will damage your rifle if you attempt to disassemble it. We will not be liable for any damage to your rifle.”
As we discovered during our build, this is not an overly cautious warning on the part of Ranger Point Precision. In fact, it is a prudent warning.
We didn’t find the Big Boy X forearm to be a problem to remove. The problem was dealing with the outer magazine tube and the way that it is installed onto the barreled action at the factory combined with the way the RPP handguard and tenon must be installed.
The short story is, we are going to show you how we installed the handguard on OUR rifle. We are not telling you how to do it nor are we offering any advice on performing this operation or suggesting that you should or can do it yourself. The reason is there is a good chance that what worked for us may not work for you since there are inevitably variations in components and machining dimensions from one gun to another. Plus, we just may have been lucky.
Ranger Point Precision included in their warning note that Louthan Gunworks can perform the installation for $65 with a 3- to 5-day turnaround. Simply contact Louthan Gunworks and make the arrangements. Unless you are an experienced gunsmith, Shoot On recommends you do just that.
With that, here’s how we went about the handguard installation, followed by the step-by-step on the remaining components (which you should have no trouble doing yourself!).
We began by removing the inner magazine tube from the rifle.
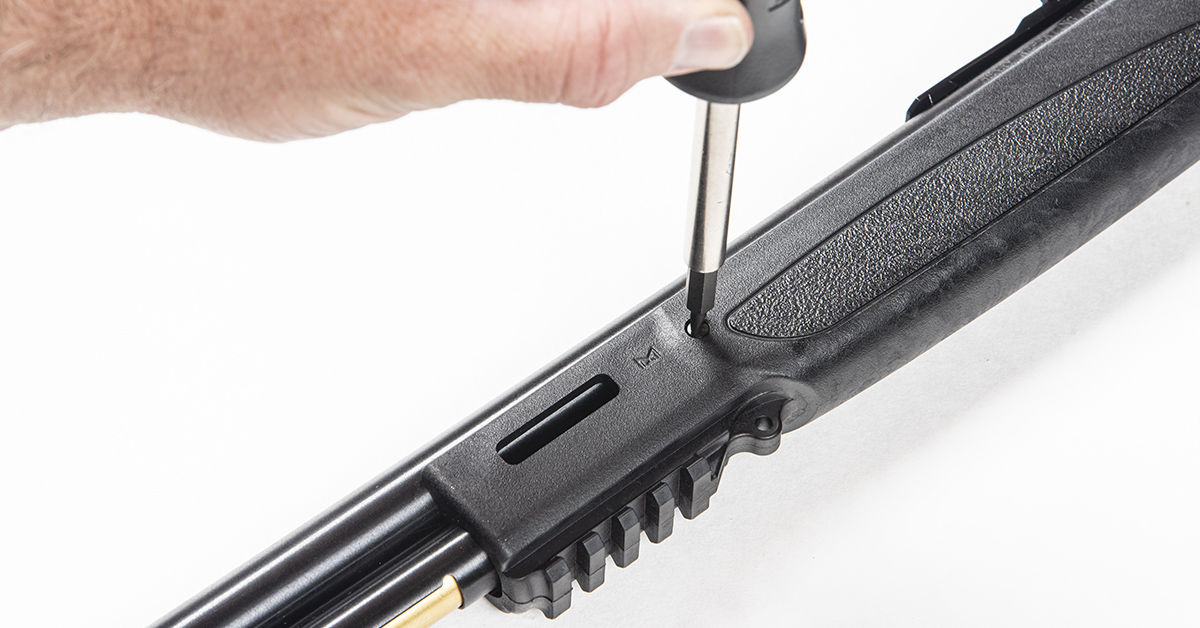
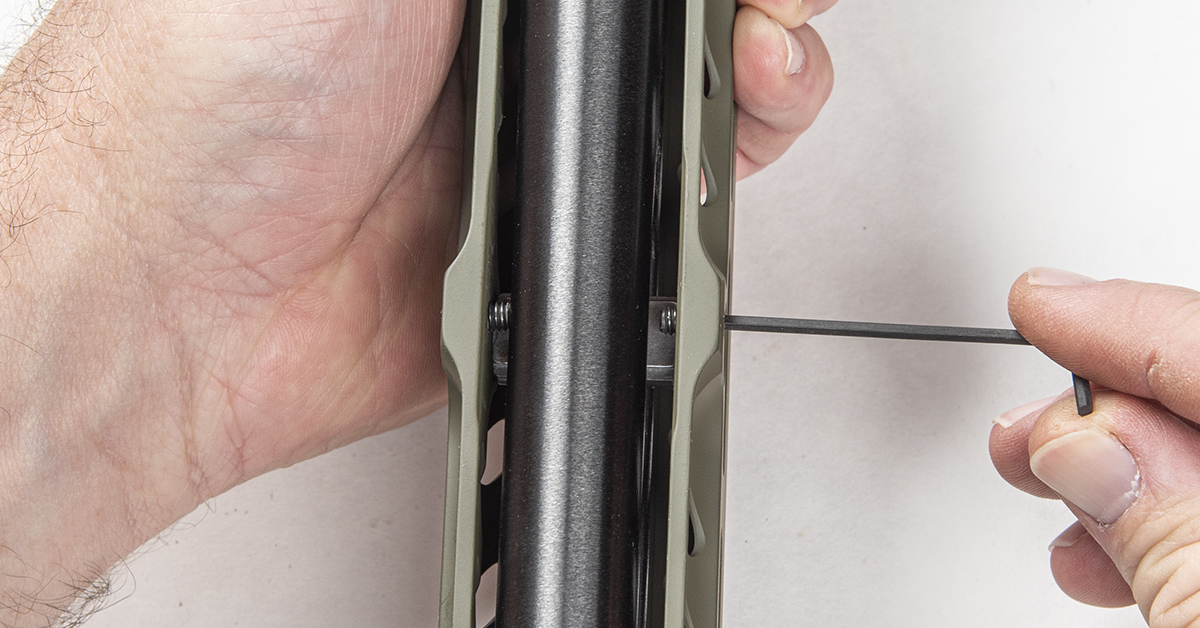
The Big Boy X has one screw on each side of the forearm that secures it to the barrel and magazine tube tenon. We removed both screws.
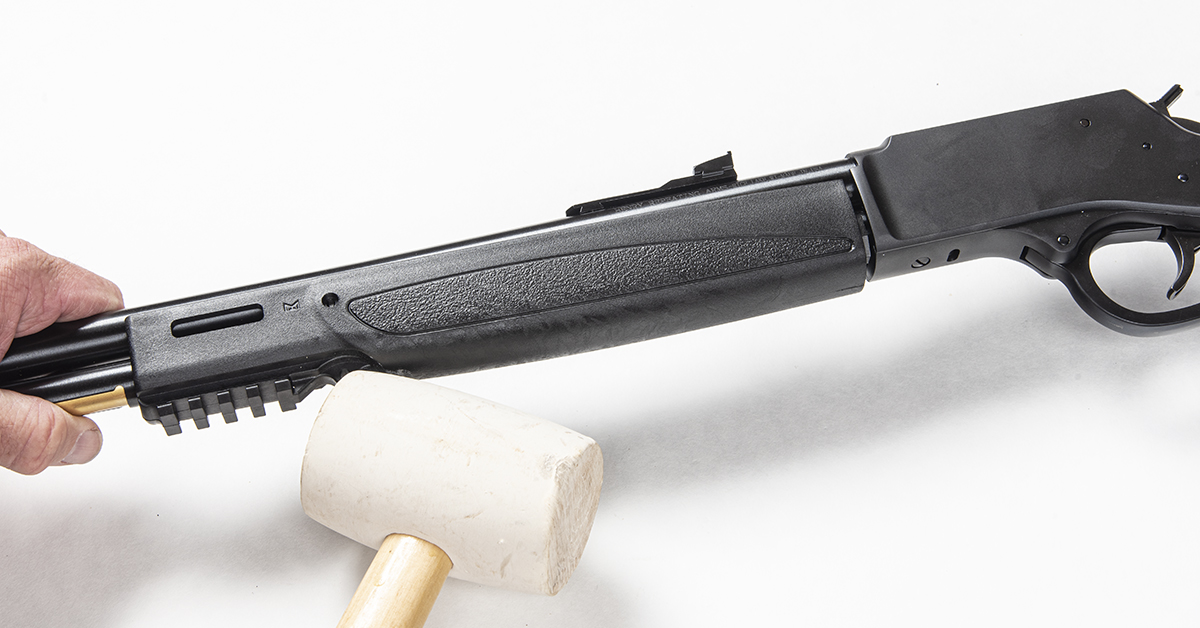
With a rubber mallet, we tapped on the forearm’s sling stud boss to move the forearm out of the receiver.
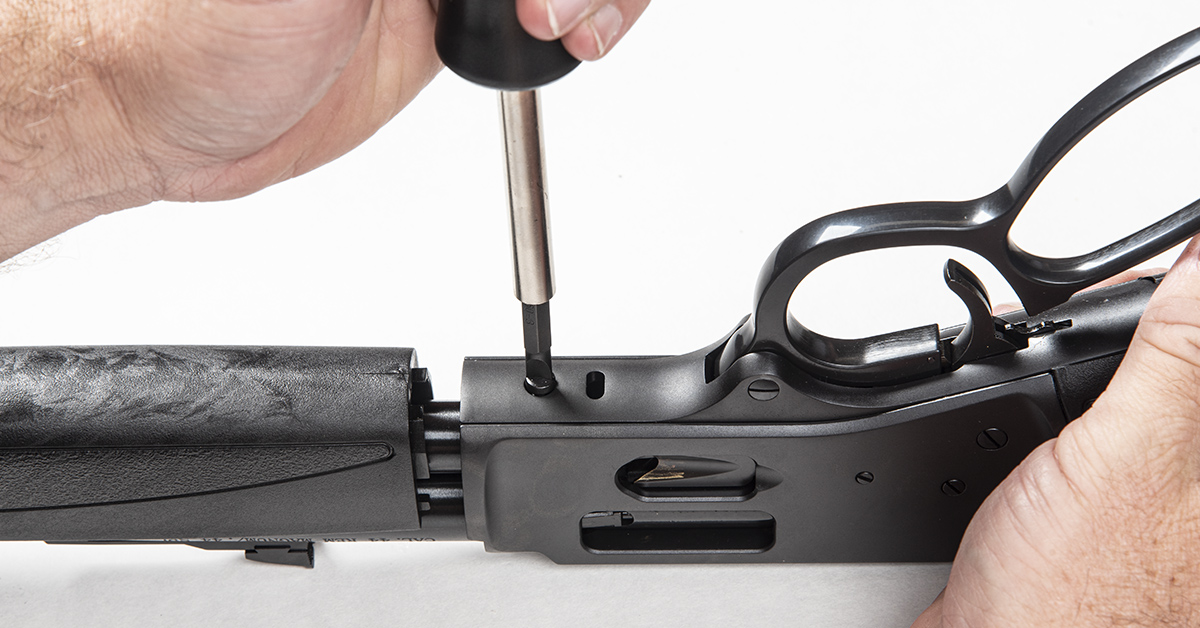
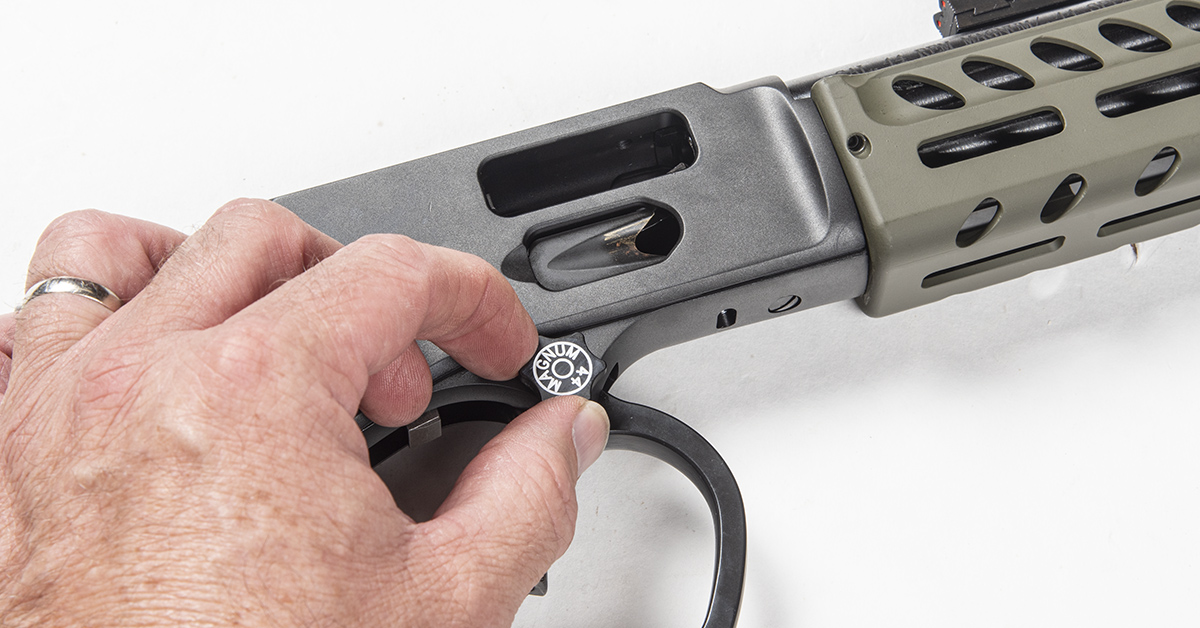
Thinking that this trigger guard screw needed to come out in order to allow access to and removal of the outer magazine tube retaining screw, we removed it. To our surprise, there was no mag tube retaining screw present—only the threaded bushing that engages the trigger guard screw.

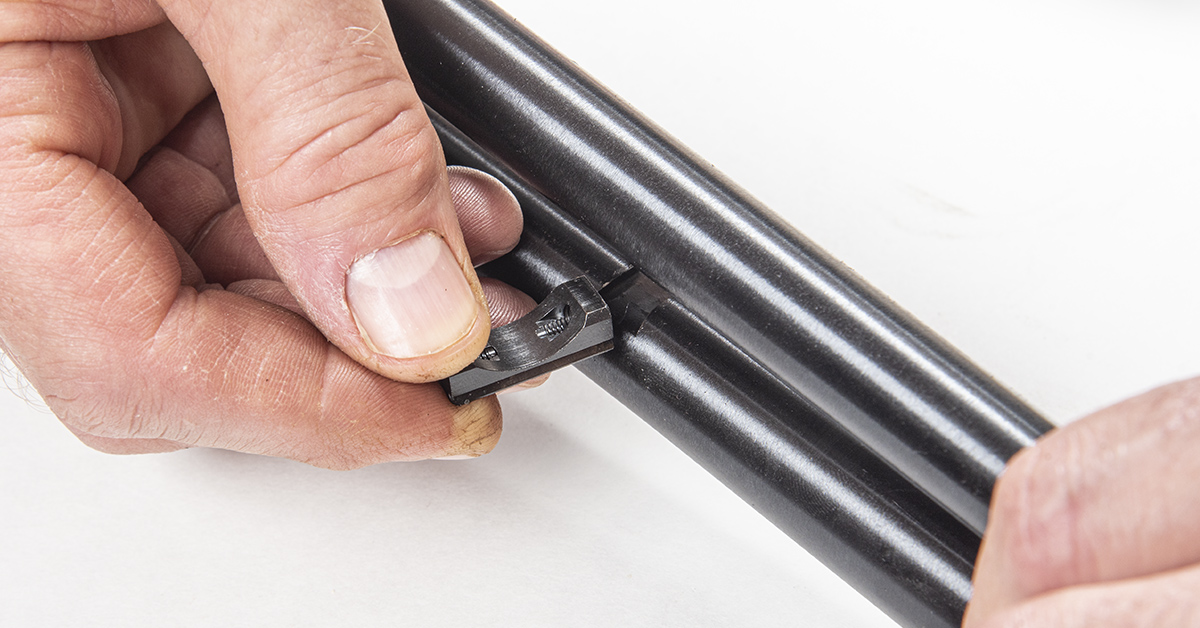
Henry, for some reason, installs the outer magazine tube and the outer magazine tube support onto the barreled action as one unit. The tube support, which uses a dovetail fit to engage the barrel, must be removed before the handguard can be removed. This is why RPP states that the Henry forearms are not made to come apart.
Nevertheless, removing the support from the barrel is the only way to get the outer magazine tube free of the barrel so the forearm can come off. To do this, we supported the barrel on a bench block and used our rubber mallet to pound the support out of the barrel dovetail slot, driving it out the ejection port side of the rifle. Fortunately, there was enough play in the magazine tube and forearm that we could accomplish this, and we didn’t bend the magazine tube in the process. (And, yes, there were a few beads of nervous sweat dripping from our foreheads as we did this!)
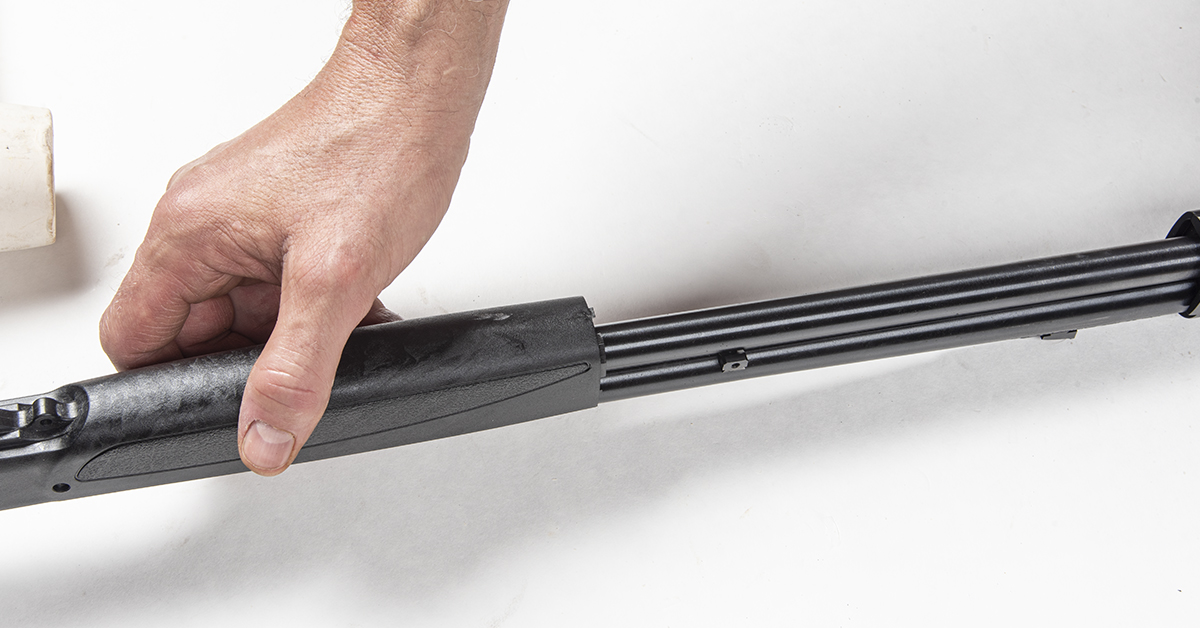
With the outer magazine tube support removed, the forearm easily slid off the magazine tube.
As with the outer magazine tube support, the barrel/magazine tube tenon installs onto the barrel via a dovetail fit. Our fit was loose, so the tenon pulled right out of the dovetail by hand. Had this tenon had an aggressive interference fit, we would have had to tap it out with a hammer.
At this point you may be thinking, “Why did you not remove the magazine tube?”
A solid question, to which we do not have a solid answer. With the trigger guard screw removed, we attempted to pull the magazine tube from the receiver. The tube would move fore and aft by about 1/64 of an inch, but it would not come out of the receiver. Looking as hard as we could, we could not determine what was holding the tube in place inside the receiver. It should have just pulled out, as far as we could tell, but it didn’t.
Perhaps we could have removed the trigger guard plate and discovered the hang-up, but in the end, we elected not to as it seemed it would not have helped matters anyway. The reason is that the new handguard, barrel/magazine tube tenon, magazine tube, and the magazine tube support would have to be installed simultaneously. Even if we could have removed the outer magazine tube, it would not have solved any problems. So, we left the magazine tube alone.

To prevent marring the barrel and outer magazine tube when we installed the new handguard, we applied painter’s tape to both down near the receiver.
Since the handguard must first be slid onto the outer magazine tube, back end first, this was our next step.

With the handguard partially installed onto the outer magazine tube, we carefully pushed the tube away from the barrel just far enough to allow engagement of the new RPP tenon with the barrel dovetail slot. Fortunately, our dovetail fitting was only slightly snug and easy to move into the dovetail with light hammer taps. This was important because the tenon cannot be moved to its final position at this time. Instead, it must be tapped into place at the same time as the outer magazine tube support and magazine are positioned onto the barrel. And that is a tricky maneuver that would made difficult to impossible if the tenon has a tight dovetail fit. Had the RPP tenon been too tight to easily tap into the barrel dovetail, we would have had to remove material from the bottom of the tenon dovetail until we could achieve the fit we needed. This process would have been done the same as when we install a dovetail sight on a pistol or rifle.
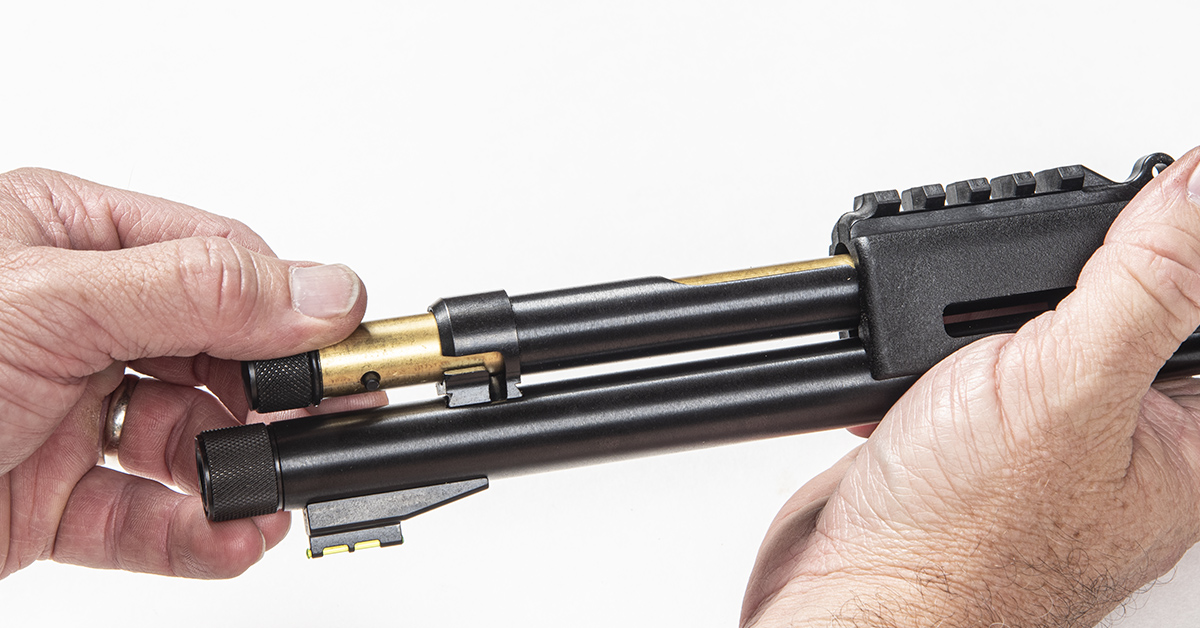
To start, we tapped the new tenon partway into the barrel (from the ejection port side) and positioned the outer magazine tube into its groove in the tenon.
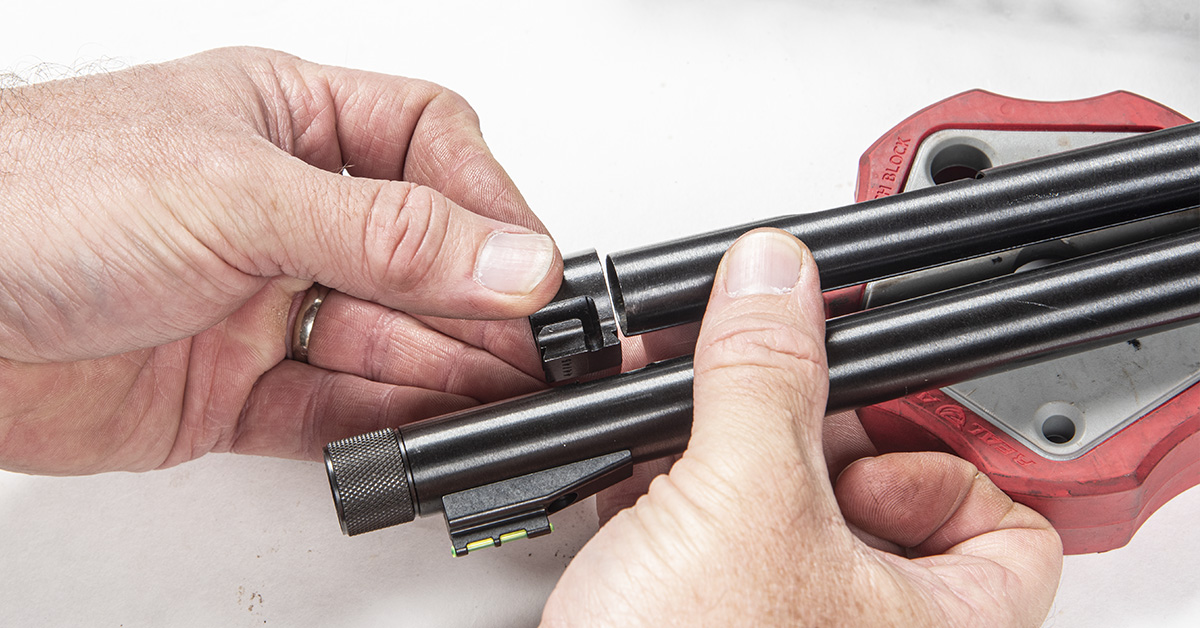
We then placed the magazine tube support onto the end of the outer magazine tube, after which we started the support into its dovetail slot in the barrel.

Supporting the rifle on a bench block up front and a piece of leveling wood in the back, we carefully tapped the magazine tube support a small distance into the barrel dovetail.
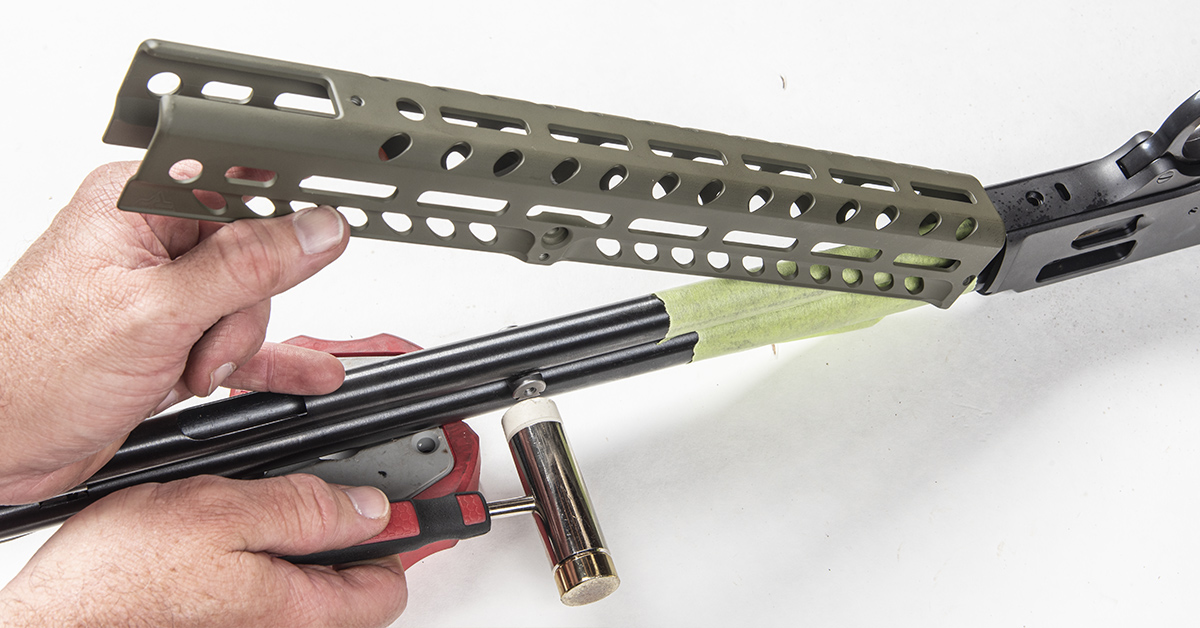
As the magazine tube support moved deeper into its dovetail, we alternately tapped the tenon further into its dovetail. This “tap a little here, tap a little there” process allowed us to move both the tenon and the support to their centered positions in the barrel without bending or otherwise damaging the tube. Fortunately, the Henry outer magazine tube is split along its length, and this likely prevented any damage since it had some inherent “give.” Of course, this process required maintaining control of the partially installed handguard to prevent damaging it.
This is another reason it was important for our tenon to have only a slight interference fit in the barrel dovetail. A tight fit would have demanded more rigid barreled action support and much harder hammer strikes. The result would likely not have been pretty and something might have been damaged.

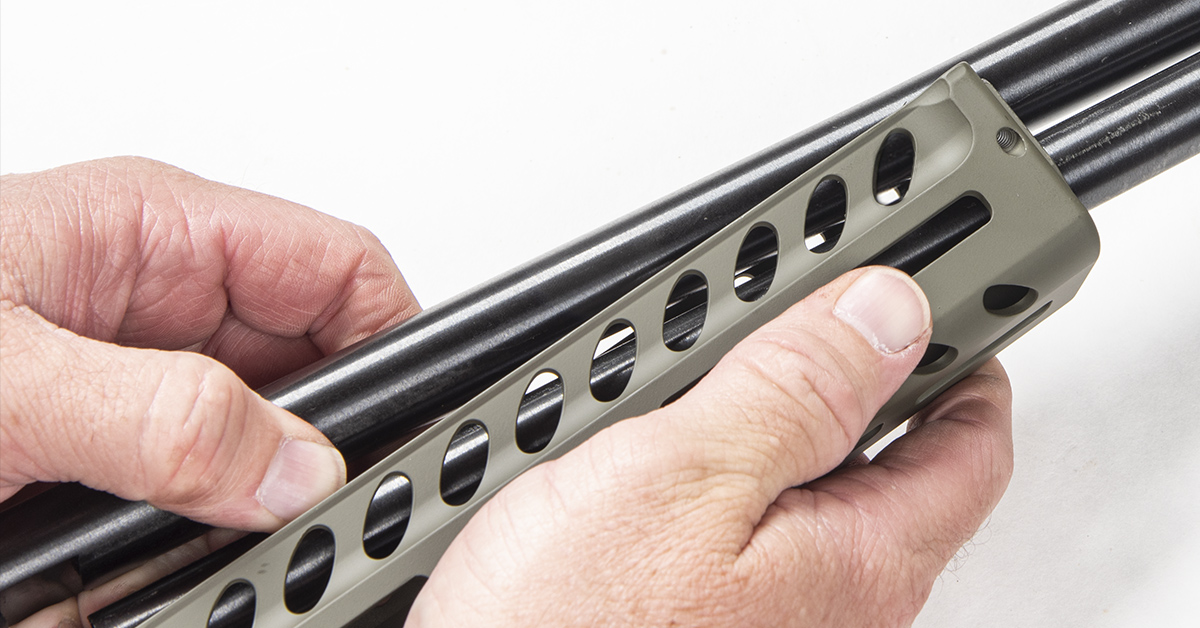
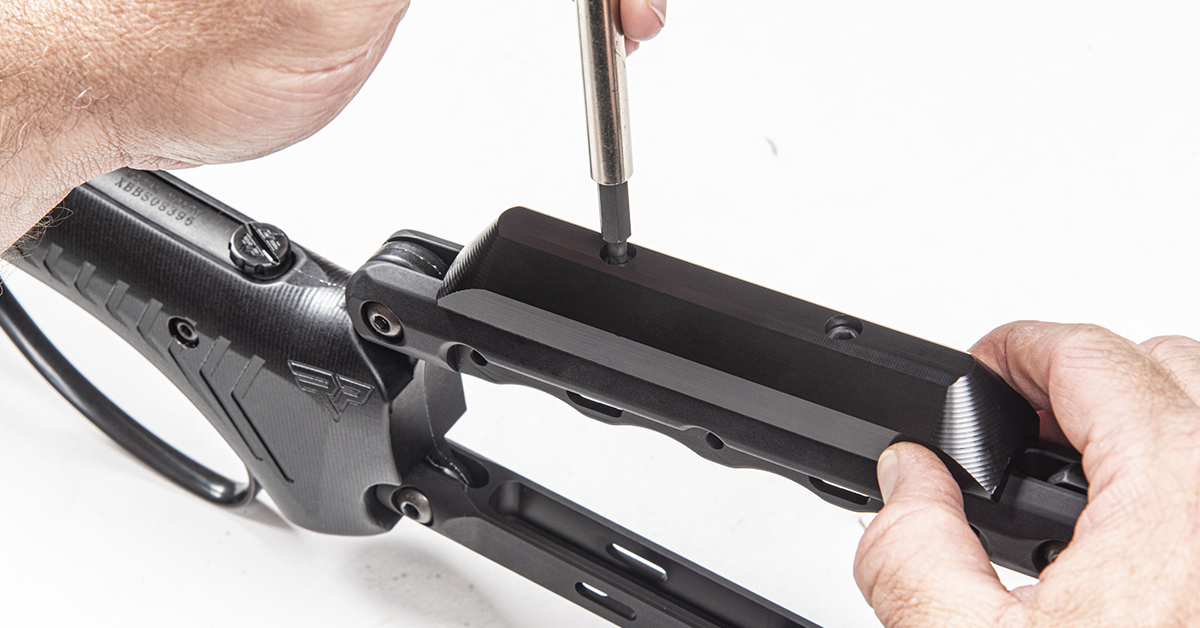
Once the magazine tube support and barrel/magazine tube tenon were positioned in the center of the barrel, we slid the handguard into place, firmly seating it in the receiver, and checked for parallel alignment of the handguard and the barrel. Next, we installed the two tenon screws and washers to secure the handguard to the tenon.
The Gen 2 Henry handguard uses two set screws above the tenon. These screws, helped with a dab of medium-strength thread adhesive, snug slightly against the barrel to prevent any lateral shifting of the handguard. This is required since the tenon has such a necessarily weak interference fit with the barrel. With these screws in place, any lateral blows to the handguard will not move the tenon and subsequently will not allow the handguard to move out of alignment.

Two set screws at the rear of the handguard keep the handguard from moving upward when shooting the rifle from a hand support or a field support. Again, we used medium-strength thread adhesive to help keep the screws secure in the handguard.
And that completes the “how we did it but we’re not telling you how to do it” portion of our build. The following parts installations are easy enough for anyone who can use a screwdriver.
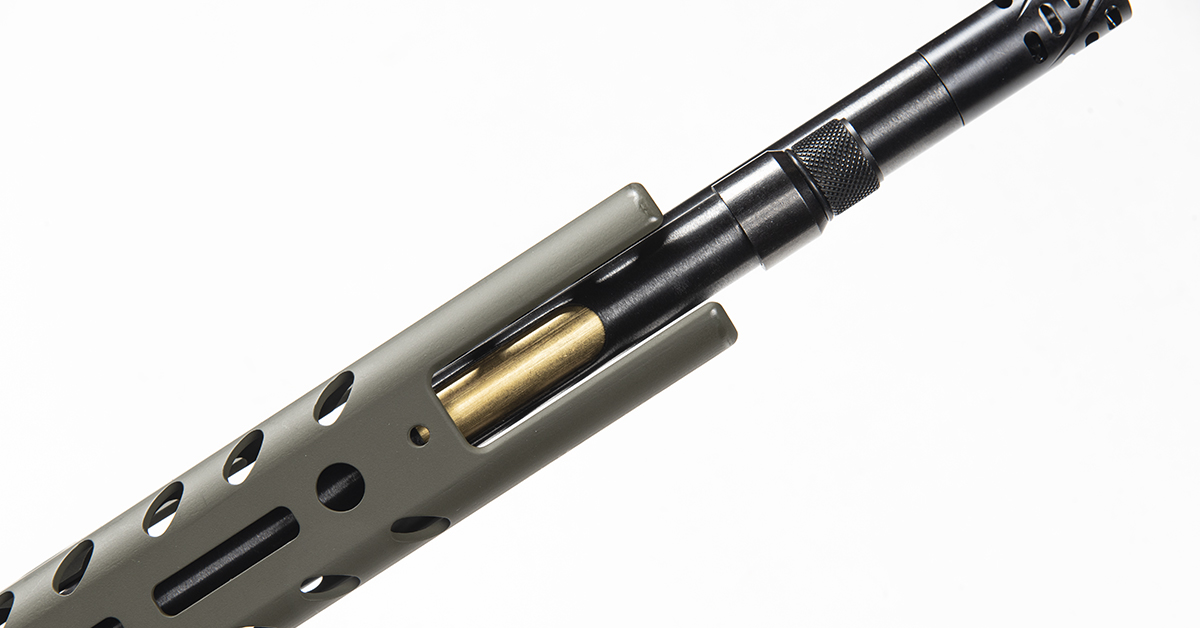
The Gen 2 Henry M-LOK handguard can be purchased with or without the loading port slot. We think having access to the magazine tube loading port makes good sense, which is why we went with the slotted model.
Before working on this or any firearm, ensure that there are no cartridges in the chamber or the magazine and that there is no ammunition in your work area.
The Comet muzzle brake screws onto the threaded muzzle by hand. You should, though, clean the muzzle and brake threads with denatured alcohol to remove any oils and apply some medium-strength thread adhesive before hand-tightening.
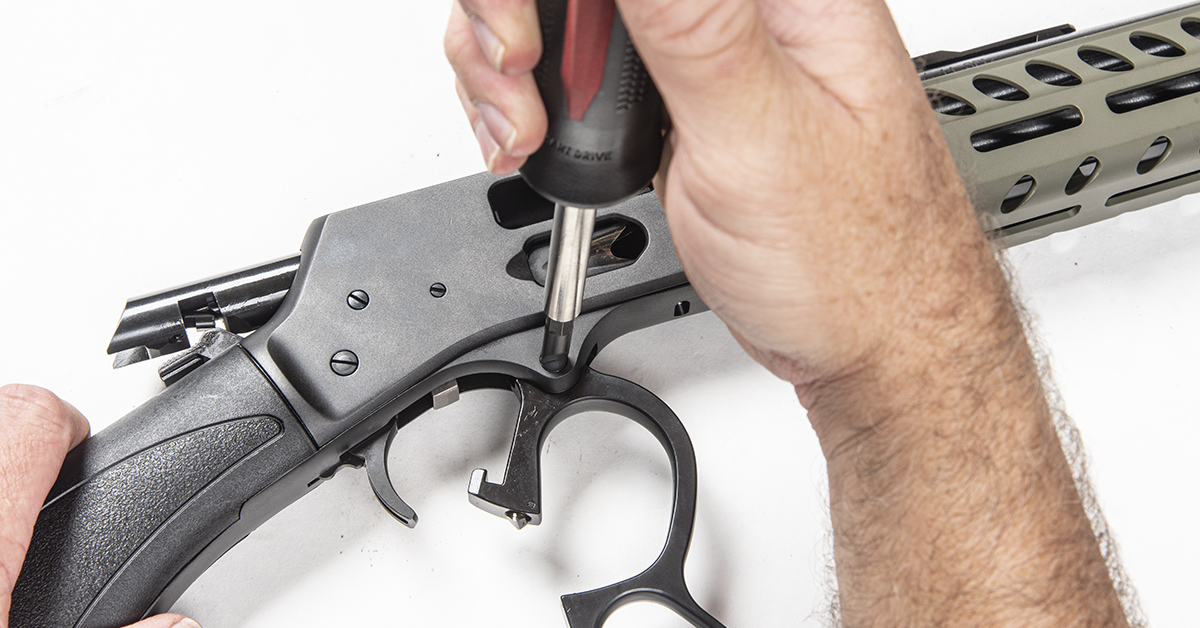
To install the lever screw, lower the lever halfway until the bolt is back and the lever can swing freely on its pivot. Use a flat-ground screwdriver bit and remove the lever screw.
Install the new RPP lever screw hand tight. The screw comes with an installed rubber O-ring to provide the tension needed to prevent the screw from backing out during use; however, we recommend verifying screw tightness each time you use the rifle.
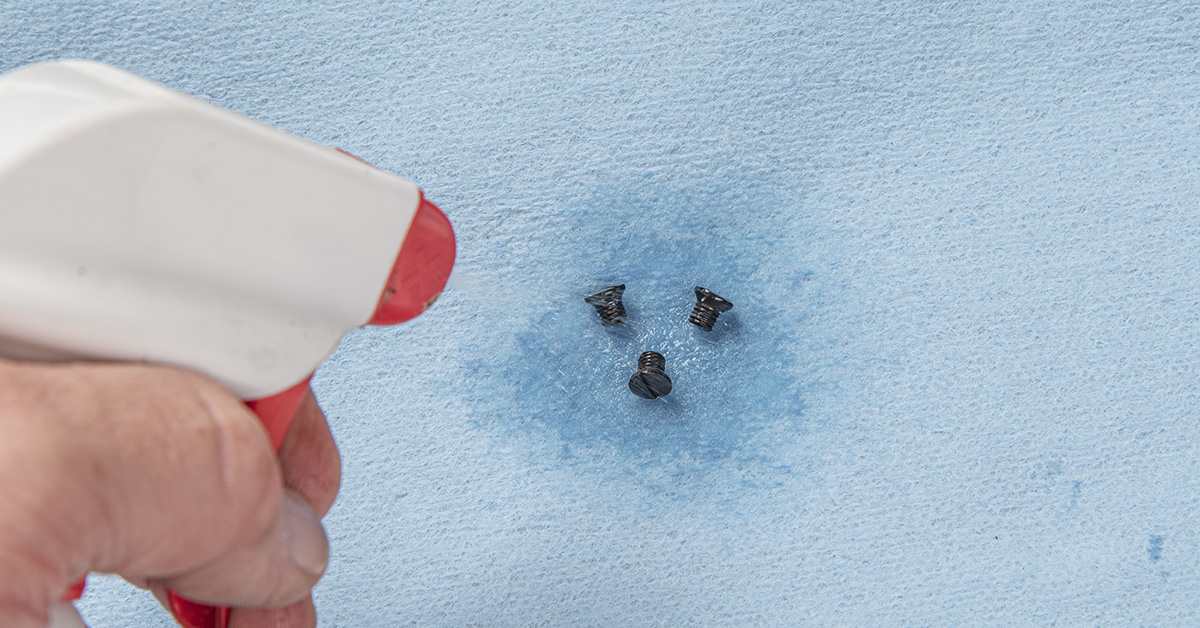
Heading to the top of the receiver, remove the three factory mount hole screws and clean the three Rhino rail mounting screws and receiver threads with denatured alcohol.

Apply a small dab of medium-strength thread adhesive to the screw threads and install the rail mount. Ranger Point did not provide a torque specification for these screws, but with the thread locker applied, “sufficiently snug” is good.

Two M-LOK screws and nuts secure the RPP cartridge quiver to wherever you like on the handguard.
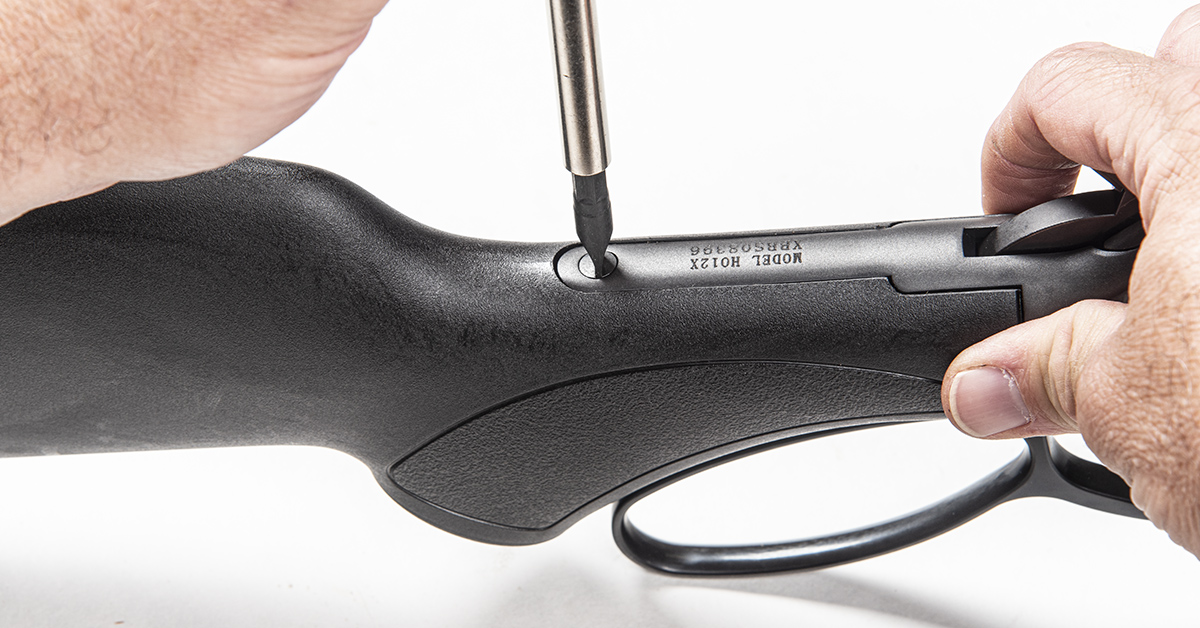
Installation of the Henry M-LOK adjustable stock begins by removing the tang screw and then pulling the stock backward off the receiver assembly.
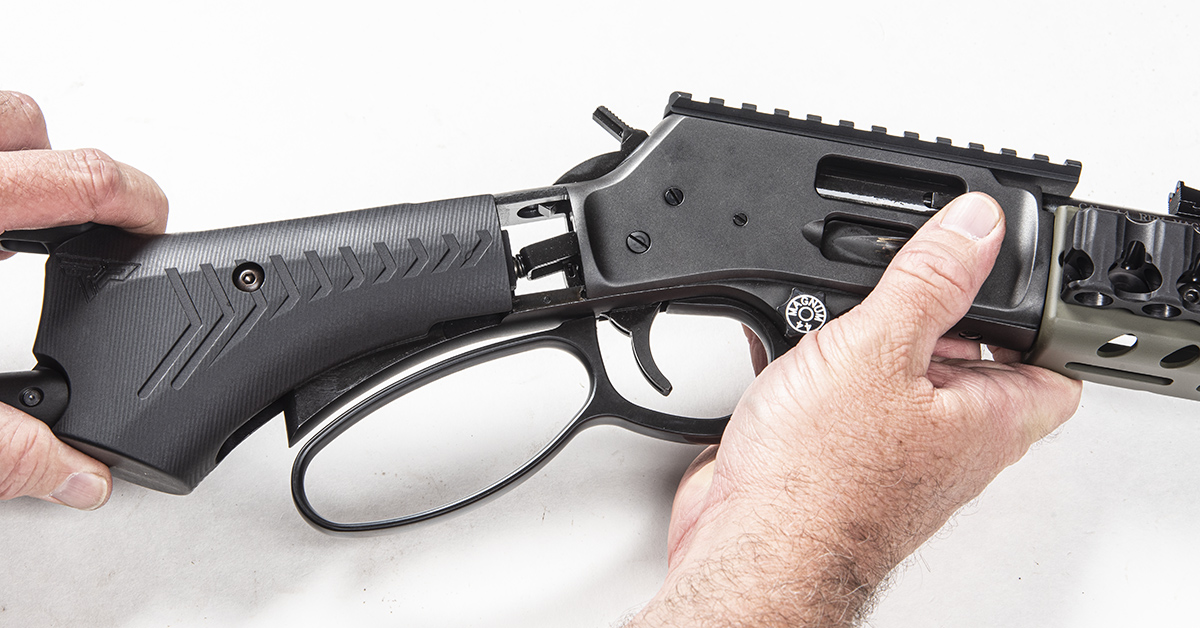
Installation of the new stock is simply the reverse. Slide the stock onto the receiver assembly until it is flush with the receiver.
Install the Quick Stock Takedown screw to secure the stock to the receiver assembly. Be cognizant of how much you tighten the screw in case you may want to remove it in the field by hand instead of with a coin or screwdriver.
Two hex-head screws secure the cheek riser to the top of the stock. The riser has a more obtuse angle on one side than the other. This shallow slope side goes against your cheek. The ambidextrous design allows you to flip the cheek riser for left- or right-hand shooters.
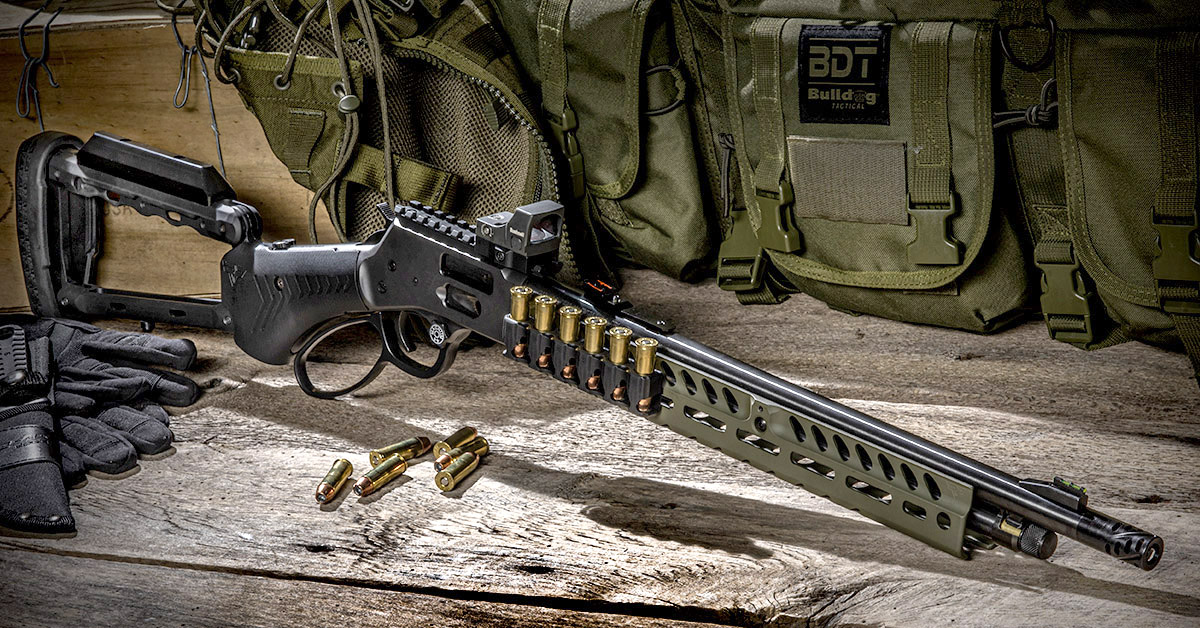
Thus completes our Ranger Point Precision makeover of the Henry Big Boy X pistol caliber lever-action carbine. Our modifications took an already modernized rifle and gave it a totally new personality with enhanced function and overall performance for defensive or hunting use. On the range, it’s downright fun to shoot and now we can’t wait for centerfire rifle season to hit and see how this gun fares in the whitetail woods.