The R3D sight system from XS Sights delivers optimal 24/7 sight alignment for micro-compact pistols
by Rob Reaser
Open sights are a matter of personal choice balanced by a handgun’s size and primary mission. In other words, the sight system you choose for a full-size handgun intended for target shooting or competition may be completely different than the system you prefer on your compact EDC gun. The former may offer precision sight alignment while the latter may be designed simply to get you on target at typical crisis-encounter distances. Then again, you may prefer the same sight setup regardless of the gun’s size or mission.
I’ve run through numerous factory and aftermarket sight systems over the years and have come to favor the traditional front post and square- or U-notch rear for most of my handguns. Add in tritium vials front and back for low light/night aiming and I have the system that works best for me—simple and clean, but with a nod to night sight acquisition.
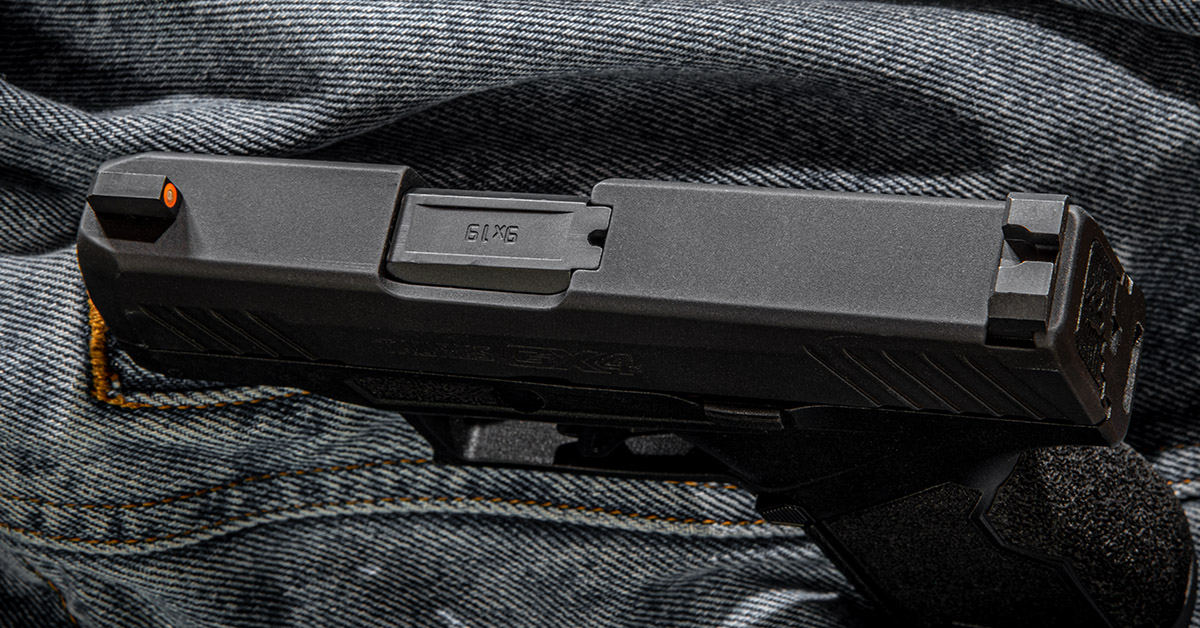
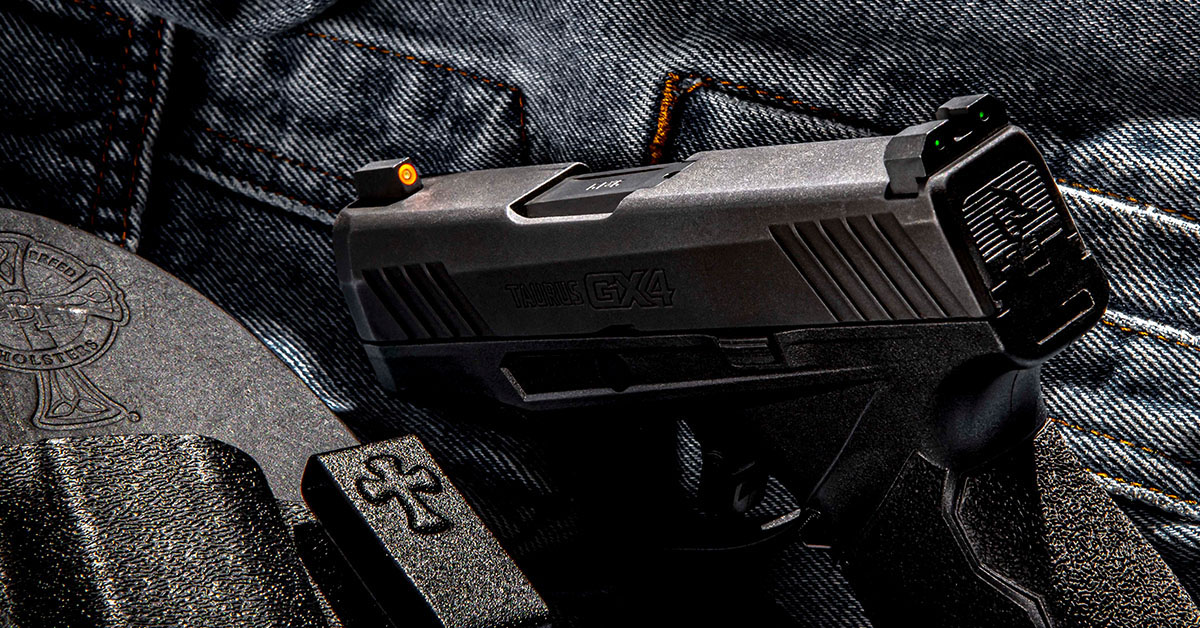
My Taurus GX4, along with my Springfield Hellcat, are my current EDC guns. Which I carry depends on what I need for a holster configuration—IWB for the GX4 and OWB for the Hellcat. Both guns are exceptionally accurate, low printing, and clockwork reliable. The factory GX4 sights, however, aren’t my preference. While I appreciate the square notch rear sight, the white dot on the front post, although sometimes helpful, doesn’t offer much in low light and it can “fuzz up” my sight picture depending on the light condition.
In looking across the aftermarket sight landscape for a replacement, the R3D tritium set from the folks at XS Sights intrigued me.
I’ve used XS Sights on other firearms and have come to expect from them products made with the utmost consideration for quality of material, precision manufacturing, and real-world innovation. XS is most noted for their express-style sight configuration, wherein the classic rear notch is replaced by a shallow “V” into which the Big Dot front sight settles. This system, once you get used to it, offers extremely fast sight alignment at the close distances for which it was developed. Given that the Taurus GX4’s accuracy potential exceeds that of the express sight for my needs, I wanted something that would provide razor-sharp sight alignment for longer-distance shooting while delivering fast alignment at close distances. The R3D system does both.
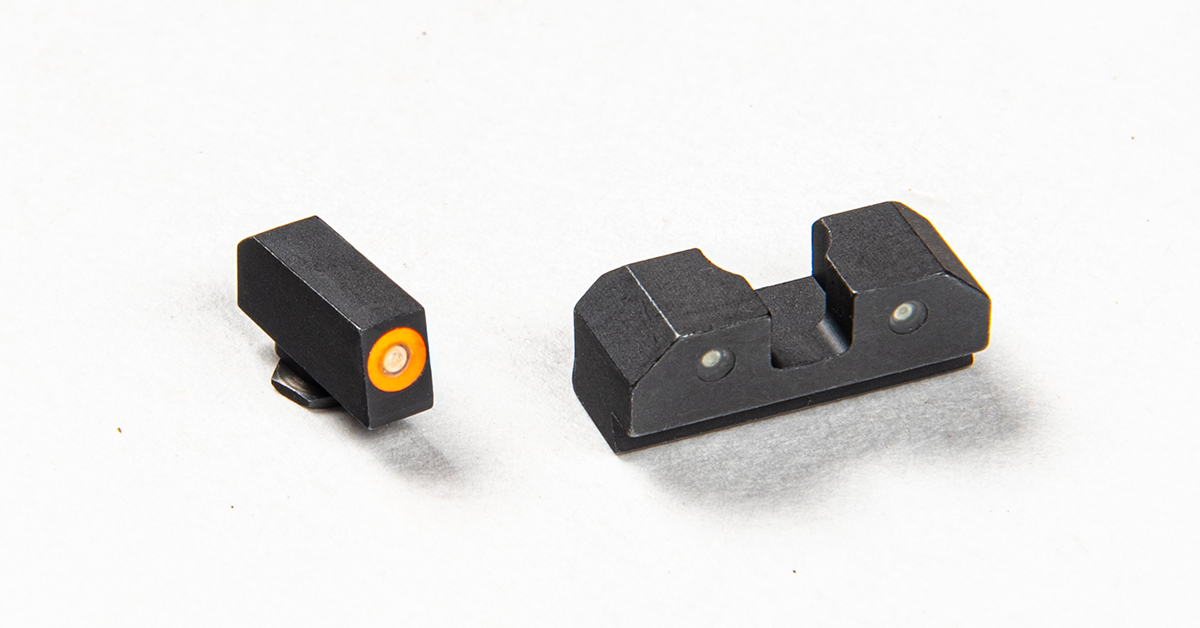
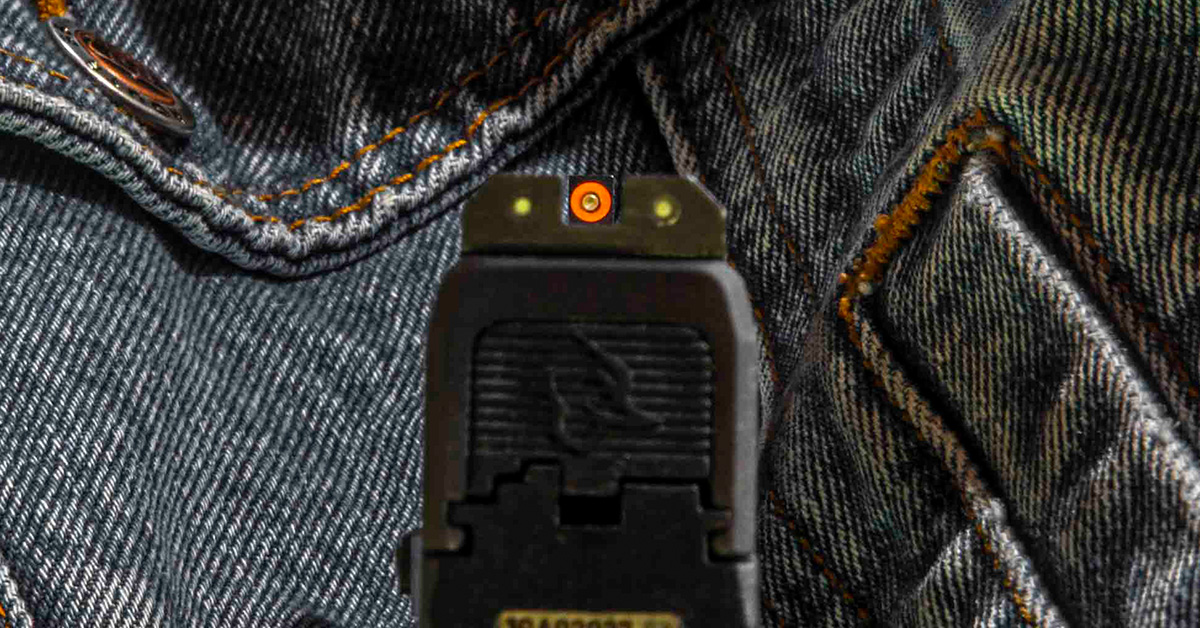
Let you think the R3D is yet another also-ran night sight, think again. There are several nuances engineered into these sights that make sense from a practical function standpoint. Some of the key design features include:
- Blackout rear to enhance front sight contrast.
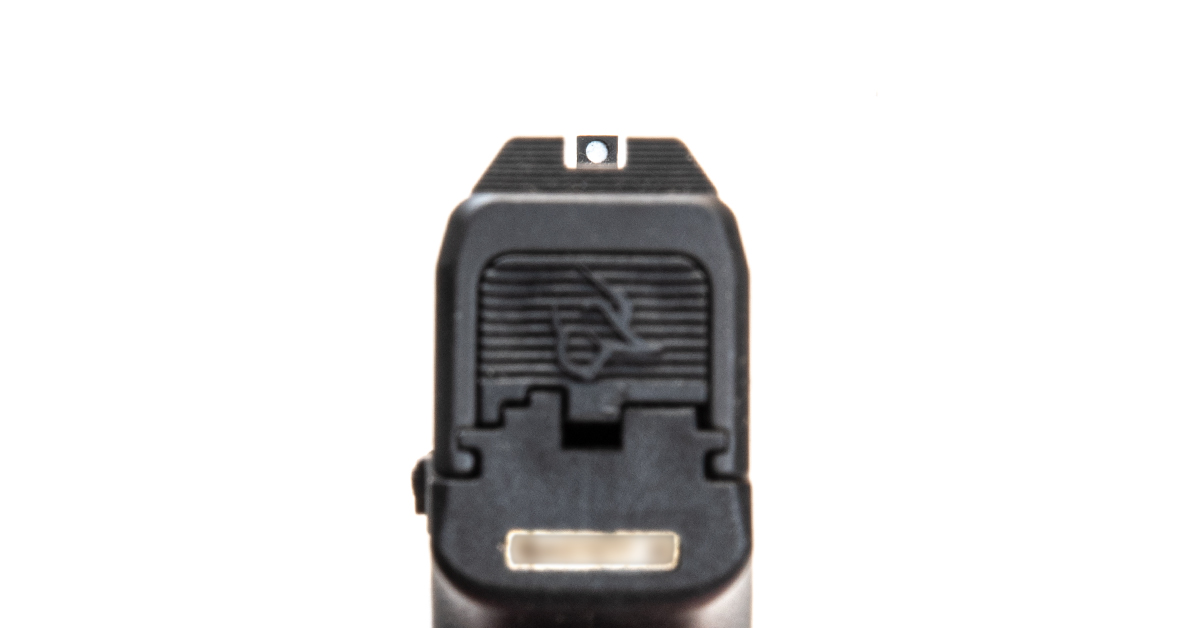
- The Ember Glow Dot front sight absorbs ambient light and glows in low-light conditions where it may not be dark enough for the tritium to stand out yet is too dark for confident front post/rear notch sight alignment.
- The generous 0.170-inch rear notch has an expanded forward cut (toward the muzzle) that delivers ample “white space” around the front post. This helps the shooter to find the front post and establish a sight picture more quickly.
- The front sight tritium vial glows more intensely and is larger than the two rear sight vials. This helps the eye focus on the front sight and reduces visual confusion in a stressful situation. Interestingly, the front vial also helps charge the Ember Glow Dot surrounding it.
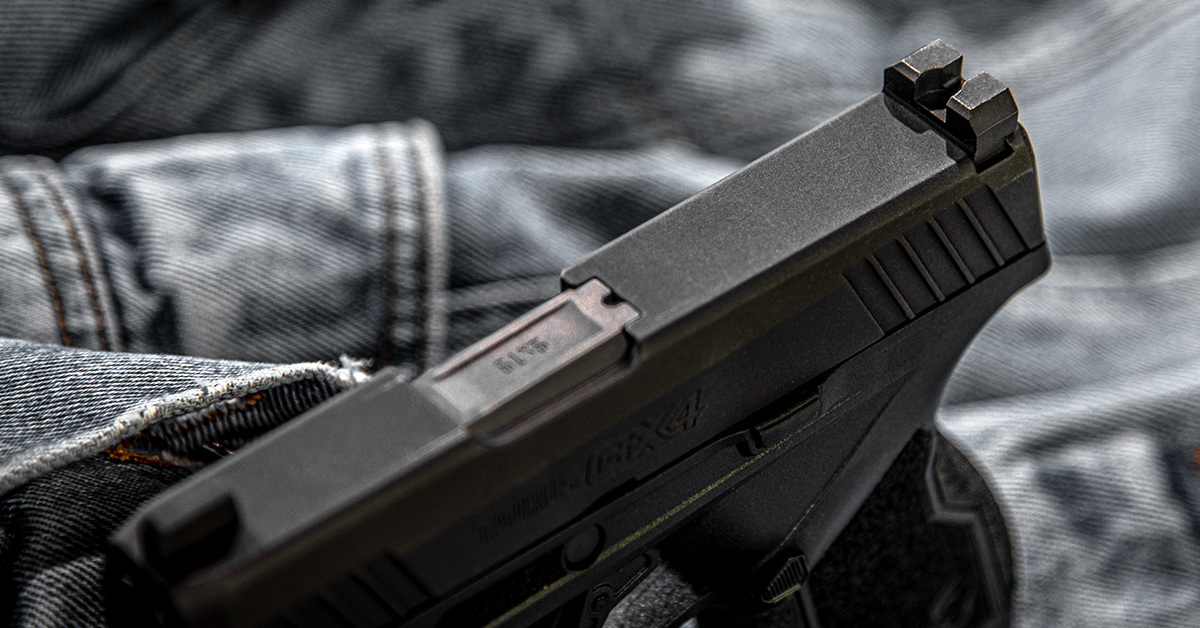
- The rear sight is CNC-machined from steel bar stock with a flat face so the sight can be used against a firm object to manipulate the slide one-handed.
Here is the factory sight configuration of the GX4. As OE sights go, these are perfectly functional and delivered exquisitely tight groups during our testing. The downside: no night capabilities. Fortunately, Taurus engineered the GX4 as well as their entire G3-series handguns with a dovetail rear sight cut that will accommodate aftermarket sights intended for GLOCKs. Since GLOCK-compatible sights dominate the aftermarket arena, the R3D sights for GLOCK perfectly fit our Taurus G4X.
Installing the XS Sights’ R3D
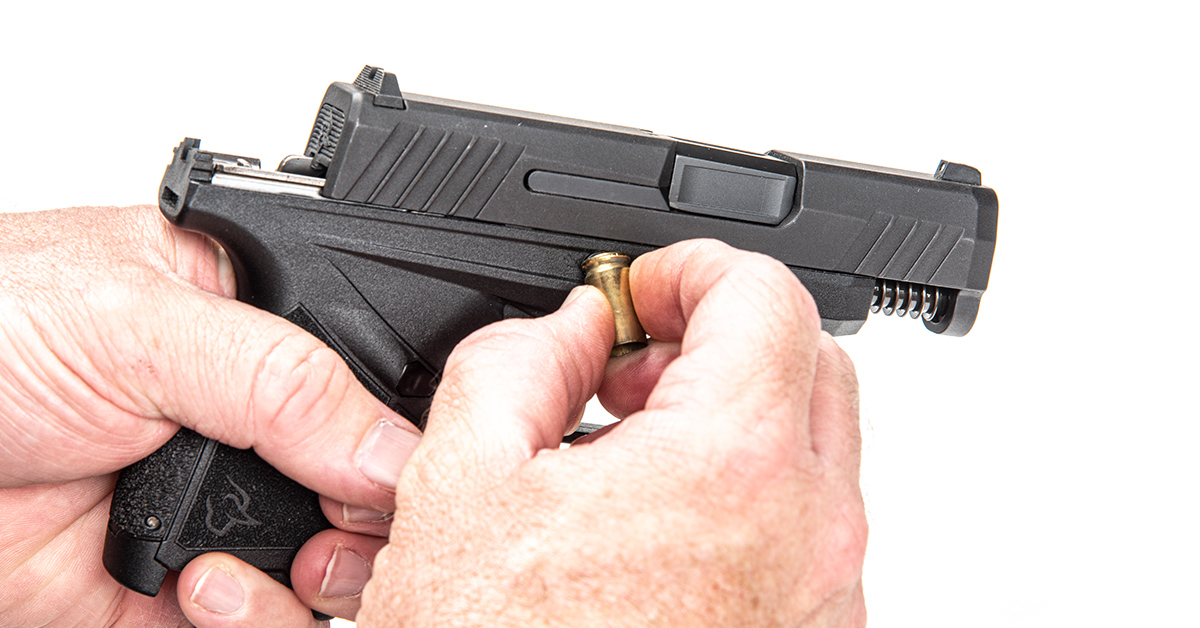
The GX4 is a breeze to field strip. Remove the magazine, pull back the slide, and ensure there are no cartridges in the pistol. Rotate the takedown pin one quarter turn. Pull the trigger and the slide will move forward off the frame.
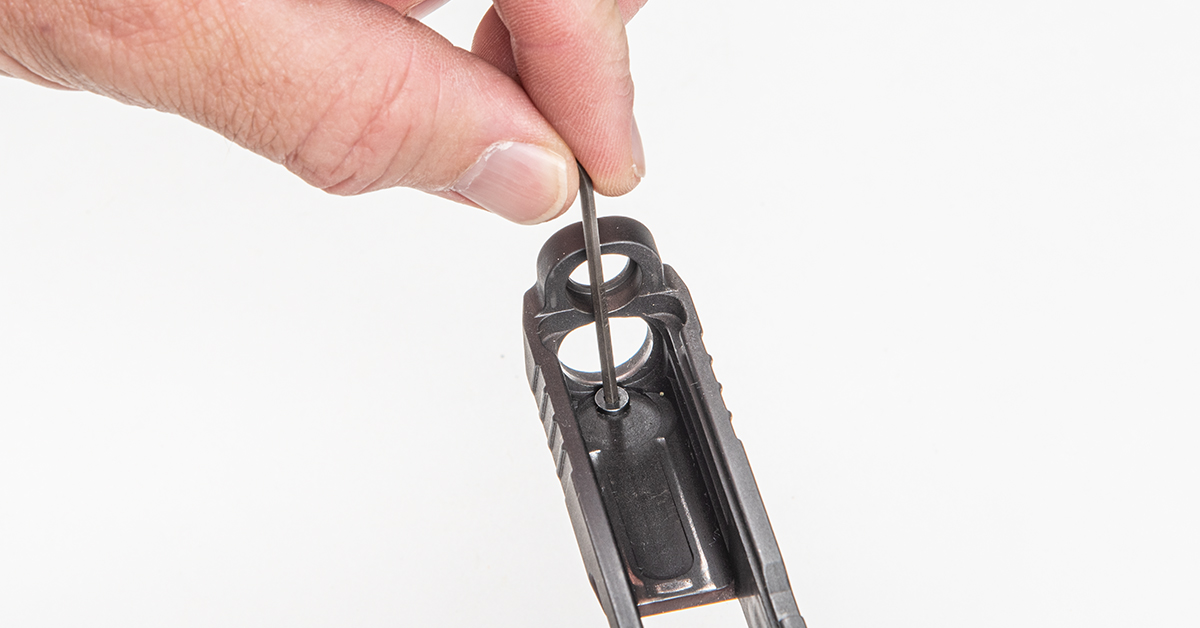
After removing the barrel and recoil spring/rod assembly, turn the slide over and remove the front sight screw. The factory screw has a round head and accepts a small Allen wrench. A GLOCK front sight tool will not remove the screw.
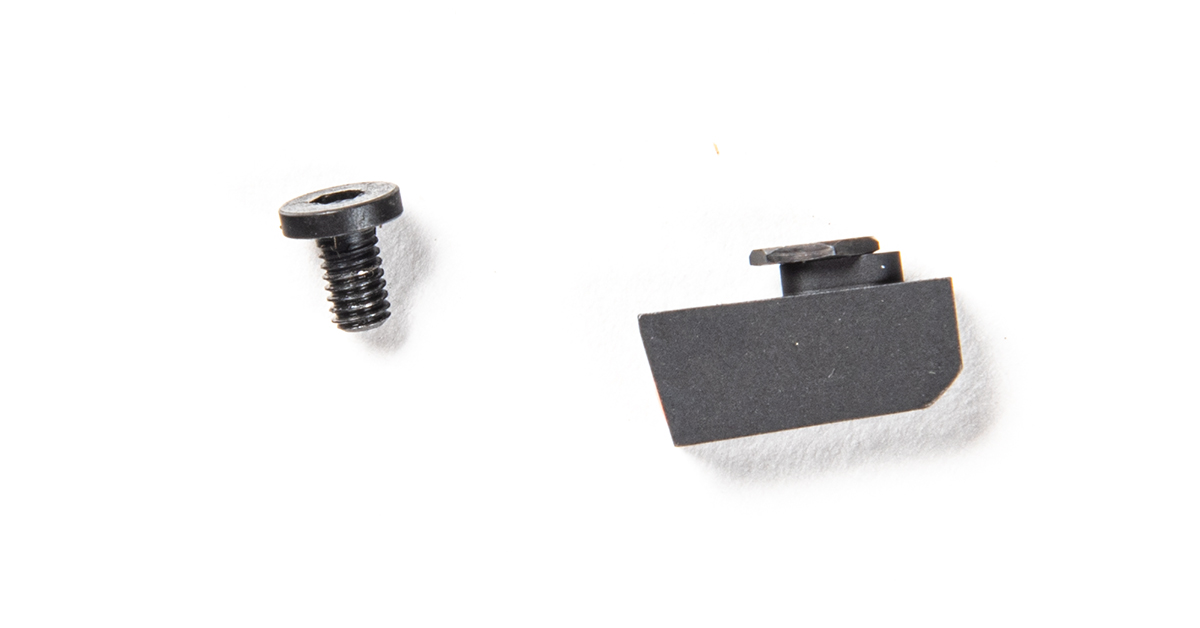
This is the factory front sight screw at left and the XS Sights front sight assembly at right (upside down, with the screw installed). Because of the tight fit between the factory screw head and the slide’s barrel shroud, a GLOCK sight tool would not work even if it had the appropriate head design.

XS uses the GLOCK-style screw for the front sight. The screw hole is positioned to the rear of the oval sight boss to provide just enough clearance to use the XS-supplied tool to tighten the screw.
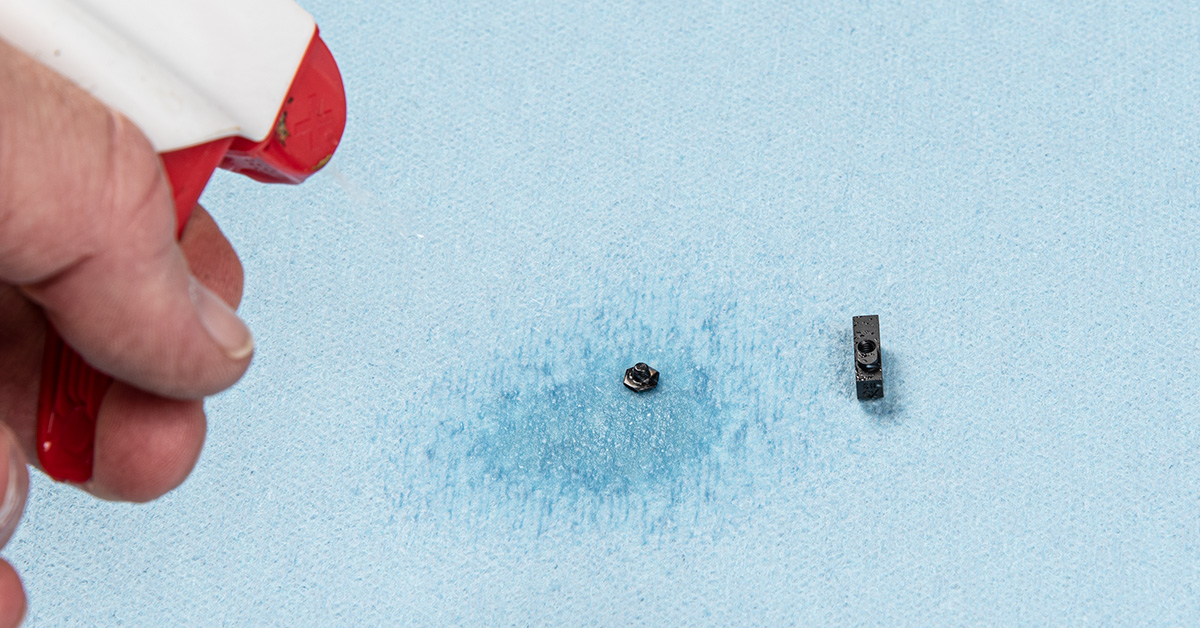
Pistol front sights should only be lightly snugged during installation. Apply too much torque to these small screws and they could break during installation or break from the stress of recoil (this has happened to us in the past). You should instead use a thread locker (supplied by XS Sights) to help keep the screw in place. Begin by cleaning the screw threads with denatured alcohol to remove any oils that could prevent thread locker adhesion.

Clean out the front sight housing threads with denatured alcohol as well.

Apply a small amount of the supplied thread locker or Loctite 242 to the screw threads.

Install the front sight onto the slide.

While holding the sight in position, use the supplied driver or your own tool (here we’re using the Real Avid 4-in-1 Tool for GLOCK) to tighten the screw slightly snug. The adhesive will do the rest.
The big investment for DIYers planning to install their own sights is a sight installer. Now, it is entirely doable to install dovetail sights with a hammer, a brass punch, and a bench block, but we don’t advise it because it is too easy to slip and damage or mar your work pieces. The sight installer is the better alternative.
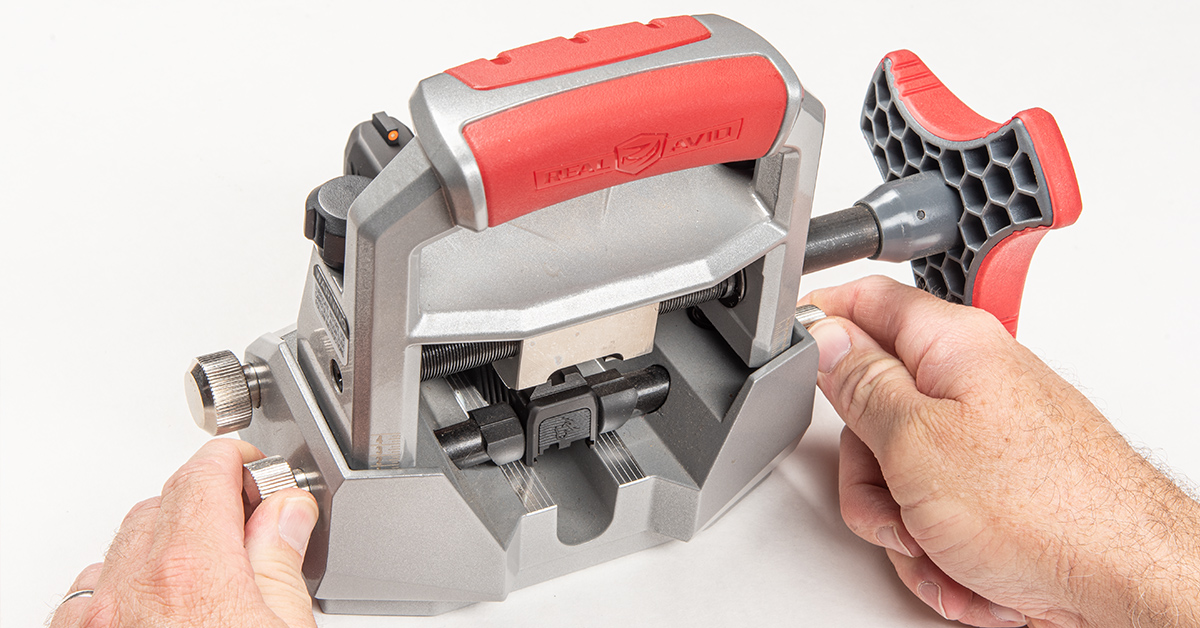
Many sight installers are designed for a specific firearm, like the GLOCK. That’s fine if you only want to swap sights on that platform. If you have multiple brand guns that may see sight upgrades, a universal sight installer is your most cost-efficient option—such as the Master Sight Pusher from Real Avid. The included directions will get you familiar with the tool’s operation. Here, we are setting up the slide so we can push off the factory rear sight.
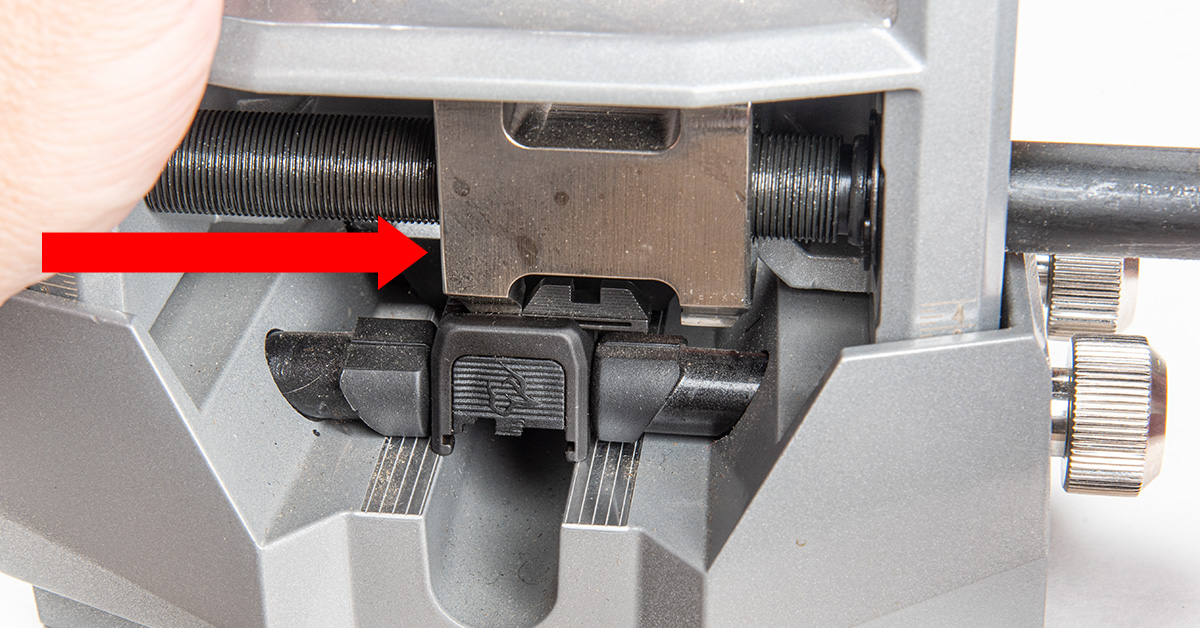
Once set up, push the sight off the slide, moving from left to right, by rotating the ram drive. Left to right removal of a press-fit dovetail piece is standard gunsmithing practice.

With the original sight removed from the slide, test fit the new R3D sight. We want the sight to be able to insert 1/3 to halfway into the dovetail by hand. This fit is tighter than we want to push, so we will need to remove some material from the bottom of the sight until we achieve a better fit.
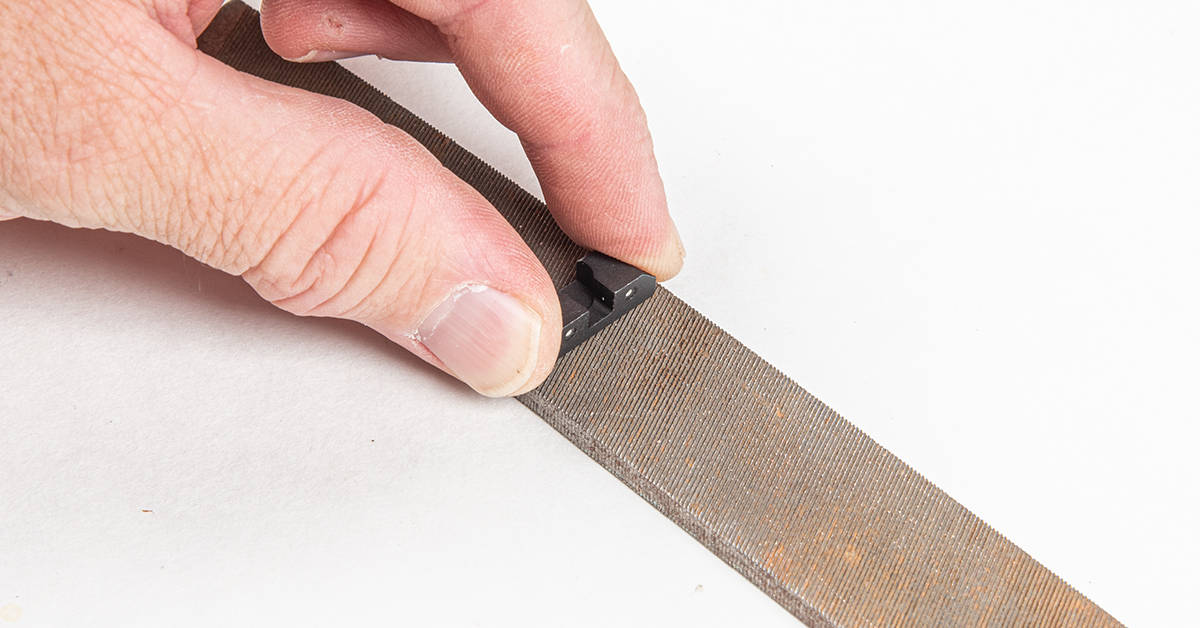
To remove material from the bottom of the dovetail, place the sight on a flat file and carefully push the sight forward in one, even stroke. At the end of the stroke, rotate the sight 180 degrees, bring the sight back to the starting end of the file, and make the next stroke. Repeat this several times and check for fitment with the slide. You must be careful when doing this, going slowly and checking frequently, because you don’t want to remove too much material and have the sight be loose in the slide.
From our experience, XS Sights tend to run slightly large in the dovetail, which is a good thing because it allows the installer to achieve a solid press fit. Just remove enough material until the sight can be pushed in by hand as seen here.

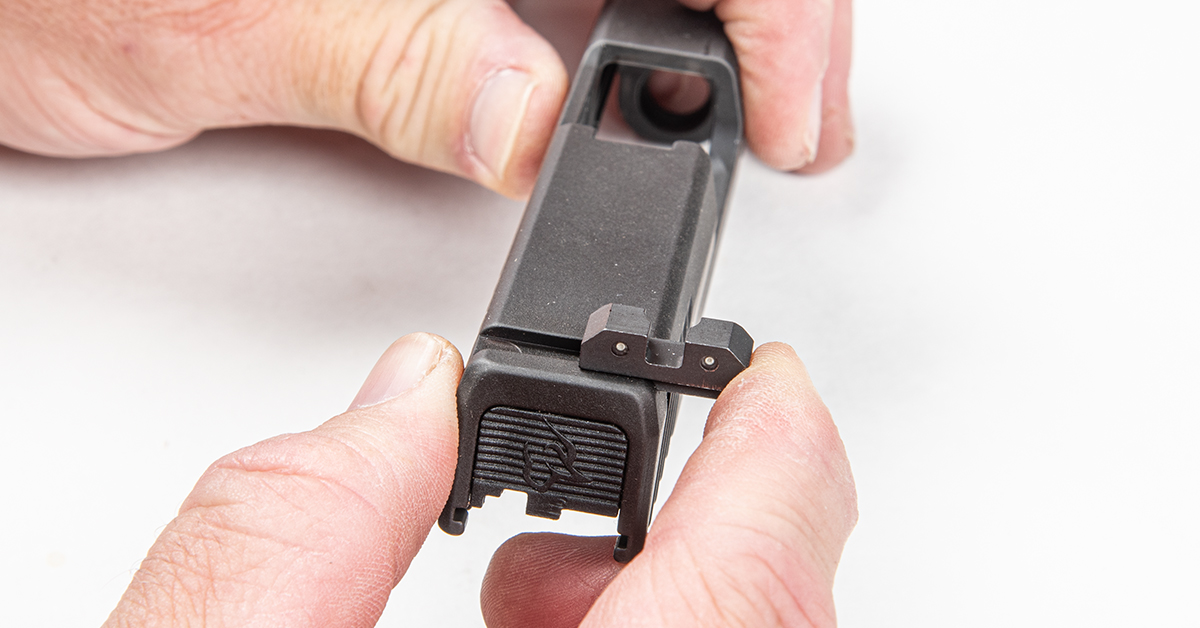
With the sight started into the dovetail by hand, move the slide back to the sight pusher per the instructions. With the ram correctly aligned with the dovetail groove and engaging the base of the sight, rotate the ram drive to push the sight into place. The goal is to position the sight exactly in the center of the slide.
When you think you are close to center, stop and remove the slide. In even light, look to see if the slide is equally positioned within the dovetail slide cut. You can use a ruler or a depth gauge to check each side for equidistance. If you need to push a little farther, return the slide assembly to the sight pusher. Just be careful that you don’t push the sight past the center (too far to the left) as this can create looseness in the dovetail joint if you must move the sight back to the right. The goal is to get it right the first time.
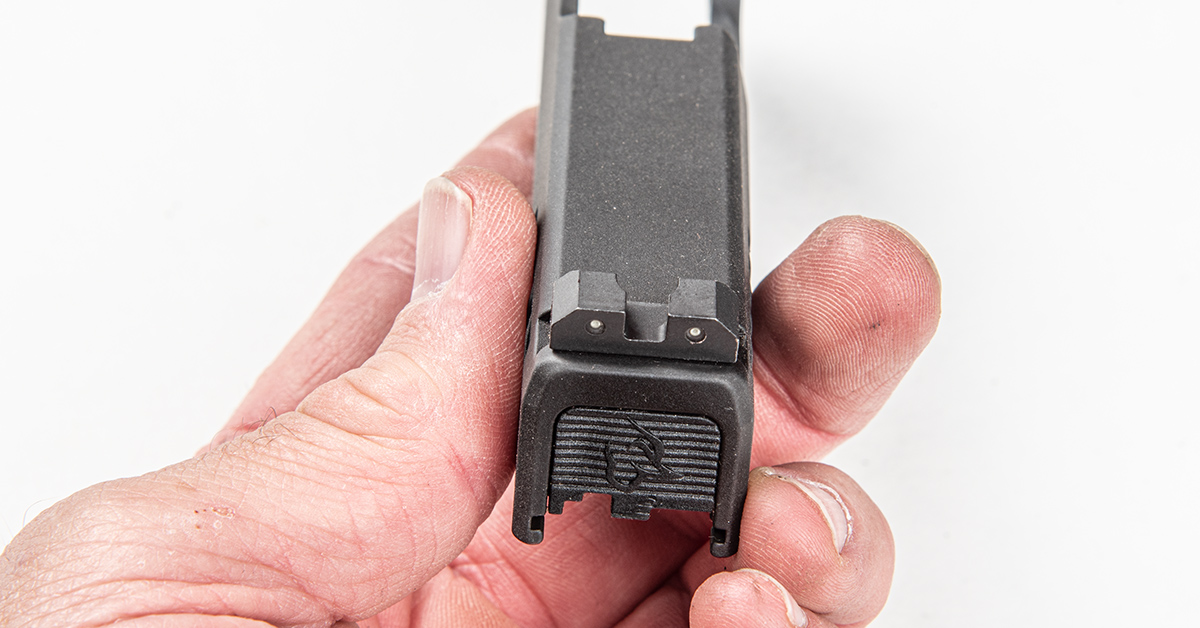
Once the sight is installed, go to the range and ensure the sights align with the point of impact. Some slight adjustment left or right may be necessary to achieve the correct windage with your chosen ammo. Point of impact can shift with different ammo types, so we recommend finding what works best in your gun, zero for that ammo, and then don’t change a thing.
As you can see, the XS Sights R3D sight system is a big step up from the original factory sights. We have three-dot tritium illumination for low light level environments, a distraction-free orange dot front and black-out rear for high ambient light conditions, and everything in-between. The front post/square notch silhouette also means we can take full advantage of the Taurus GX4’s inherent accuracy for those longer shots.