Establishing core shooting fundamentals may seem boring, but this is the “training default” that will kick in when you are in a personal defensive encounter
by Lou Patrick
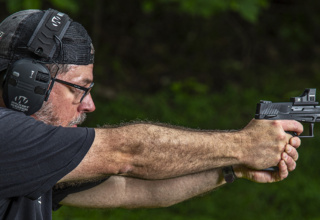
In our recent Build Your Pistol Marksmanship Foundation article, our aim was to establish handgun shooting fundamentals and then to practice those fundamentals until they become so engrained that they are practically instinctive to execute—as instinctive as throwing a baseball or pointing at a distant object. The practical exercise illustrated to accomplish this goal is performed by learning to shoot the handgun using only one hand. Providing you take that practice seriously, you can become quite accurate shooting the handgun while utilizing the one-handed grip.
Such was the case with our Shoot On editor, as Rob and I worked together on these two articles. Although a longtime handgunner and very capable of hitting his intended target, Rob had never practiced the one-handed grip. Since he was eager to follow instruction and improve his shooting skills, I encouraged him to give this technique a try.
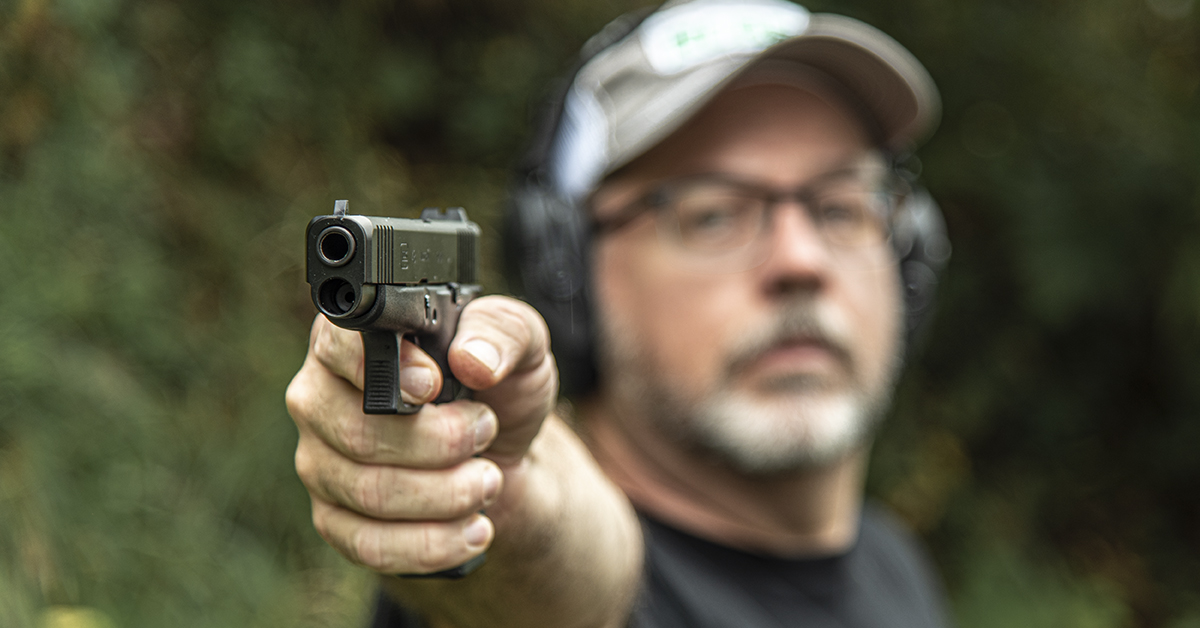
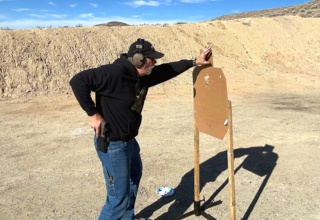
Using a new, out-of-the-box GLOCK G48 that he had never fired, this was the perfect opportunity to illustrate that the fundamentals, properly executed, simply work. So, he got into position, aligned himself properly with the target to acquire his natural point of aim, and then raised his firing arm and slowly fired three deliberate shots using the one-handed grip. He then turned and grinned from ear to ear because the resulting group was much smaller than he had expected.
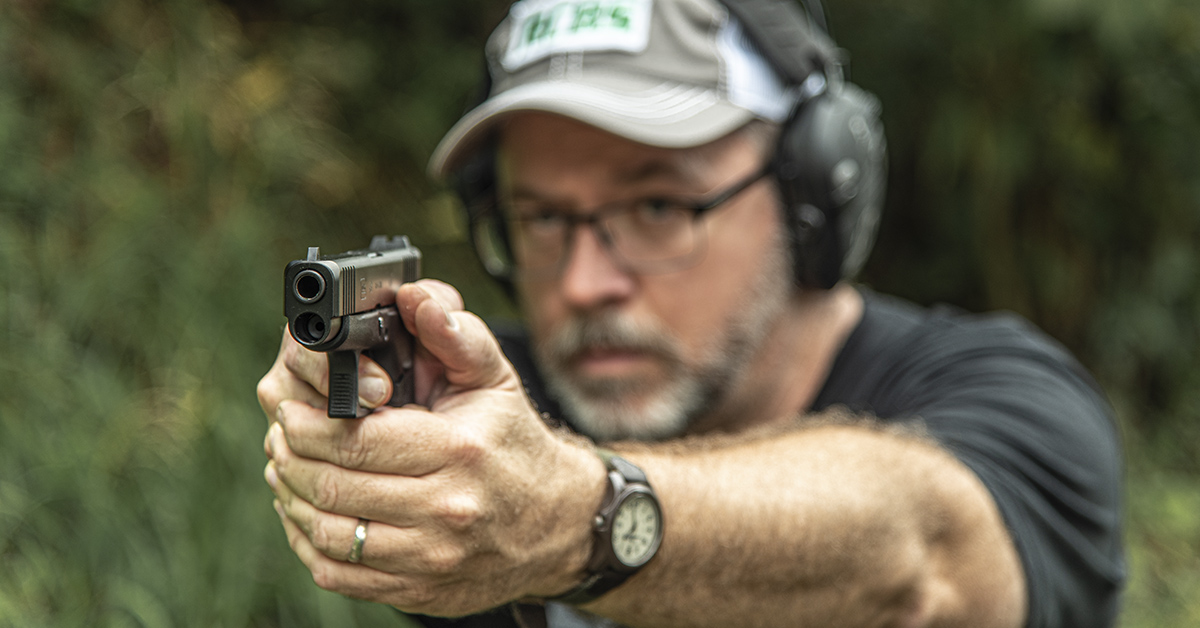
Next, while firing at the same target with the same GLOCK from the same distance using the same ammo, he went back to his standard two-handed grip with same body position that he has been using for years and fired three shots. Much to his surprise, the one-handed shot group was smaller!
It has been my experience that, as time passes, we tend to fall into a rut. Sure, we go to the range for an enjoyable afternoon of shooting, but somewhere along the way we slide into a familiar groove, doing the same thing repeatedly. We forget to be mindful of the shooting fundamentals as we explore other training challenges. Therefore, it pays to frequently revisit the basics, such as shooting with one hand.
When we raise a handgun with one arm, we must really focus on these fundamentals if we are going to hit the target. Shooting is as much mental as it is mechanical and in shooting one-handed, Rob’s concentration was sharply focused. In the beginning, this focus will be rather intense but eventually, through practice, it will become second nature. This is a vital skill set that will easily transfer to the two-handed grip style of shooting. While the two-handed grip does allow the shooter to steady the firing hand and provide more support during firing, we find it wise to also practice shooting the handgun with one hand, as this skill can be critical in a personal defense scenario. A home invasion could mean one or multiple targets at odd angles. Firing one-handed allows you to quickly rotate the torso to engage a target to the rear. You may even need to use your non-firing hand for another important task, such as moving a spouse or a child out of danger.
That said, the two-handed grip is always the preferred shooting grip in a defensive encounter.
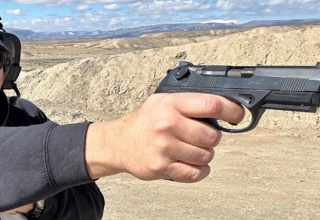
There a generally three different two-handed grip styles: the fist grip, the palm-supported grip, and the Weaver grip.
Fist Grip
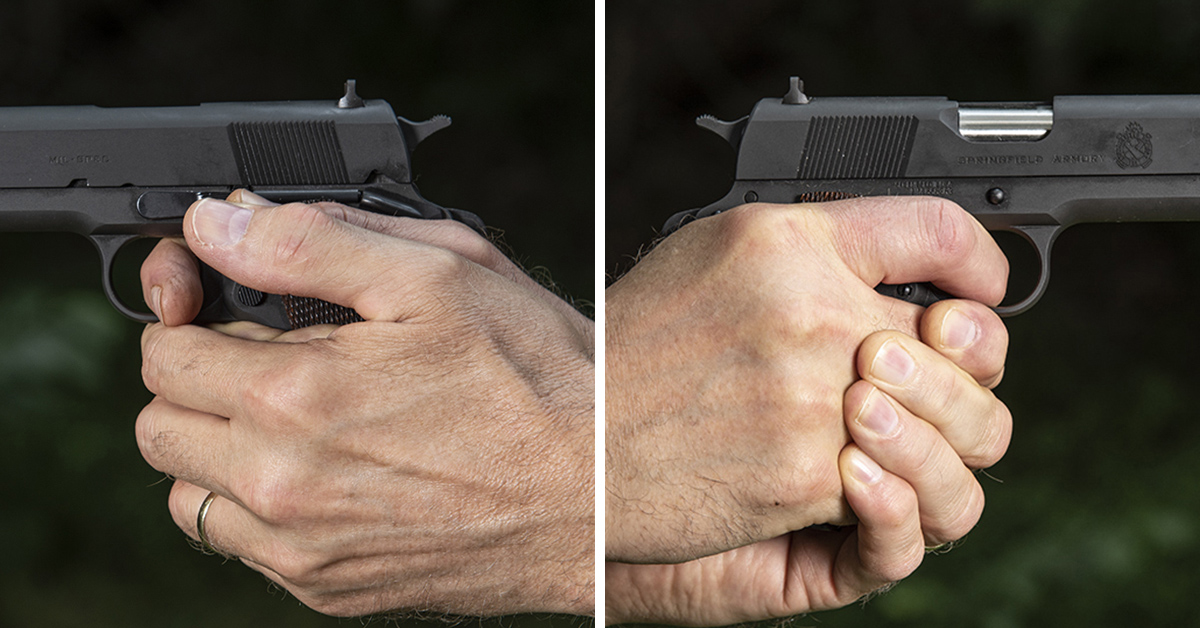
You must first grip the pistol with the firing hand as previously described in the Build Your Pistol Marksmanship Foundation article. Next, firmly place the fingers of the non-firing hand over the fingers of the firing hand, with the index finger in front of the middle finger of the firing hand. Place the non-firing thumb alongside the firing thumb.
Weaver Grip
The Weaver grip is applied in the same fashion as the fist grip, with one exception—the non-firing thumb is wrapped over top of the firing hand thumb.
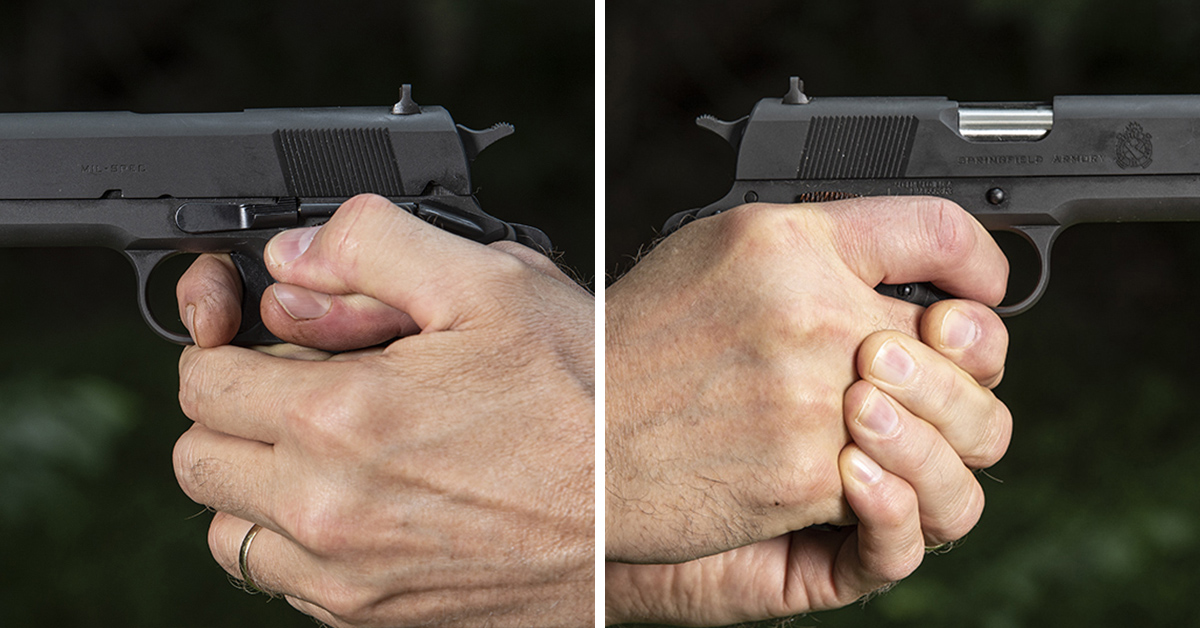
Palm-Supported Grip
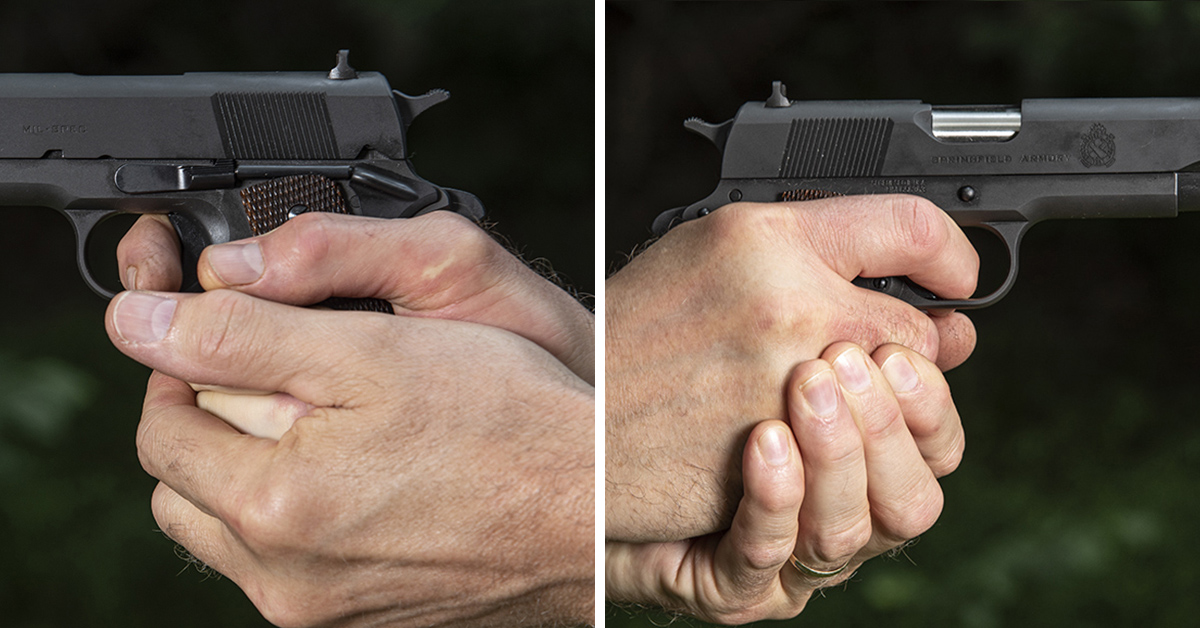
Grip with the firing hand as described for the fist and Weaver grips. Here, the non-firing hand is placed under the firing hand. Firmly wrap the non-firing fingers around the back of the firing hand with the non-firing hand thumb placed over the middle finger of the firing hand. This grip is also known as the “cup and saucer” grip, as one hand is placed atop another.
Either of these three grip styles, when properly applied, will include the element of isometric tension to further aid in a steady position. The term isometric refers to balance or equality—in this case, equal applied tension.
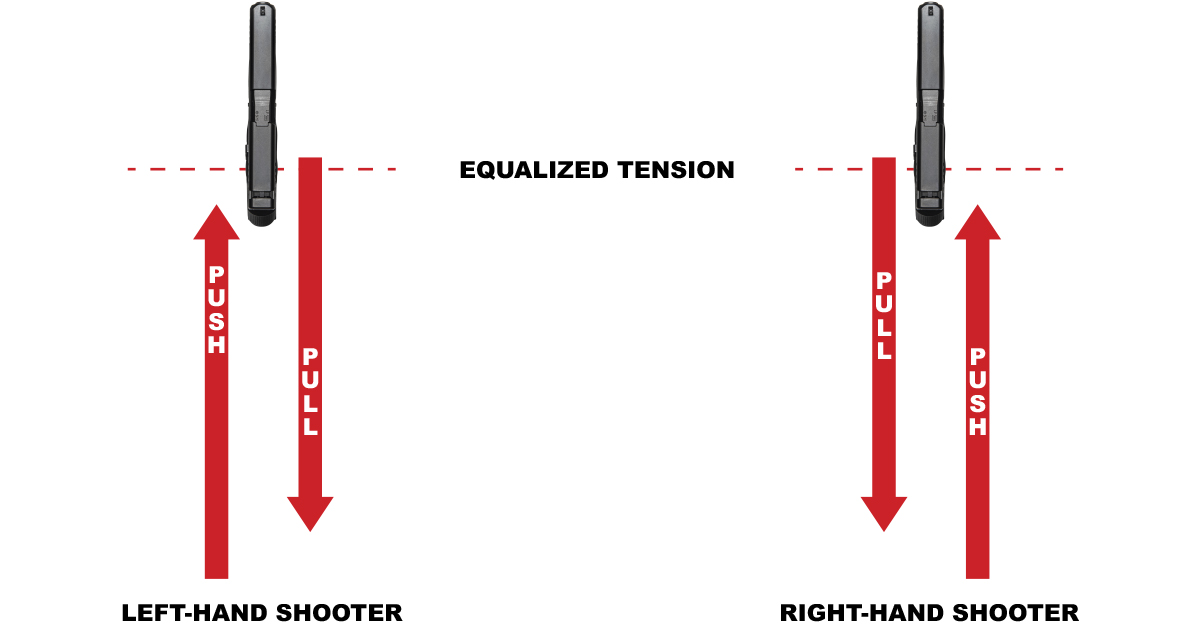
When the arms are raised to the firing position, isometric (equal) tension is then applied through the arms. This is commonly referred to as the “push-pull” method used to maintain handgun stability. The shooter will apply forward pressure with the firing hand while simultaneously pulling rearward with the non-firing hand with equal pressure. This creates an isometric force that will help stabilize the handgun and reduce barrel rise from recoil; however, the amount of force exerted should never cause the shooter to tremble. The shooter will need to practice to determine the correct amount of force to apply.
Practice and experiment with the various two-handed grip styles to learn how to apply the proper amount of isometric tension that works for you. When developing your grip style, you should work from the standing position.
Shooting Positions
Standing Position
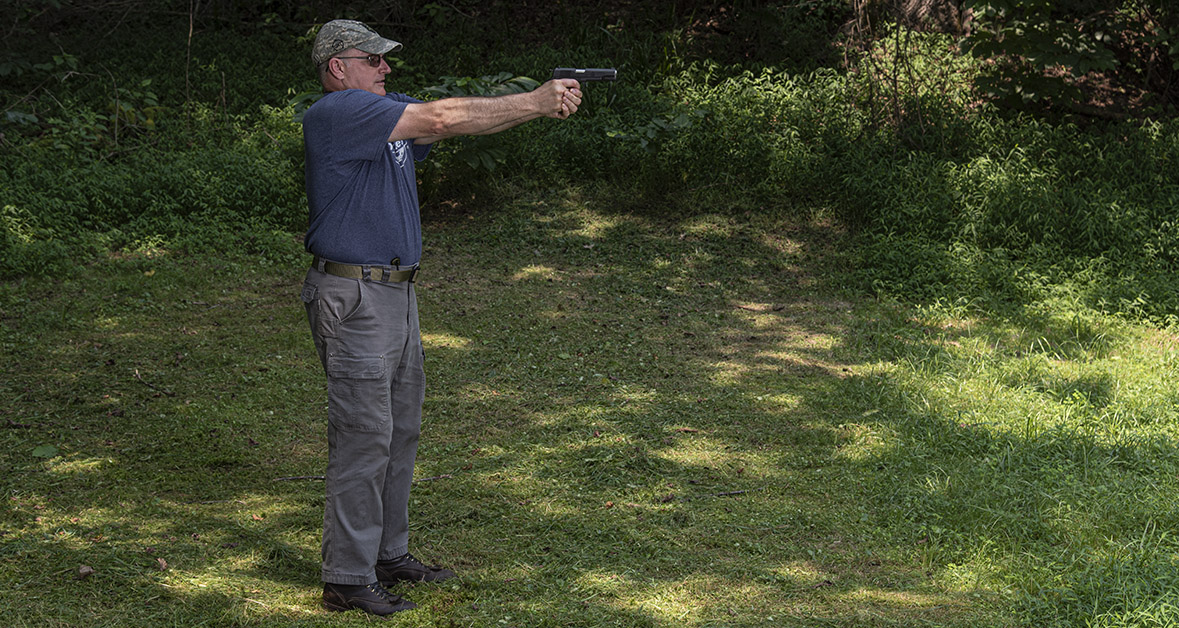
Stand facing the target with your feet about shoulder width apart. The body is straight, the head up, and the shoulders slightly forward of the hips. The firing arm is fully extended with the elbow and wrist locked. The non-firing arm is slightly bent with the elbow down and the wrist locked. It is important to remember that the same amount of isometric tension should be applied by the firing and non-firing hands.
Once you have found your preferred grip, discover how much isometric force to apply, and can hit your intended target consistently, practice can then progress to shooting the handgun from various other positions.
Crouch Position

The crouch position is similar to the standing position. The differences are the body is not fully erect, the knees are slightly bent, the shoulders are a little further forward of the hips, the head is slightly down, and the weak (non-firing hand) side is slightly ahead of the other. The latter facilitates rapid movement and helps keep the body stabile under recoil.
This is the most likely and most common defensive shooting position, as we tend to instinctively “crouch” during a stressful situation. Therefore, it is important to consistently practice from this position.
Kneeling Position
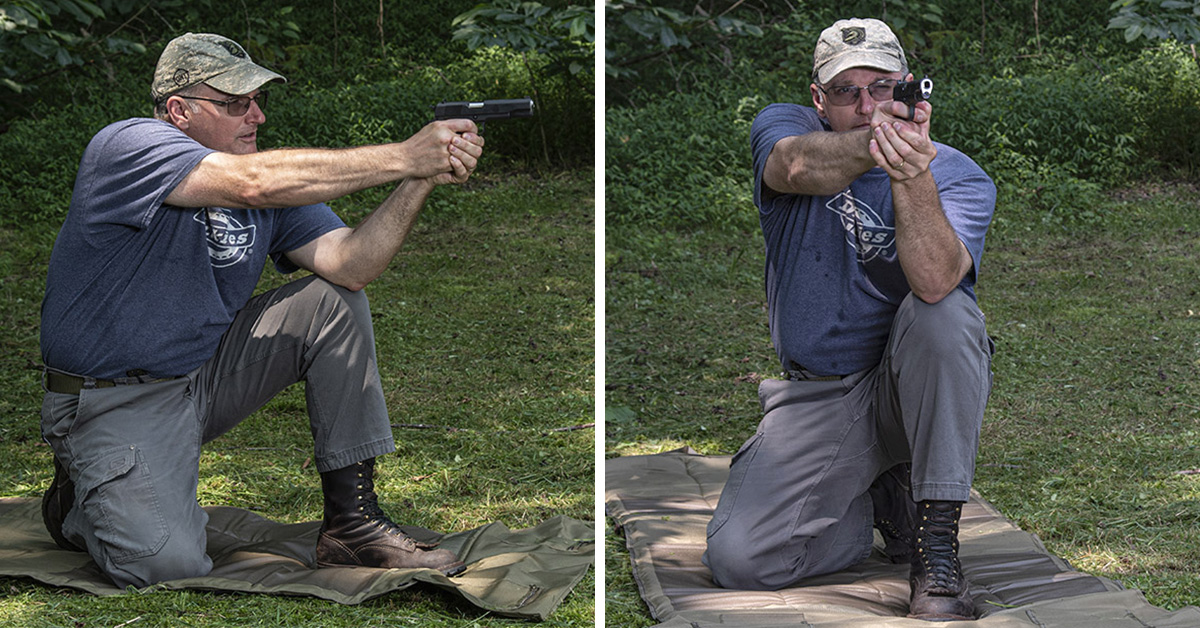
Place the strong (firing side) knee on the ground with the foot vertical and under the buttocks, resting your body weight on the heel and toes. Using a two-handed grip, rest the non-firing arm just above the elbow onto the knee. Extend the firing arm with the wrist and elbow locked.
A key advantage of this position is that it is quite stabile since the non-firing arm is supported by the knee and the shooter presents a smaller target to possible incoming fire.
Prone Position
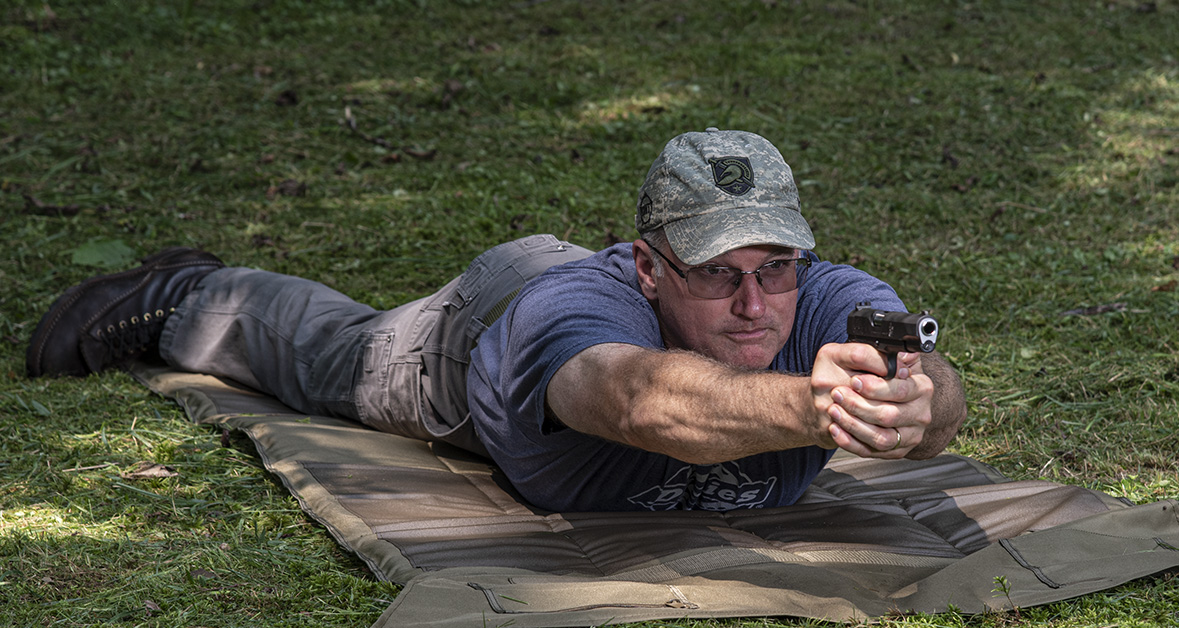
To assume the prone position, simply lay flat on the ground facing the target. The arms are extended forward with the firing arm locked, although the arm may need to be unlocked depending on the height of the target. The bottom of the pistol grip (butt) may rest on the ground for single, well-aimed shots. Keep the head down between the arms and behind the handgun as much as possible.
This is perhaps the most difficult position in which to shoot a handgun; nevertheless, it should be practiced because it could be necessary in a defensive scenario.
Regardless of the situation in which you may be required to use a handgun, effective handgun shooting will always come back to the proper application of the shooting fundamentals: grip, aiming, breath control, trigger squeeze, sight alignment, sight placement, and shooting position. These are simply inescapable truths and, unfortunately, their effective application is a perishable skill that can only be maintained and refined through practice.