Closets, basements, and dusty gun cabinets across the country are favorite hiding places for worn and forgotten Mauser 98 bolt-action rifles. Here’s how to bring an old favorite back to life.
by the GUNS DIY editors
EDITOR’S NOTE: This article is the extended version of a piece that appears in the 2022 edition of GUNS DIY magazine, on newsstands July 26 through October 2022.

For more exclusive DIY content, pick up your copy today.
Firearm scholars estimate that over 100 million Mauser model 98 bolt-action rifles were manufactured by various countries throughout the 20th century. Untold numbers found their way from assorted military services across the world and landed in the U.S. Many were grabbed up by shooters and ex-GIs who appreciated the rifle’s exquisite engineering and performance. Still more saw in the Mauser 98 an inexpensive rifle to kick around with and to deploy on crafty whitetails.
Being originally designed for military use, the Mauser 98 begged for modifications to make it more suitable for American-style hunting and field use. This included installing optics onto receivers that were never meant for scopes, bending the Mauser’s straight bolt handle, removing the factory stripper clip guide to clearance said optics, and upgrading to a conventional stock, among other modifications. In other words, “sporterizing” a military rifle.
The Mauser 98 is, today, an often overlooked and under-appreciated rifle that can still be purchased for a reasonable price, often from someone who may have inherited one but who doesn’t use it. Many of these guns were previously modified — some more skillfully than others.
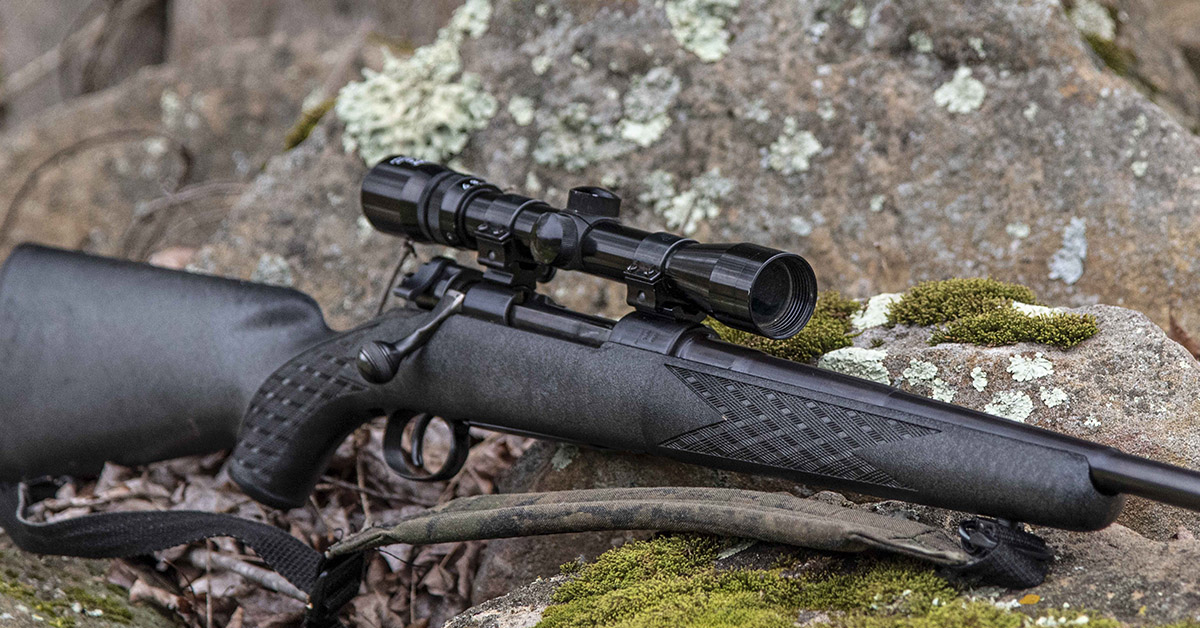
A family member presented us with one that is typical of the breed. Decades earlier, some gunsmith did a fair job of bringing this former battle rifle into contemporary compliance, but as is often the case, newer rifles built to modern expectations relegated it to the ignoble position of dust catcher. A shame, really, because bargain Mauser 98s like this are abundant and with a little bit of work, a lot of cleaning, and some carefully selected aftermarket parts, they can be brought back into service with performance potential unrivaled by many production rifles of today.
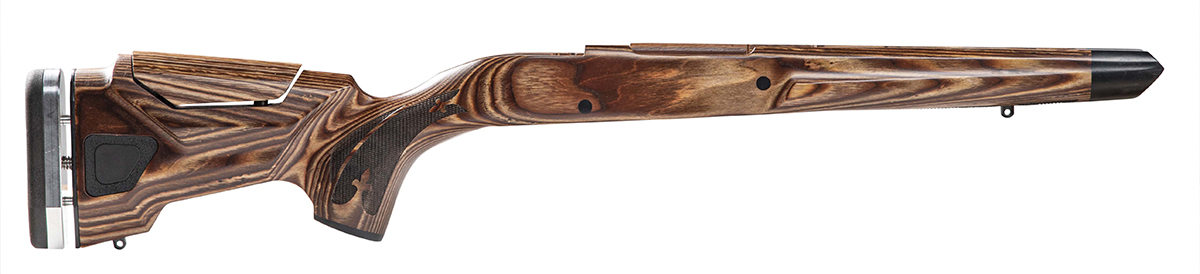
The first stop in our Mauser makeover was Boyd’s Gunstocks. Boyds makes not only replica stocks for Mauser rifles, but they also offer Mauser inletting for some of their more advanced stock models. Since we were looking to bring this rifle into the modern era, we selected Boyd’s Agility stock. Boyds pitches the Agility as “the perfect combination of modern and traditional stock designs.”
The Agility takes the conventional stock shape and adds contours that the modern shooter will appreciate, such as a modified beavertail forend that helps the gun sit flat on a field rest and provides a solid support hand grip for better muzzle control. The grip/wrist area is a hybrid between classic and precision rifle stock design, with an angle that gives a pleasing trigger reach and hand positioning for straight pulls.
Making the Agility ideal for multi-season shooting is the adjustable butt pad. With a push of a button, the aluminum/rubber butt pad can be moved fore and aft. This allows the shooter to customize the length of pull to meet different clothing requirements.
We also opted for the adjustable comb. By loosening two hex-head screws, the comb can be raised or lowered for a custom fit and optimal eye positioning behind an optic.
There are several reasons why we look to Boyds for our upgrade stocks. First, their laminated hardwood not only looks awesome in their wide range of available colors, but the laminated construction also provides that much-needed rigidity for developing an accurate rifle platform. Second, only minor inletting (if any) is usually all that is required to fit a barreled action into a Boyds stock. Finally, Boyds offers a lot of custom features that you can select to make your rifle one-of-a-kind. These include colors, finishes, engraving, and more.
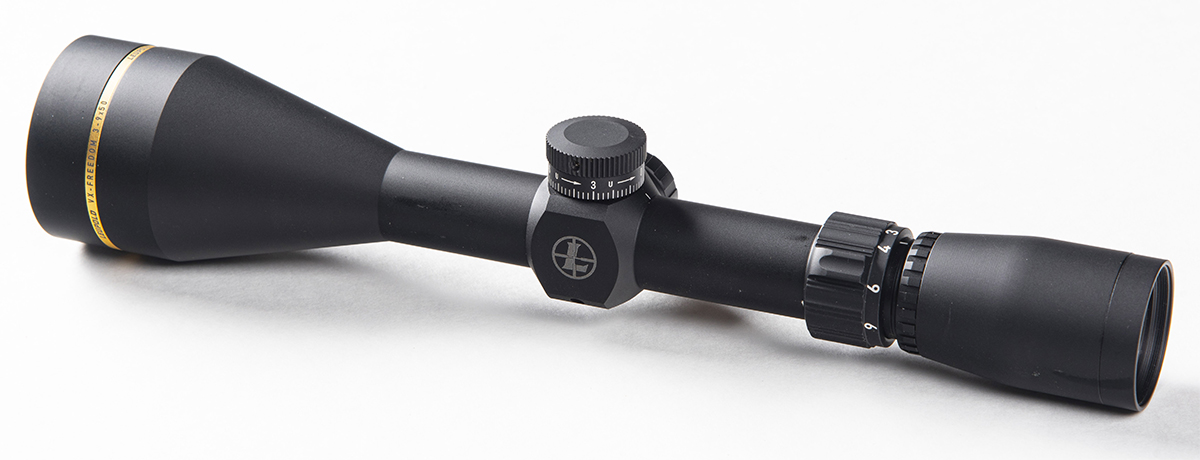
Since this Mauser will be a dedicated deer rifle, we wanted a scope that made sense in the whitetail woods. A 3-9x magnification range would cover everything from close-in shots to the 200-yard-plus field shots that might be encountered. For this, the VX-Freedom 3-9×50 from Leupold fit the bill nicely. This scope is built on a 1-inch aluminum tube with a duplex reticle and Leupold’s Custom Dial System (CDS) so you can quickly and easily make manual adjustments for windage and elevation once you’re zeroed.
Buying a scope sight unseen for a Mauser like ours is taking a bit of a chance. With the size of eyepieces varying between scope manufactures, we had no way to know if the bend in our bolt handle was sufficient to clearance the scope body. Only after we installed the scope would we know.
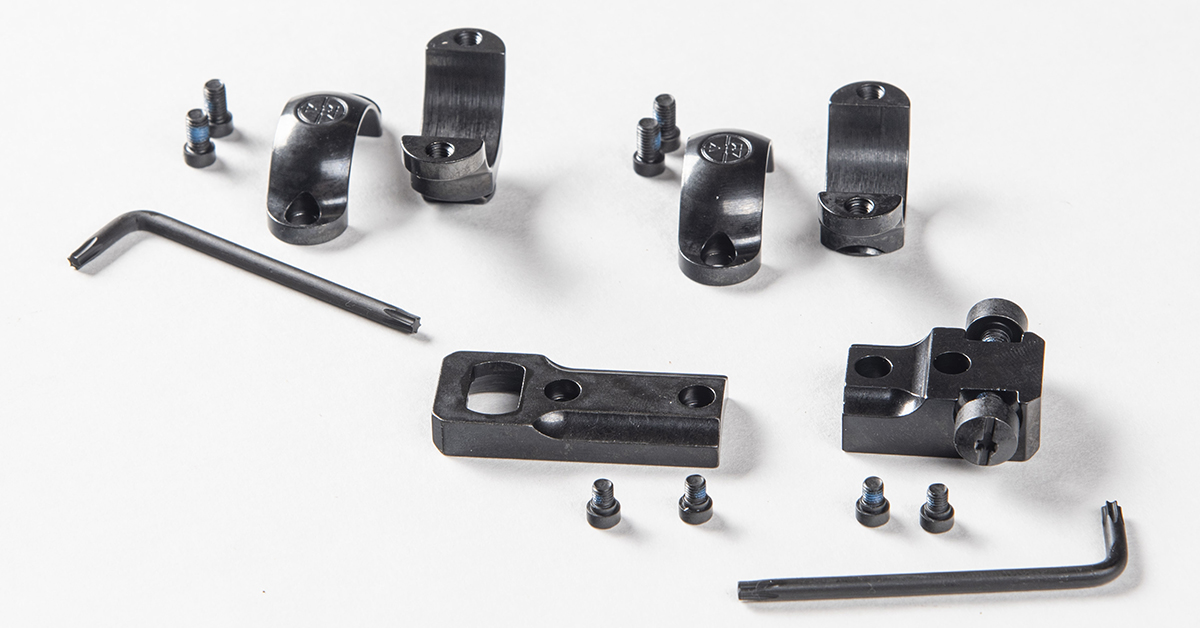
Another challenge with a project like this is the scope mounting system. While our receiver had been tapped for mounts by a previous gunsmith, the mounts were not adequate for our needs. What we needed were military Mauser 98 scope bases; all we could find were Leupold FN Mauser 98 bases due, we suppose, to the ongoing supply chain issues. More on that to follow.
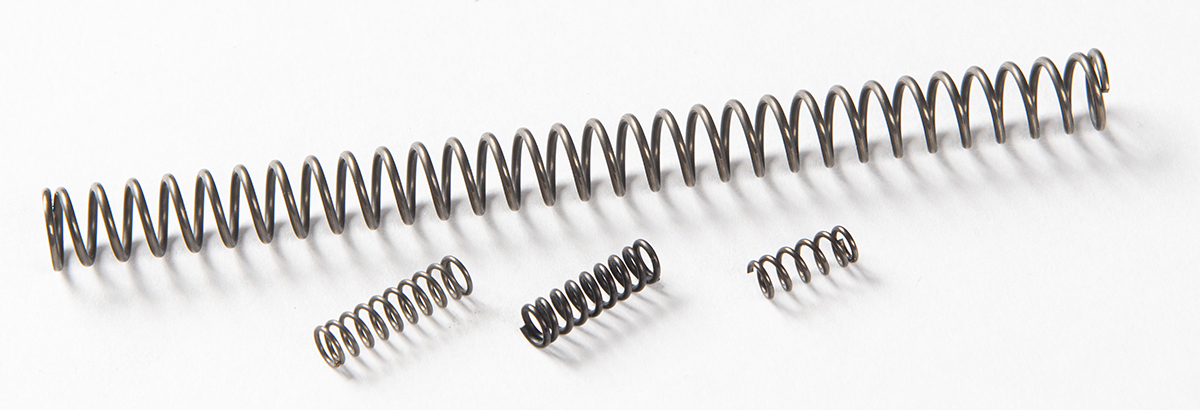
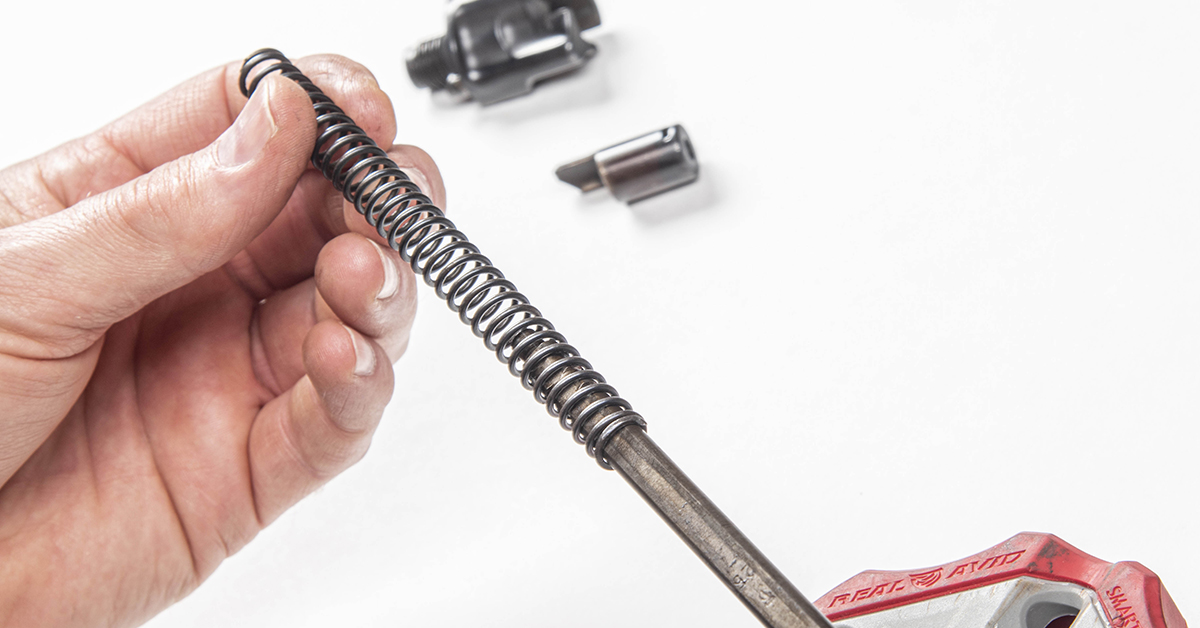
With a barrel date of 1940, our model 98 has been around for quite some time, and we had no doubt that the springs had grown “tired.” During the “sporterization” process, we planned to install a new Wolff Gunsprings Mauser 98 Service Pack. This set of springs contains a 22-lb. striker spring, a bolt sleeve spring, a sear spring, and a floor plate catch spring.

Military Mauser 98s utilize these small lock screws to hold the action screws in place. In our experience, these screws are usually missing, and this was the case with our Mauser. We were able to source these lock screws through Amazon.
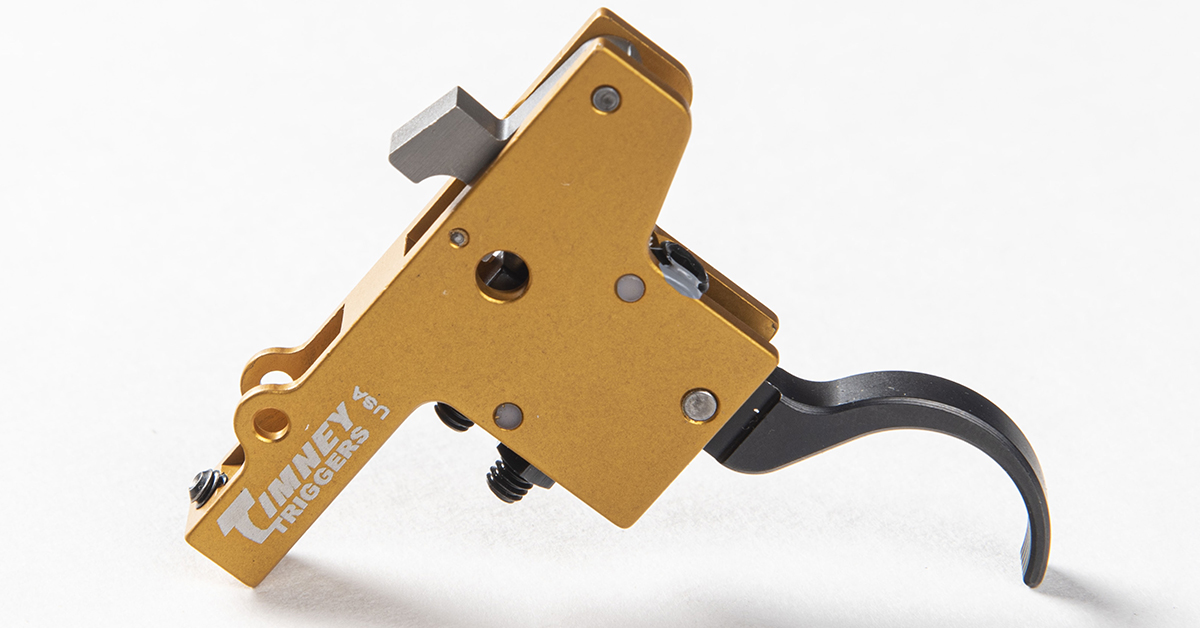
Over 75 years ago, Allen Timney began manufacturing precision single-stage triggers for military bolt rifles-turned sporters, including triggers for the Mauser. So, in looking to upgrade our Mauser, Timney Triggers was the first and only choice.
The military-style trigger, while functional, leaves much to be desired for use in a hunting rifle. Timney’s Mauser Featherweight is as crisp and precise as they come and is fully adjustable for sear engagement, overtravel, and pull weight. Installation is also simple, making this a no-brainer upgrade for any Mauser enthusiast.
Because we were dealing with a rifle that was over three quarters of a century old, this project demanded a complete teardown, cleanup, and evaluation of the rifle and bolt assembly. Thus, we’re going to do things a bit differently with this how-to article because of the project size. First, we will cover the more notable highlights of our project. Afterwards, we’ll show the detailed disassembly/assembly process for the Mauser bolt. This will allow you to more easily digest the primary modifications and then you can go to the step-by-step bolt work when you’re ready to jump right in. This section is also valuable if you simply want to give your Mauser a deep cleaning without any modifications.
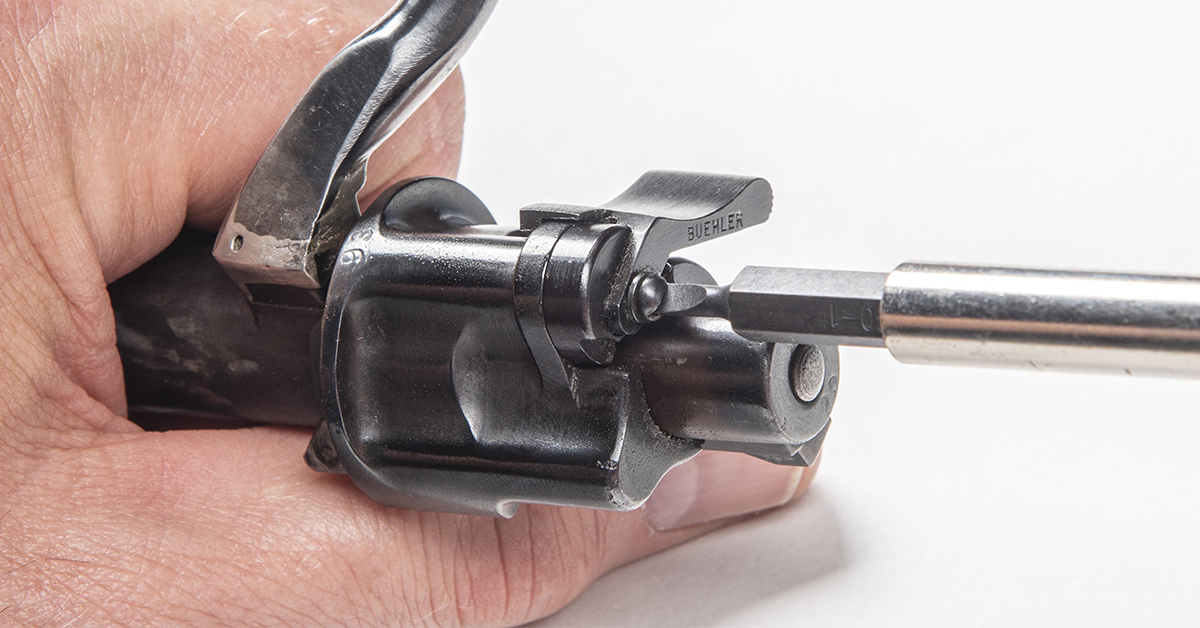
You’ll find that many older sporterized Mausers will have a Buehler low-profile safety installed (ours did). This replaces the original safety to prevent interference with a scope. If your Mauser has the original safety, it can easily be replaced at this time with one of the two low-profile safety options offered by Timney Triggers or by selecting a Timney trigger with a trigger safety.

Once you remove the action screws, the floor plate assembly and barreled action can be lifted out of the stock. The floor plate assembly should be disassembled and cleaned along with the disassembled bolt.
Magazine Follower Modification
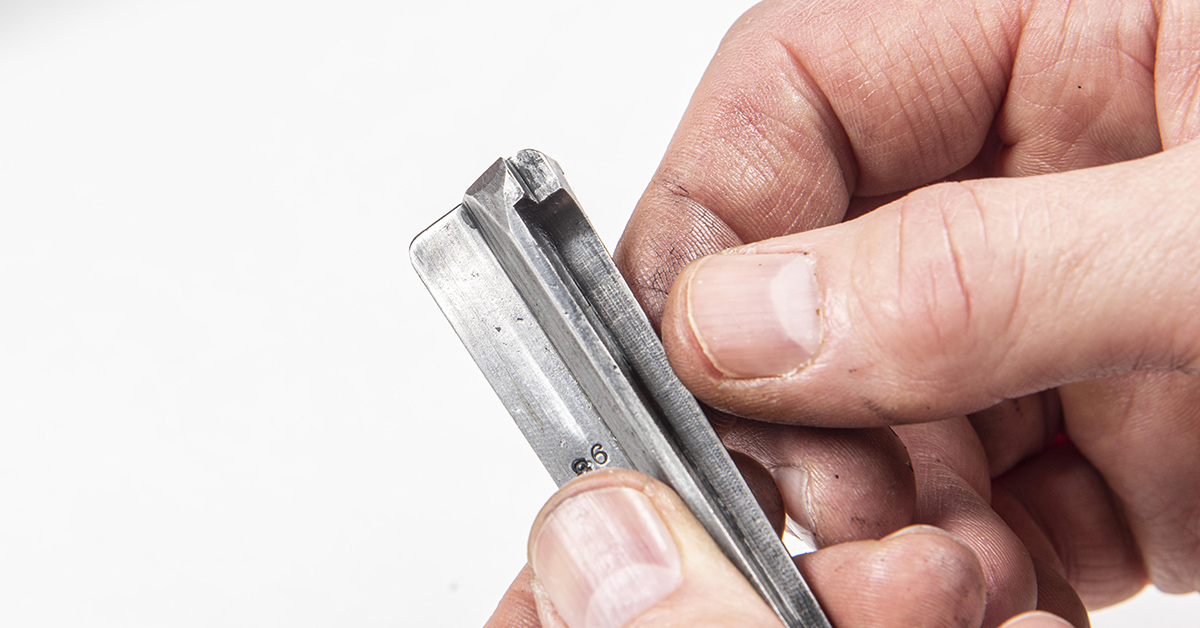
Original Mauser magazine followers were designed to hold the bolt open upon firing the last cartridge from the magazine. This is a desirable feature for military use as the soldier could rapidly reload with a stripper clip. Scope mounting will negate the use of the stripper clip function, making this feature useless to the hunter, and it just becomes a hassle in normal operation.
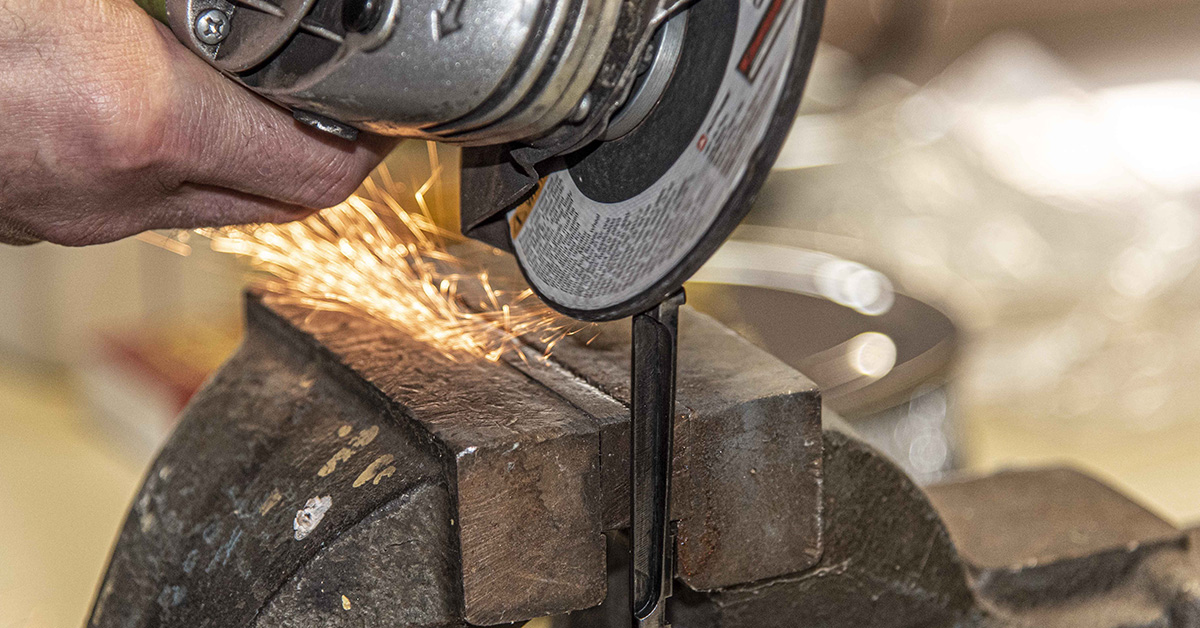
To remove this proud portion at the back of the follower, place the magazine follower in a vise with the rear of the follower facing up. Use an angle grinder or a file and reshape the end of the follower to form a slight angle.
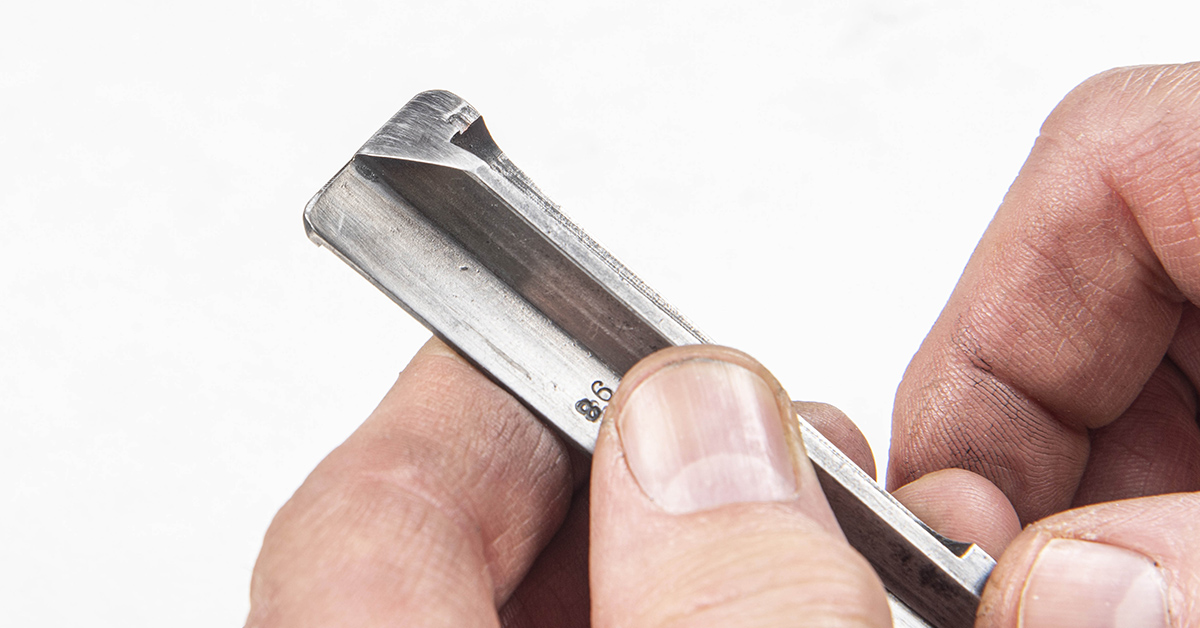
The newly-shaped follower, with this modest angle, will now allow the bolt to override the follower after firing the last round, which is what we have become accustomed to with modern sporting rifles.
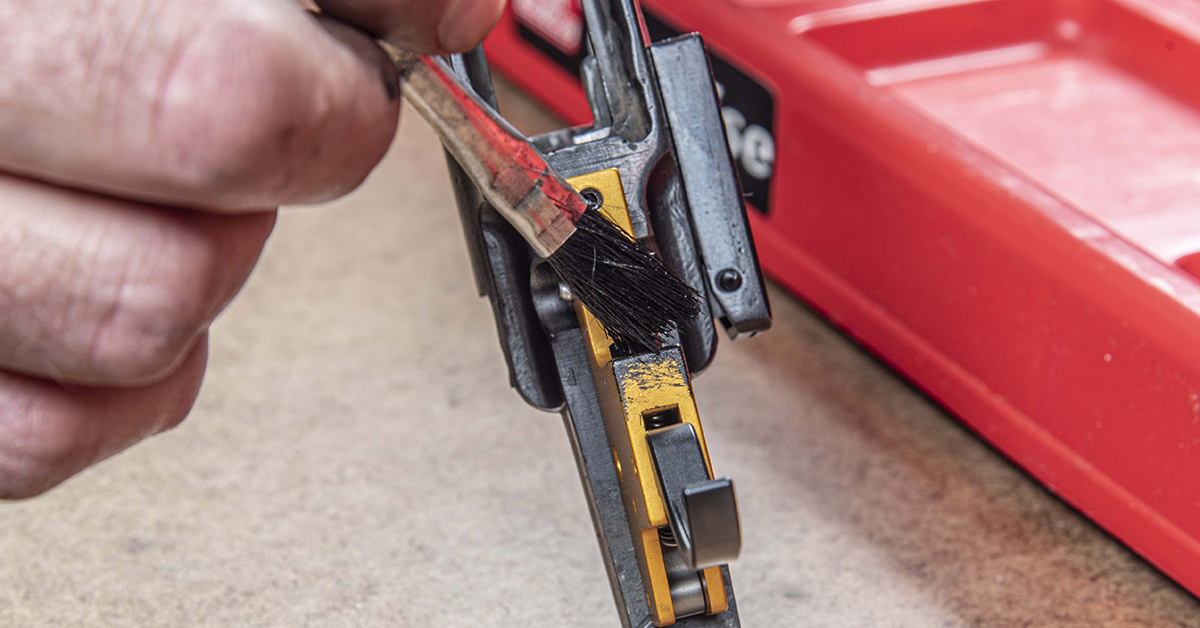
Cleaning
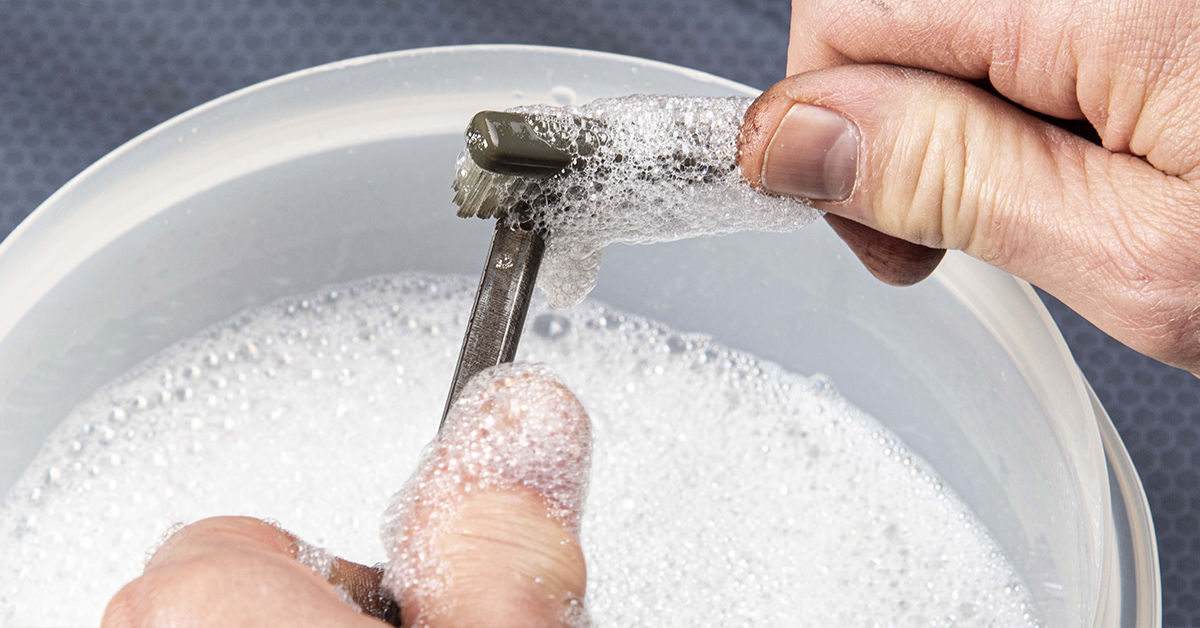
Upon disassembly, all parts should be thoroughly cleaned. Use soapy water that is as hot as you can stand and scrub with a stiff nylon brush to remove old oil and grease that may have been building up for decades. Once clean, immediately rinse the parts in hot water and blow dry with compressed air.
Safety First!
Following WWII, most of these rifles were disassembled for storage. As a result, many, if not most, have mismatched bolts, meaning that the bolt that is in this rifle is most likely not the original bolt that went with the barreled action. This potential mismatch can have a direct effect on the rifle’s headspace dimension, which is also directly related to safety.
It is wise, therefore, to always gauge headspace on these rifles before putting them into service (our recommendation for all guns!). This is the only way to ensure the gun is safe to operate.
To correctly gauge headspace, the parts, specifically the bolt and chamber, must be clean and degreased. Proper use of the gauge also requires disassembly of the bolt. This is one reason a project of this nature always begins with disassembly and a thorough cleaning.
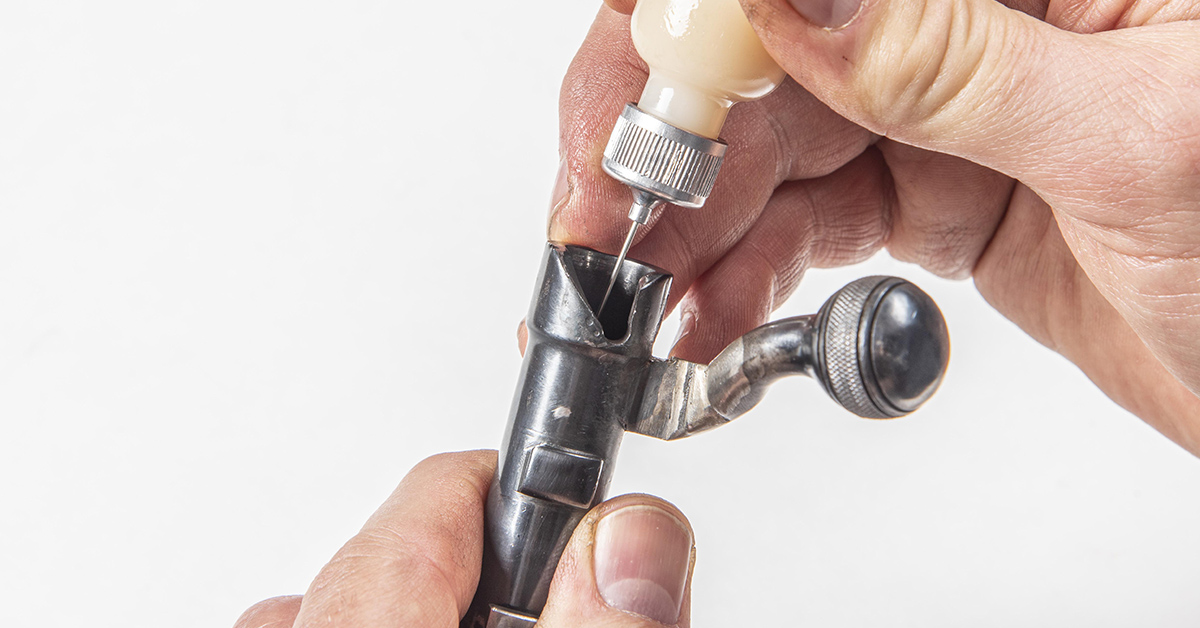
Before gauging headspace, the clean extractor must be reinstalled on the clean bolt (see the bolt disassembly/assembly process below for details).
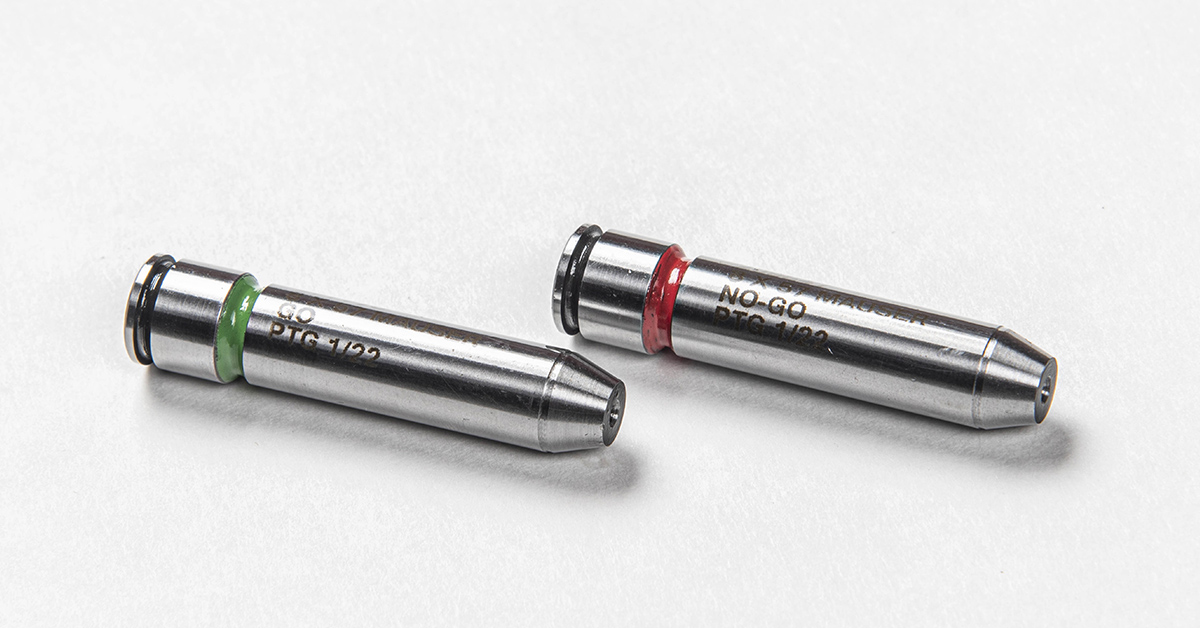
For our gun, we went to Pacific Tool and Gauge for a precision set of 8×57 Mauser GO and NO-GO gauges.
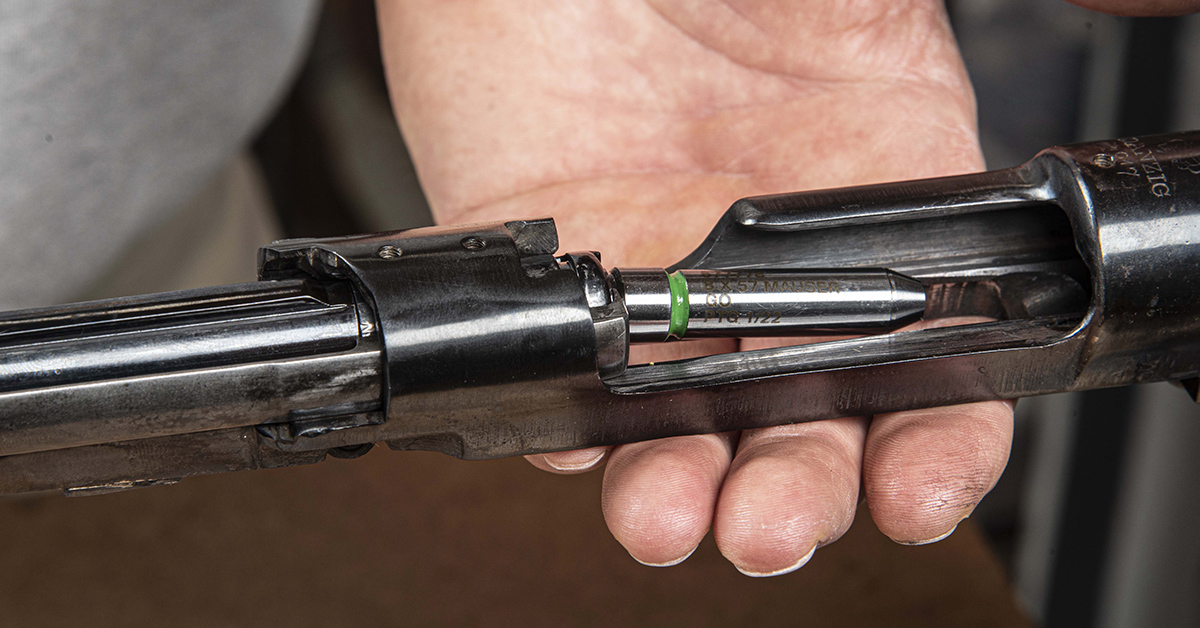
When checking headspace dimension in the Mauser, DO NOT place the gauge in the chamber and attempt to close the bolt on the gauge. Since the Mauser 98 is of the controlled-round-feed design, the extractor is NOT designed to “snap over” the cartridge case rim. The gauge must be slid underneath the extractor and against the bolt face from the bottom up in the same fashion as rounds would be fed from the magazine. If the extractor is not installed first, you will find that the collar will get hung up in the action (and it’s a bit difficult to get it free). Removing the collar could damage it. We have found it best to gauge Mauser headspace with the bolt in this configuration. Place the GO gauge on the bolt as pictured.
Slowly guide the gauge into the chamber and attempt to close the bolt. The bolt should close easily with little to no resistance on the GO gauge. Next, repeat the process using the NO-GO gauge. The bolt should not close on this gauge. If the bolt does not close on the GO gauge or closes on the NO-GO gauge, seek assistance from a professional gunsmith.
Bore Deep Cleaning
The bore of our rifle looked good, but with a barrel dating to the 1940s, there’s no doubt it needed a cleaning from more than the usual brush-and-patch job. We’d argue that goes for any neglected Mauser you may come across.
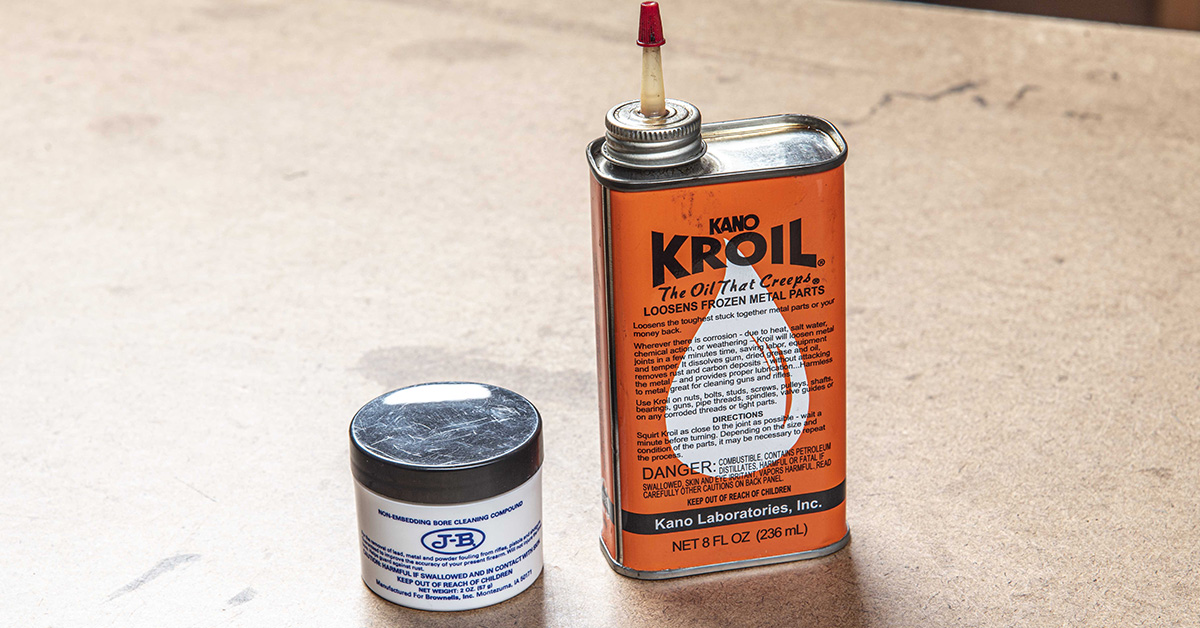
JB Bore Paste and Kroil has long been known as an effective bore cleaning duo. Not only will this combination clean a rifle bore to the nth degree, but it may also boost accuracy.
Note that this cleaning process will work for any rifle.
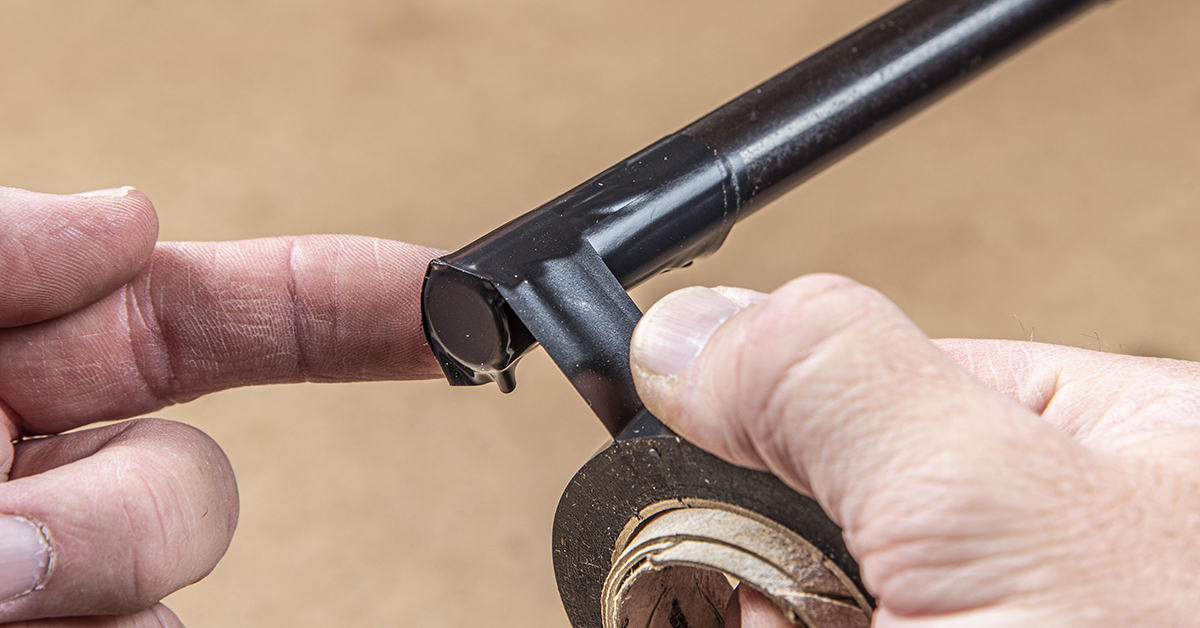
Beginning by taping the muzzle closed with electrical tape. This is done to keep the Kroil in place and to keep you working within the bore while using the JB Bore Paste.

With a bore guide in place, pour some Kroil into the bore. We are not trying to fill the bore, but we do want sufficient Kroil to seep into the nooks and crannies and loosen any hard fouling.
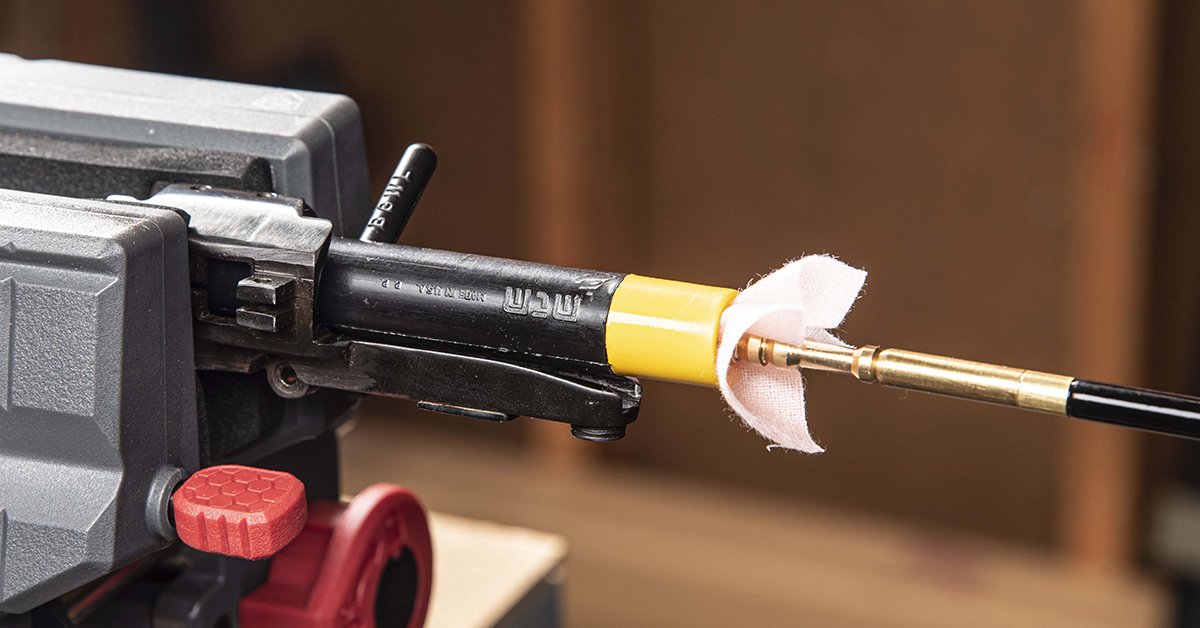
After saturating the bore, quickly place the barrel in a horizontal position. The Real Avid Master Gun Vise makes this easy.
Being careful not to push through the tape on the muzzle end, work a patch saturated with Kroil along the entire length of the bore. Once the Kroil has been evenly distributed throughout the bore, allow the Kroil to soak for 24 hours. This will help to loosen any stubborn fouling.

Liberally coat a patch with JB Bore Paste and work it the entire length of the bore. About 5 to 10 passes is fine. Pay particular attention to the area just ahead of the chamber. Next, clean the bore with bore solvent to remove all traces of the JB Bore Paste. On older barrels such as this, you may want to repeat the process. The fine abrasive of the JB Bore Paste is effective at removing fouling while also giving the bore a light polishing. Combined with the penetrating qualities of Kroil, this is a good deep cleaning combination for any rifle barrel.
Stock Inletting
In our experience, Boyds’ stocks typically require little if any inletting work, but the more you change on a rifle the more likely it is that some wood will need to be removed. We ended up taking a good bit of wood off our Agility stock — not because of the Boyds factory inletting but because of our rifle’s previous modifications.
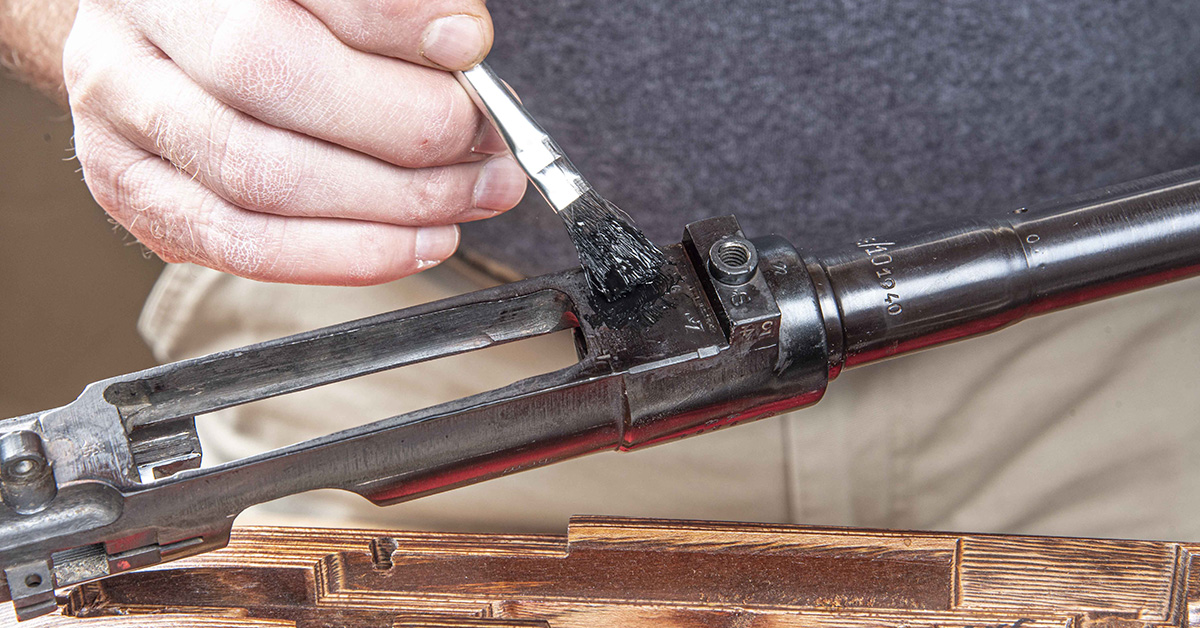
Beginning with the cleaned barreled action, secure the stock in a padded vise or cradle. Here, we’re using MTM Case-Gard’s Gun Vise. Place a light coat of inletting black on the bottom surface of the barreled action.
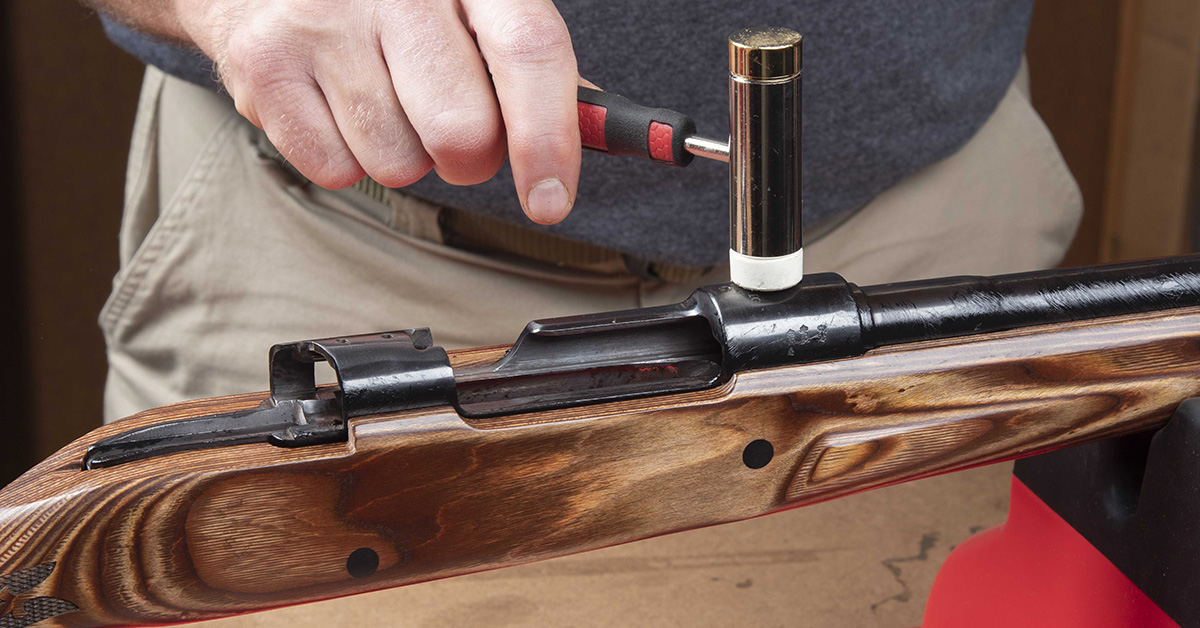
Carefully place the barreled action into the stock. The goal is to go straight down into the stock with the barreled action. We only want inletting black to transfer to the places on the stock that will require removal. Once in place, use a soft-faced hammer to give the barreled action a light tap and transfer the inletting black to the stock.
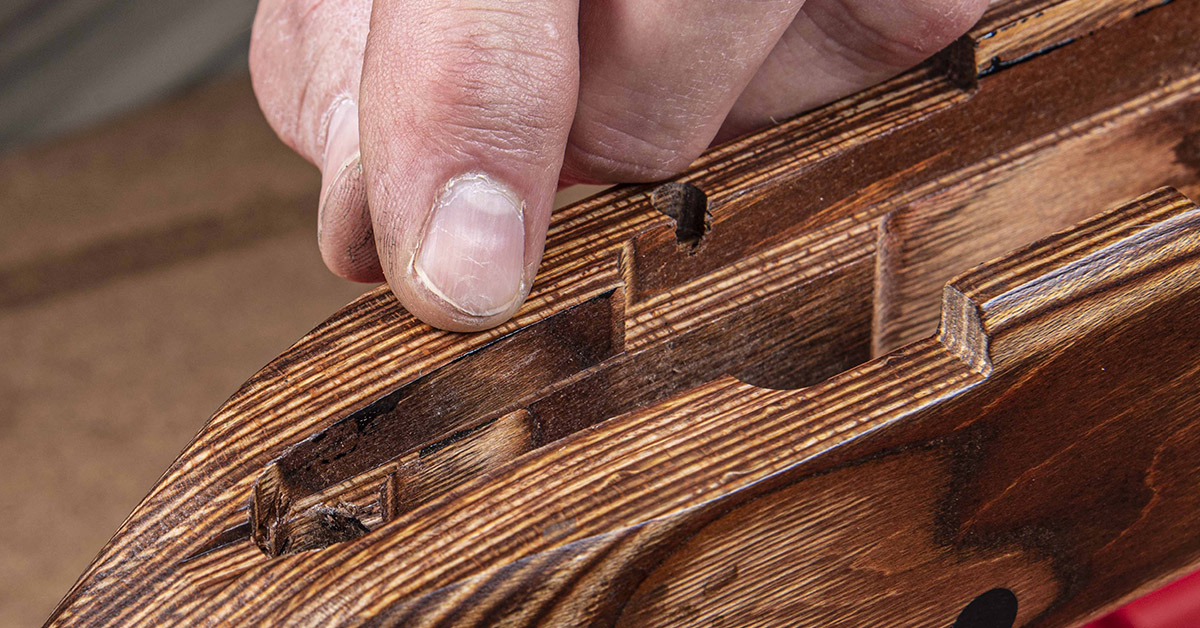
Look carefully at the stock for the places where the inletting black has transferred. This is where wood must be removed.
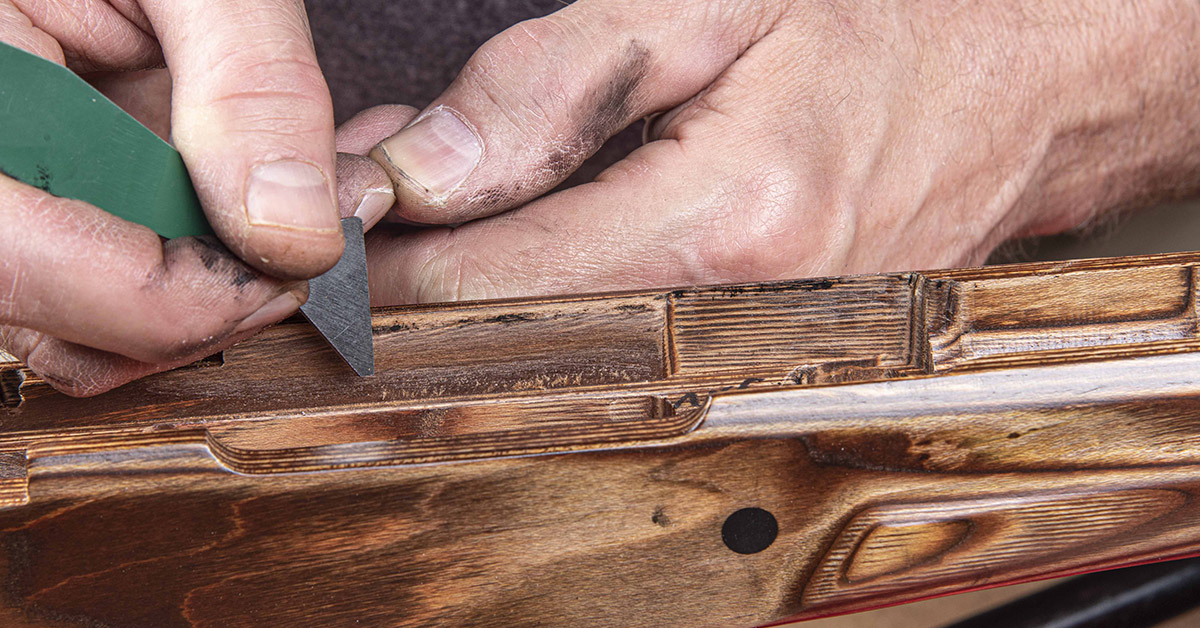
Use a scraper to lightly scrap away these high points, then repeat the procedure. This can be a slow process, so work carefully and patiently. Each time you place the barreled action into the stock, you’ll notice that the fitment improves. The objective is to have the bottom of the receiver in firm contact with the stock. This includes the recoil lug mortise. Wood is generally not removed in these areas, but instead along the sides of the inlet until the barreled action “bottoms out” in the stock and is easily installed or removed.
Once this is accomplished, turn the stock over and repeat the process for the trigger guard/magazine box assembly. Properly fitted, the magazine box will easily go into place, “bottoming out” in its inlet and, when the stock is turned over, falling out of its inlet under its own weight. Once completed, clean the inletting black off the barreled action and trigger guard/magazine assembly.
The Timney trigger is somewhat larger than the original trigger and may require some slight modification to the stock. Place a light coat of inletting black onto the exterior surface of the trigger.
Place the barreled action into the stock. Lightly tap the rear receiver ring with a soft-faced hammer to ensure transfer of the inletting black.
Remove the barreled action and examine where the inletting black contacted the stock. Remove material from the stock as needed to achieve proper fitment. A barreled action with the trigger attached should go in and out of the stock easily with no binding.

All that was needed to achieve proper fitment was the removal of a small section in the forward area of the original stock trigger inlet. Remove the inletting black from the trigger housing when done.

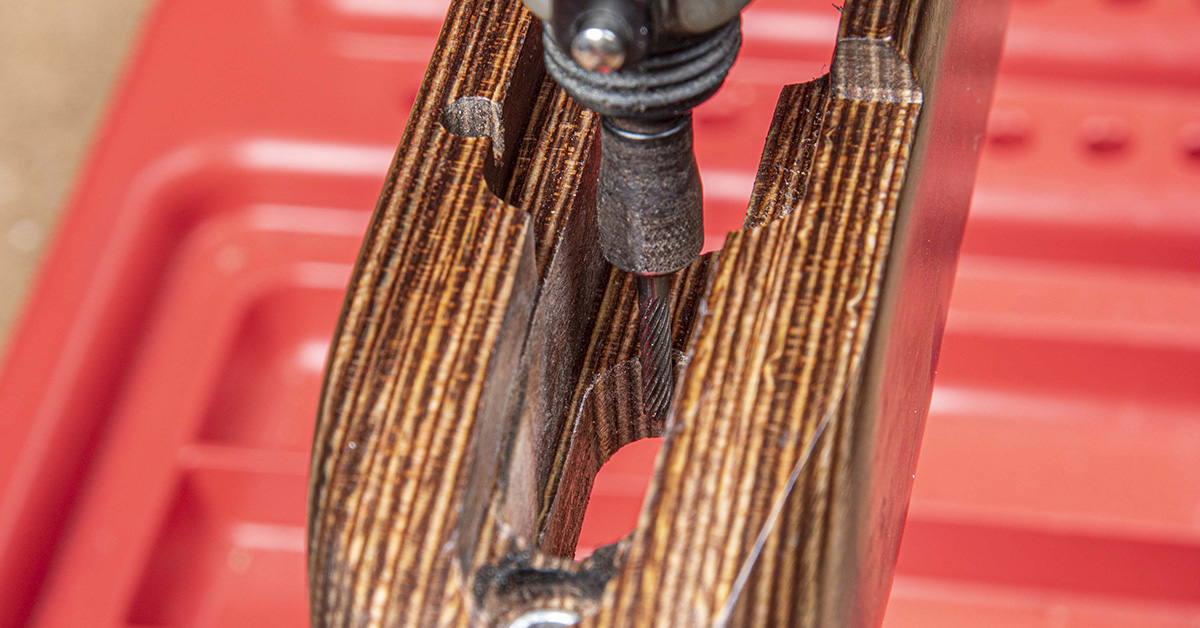
Moving on to the bolt handle, install the barreled action and trigger guard assembly into the stock.
Install and tighten the action screws and the lock screws.
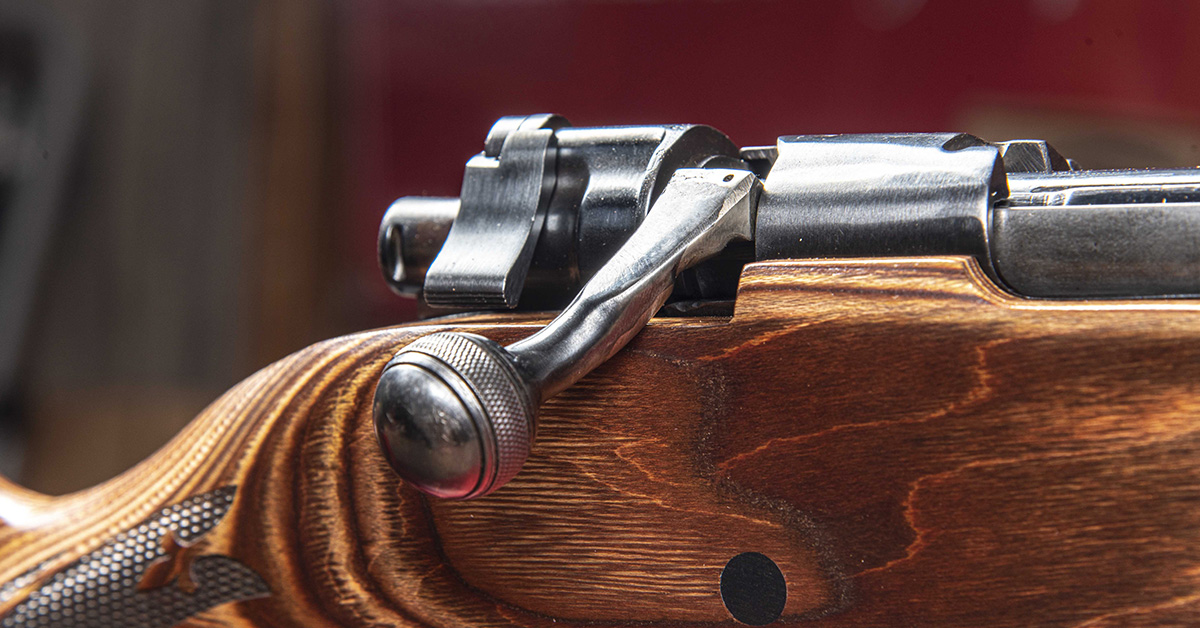
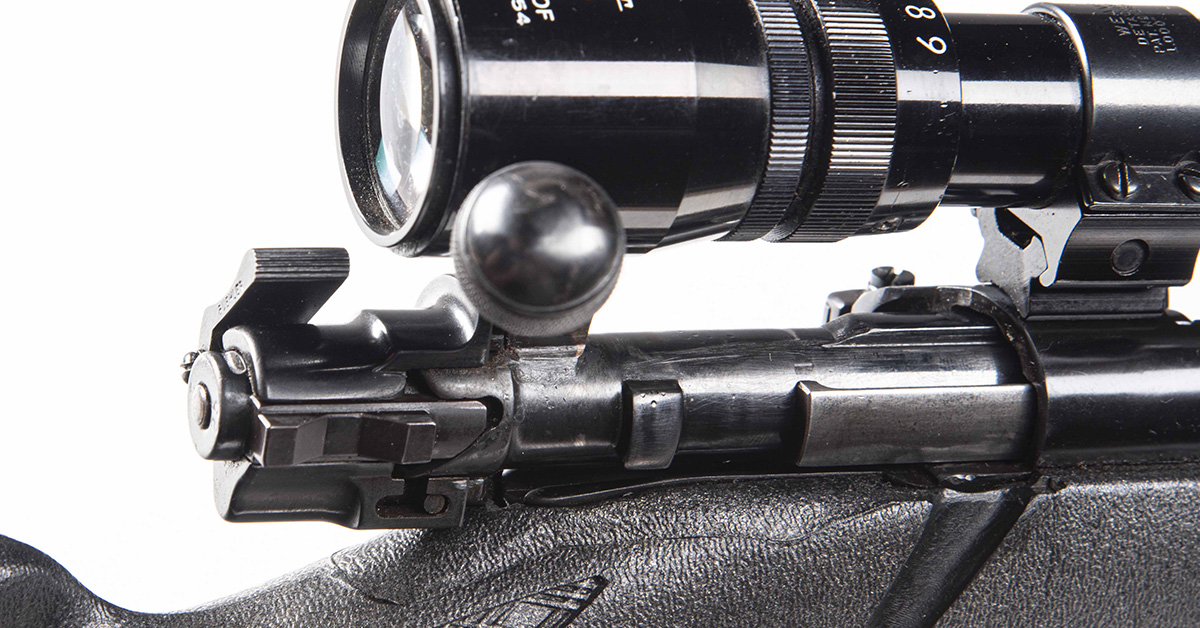
Install the bolt and most likely the stock will prevent it from going fully closed, as seen here. Military Mauser 98 bolt handles need to be bent and reshaped for use with a scope. Fortunately, ours was already bent. Since the bends applied by assorted gunsmiths will vary, the amount of wood you need to remove from your stock in order to gain proper function can also vary. The procedure, though, is the same.
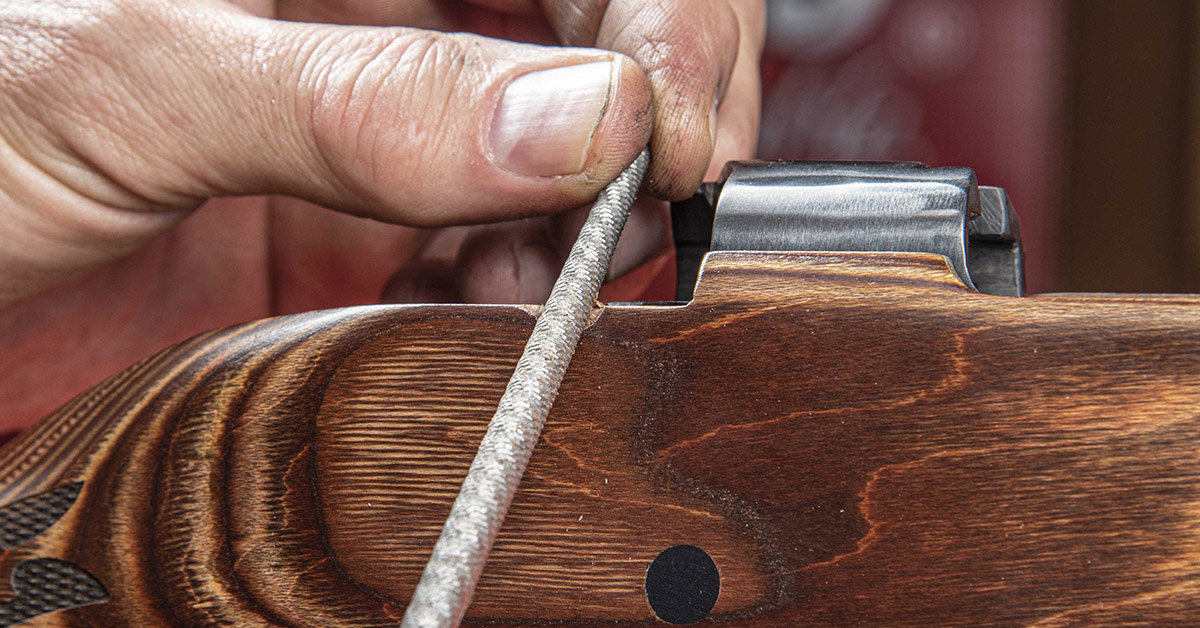
Coat the underside of your bolt handle with inletting black and attempt to close the bolt. Remove the bolt and look closely at the stock where the inletting black has transferred. Using a round or half round file, remove material where contact was made. Install the bolt and repeat the process until the bolt handle fully closes without making any contact with the stock. Properly completed, the bolt will fully close without any contact between the stock and bolt handle. Any bolt handle to stock contact is a detriment to accuracy and may prevent the bolt from fully closing.
Once properly fitted, the bolt handle cutout in the stock can be worked to whatever shape you find appealing. Just be sure to seal the wood. We applied some Birchwood Casey Tru-Oil to the raw wood and it sealed nicely with a blended finish.
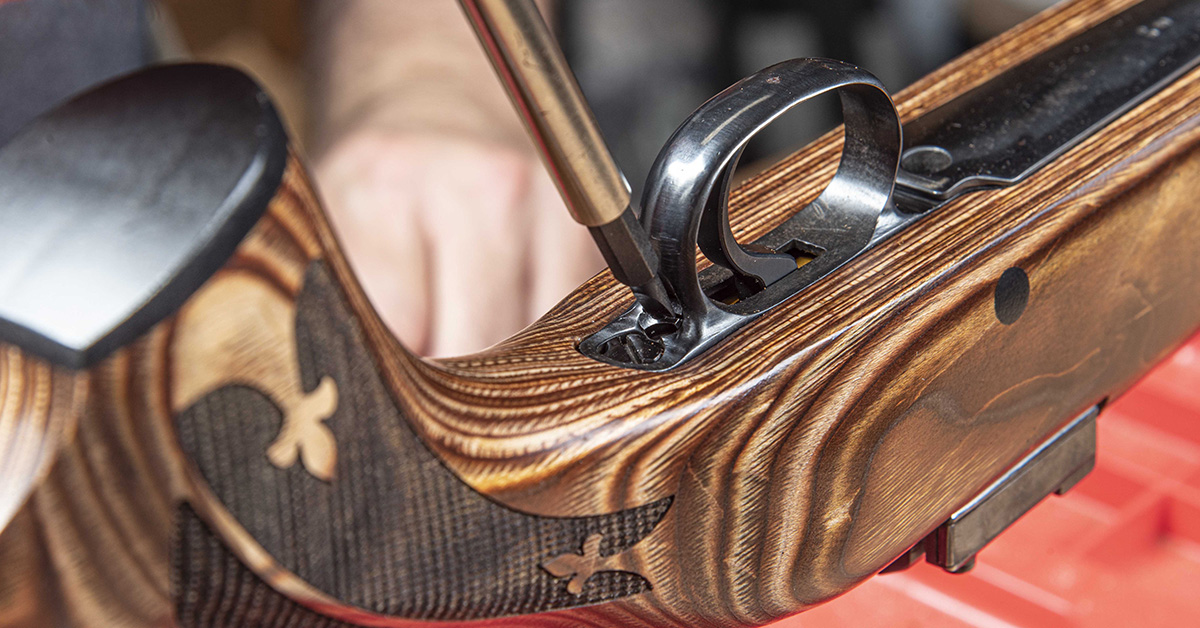
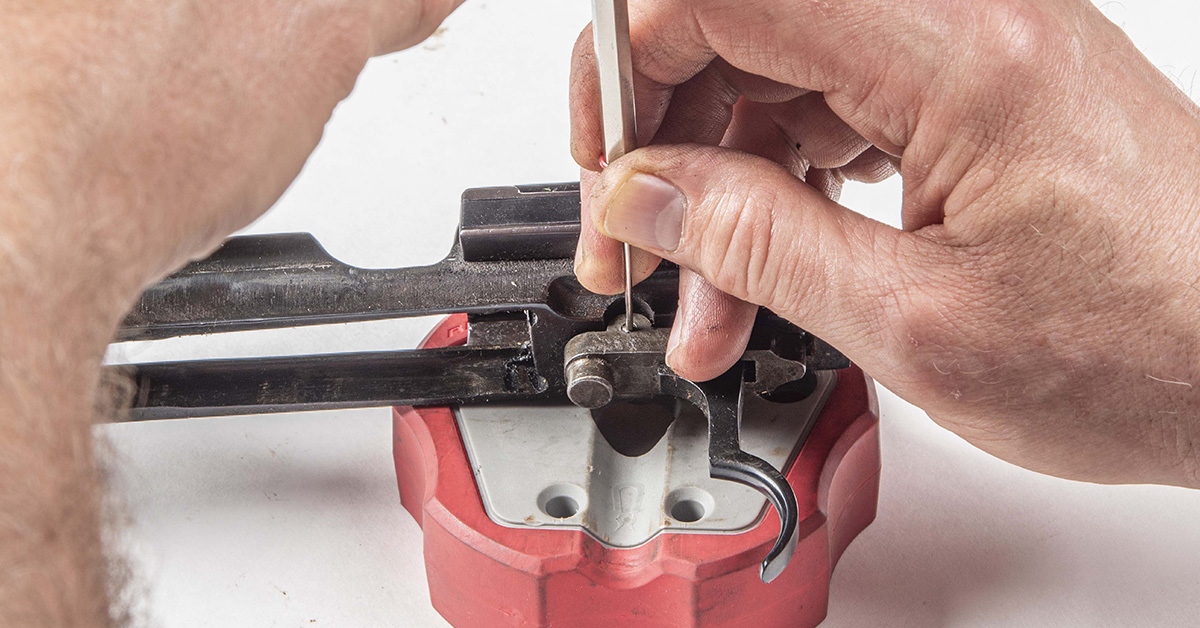
Trigger Install
Replacing the stock trigger with a Timney performance trigger in a Mauser really takes no step-by-step instructions even if you haven’t done it before because it is so simple. As such, it makes sense to do this swap even if you aren’t going for a total gun makeover. Here’s how easy it is…
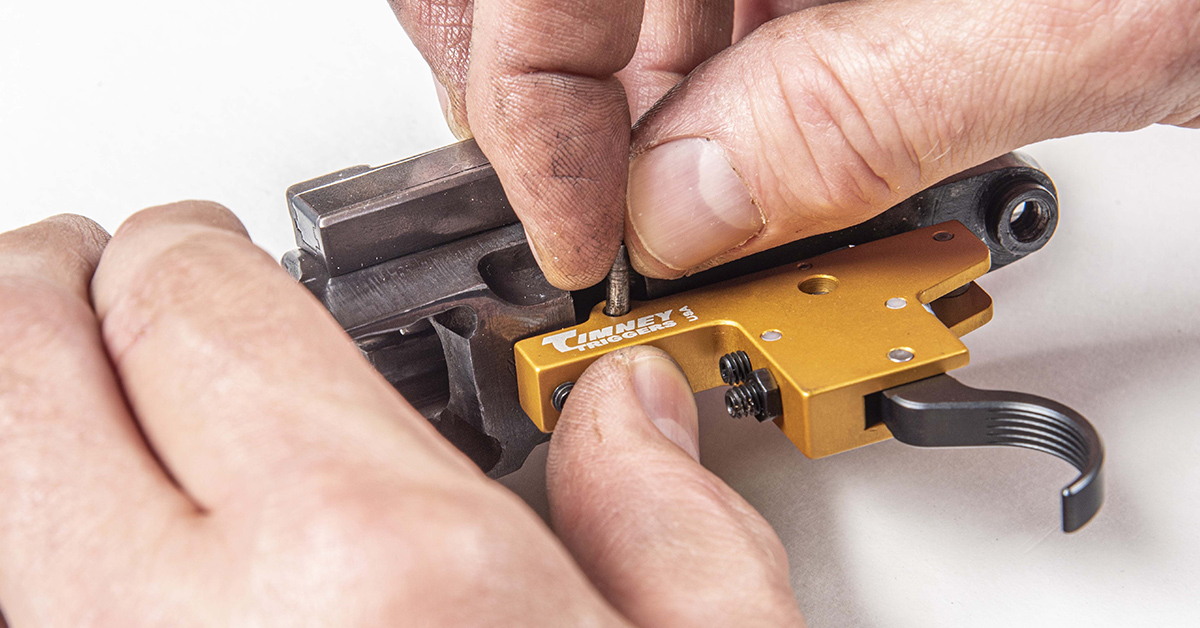
A single pin secures the stock trigger to the receiver. All it takes to remove the trigger is to tap out this pin with a hammer and punch. Installation of the new Timney trigger is the reverse. Align the pin holes in the trigger housing and receiver and reinstall the original pin.
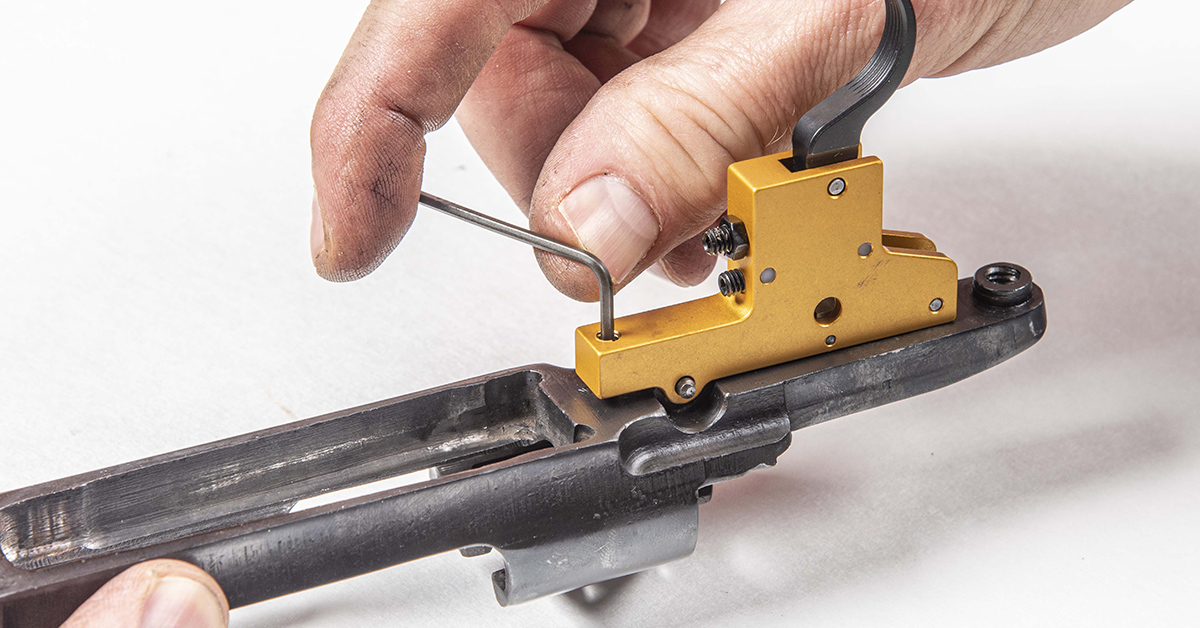
Tighten the set screw to secure the trigger assembly and that’s it for the installation. Given how much a Timney trigger can improve shooter’s accuracy potential, this is one upgrade that’s always worth doing.
Scope Mounting
To this point, our Mauser conversion went as expected. The final act of this drama — mounting the Leupold scope — provided the most challenge.
Our receiver required military Mauser 98 bases. Since we couldn’t beg, borrow, or steal them from anywhere due to the supply chain issues still plaguing us, we had to go with FN Mauser bases.
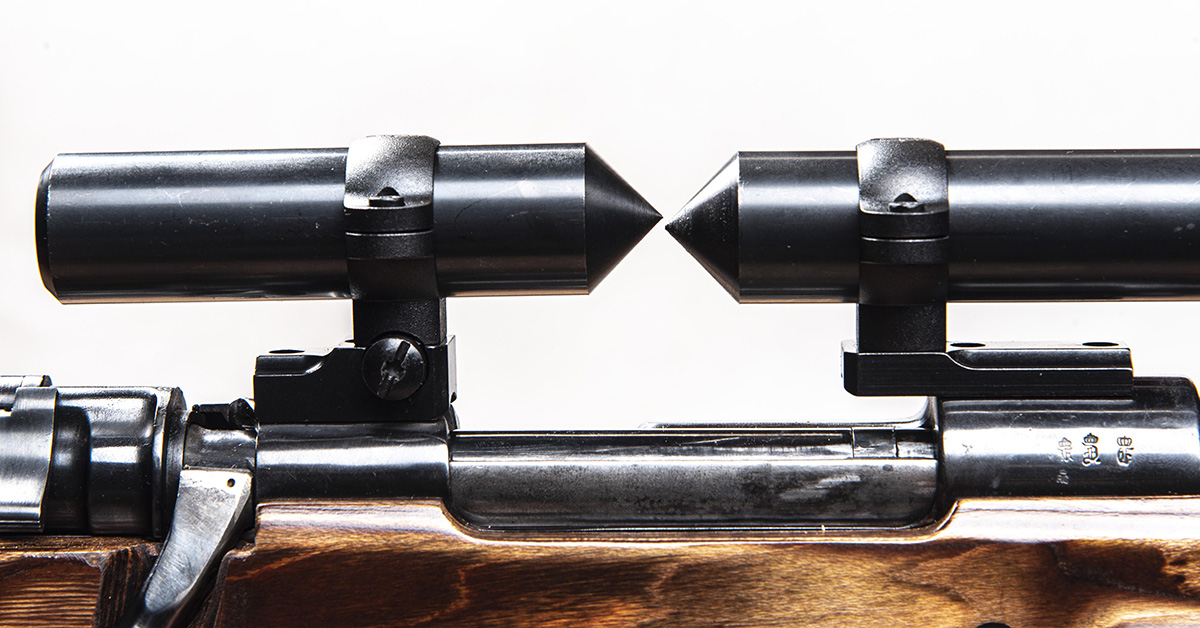
As you can see here, the rear ring is about 1/16th of an inch higher than the front ring. To make these mounts work, we were left with no option but to shim the front base.
We have used JB Weld as a leveling and adhering solution for scope base mounting on many projects. You can follow the complete step-by-step process for this below. In a nutshell, we use a lapping bar to “float” the front base to the correct height. This allows the JB Weld to set beneath the front base in perfect alignment with the rear base.
Once cured, the JB Weld provides a rock-solid foundation and superior adhesion between the action and the front base. Reinforced with the base screws, this mount isn’t going anywhere.
Note that you can perform this procedure to achieve the rigid scope base mounting on most any rifle. We use this process nearly every time we build a precision long-range rifle because it offers the utmost in scope mount rigidity and security.

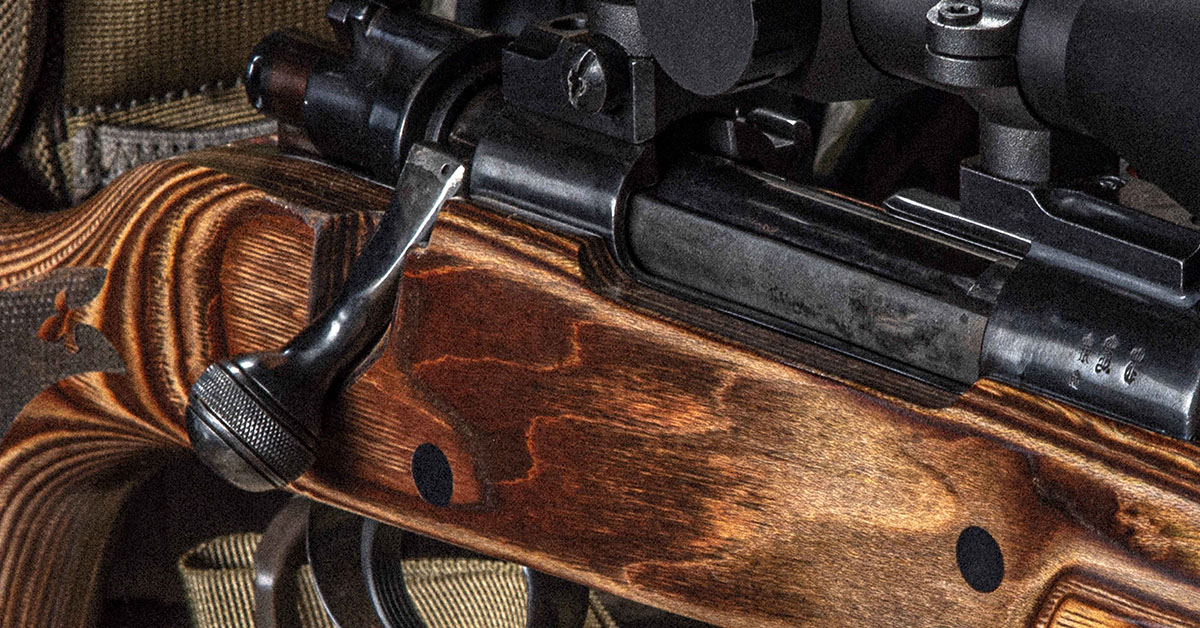
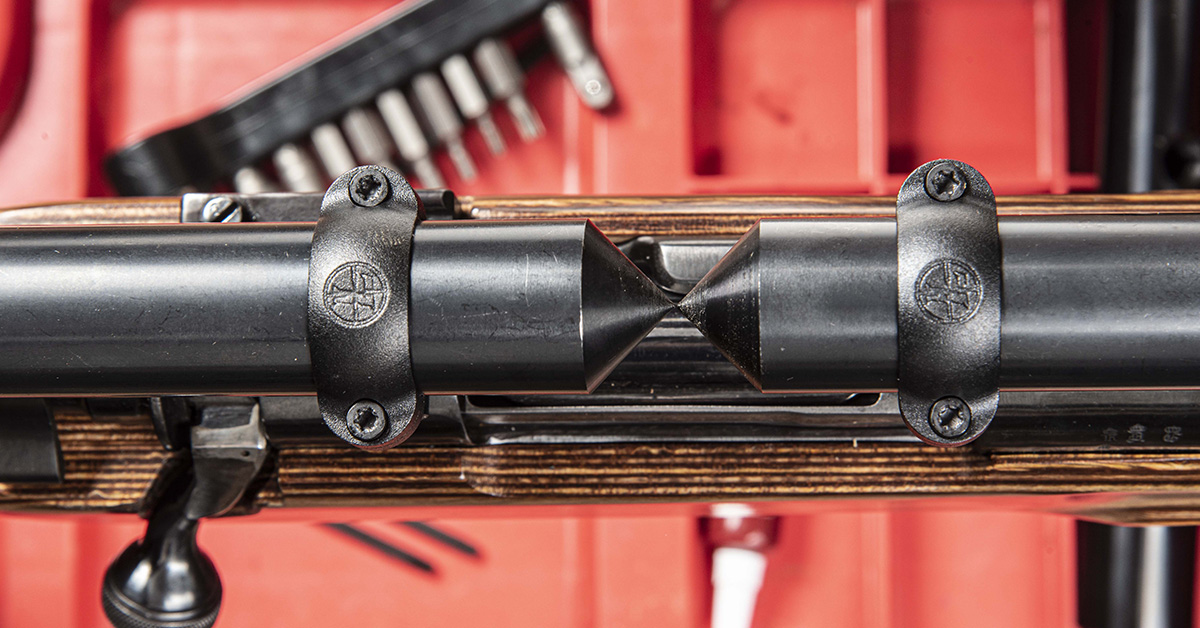
Leupold’s Mauser scope ring mounts come in low, medium, and high. We found that the medium-height rings provided ample clearance between the scope and bolt handle while maintaining the lowest possible scope-to-bore-line distance.
Fixing the Occasional “Mauser Oopsie”
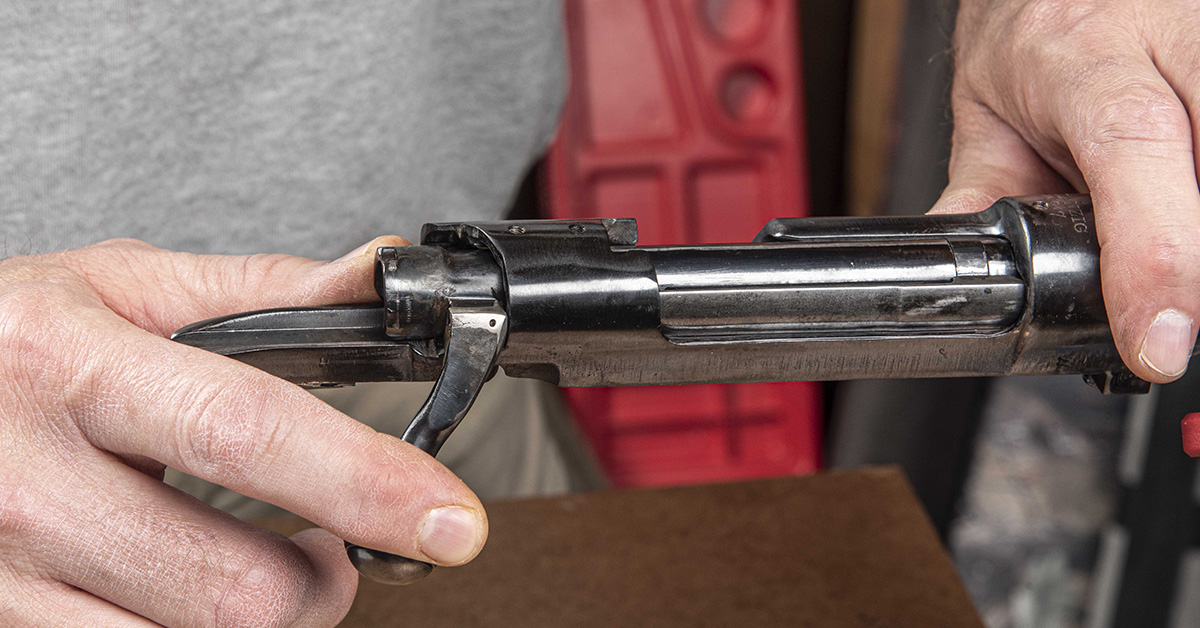
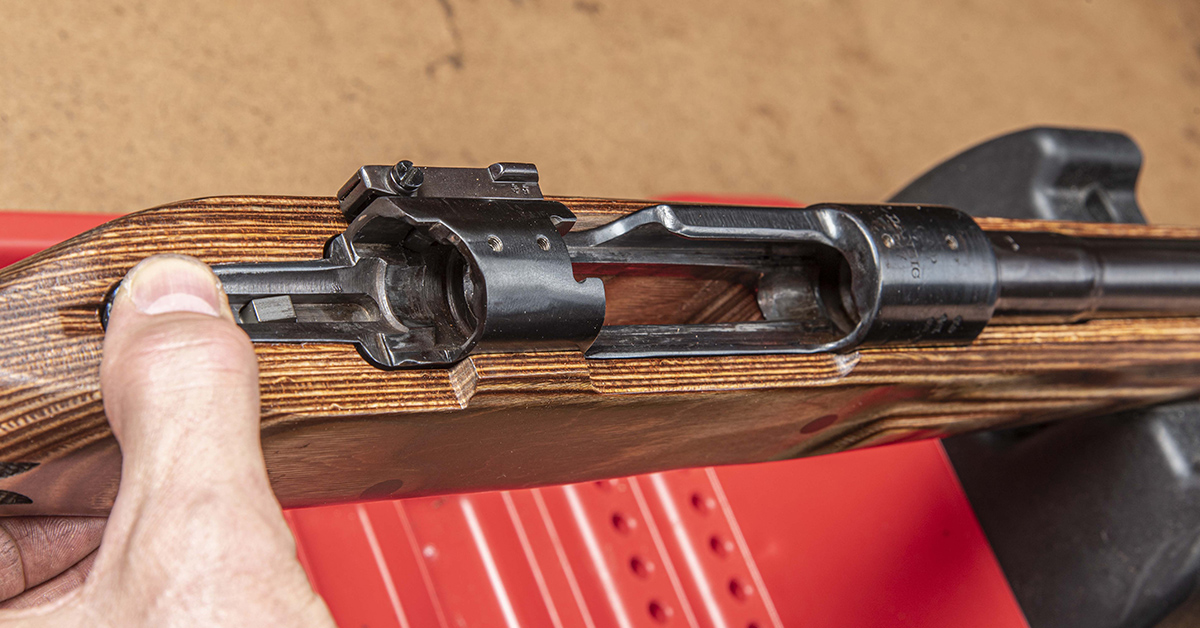
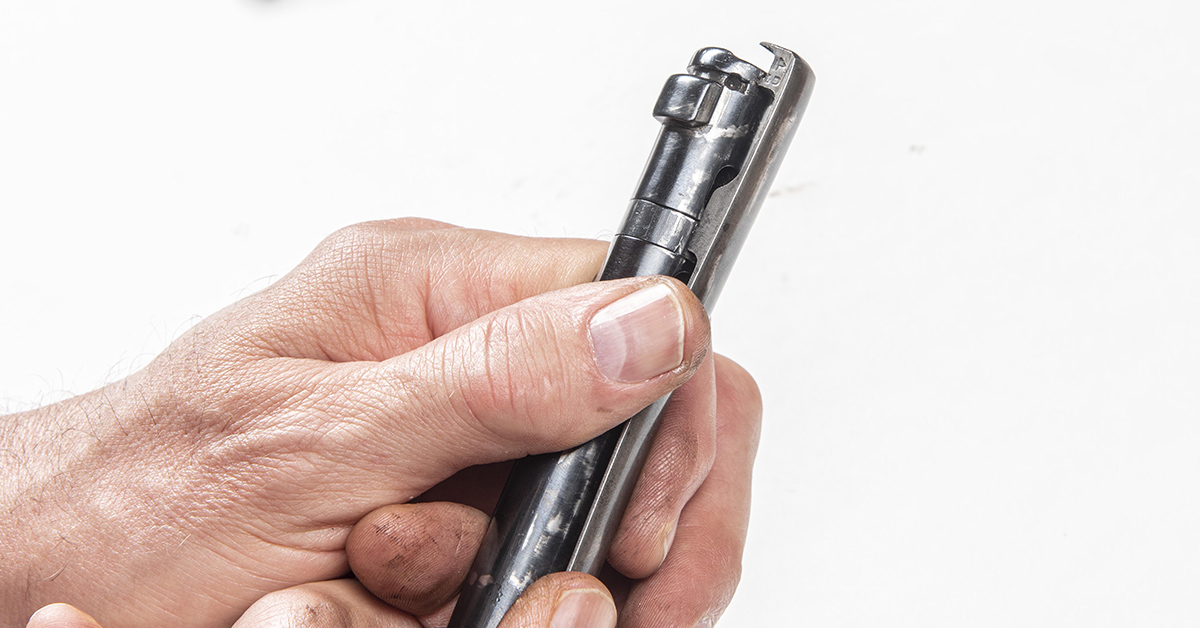
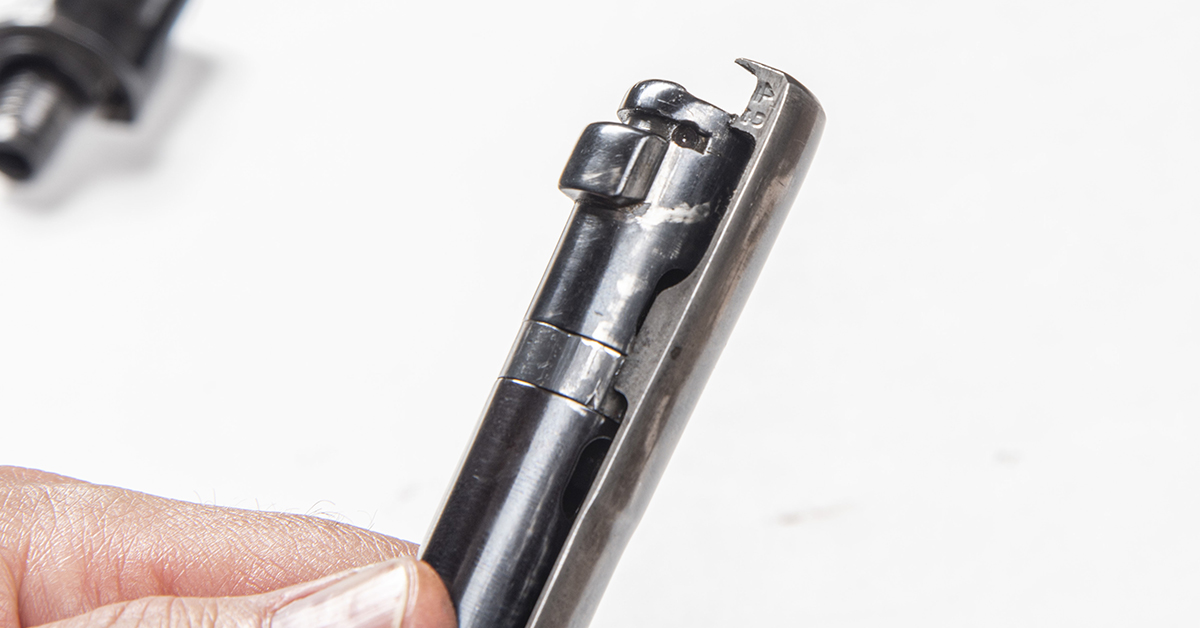
This is the condition in which we received the Mauser 98 — the bolt would not go forward into the receiver. We have seen this several times over the years. While this condition can be confusing to some gun owners, it’s an easy fix once you understand what has happened. It doesn’t happen often, but it can happen to any bolt gun, and it may be a little more prone to happening with the military Mauser 98 because the firing pin spring is not that strong and the half-cock notch is not very pronounced.
Look closely at the cocking piece in this picture. The cocking piece is in its forward fired position and not in the half-cock notch. As such, it cannot be inserted into the rifle.
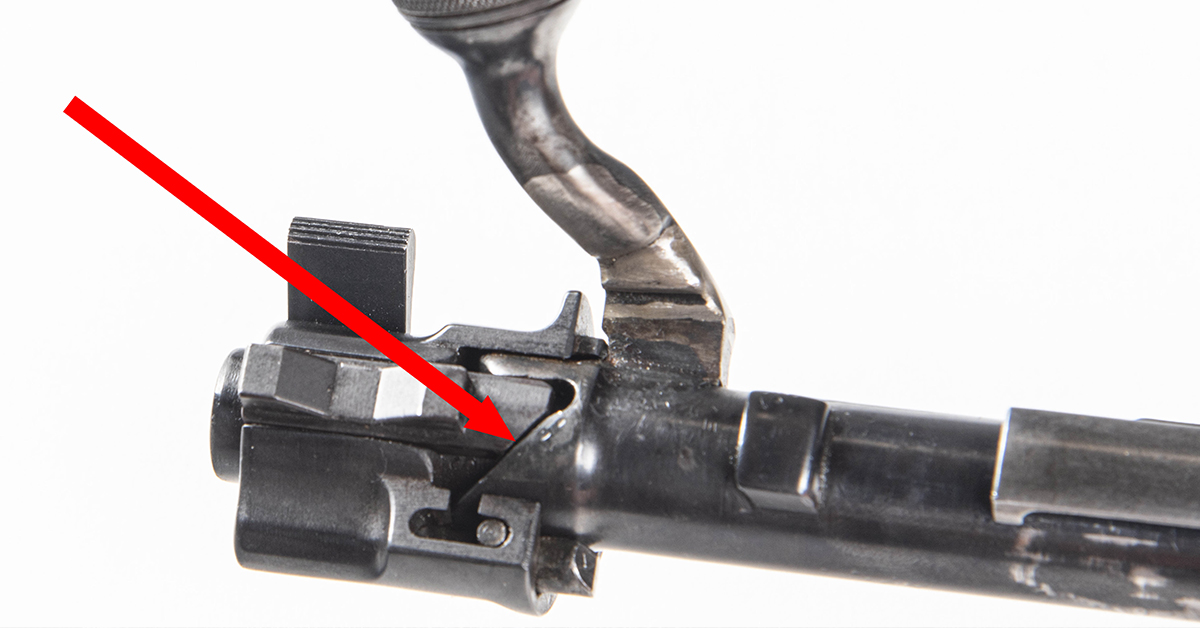
With the bolt removed from the rifle, it is easier to see what happened. The cocking piece is in the fired position. In operation, you would raise the bolt handle after firing a round. As the bolt handle is raised, the bolt will rotate and the cocking piece will ride up the ramp (arrow), cocking the rifle in order to fire the next round. If the cocking piece accidentally falls into the fire position like this, it’s an easy fix.
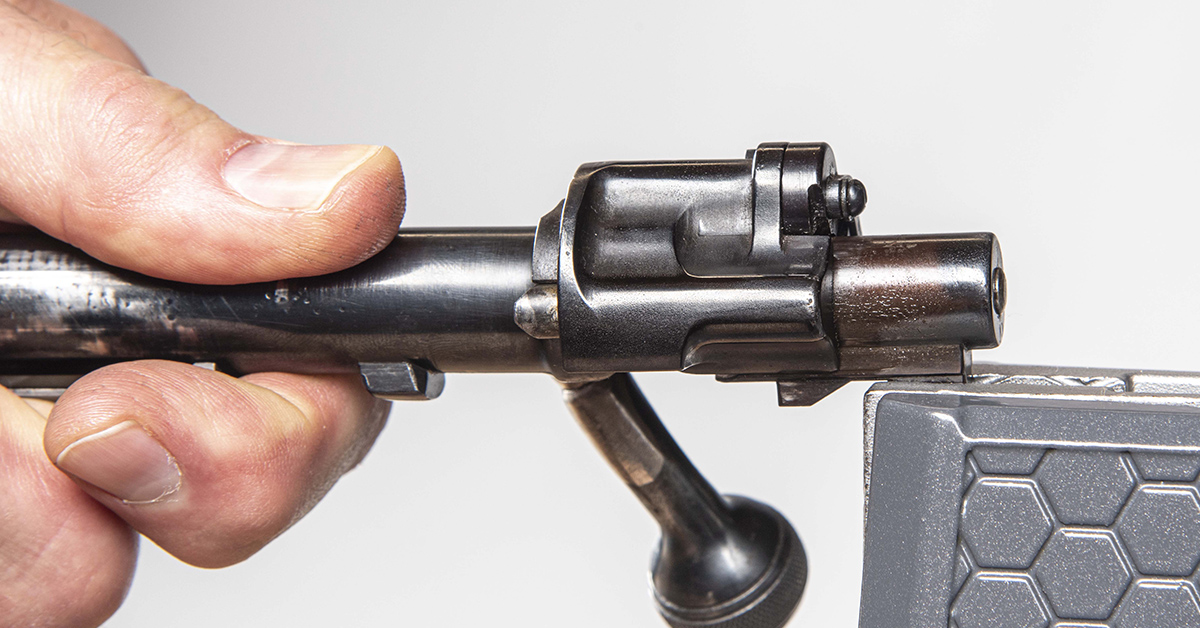
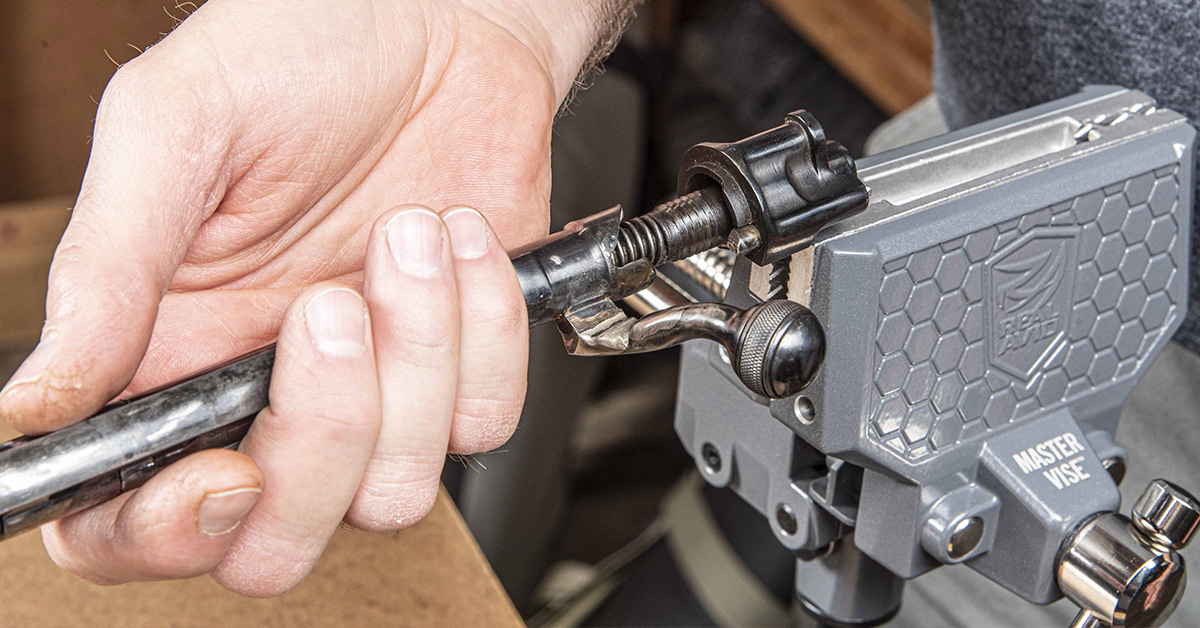
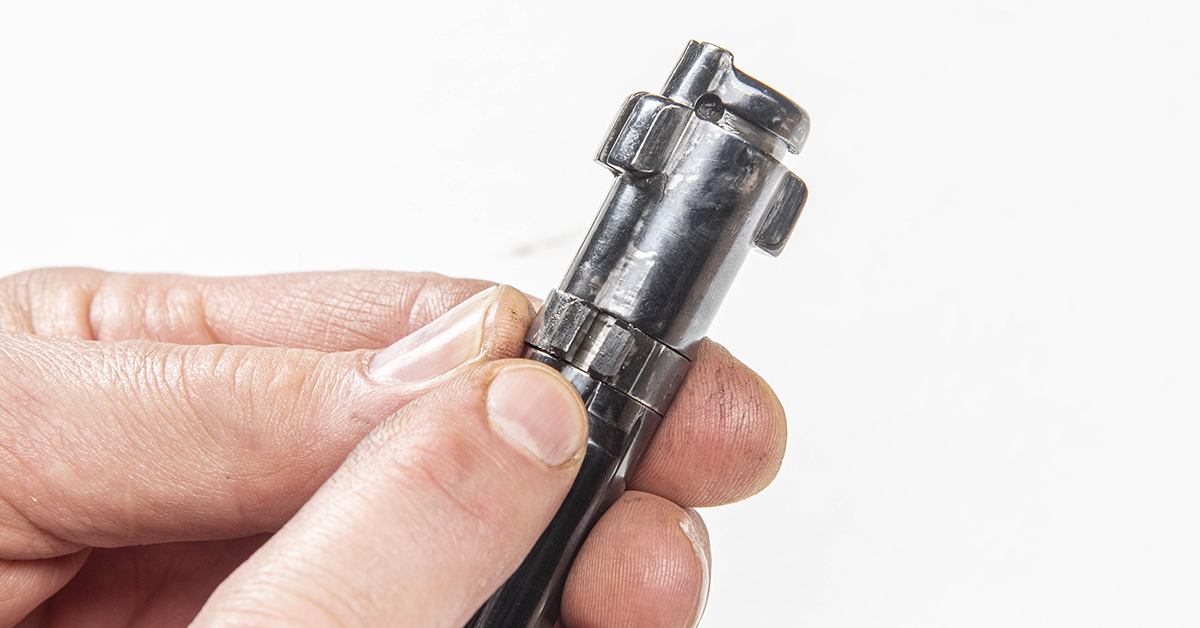
Secure the cocking piece firmly in a bench vise and pull the bolt forward. Slowly rotate the bolt handle upward until the cocking piece falls into the half-cock notch.
Once in proper alignment, slowly allow the bolt to move rearward into place.

With the bolt in its correct half-cock position, the bolt can now be inserted into the receiver.
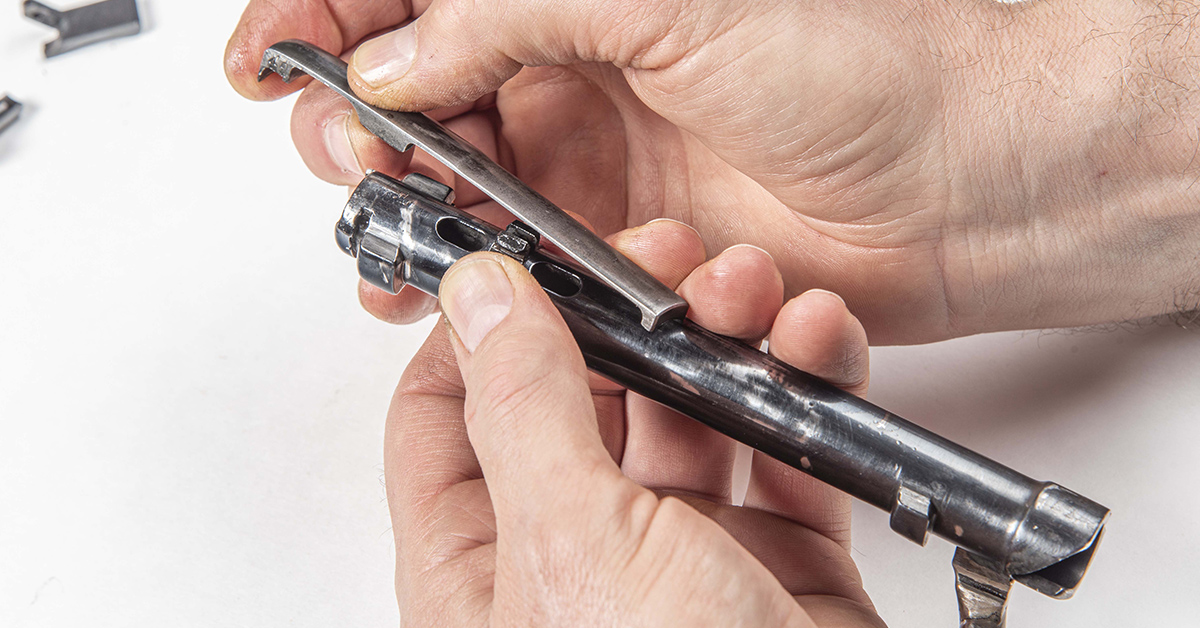
Bolt & Barreled Action Disassembly Procedure
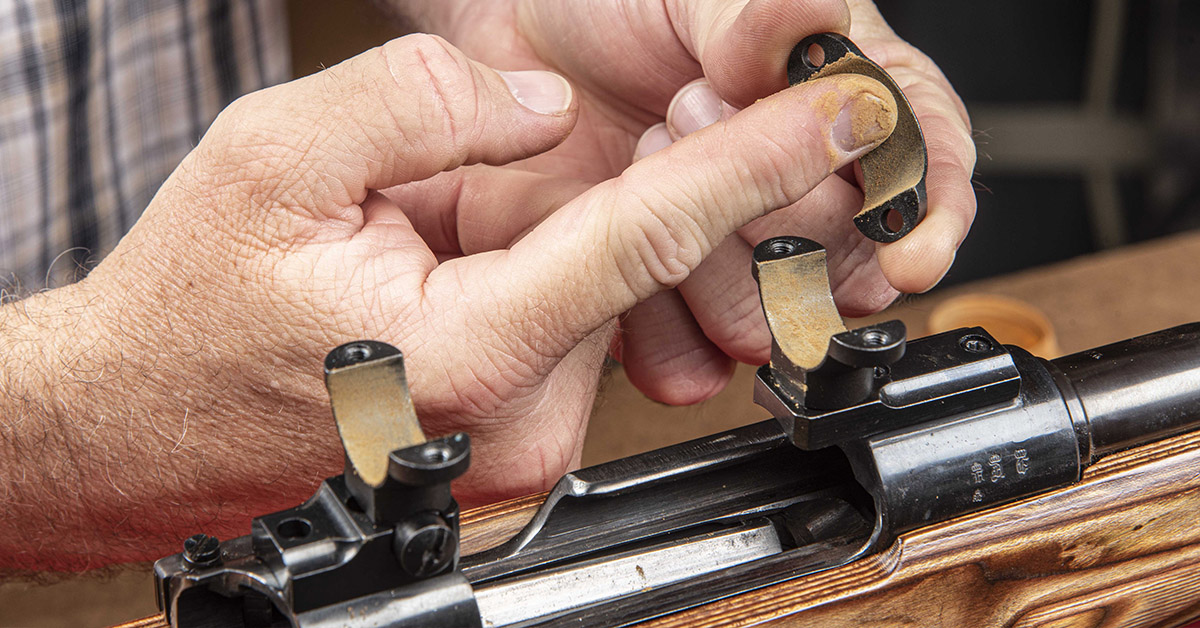
Remove the bolt from the receiver. Our rifle had the popular Buehler aftermarket safety installed. This safety, or the use of a trigger that incorporates a safety, is needed for use with a scope. Remove the screw that attaches the safety lever to the safety. Military style safeties will not have this screw.
Remove the safety lever.
Remove the safety.

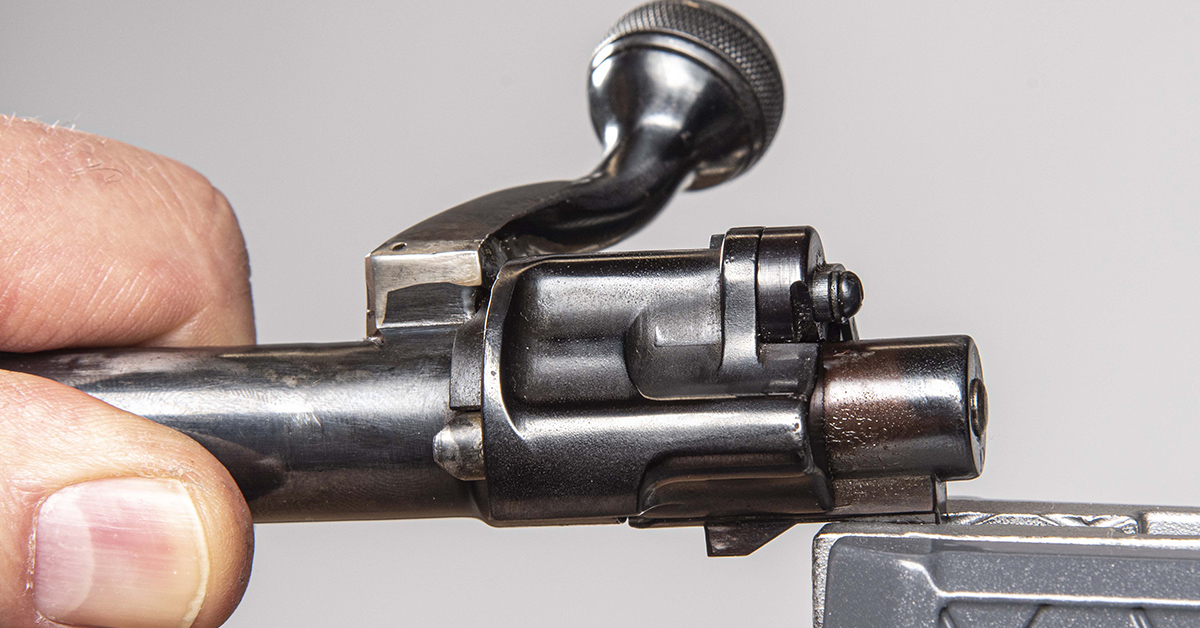
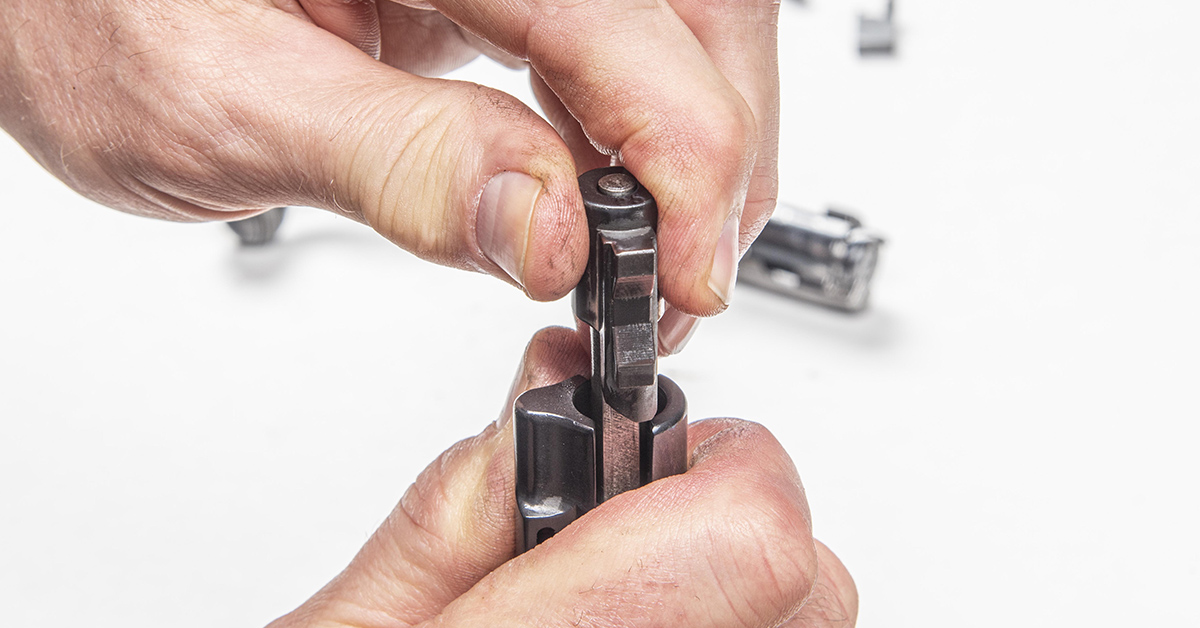
With the bottom of the cocking piece held in a vise, pull forward on the bolt and simultaneously push the bolt shroud plunger rearward. Next, rotate the bolt counterclockwise.
Continue to rotate the bolt counterclockwise and then remove it from the bolt shroud.

Hold the firing pin vertical with the pin tip on the workbench. Push downward on the bolt shroud and rotate the cocking piece ¼ turn.

Remove the cocking piece from the firing pin while maintaining control of the spring tension.
Slowly release the spring tension and remove the bolt shroud from the firing pin.
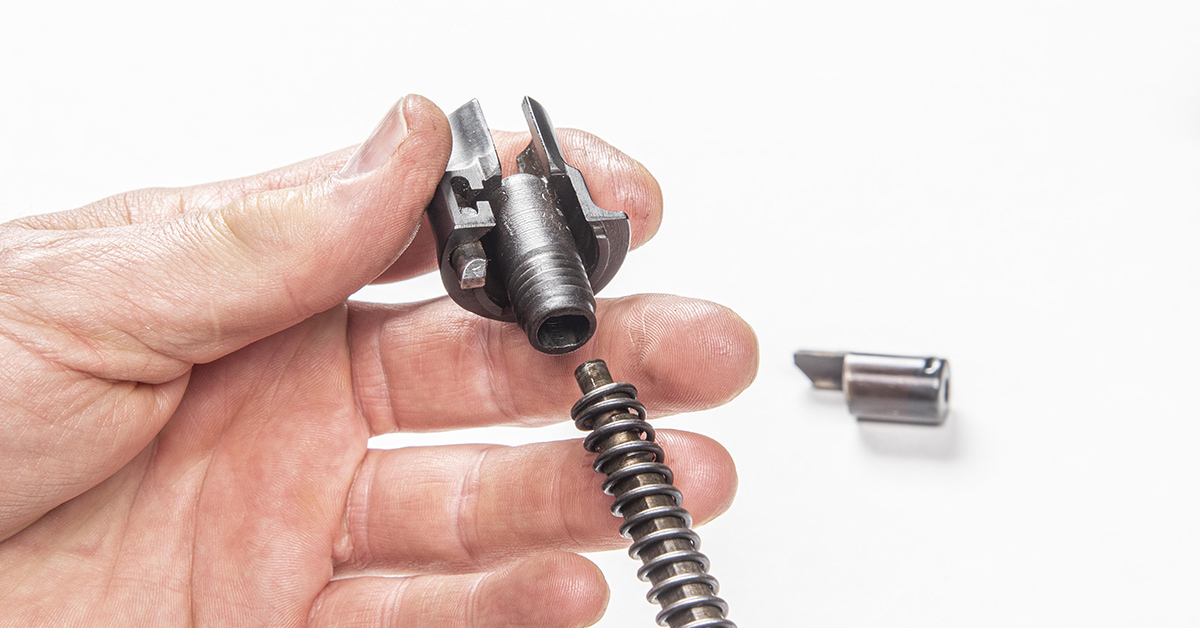
Remove the firing pin spring.
Push inward on the plunger and rotate it to clear the notch.
Slowly release spring tension and remove the plunger and spring.

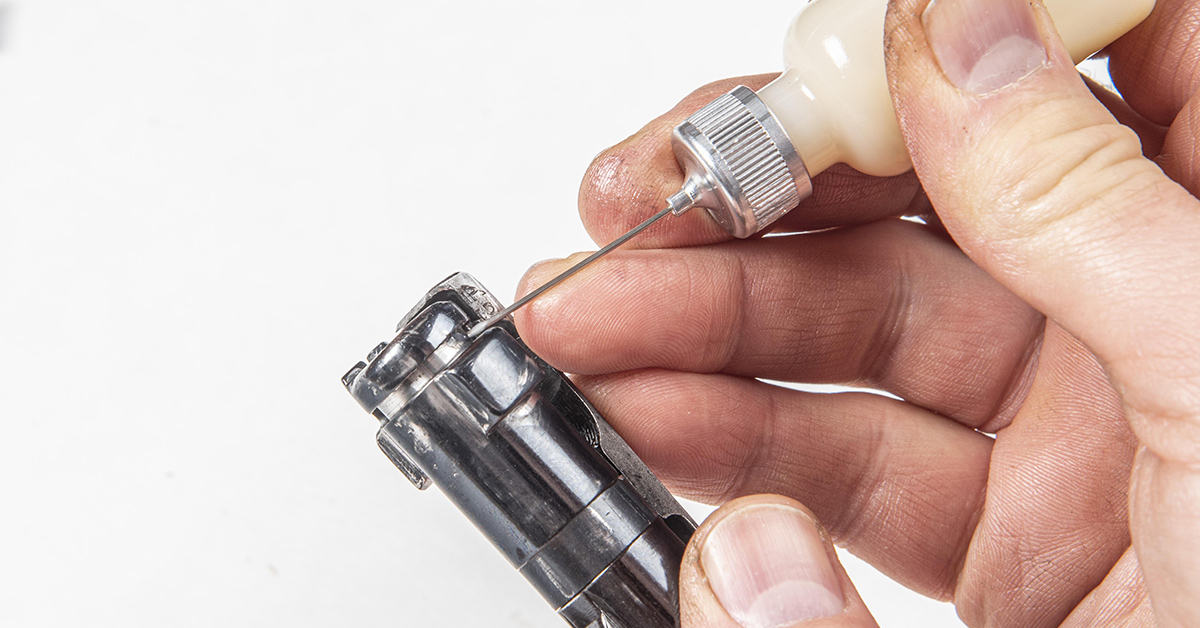
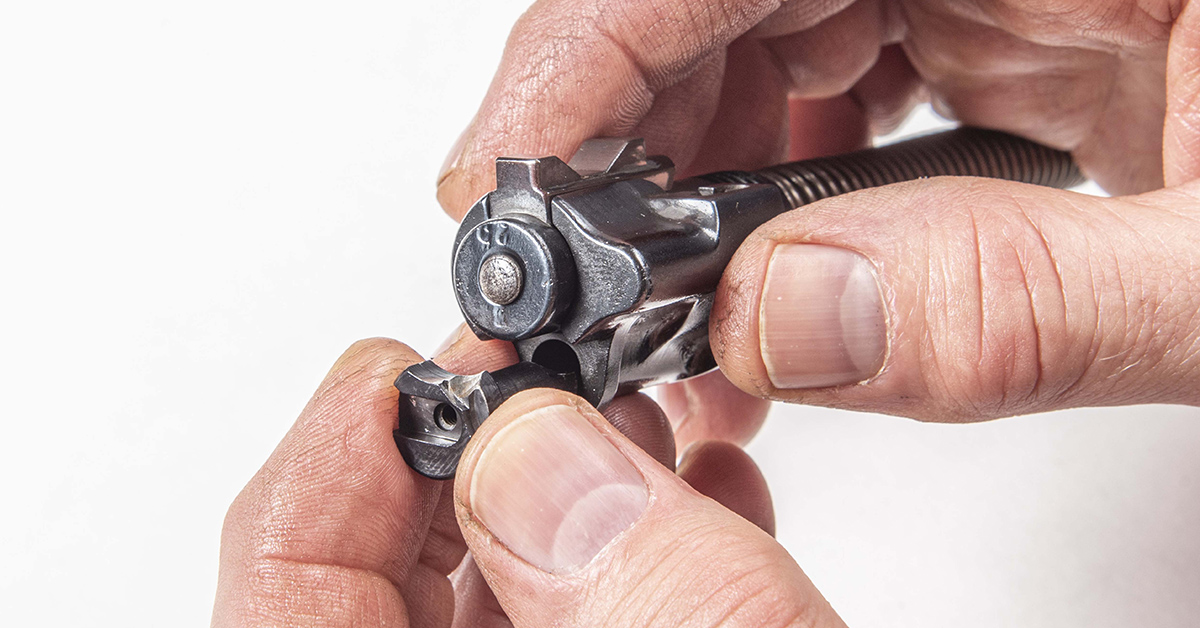
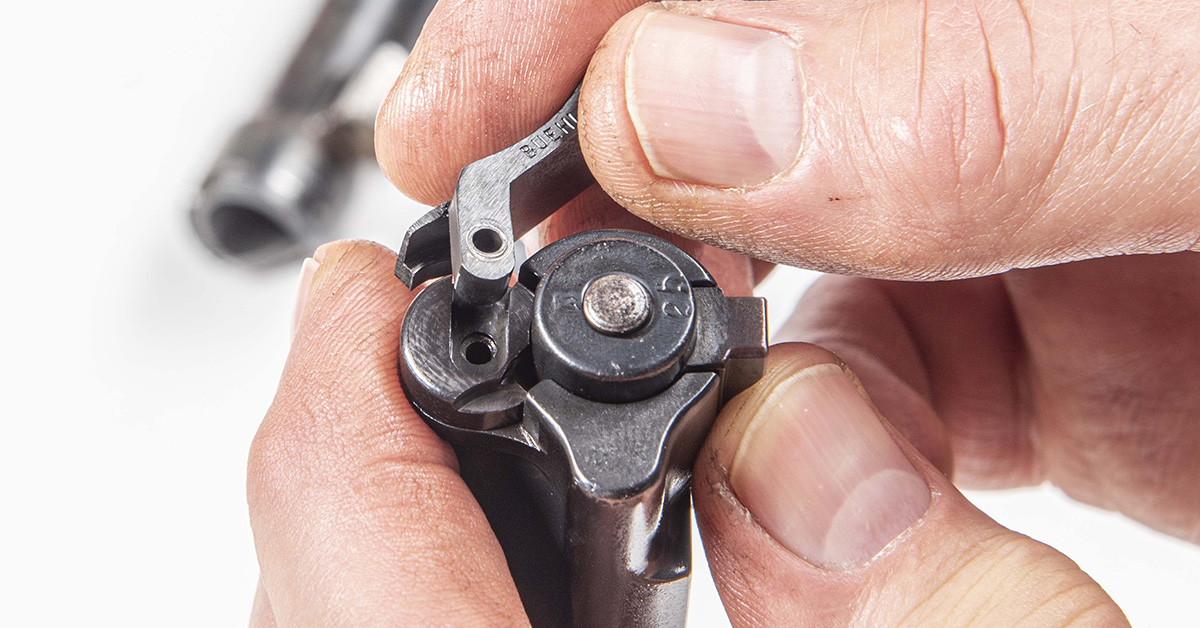
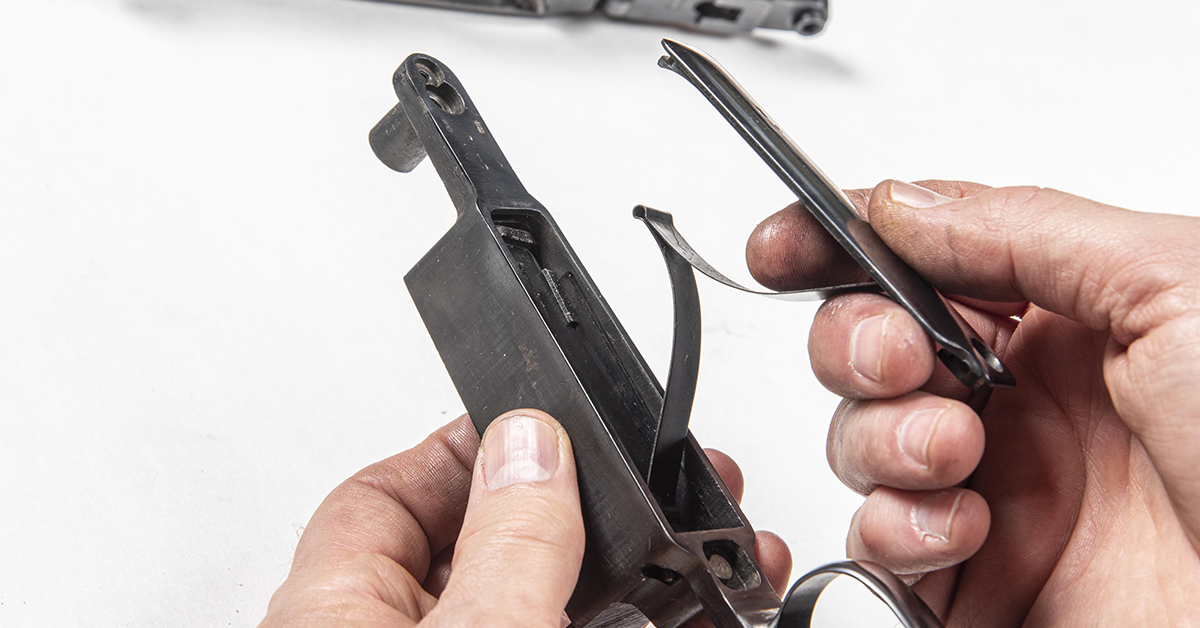
Rotate the extractor to the right as pictured.
The forward edge of the extractor will ride up and out of its forward groove in the bolt.
Pushing inward and forward on the extractor, remove the extractor.
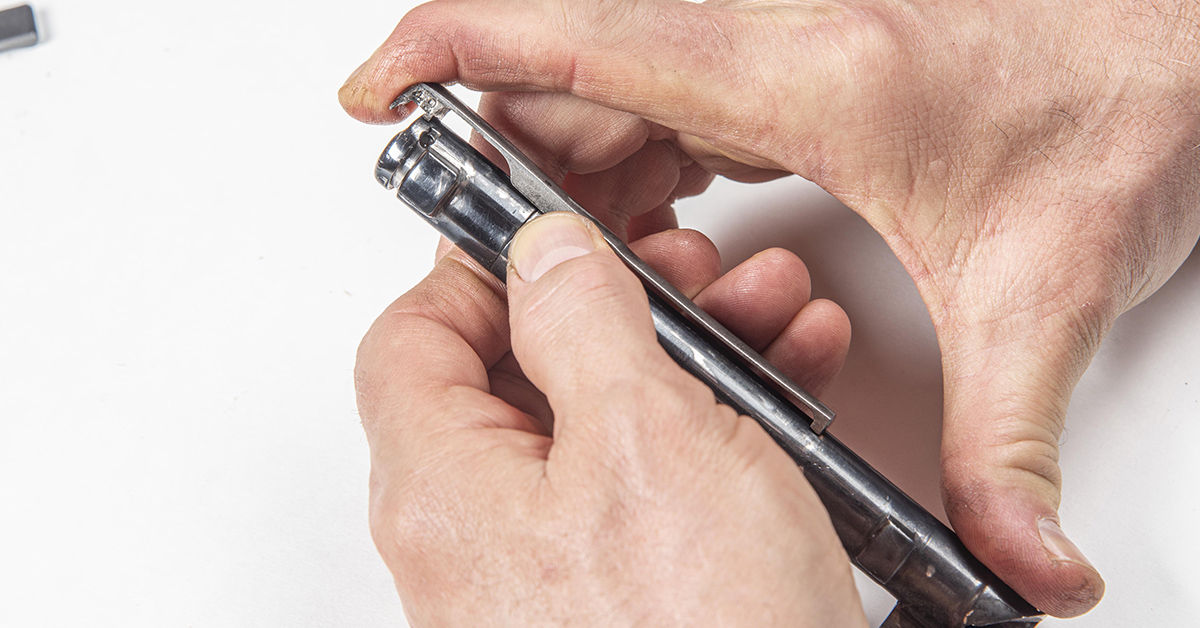
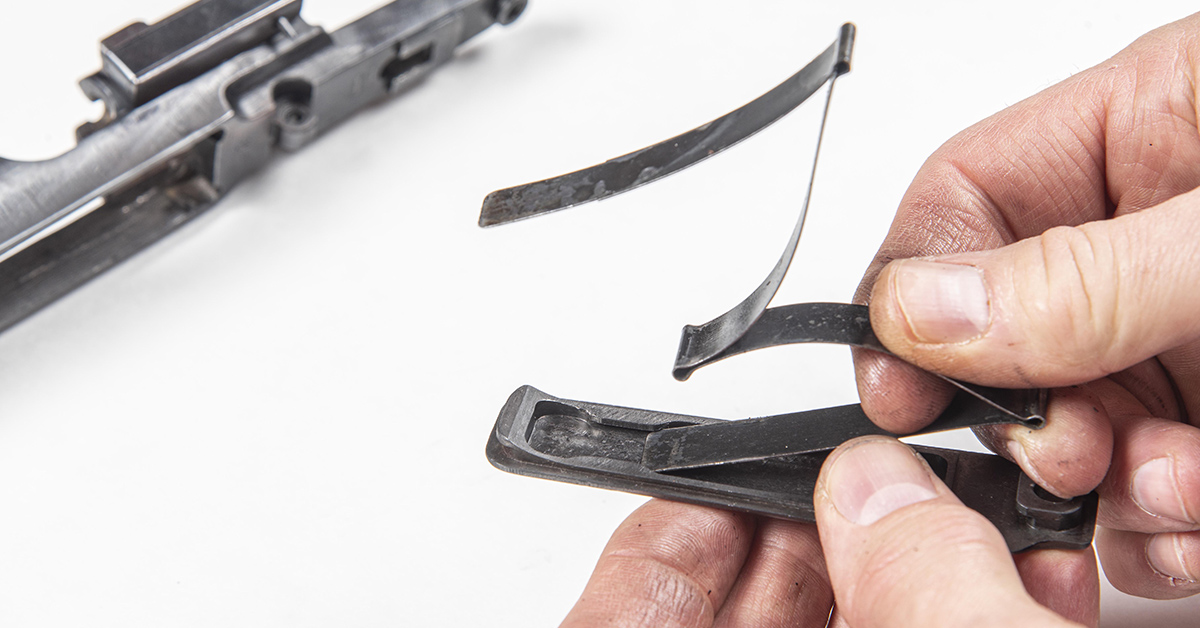
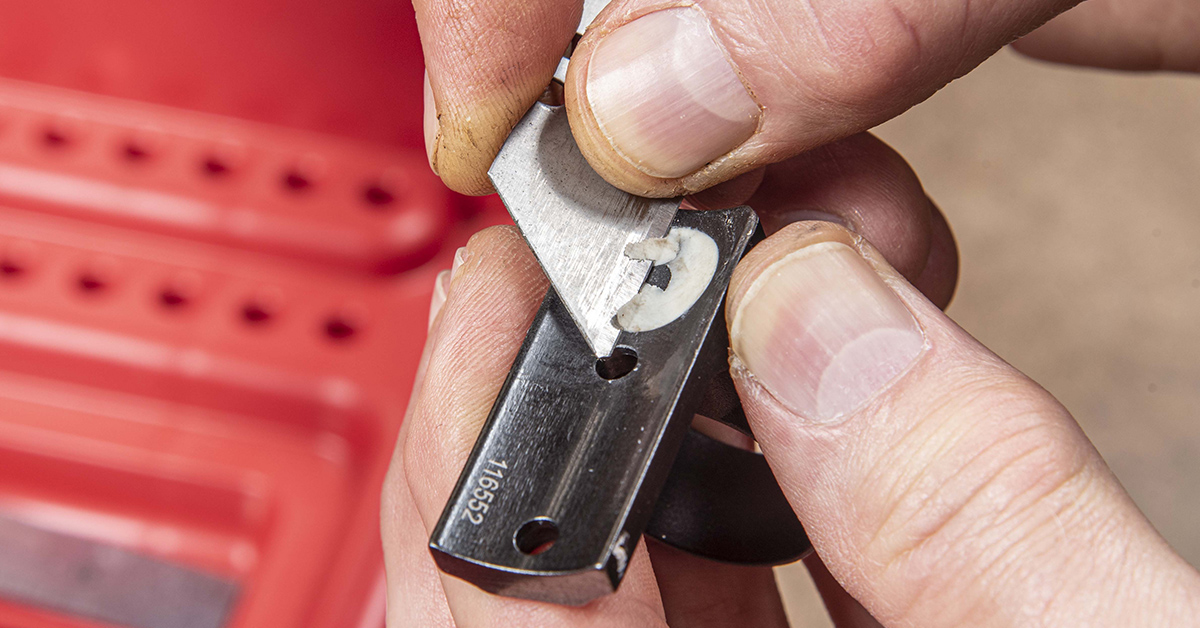
The extractor is held in place by the forward groove on the bolt and this collar. The collar can be removed from the bolt by spreading the collar open and sliding it off the bolt. This is usually accomplished without any difficulty, although repeated assembly and disassembly may cause the collar to break. With this in mind and not having a spare collar on hand, we decided to leave the collar in place.
Remove the action screws and the floor plate assembly and barreled action can be lifted out of the stock.
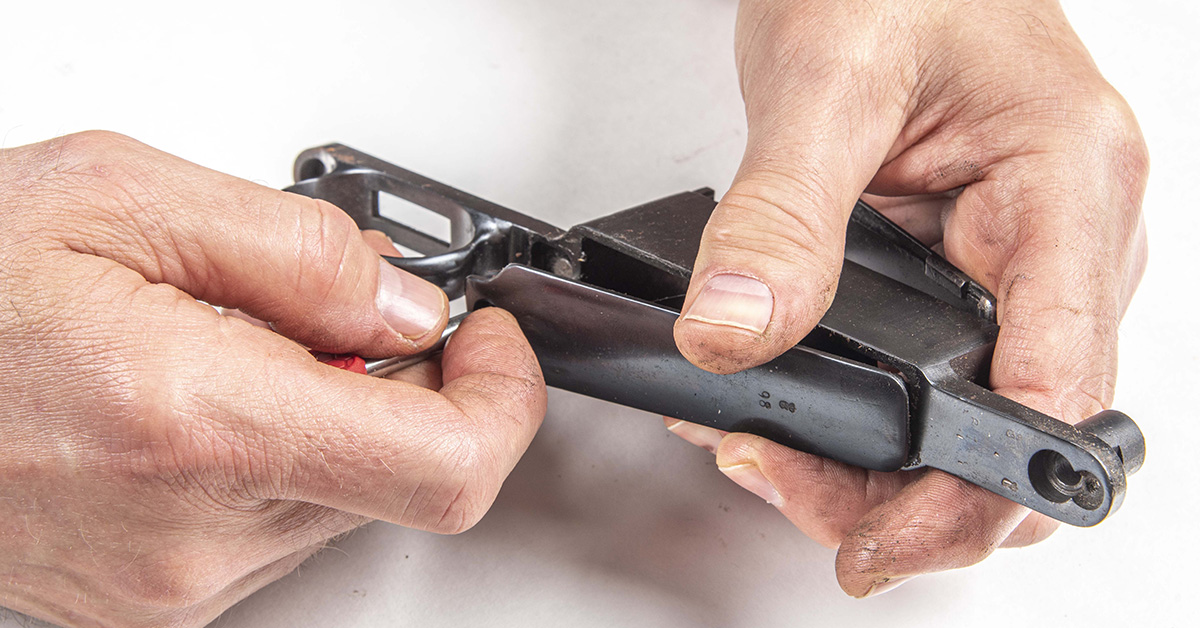
Insert a small punch into the hole found at the rear of the floorplate. Push inward on the floor plate release while pushing the floorplate rearward. Remove the floorplate from the magazine box.
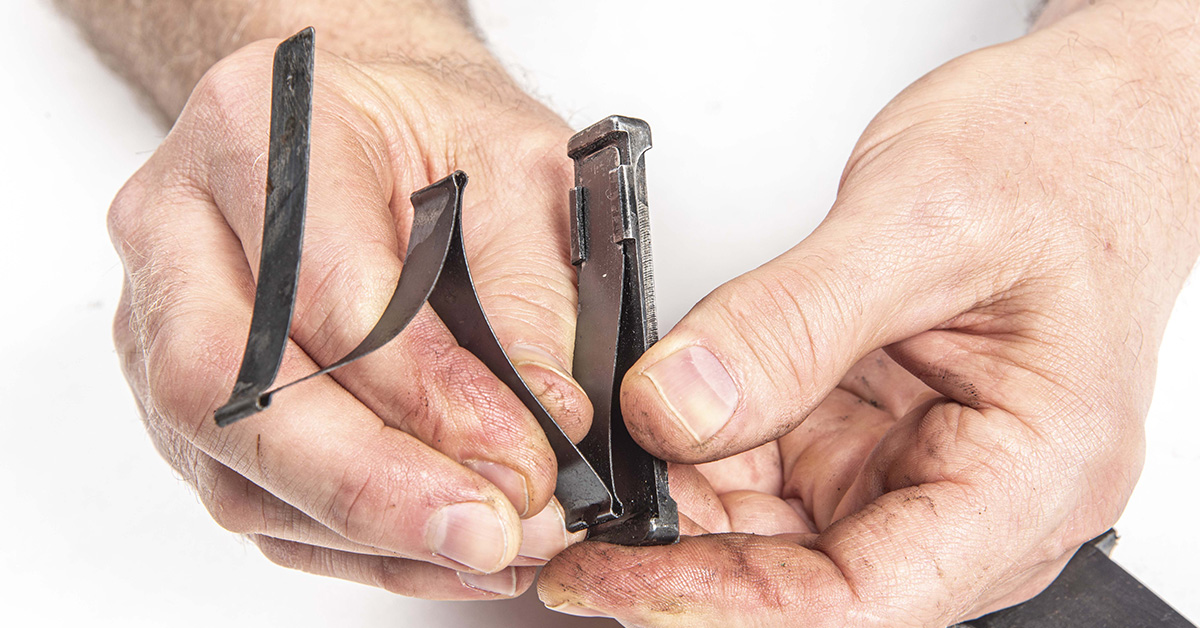
Pull upward on the magazine spring and slide it rearward and off the magazine follower. If desired, you can now profile the follower with a grinder as previously discussed.
Remove the trigger and sear spring from the receiver. The trigger assembly can be cleaned and reinstalled, but our recommendation is to discard it and install a Timney Trigger.
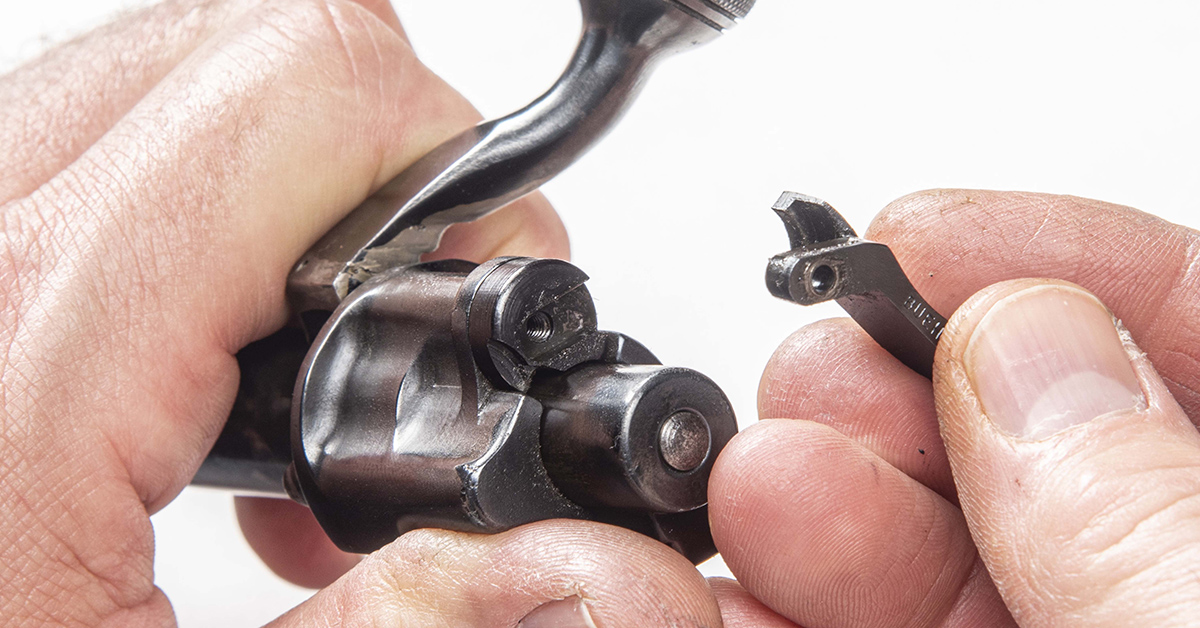
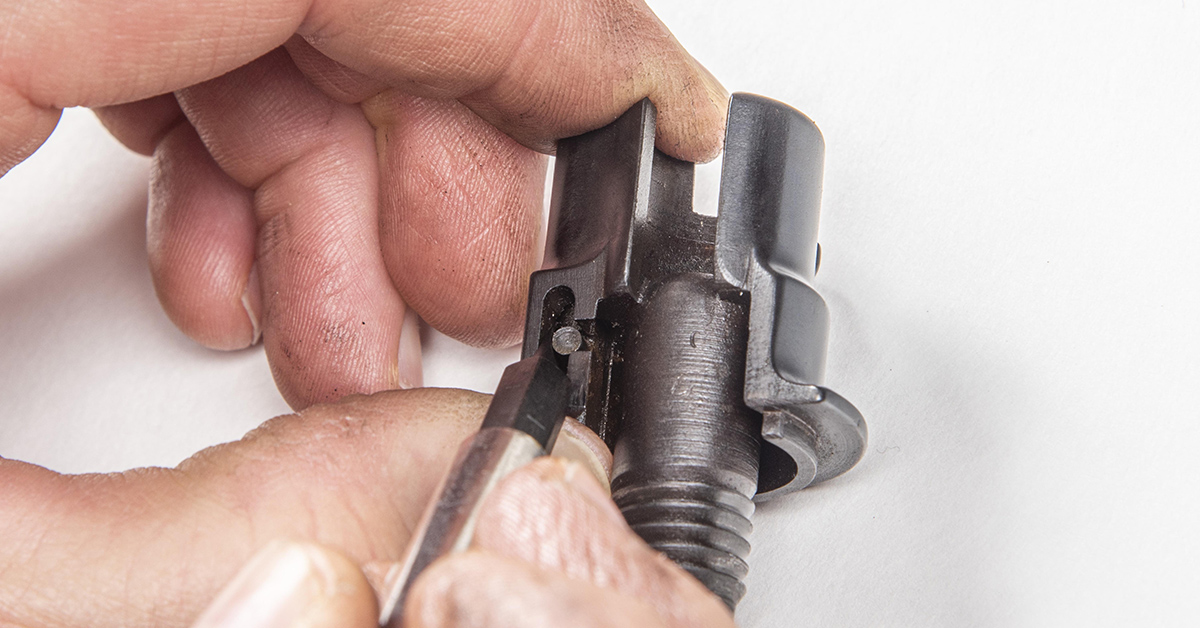
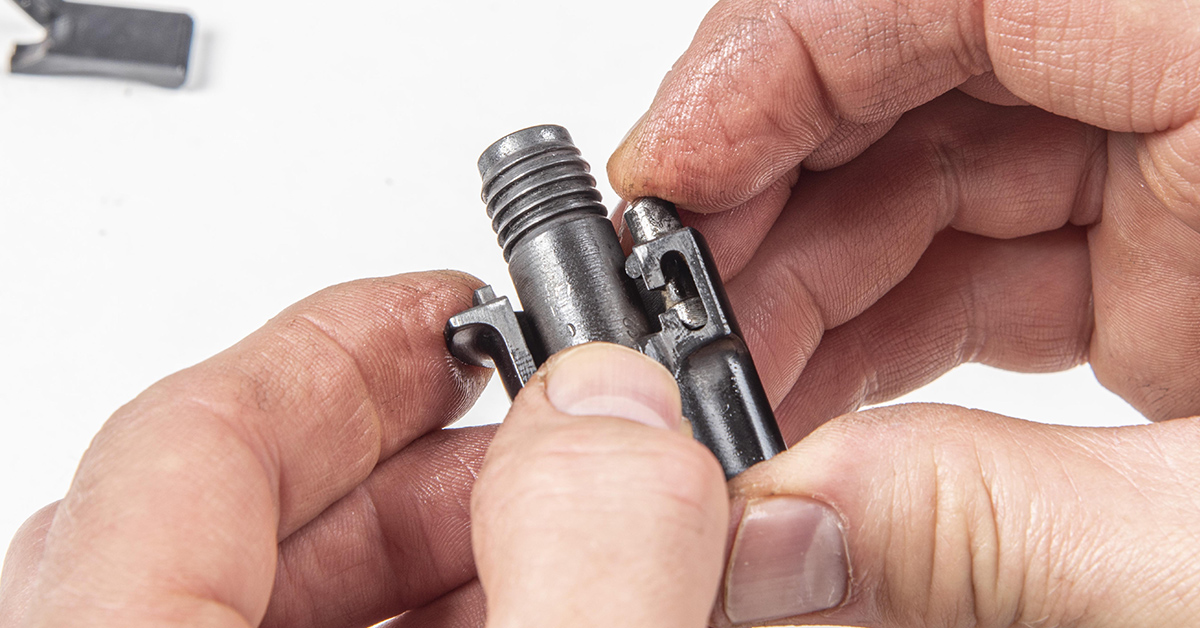
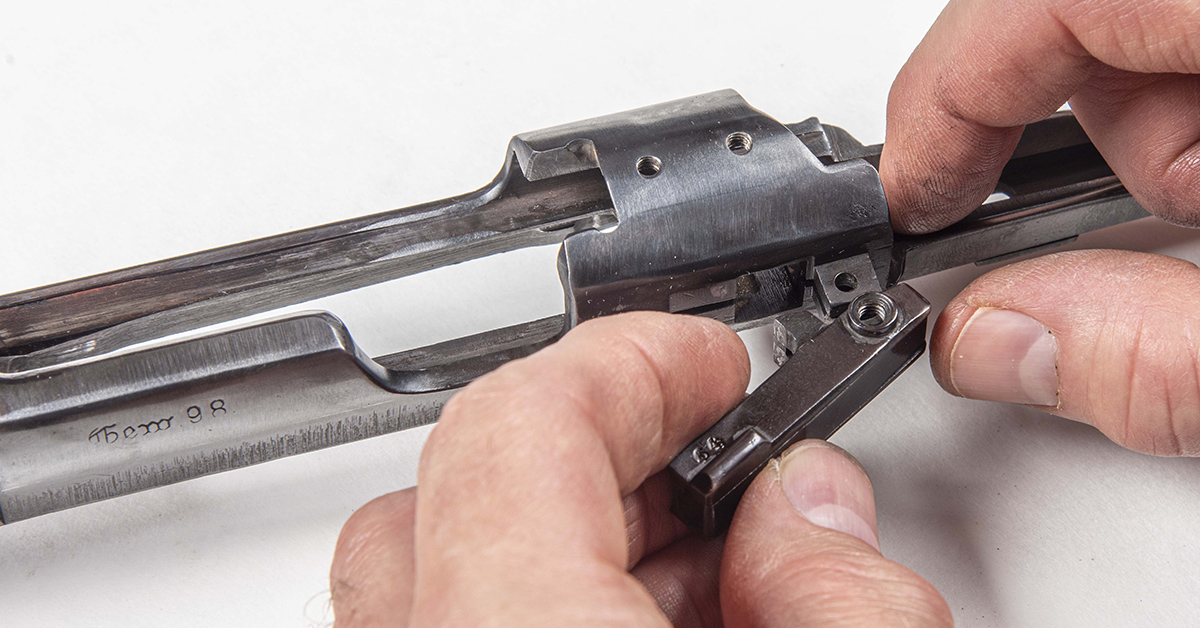
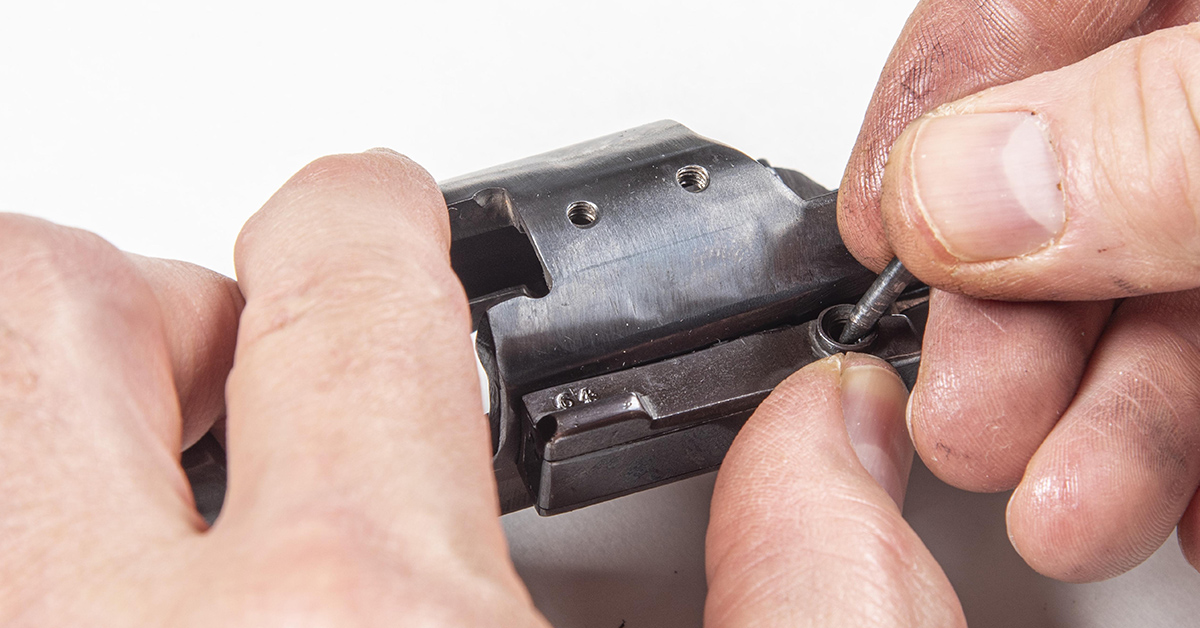
Loosen the screw that attaches the bolt stop/ejector assembly to the receiver.
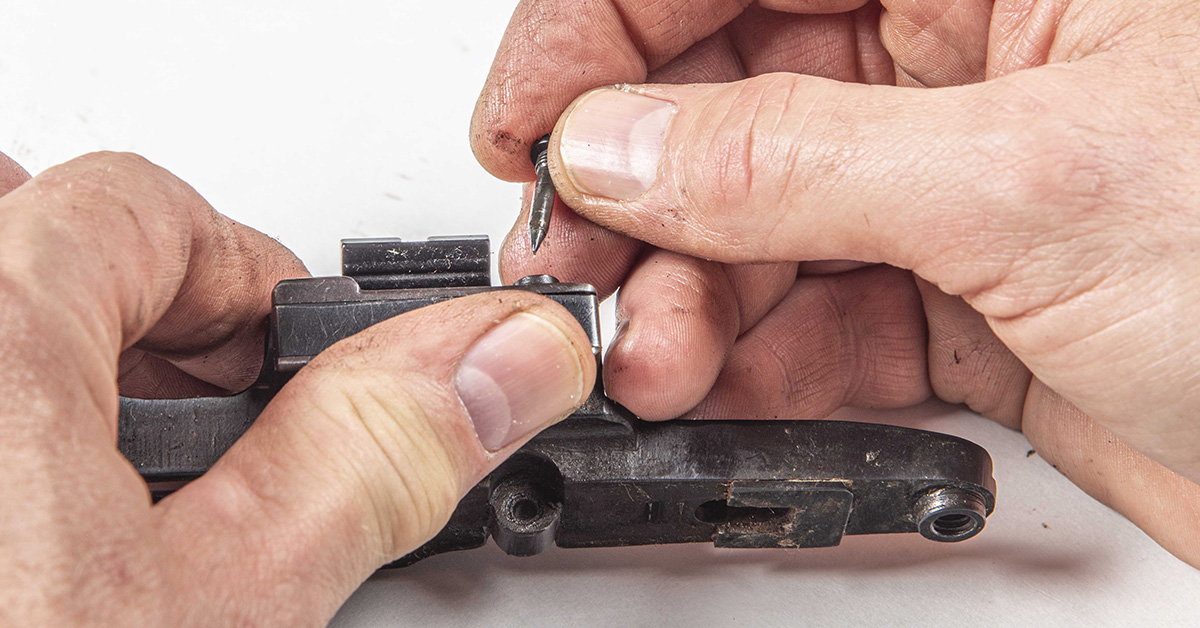
The screw has a very sharp point on the bottom of it. This allows the screw to easily align the components during reassembly. Carefully remove the screw.
Remove the bolt stop/ejector assembly from the receiver.
This completes the disassembly process. All parts should now be cleaned with hot, soapy water as previously mentioned and the barrel bore cleaned and polished.
Bolt Reassembly Procedure
You will need to lightly lubricate all parts during reassembly. The important thing is to not overdo the lubrication; it only takes a drop or two.
Place a small drop of oil into the forward extractor groove on the bolt. Do not get any oil on the bolt’s locking lugs.
Place a small drop of oil on the rear of the extractor where it will contact the bolt. Squeeze the “ears” of the collar tightly together and place the extractor into position on the bolt as shown, somewhat to the right of the forward extractor groove.
With the rear of the extractor contacting the bolt, push downward and rearward while simultaneously engaging the collar “ears” with the extractor. Once fully engaged, rotate the extractor to the left, engaging the extractor within its forward mounting groove on the bolt.
At this time, you will want to check headspace dimension to ensure the bolt and rifle combination are within safe operating parameters. See the previous discussion for this process.

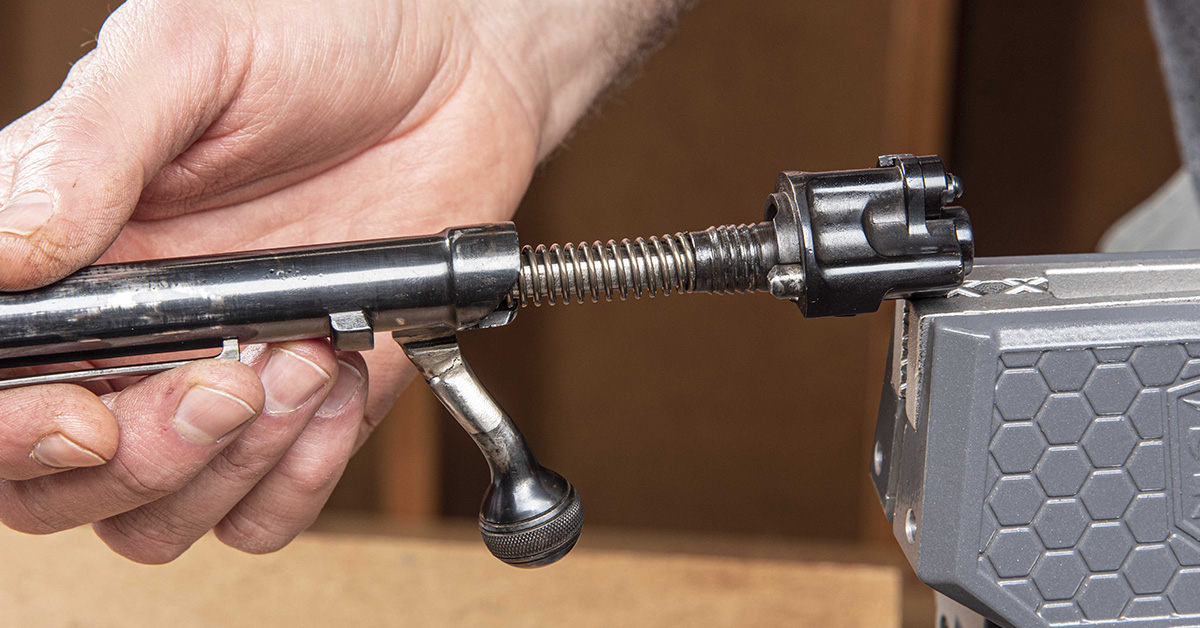
Install the new bolt sleeve spring onto the bolt sleeve stop and insert the bolt sleeve stop into the bolt sleeve as shown.
Push the bolt sleeve stop into the bolt sleeve. Align the small protrusion on top of the bolt sleeve stop with the notch in the bolt sleeve and then rotate it to the right as shown.
Slowly release the spring pressure and allow the bolt sleeve stop to move forward into position.

Each time you raise or lower the bolt handle during operation of the firearm, the bolt will rotate slightly on the threads of the bolt sleeve. Lightly lubricate the threads of the bolt sleeve.

Lightly lubricate the new striker spring.
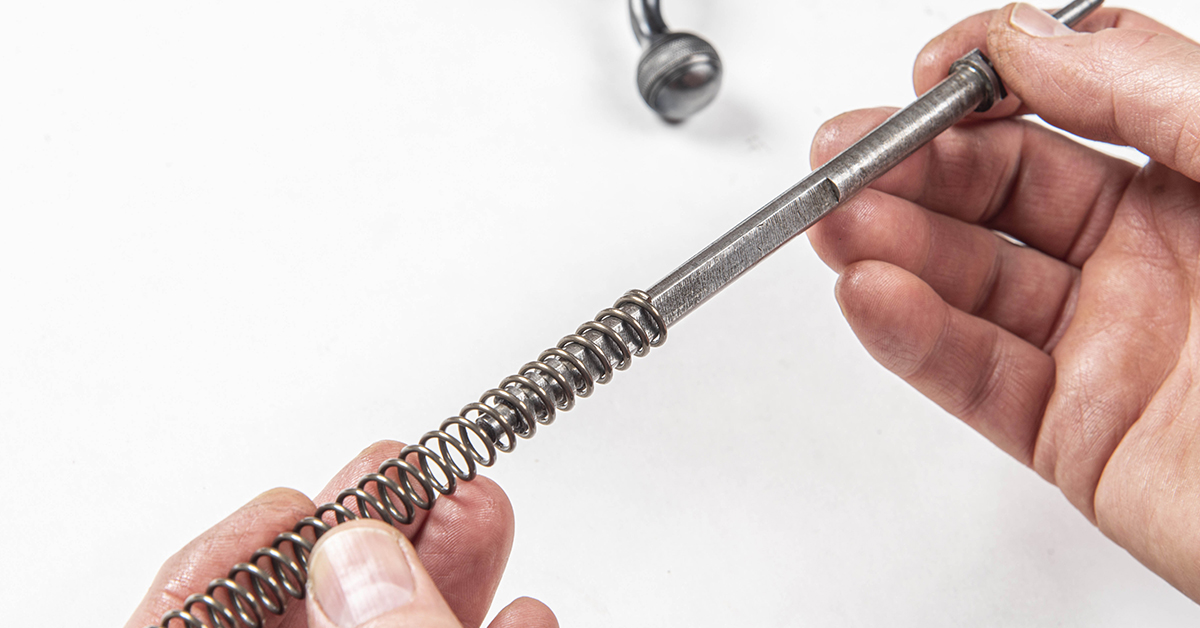
Lightly lubricate the firing pin and install the firing pin spring.
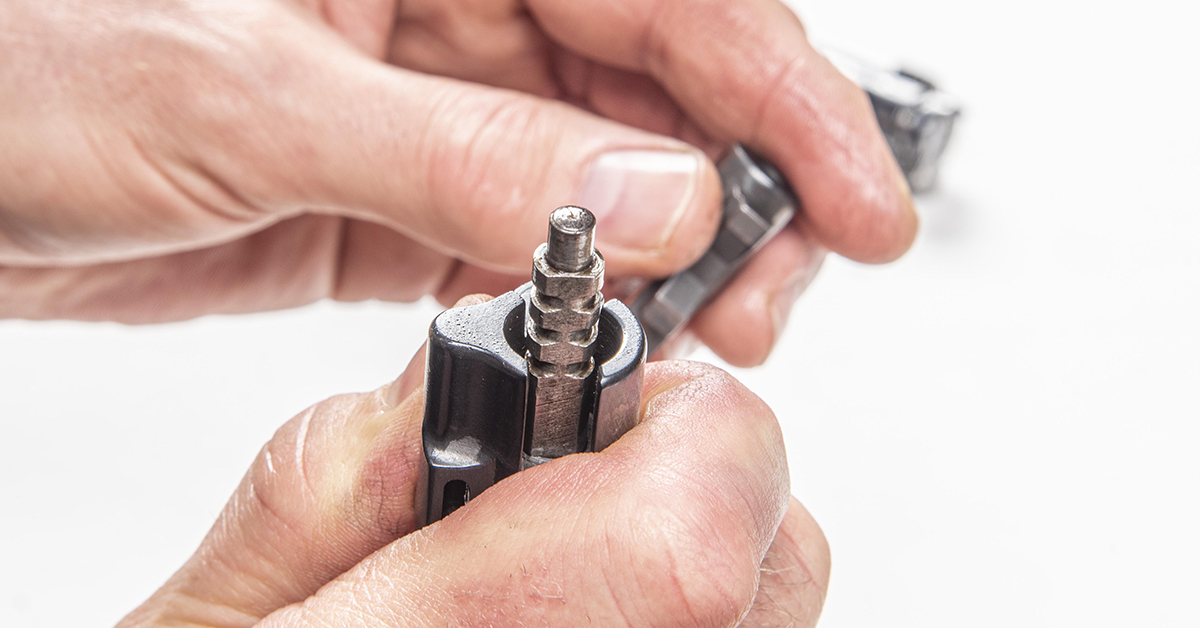
Place the firing pin (point down) and spring in a vertical position on your work bench. Slide the bolt sleeve onto the firing pin and compress the spring.
Carefully maintain control of the spring tension and install the cocking piece.
Install the safety.
Install the safety lever.

Install the safety lever screw and tighten the screw.
Place a drop of oil on the bolt’s internal threads.
Secure the cocking piece in a vise.
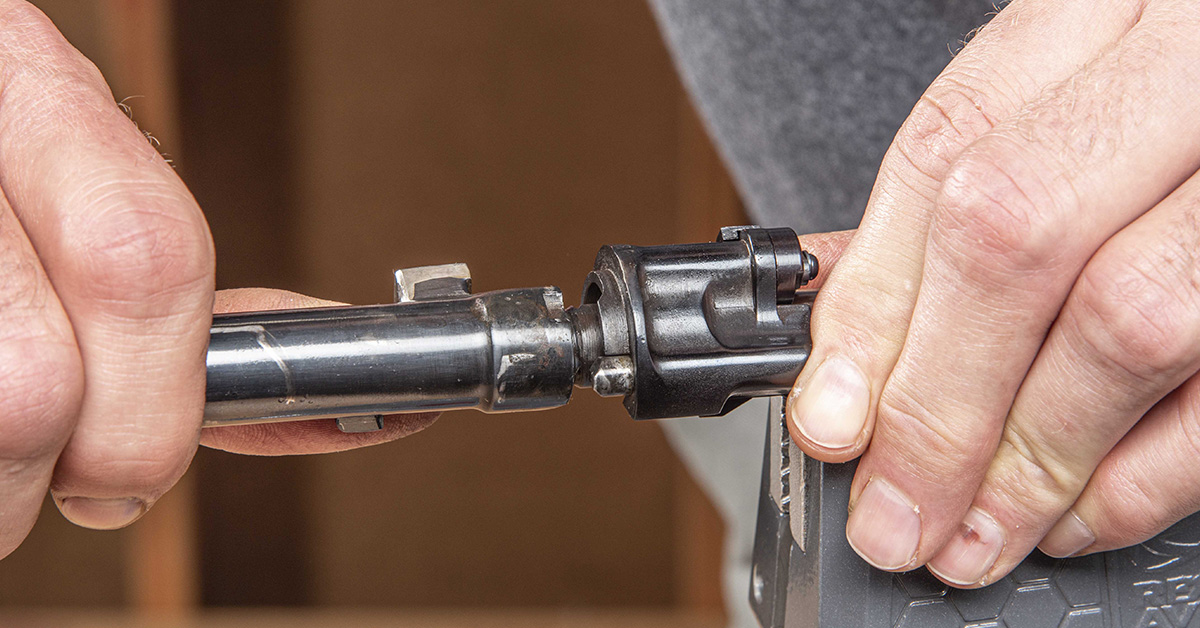
Pushing forward on the bolt sleeve, rotate the bolt clockwise, threading it onto the bolt sleeve.
Properly installed, the forward end of the cocking piece will rest in the half cock notch of the bolt body.
Barreled Action Reassembly
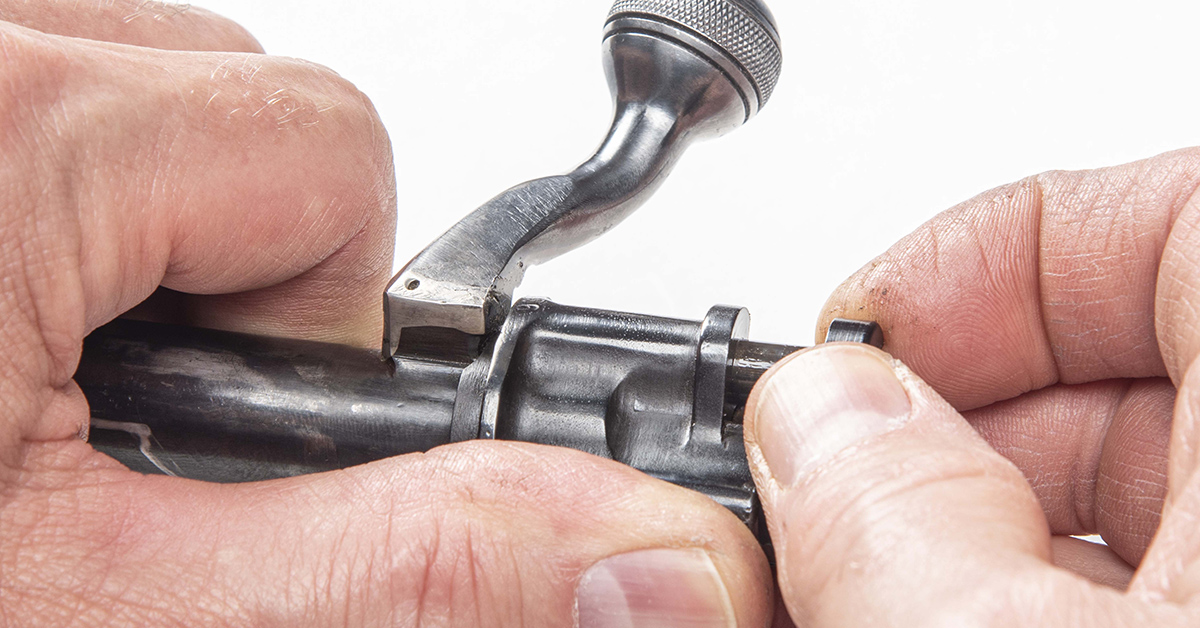
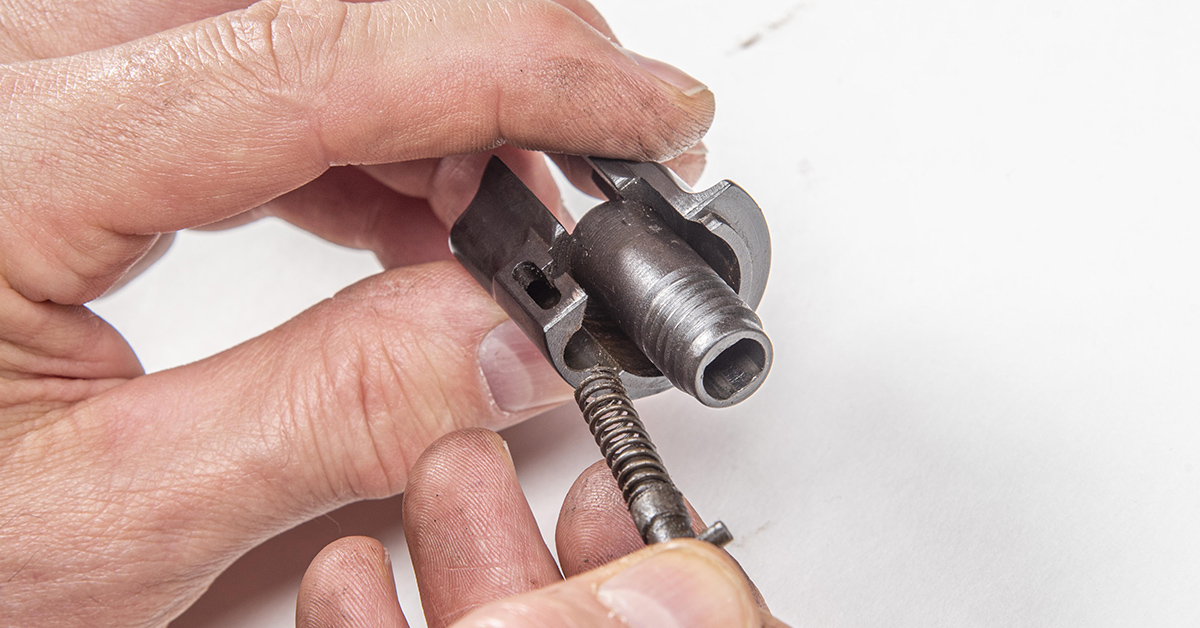
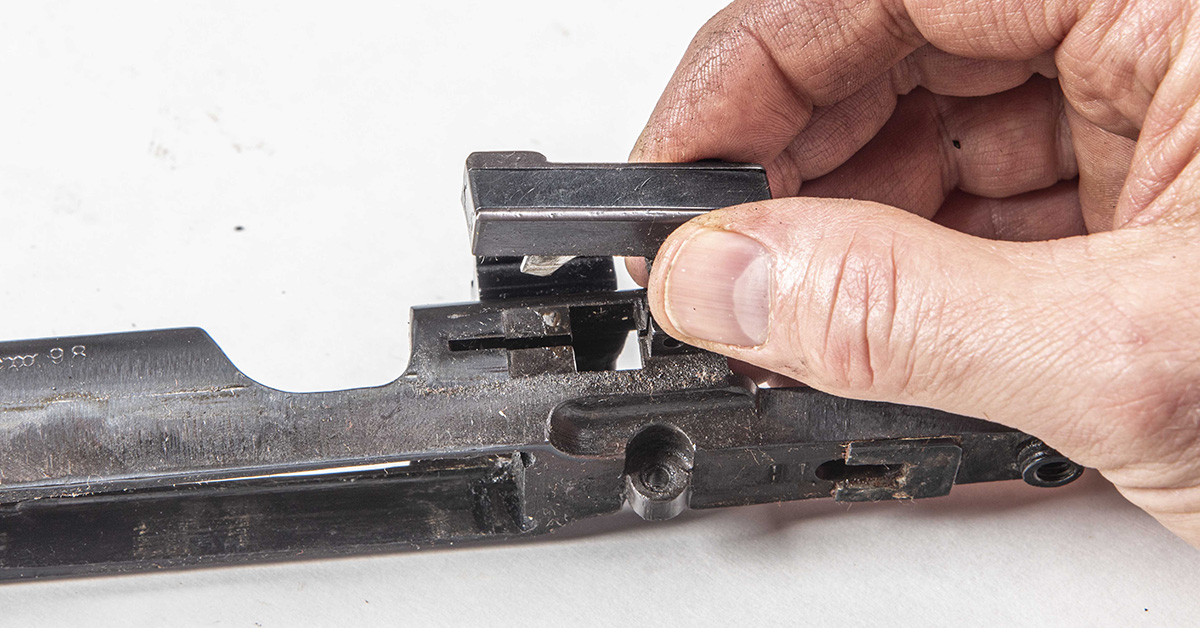
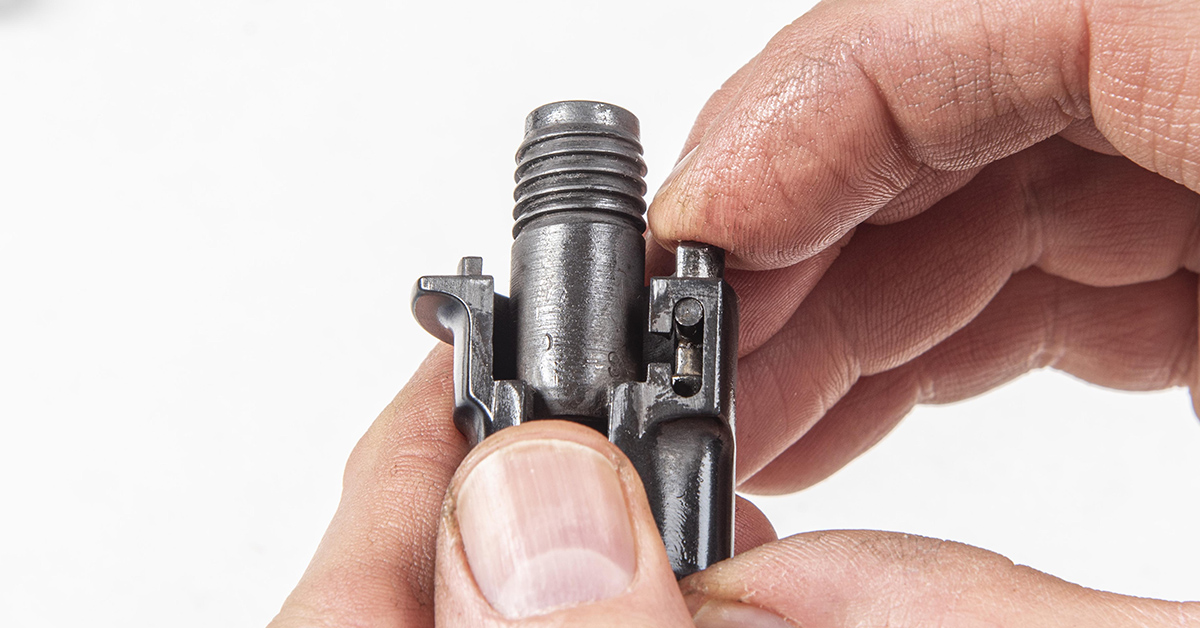
Place the bolt and ejector assembly onto the receiver.
Install the screw and ensure that you have captured the ejector.
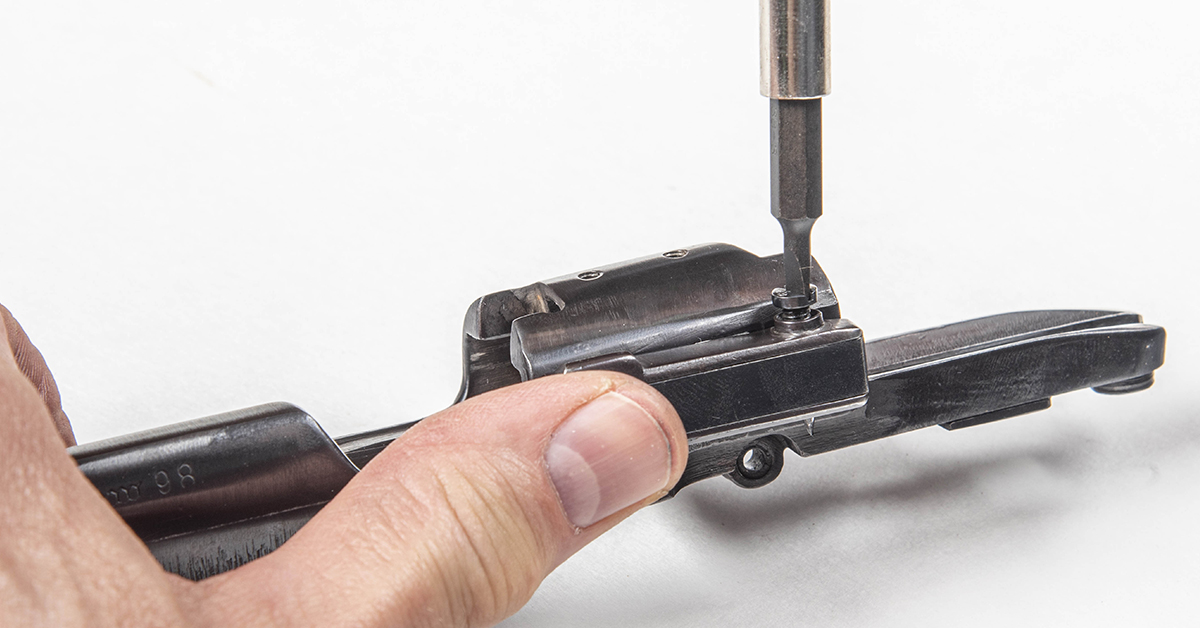
Tighten the bolt stop screw. Do not over tighten. Snug is sufficient.
Hold the magazine spring as shown with the narrow end against the bottom of the magazine follower and slide it into place.
Place the magazine assembly into the trigger guard/magazine box assembly as shown with the rear of the floor plate (hole) towards the trigger guard.

Push downward and forward, locking it into place.
Place the Timney trigger into position onto the receiver and install the trigger pin.
Tighten the set screw to secure the trigger in place.
Trigger Adjustment/Function Check
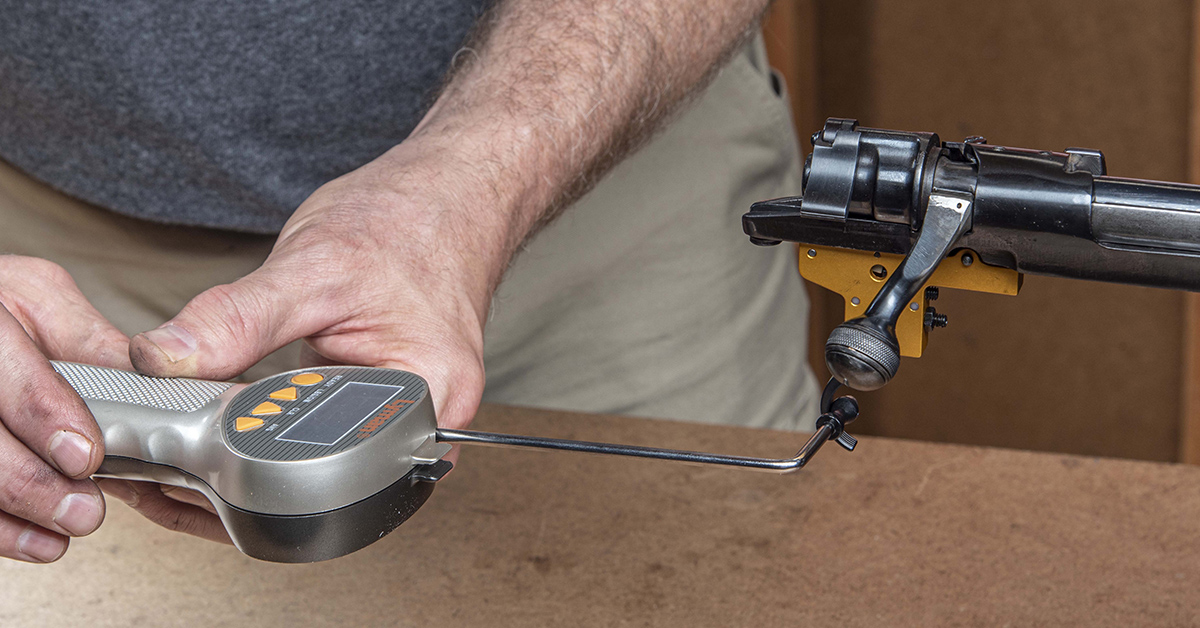
Install the bolt into the receiver. Secure the barreled action in a bench vise and cock the action. The cocking piece should be held rearward in the firing position. Pull the trigger and dry fire the action to ensure that the trigger is functioning properly. Repeat this process a few times, looking for consistent function. Ours functioned properly. We then measured the pull weight and was satisfied with the 2.5lb weight of pull.
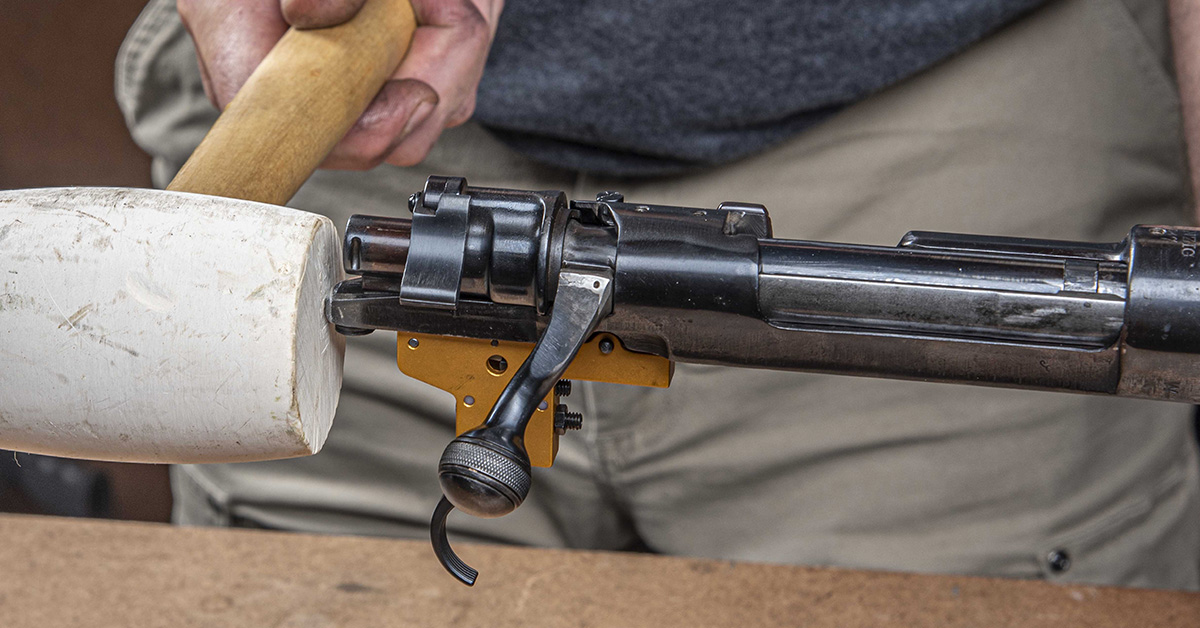
Work the action briskly several times and ensure that it doesn’t slam fire. With the action cocked, using a rubber mallet and strike a moderate blow to the receiver on the end of the tang. The action should remain cocked. Our trigger passed these tests and did not need any adjustment. If you find that your trigger needs adjusting, follow the instructions provided by Timney with the new trigger.
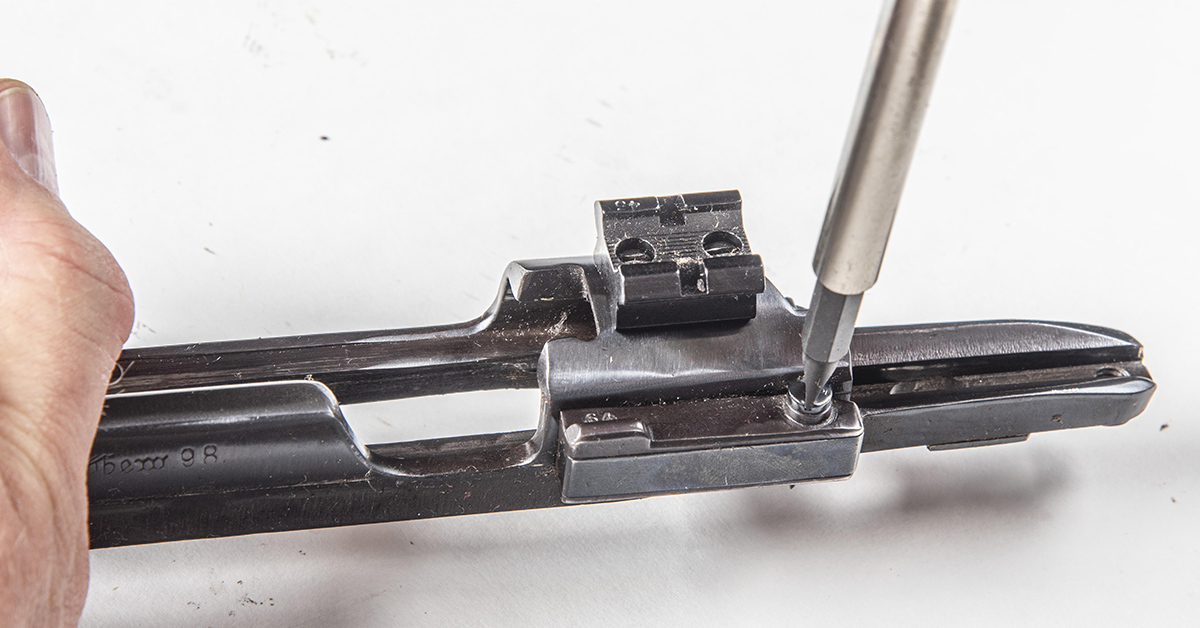
Scope Mounting
Degrease the scope bases and mounting screws with denatured alcohol.

Degrease the front and rear scope mounting surfaces of the receiver and the screw holes with denatured alcohol.
Attach the scope bases to the receiver and, using alignment bars, align the front and rear rings. We were able to achieve perfect alignment as far as windage is concerned.
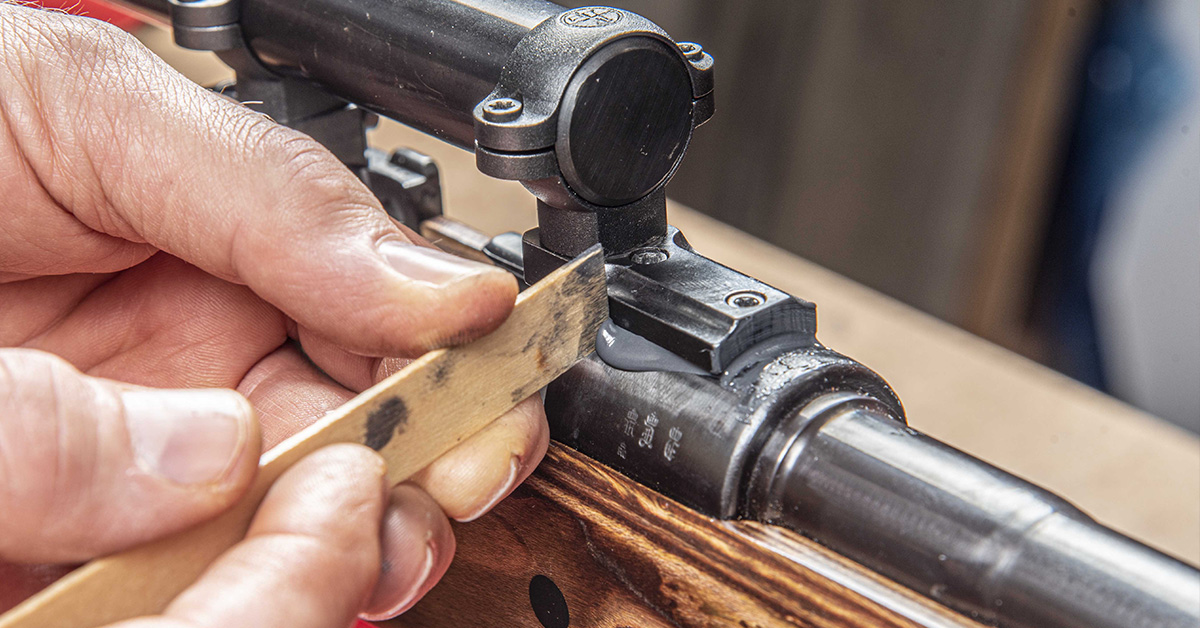
We were expecting a little hiccup since we could not obtain Military Mauser 98 bases and had to go with FN Mauser bases. You can see here that the rear ring is about 1/16 of inch higher than the front ring. To get this rifle back into use, we have no choice but to shim the front base. Leaving the front ring in place, remove the alignment rod and remove the front base from the rifle.
With the rear base tightly secured in place, we removed the alignment rod and installed the precision ground lapping bar from our Wheeler scope mounting kit in its place. This will provide a rigid alignment for the front base. Thoroughly degrease the front receiver ring and mounting holes.
Place a small amount of clay into the underside of the front base where the front ring mounts. This will prevent epoxy from flowing into this recess and effectively locking the ring in place.
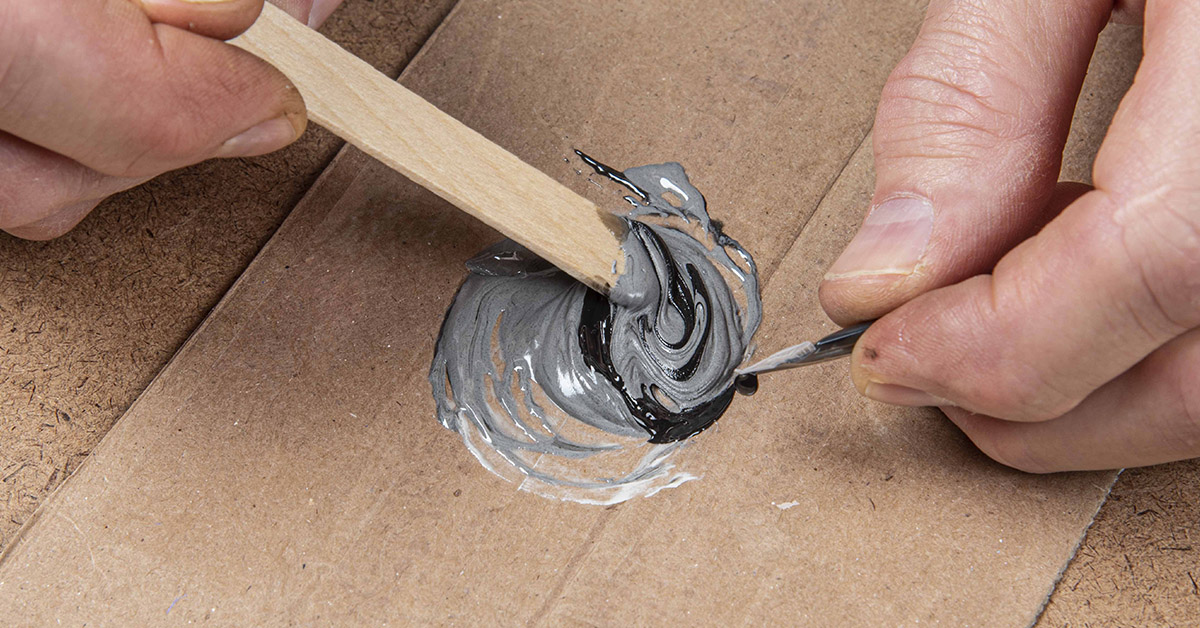
Mix equal parts of JB Weld. We added some black die from a Brownell’s Acraglass kit. The black die will make the epoxy more closely match our receiver finish.
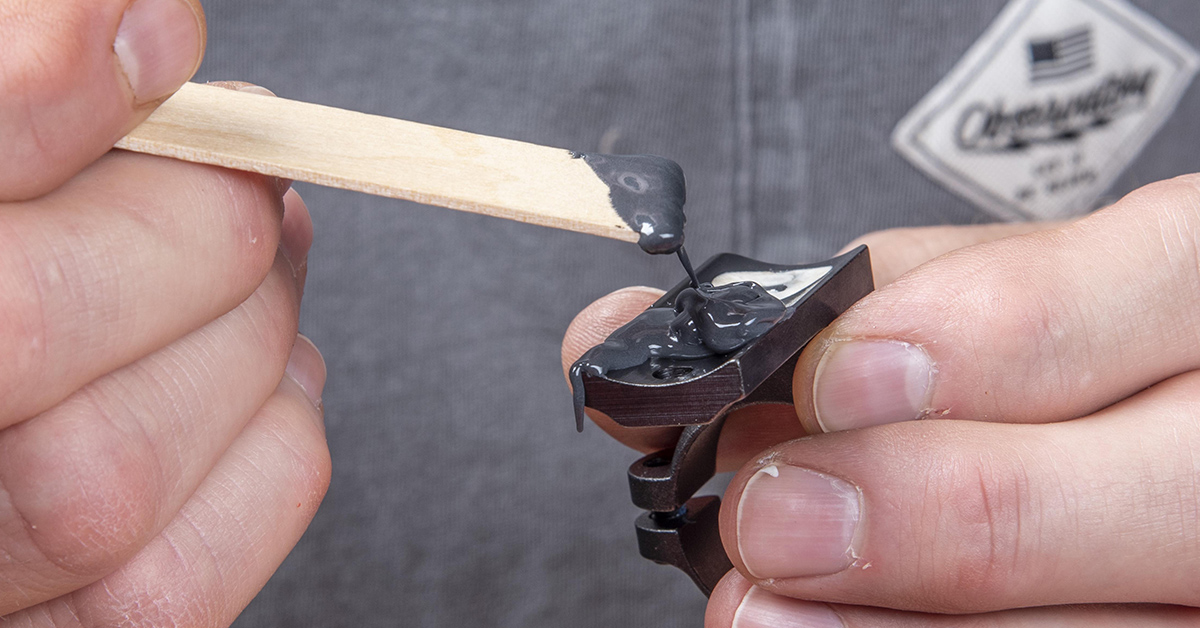
Apply the JB Weld to the underside of the front base. Leave a small area clear of epoxy around the screw holes.
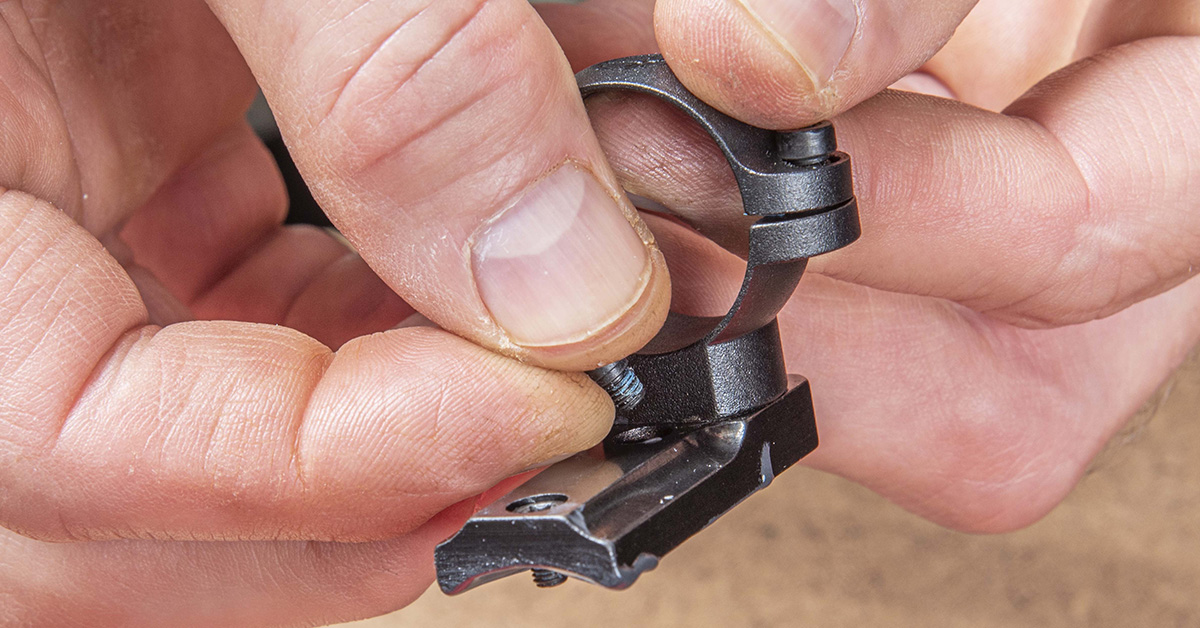
Place the mounting screws into the scope base.
While holding the base off the receiver as high as possible, install the screws, giving each screw just a couple of turns once the threads engage the receiver. Continue to hold the base up and off the receiver.

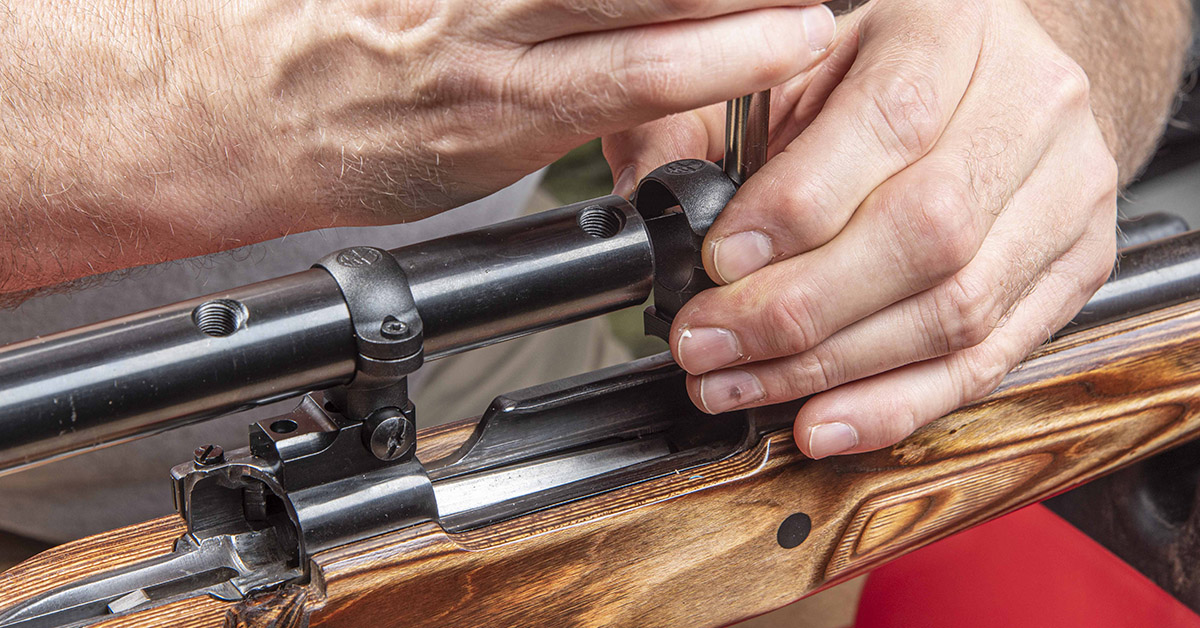
Slide the lapping bar into the front ring, tighten the rear ring cap screws first, then tighten the front ring cap screws. Being guided off the rear ring, the lapping bar will hold the front ring and base assembly up at the required height as the epoxy dries.
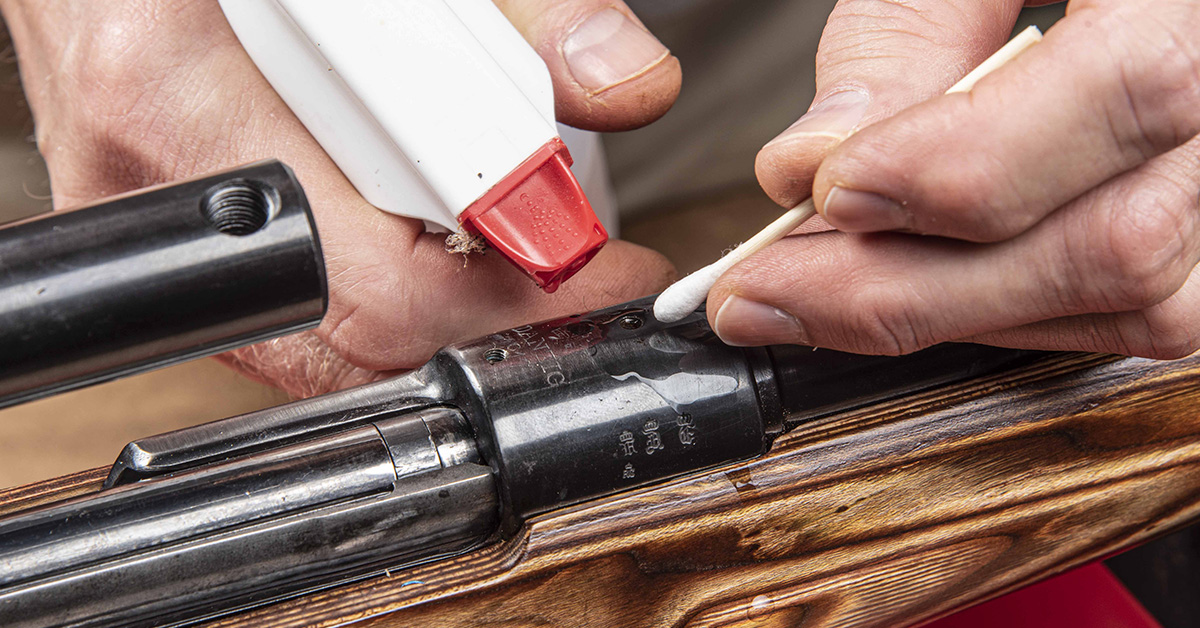
Carefully remove the excess epoxy.

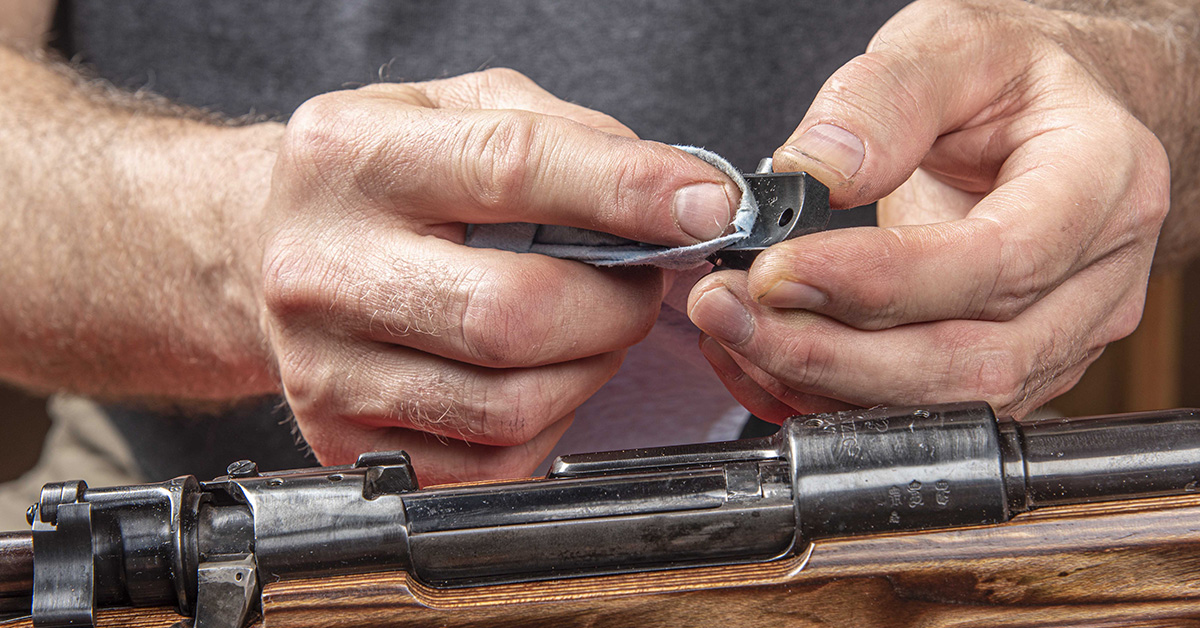
A Q-tip with a light coat of oil works best for final clean up. Don’t forget to check inside of the receiver. Since the scope mounting holes go through the receiver, there is a chance that some epoxy can flow through a screw hole and into the receiver.
Allow the epoxy to cure for 24 hours. JB Weld is surprisingly strong. Done correctly, without any base screws in place, you will be able to pick up the entire rifle by the front scope ring. Once the epoxy dries, the rings will be in perfect alignment.
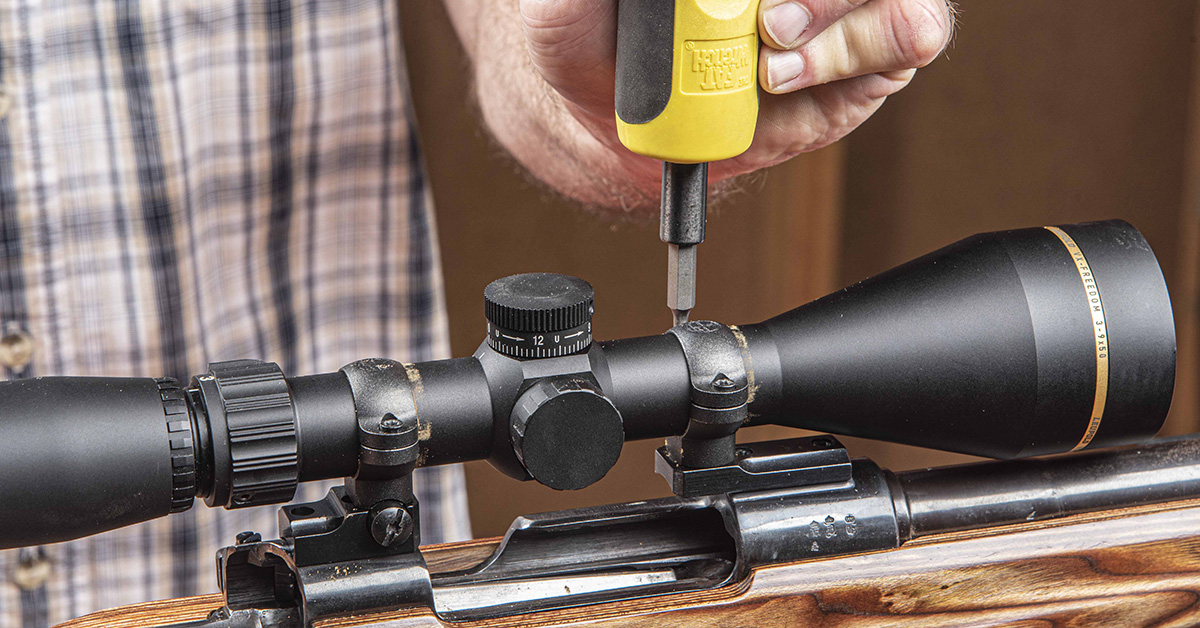
Using denatured alcohol, degrease the inner surface of the scope rings and then apply a light coat of powdered rosin. The powdered rosin will increase friction and help to hold the scope in place.
Once proper eye relief has been determined and the reticle is square to the bore line, degrease the ring cap screws. Apply a small drop of blue Loctite 242 to each screw and, using a torque screwdriver, tighten the screws to the manufacturer’s specification.
The medium-height rings provided the necessary clearance for the bolt handle.

The Mauser 98 is recognized as one of the best (and some would argue THE best) bolt-action rifles of all time even though it was developed over a century ago. That, in itself, makes these treasured firearms worth preserving and bringing back into action today. We hope that our makeover, transforming what was a bargain bin beater into a top-notch hunting rifle with many more years left in it, will inspire you to knock the dust off your Mauser 98 and get it back in the game.
- Shoot ON Contributor Pens Red Dot Book “Optics Ready” - July 15, 2026
- Gould Busts Clay Shooting Distance Record with Benelli A.I. Shotgun - July 15, 2026
- Check-Mate 1911 Double Stack UHC Magazine Set Debuts - July 3, 2026