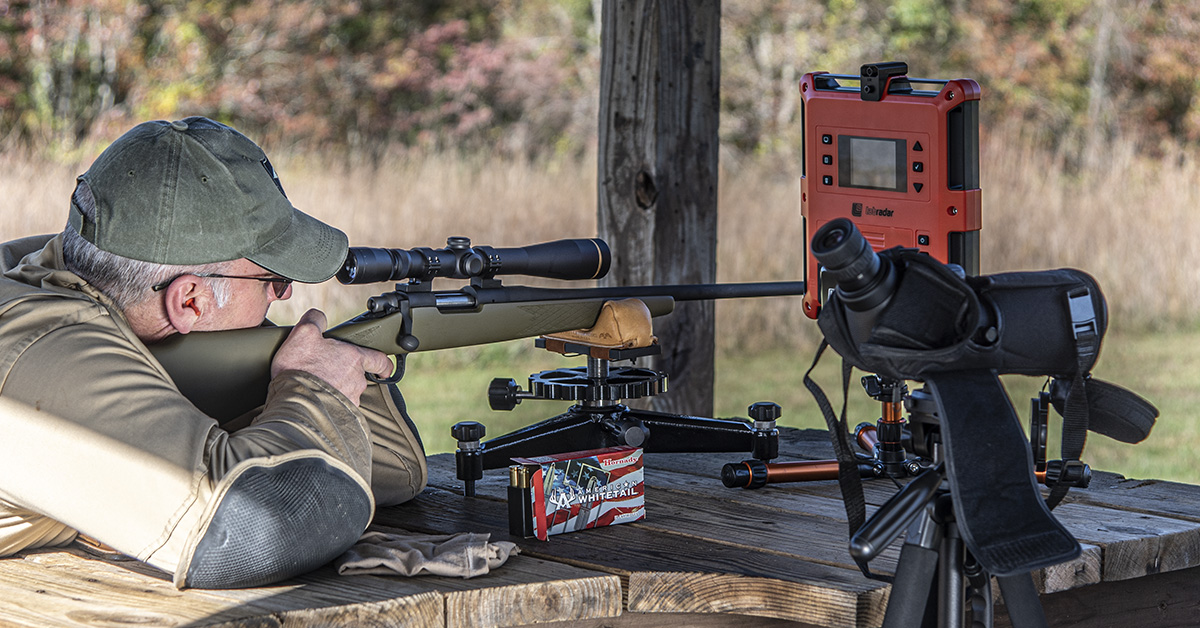
In this part of our continuing series on reloading, we head to the shooting bench for the all-important rifle zeroing
by Lou Patrick
Reloading represents a natural progression for many firearms enthusiasts (me included). It also represents the last step in the quest for an accuracy/performance improvement. We start the journey by purchasing a rifle. Next, we explore barrel free floating, pillar bedding, and a new trigger with a lighter weight of pull. Along with improvements to the rifle, upgrades in our shooting gear such as a solid, adjustable front rest and rear bag are sure to follow. Once these are taken care of, for those who are looking for a continued increase in performance, all that is left to improve upon is the ammunition.
This is also our approach in this series of articles, which begins with the first installment. Our test rifle is a Remington 700 that was manufactured in the early 1970s. Upgrades to the test rifle include:
- Douglas barrel, air gauged, chambered in .308 Win., #3 sporter contour, 24 inches long, .625 muzzle diameter, 1:12 twist
- Nitrofreeze cryogenic stress relief of the barreled action
- Factory stock is pillar bedded, barrel free floats, painted OD green, action screws tightened to 45 in/bs
- Timney #532 two-stage trigger
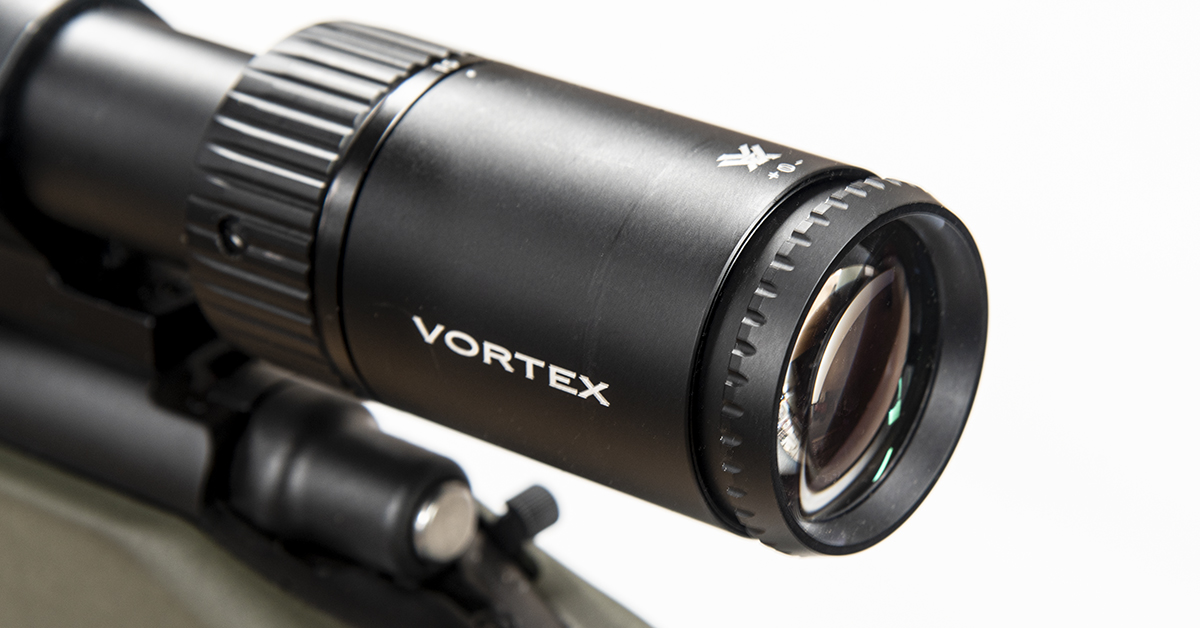
- Leupold VXIII 6.5-20X40mm scope
- Talley lightweight scope mounts
With the rifle upgrades complete, the next step is to zero the rifle. It is my advice, especially for the novice reloader, to zero the rifle using factory ammunition. Use factory ammunition of the same type that you intend to replicate at the reloading bench. Once zeroed, perform an accuracy test using the same ammunition. This establishes an accuracy baseline, giving you something to work towards and draw comparisons from while reloading. Our current goal is to provide an “initial zero” of the rifle, meaning that we are not concerned with pinpoint accuracy or group size We simply want all shots fired to reliably impact towards the target’s center. This is done in preparation for the subsequent ammunition test and the final zeroing of the rifle.
The difficulties that may arise when zeroing a scoped rifle come from three different sources, those being shot dispersion, the scope, and the ammunition.
Shot Dispersion
Perhaps the greatest reason some people struggle when trying to zero their rifle is that of shot dispersion. As much as we would like every bullet to go into the same hole, the reality is that it is most likely not going to happen. The shots are going to be randomly dispersed on the target. Of course, the quest for accuracy requires us to minimize this dispersion. This is a reason why we suggested in part one of this series to get your rifle and shooting gear squared away first. Following this methodology will “hopefully” isolate the source of whatever dispersion remains to the ammunition, which in turn gives you greater control over dispersion at the reloading bench.
Eliminating shot dispersion entirely would be a wonderful accomplishment. Unfortunately, while shot dispersion can be minimized, it most likely will not be eliminated; therefore, we are going to have to learn how to live with dispersion.
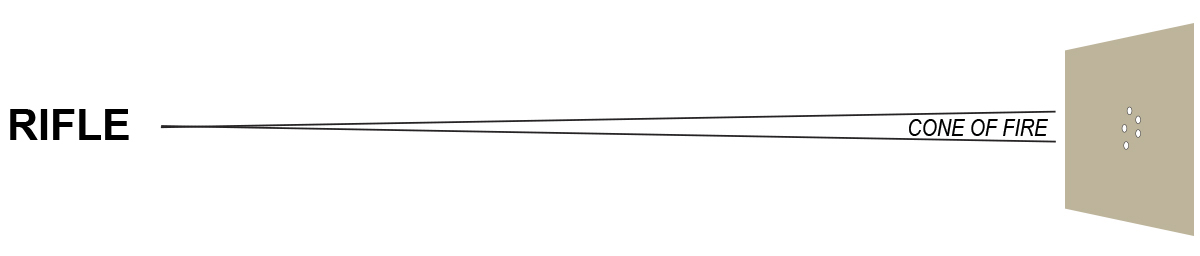
Consider if you were to fire twenty shots from your rifle all at once. These twenty bullets would travel downrange in something of a cone shape, producing a twenty-shot group of randomly dispersed bullet holes on the target. The key word here is “dispersed,” as all shots fired did not go into the same hole. As you learn to live with dispersion, you learn to expect it. The unreasonable expectation of all shots fired impacting the target in the same place will result in making unnecessary scope adjustments because you cannot eliminate shot dispersion with scope adjustments.
At this time, we do not know how much dispersion to expect from this rifle and ammunition combination, but it will exist. My advice is to trust your rifle, marksmanship, and scope adjustments. Much of the error you will encounter will be caused by shot dispersion. Keep this in mind lest you fall into the trap of chasing two inches of shot dispersion with ¼ inch scope adjustments. This Hornady podcast does a terrific job of explaining shot dispersion.
I advise a three-step process in zeroing your rifle:
- Initial zero
- Ammunition test
- Final zero
Rifle Scope
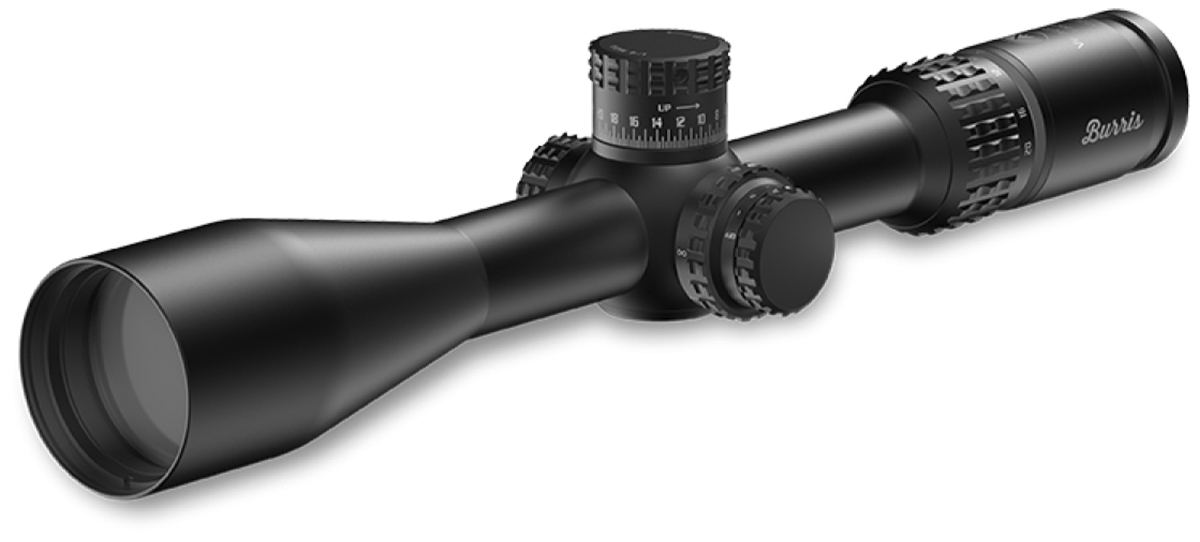
Modern rifle scopes are packed full of features — so many, in fact, that they can become confusing until you learn the system. Read the owner’s manual to ensure that you understand the function of each of these features and how to operate them correctly.
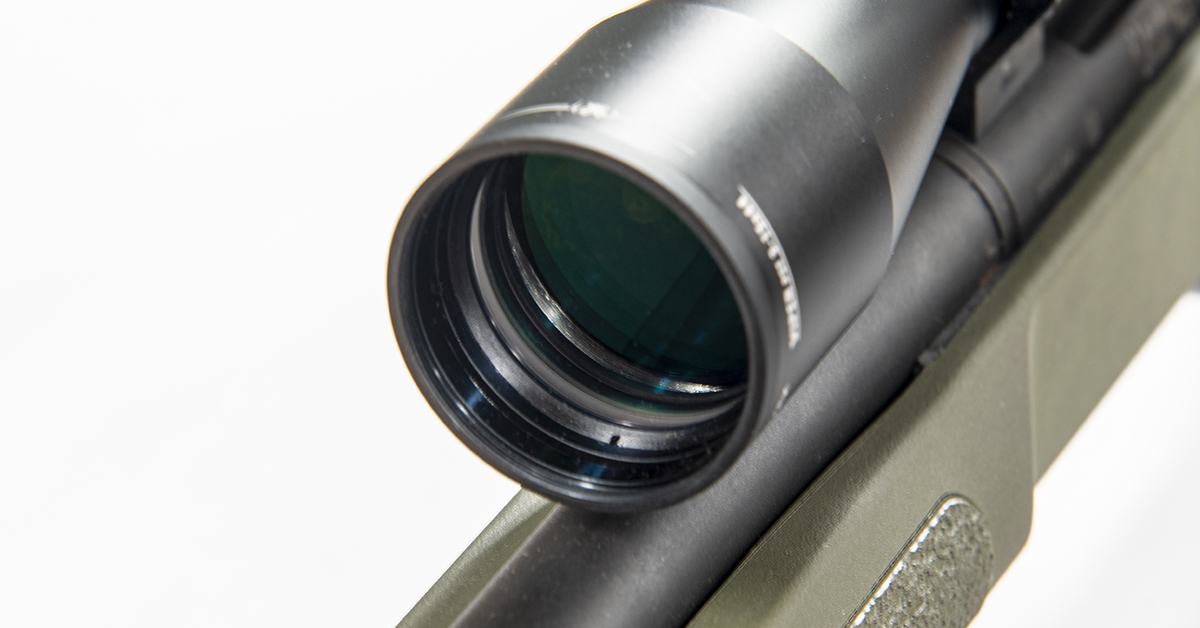
Clean the lenses of your rifle scope. A large portion of the cost and performance of your scope is directly proportional to the quality of the scope’s lenses. To get the most performance your scope can deliver, the lenses must be clean.
The lens on the rear of the scope is called the ocular lens. The ocular lens is adjustable, allowing you to bring the reticle into focus. Focusing the reticle is usually a one-time adjustment unless your eyesight changes over time. For more information on how to focus your scope’s reticle, consult the owner’s manual.
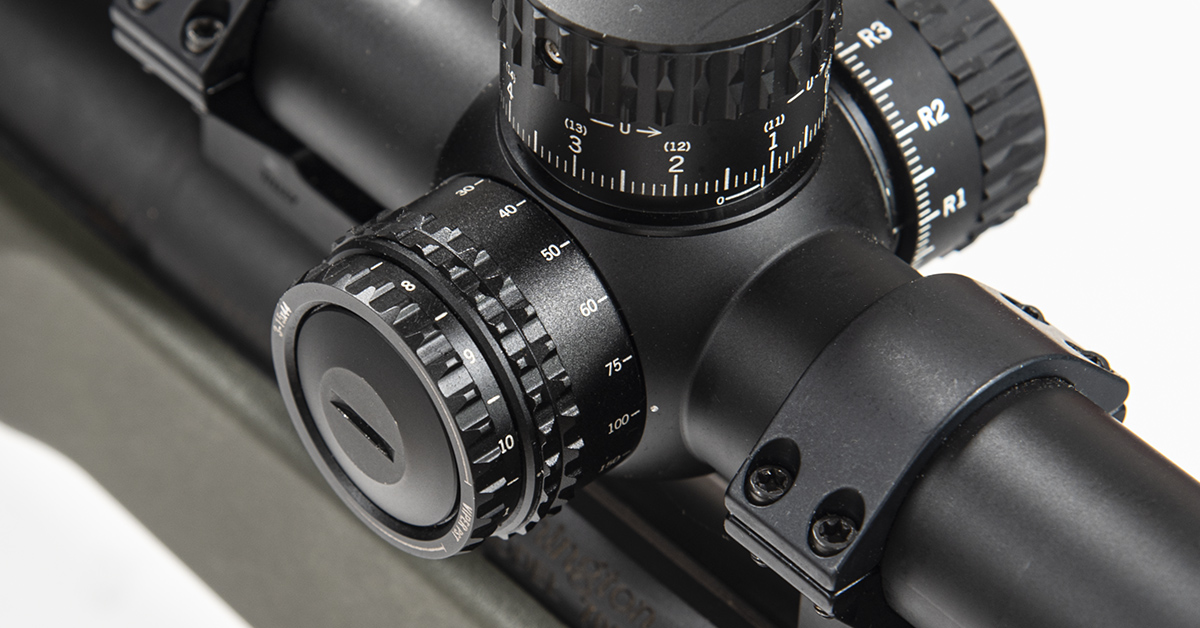
Parallax-adjustable scopes have become quite popular over the years. Some scopes have a side-mounted parallax adjustment, or “side focus,” as its commonly called, while others have an adjustable objective lens that provides for parallax adjustment. If your scope has this feature, ensure that it is adjusted properly. Remember…a change in the distance to the target may require a slight adjustment for parallax.
For more information on the subject of parallax, check out our article Optics 411: Zeroing in on Rifle Scopes.
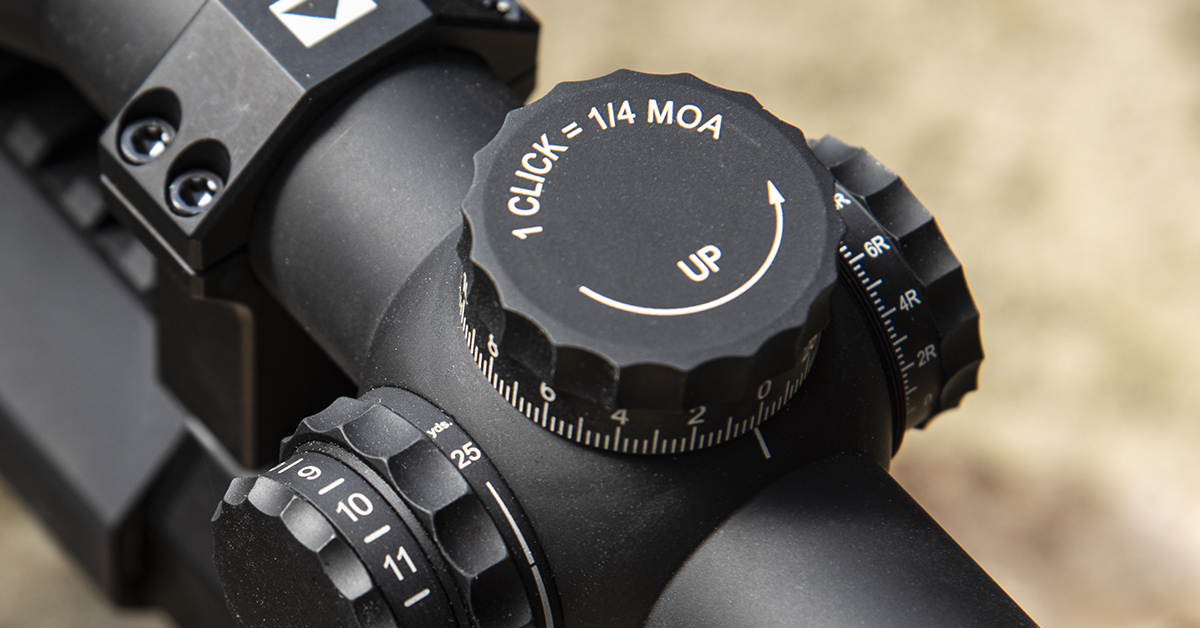
Windage and elevation turrets usually provide for a ¼ minute of angle, or ¼ inch of adjustment per “click” or “graduation” at 100 yards. The ¼ “minute” or “minute of angle” terminology can be confusing for some. Both terms mean the same thing since angles are measured in degrees, minutes, and seconds. When speaking of angular measurement and how it is most applied to firearms, specifically sight adjustment, we use “minutes” because “degrees” are typically too large of a unit of measure and “seconds” too small. One “minute” or “one minute of angle” equals one inch at one 100 yards, making it by far the most convenient unit of angular measurement to use. Most scope manufacturers, to provide for finer windage and elevation adjustment, simply divide this “minute” by 4, making one click of scope adjustment equal to ¼ minute, which also equals ¼ of an inch at 100 yards.
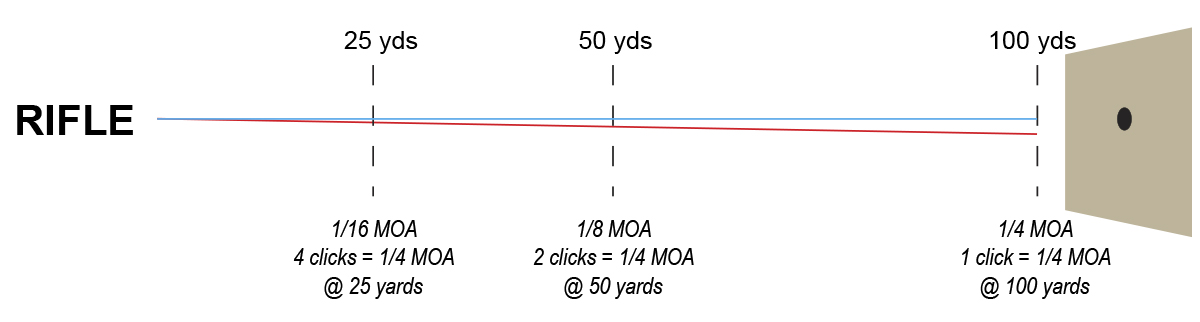
As you are looking through your scope at a target 100 yards away, your line of sight is straight (straight through the scope all the way downrange to the center of the target’s bullseye). This is represented by the straight blue line in the above graph. For example, as you are aiming the rifle with the center of the reticle placed on the target’s center, your line of sight is straight. Upon firing the rifle, you find that the bullet impacts the target, let’s say, ¼ of an inch to the right of the target’s center. This reveals an angular relationship that exists between the line of sight and the path of the bullet. This is represented by the red line departing from the line sight. This angular relationship is directly proportional to distance. As the distance to the target increases, the further the bullet will depart from the line of sight. As the distance to the target decreases, the bullet’s departure from the line of sight also decreases.
This is important to know and understand. When we begin zeroing our rifle, we will do so at 50 yards. With the range being cut in half (compared to 100 yards), the angular relationship of our scope adjustments will also be cut in half. This means that at 50 yards it will now take two “clicks” to move the bullet impact on target ¼ of an inch (as opposed to one click at 100 yards). Move the target to 25 yards and it will now take four clicks to move the same ¼ of an inch.
Once the scope is zeroed, this angular relationship will no longer exist since the bullet’s trajectory, while not laser-beam-flat, will be in the proper relationship with the line of sight.
Ammunition
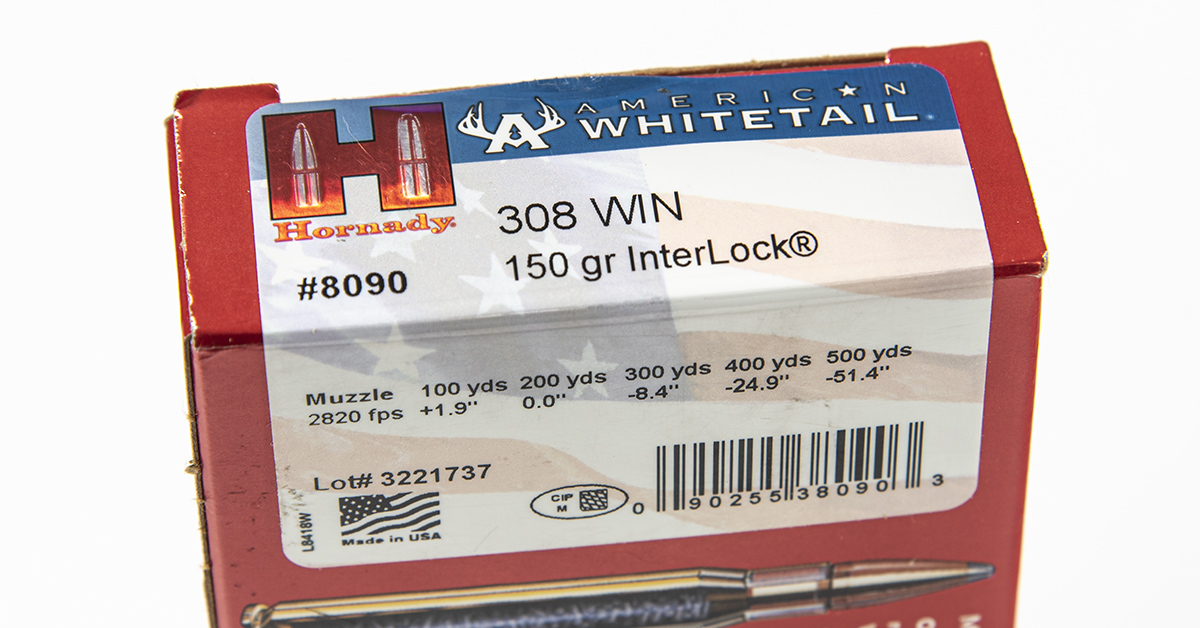
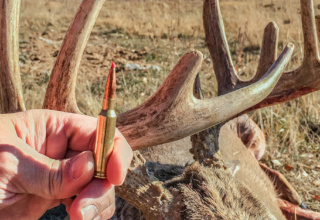
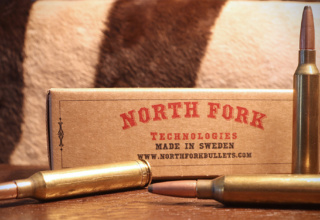
For our test, we will be using Hornady American Whitetail ammunition with a 150-grain Interlock bullet to zero the rifle. What we are most concerned with at this time is found on the back of the box — specifically, the muzzle velocity of 2820 fps and the lot number. Remember, we will begin zeroing our rifle at 50 yards. Once on target, we will then move the target to 100 yards to complete the initial zeroing process. It is important to know prior to going to the range how this change in target distance will affect the strike of the bullet on target.
The trajectory of a .30 caliber 150-grain spitzer bullet at 2800 fps, given a 200-yard zero, is:
- 50 yds. +.780 in.
- 100 yds. +1.86 in.
- 200 yds. 0.00 in.
- 300 yds. -8.04 in.
- 400 yds. -23.43 in.
- 500 yds. -47.64 in.
For the purpose of initially zeroing your rifle, all you need to know is the weight of the bullet and the muzzle velocity, as bullet shape will not make much of a difference at these ranges. With this information, consult a ballistics chart to determine the trajectory of the bullet. Looking at the data above, with a 200-yard zero, the bullet will be .780 inches high at 50 yards and 1.86 high at 100 yards. What is important to know currently is the change in trajectory from 50 yards to 100 yards. If the bullet impacts the target .780 inches (about ¾ inches) high at 50 yards, moving the target back to 100 yards will cause the bullet to impact the target 1.860 inches (about 1 7/8 inches) high. Our goal is to have the initial zero adjusted so that the bullets strike the target at about 1.5 inches high at 100 yards. I say, “about 1.5 inches high,” because shot dispersion will probably keep every shot from being precisely 1.5 inches high at 100 yards.
Adjusting the point of impact to be above the point of aim is done to keep from shooting out the aiming point during the ammunition test. Ammunition of the same type and lot number will be used later in an ammunition test.
Bore Sighting

Bore sighting is usually performed following the installation of a new scope. This is to align the scope’s reticle with the bore of the rifle to get the bullet to strike on target. After bore sighting, the bullet may strike anywhere on the target, but if the bullet strikes the target or target backer, we know where it’s at and can easily adjust the scope accordingly. Begin by placing two zeroing targets side by side on the target backer 50 yards downrange. The bolt is removed from the rifle and the rifle is held securely on the front rest and rear bag.
Look through the rifle’s bore. You want to look as straight as possible through the rifle’s bore at the target 50 yards downrange. Using the rifle rest to support the rifle, move the rifle as necessary to align the bore of the rifle with the target. The goal is to center the target within the rifle’s bore.
Once the target is aligned with the rifle’s bore, take care not to move the rifle and look through the scope. Adjust the scope’s windage and elevation to move the reticle to the center of the target. It is important not to move the rifle while making these adjustments. If this is your first time bore sighting a rifle, you may wish to use a large piece of cardboard as a target backer. The larger target backer will allow for a greater margin of error. Once you know where the bullet strikes, it’s easy to make the necessary scope corrections.
When bore sighting, it helps to have a couple of rulers or a measuring tape to determine how much adjustment to the reticle is required to move the bullet impact where you want it. If your bullet should strike the target backer, measuring to the target’s center with a tape measure is far better than guessing.
Initial Zeroing
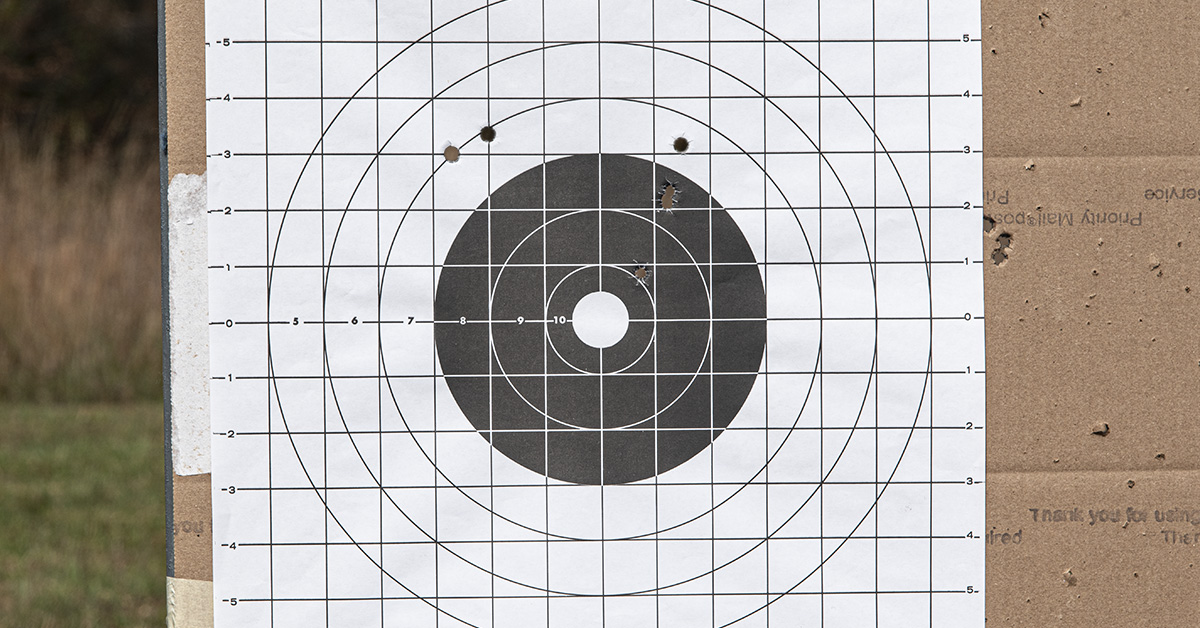
Once the rifle is bore sighted, install the bolt and, while aiming at the center of the target 50 yards downrange, fire one round. Our first shot impacted the target 3 inches high and 2 ¾ inches to the left of the target’s center. It is possible that the first shot from a cold, clean barrel can behave somewhat differently compared to subsequent shots. As such, I do not recommend making any scope adjustments at this time.
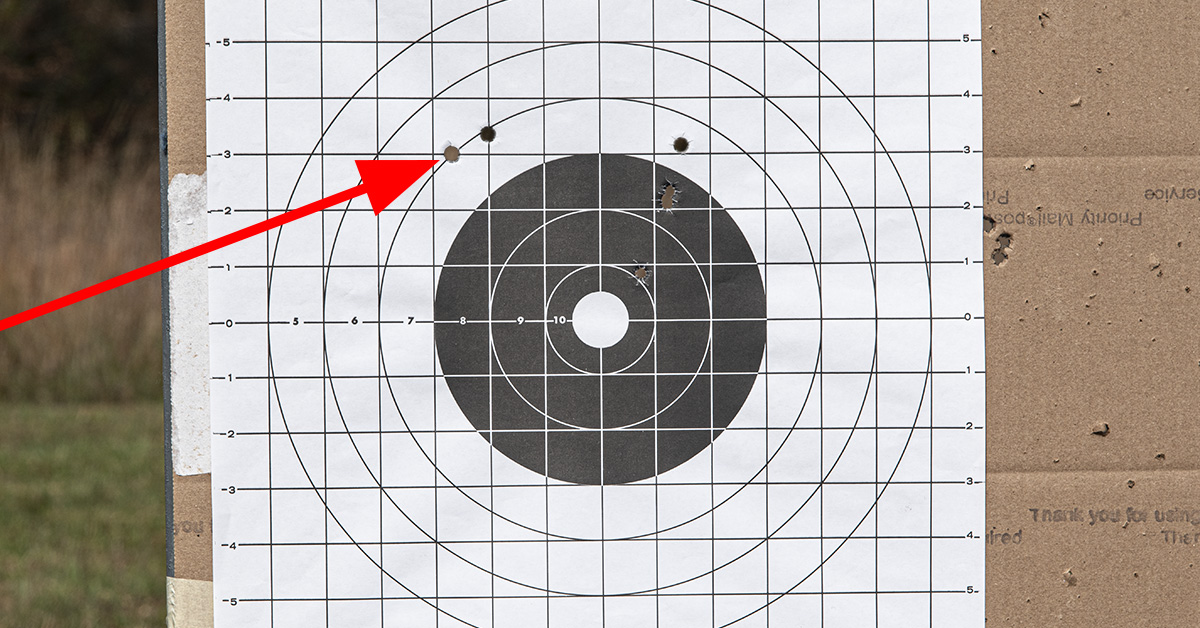
The second shot impacted the target about ¾ of an inch to the right and about ¼ of an inch higher than the previous shot. Being very similar to the first shot from the cold, clean barrel, this difference is of no concern and most likely falls within the normal shot dispersion of this load. Using the center of the two-shot group as a reference point, scope corrections were made to place the next shot ¾ of an inch above the target’s center. Remember, at 50 yards, one click of scope adjustment will only provide for 1/8 of an inch of correction as opposed to ¼ of an inch at 100 yards.
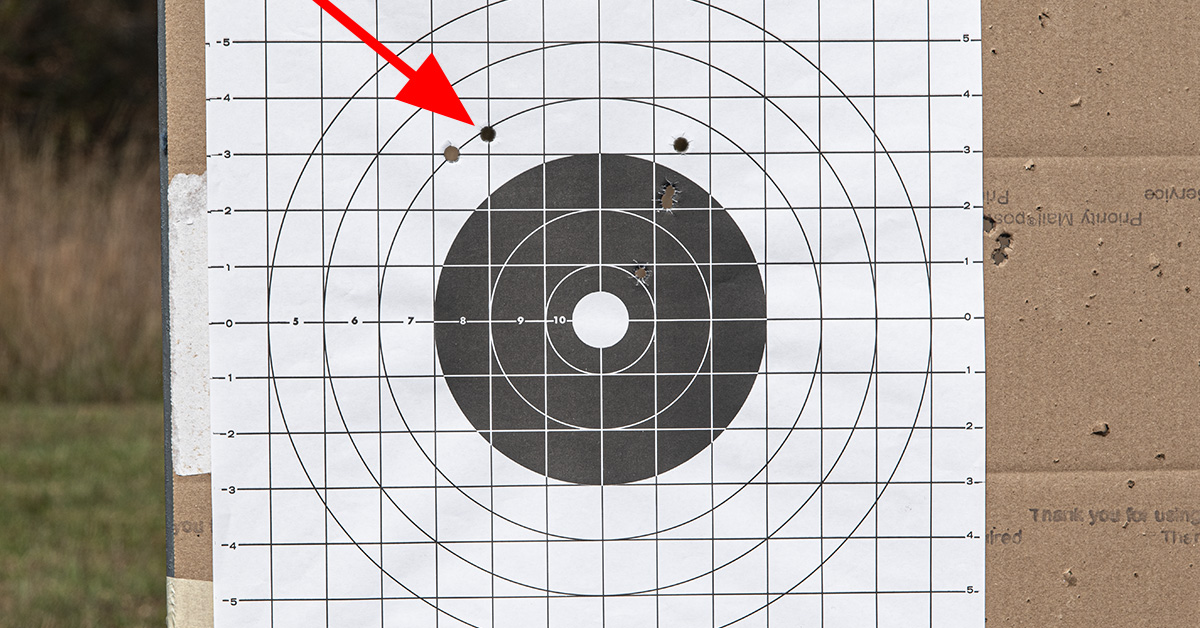
After the scope corrections were made, the following shot impacted the target 7/8 of an inch high and about ¾ of an inch to the right of the target’s center. Did this shot go exactly where intended? No, it did not; however, it wasn’t expected to because we must learn to live with shot dispersion. Again, trust your rifle, marksmanship, and scope corrections. Scope adjustment at this time would be futile in my opinion. With nothing left to be gained at 50 yards, the target is moved to 100 yards.
According to the ballistics chart, with this change in distance, we can now expect to be 1.86 (about 1 7/8) inches above the target’s center. If you are using a scope that has parallax adjustment, this change in distance will most likely require an adjustment to your parallax setting. The scope’s windage and elevation adjustments will now function as labeled, with one click equaling a ¼-inch of adjustment.
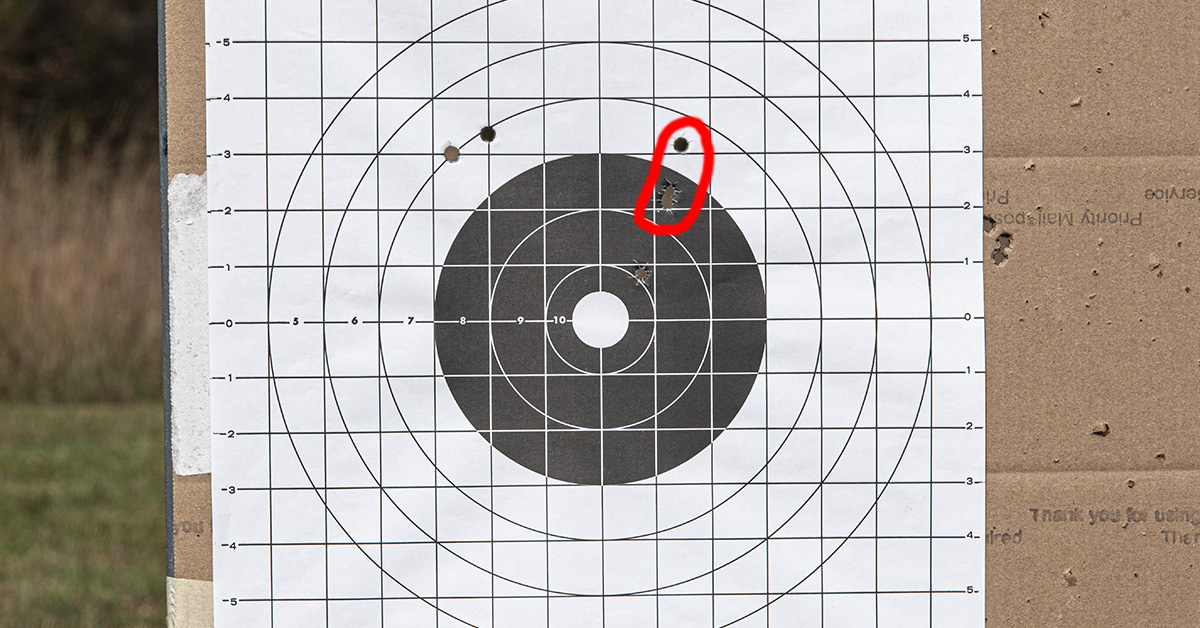
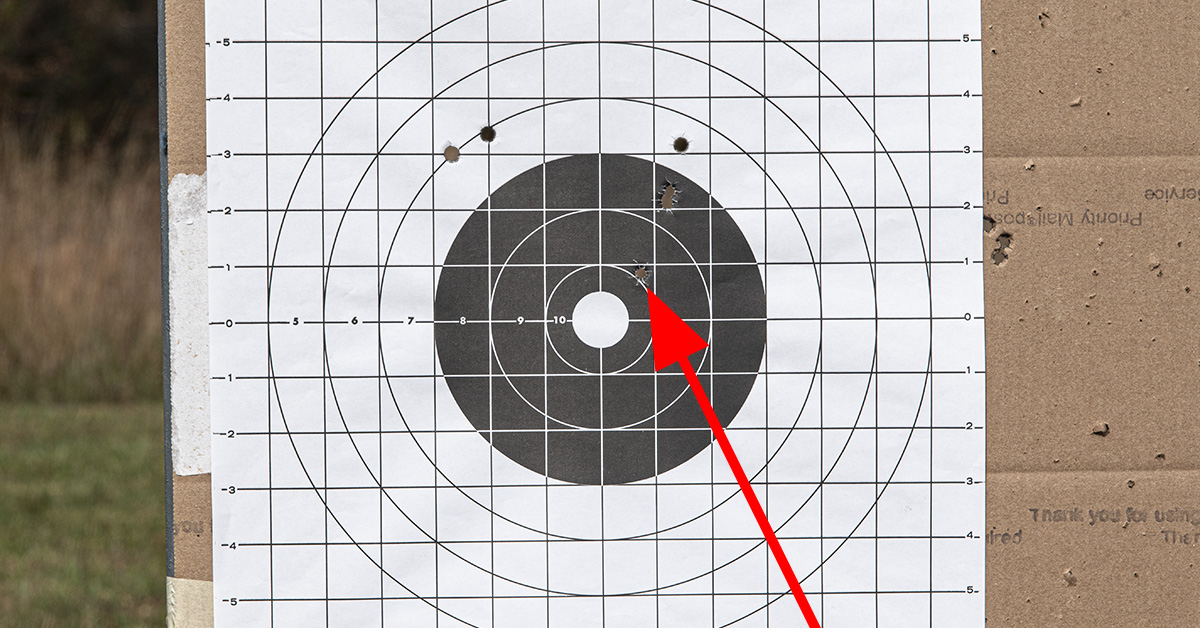
At 100 yards, I advise firing three-shot groups. This method gives you a small peek (statistically irrelevant) at group size and shape. Here, the three shots provided a vertical string with the center of the group 2 ¾ inches above the target’s center. This is higher than expected (1.86) than the desired 1 1/2 inches above center. The center of this group is also 1 7/16 of an inch to the right of the target’s center. The last shot fired at 50 yards was also to the right of the target’s center, making four consecutive shots to the right of center. This error most likely falls within normal shot dispersion combined with an increase in distance; however, we now have three shots higher than desired, with a total of four being too far to the right. If this trend continues during the ammunition test, the shot group may get close to the edge of the target. Using the center of the three-shot group as a point of reference, scope adjustments were made to center the group 1 ½ inches above the center of the target.
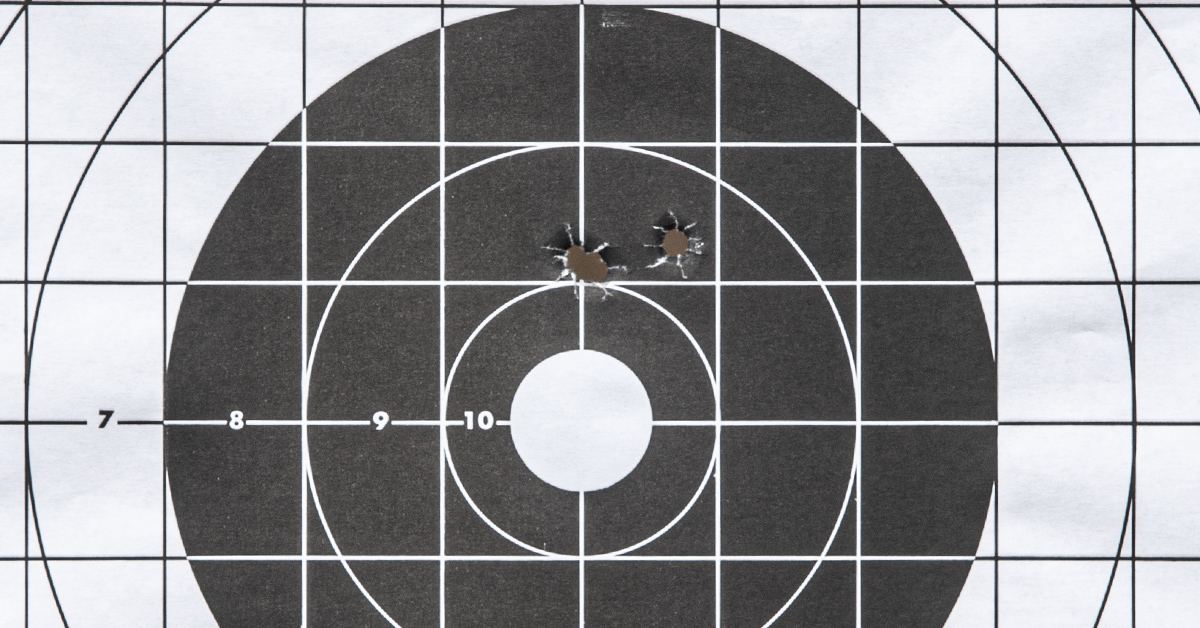
Following the scope adjustments, a three-shot group was fired on the new target, producing this now horizontal string. Use of the new target eliminates the confusion caused by adding more bullet holes. This is also the last three shot group that will be fired during the initial zeroing of the rifle. I advise firing this last group on a clean target and saving it for future reference.
This group also has one shot to the right of center, making 5 of the last 7 shots impacting to the right. We have also fired a vertical string, followed by a horizontal string. Will these trends continue? We also don’t know if this group represents the upper or lower edge of the “cone of fire” or somewhere in-between. Remember, trust what you are doing and learn to live with dispersion. The only way to gain this information is by shooting a larger group with the same ammunition. It is for this reason that I consider this as the initial zeroing of the rifle. Final zeroing will occur following the ammunition test in part five of our series.
If you want more info on how to sight in your rifle, check out this Hornady podcast.