Understanding rifle scope features allows you to make the best purchase for your needs and budget
by Lou Patrick
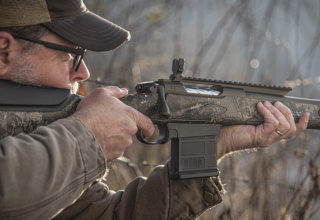
Many of us remember when most hunters used open, or iron, sights on their rifles. Sometime around the 1980s, rifle scopes shifted from being a luxury to a “necessity.” Even then, there wasn’t much discussion in camp about parallax error, side focus, or bullet drop compensation. Things were simpler and we were more concerned about when breakfast would be served and who was cooking.
Although the essence of hunting has not changed, the equipment we use most certainly has. Technological advancements have given us optics that are not only more capable and reliable, but also more complicated. Yet despite progressive features such as caliber-specific reticles, zero-stop turrets, illuminated reticles, integrated rangefinders, and even Bluetooth communication between optics and mobile devices, the common scope features remain and understanding how they work is fundamental to getting the most out of your optic and making an intelligent purchase for an item that most likely costs as much or more than the rifle you are putting it on.
Our goal here is to cut through the technical jargon and explain in simple terms the core features of a modern rifle scope so you can be better informed when making a purchase to best meet your needs.
Magnification
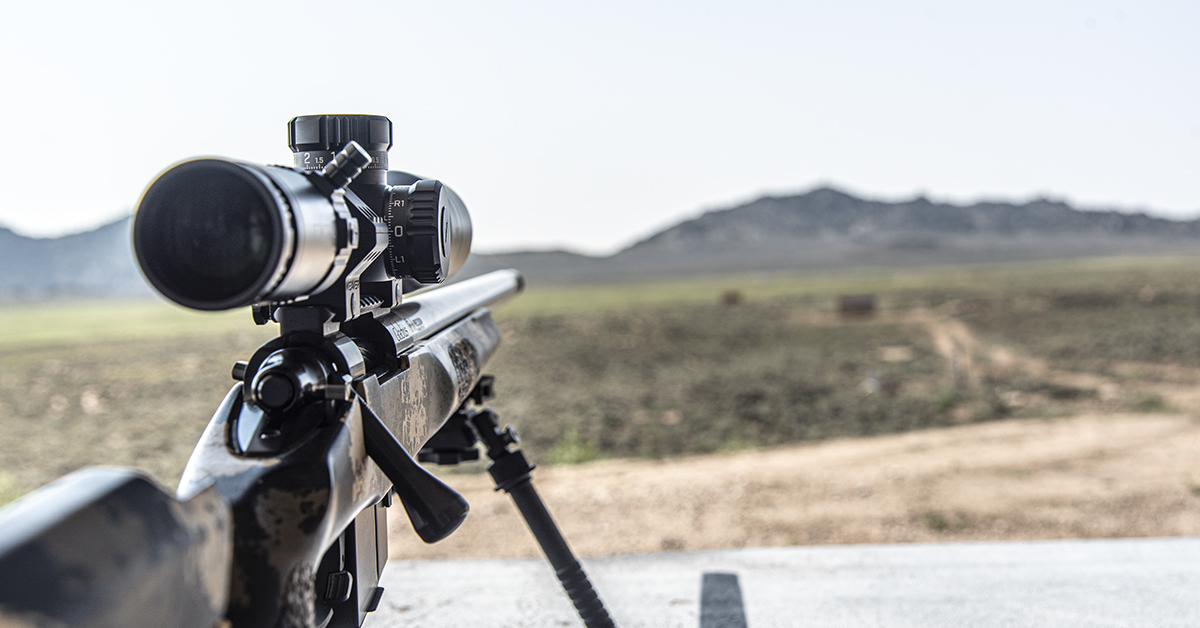
Every rifle scope is designated by two essential factors — its magnification range and the size of its objective (forwardmost) lens. Magnification is expressed by either a single digit, in the case of a fixed magnification scope, or by two digits, in the case of a variable-power scope. A “4x” scope, for instance, means that the scope has a fixed magnification power of 4, or four times the magnification of the naked eye (1x). A variable magnification power scope will have two numbers associated with the magnification power.
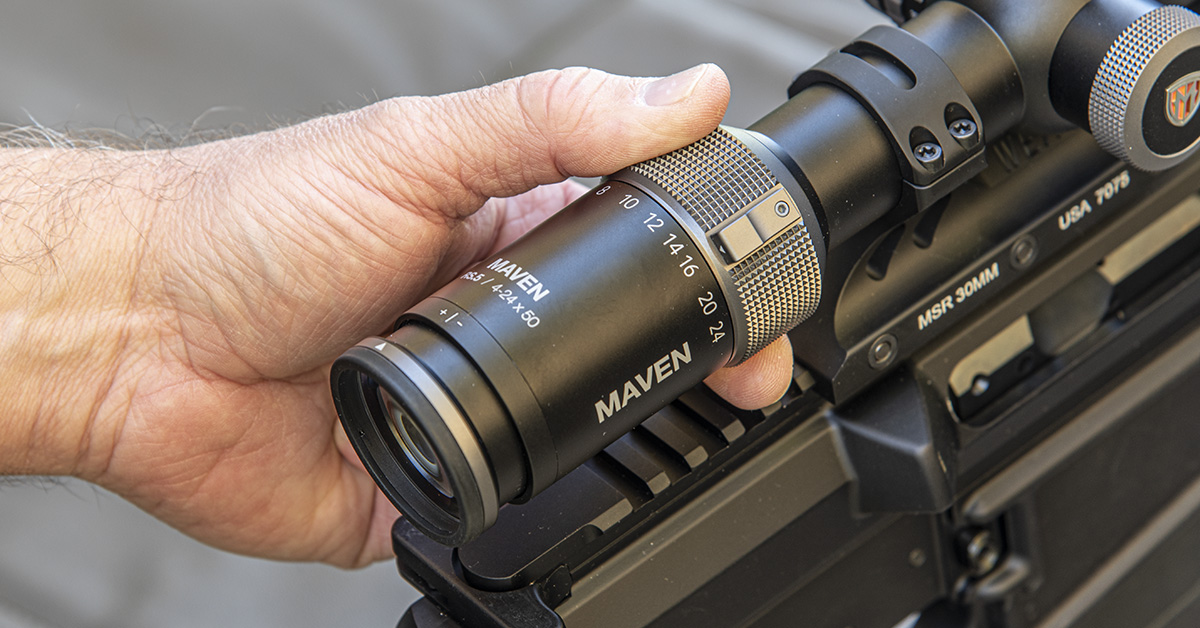
Taking this Maven RS.5 4-24×50 scope as an example, this scope has a 4x magnification at the bottom end and a 24x magnification at the top end of its range, with the magnification range in-between being variable.
Objective Lens
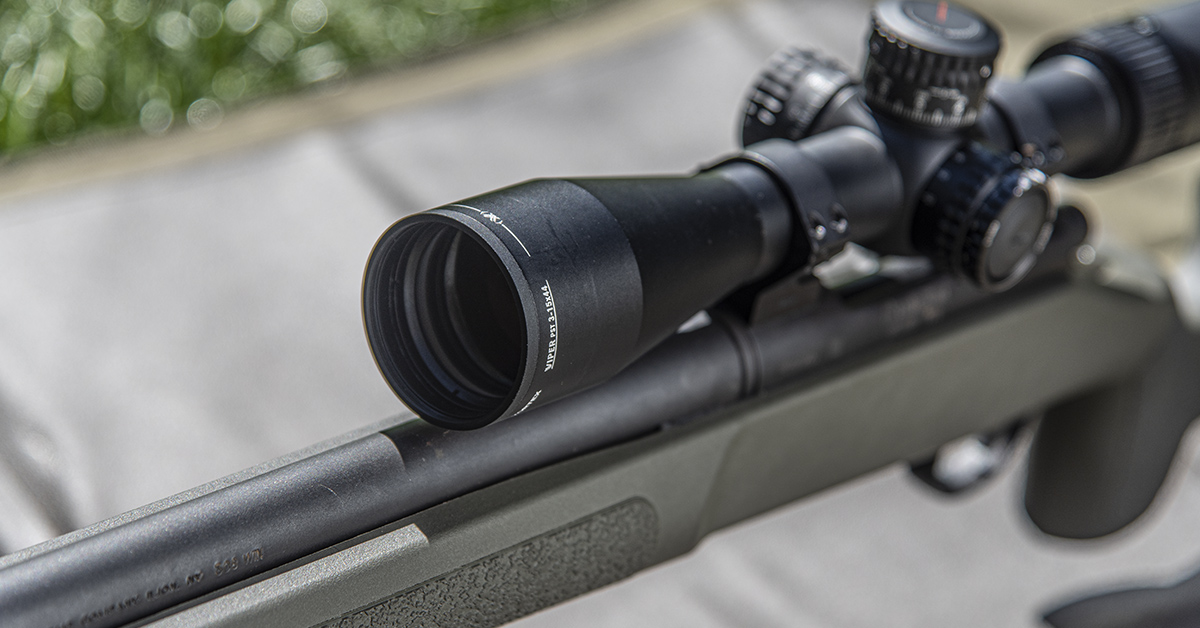
The objective lens is the forward lens on the scope tube and its diameter is referenced in millimeters. A scope labeled as 3-9×50 will have a 50mm objective lens — the last two digits indicating the size of the objective lens.
Objective lens diameters have grown considerably over the years, with the larger lenses often being said to “gather more light,” thus making a brighter image. That is an incorrect statement since the objective lens does not “gather light.” Instead, it simply allows light to enter the scope. Just as a larger window allows more light into a room, a larger objective lens allows more light into the scope. When speaking of scopes and light, it is more accurate to think in terms of “light transmission” instead of “light gathering.”
Light Transmission
The successful transmission of light through a scope is dependent upon several factors, including the optical quality of the lenses and their anti-reflective coatings. Unfortunately, not all available light makes the journey through the scope. Some light is absorbed, and some, just as we see on windows or the lenses of eyeglasses, is reflected.
You may see on a scope’s objective lens a multitude of different colors rather than clear glass. The different colors hint at the various coatings applied to the lens. Some of these coatings may have anti-fog or anti-scratch properties while others minimize reflection or aid in light transmission.
A bright image is obviously important in a rifle scope, especially for hunters. When looking for a “bright scope,” attention must be paid to the quality of the glass and the lens coatings — not just the size of the objective lens because a large objective lens does not necessarily equate to a brighter image. It does mean, though, that you will be carrying a larger, bulkier scope and scopes with larger objective lenses must be mounted higher on the rifle. This can negatively affect marksmanship since scope height is directly related to your cheek-to-stock weld. You will tend to shoot more accurately and more easily with the scope mounted as low as possible on the rifle.
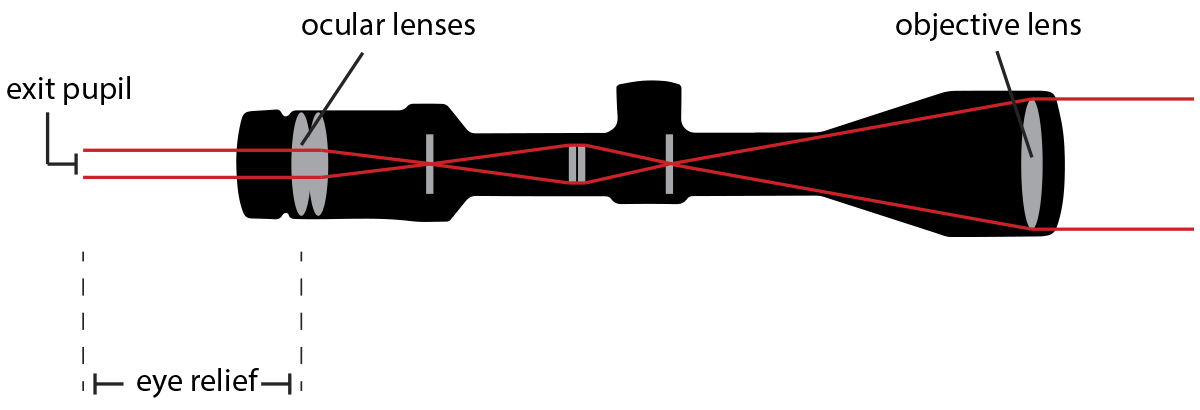
Light transmitted through a scope will exit through the ocular lens (the lens closest to your eye). This stream of light is referred to as the exit pupil. It provides the image that you see and is of a specific diameter.
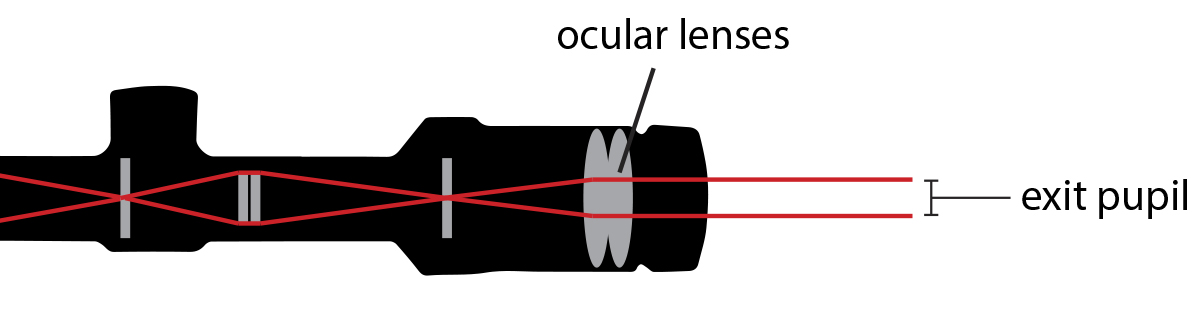
The diameter of the exit pupil is also referenced in millimeters. Its diameter is determined by the size of the objective lens and the magnification power of the scope. The diameter of the exit pupil is also related to the brightness of the image we see.
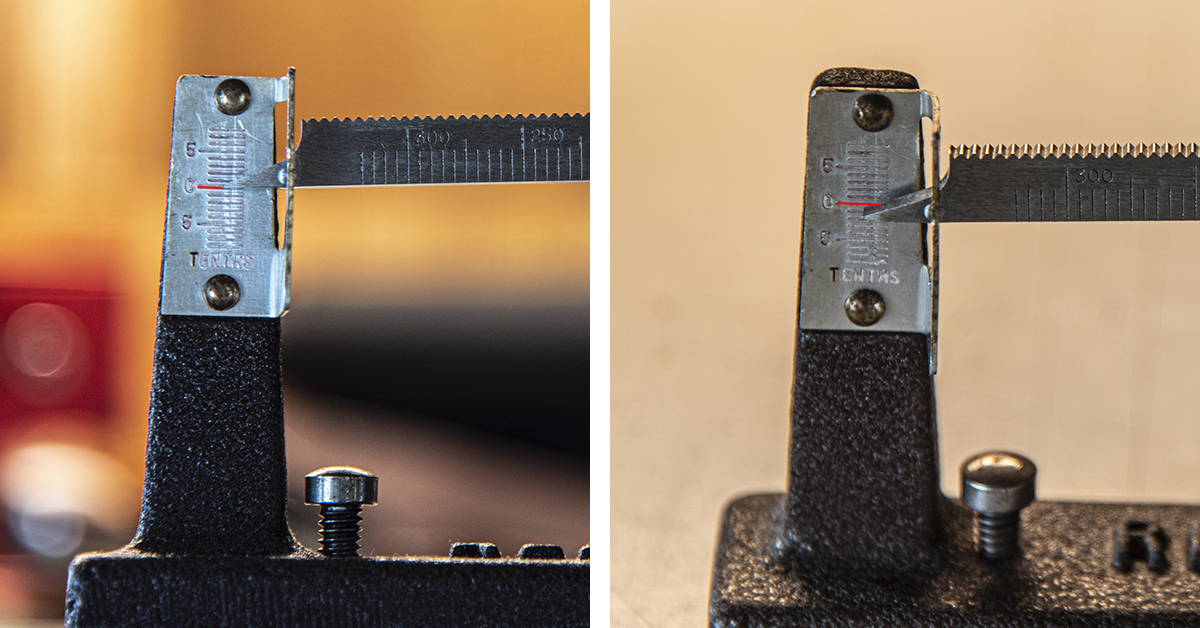
The exit pupil of a fixed power scope is fixed and easily determined. Take a fixed 4x scope that has an objective lens diameter of 33mm. Divide the objective lens diameter (33mm) by the magnification power (4) and you get an exit pupil 8.25mm in diameter.
The pupil of the human eye expands and contracts according to the intensity of light it is exposed to. On average, a pupil (the opening in the iris) is around 8mm in diameter under low light conditions (dilated) and around 3mm in daylight conditions (constricted). The scope in our example has an exit pupil of 8.25mm. In daylight conditions, our pupil is around 3mm, meaning most of the available light provided by the scope’s exit pupil is blocked by the Iris. This is of no consequence in the daylight but in low light, our pupil is 7-8mm and more closely matches the 8.25mm exit pupil diameter of the scope. The image through the scope will, therefore, appear suitably bright.
The difference with variable power scopes is that the exit pupil will vary according to the power setting. Using a 5.5-20×50 scope as an example, the objective lens is 50mm (17mm larger than our previous example) set at its lowest setting of 5.5x. This gives an exit pupil of 9.09mm. A 17mm increase in objective lens diameter combined with a 1.5x increase in magnification thus yields an increase of .84mm in the exit pupil diameter. Regardless of the light conditions, this is of no benefit.
When set to its highest setting at 20x, the exit pupil is 2.5mm. In low light, the image will appear dark since the human pupil is about 7-8mm in diameter when dilated. Shifting to bright light, the eye’s pupil, now being around 2-3mm, will more closely match the 2.5mm exit pupil. The image will appear bright.
If we set this scope at 10x, we have an exit pupil of 5mm, which will still appear somewhat dark in low light — darker than that of our 4x33mm scope. You would have to set this scope at 6x, delivering an exit pupil of 8.3mm, to closely approximate the exit pupil and the amount of usable light from our 4x33mm scope example.
The takeaway here is an important one. Bigger optic glass and higher magnification can be beneficial in some instances and detrimental in others. You must weigh the advantages and disadvantages when deciding which scope is right for your specific needs.
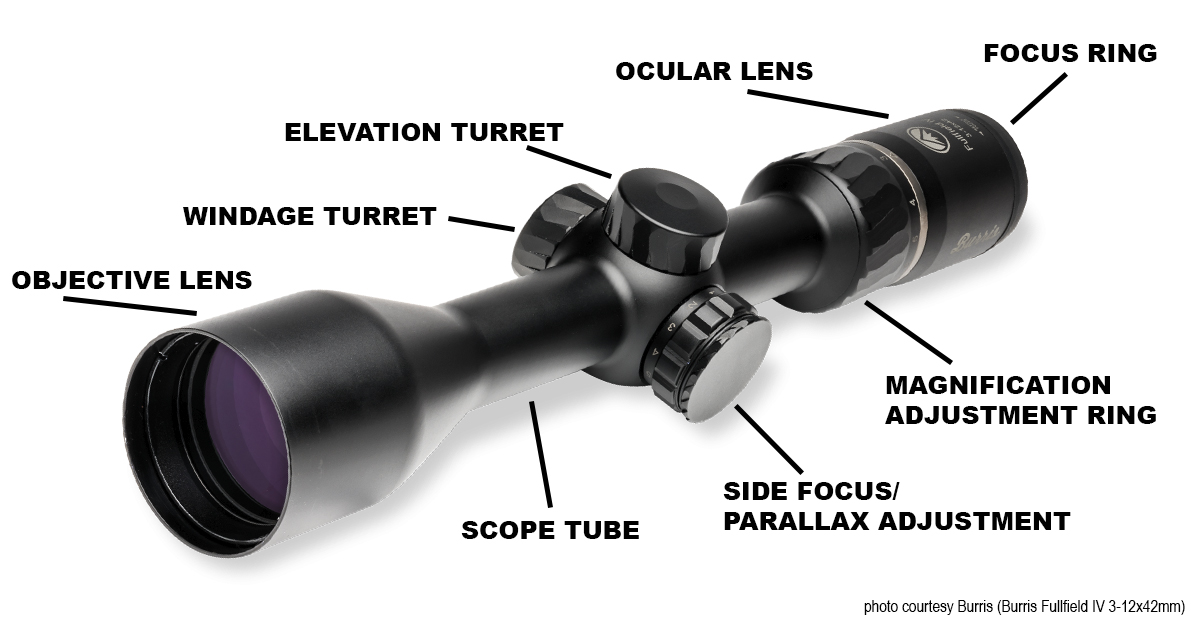
Scope Tubes
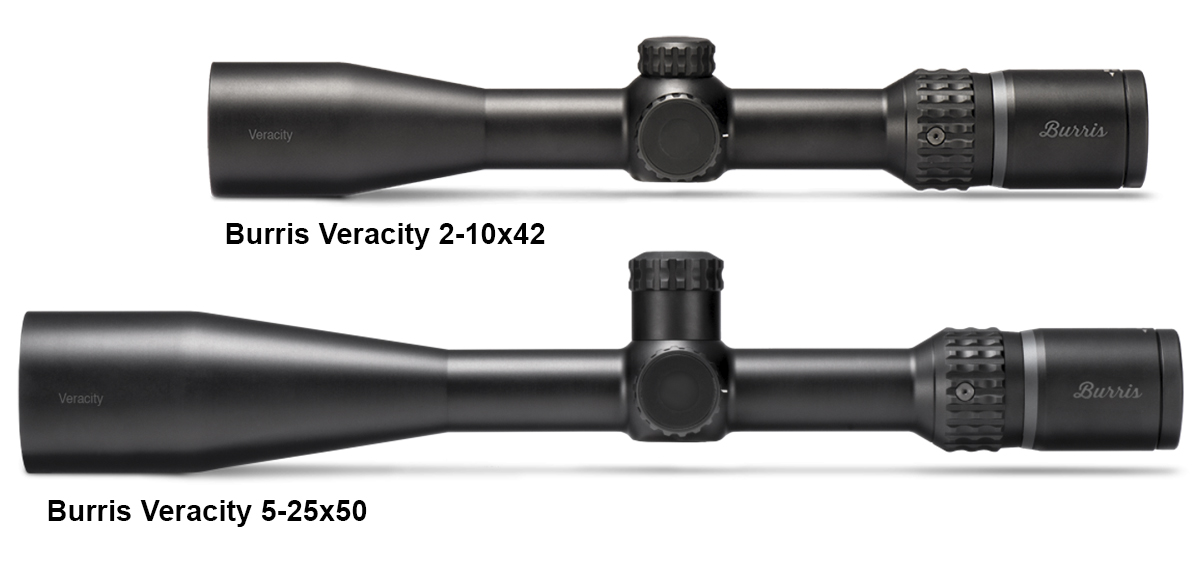
The main body of the scope is referred to as the scope tube. Scope tubes are available in different diameters, with the most common tube diameters being 1-inch or 30mm. When comparing these two diameters, 30mm is equal to 1.181 inches, making it almost 3/16 of an inch larger in diameter than the 1-inch tube. The 30mm tube is noticeably larger. This increase in tube size has also lead to some misconceptions about its benefits.

In similar fashion to scopes with the large objective lenses, the larger 30mm tube is often thought to gather more light, or to transmit more light. It does not. The benefit of the larger tube is that it provides for a greater range of internal adjustments. This is often accomplished by placing the smaller 1-inch internals inside of the larger diameter tube. The greater range of adjustment, especially with elevation, can be beneficial when long-range shooting. Unless you are routinely shooting 500 yards and beyond, though, the 30mm scope tube is probably of little benefit to you. Tube diameter will also dictate the size of the scope rings required to mount the scope to your rifle. The larger tube adds bulk and weight to the rifle, and expense to the scope.
Windage and Elevation Turrets
Windage and elevation are used to adjust the reticle to coincide with the impact of the bullet on target. Turrets are typically available in two different styles. The taller “target” style that allows for easy adjustment with the fingers and the much lower and more streamlined hunting or field style that may be turned by fingers or require the use of a small screwdriver or coin.
The target style turrets are easier to use when making corrections for extended range and/or wind drift. It has been my experience that competitive shooters get the most use out of this feature, while many hunters, if not most, tend to not make scope adjustments after zeroing. Albeit a minor factor, tall turrets do add some bulk to the rifle while also providing a little something extra to snag on when afield.
Parallax Adjustment
Adjustment for parallax, or focus, is offered on most mid-level and nearly all high-level scopes. Parallax is adjusted via the turret found on the left side of the scope tube, opposite the windage turret. In a bygone era, parallax adjustment came in the form of an adjustable objective lens. This adjustment has since been moved to the side on many scopes for convenience. To have enough internal room for the adjusting mechanism, its placement on the side usually necessitates a 30mm tube.
To understand parallax, it is important to realize that you are already aware of it and have been dealing with it your entire life. You probably just haven’t thought about it in terms of “parallax” or “parallax error.” A reloader’s balance beam scale is a good example of this. You must look straight at the scale in order to get an accurate reading. If you look at the scale from different angles, you will get different readings. This is due to parallax. The error caused by looking at the scale from an angle rather than straight on is referred to parallax error, this is because the error is induced by an off-center line of sight.

The same is true for rifle scopes. To be parallax-free, your aiming eye, the scope’s reticle, and the target must be in alignment. The scope simply introduces another factor into the equation that causes some confusion, that being focus.
Let’s forget about scopes for a minute and go back — way back — to the days of iron sights. When using iron sights, the shooter is looking through the rear sight, aligning it with the front sight, and ultimately the target. All three of these items — rear sight, front sight, and target — are at different distances. The reality is that your eye can only bring one of these objects into sharp focus. The other two will be out of focus.
The rifle scope is similar in operation, yet it can bring the target and the reticle into focus on the same focal plane; however, it is similar to our eye in that it can only do so at one distance at a time.
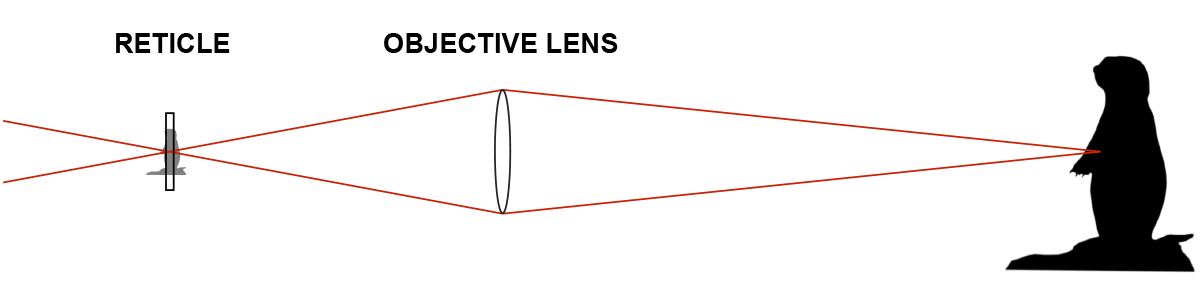
Looking at the above picture, the lines meet on the prairie dog’s chest, meaning that the scope is in focus on the target. The image of the prairie dog will thus be in focus where the lines meet at the reticle. This indicates that the image of the prairie dog and the reticle will be (as one) on the same focal plan. Stated differently, the image that you see will be the prairie dog (target) and the reticle (sight) in focus even though they are at different distances from your eye. This is a parallax-free condition since the target and reticle are on the same focal plane. There simply isn’t anything to line up as these two images are as one.
Traditionally, scopes have been manufactured to be parallax-free (focused) at 100 yards with no ability to adjust the focus. The problem with parallax, or parallax error, arises when the distance to the target is no longer at that predetermined focal distance.
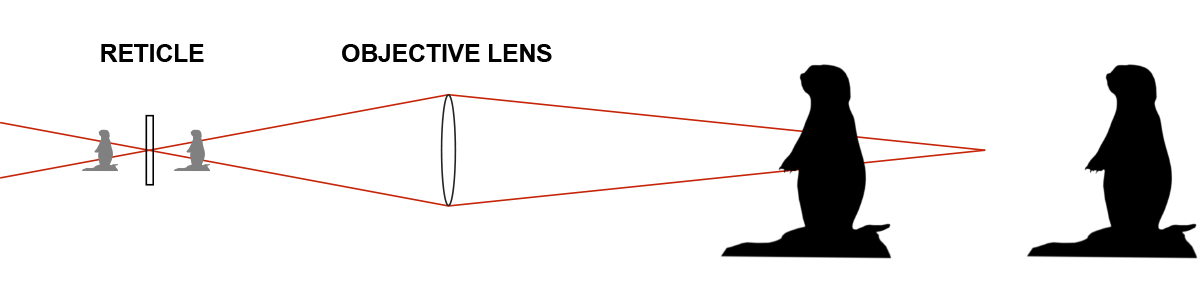
Staying with our example above, if the prairie dog scampers closer to or farther away from you, the scope remains focused at 100 yards. The critter may now appear slightly blurry because it is now out of focus. More importantly, the image of the prairie dog and the reticle are no longer on the same focal plane. When using a “fixed focus” scope and the target is presented at a distance that is either further away or closer than the predetermined focal point, the target image will either appear in front of or behind the reticle. It will no longer be on the same focal plane. The reticle and target are now two separate images, one in front of the other, and have become more sensitive to alignment. Just like our reloading scale example, we need to be looking straight through the scope to maintain proper alignment.
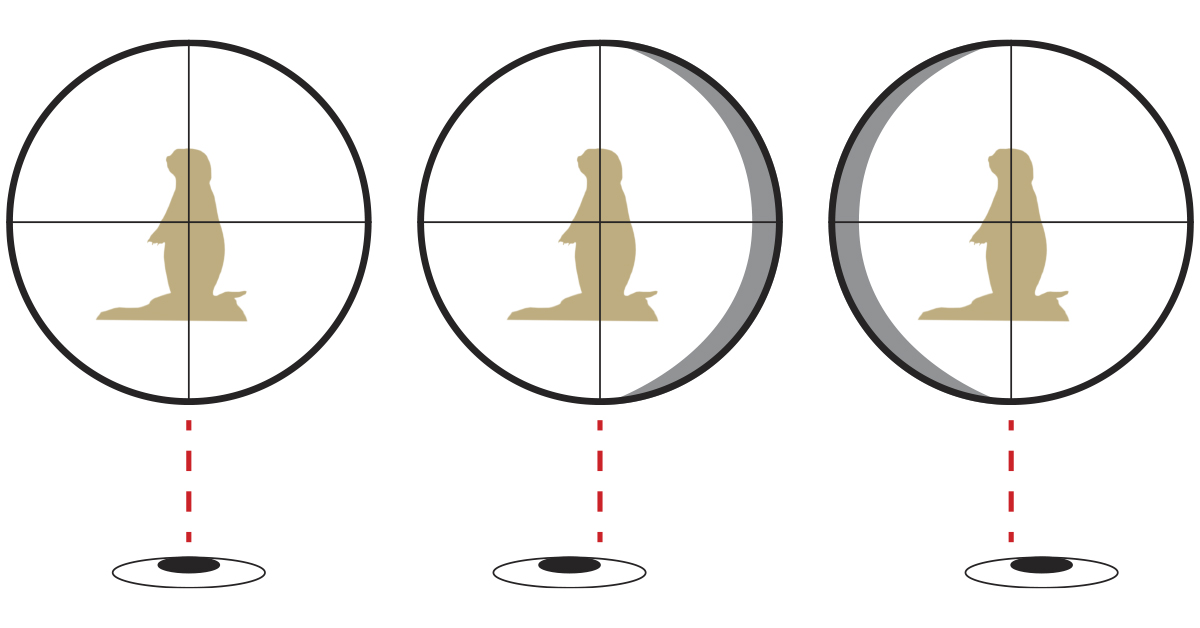
Parallax is easy to detect in your scope. For example, take a traditional scope that is parallax free at 100 yards with a target at 100 yards away. Look through the scope and move your eye (not the scope) slightly left and right. You’ll notice that the reticle will not seem to move around relative to the target. That is because the reticle and target are on the same focal plane (in focus).

Now, position the target to 50 yards or move it out to 200 yards. Again, move your eye slightly left and right and you’ll see that the reticle appears to “float” across the target. This is because the image of the reticle and the target are no longer on the same focal plane. One image is in front of the other and is now more sensitive to your viewing angle.
Fortunately for the average shooter/hunter, parallax or parallax error isn’t as bad as it may sound, as these errors are generally small. Traditional fixed parallax scopes have proven to be plenty accurate for most hunting/general shooting situations. Parallax errors become more pronounced with distance and with higher magnification scopes, particularly those greater than 12x magnification. Scopes under 12x magnification have no real need for parallax adjustment for most shooting conditions.
Adjustable parallax scopes really shine when using high magnification at extreme distances because at long range, even slight parallax error could result in a miss.
Keep in mind, parallax is the apparent change in position of an object (reticle), relative to a more distant object (target) caused by a change in the observer’s line of sight towards the object. Simply put, sight alignment is not just for iron sights. The fundamentals of rifle marksmanship, which include sight alignment, applies to shooting with a rifle scope as well. The small error induced by parallax can be partially resolved with a consistent stock weld.
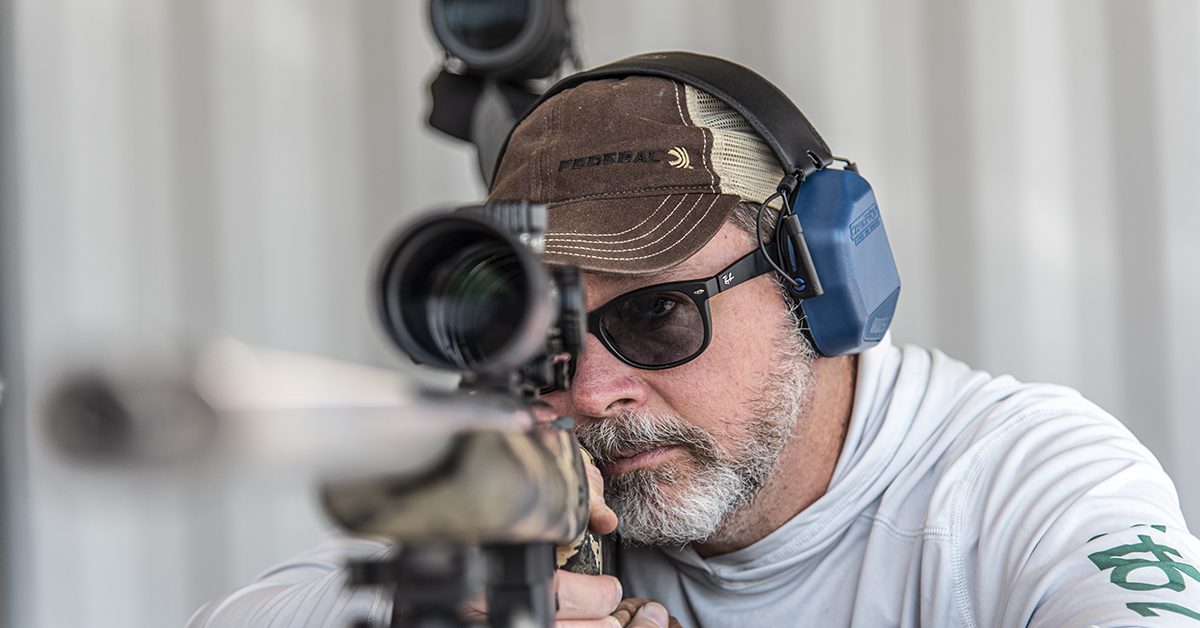
Proper placement of the shooters cheek against the stock should be firm and consistent from shot to shot. Firm, consistent contact between the cheek and stock serves to keep the aiming eye centered in the scope and from moving out of position during recoil. The head should remain erect to allow the aiming eye to look straight through the scope. Whether hunter or competitor, iron sights or scope, if you shoot, there is no escaping the fundamentals of marksmanship.
Reticle
Reticles come in many different styles. Thin lines easily get lost in the woods amongst the trees and brush, especially in low light. Thus, heavy duplex-style reticles (combining thick and thin crosshair lines) are a good choice for hunters. Illuminated reticles are also worth consideration for low-light conditions.

For general purpose use, it is arguably best to avoid the more complicated reticles unless you truly need them for long-range target shooting or you are willing to dedicate yourself to learning how to use them quickly and effectively in field settings. These include rifle scopes with features such as hold-over and wind drift compensation points and optics with integrated rangefinders.
Field of View
Field of view is the area you see as you look through your scope. It is an often overlooked, yet important characteristic of the scope.
Game animals are typically on the move, and they don’t always present themselves in wide-open terrain. The larger the scope’s field of view, the more easily it will be to quickly acquire your target. This is especially true in heavy cover.

The field of view is usually stated by scope manufacturers as the area that you see through the scope, in feet, at a distance of 100 yards. As magnification goes up, the field of view goes down. One scope with a 4x magnification may, for instance, have a field of view of 24 feet. At 6x, this drops to 17.3 feet. At 16x, you’ll be looking at an area of about seven feet. Hunters with variable power scopes have long been advised to set their scopes at the lowest power setting when still hunting to quickly obtain a sight picture when spotting game. Should more magnification then be necessary, it is easy enough to “dial up” once the target is in view.
Eye Relief
Eye relief is the distance the eye needs to be placed behind the scope in order to see a full field of view. Eye relief is directly related to magnification. As magnification goes up, eye relief goes down.
The scope should be positioned on the rifle so that when you shoulder the rifle and achieve a comfortable cheek weld, the scope presents a full field of view instantaneously with no need to move your head about the stock in order to acquire it.
This is simple enough when using a fixed-power scope because the eye relief will always be the same. This characteristic also lends itself to good marksmanship since it allows you to always have a consistent stock weld.
The eye relief of variable power scopes will, of course, vary according to the power setting. Thus, it will require you to slightly adjust your stock weld to obtain a full field of view. How much variance is dependent upon the power range of the scope. Take a Leupold VX-Freedom 3-9x40mm. This scope has an eye relief of 4.2 inches on 3x and 3.7 inches when set to 9x, which means you’ll be adjusting your stock weld by half an inch across its range of magnification. A VX-Freedom 4-12x40mm scope will require 1.2 inches of change in your stock weld.
Because of this variance, it is recommended when mounting a variable scope to place it on its lowest power setting. Next, position the scope on the rifle so that when you shoulder the rifle the scope instantly presents a full field of view. This method allows you to quickly take advantage of the largest field of view offered by your scope, which is desirable should you need to make a quick shot on game.

As with most everything else in life, there is no free lunch. This is true with rifle scopes as well. Increase magnification and you’re going to have to give up some field of view and eye relief. Large objective lenses are going to require high mounting. Variable power is going to require a variable stock weld to go with it.
When it comes to putting this all together and making the final decision on what scope to purchase, my advice is this: take into consideration the terrain that you hunt, the average shot distance you’ll most likely be taking, and the size of the quarry. Then think of the scope that meets these needs and that lends itself towards good marksmanship characteristics, such as low mounting. This will set you up for success in most of the hunting situations that you expect to encounter while keeping you from spending extra money for an encounter that may never happen.