We put a bow on our exhaustive reloading series with a final test and comparison of our load workup
by Lou Patrick
Those of you who have been riding along on this journey are finally coming to the end of the trail. Along the way, you have been introduced to the fundamentals of reloading tools, materials, and theory of reloading and have witnessed the application of the same through real-world testing. If you are only now joining us and would like to start your own journey through the world of reloading, check out the series links at the end of this article.
We left off in Part 11 of this series having determined that the following load was safe and worthy of further testing.

This load produced a three-shot velocity average of 2830 fps, which is 12 fps slower than our target velocity of 2842 fps produced by the Hornady factory load. Getting the velocity of a reload to match precisely the velocity of a factory load can be a rather daunting task. Fortunately for the reloader, this is not a necessity. For our purposes in this reloading series, it has been my goal to get the velocity of the reloaded ammunition as close to that of the factory load as possible. The reason for this is to simply provide for a more apples-to-apples comparison following the ammunition test.
We currently have a 12 fps difference in velocity, which is really not much of a difference. We must also consider the fact that our reload velocity is currently from a 3-shot sample, which isn’t large enough to firmly establish the velocity of this load. With this in mind, we enter the ammunition testing with one of the questions being, “Will a 20-shot group produce a slower or higher velocity average as compared to the previous three shot sample?”

During the pressure testing phase in Part 11 of this series, this load produced the 3-shot group measuring .290 inches pictured above left. During the factory ammunition test, the factory load produced the .983-inch group pictured above right. Naturally, we are going to the range with high expectations concerning the accuracy of this load.
A word of caution. It is wise to temper expectations a little, as thus far (Part 11) we have only fired 3-shot groups with this load. We enter this test knowing that the load is safe, and while we may have high expectations concerning its accuracy, at this time, we truly know very little to nothing concerning the accuracy of this load. The only way to know is through further testing.
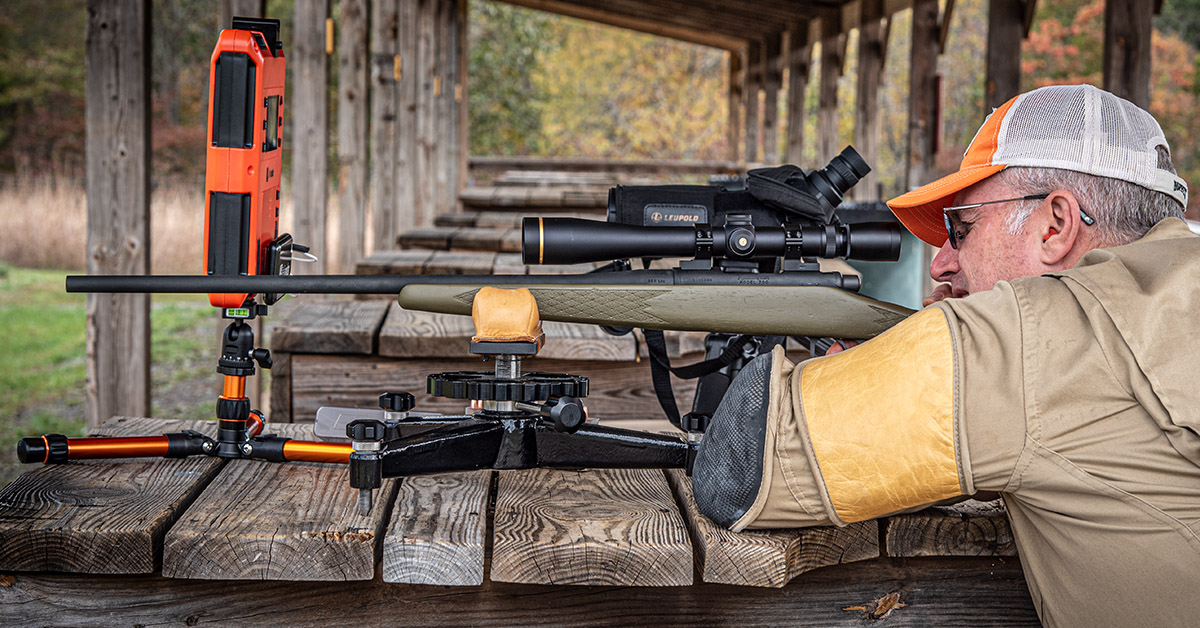
Now the rubber meets the proverbial road. We will soon find out if our reloads can outperform the Hornady factory load. The accuracy test will be conducted using the same methodology as used when conducting the factory ammunition test performed in Part 5.
Test Procedure
- Twenty-one rounds of reloaded ammunition are used.
- Five targets are stacked one atop the other and placed on the left side of the target backer. One target is placed on the right side of the target backer.
- The first shot from the cold, clean barrel is fired at the target on the right.
- A 3-shot group is fired on the target stack on the left. The top target containing the three-shot group is then removed.
- Two shots are then fired on the target stack, producing a 5-shot group. The top target is removed.
- Five shots are then fired on the target stack, producing a 10-shot group. The top target is removed.
- Five shots are then fired on the target stack, producing a 15-shot group. The top target is removed.
- Finally, five shots are fired on the remaining target, producing a twenty-shot group. This is the final target.
- Chronograph (optional) data is collected while firing the 20-shot group.
- The barrel is allowed to cool while the top target is being removed.
- The barrel is not cleaned during this test.
- Scope adjustments are not made during this test.
- Point-of-aim is always at the center of the target.
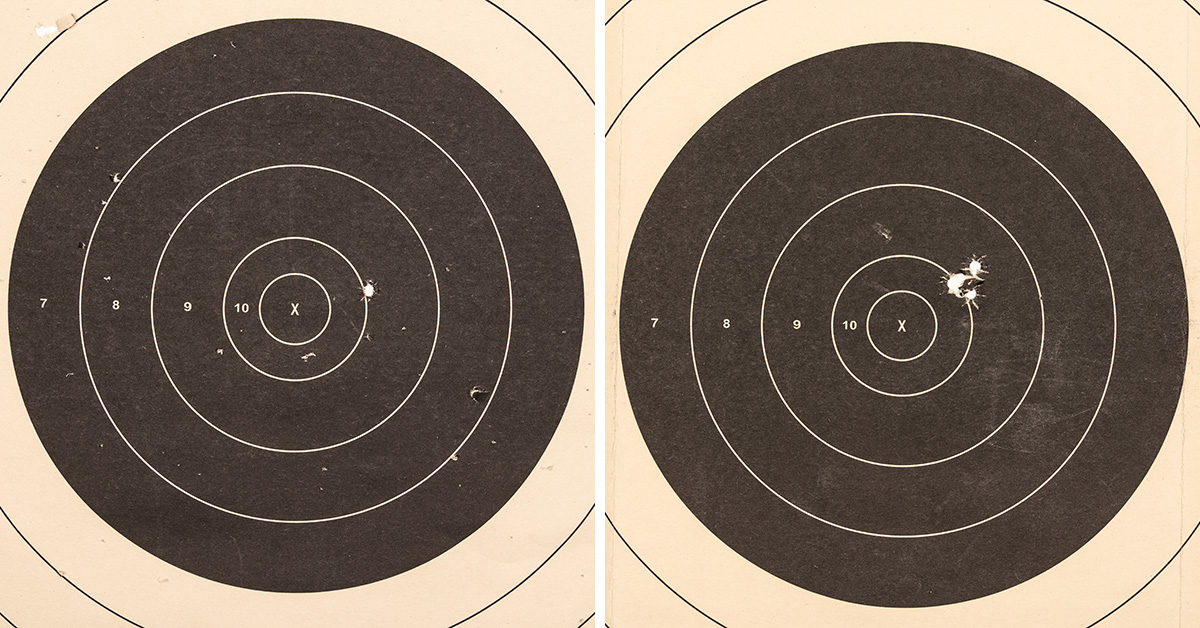
The first shot from a cold, clean barrel is pictured above left. Pictured above right is the 3-shot group (measuring .290) fired using this load during the pressure test that was performed in Part 11. Look closely at the position of each group on the targets. The first shot from a cold, clean barrel has impacted the target where we would expect it to, perhaps just a little lower than the previous shots fired with this load.
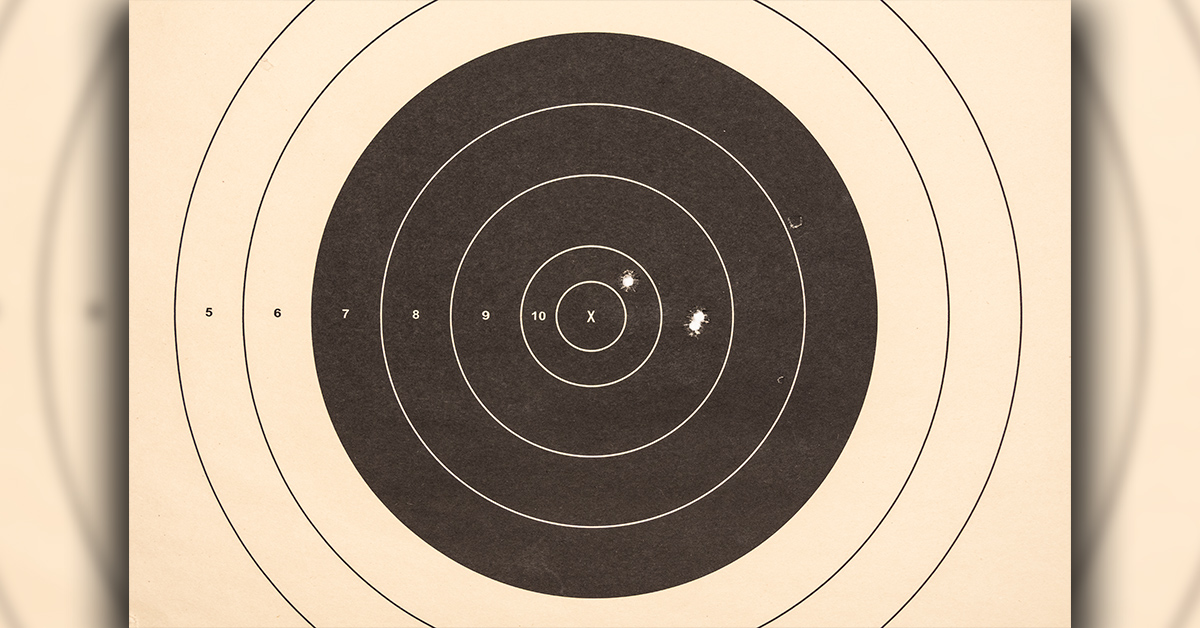
UH-OH! Something must be wrong! After all, this load fired a .290 group during the pressure test and here we are with the first three shots of our ammunition test producing this .963-inch group. Actually, all the groups fired with this powder during the pressure test were much smaller than this .963-inch bubble burster. With two of the shots being low and to the right of the previous point of impact of around 1-2 o’clock of the 10-ring, something must be wrong, but what?
When you experience something like this, relax. As mentioned earlier in this series, you must trust your marksmanship, rifle, equipment, and now your reloads. Firing a much smaller group with this load during the pressure test was no accident and it had nothing to do with the alignment of the stars. Nor does the current larger group immediately indicate that something has gone awry. Three-shot groups simply do not provide enough information to allow you to draw any reliable conclusions.
But why is the group much larger now? Remember the shot dispersion discussion from Part 4? We are not shooting laser beams, nor is this a high-end custom rifle sporting a heavy contour, cut-rifled barrel. What we are most likely experiencing here is within the normal shot dispersion for this rifle when firing this particular load. The previous 3-shot samples were simply not large enough to reveal it. Now that we have fired it more, this 3-shot group is beginning to show more of the true accuracy of this load being fired from this rifle. As we continue firing the 20-shot group, we will have a better picture of the true performance of this rifle and load combination.

Despite the bubble-bursting size of our 3-shot group, the accuracy test continues. The top target containing the 3-shot group was removed. During this time, the barrel was allowed to cool. Two shots were then fired, producing this 5-shot group. These two shots impacted the target within the previously established 3-shot group. Rather than immediately thinking something was wrong and perhaps becoming a little discouraged and/or frustrated, all we needed to do was to keep shooting. Both shots impacted the target much closer to the expected point-of-impact at around 1-2 o’clock on the 10-ring.
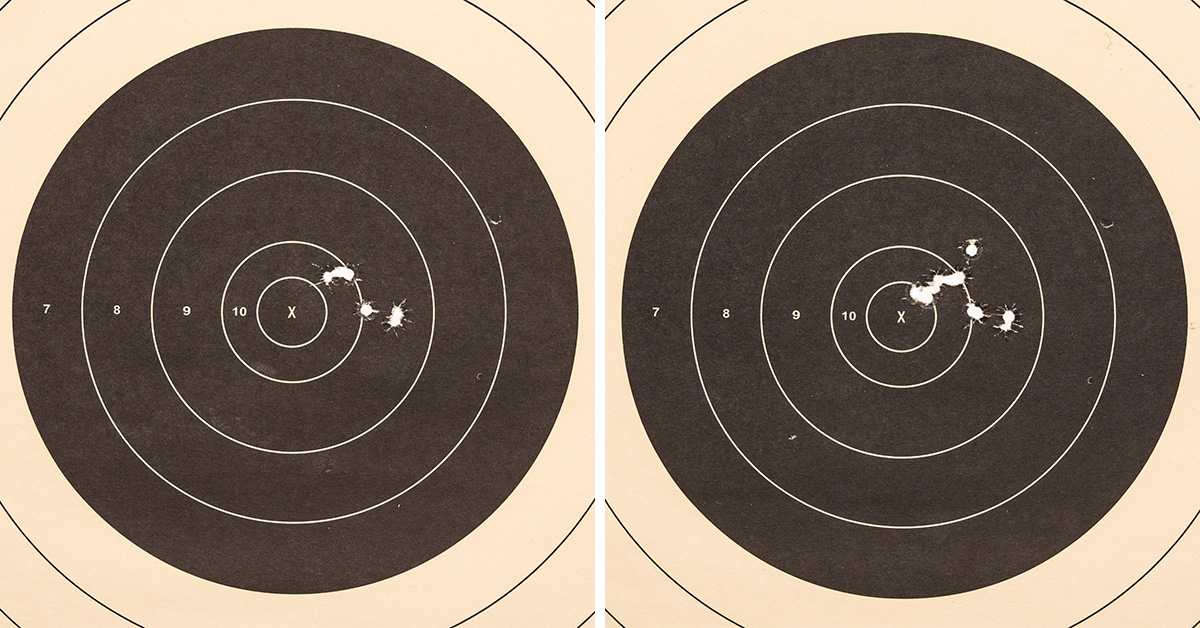
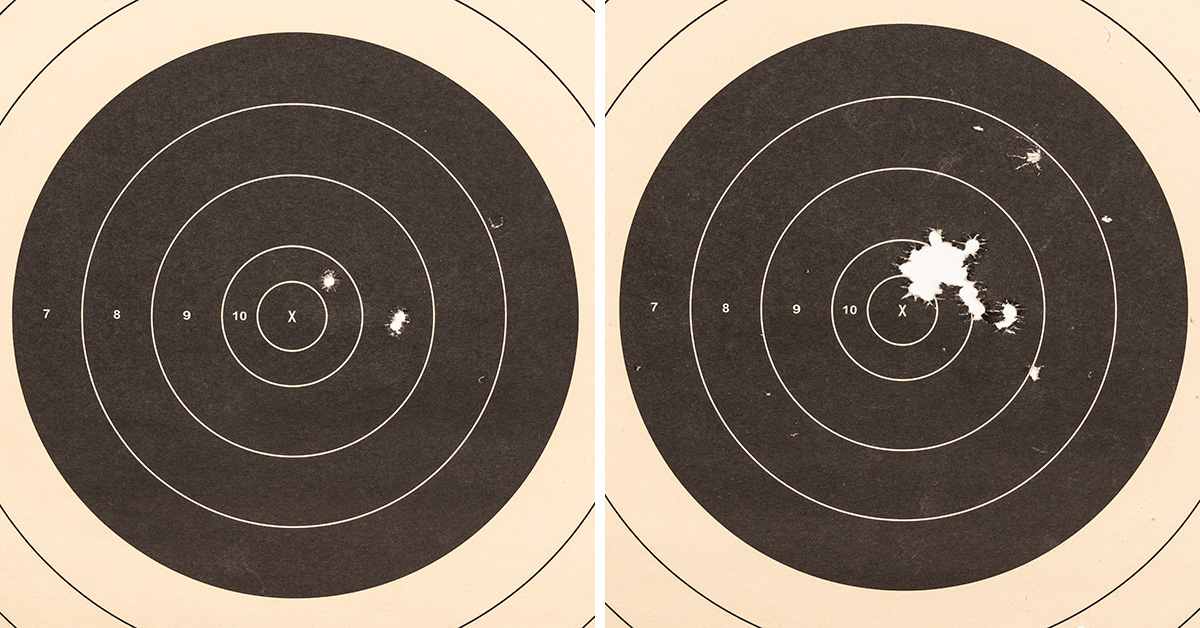
The target containing the 5-shot group is pictured above left. Five additional shots were fired to produce the 10-shot group pictured above right. Look closely at the 10-shot group. One round went a little high and right, with the remaining four shots going into the “main” group being established at about 1 o’clock of the X-ring. The two shots low and to the right are from the first 3-shot group.
Five shots were then fired, producing this 15-shot group. All five rounds impacted within the “main” group being formed just above and slightly to the right of the X-ring. Remember, this all started with a rather unimpressive 3-shot group measuring .963 inches. The “main” group now contains 13 rounds and measures .818. Overall group size is currently 1.371 inches. That’s 15 shots from a lightweight hunting rifle within 1 3/8 inches.
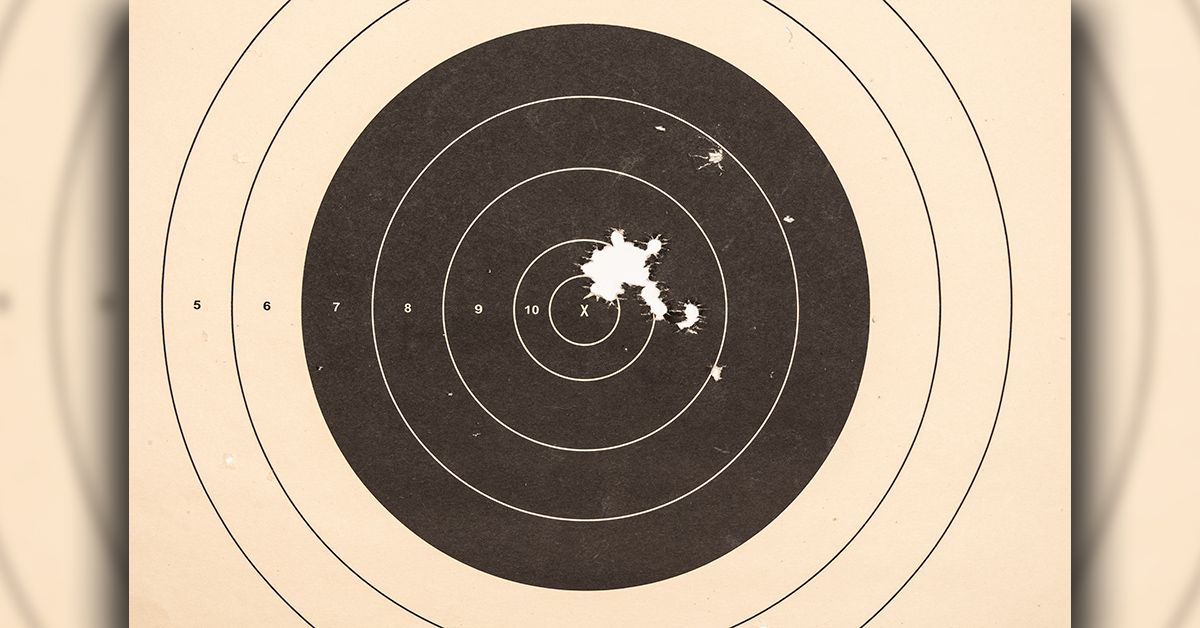
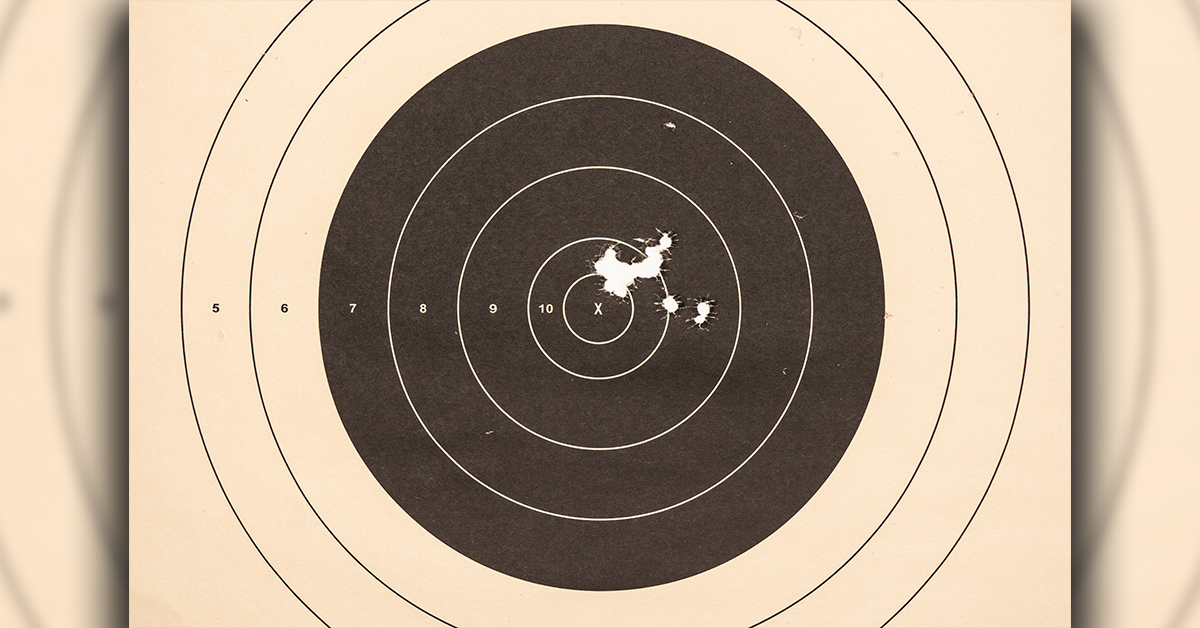
Five shots were then fired, producing this 20-shot group. All five rounds fell within the main group that formed just above and to the right of the X-ring. The overall group size did grow somewhat and is now 1.407 inches. That’s 20 shots within 1 1/2 inches at 100 yards. The Hornady factory load produced a 1.821 group during the factory ammunition test in Part 5. Our reloads, using the same Hornady bullets and brass, have produced a group that is .414 inches smaller.

The target on the left is the 20-shot group produced during the factory ammunition test. The target on the right is the 20-shot group produced using our reloads. Not only is the group size noticeably smaller with our reloads, the “main” group is more circular in shape, with only two rounds not being connected to it.
Looking more closely at the reload target, you can see that two shots (arrow), while connected to the main group, impacted slightly low at around 5 o’clock of the main group. Just to the right of those two shots are the two shots that were low and right that were fired during the initial 3-shot group.
Back to the two shots indicated by the arrow, the lowest of these two was fired producing the 5-shot group, with the higher one being one of the last five rounds fired while producing the 20-shot group.
With the higher shot of these two rounds having been fired much later in the series while producing the 20-shot group, and taking into consideration that this shot, while being somewhat low, does connect with the main body of the group, this leaves us with the three lowest shots having been fired within the first five shots of the test. This can lead you to believe that perhaps barrel fouling or heat, among countless other reasons, caused a shift in bullet impact.
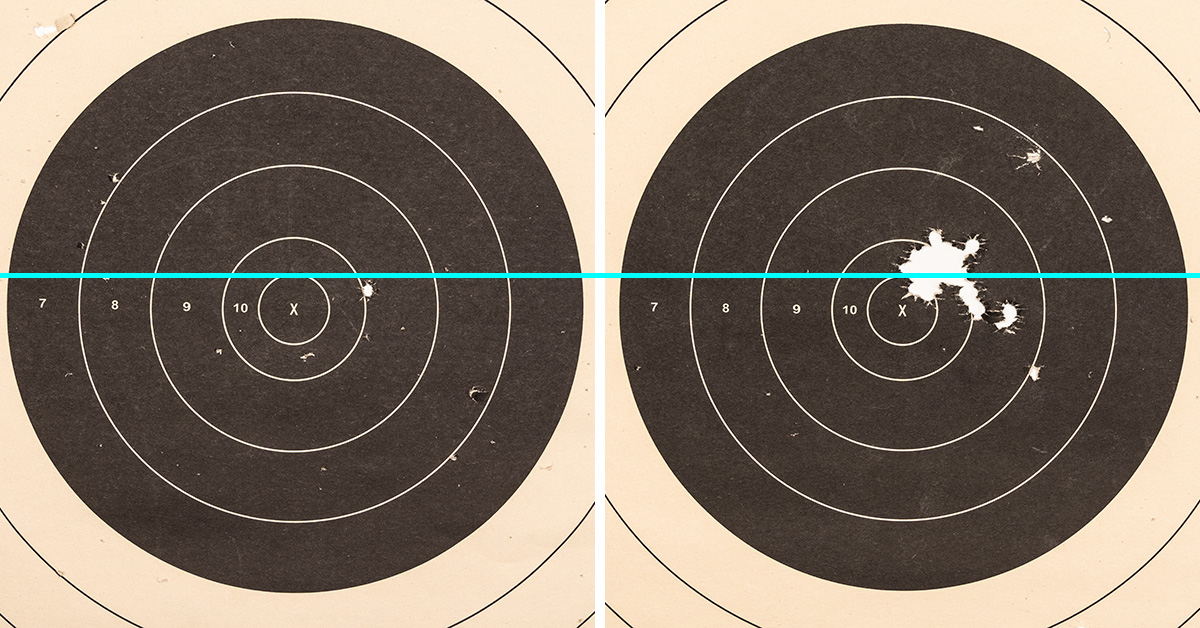
It has been my experience that trying to decipher shot dispersion and to then attach a reason as to why a particular shot impacted the target where it did can be a rather difficult, if not impossible, task. The target pictured above left was the first shot fired from a cold, clean barrel. Follow the line over to the 20-shot group target on the right and you can see that the first shot fired impacted the target in a practically identical location as one of the last 5 shots fired. In my opinion, this illustrates that barrel heat or fouling is probably not the cause as to why some of the bullets impacted the target low and right. Shot dispersion is random. This is why I mentioned earlier in this series that while we strive to minimize shot dispersion, we are also going to have to learn to live with it.
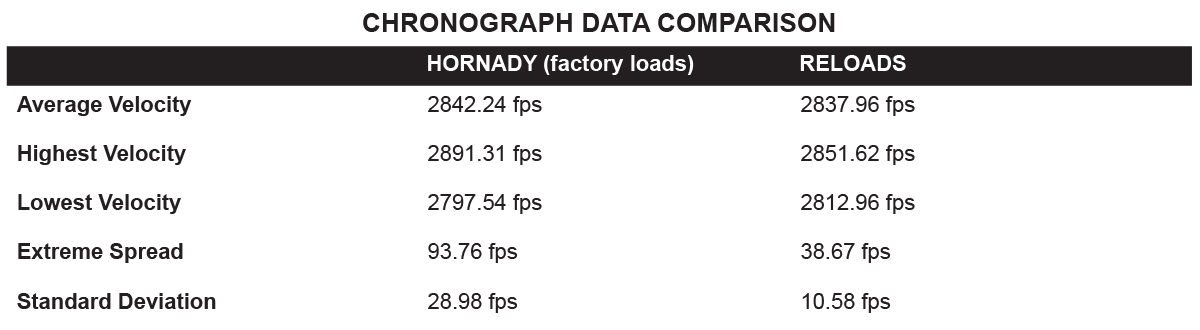
Our chronograph data is now averaged over a 20-shot string, which provides us with much more accurate data as compared to the 3-shot sample used during the pressure test in Part 11. Rounding the numbers off properly, there is only a 4 fps difference in velocity between our reloads and the factory ammunition. Our previous assumption, or hope, that a 20-shot sample would show a slight velocity increase worked in our favor. This is close enough, in my opinion, to call them the same. This provided us with a direct apples-to-apples comparison with the Hornady factory load — same bullet, same brass, same velocity. Our reloads have outperformed the factory ammunition in every category, having cut the standard deviation by almost 2/3rds and shrinking the group size by almost half an inch, and with fewer “fliers.”
Our ammunition test began with a rather unimpressive 3-shot group measuring .963 inches. Often, people will stop here, wondering what is wrong, completely unaware that the load is capable of placing 20-shots in 1.407 inches, with 16 of those shots falling within .818 inches. You’ll never know what you have until you shoot it, and three shots really isn’t enough to know.
Once the test is complete and you return home, be sure to record the results of the test in your Handloaders Log. Do this as soon as you get home while everything is fresh in your mind. Proper record keeping is a key to successful reloading.
Of course, now the question is whether to load a large quantity of this load for hunting and target practice, or can I further enhance the load’s accuracy? For those who wish to wring out a little more accuracy from this load, we should first define the term “load.”
The current load is this:
In my opinion, any change of components means that a new and different load is being created. Further refinement of the current load in an attempt to wring out a little more accuracy dictates that we continue to work with the same identical components. This leaves us with just a couple of things to tinker with to gain a little more accuracy — those being bullet seating depth and powder charge weight.
It has been my experience that changes in bullet seating depth will most likely cause little to no change in the accuracy of this load. After all, the cartridge is currently as long as it can possibly be and still fit in the magazine.
This leaves us with the powder charge weight, which is most likely your greatest chance at producing a little more accuracy from this load.
The current load is rather close to its maximum velocity. Backing off the powder charge weight just a little and slowing this load down may result in a more accurate load. And this is a perfect example of why keeping good records is so important. Looking in our log, we see that during the pressure test, the most accurate 3-shot group was produced with 44.2 grains of powder, with a 3-shot velocity average of 2774 fps producing a group size of .256.
Once the accuracy bug gets you, it gets you. With only a 64 fps difference in velocity, the deer will never feel the difference.
Time to load some more ammo, as I see another ammo test on the horizon.
- Shoot ON Reloading Series Pt. 1
- Shoot ON Reloading Series Pt. 2
- Shoot ON Reloading Series Pt. 3
- Shoot ON Reloading Series Pt. 4
- Shoot ON Reloading Series Pt. 5
- Shoot ON Reloading Series Pt. 6
- Shoot ON Reloading Series Pt. 7
- Shoot ON Reloading Series Pt. 8
- Shoot ON Reloading Series Pt. 9
- Shoot ON Reloading Series Pt. 10
- Shoot ON Reloading Series Pt. 11