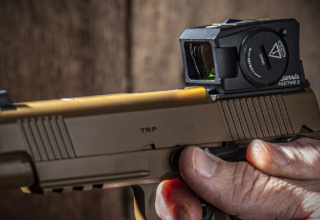
We’ve paid attention to all the small but important reloading details of cartridge preparation. Now it’s time to bring it all together before heading to the test range.
by Lou Patrick
If you’ve been following our extensive reloading series, you know that we’ve covered the basics of ammunition reloading, established baseline performance of factory ammunition, and have taken a deep dive into brass evaluation and preparation. The hard work is now behind us.
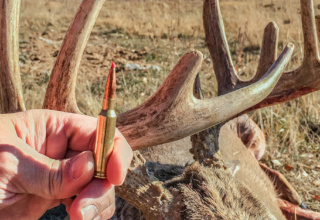
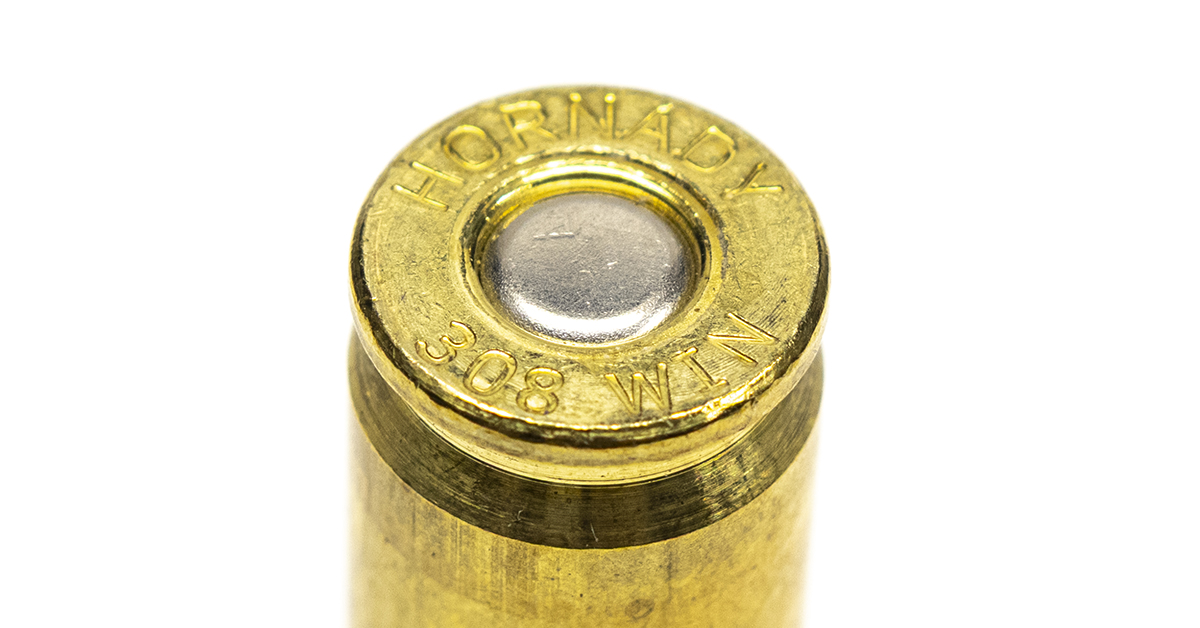
Our once-fired Hornady brass, which we prepped in Part 7 and Part 8 of this series, is ready for reloading. In Part 9, we established the desired overall length of the cartridge. Continuing in Part 9, we produced a few dummy rounds to the desired C.O.L. We then cycled them through the firearm to ensure proper function. Currently, we have our brass prepped and our bullet seating die properly adjusted. At this stage of the process, the mechanics of reloading are actually quite easy and can move along rather quickly and seamlessly.
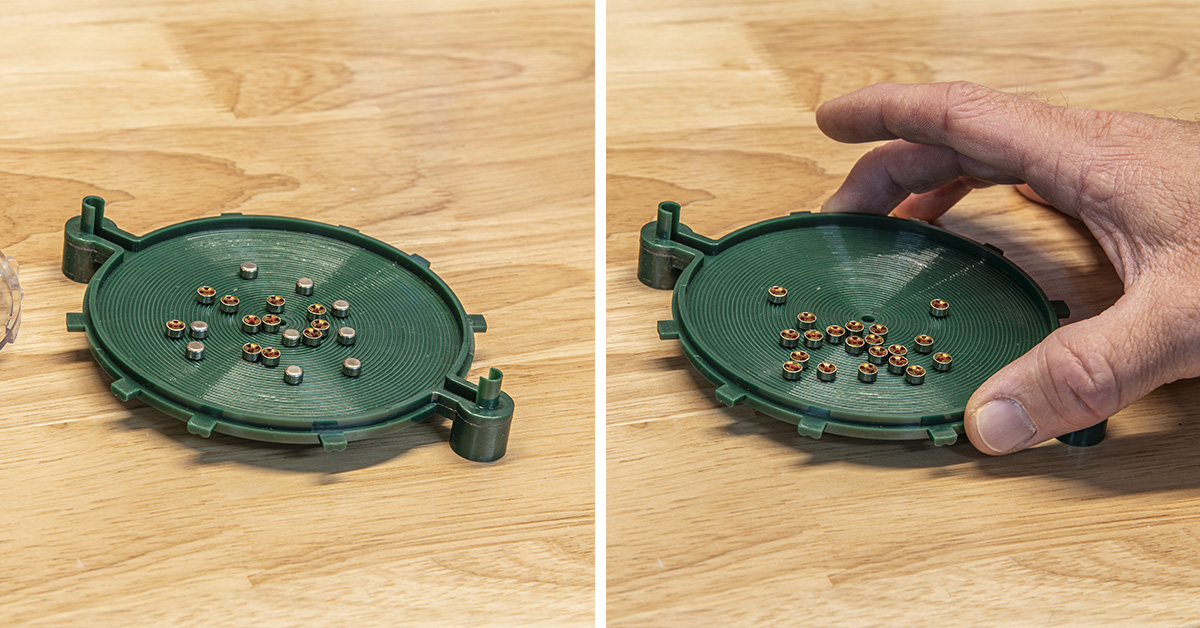
The process of assembling a loaded cartridge begins by placing the required number of primers on a primer tray. In loading the tray, you can see that some primers have the anvil side up while others have the cup side up. Gently shaking the primer tray will orient the primers to the desired anvil-up position. This makes the reloading process much easier since the primers are placed individually into the priming ram of the reloading press with the anvil side up.
Primer installation is usually accomplished with the use of a hand priming tool or with the reloading press. Regardless of which tool you use, primer installation is generally accomplished by “feel,” meaning that you will press the primer into the primer pocket until you feel the primer bottom out within the primer pocket. There are a few advantages to using the handheld priming tool. This tool combines the primer tray and priming tool into one easily operated unit. It also eliminates the handling of each primer individually, greatly speeding up the priming process.
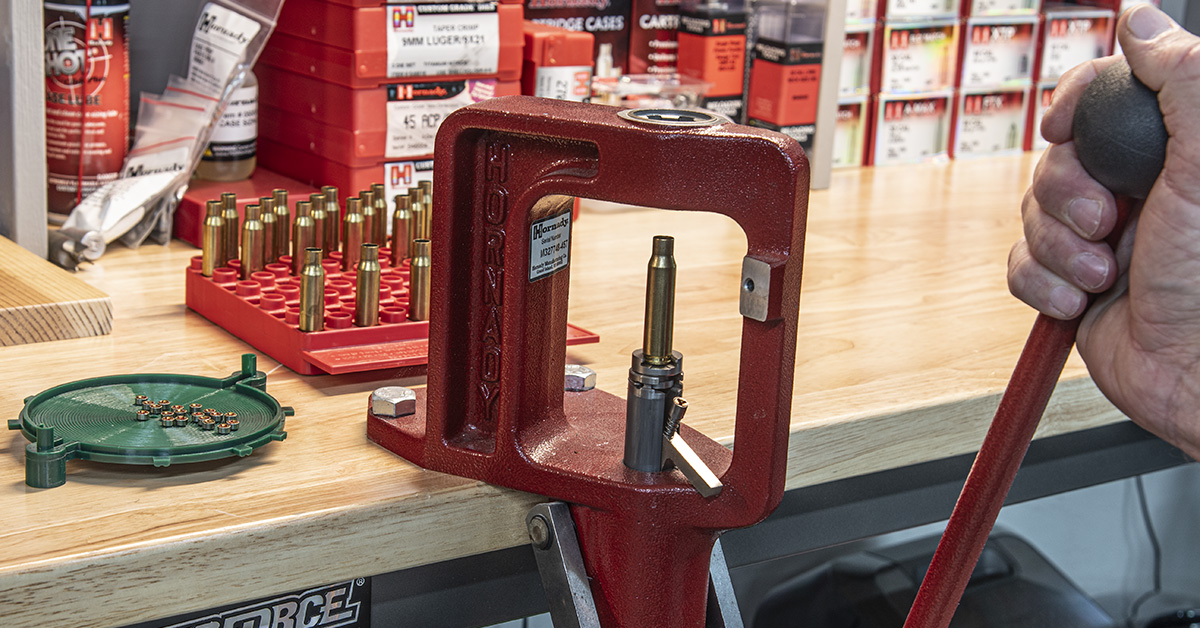
While the hand priming tools are a little faster and do provide a little more “feel” to the priming operation, I still prefer to prime cases with the reloading press. The primer is placed into the priming ram anvil side up. The priming ram is then rotated into position. As the case is lowered, you will feel the primer being pressed into the primer pocket, soon followed by a firm stop. Once you feel the primer come to a firm stop within the primer pocket, stop applying pressure, raise the cartridge case, and remove it from the shell holder.
Primer installation is performed very much by feel. Fortunately, it doesn’t take long to develop the proper touch. When properly installed, the new primer will be even with or slightly below the cartridge case head.
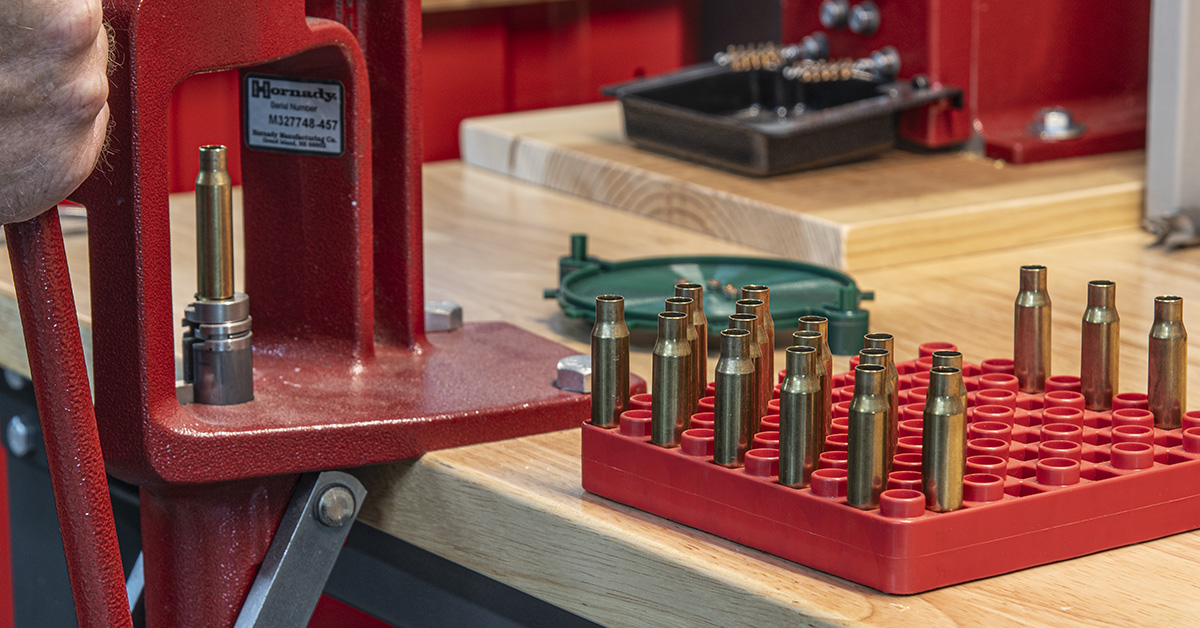
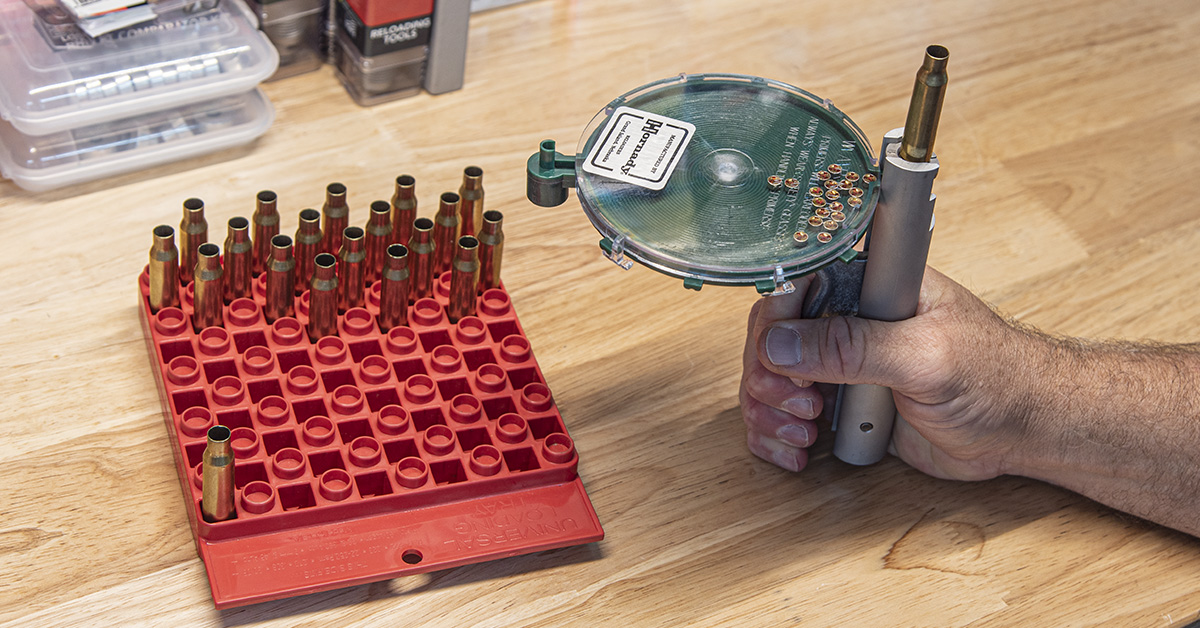
Remember, the loading block helps you to keep track of your work. As each case is primed, move it forward in the loading block. For the purposes of this article, we are loading twenty rounds. All 20 will be primed before moving on to the next step in the process.
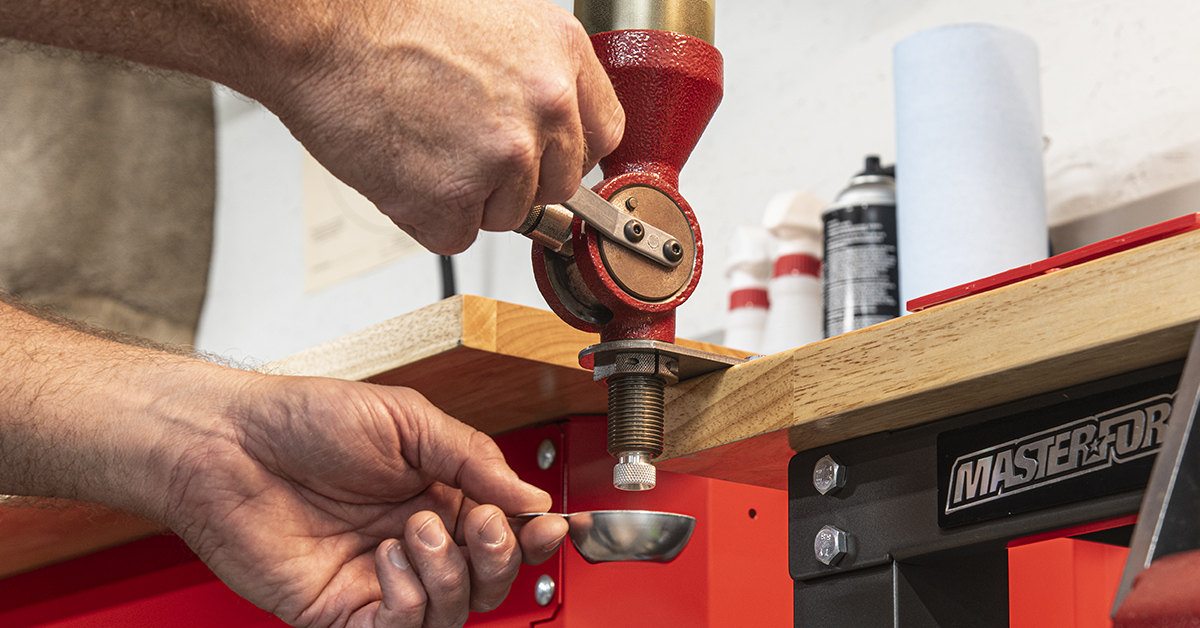
Currently, the cartridges we are loading are untested; we are in an experimental phase of load development. As such, it is my preference to use a balance beam scale to weigh each powder charge prior to placing it in the cartridge case. The goal is to have each powder charge of an identical weight. It is my opinion that the old tried and true balance beam scale is the best way to accomplish this. I begin this process using a powder measure. The Hornady Lock-n-Load Powder Measure meters the powder by volume. The powder measure is adjusted to meter (throw) a charge of powder that is somewhat lighter than the desired weight. The scale’s powder pan is held directly below and in contact with the powder measure drop tube. After the powder is dispensed, the powder pan is carefully removed from the drop tube.
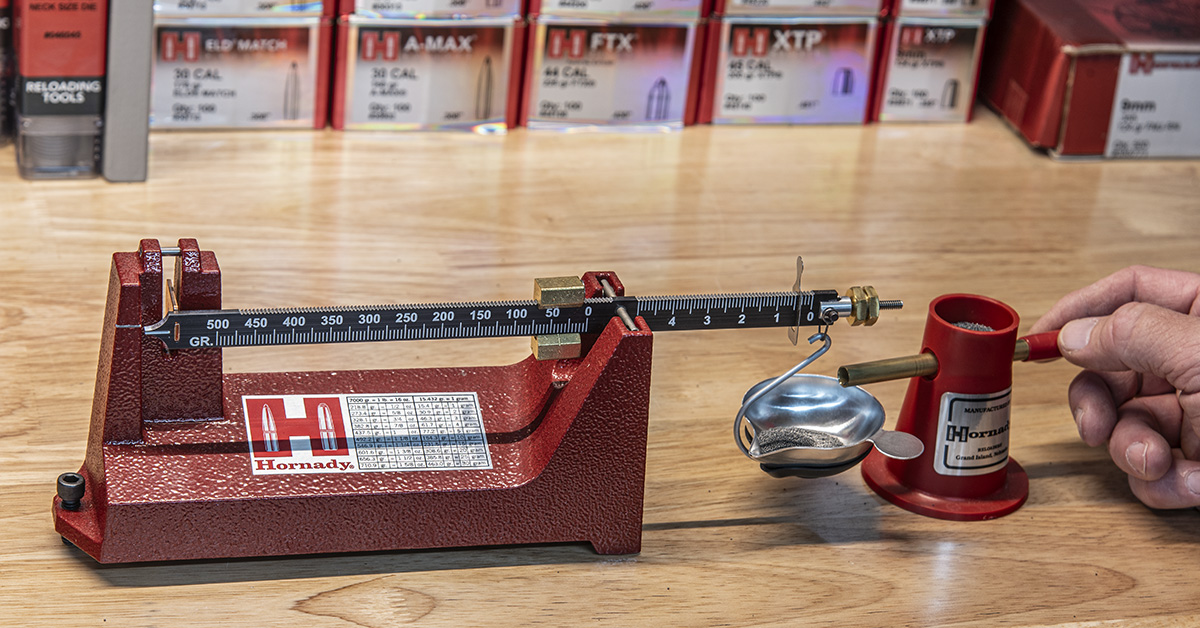
The powder pan is then placed on the powder scale and slowly brought up to the desired weight by use of the powder trickler. Careful operation of the powder trickler will allow you to drop one kernel of powder at a time. Keep in mind that our goal during this experimental phase of load development is to have each powder charge weigh the same, not reloading speed.
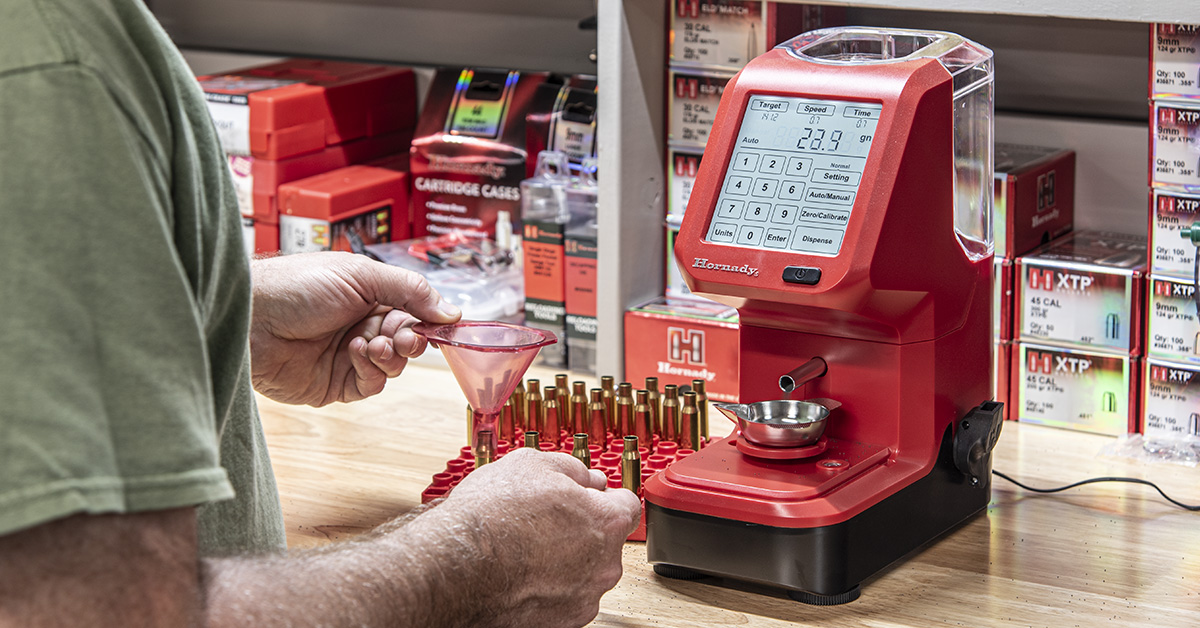
Powder metering/weighing has certainly changed a lot since I began reloading. I’ll readily admit that I may be somewhat set in my ways of doing things. While the Hornady Auto Charge Pro is not my preference for use during this experimental phase of load development, it will work perfectly fine. Its use will most likely make the process easier and faster.
Once you have the desired weight of powder, place the powder funnel over the cartridge case and dump the powder into the case. I don’t know that it is necessary, but I will tap the side of the case a few times to ensure that the powder has settled into the case. Once a case is charged with powder, move it forward in the reloading block. Charge each case with powder before moving on to bullet seating.

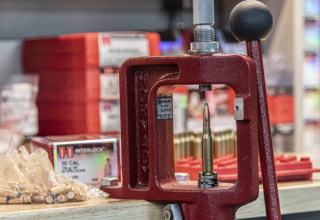
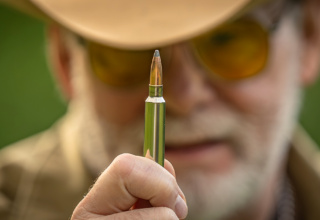
Having previously made a few dummy rounds to our desired C.O.L in Part 9, bullet seating will move along rather quickly. My advice is to not seat all the bullets consecutively, but rather to seat a bullet and then measure the cartridge’s overall length to ensure that it is correct. The goal here is not speed, but to have all the cartridges loaded to the same C.O.L.
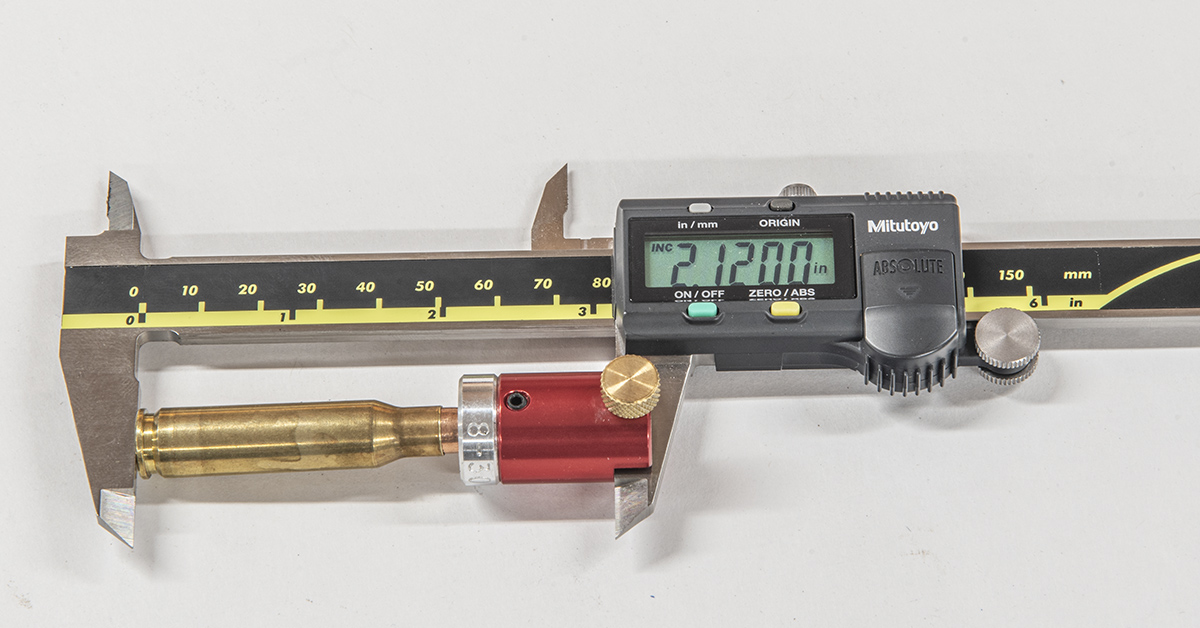
Once you have verified the overall length of the cartridge, place it in the forward end of the reloading block and repeat this process until all the cartridges are loaded. Easy enough, right? Well, it is, kinda. The mechanics of reloading a metallic cartridge are straight forward and easy to perform.
This is where the “kinda” part of my previous statement comes into play. Often during my gunsmithing career, I have encountered people new to reloading and full of enthusiasm. They go about purchasing their equipment, setting up the reloading bench, and instead of taking the time to read through the reloading manual, they go directly to the load data page and in the blink of eye they are weighing powder and seating bullets. Once the ammo is loaded, then it’s off to the range with visions of one-hole groups dancing in their heads. Unfortunately, the success rate of this hurry up and reload method is rather low. Once the shooting begins, the visions of one-hole groups vanish rather quickly and they are left scratching their heads wondering why their “custom reloads” are performing far worse than factory ammunition.
Provided that the firearm and shooting gear is up to the task as described in Part 1 of this series, the answer to most problems likely concerns the selection of the reloading components.
In this series, we are reloading .308 Winchester ammunition using a 150-grain bullet. If you were to follow this “hurry up and load” method, you would turn to the .308 Winchester 150-grain load data page.
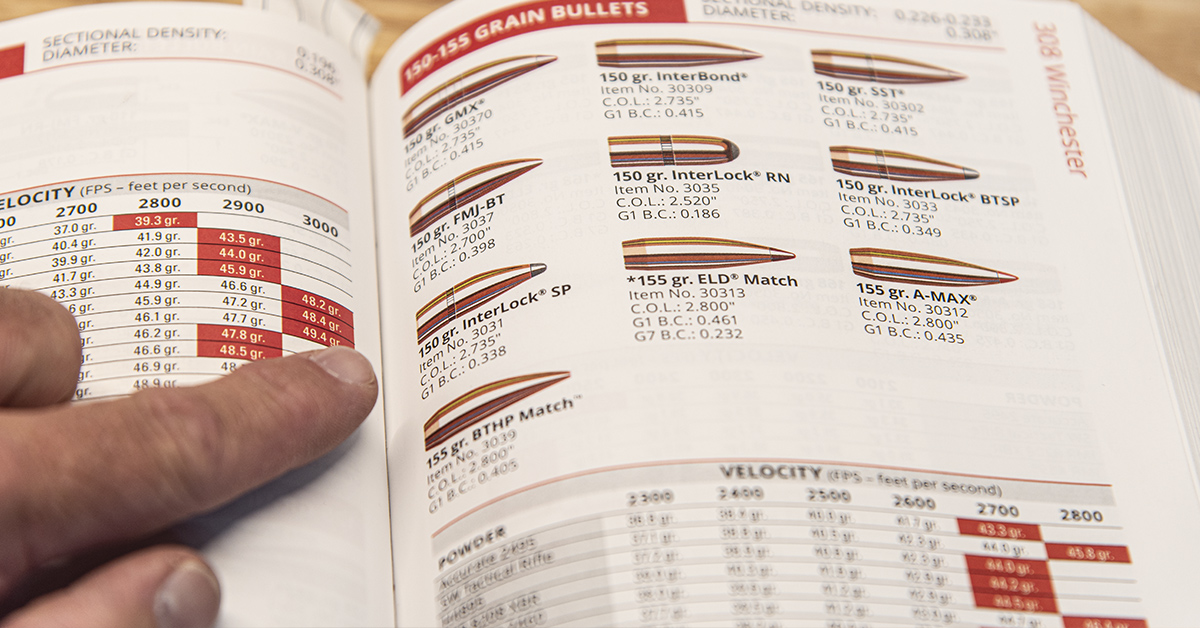
Pictured is the top half of that page containing the various .30 caliber 150-grain bullets that Hornady manufactures. These bullets are grouped together by bullet weight, as the weight of the bullet is one of the factors that determines the powder type and charge weight found on the bottom half of the page. Bullet selection is ultimately driven by its intended purpose combined with the rifling’s rate of twist. That is because the rifling must be able to stabilize a given bullet weight. The ten different bullets seen here differ from one another. Many of these differences involve aerodynamics that are primarily meant to enhance velocity retention when fired over long distances. In my opinion, when shooting within 300 yards, these differences can be rather insignificant.
Consider the following data with a 100-yard zero and a muzzle velocity of 2800 fps.

From an accuracy standpoint — while also taking into consideration that the ammunition will most likely be tested at 100 yards — these bullets will perform satisfactorily. Of course, some will shoot better than others, but at 100 yards, if your ammunition isn’t performing satisfactorily, the problem most likely lies somewhere else and not with the bullet.
More information on bullet selection can be found starting on page 102 of the 11th Edition of Hornady’s reloading manual. For an interesting educational diversion on how bullets are made, check out this Hornady podcast:
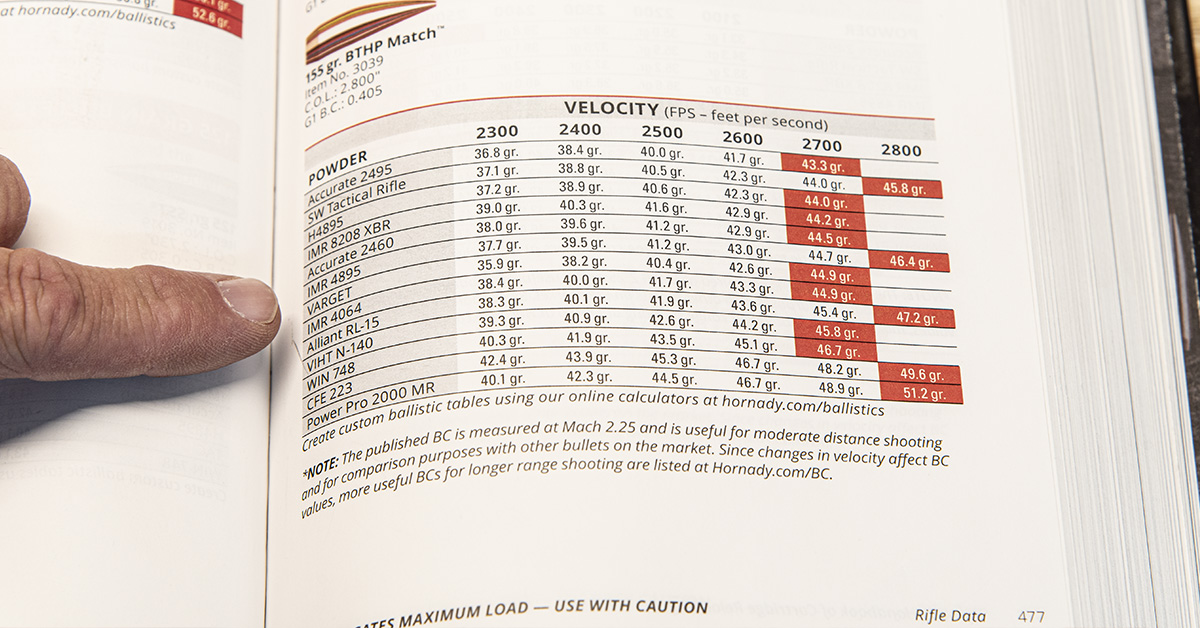
Looking at the bottom half of the reloading data page, you will see the different powders that were used during Hornady’s testing. Powder type is listed in a vertical column on the left side of the page with the powder being organized by burn rate. The fastest burning powder tested is listed at the top of the column. As you read down the column, each powder listed is of a somewhat slower burn rate, with the last powder listed being the slowest burning powder tested. Reading across the chart, you see the various powder weights tested and the velocities achieved with that particular charge weight. Yes, the maximum charge weights listed are considered maximum and should not be exceeded.
It is my opinion that powder selection is probably the greatest obstacle to overcome for the rookie reloader wanting to reload accurate ammunition. From a safety standpoint, this load data can certainly be considered safe, but when it comes to accuracy, with each one of these powders being of a different burn rate, you can expect that they are not all going to perform the same when fired out of your rifle.
Modern smokeless powder is not an explosive, it’s a propellent. It is the controlled burning of the powder that builds pressure — a lot of pressure — extremely fast. The burn rate of the powder will determine how quickly or comparatively slowly this pressure builds. How your rifle’s barrel responds to these pressure differences has a direct impact on accuracy. Select new match grade cases, bullets, and primers and then choose the wrong powder and your accuracy will suffer greatly.
My advice to those making their first powder choice is to look at the published powder list. Varget is directly in the middle, with IMR4895 directly above and IMR 4064 directly below. This is as a good a place as any to start; however, there are some other things to consider first.
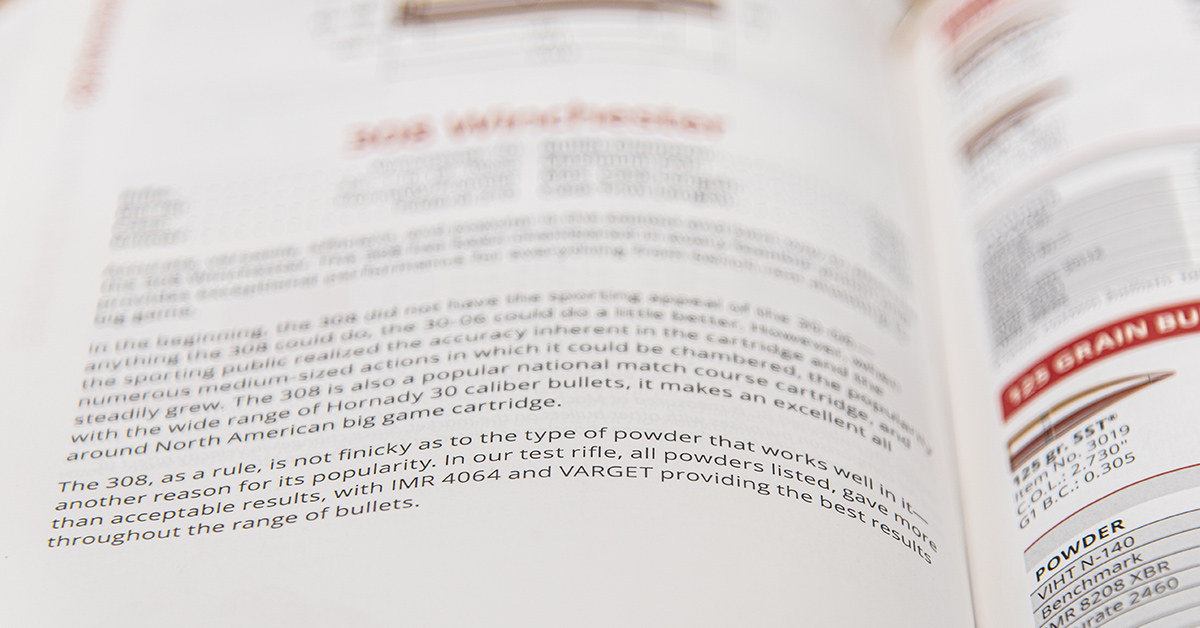
There is an introductory page for each cartridge that is listed in the Hornady manual. Prior to reloading, you should read this introductory page, as it contains valuable information concerning the tests that were performed by Hornady. This allows you to draw some comparisons from what Hornady has tested as compared to what you are doing.
For example, the rifle used by Hornady had a 22-inch barrel. Our test rifle has a 24-inch barrel. The longer barrel on our rifle should provide for a slight velocity increase as compared to the shorter barrel used by Hornady. The last paragraph on this page provides us with some guidance concerning powder selection, stating that IMR 4064 and Varget provided the best results throughout the range of bullets. Oddly enough, Varget was directly in the center of the burn rate list of powders tested, with IMR 4064 being the next slowest in burn rate tested.
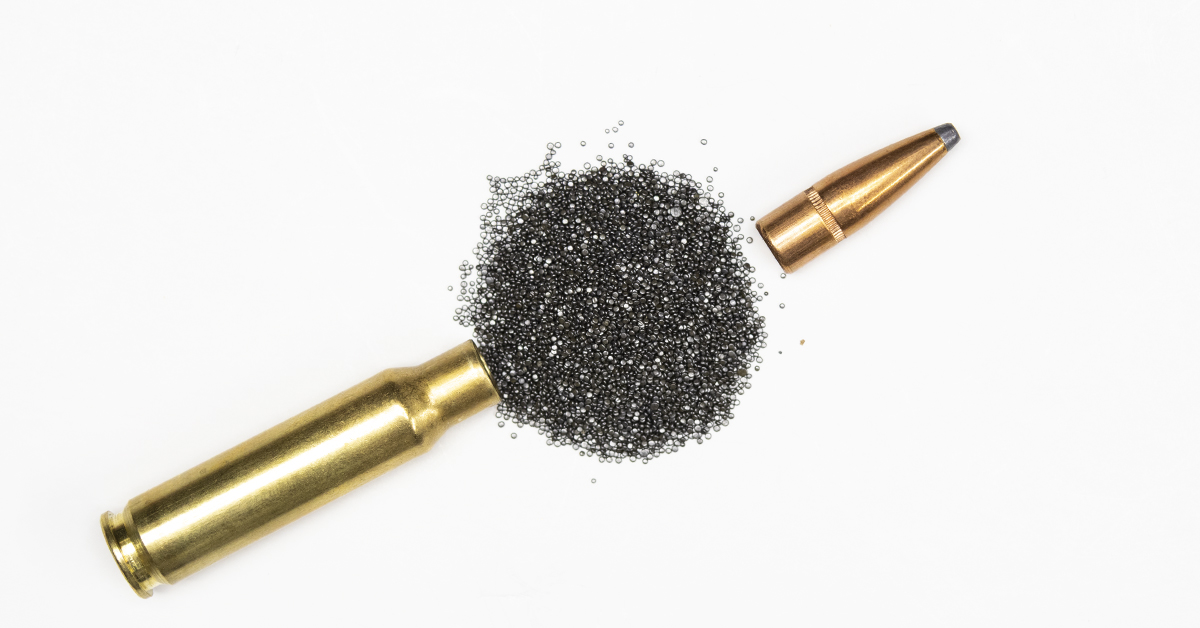
When working on a project such as this, with the goal of increasing accuracy over a factory round, we have a known standard from which to begin our work. The factory load fired a 20-shot group measuring 1.821 inches. We also made a comparison of the factory load’s C.O.L. with the C.O.L. that we established for our reload in Part 9. Before I decide on which powder to use, I can’t help but be curious as to what type of powder Hornady used. I am only concerned with the shape of the individual powder kernels, as powder kernels come in a variety of shapes to include extruded or tubular, diamond shaped flat flakes, circular flat flakes, and ball or spherical powder.
Pictured above is a Hornady American Whitetail cartridge with the bullet pulled. You can see that the individual powder kernels are spherical or ball shaped. This, of course, shows us that Hornady used a ball powder. I do not know which ball powder was used, nor did I weigh the powder charge. My only concern is that of powder shape.
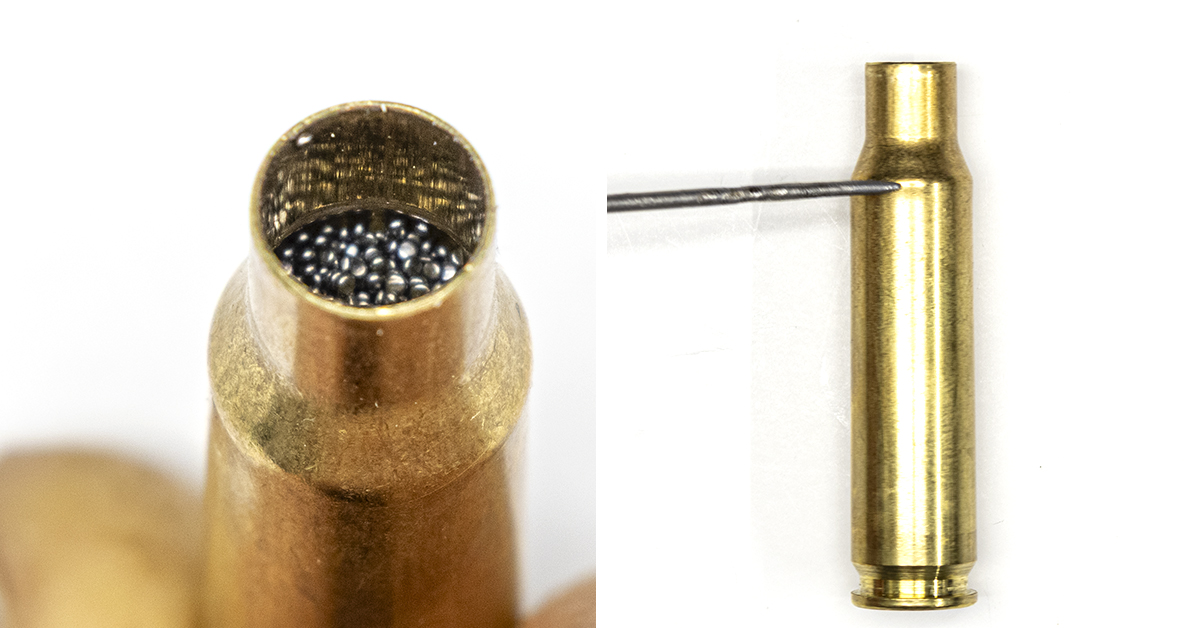
Placing the powder back into the case, you can easily see that it did not entirely fill the case. The powder level is just below the shoulder of the case (right). This is important to know because rifle cartridges tend to be more accurate when the powder fills the case. NO…this does not mean you should add more powder until the case is full! This information is simply used as a guide in our powder selection.
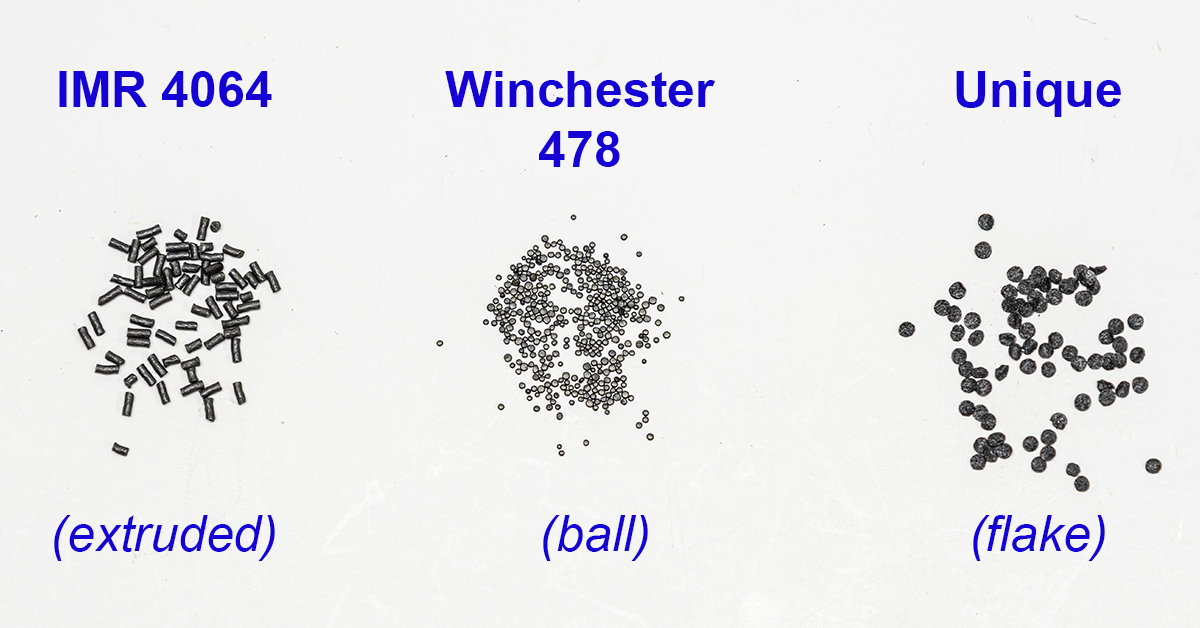
The individual kernel size and shape of the powder will directly influence how well it fills the cartridge case. Looking at the picture above, IMR 4064, having the larger extruded kernel, will fill the case more completely as compared to the smaller ball shaped kernels used to produce the Winchester 748 powder. Unique is NOT suitable for use in the .308 Winchester cartridge. This powder is used for handguns and shotguns. It is pictured here only to illustrate the appearance of a flake powder.
IMR 4064 and Varget are both extruded powders and both stated by Hornady as producing good results in their tests. It has been my experience that, when reloading cartridges with a case size of the .308 Winchester or larger, extruded powders tend to perform better since they fill the case more completely. For cases smaller than the .308 Winchester, ball powders tend to perform well. The key here is that I’m speaking of tendencies…not absolutes. Staying within the parameters of our current example, it is my advice to those buying their first pound of powder to purchase Varget. If Varget is unavailable, the next choice is a tie between IMR4064 or IMR4895.
Here’s an interesting and entertaining vintage film from Hornady wherein Joyce Hornady, around the 6:37 mark, illustrates the burn differences between black powder and today’s smokeless powder:
And for a deep dive into modern smokeless powders, this podcast is worth your time:
More information concerning powder burn rate can be found on page 38 of the 11th Edition of the Hornady manual.
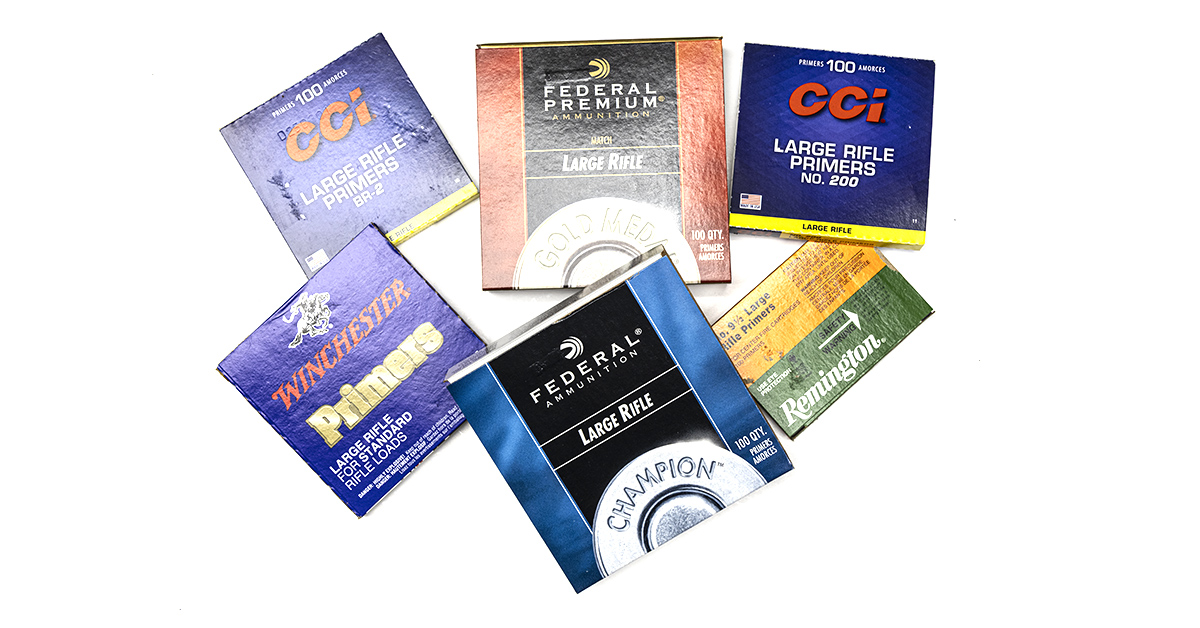
Primers are available from a variety of manufacturers. They also come in different sizes, magnum vs, standard, as well as match primers that are said to provide a higher level of consistency. Page 36 of the Hornady manual provides a primer application chart.
When selecting primers, the first thing to consider is size. For our purposes here, we will be using large rifle primers, as this is what is required for use in the .308 Winchester cartridge. Of course, the next question is which large rifle primer to choose and why? I really do not have a firm belief as to one primer brand being better than another because I have successfully used all the primers pictured above to reload accurate ammunition over the years. Although my preference is for match grade primers, ultimately, my advice concerning primers is to pick a primer, stay with it, and buy in bulk. Once the load is developed and performing to your satisfaction, something as seemingly harmless as a primer change can negatively affect the accuracy of the load.
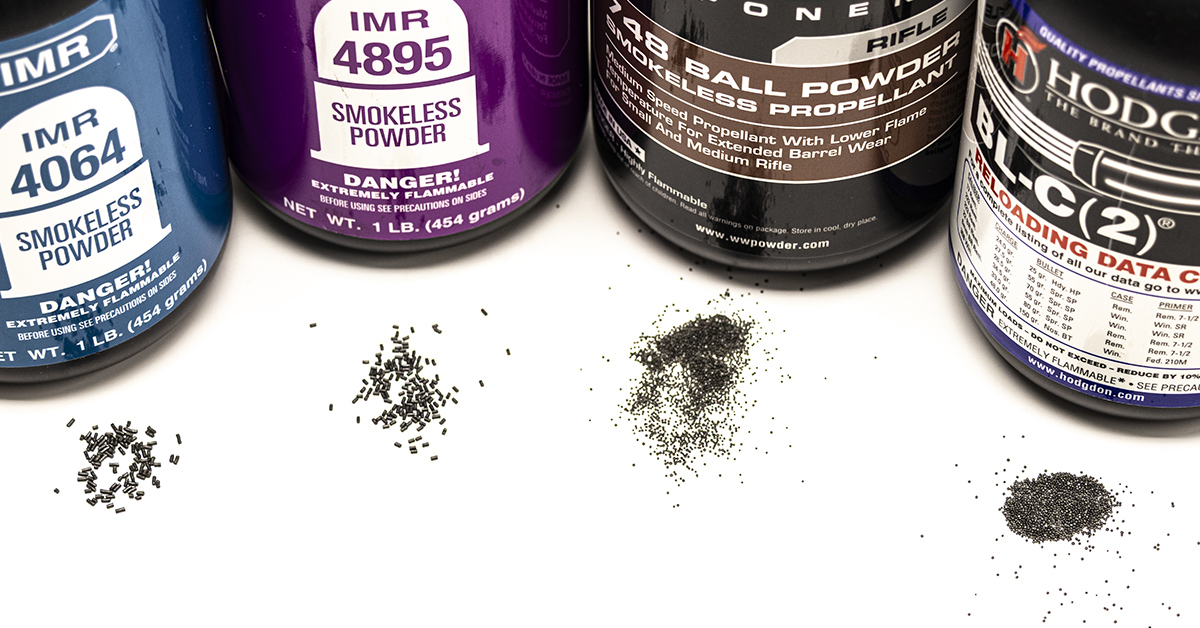
After years of reloading, I have acquired a few different burn rates of powder that are acceptable for use in the 150-grain .308 Winchester load. It is my advice at this stage of load development to perform a powder burn rate test, as each one of these powders pictured will most likely yield different results. As luck would have it, I did not have enough Varget in stock, but I did have IMR4895 and IMR 4064, along with Winchester 748 and BL-C(2). This allows for the testing of two different extruded powders and two different ball powders with four different burn rates.
We will continue in Part 11 of this series with powder testing.
- Shoot ON Reloading Series Pt. 1
- Shoot ON Reloading Series Pt. 2
- Shoot ON Reloading Series Pt. 3
- Shoot ON Reloading Series Pt. 4
- Shoot ON Reloading Series Pt. 5
- Shoot ON Reloading Series Pt. 6
- Shoot ON Reloading Series Pt. 7
- Shoot ON Reloading Series Pt. 8
- Shoot ON Reloading Series Pt. 9