A personal defense weapon is just that…personal. At least it should be. And that begs the question: “Do you really know your gun?” Have you explored and tested every nuance to ensure maximum proficiency, comfort, and confidence? Here’s your guide to settling on “The One.”
by Rob Reaser
Quick question: How many of you have tested your everyday carry handgun for…let’s say…accuracy? What I mean by that is not shooting a box of cartridges at a 10-yard target and proclaiming, “Yep…most of them hit the paper. We’re good here.” I mean shooting several different loads by several different manufacturers, carefully analyzing the points of impact and group sizes, and determining exactly which loads deliver the tightest groups to the point of aim.
If you are an experienced and deliberate shooter, you have done this. If you are a new or “casual” shooter, I’d say the odds that you have noodled out the accuracy of the pistol or revolver you have designated as your carry gun are probably slim. If we are talking about the general gun-owning populace, I would say those odds are next to nil. That’s just a wild guess on my part, but I’d wager it is close to the truth.
Determining the most accurate and effective load is just one aspect of a personal defense firearm that demands attention. You also need to learn how to use it to ensure reliable performance. This can include everything from how best to grip the pistol to adjusting aim to shoot with precision at varying distances and scenarios to the type of holster you choose and how best to carry it. Talk to a seasoned shooter or a highly trained defensive firearm professional and you’ll discover there are many more nuances that contribute to reliable and precise deployment of a personal defense firearm — style of sight, grip profile, trigger reach, grip texturing, safety actuation (if so-equipped), trigger take-up, pull weight, slide release position and texturing, magazine release position and texturing…the list is seemingly endless.
Fit and Familiarity
Finding that perfect handgun — the one that has and does everything you want — is always a challenge. Most folks find one that feels good in the hand while they are standing at the gun counter and then they lay their money down. If you’re lucky, you get to test-fire the gun before making the decision. Regardless, finding that ideal handgun is not always easy. Typically, we take our best guess and learn to work with it.
And that brings us to another aspect of the defensive handgun: becoming intimately tuned to your pistol or revolver. I’m talking about complete “eyes blindfolded” familiarity. Think of this like a keyboard. Those of you who learned typing in high school (is that even still a thing?) understand this. Place your fingers over the home keys and you don’t even think about which keys to push to type out a word. The word enters the mind and the fingers almost magically hit the right keys with no conscious thought involved.
That is how familiar you should become with the operation of your defensive weapon. It takes practice, for sure, to always achieve the correct grip on the draw, to operate the controls, swap magazines, to run the slide with precise, fluid-like efficiency, and to work through failures, yet this is something we should strive for because it is that confident familiarity that may make the difference in surviving a violent encounter. In doing this with deliberate focus, we establish a necessary benchmark for evaluating other handguns that pique our interest, and that is how you drill drown to find the gun that works best for you.
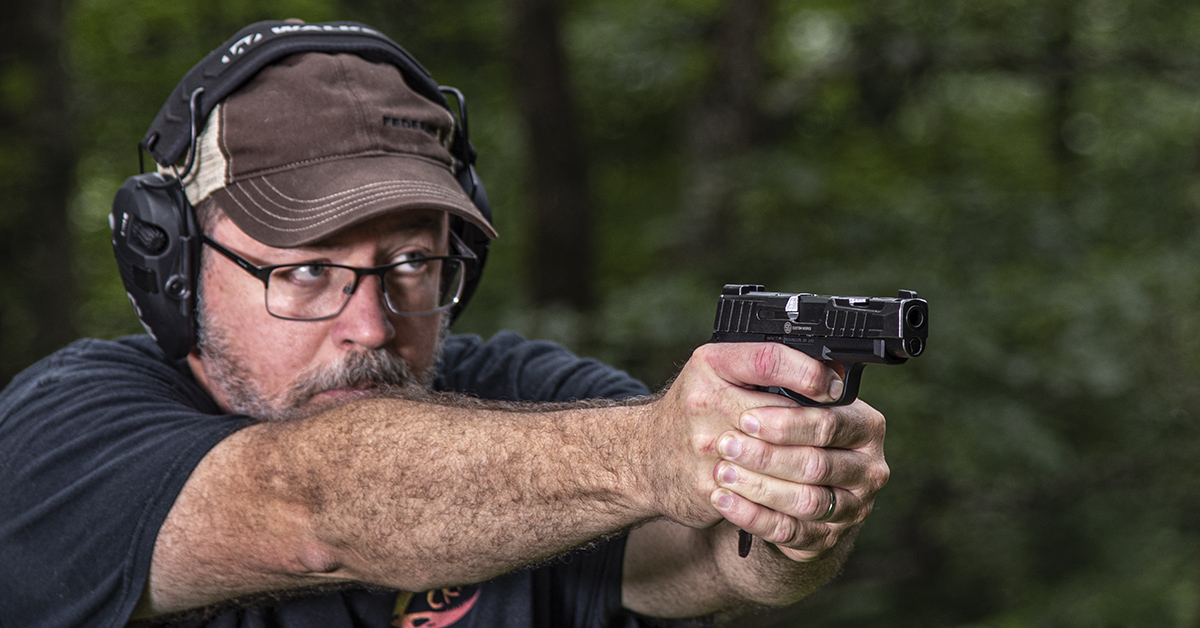
Over the years, I have tapped numerous striker-fired polymer frame pistols for my EDC needs — everything from my full-size GLOCK 17 to the diminutive Springfield Hellcat. In between, I’ve tested most handguns in this class as part of my Shoot On evaluation duties. In that, I am fortunate because I have learned what style of handgun does and doesn’t work well for me. One gun I have and love dearly is my Springfield 1911 MIL-SPEC model.
Yet much as I like the gun, I’ve never spent a lot of time with it until recently. Part of the reason for that is because most of my available range time is devoted to testing new firearms. Another reason is that I’ve never given the 1911 much consideration as a CCW platform.
“Too heavy,” they say.
“Too big,” they say.
“Doesn’t hold enough ammo,” they say.
Well, “they,” I discovered, don’t know what they’re talking about.
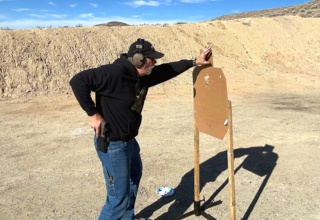
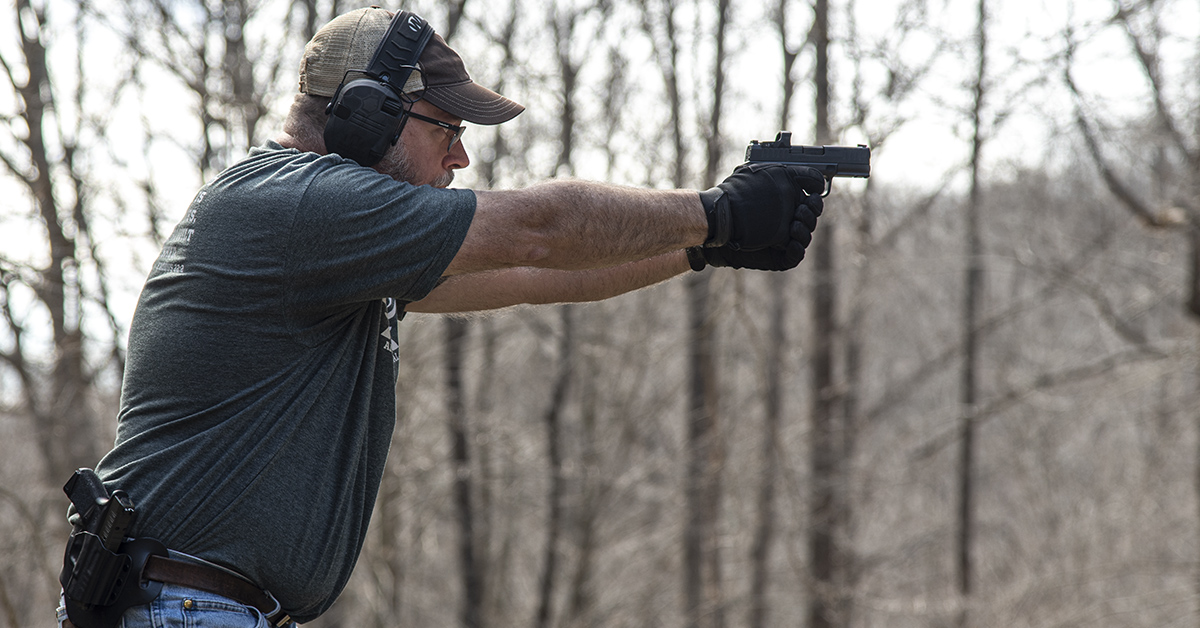
Not too long ago, I went to the range with the sole objective of running my neglected 1911 through several timed drills, drawing from the holster and doing speed reloads. I’m not sure how many rounds I fired or how many times the timer buzzed, but my back was in quite the state from all the brass I picked up afterwards.
The conclusion smacked me right between the eyes.
I shoot this 1911 better than any other pistol I’ve wrapped my paws around (and I’ve wrapped my paws around quite a few). Why? I can’t point to any one thing that makes the difference, but the overall package just works best for me. Maybe it is the heft of an all-steel frame or the just-right grip profile. The sights definitely work for me, as does the trigger. Of course, that five-inch match-grade barrel and longer sight radius offer huge advantages in terms of accuracy potential and marksmanship enhancement.
The bigger question, though, was why I had not made this gun “The One” after all this? Prejudice likely weighed heavily in my ignoring the 1911 for EDC duties. I certainly gave too much credit to the “too big for CCW” naysayers without really examining things for myself. Whatever the case, that day on the range really knocked me. If this is the gun I shoot the best and handle with ease, then this is the one I should carry.
Now, before I go any further, understand that this discussion is not a rah rah pitch for the 1911. No 1911 vs. GLOCK flamethrowing will be forthcoming. The point I’m trying to make is that the defensive handgun that works best for you is the one you should focus on. Maybe that is a full-size or a micro-compact. A polymer- or a steel-frame. A revolver or a semi-auto. This brand versus that brand. You don’t know what you don’t know, and you won’t know until you try.
If budgetary constraints keep your handgun options limited, that’s fine. You can learn to work with what you have. Humans are great at adapting. Frequently engage in meaningful dry-fire exercises at home. It doesn’t cost you anything and the time spent (even if it is just 10 or 15 minutes every other day) will go a long way in helping you improve trigger control and becoming one with the gun. And when you do get to the range, make sure your practice is deliberate. Get the basics down with slow-fire marksmanship practice. Become familiar with the sight picture, recoil control, and point-of-impact before speeding things up or introducing new scenarios. This is a slow and steady exercise that builds the foundation of familiarity and proficiency that you need. If possible, take a defensive handgun course or two and learn under the guidance of a qualified trainer.
The Holster
As you are developing that familiarity and proficiency with your gun, you should give the same consideration to your holster. The holster is a vital link in your approach to everyday carry. It begins with comfort and ends with performance.
I had tried several IWB and OWB holsters fitted to my 1911 over the years. There were a few “okays” and several “no ways” in the bunch. Most, though, served to validate the 1911 naysayers because the gun always felt bulky and heavy, didn’t seem to conceal all that well, and — the biggest gripe of all for me — always dragged down my belt line. I HATE that!
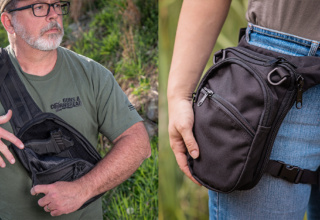
After I decided that the 1911 was, indeed, the gun I needed to carry, I had to get serious about the holster. Upon considering what Shoot On contributor Bob Campbell recently had to say on the matter, I zeroed in on Galco’s Concealable Belt Holster.
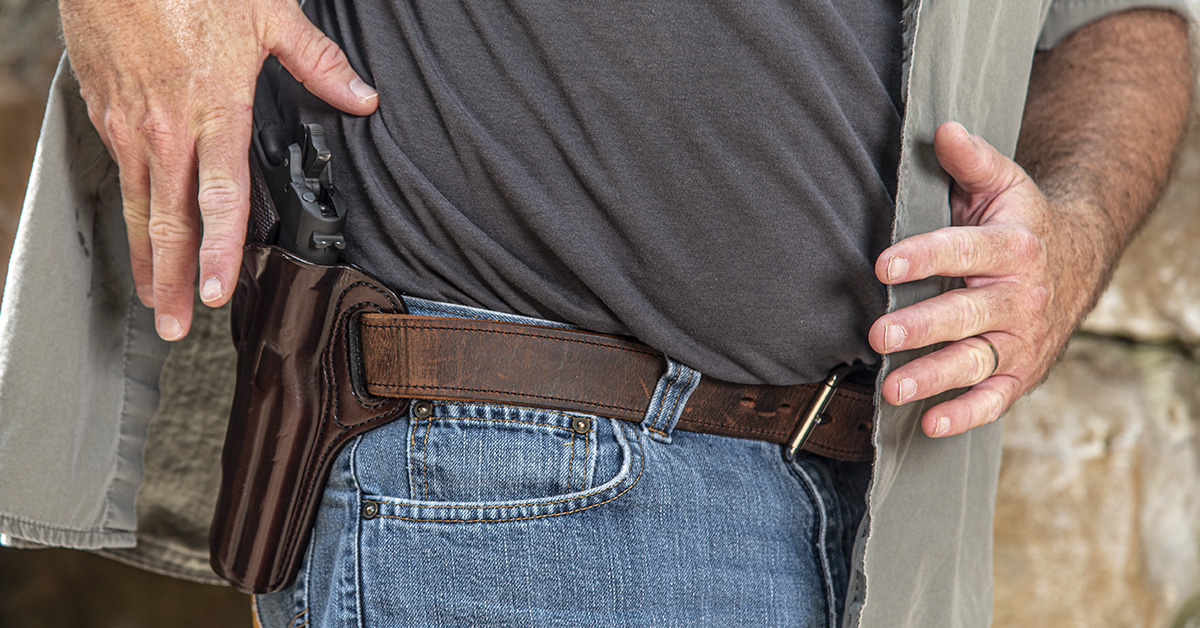
To work for me, I knew the holster had to ride high on my waist line and hug tight to my torso, and this holster looked like it would do the job. I was also intrigued by the holster’s forward molded design, which provides a flat backer on the inside and a molded panel on the outside. This, combined with the forward cant, I figured, should offer a “high-and-tight” fit that would conceal well beneath an overshirt.
With a price of $167, it was a costly gamble, but after studying on it for several days and looking at the pictures on the Galco website, I felt it was a gamble worth taking.
A few days later, the holster arrived. The instructions cautioned that the gun would have to be worked into the holster to allow time for the fibers to stretch as needed to accommodate the gun. No kidding! The gun fit so tight that I thought Galco had sent me the wrong model. Nevertheless, I followed the instructions and gradually twisted and pushed the 1911 until it was fully seated into the holster and left it in there for two days.
The saying, “Fits like a glove,” aptly applies. The holster offers just the right amount of tension with absolutely no slop or wiggle. A firm tug releases the gun without hiking up my jeans and causing my voice to rise a few octaves.
What did bother me was the aggressive forward cant of the pistol. During range drills, it took some time before I could get used to the grip position. But as I mentioned earlier, we learn to adapt. The trade-off for that pronounced forward position, though, is greater concealability. With that cant, the grip is right in line with my torso, so the bottom of the grip doesn’t poke out as I move.
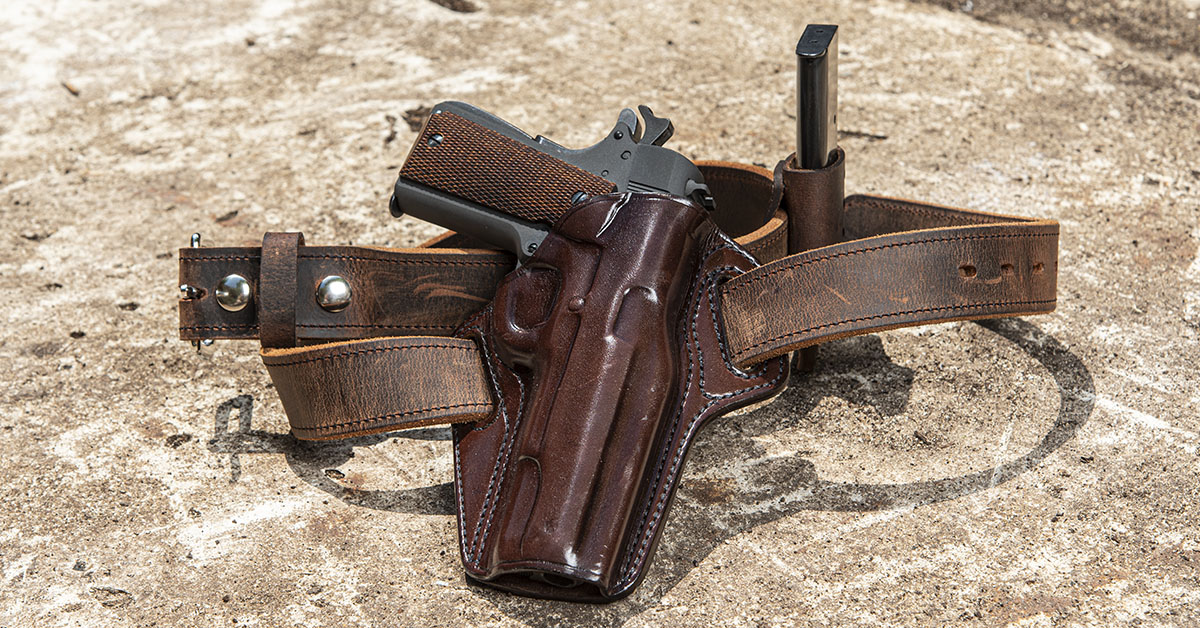
The other factor in making this (or any holster) work best is a thick and sturdy belt. For that, I went with Versacarry’s Rancher Carry model and tossed in their Adjustable Magazine Pouch. The belt offers the support needed for robust handguns like the 1911 and the mag pouch negates the modern-day “not enough rounds” argument against the 1911.
Together, the holster and belt make my 1911 more comfortable to carry than even the micro-compact models I have been carrying OWB. Sounds crazy, I know, but for me, it just is.
All of that to say, once you have settled on “The One” carry gun, get serious about the holster. You may have to experiment with several designs and manufacturers, but your effort and expense will result in a holster that enhances your carry comfort and deployment proficiency.
Finding “The Load”
Alright. You are intimately familiar with your chosen carry gun. It works for you on the range, your holster system allows for comfortable carry, and you are swift on the draw and safe on the re-holster. The infrastructure is set. The next step is to determine the most accurate and effective load for your gun.
In the load refinement process for your defensive handgun, it is important to keep in mind the objective. This is your defensive gun. Thus, you should experiment with defense-oriented ammunition. Using the popular 9mm pistol as an example, I would focus on bullets in the 124-grain range that are designed for optimal terminal performance, like jacketed hollow points. Full metal jacket (FMJ) rounds need not apply. Leave those for training. Examples you would want to look at include Speer Gold Dot, Sierra Jacket Hollow Point, Federal HST, and Hornady XTP. Most commercially available cartridges with bullets in this weight range and type work at velocities for which today’s 9mm pistols eagerly accommodate.
I began my load hunt by shooting several different cartridge brands, weights, and bullet types to determine which delivered the tightest groups at 25 yards. I even included handloads I had on hand. While most personal defense encounters are in the five- to ten-yard zone (and often closer), I figured 25 yards was close enough to keep it real and far enough to evaluate a load’s point-of-impact consistency. In the end, all shot well in my 1911, with the best results coming from bullets in the 200- to 230-grain weight range. That made sense given that the 1911 was designed with the 200-grain bullet in mind and the U.S. Army had adopted the 230-grain weight standard while the 1911 served as its issue pistol. Regardless, the bell curve for my gun swung toward the 200-grain rounds, so that is where I would focus my load development.
You Don’t Know Until You Shoot
Beginners are often dumbstruck to learn just how much variance in accuracy and point-of-impact there can be between cartridges shot from the same gun — even cartridges of the same general bullet weight or the identical weight. Handloaders, though, understand this all too well.
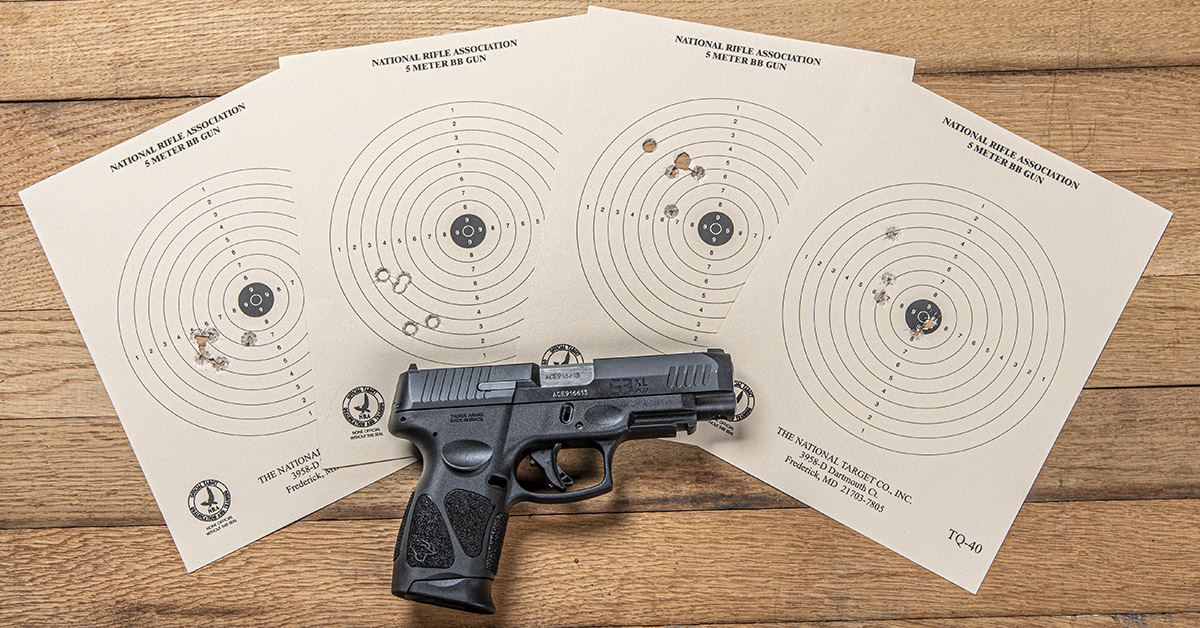
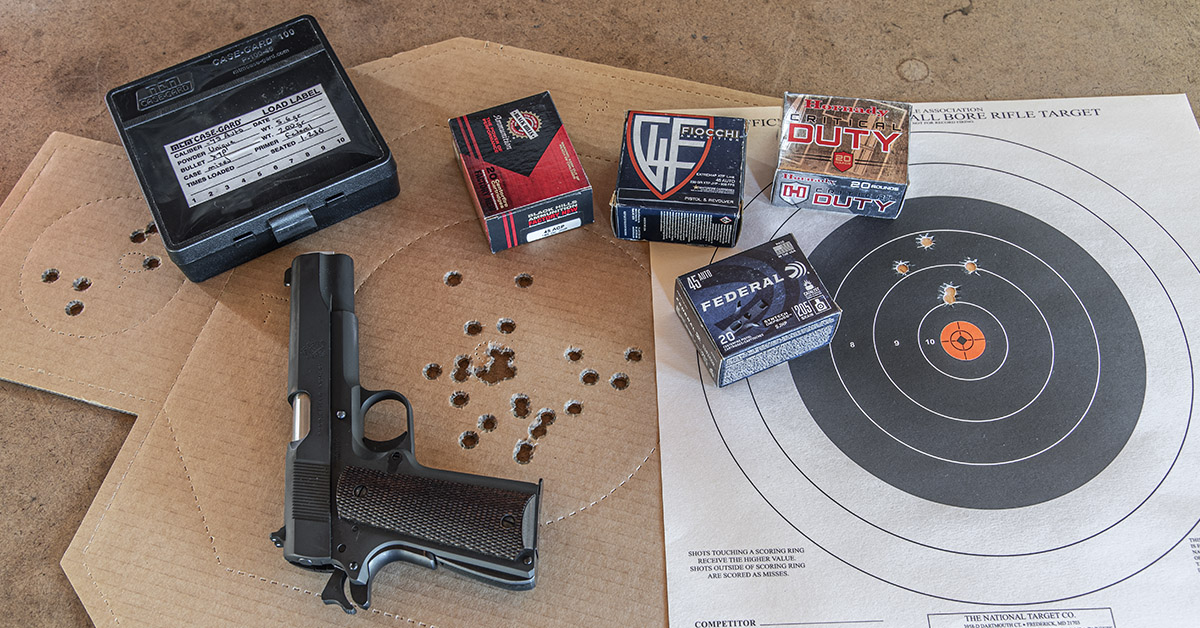
Here is an example of four different cartridges shot from the same 9mm pistol at the same distance. The three targets on the left were shot with 115-grain bullets from three different manufacturers. The target on the right was shot with 124-grain bullets from yet another manufacturer. At a mere 10 yards distance, most folks would never believe there could be such a variation in point-of-impact and group size — especially between bullets of the same weight. The targets, though, do not lie. And this is not an exception but is generally the rule. Differences in powder type, powder weight, primer, bullet seating depth, and manufacturing tolerances can all contribute to such dramatic shifts in accuracy and point-of-impact. And you must consider the gun as well. You can take one load and shoot it from two identical handguns and often see similar diverse results.
For this reason, it is incumbent on you, the responsible gun owner, to discover and to use the ammunition that shoots most accurately from your defensive weapon. Shifts such as those illustrated above only expand the farther away from the target you are. And since you are responsible both ethically and in the court of law for every round you fire in a personal defense encounter, you better be sure those rounds are going to hit where you intend them to hit. This requires developing good marksmanship skills, ample training, knowing your firearm setup, and using the most accurate ammunition you can find for your gun.
That is the minimum standard. To take things to the next level, handloading is in order.
Build Your Perfect Defense Load
Handloading offers more than a fun hobby and a way to save serious money on ammunition. It gives you the opportunity to really hone your firearm’s accuracy performance. I just mentioned how the most minute variations in a cartridge’s components and construction can make an astounding difference in accuracy. Handloading allows you to really fine-tune that accuracy and further boost confidence in your defensive setup.
Now, lest you dismiss the notion of handloading because you think it is too complicated or too expensive to get into, let me dispel such thoughts. Hornady offers their Lock-and-Load Classic Press Kit for $354.99 on Amazon. It has everything you need to start handloading, minus the shell holders (around $10 each) and the die sets (around $50-$60 per cartridge type). After that, you have the component expenses (new brass, bullets, primers, and powder). You’re now ready to handload your pistol cartridges. Yes, it is an investment, but one that will pay for itself rather quickly.
As for difficulty, handloading is not difficult at all — especially when you’re dealing with straightwall pistol cartridges. At the end of this article, I’ll run through the steps involved to show you just how easy handloading really is.
For now, follow along as I walk through my load-testing process, as this is the same process you can follow when working up your own load.
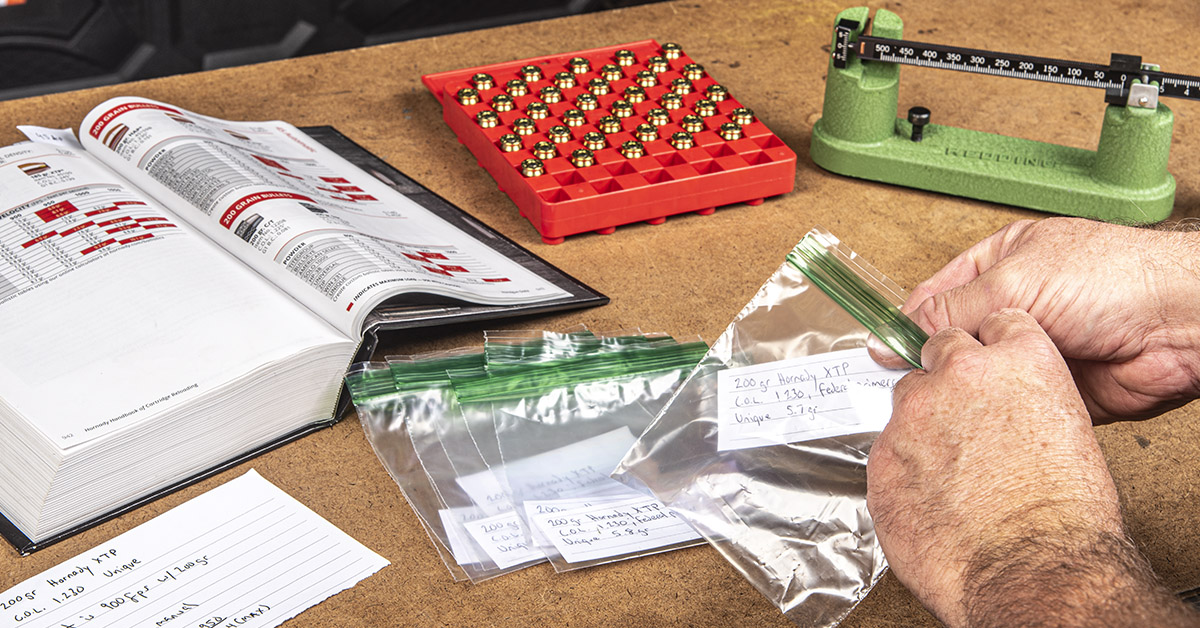
To refine my .45 ACP load, I took into consideration that my 1911 seemed to like 200-grain bullets better than 230-grain. Fortunately, I had a good stock of 200-grain Hornady XTP bullets on hand along with a generous supply of Unique powder I scavenged in the early months of the Great Bug Bamboozle. Since John Browning designed the 1911 to work best with a 200-grain bullet exiting the muzzle at around 900 fps, I determined a powder weight range and decided to load my test cartridges in 1/10-grain increments. The goal was to find the powder charge that delivered the greatest accuracy as close to that 900 fps muzzle velocity as possible.
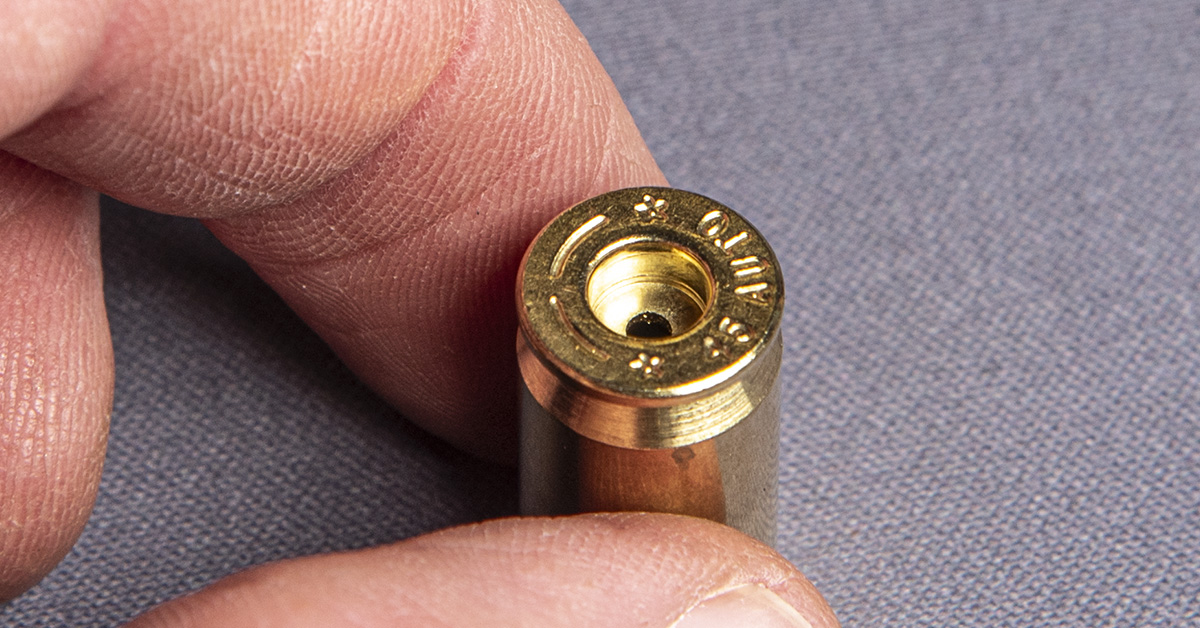
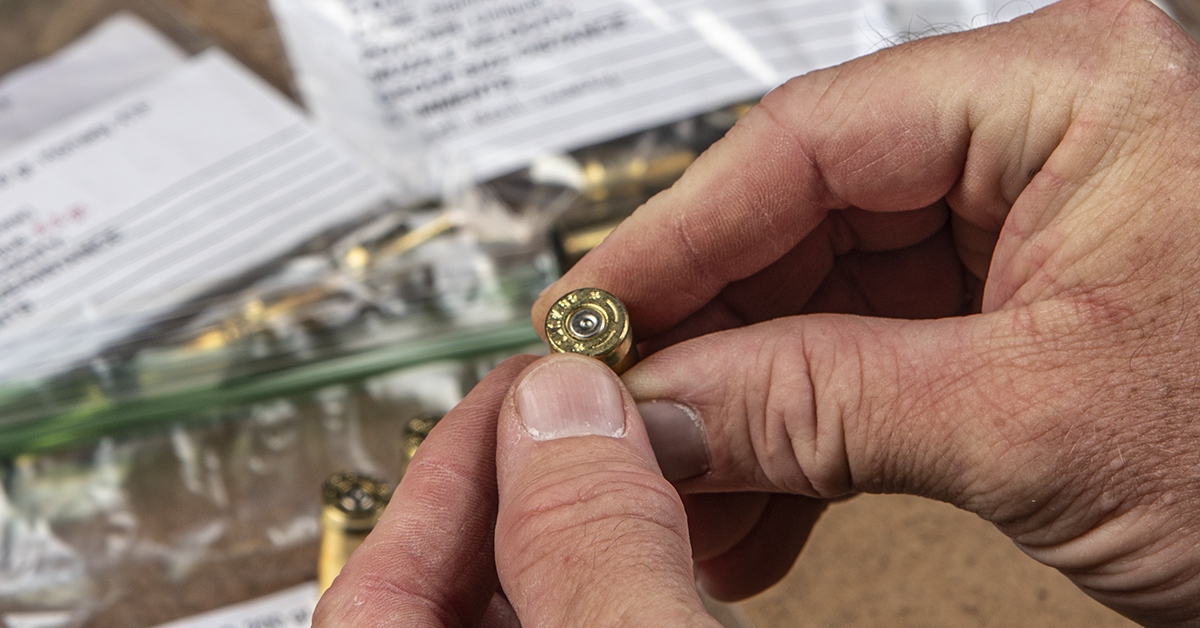
I started with new brass for this test since I was running somewhat blind on the powder load range. My Hornady reloading book did not offer a chart that combined the 200-grain XTP bullet with Unique powder. I did have access to a couple of Sierra reloading books (3rd and 6th edition) that used Unique with their 200-grain bullets, but the load charts between the two were quite different. Essentially, I had to take an educated guess as to the powder weight range, so I would start on the low end and SLOWLY work my way up to higher velocities. This necessitated carefully examining the cartridge cases and primers along the way, looking for any possibly deformities, unusual stresses, blown or bulging primers, and excessively harsh recoil and report. For this reason, I wanted to start with fresh brass. Excessive pressure, for example, could deform the otherwise crisp head stamping of new brass, hence my desire to use the new stuff.
Consistency in material dimensions and weight lead to repeatable results. Although my brass was new, variations occur in manufacturing. Therefore, I measured and weighed the new brass. Brass was trimmed to within +/- .002 inches of case length variance and +/- 0.1 grain of weight difference. Excessive tolerance control for a pistol cartridge? Yes, but that’s just me.
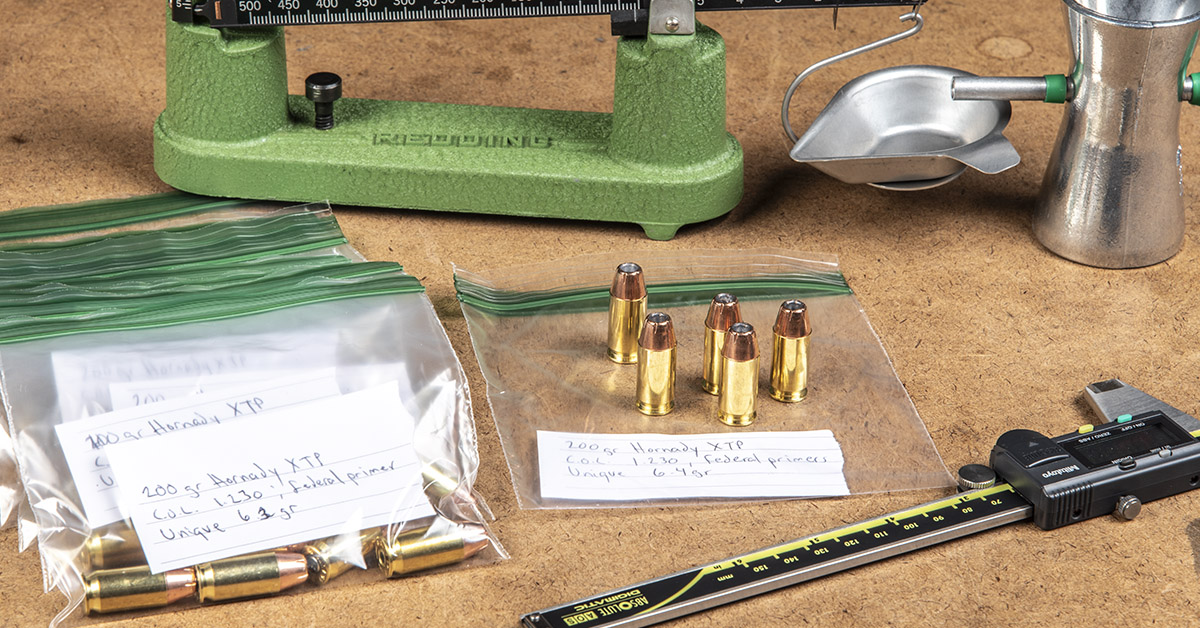
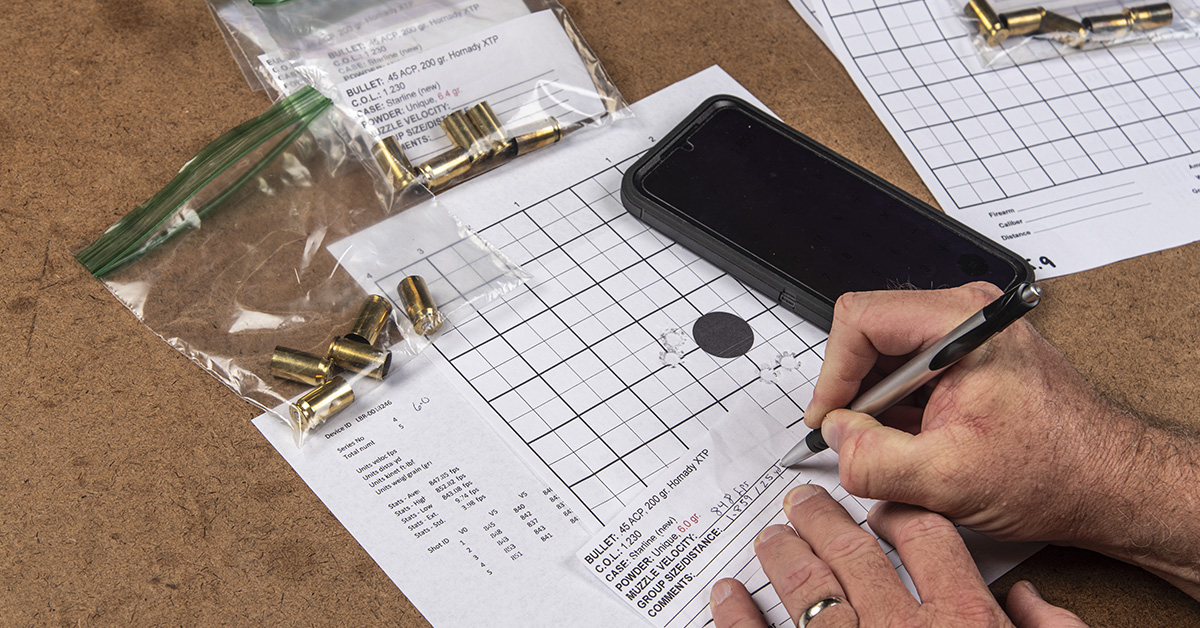
I ended up with eight different loads of five rounds each and separated them along with their own data sheet so I could keep track of everything. In all, my test would comprise 40 rounds, going from a light load I had already used and knew to be accurate up to a maximum load as recommended by one of the Sierra books.
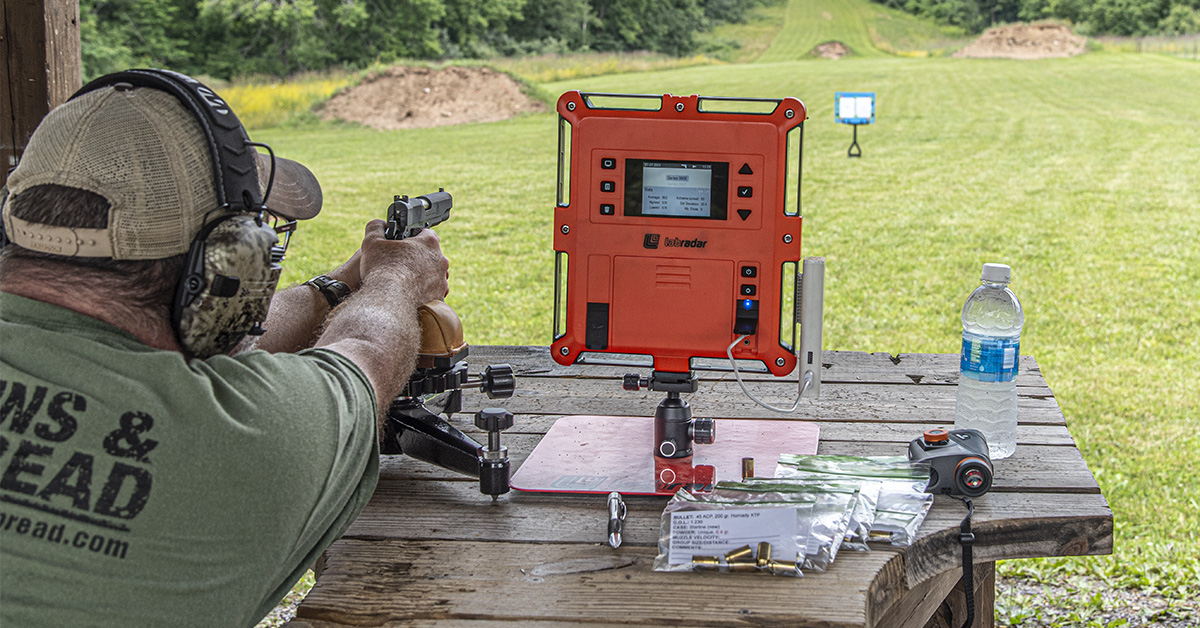
At the range, I set my MTM Case-Gard Jammit target stand at 25 yards as measured by my Maven RF.1 rangefinder (I love the reticle and magnification on this thing!) After spinning up the Labradar unit to capture velocities, I took as good an aim as my post-40-year-old eyes could muster and gave it my best shots.
NOTE – You don’t need a chronograph or radar unit to develop your own loads, but it is good to know your velocities if you have the option. Since I was going for a specific velocity with my loads, I needed the tool.
I closely examined the brass after each shot string, looking for any signs of excessive pressure as I worked my way toward each successively hotter load. No problems revealed themselves.
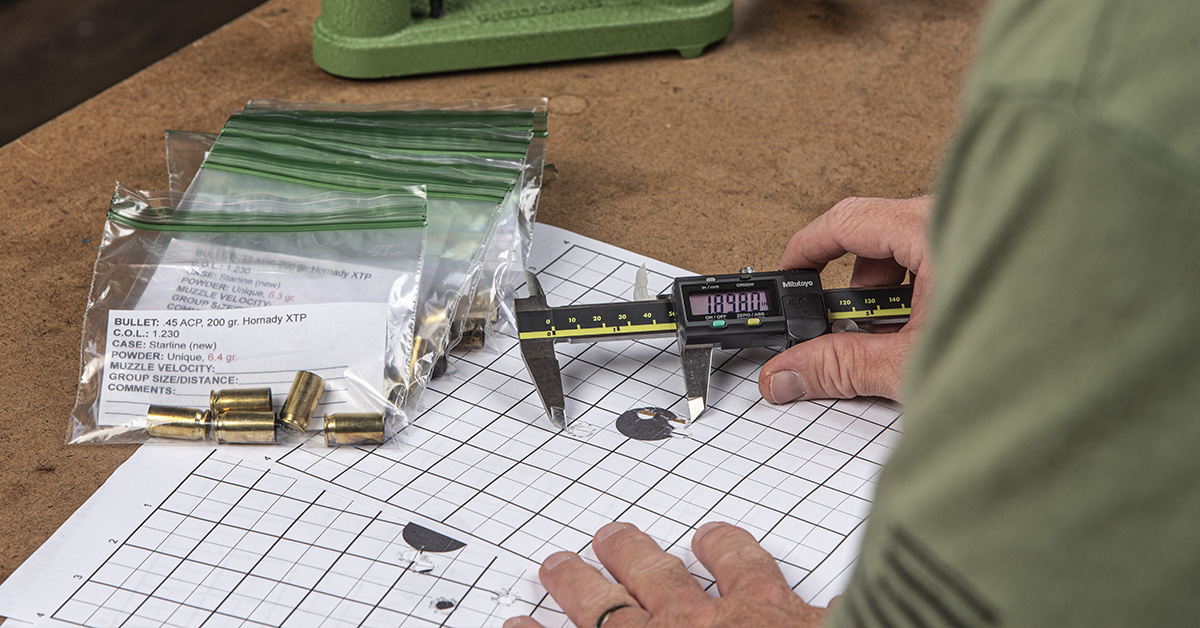
Back home, I measured the results and determined which load shot the tightest group.
Next, I downloaded the velocity data from the Labradar and assigned the numbers to their corresponding load data sheets.
The result left me not with a clear answer as to which load was best, but with a choice to make.
The most accurate load was also the lightest: 1.499 inches at an average velocity of 814 fps. The fastest load (and the one that hit my velocity objective of 900 fps) shot a less-impressive 2.649 inches at 902 fps. The second most accurate load, at 1.649 inches, boasted an average muzzle velocity of 874 fps.
In the end, I decided to sacrifice around 25 fps to cut one inch off my group size. The quarter-inch I could gain by going with the slightly more accurate but lighter load, though, was not worth the loss of nearly 90 fps and the corresponding terminal energy loss. Now I have a load that delivers good accuracy and is close enough to my target velocity that terminal performance will not be questioned.
“The One” is Done
After having gone through this comprehensive process, I have total confidence and competency with my EDC rig. I know the gun intimately. I know how it works and how I work with it. I know my ammunition will do its job so long as I do mine. Careful holster selection and practice with that holster delivers maximum proficiency in use plus all-day comfort. From here, it is all about continuing to maintain marksmanship skills and expanding scenario training.
Now…aren’t you ready to get serious about your EDC rig?
— Handloading…Easier Than You Think —
As with most anything, handloading can be straightforward and simple, or you can try to chase perfection until your head explodes. That is especially true once you get into handloading for precision long-range shooting.
Fortunately, cooking up a batch of accurate pistol loads is really easy. There are nuances to be learned, but here is the quick take on how it’s done when using new brass.
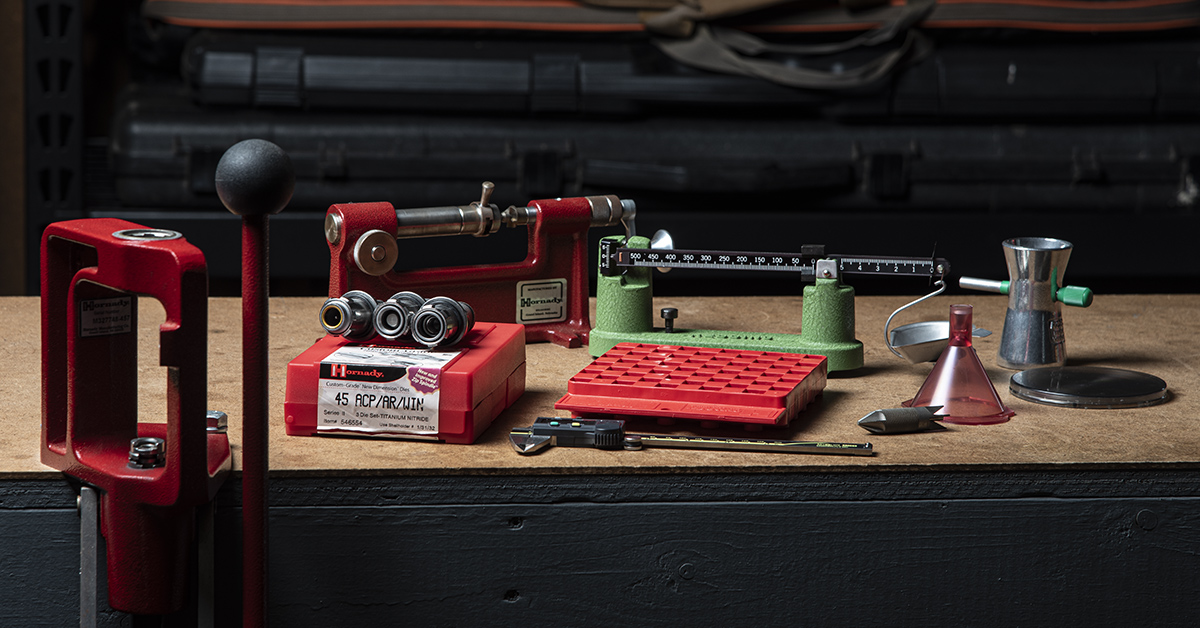
This is the minimum for pistol cartridge reloading. From left to right: reloading press, reloading dies (caliber-specific), case trimmer, precision caliper, reloading block, precision scale (beam balance or digital), case chamfering tool, funnel, trickle powder dispenser, powder dispenser (not shown here), and primer tray. In addition, you will need a reloading handbook (preferable from the manufacturer of the bullets you are using) and a shell holder for your specific caliber.
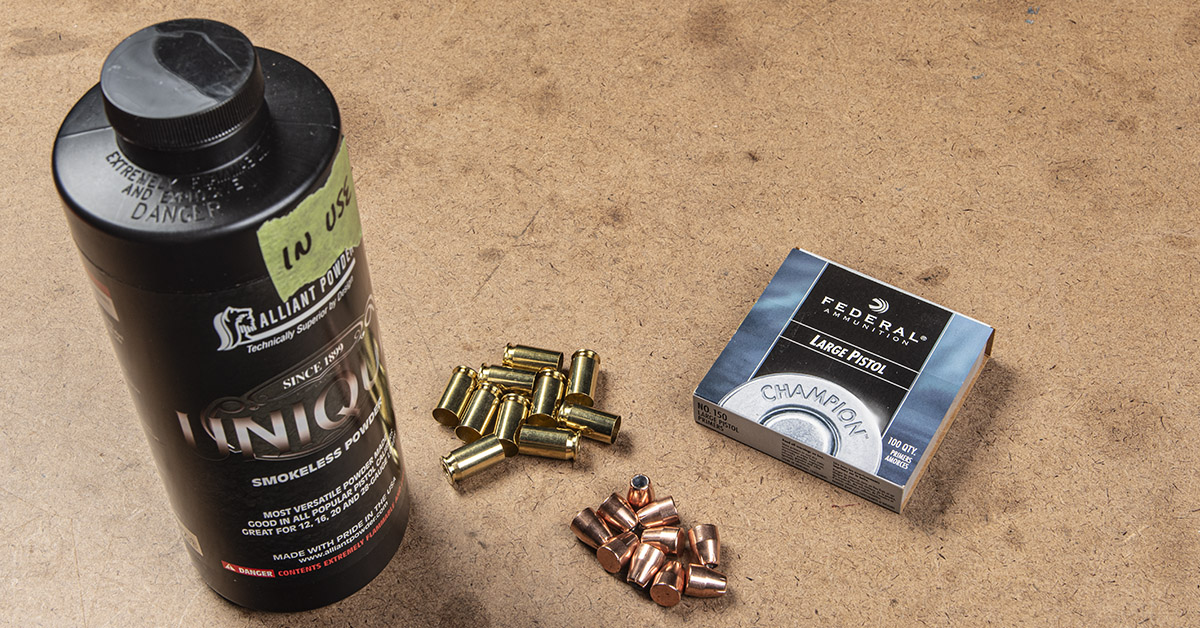
Components for reloading include powder, cases, bullets, and primers.
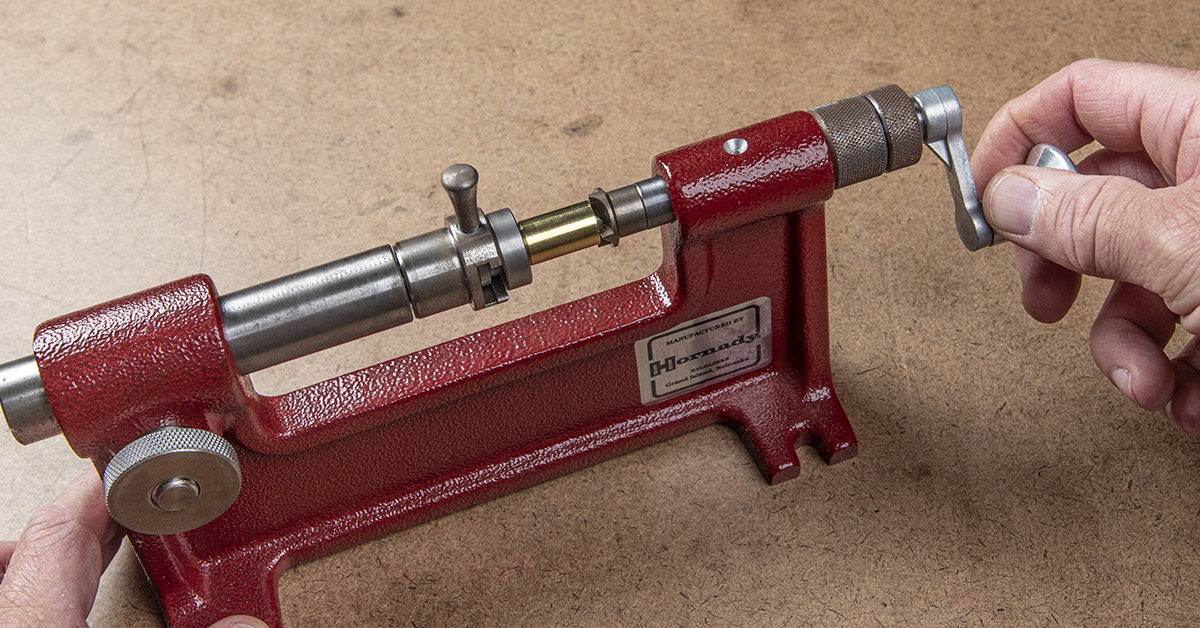
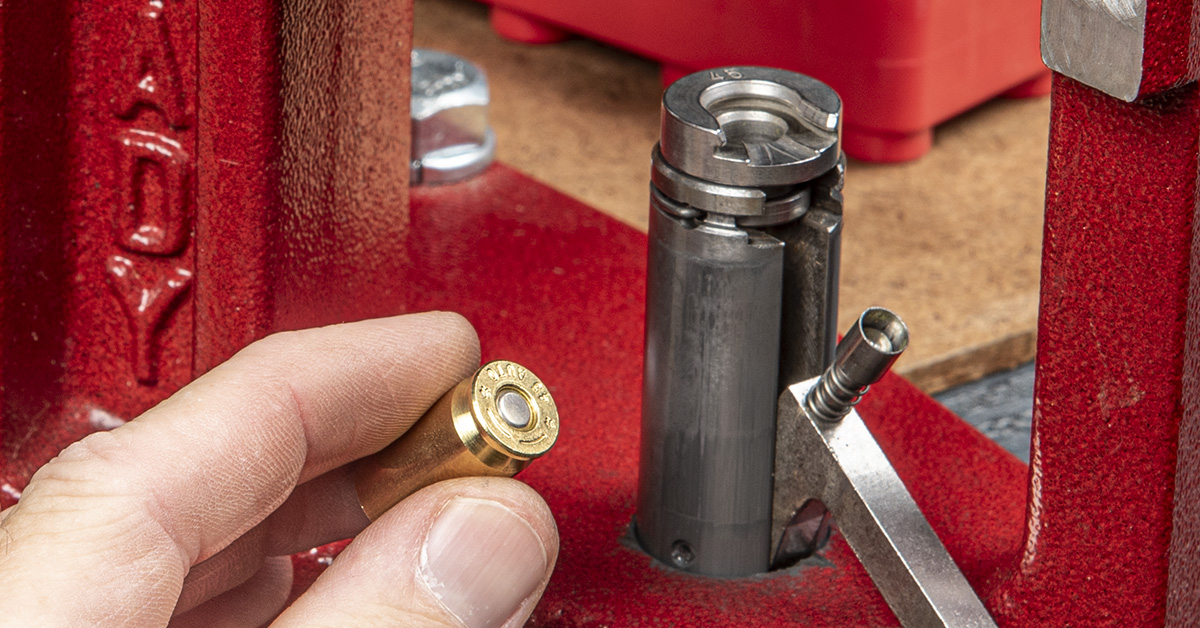
If you were loading previously-fired brass, the first steps would be to use a sizing die with a decap pin to punch out the old primer and to resize the case to bring the case to its correct dimensions. This would be followed by cleaning the brass in a tumbler. With processed previously-fired or new brass, the case trimmer is then used to trim the brass cases to the specified case trim length and to square up the case mouth. Follow the instruction included with the case trimmer.
A chamfering tool knocks down the sharp edges around the inside and outside of the case mouth.
A primer tray is used to stage the primers in a bottoms-down position for the primer insertion process.
An expander die slightly expands the case mouth so that the bullet can be placed upright on the case mouth during the bullet seating process. Follow the instructions included with the expander die.
With the brass correctly sized and the mouth slightly expanded, primers are inserted into the primer pockets. There are several ways of doing this depending on the press system you use.
Always check to make sure the primers are fully seated in the primer pockets.
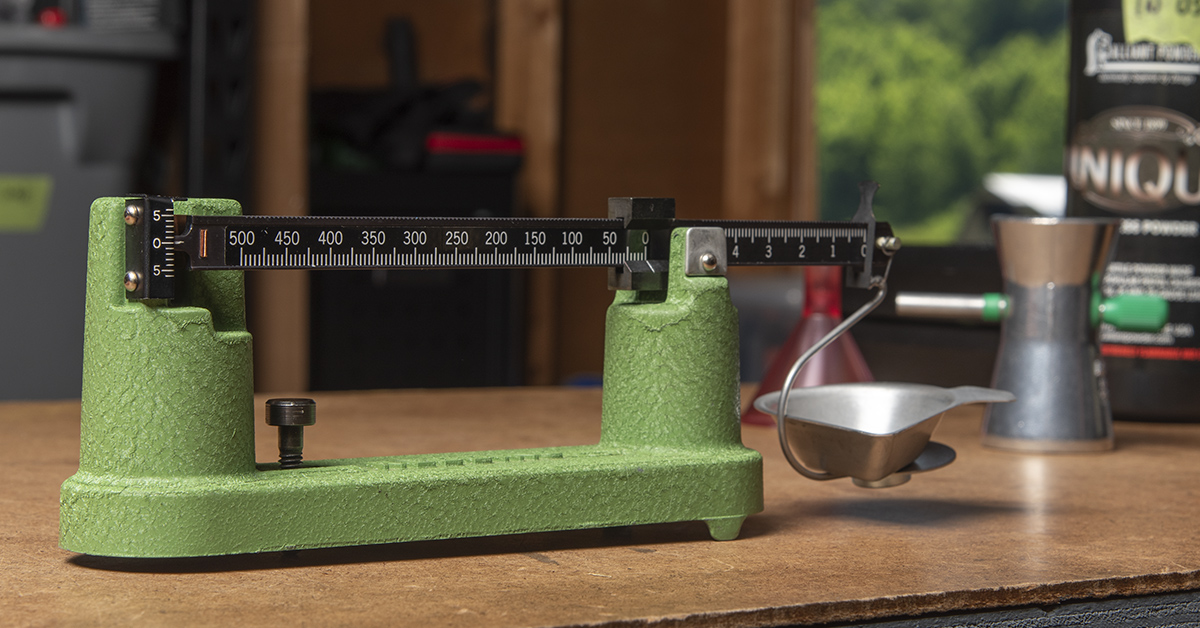
Most handloaders today favor digital scales. I prefer a balance beam scale like this Redding unit because of its extreme accuracy…even though it does slow the process somewhat.
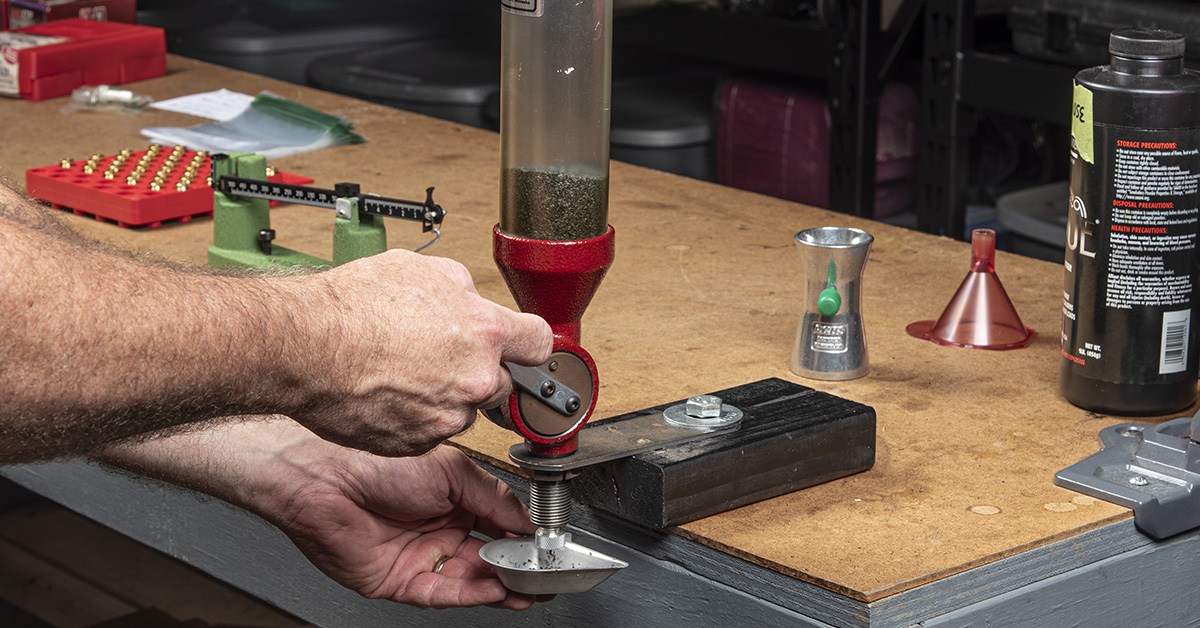
A powder dispenser drops the adjusted powder charge into the powder pan. See the dispenser instructions for dialing in the correct powder charge.
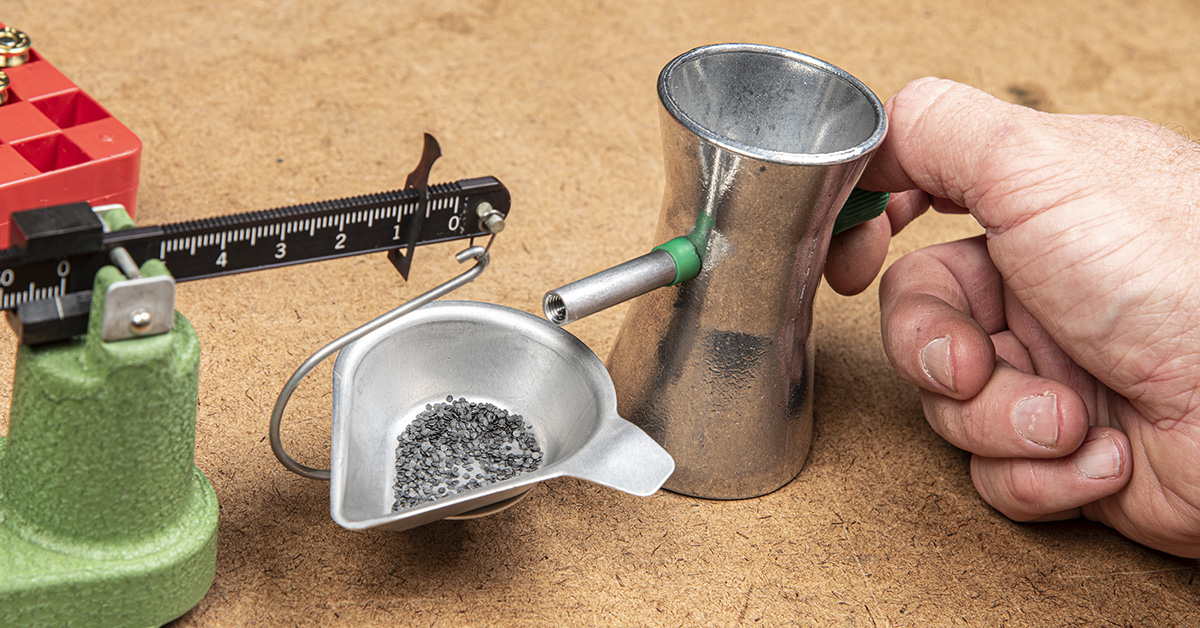
Although powder dispensers can be fairly accurate, I prefer to drop a slightly lighter charge into the pan and then bring it up to the target weight by trickling the powder with the pan on the scale. This takes longer, but accurate weight is guaranteed.
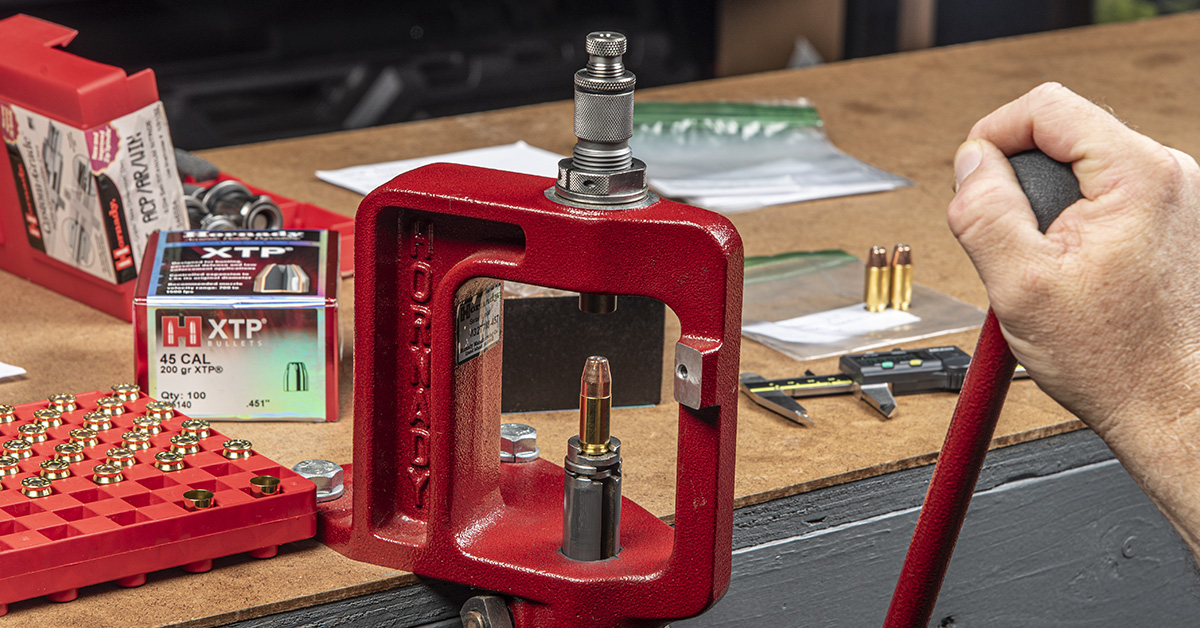
After dumping the measured powder into the case, the bullet can now be seated and crimped using the seating die. Follow the instructions included with the seating and crimping die.
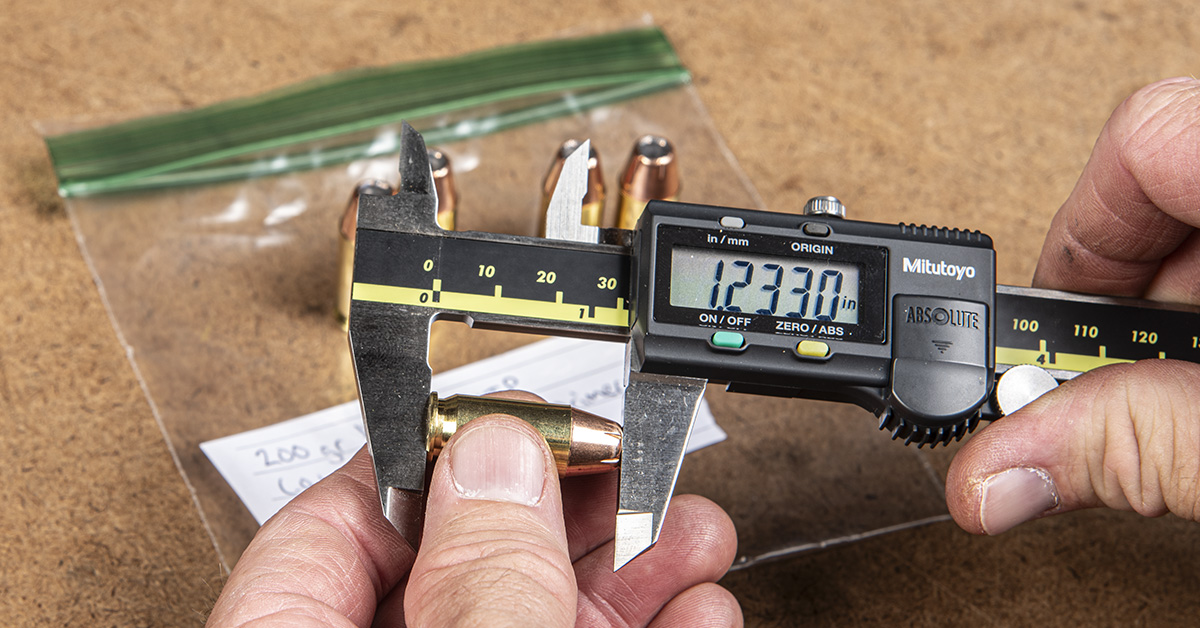
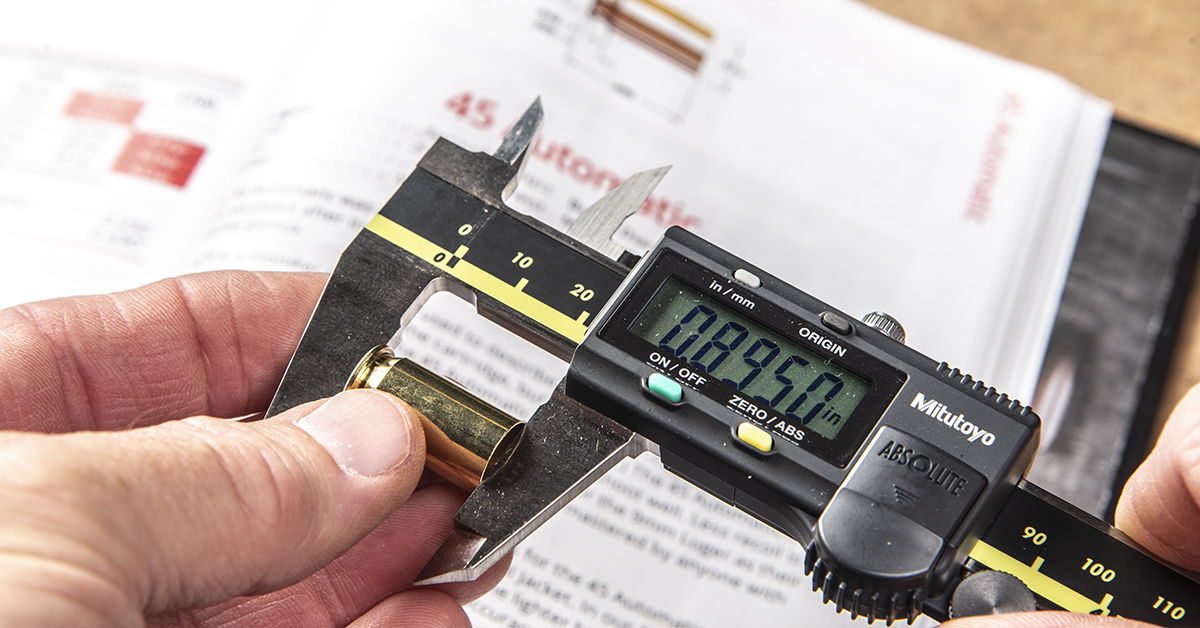
Every case/bullet combination has a specified cartridge overall length (C.O.L.). Follow your seating die manufacturer’s instructions to achieve this dimension and verify with a caliper.
And those are the basic steps to handloading pistol cartridges. Simple!