XS Sights takes a new approach to GLOCK sight installation tools and easily wins our “Best One Yet” award
by Rob Reaser
With specialty pistol sights, especially tritium night sights, becoming more of a must-have than a luxury upgrade for many shooters, the first question most potential DIYers have is, “How do I install them?”
The answer can be found in the multitude of sight installers produced by the aftermarket. These range from universal-style sight installers that are designed to work with most styles of handguns to firearm-specific installers. Yes, former tend to get the job done, but their universal design usually means that they don’t meet the professional grade standard demanded by true gunsmiths. In our experience using universal sight installers, there are often issues with the sight pusher (or ram) not seating flat against the sight or there is imprecise clamping of the slide that can cause the slide to cant—meaning they tend to push against the sight at an angle instead of straight. Given how much force is often required to install a dovetail base sight, any tool that doesn’t drive the sight in a straight line can make for a sketchy installation.
Of course, there are a few gun-specific sight installation tools on the market for the more popular handgun models. We’ve had no problems using them, and they are our first choice in sight installation tools because of their exact-fit engineering. Anytime you can eliminate “slop” you increase mechanical efficiency and reduce the chance of breaking or damaging your work piece.
Perhaps no handgun enjoys more model-specific sight tool options than the GLOCK. There are scads of GLOCKS in circulation, and other handgun manufacturers are increasingly using the GLOCK dovetail pattern so that their pistols can be more easily upgraded by the consumer to accept aftermarket sights—of which the GLOCK pattern dominates. There are several manufacturers of GLOCK-specific rear sight installation tools, and yet another one just came to market by a company that is no stranger to the aftermarket sight scene. We’re talking about XS Sights and their new GLOCK Inline Sight Pusher Kit.
XS Sights offers four part numbers for their new Inline Sight Pusher. There is the DIY Series model and the Gunsmith Series model. Additionally, there is the DIY Series Bundle and the Gunsmith Series Bundle. The two former models include only the Inline Sight Pusher Kits while the latter two include the kits as well as XS Sights’ R3D night sights plus the necessary installation materials (gun lube and thread locker).
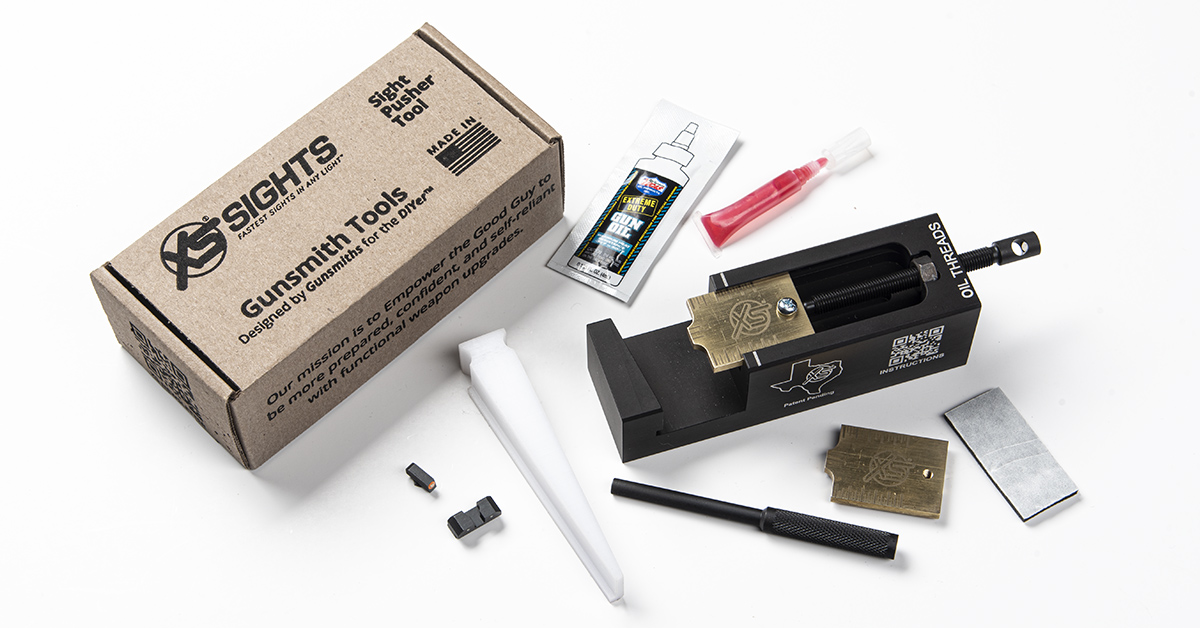
Above is pictured the Gunsmith Series Bundle. It includes the machined aluminum sight pusher, steel black oxide bolt, combination T-handle and magnetic front sight tool, two brass pusher bits with integrated centering scales, a locking wedge (which we believe is machined Delrin), oil, thread locker, and an R3D tritium sight set. MSRP is $304.98 for the bundle, but keep in mind that includes the sights, which sell for $116 (standard height).
The DIY Series Bundle comes with a few minor changes compared to the Gunsmith Series Bundle. The stainless-steel bolt is three-quarter inches shorter than the pro model, uses an Allen key handle to turn the bolt, and comes with three non-magnetic aluminum front sight tools. This kit also comes with one brass pusher bit and has a tool life of 50-100 installations versus 200+ installations with the Gunsmith Series tool.
While the Inline Sight Pushers are specific to GLOCK pistols, there is another important caveat which we must mention. XS Sights for GLOCKs utilize a crush zone in the rear sight dovetail. This means there is a void in the rear sight’s dovetail base that “crushes” during installation to conform to the slide’s dovetail slot, thereby reducing the amount of force required to install the sight (versus a solid base sight dovetail). The XS Sights Inline Sight Pushers are thus rated for use with the company’s proprietary sights and not necessarily other brand aftermarket sights that have solid dovetail bases.
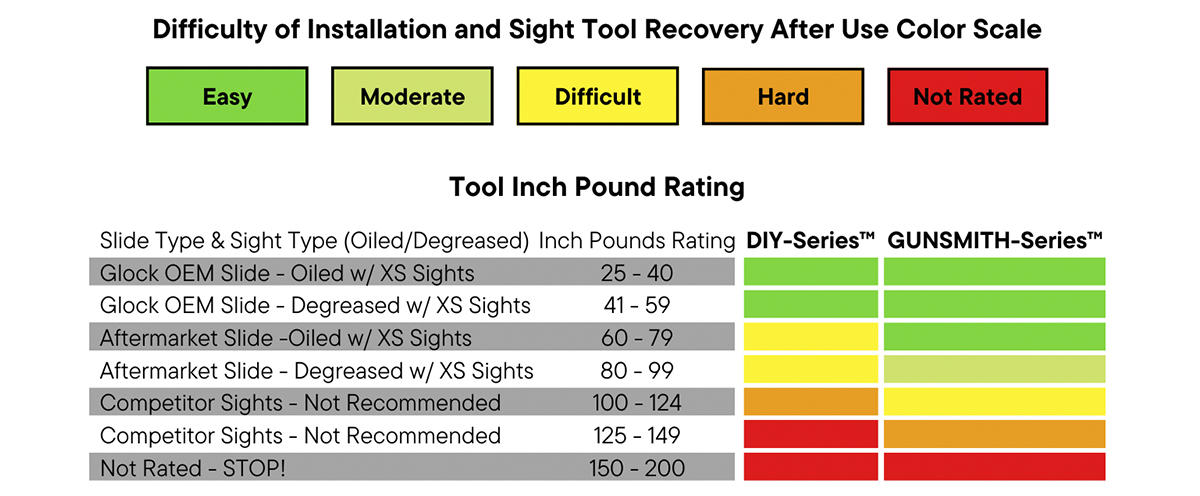
As you can see from this chart provided by XS Sights, the in.-lb. torque requirements run from “no sweat” when installing XS Sights onto GLOCK OEM slides to “kidney buster” with some aftermarket sights. From our experience, this is true. We’ve spent a lot of time filing down rear sight bases of other brand sights before we could get them into the slide dovetails. XS Sights, by contrast, have always gone in nice and easy, and always stay in place with a bit of thread locker insurance thrown in for good measure.
Another caveat to keep in mind is that the Inline Sight Pusher is designed for use only with sights that have vertical side walls. This is because the brass bit face (where it engages the sight) is vertical and you need flat-on-flat when installing a rear sight, not flat-on-angled.
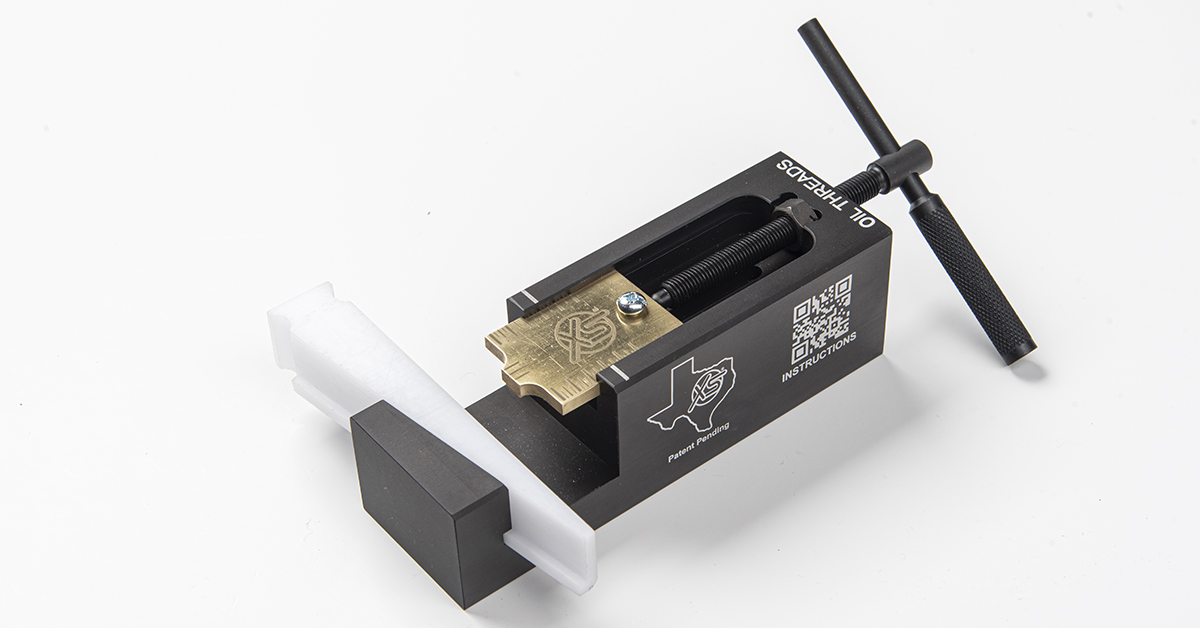
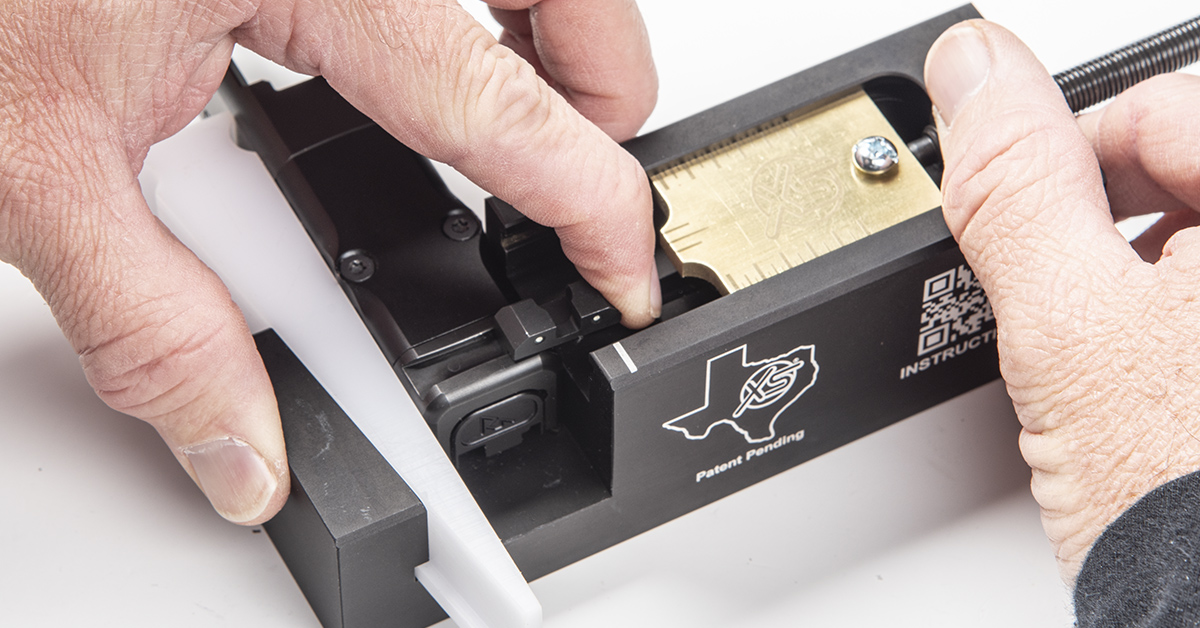
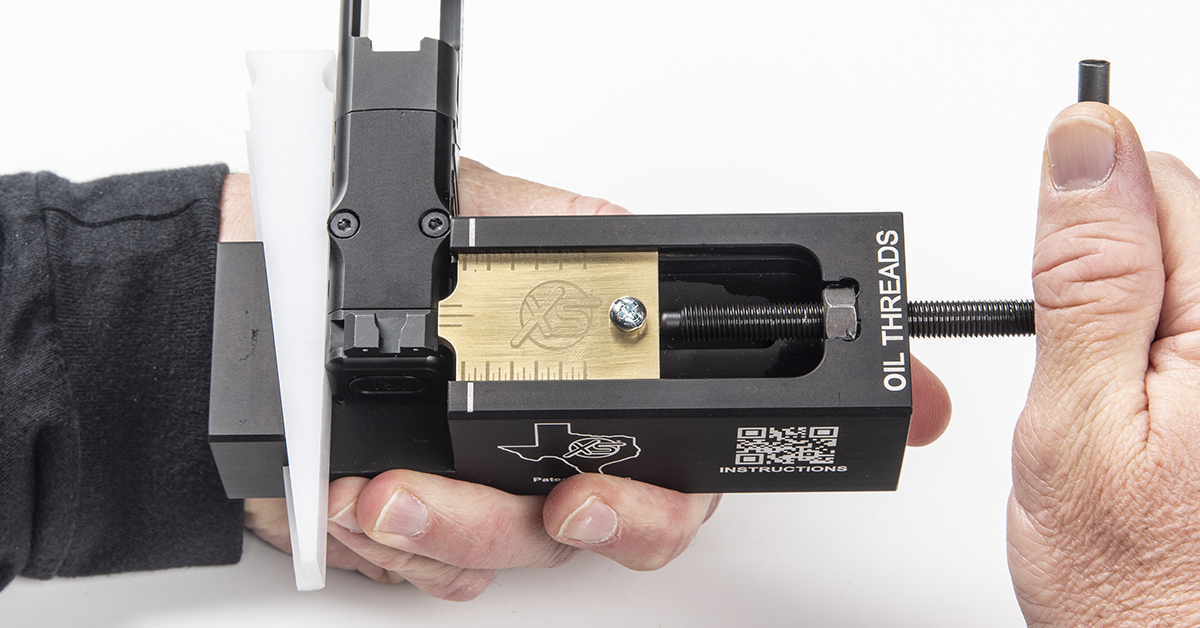
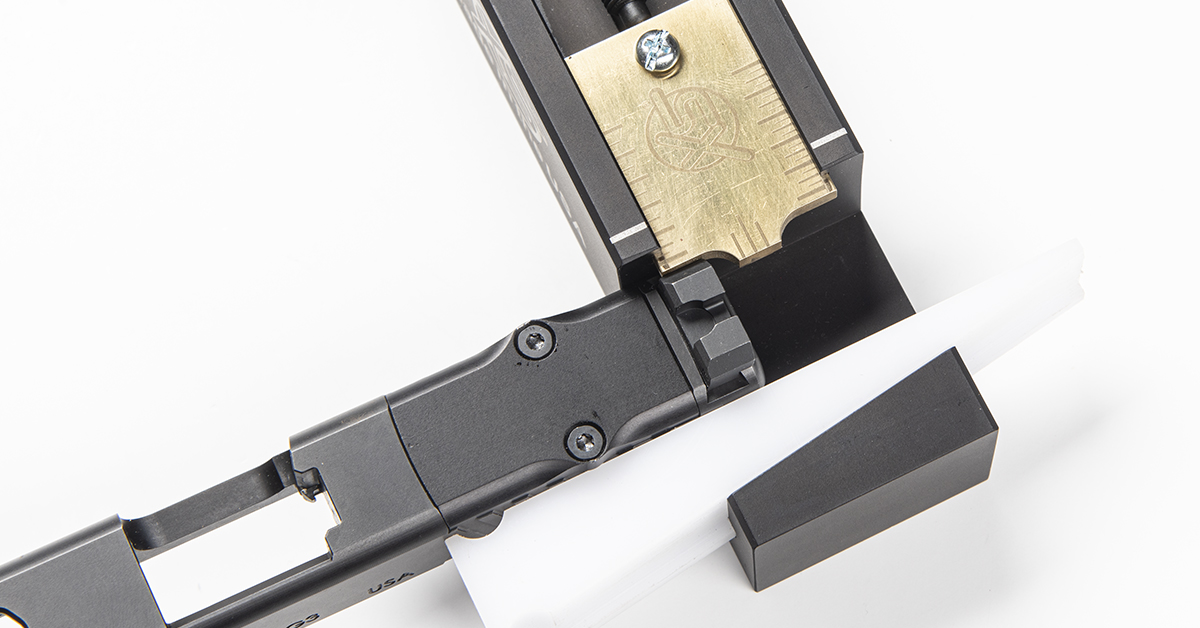
There are a couple key areas that set the XS Sights Inline Sight Pusher apart from other gun-specific sight pushers we’ve used. First is the slide clamping design. The Inline Sight Pusher employs a Delrin wedge that uses tension to lock the slide into place in the tool rather than the screw-and-clamp system found in most sight pushers. We first thought this concept was a bit “iffy.” Such notions quickly disappeared once we put it to use. Simply position the slide in the tool so that it lines up with the brass bit and insert the wedge between the slide and the tool. The wedge effectively locks the slide in place.
Another benefit of this open design concept, aside from being quick and easy to set up, is that it gives you an unobstructed, top-down view of the slide and sight as you push the sight into position. This makes it much easier to get the sight centered into the slide on the first go. With other style sight installers, you typically must take the slide assembly on and off the tool as you try to nudge your way to center. And that brings us to the next cool feature of the Inline Sight Pusher.
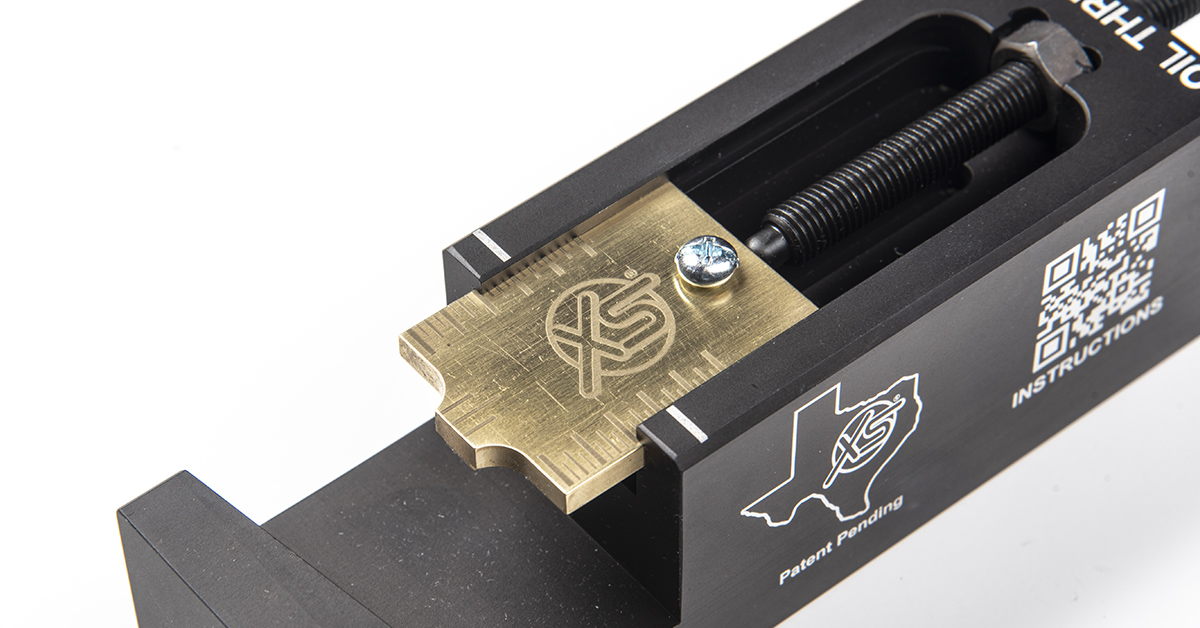
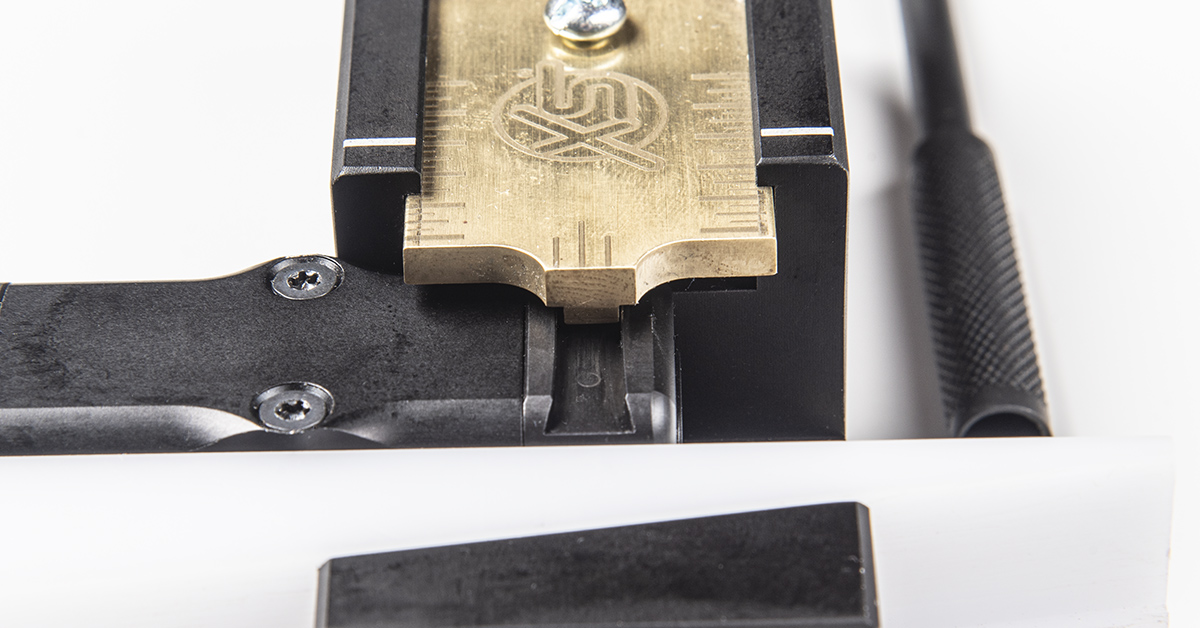
The brass bit has an integrated scale in 1/6-inch demarcations and index lines on either side of the tool. We’ll illustrate how this works in a moment, but the benefit is that this scale, combined with the locking wedge system, allows you to easily monitor and adjust the sight position in the slide so you can hit center alignment without going over-center—something you should always strive for when installing dovetail sights.
With that overview, let’s walk through a sight installation using this new system.
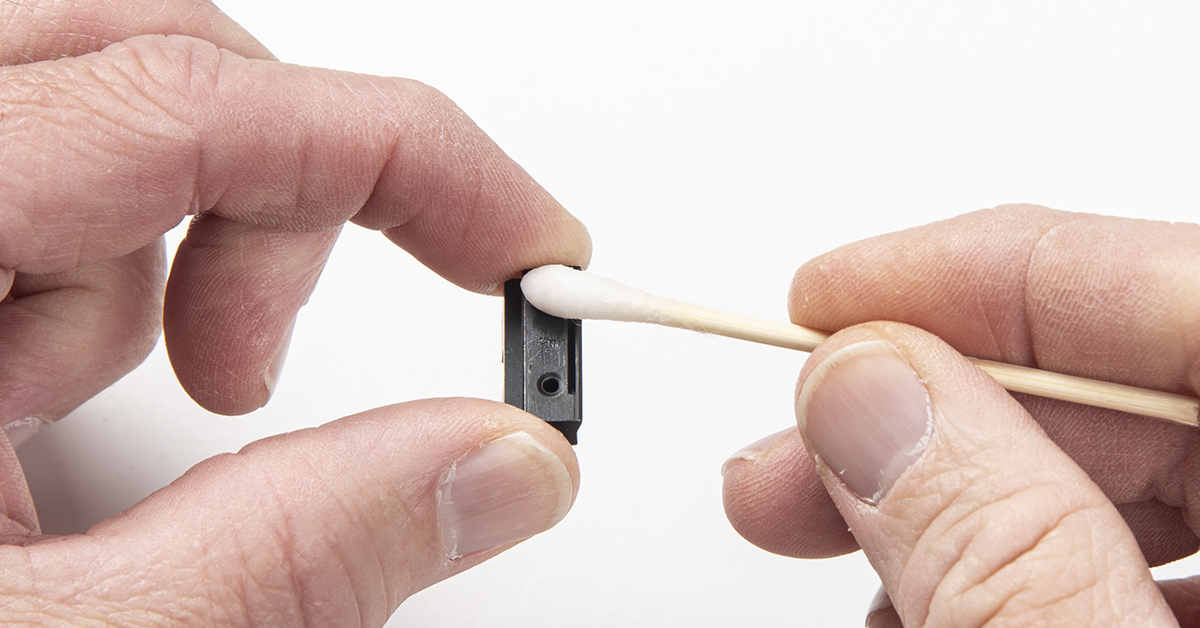
Clean the slide dovetail with denatured alcohol to remove any oils.
Do the same for the rear sight base.
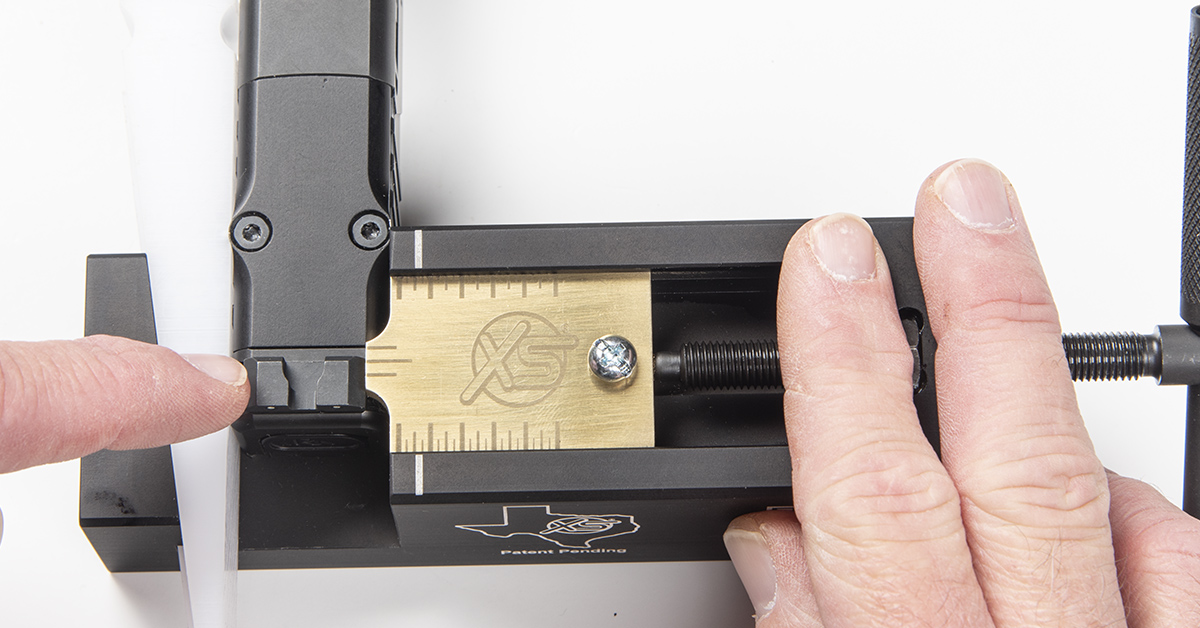
The base of the brass bit is designed to move through the slide dovetail without touching it. Position the slide in the tool and move the bit into the slide dovetail. Once centered, insert the locking wedge between the tool and the slide to keep the slide in position.
Here is the slide correctly aligned with the bit.
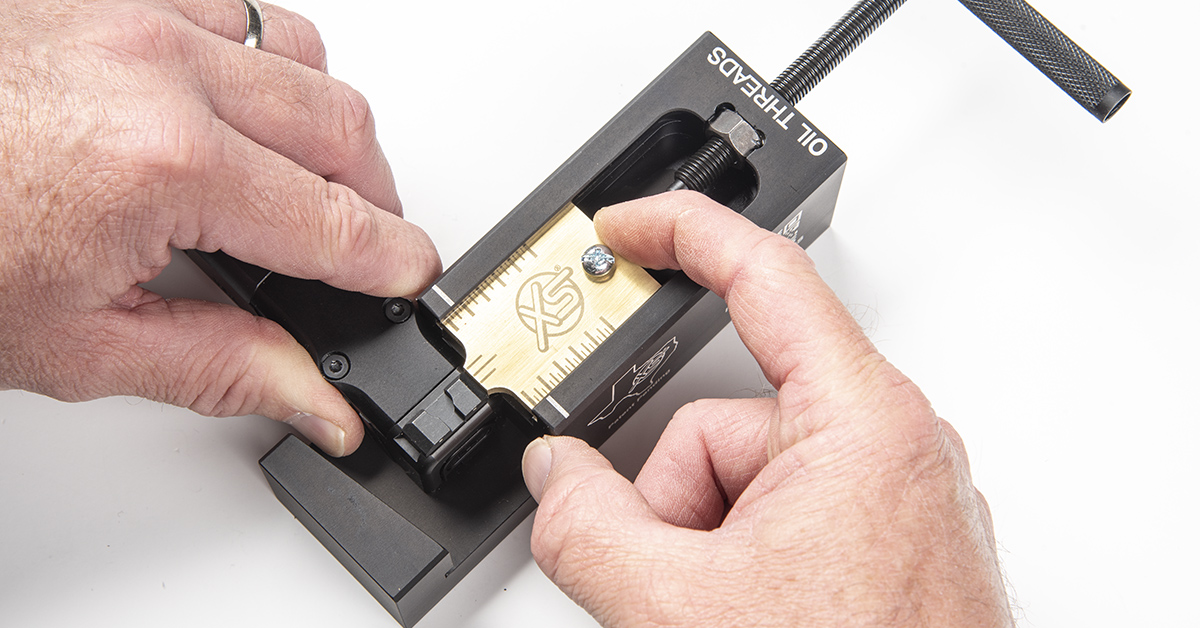
Position the bolt and brass bit to the opposite side of the tool to gain clearance for the new sight. Install the sight into the slide dovetail until it stops.
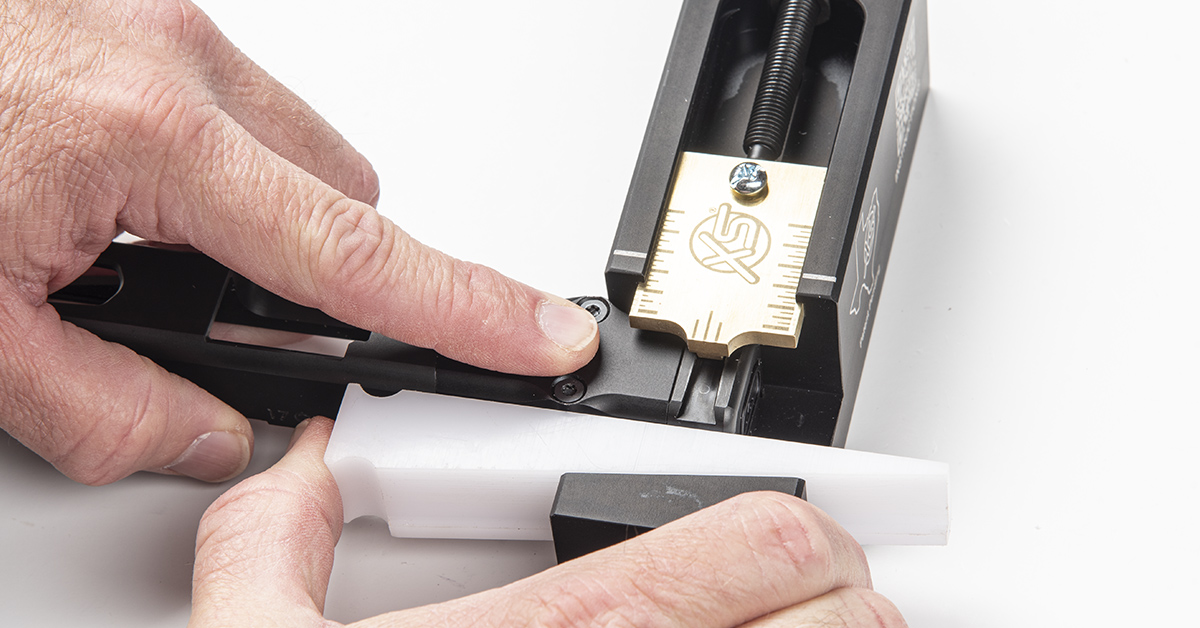
Rotate the bolt clockwise so it pushes the bit against the slide. It is a good idea to double-check to make sure the bit does not contact the slide. It should only contact the side of the sight. Continue pushing until the sight looks centered in the slide or is slightly shy of center.
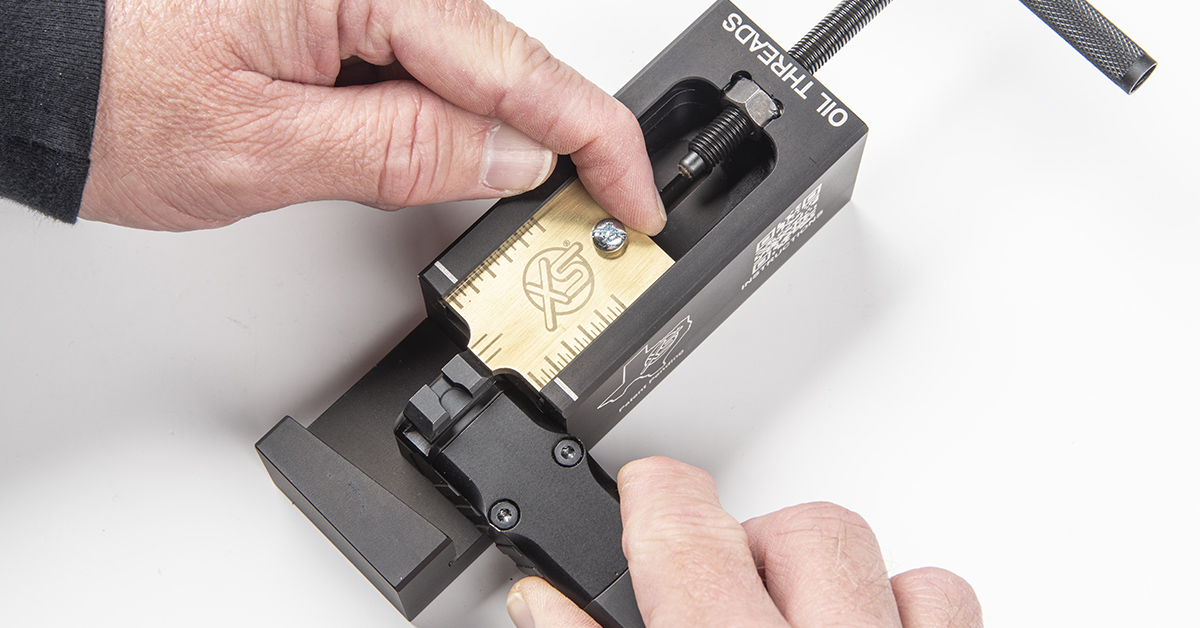
As you can see, with the tool providing a clear top-down view of the slide assembly, it is easier to eyeball the center position with the Inline Sight Pusher than it is with conventional-style sight pushers that only offer a rearward view of the sight.
Once the sight looks to be centered in the slide, you can use the scale to verify the sight’s position. Simply remove the locking wedge and place the slide against the tool. Move the bit against the side of the sight and note the scale position relative to the index mark on the slide.
Next, rotate the slide 180 degrees and repeat the measuring. When the sight is centered in the slide, the scale will show identical indexing on the left and right side of the slide. Fine-tune adjustment can then be made at the range. This is another advantage of the Inline Sight Pusher—its compact and lightweight design makes it easy to stuff in your range bag. Once zeroed, apply the supplied thread locker to the left and right side of the rear sight to complete the installation.
Although we didn’t have an optic installed on this slide, note that the Inline Sight Pusher allows you to remove and install a rear sight without having to remove a previously installed and zeroed red dot. This is perfect for red dot owners who wish to install taller sights.
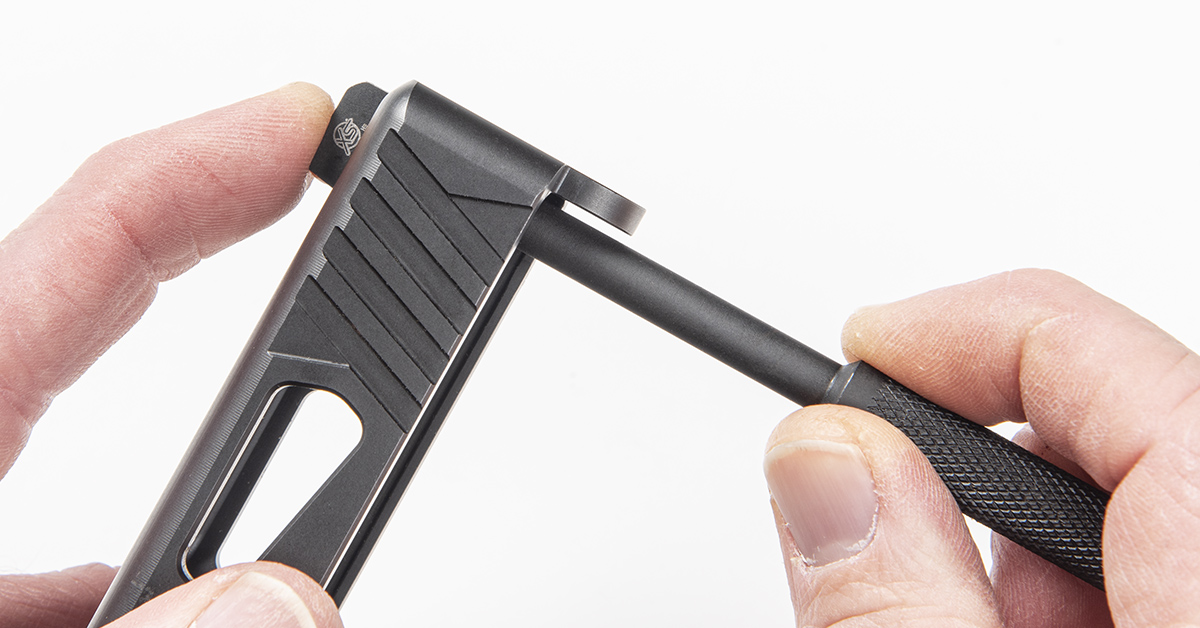
Finally, the Inline Sight Pusher’s T-handle (Gunsmith Series) doubles as a GLOCK front sight tool. Degrease the screw and sight threads, apply a drop of thread locker to the screw threads, and install the screw finger tight. DO NOT OVERTIGHTEN! Let the thread locker do the heavy lifting, otherwise the screw may shear under recoil.
While the XS Sights Inline Sight Pusher for GLOCK is intended for use with XS Sights, we must applaud this fresh design because it not only works well, it also eliminates some of the aggravations we’ve had with conventional sight pushers over the years. If GLOCK pistols are your thing, you should give this tool a closer look. And if we were to take a guess, we’d bet that XS Sights will be coming out with dedicated Inline Sight Pushers for other popular pistol platforms in the future.

