Although modifying a Henry lever gun’s forearm is a nail-biting operation for most gun DIYers, we show how to install XS Sight’s new Henry LVR-HG with minimal sweat and panic attacks. We round out this modification with several more items that will turn this already excellent platform into a carbine for which you’ll want to find more excuses to run.
by Rob Reaser
Let’s start by addressing the elephant in the room…the following is an operation that is best left to a willing gunsmith [that’s our obligatory disclaimer]. We’re talking about removing and replacing the forend of a Henry lever-action rifle.
No small feat, that.
Henry assembles these rifles in a manner that doesn’t lend themselves to easy removal of the handguard. That is because the magazine tube and the forend are both captured by the outer magazine tube support, which uses a dovetail interference fit to the barrel. In short, it is necessary to drift the tube support off the barrel with the magazine tube and forend in place. And that is the challenging part of this operation — to do so without damaging the firearm.
So, why is swapping the stock Henry lever-action forend for an aftermarket system even a thing? Because it is a worthwhile upgrade for many and it can be done cleanly with the proper tools and technique. We’re not saying you should do this yourself rather than employing the services of a gunsmith; we’re just saying it can be done and we’re going to show the process here. And since we last performed this operation, we’ve come across a super-nifty tool that makes the job a lot easier and with less trauma to the gun components.
The Henry LVR-HG (Lever Handguard)
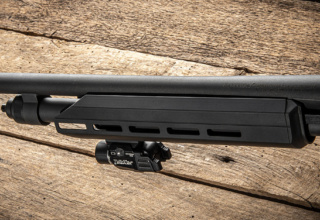
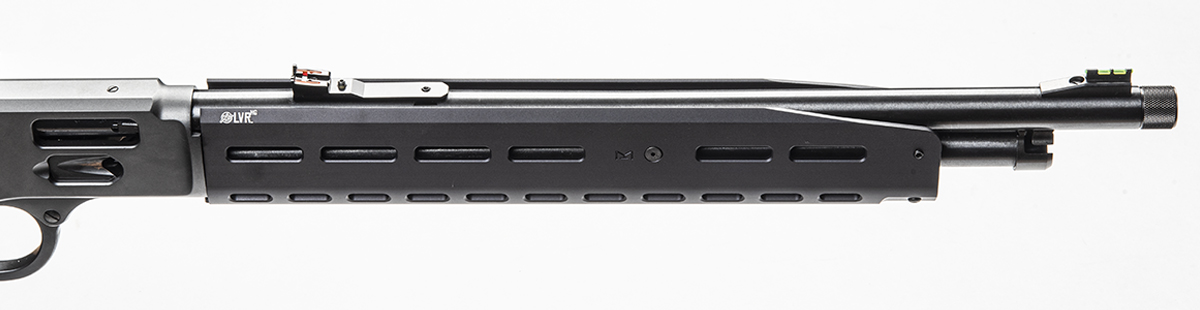
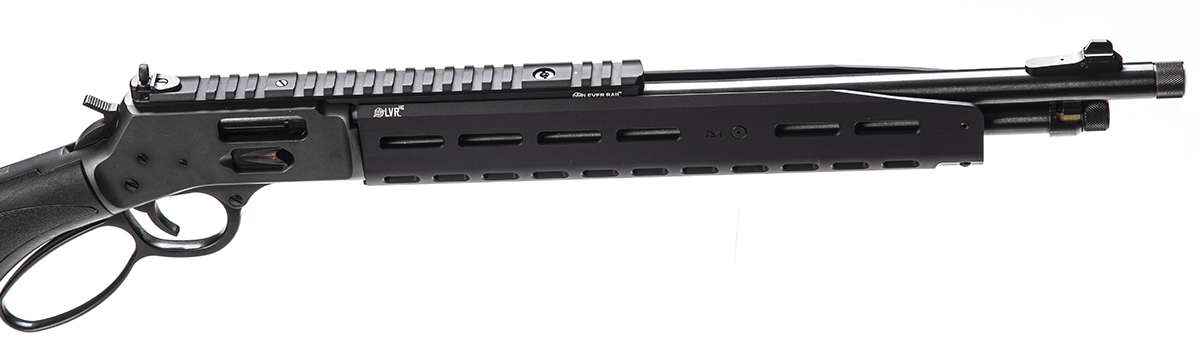
XS Sights isn’t the first company out of the gate to make an upgraded forearm for Henry lever-action rifles, but this is arguably the sleekest, most ergonomic, and easiest to install handguard that we’ve encountered. Made of a lightweight yet tough aluminum, the XS Sights’ LVR-HG (Lever Handguard) maintains a super-sleek profile that holds to the same width as the receiver. Generous M-LOK slots along the sides and bottom of the handguard provide numerous mounting points for sling attachment and accessories. Additional slotting along the lower sides of the handguard further lightens weight and ensures ample airflow for barrel cooling.
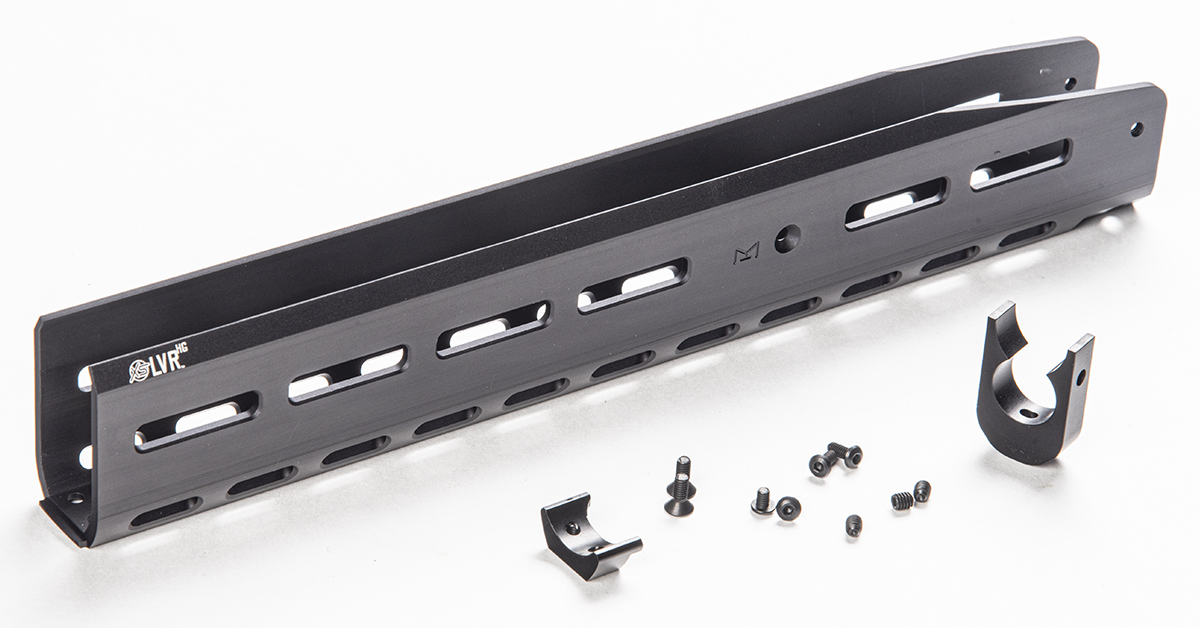
The handguard utilizes three attachment points to engage the firearm — the magazine tube support, forearm support, and a receiver mount. With these three mounting points, the handguard is ultra-stable and secures tight to the receiver and barrel assembly with assorted retaining and set screws.
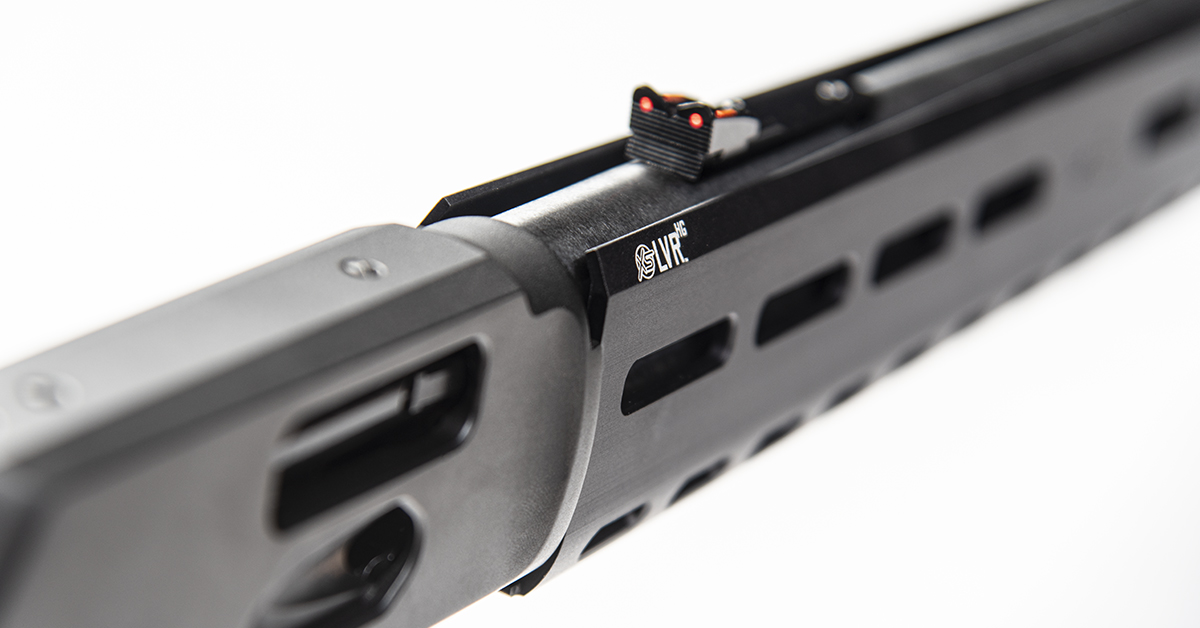
One of the many aspects of the LVR-HG is its smooth, elegant design. The slab-side profile fits neatly in the support hand while the beveled corners deliver a comfortable yet secure grip. All this makes for a handguard that is fast to point and positive in retention.
LVR-HG Installation
As with any firearm work, begin by clearing the rifle of all ammunition. Ensure the magazine tube is empty and that there are no cartridges in the chamber or receiver.
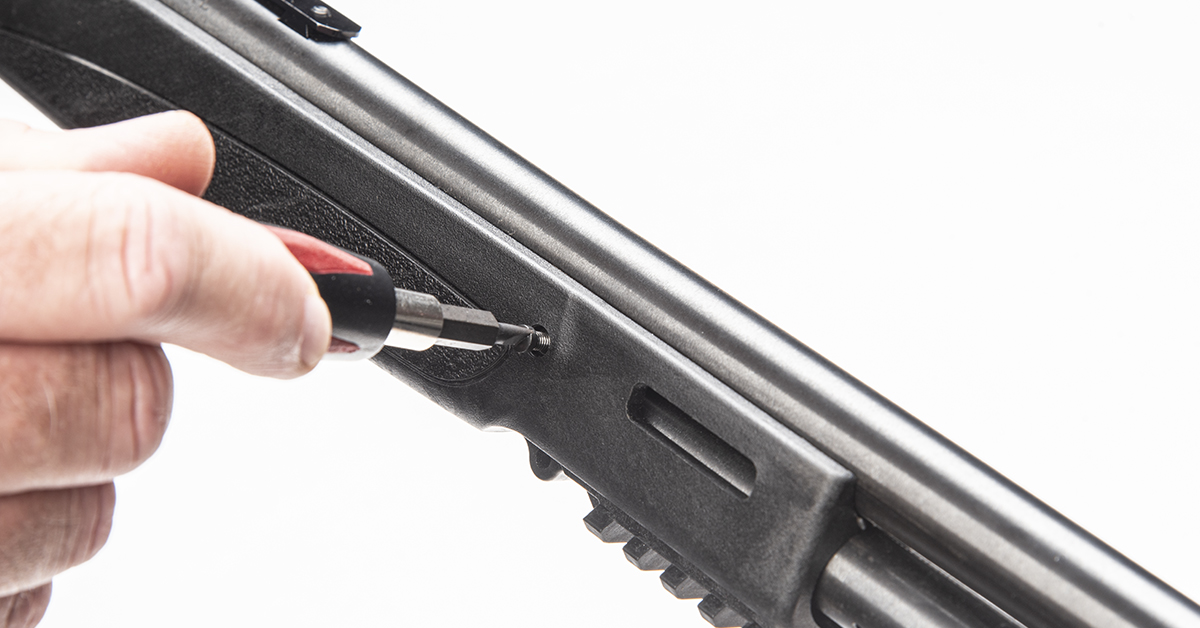
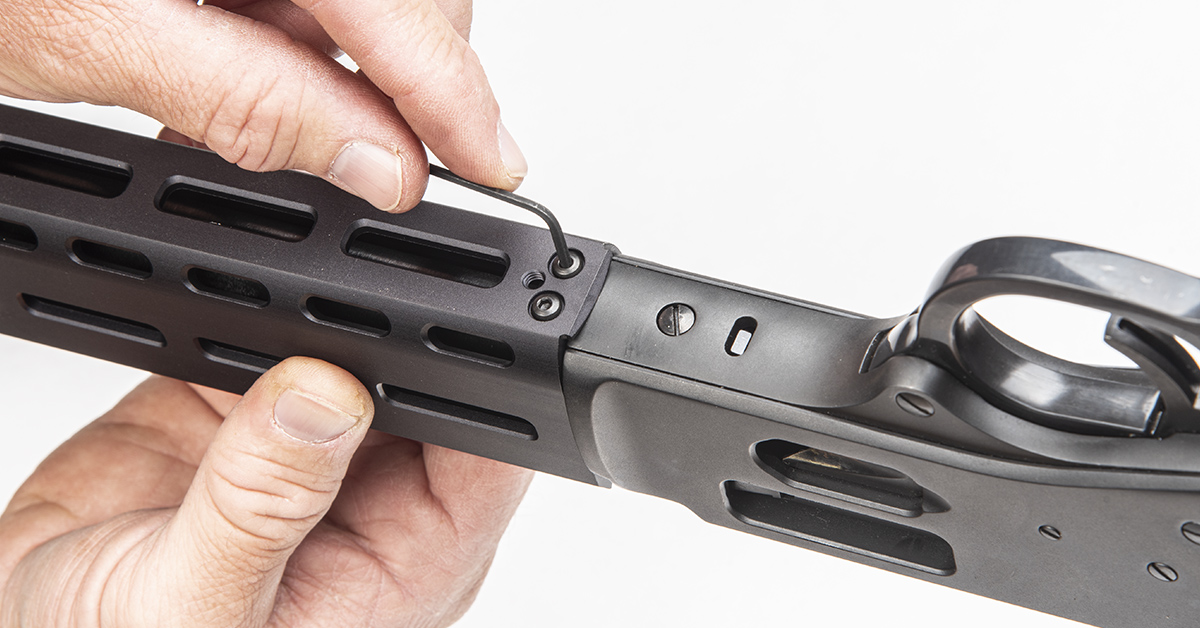
Once the firearm is rendered safe, start by removing the two forearm retaining screws from the left and right side of the forearm support and set them aside.
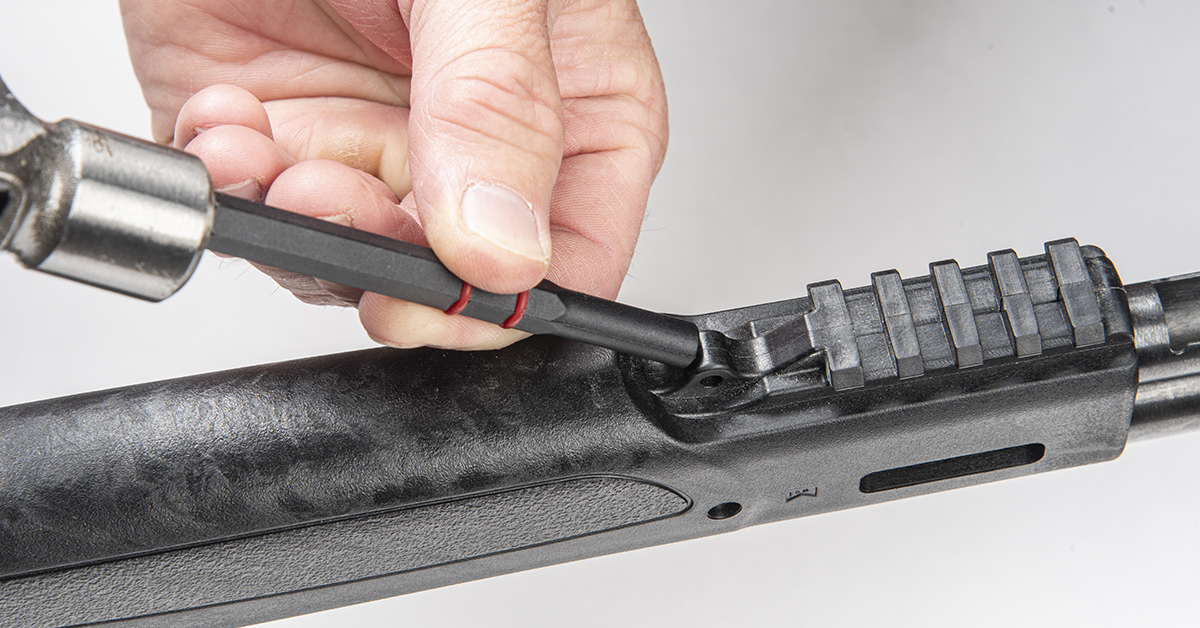
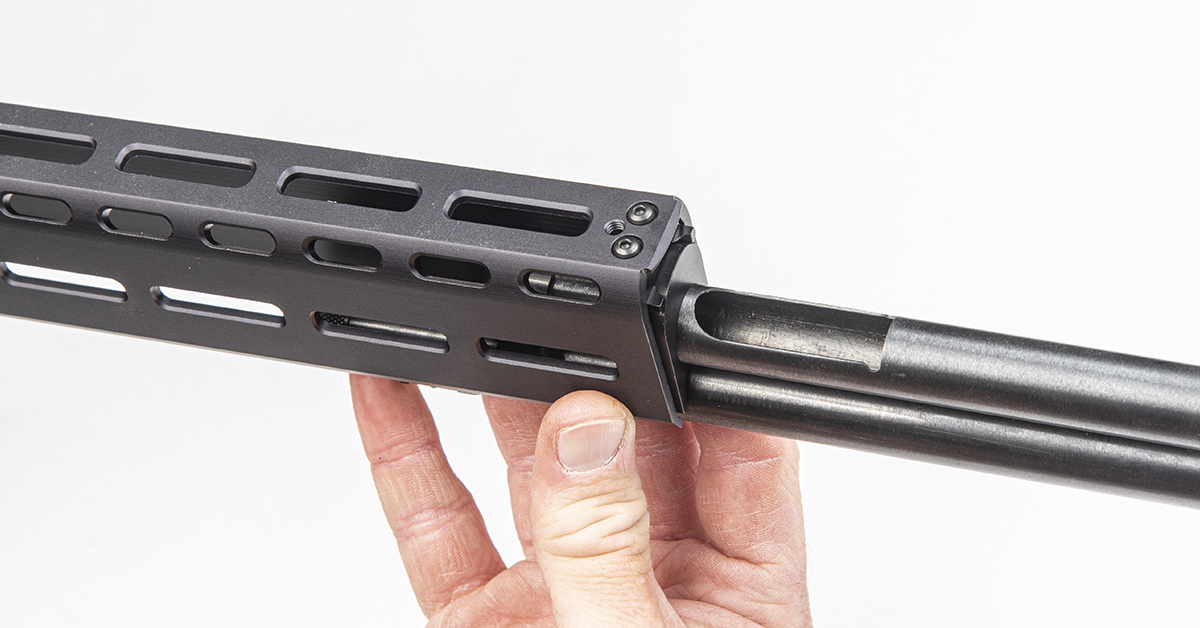
The factory forearm is channeled to engage with the outer ends of the forearm support. This is an interference fit that can be somewhat tight. Removal of the forearm thus requires tapping the forearm toward the muzzle. We have found that the easiest way to control this forward movement of the handguard is to use a hammer and non-marring punch, applying the impact blow to the back of the sling swivel boss. Tap the forearm forward until it moves out of the receiver by 3/8- to 1/2-inch. You don’t want to move the forearm too far forward in order to allow for enough free movement when it is time to remove the magazine tube support from the barrel.
As mentioned, the most challenging part of the handguard swap is removing and reinstalling the magazine tube support, which uses a dovetail interference fit to the barrel. As such, the support must be hammered out of the barrel dovetail. There are two ways to do this.
The first method, and the one we recommend because it imputes less stress onto the firearm, is to utilize one of the best (if not the best) tools ever made to drift parts out of dovetail slots. We’re talking about the Wyoming Sight Drifter available from Skinner Sights.
We had recently acquired this tool for pistol sight installation and wondered if it would work equally well in moving the magazine tube support off of the Henry rifle. Well, it did, and with no trauma to the work piece.
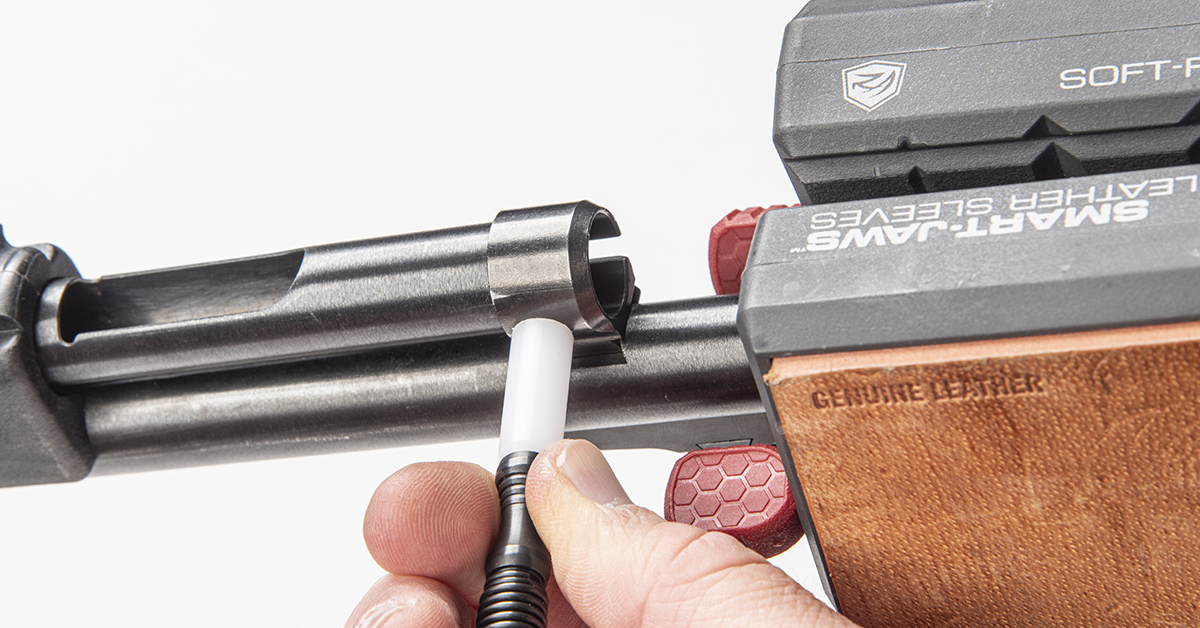
To remove the support, we secured the muzzle end of the rifle in Real Avid’s Master Gun Vise. Placing the Wyoming Sight Drifter’s Delrin ram against the left side of the support, we used the spring-loaded power of the tool to push the support out toward the right (ejection port side) of the gun. When doing this, it is important that the support is removed toward the right side of the gun, not the left.
The Wyoming Sight Drifter is the best bargain around for dovetail drifting operations like this. And with an easy price of $39, there’s no reason not to have one or two of these in your tool kit.
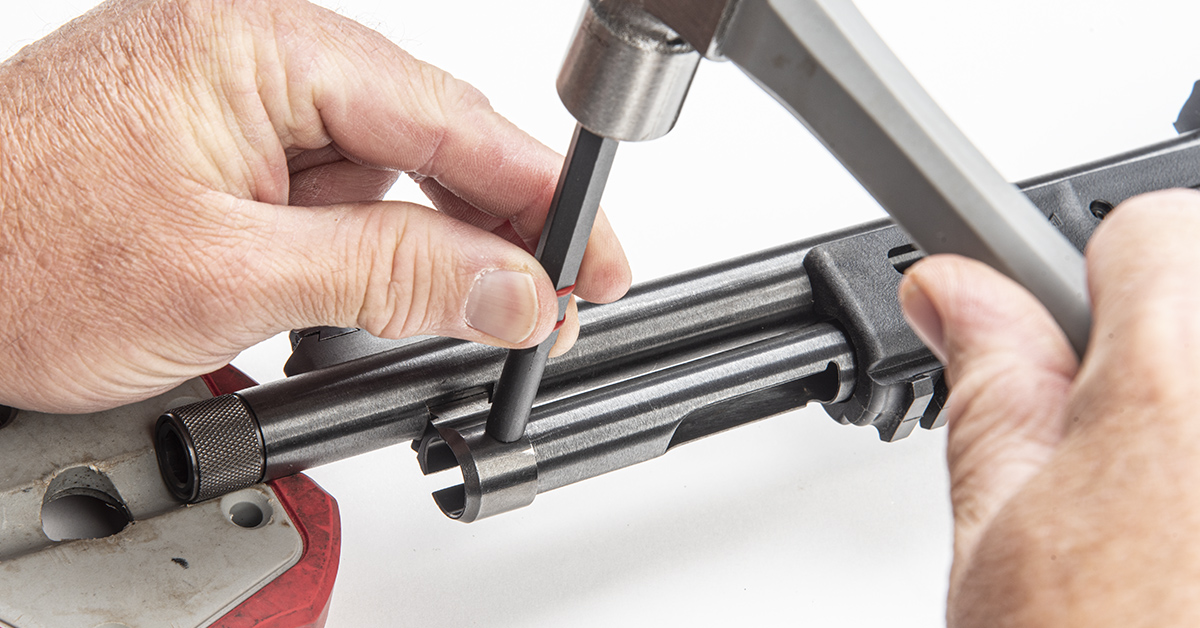
The alternate way to remove the magazine tube support is through the conventional method of hammering it out with a hammer and punch. If you choose this method, begin by supporting the muzzle end on a bench block (here, using Real Avid’s Smart Bench Block) and supporting the receiver on a wooden block. Position the gun with the ejection port side down and drive the magazine tube support out the right side of the barrel. Once the support clears the dovetail, remove it from the end of the support.

Pull the forearm forward to remove. It will likely be necessary to tap it off using a soft-faced hammer.
The forearm support fits loosely in its barrel dovetail. Ensure it remains in place, as there is no need to remove it.
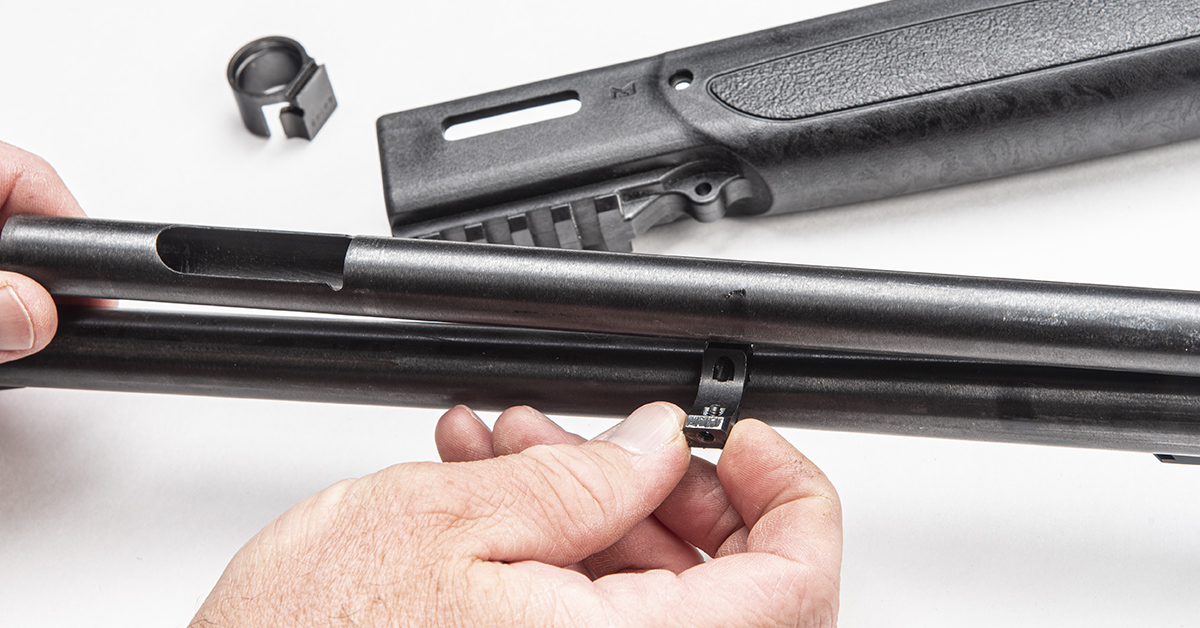
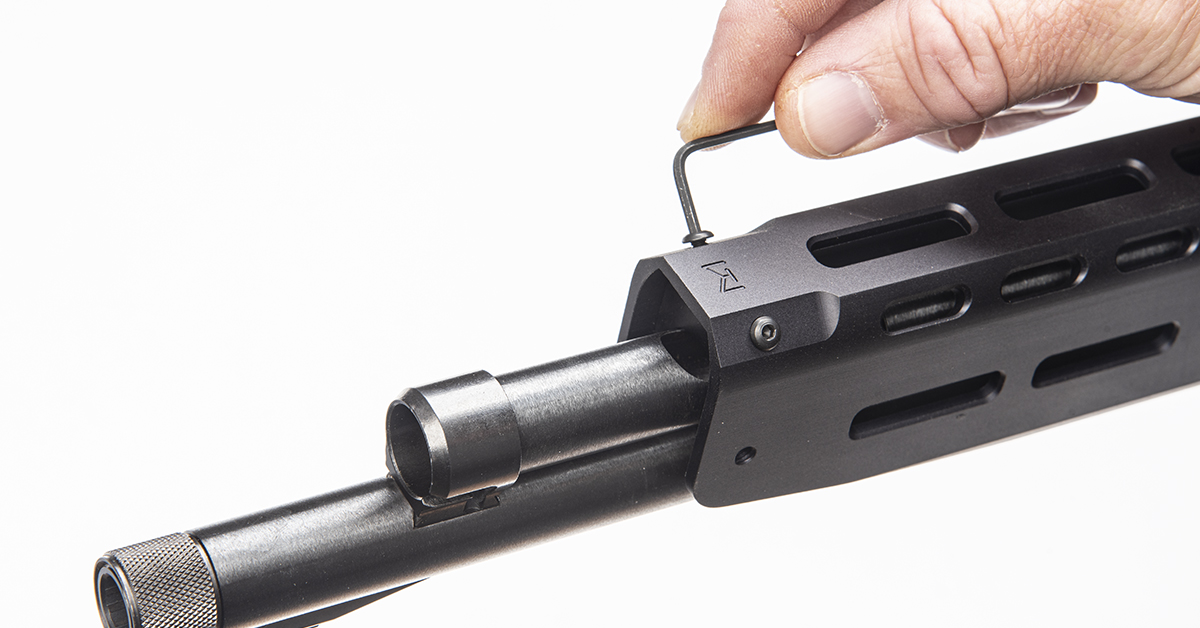
Begin the LVR-HG installation by installing the new magazine tube support mounting block onto the magazine tube. The block has the firearm caliber engraved in the front. Be sure the engraving is oriented toward the muzzle.

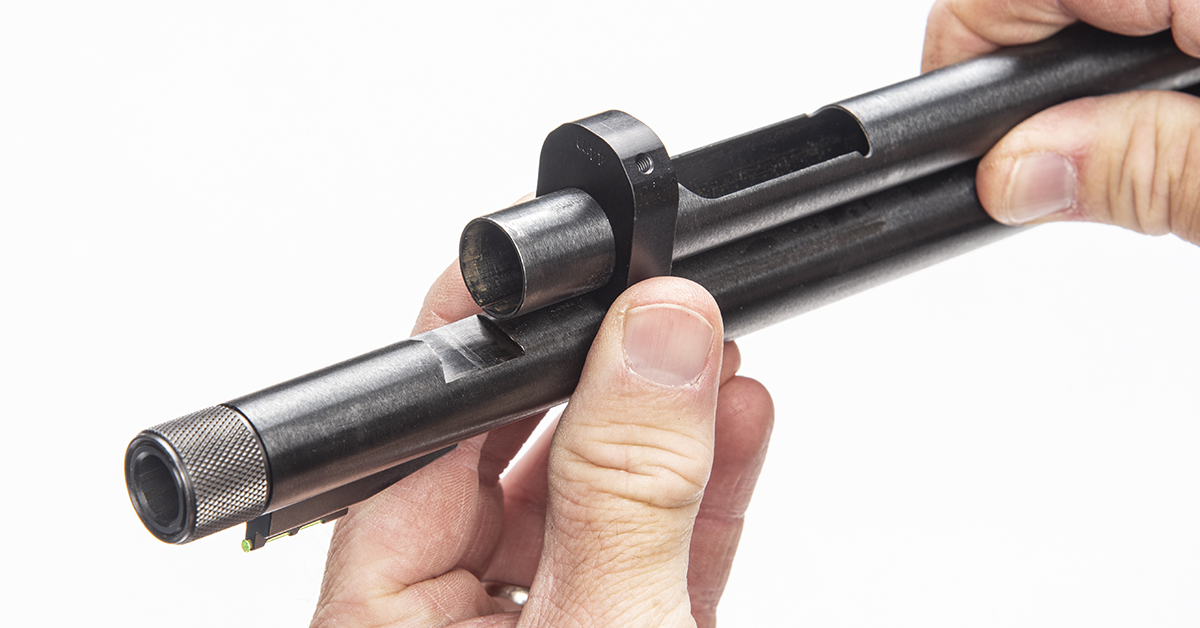
Now comes the tricky part. Install the magazine tube support onto the end of the magazine tube. To do this, you must pull the magazine tube toward the right side (ejection port side), install the support, and orient the support dovetail so that it can start into the barrel dovetail slot. There is only way this will go on.
You’ll notice that the left side of the magazine tube support dovetail is slightly angled to facilitate entry into the barrel dovetail slot. Take your time here in aligning the support into the barrel dovetail. It may require significant pressure, pulling the magazine tube assembly to the right side, to get the support properly aligned and started in the barrel dovetail. The important thing to remember is to get the support aligned and started correctly in the dovetail before you begin tapping the support back into the barrel. Failure to achieve proper alignment may result in damaging the dovetail fitment (displacing metal). If that happens, any displaced metal will need to be carefully filed out before attempting to reinstall the support.

Once you start the support into the barrel, drive it into place, centering it in the barrel dovetail. Here, the Wyoming Sight Drifter performs this task quite handily and without hard blows being delivered to the gun. You can, of course, do the same by supporting the gun on a bench block and wooden support and using a hammer and nylon or brass punch.
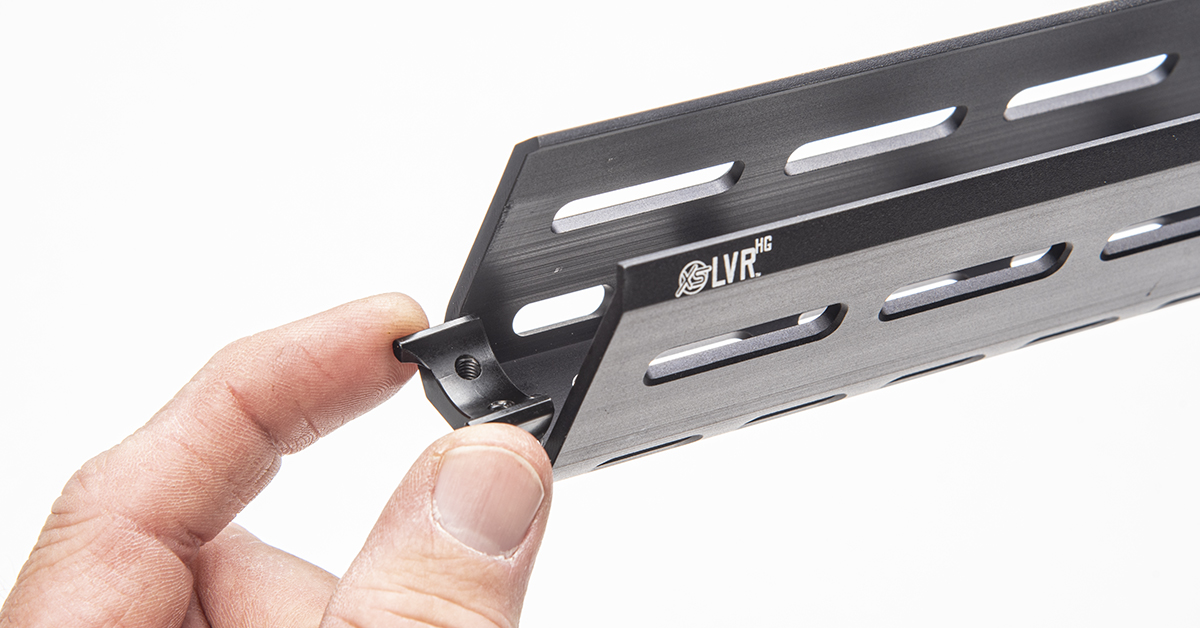
With the magazine tube support in position, place the LVR-HG receiver mount into the back of the handguard as shown. Note that the two protrusion face the receiver.
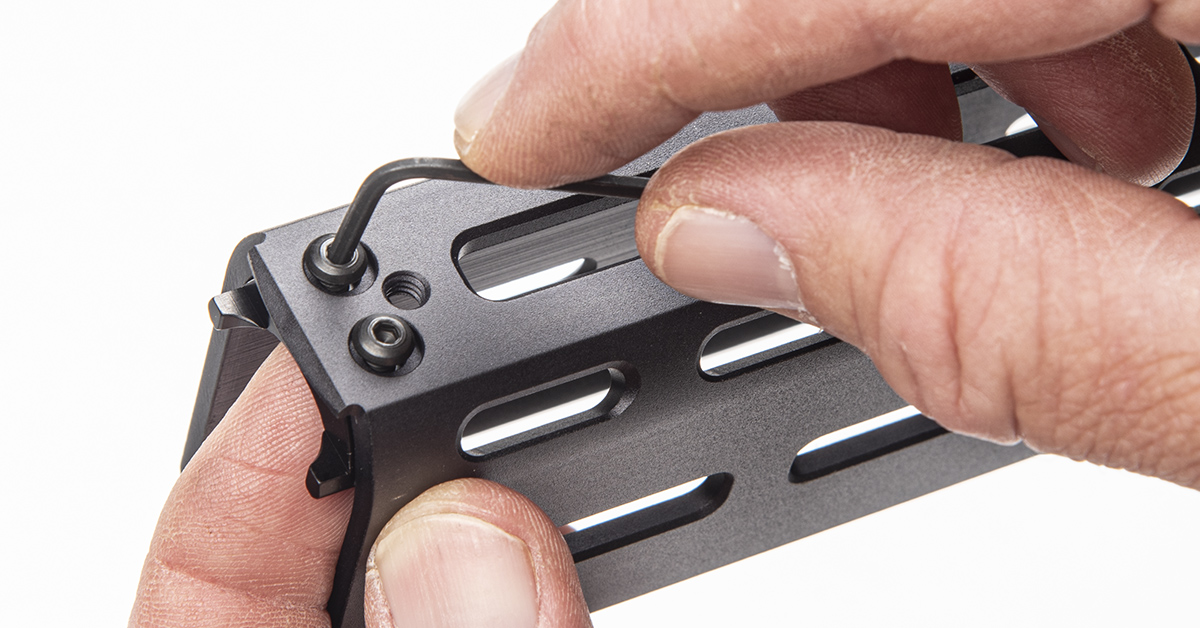
Loosely install the receiver mount retaining screws. Do not tighten them at this time.
Slide the LVR-HG assembly onto the barrel and magazine tube. Be sure that the forearm support is in place and has not slipped out of its dovetail slot in the barrel.
Firmly seat the handguard against the receiver. Check to ensure that the receiver mount screws are still loosely installed.
Check that the forearm support screw holes align with their corresponding holes in the LVR-HG. Loosely install the new support screws. The holes in our Henry’s forearm support did not precisely align to allow both these screws to be installed together. The fix was to enlarge of one of the holes in the handguard to provide clearance for the screw shank to thread into the support. We used a needle file to make the enlargement.
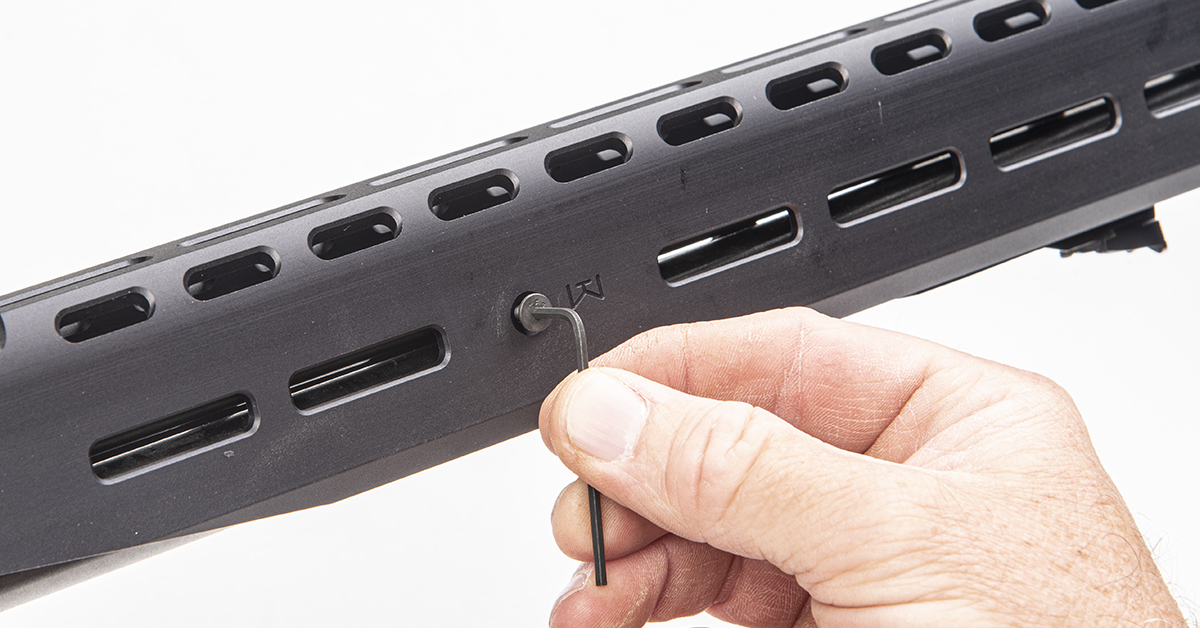
Moving to the front of the handguard, loosely install the two screws into the magazine tube support mounting block.
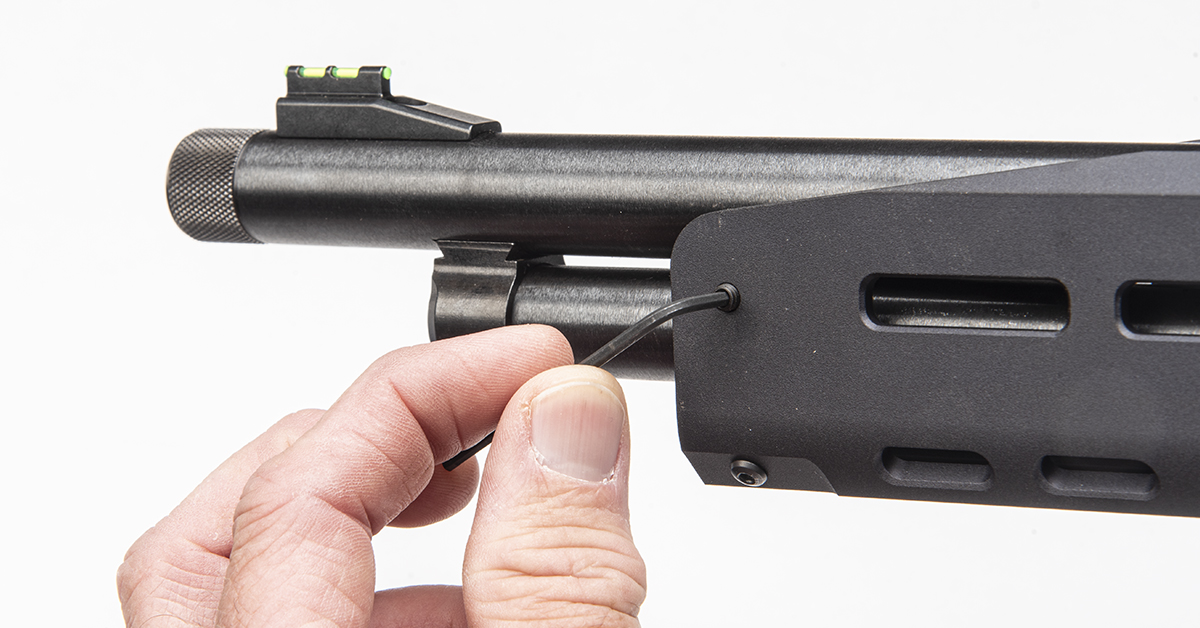
Lastly, loosely install the two set screws into the side of the handguard.
With all the screws loosely installed and the handguard assembly properly fitted to the gun, the next step is to apply threadlocker and tighten all the screws. This process is done one screw at a time. Take one screw out, clean the threads with a solvent such as denatured alcohol, apply a drop of blue threadlocker to the threads, and tighten with finger pressure. The exception to this is the two forearm support screws. These need to be tightened to 15 in/lbs.
By exercising patience, restraining from brute force, and using quality tools, the XS Sights LVR-HG can be installed successfully by the DIY enthusiast. We’re not saying you should do it yourself, only that it can be done. The decision is on you. Just be aware that if you do decide to do it on your own or have a gunsmith perform the work, it will likely void your warranty should damage occur in the process.
Sight/Optic Upgrade Options
If you’ve gone so far as to install the XS Sights LVR-HG, there’s little reason not to take your Henry rifle transformation all the way. That means ditching the factory open sight set for what many shooters consider to be a more precise sighting system — a ghost ring rear and a front post sight set — or install a red dot or a magnified optic. XS Sights has the goods to allow you to go either way.
You will note in the following section that we are installing an XS Sights system onto our Henry Big Boy X prior to the previous discussion regarding the handguard swap. The reason is we wanted to illustrate the installation of both processes (handguard swap and sight system upgrade) starting from a factory-fresh rifle configuration. It does not, though, make any difference in which order you perform these installations. You can install the handguard and then the sight/rail kit, or vice versa.
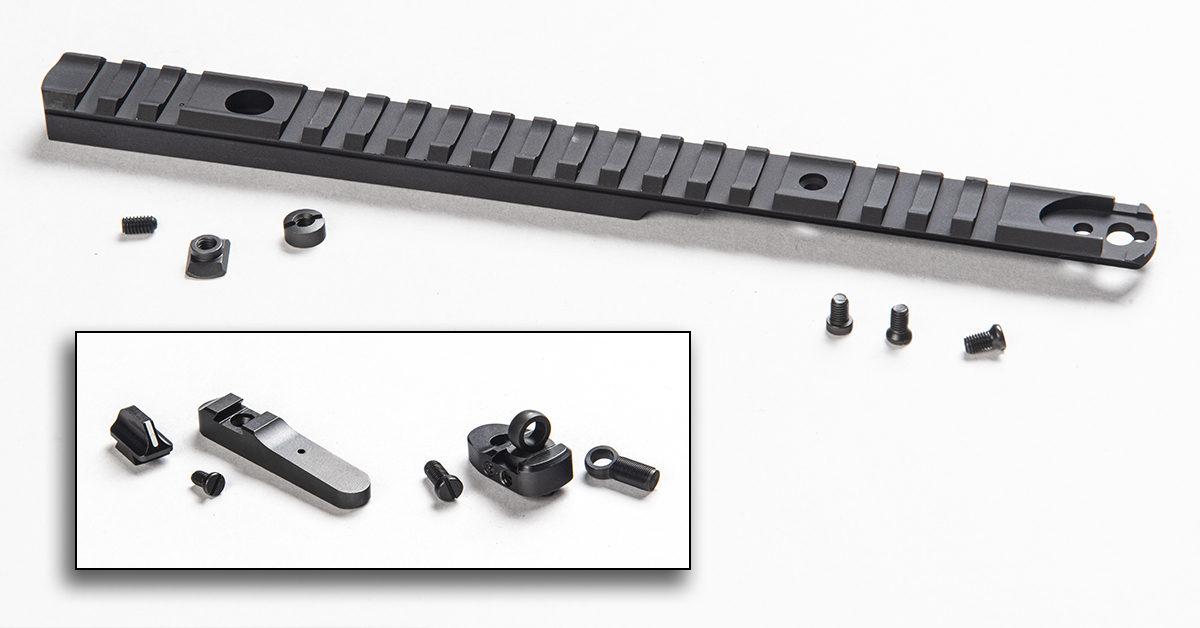
Our kit is a combination of two XS Sights products — the Henry Optic Mount (no sights included, PN# HN6002R-N ) and the Henry Ghost Ring Sights (PN# HN-0005-5). This fitment is for the Henry Big Boy X in .44 Magnum. Check with XS Sights for your specific Henry application.
The rail kit displaces the factory rear sight and secures to both the receiver and the barrel, making for a solid installation. This rail can be used by itself to mount an optic or it can accommodate XS Sights’ Henry Ghost Ring Sights, should you prefer that option. For the sake of this discussion, we’re going to show you how to install the ghost ring sight system even though our final configuration will include the new Burris Fullfield 2-8×35 riflescope.
Note that XS Sights offers two variations of its Ghost Ring Sights sets. One is for those rifles with a screw-on front sight base and the other is for rifles with a simple dovetail front sight. Select the correct sight for your model rifle.
Rail and Ghost Ring Sight Installation
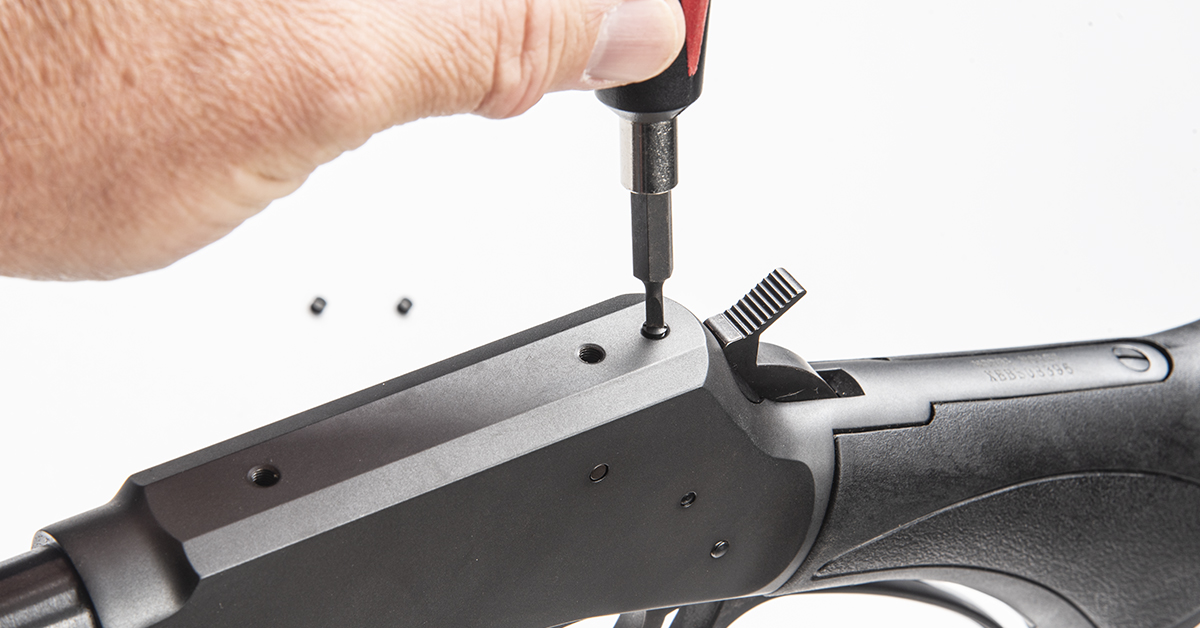
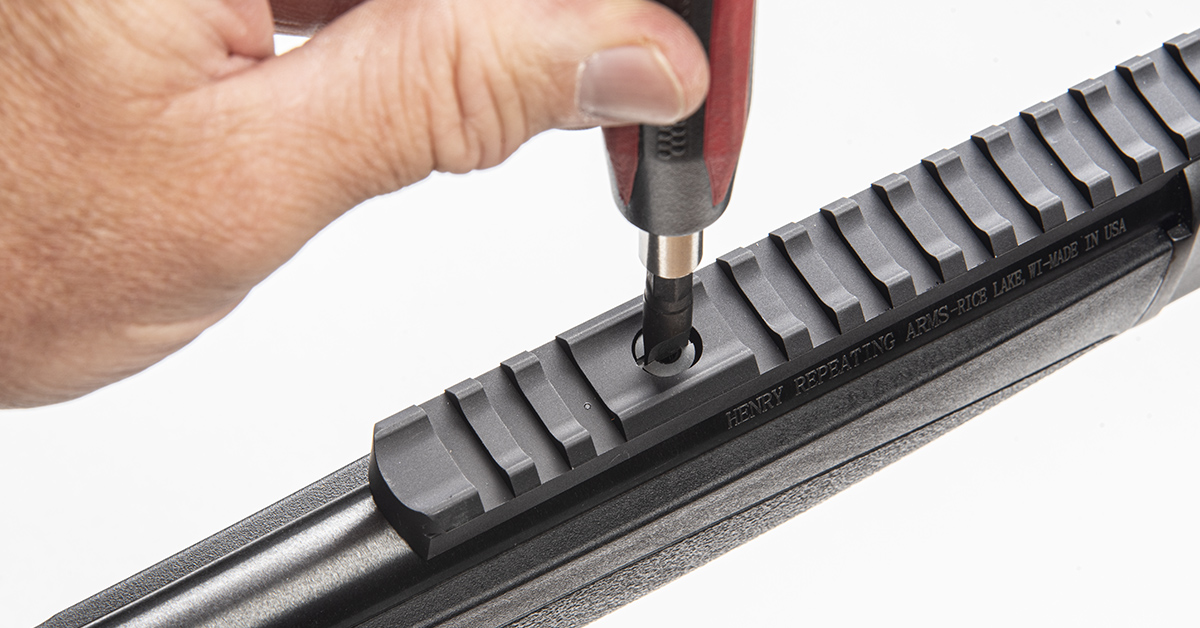
Begin by removing the three filler screws atop the receiver.
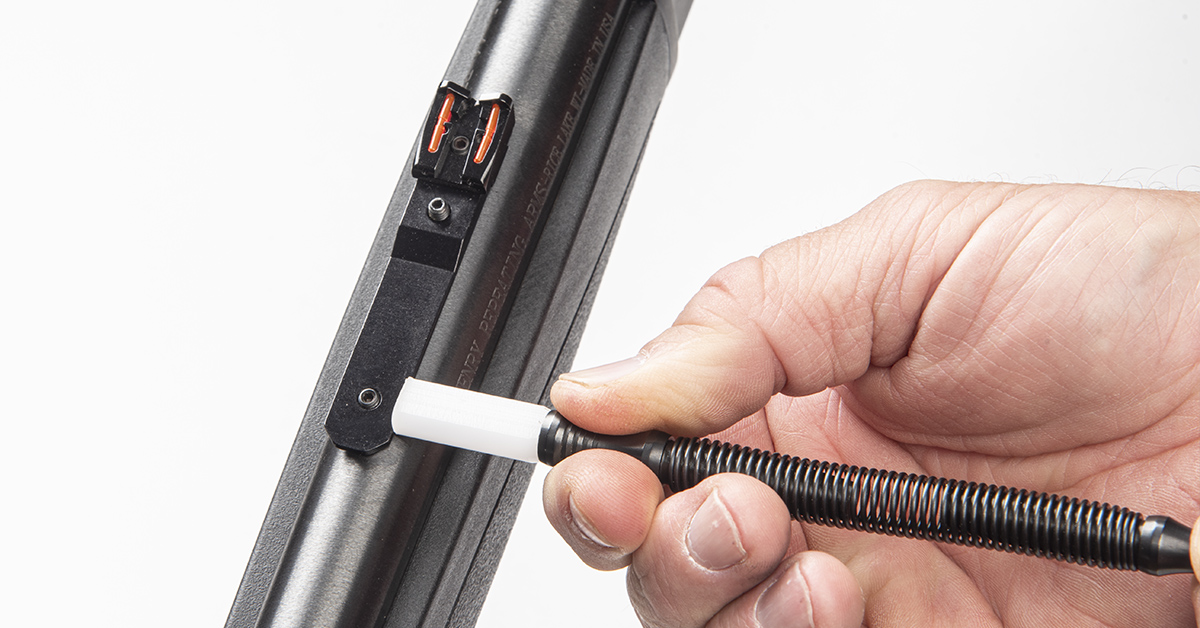
Loosen the set screw on the factory sight base and, using the Wyoming Sight Drifter (or a brass/nylon drift and hammer), move the sight to the right and off the barrel.
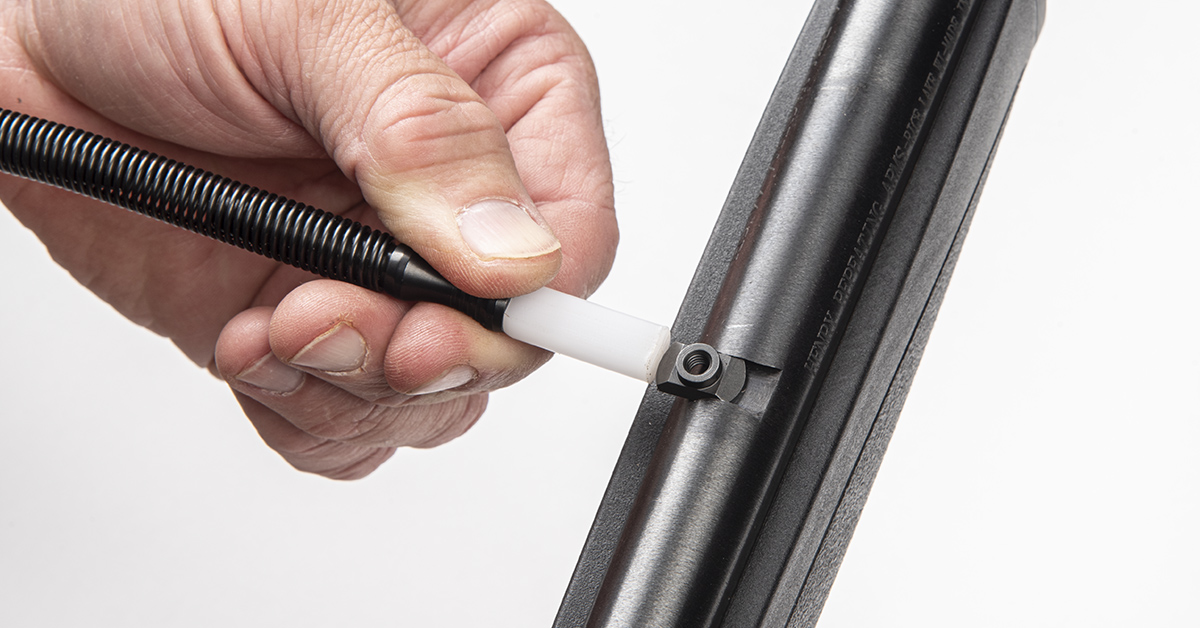
In place of the factory rear sight, install the supplied pillar. Again, we used the Wyoming Sight Drifter to position the pillar in the center of the dovetail slot. You can also use a hammer and drift for this operation but just know that the Wyoming Sight Drifter is so much easier to use and presents less chance of damaging the work piece.
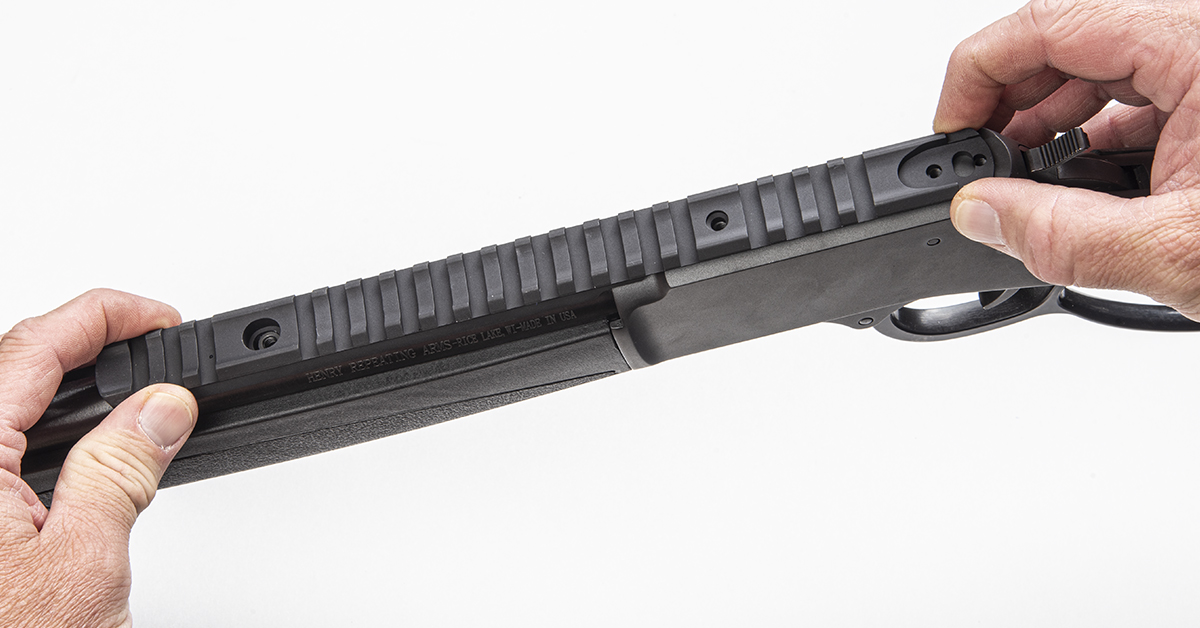
Place the rail atop the receiver and barrel, positioning the rail’s front hole over the pillar. Check that all screw holes are aligned. If there is a front-to-back alignment issue, you may need to enlarge the pillar hole in the rail to ensure the rail holes align with those in the receiver. Working slowly with a needle file will get the job done in short order. We had no such alignment issues with our rail. For left-to-right alignment issues, it may be necessary to drift the pillar left or right accordingly.
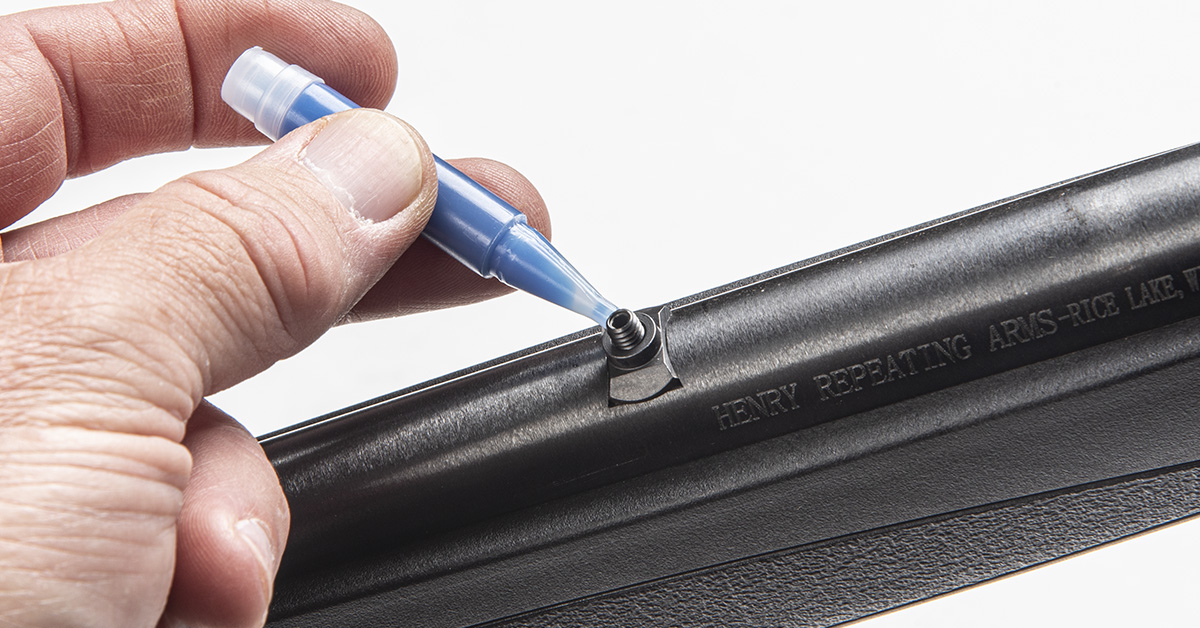
Once the rail is properly aligned with the pillar and the receiver screw holes, remove the rail and apply a small quantity of medium-strength threadlocker around the pillar. The threadlocker will creep into any gaps between the pillar and the dovetail slot.
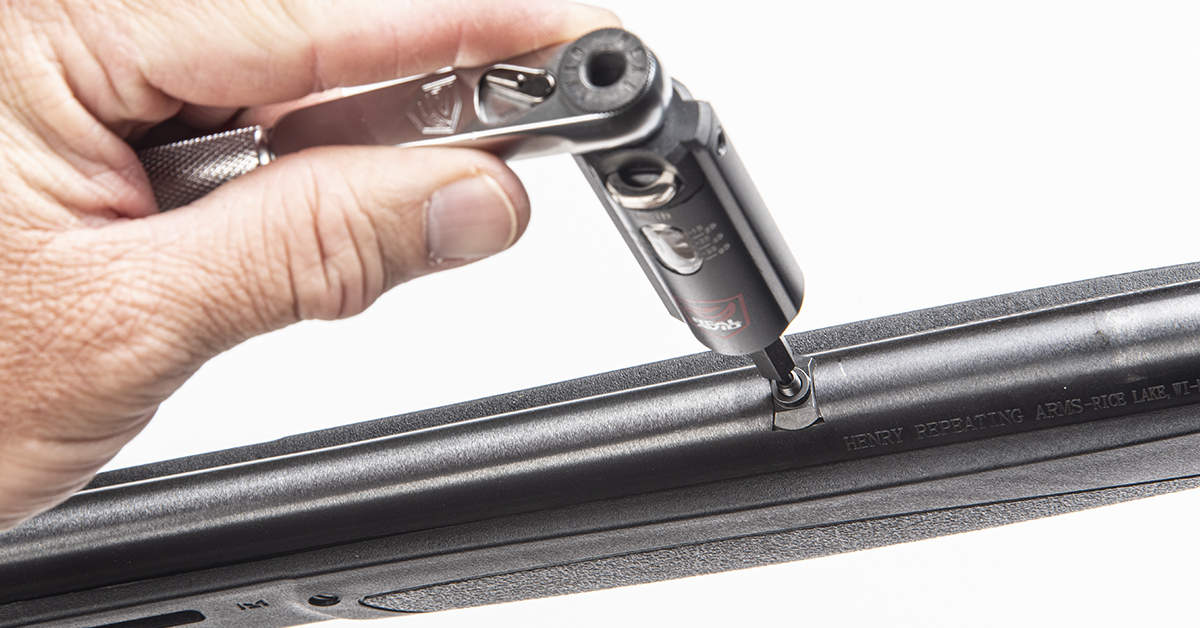
Install the supplied pillar jack screw and torque to 12 to 15 in/lbs. Here, we are using Real Avid’s new Smart-Torq Adjustable Limiter & X3 Driver to achieve the proper torque setting.

Apply a small amount of threadlocker to the bottom of the cleaned rail and position the rail onto the gun. Install the rear sight assembly into place. Next, apply a small amount of the threadlocker to the rear sight and mid-rail screws, as well as to the pillar nut threads.
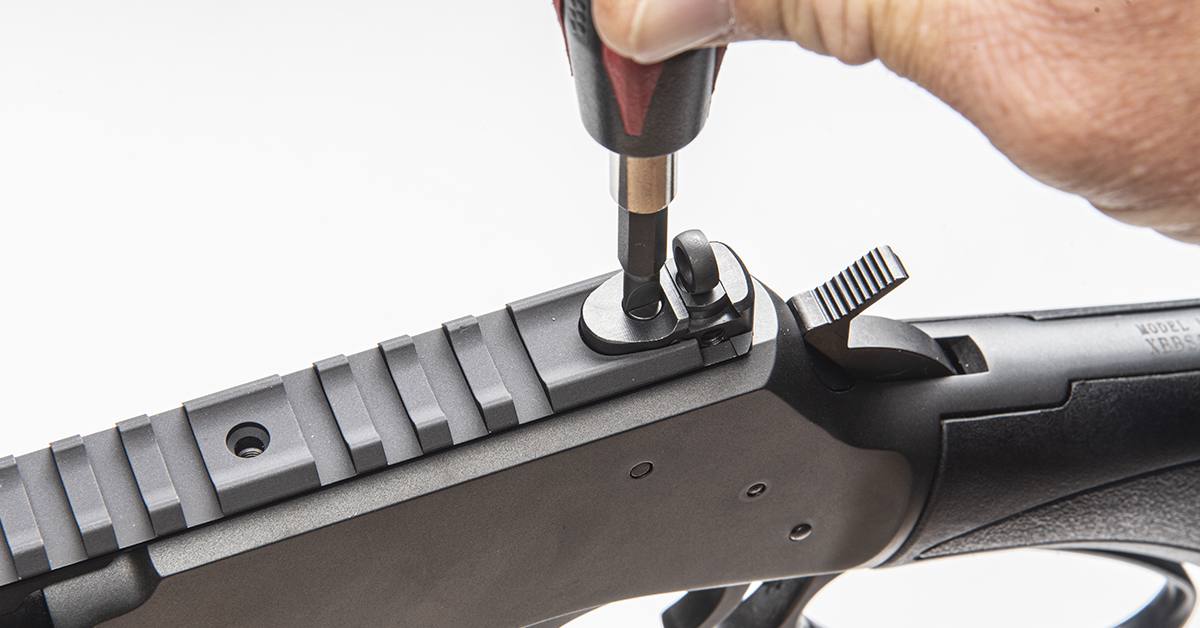
Loosely snug the rear sight with its screw…
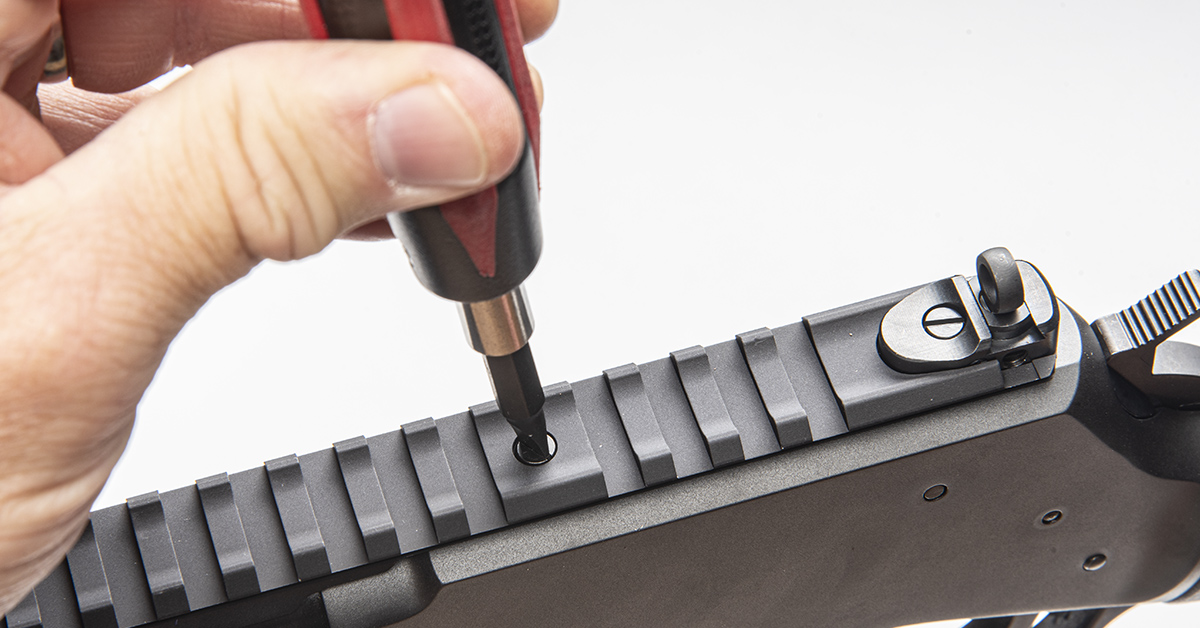
…and do the same for the mid-rail screw…
…and the pillar nut. Tighten both screws and the pillar nut to between 12 and 15 ft-lbs.
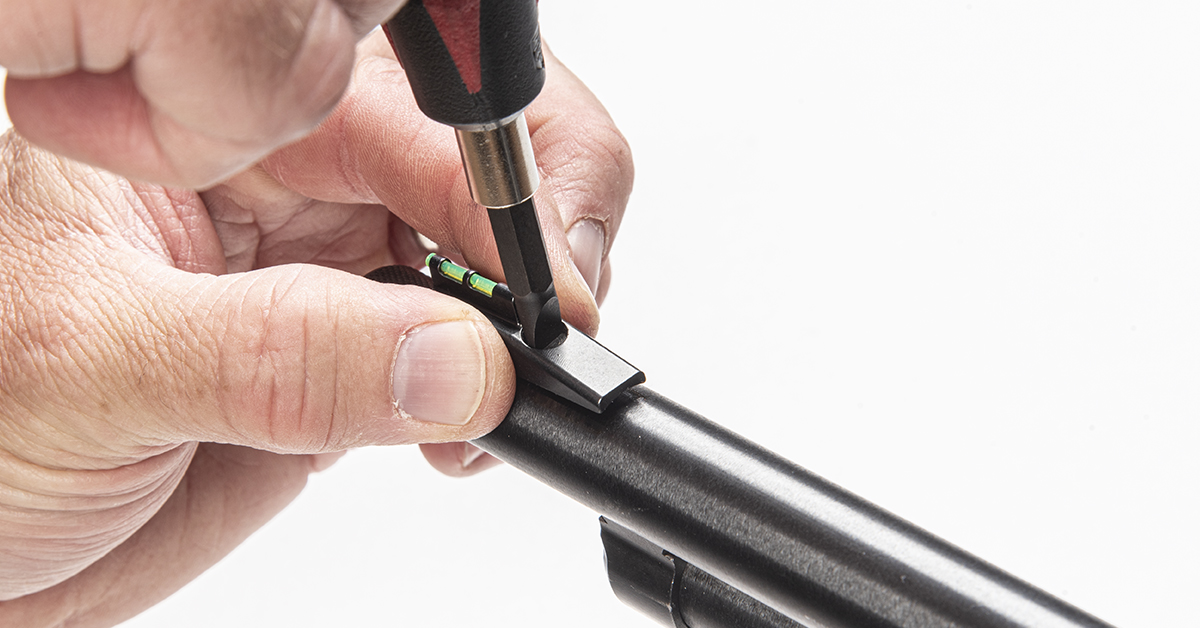
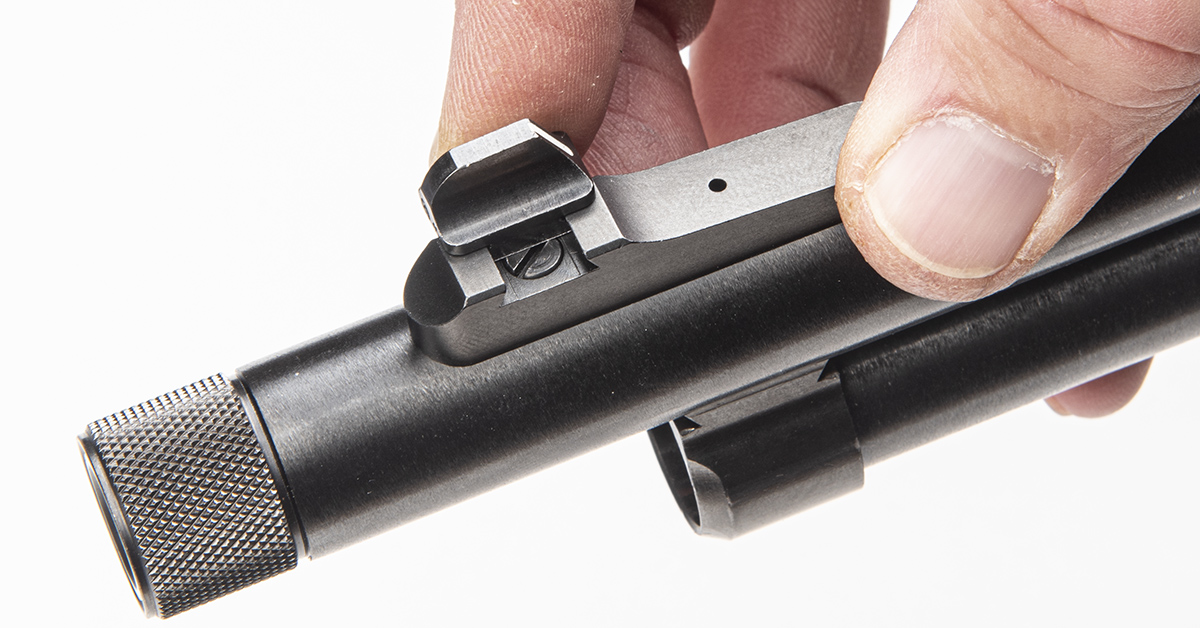
Moving to the front sight, use an appropriately-sized flathead bit and remove the front sight retaining screw and the sight from the barrel.
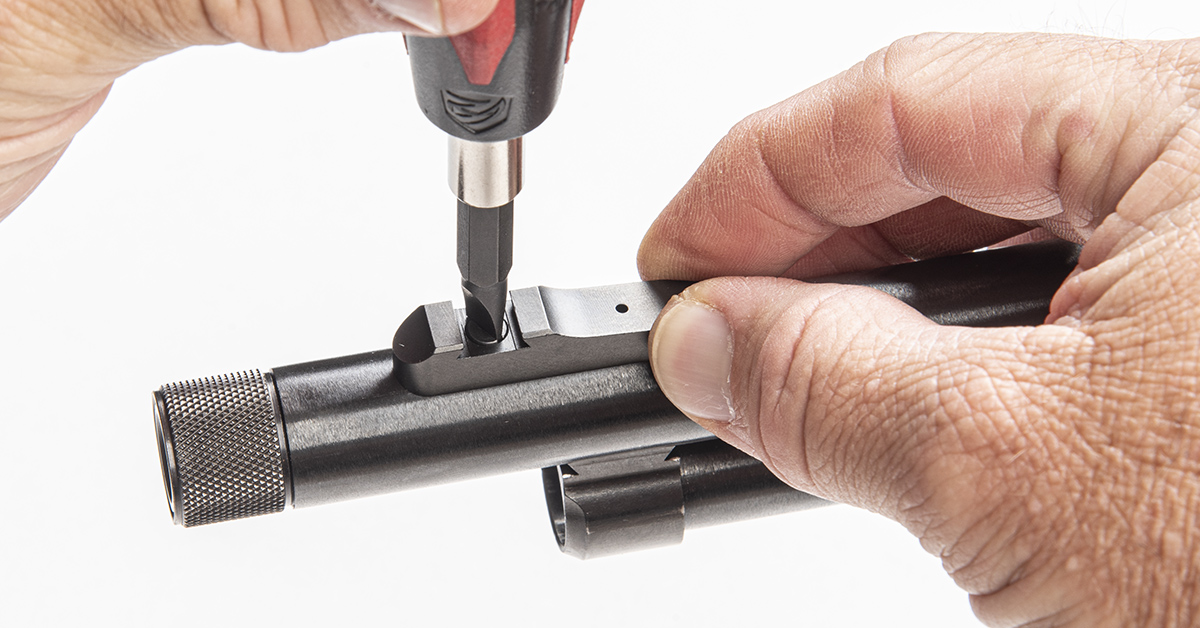
Test-fit the new sight by installing the integral base onto the barrel. There can be variations in the screw hole depth from barrel to barrel. This is important because the front sight installs onto the base with a dovetail fitment. As such, the screw head cannot be taller than the dovetail flat.

Here, you can see that the screw head is slightly higher than the dovetail flat. This means the front sight cannot drift into the dovetail. Either the retaining screw is too long or the threaded hole in the barrel is too shallow.
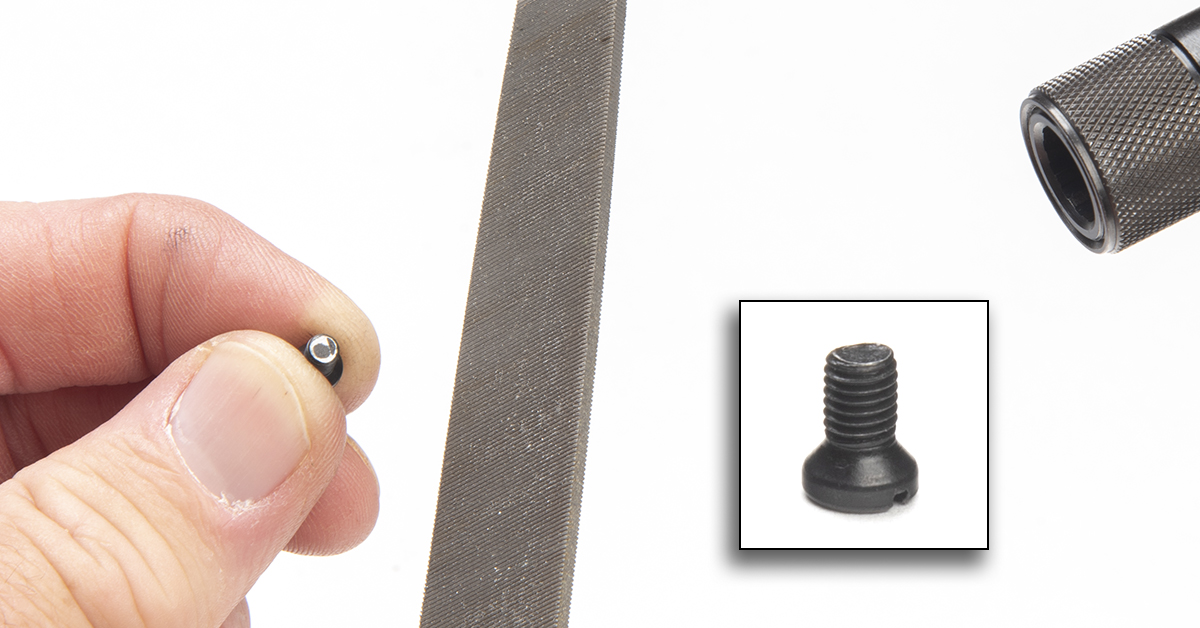
We began by leveling out the end of the screw shank. You can see from the inset photo of the screw the irregularities that could prevent the screw from seating deeper in the hole. To flatten out the screw end, we made a few passes over a flat file.
Filing helped a little bit in bringing the screw head down, but not enough. For step two, we filed a bit off the base of the sight dovetail, which we needed to do anyway so that the sight would move at least 1/3 of the way into the dovetail by finger pressure.
CAUTION: If you must modify the screw, it is important that you do not remove too much material from the end of the screw shank. You need a minimum of 2-3 threads engaging the screw and the tapped hole in the barrel. Less than that and you run the risk of damaging the screw when the sight is drifted onto the base.
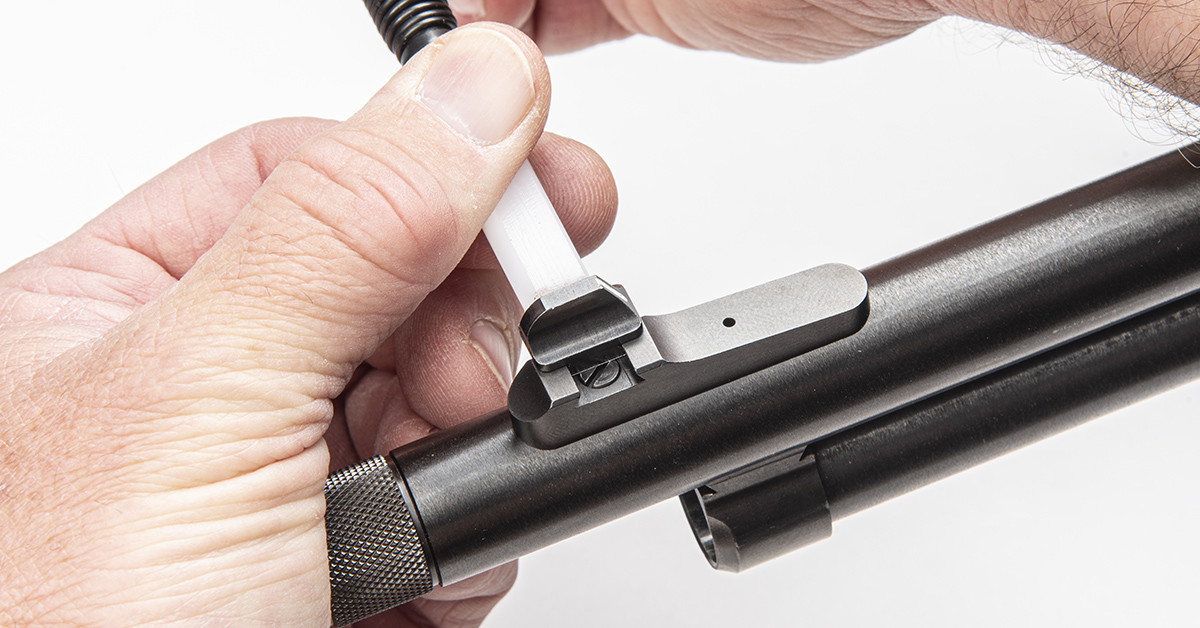
Once the sight would move 1/3 of the way into the dovetail, we applied threadlocker to the screw and drifted the sight into place with the Wyoming Sight Drifter. Finally, we applied thread locker to the dovetail joint. Capillary action sucked the compound into the voids. Between the adhesive and slight interference fit, the sight will stay firmly in place.
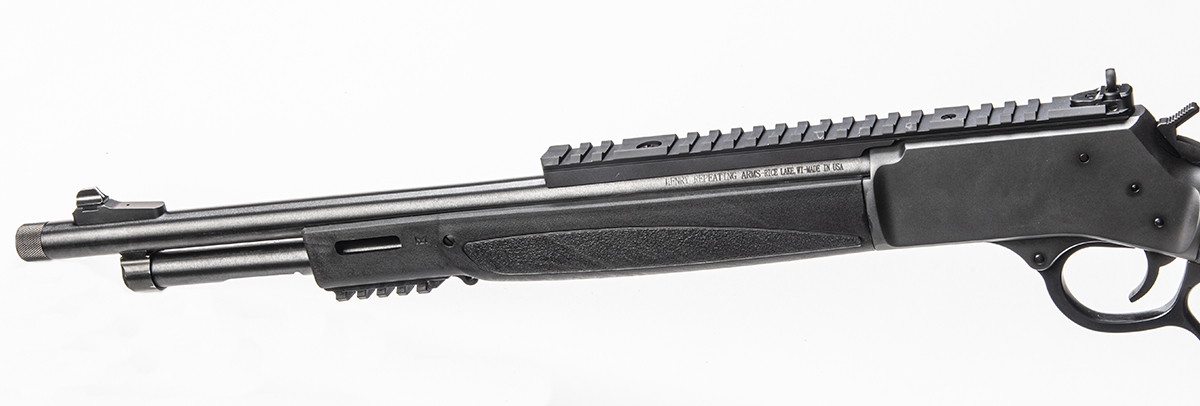
Open sights are ideal for the typically short-range applications of the lever-action carbine. Styles vary, but a rear aperture (or ghost ring) style rear sight combined with a high-visibility front sight such as this one from XS Sights offers, in our opinion, the most precise aiming method for shooting irons. After all, it is basically the same type of sighting system we successfully use on MILSPEC ARs out to 300 meters when shooting silhouettes.
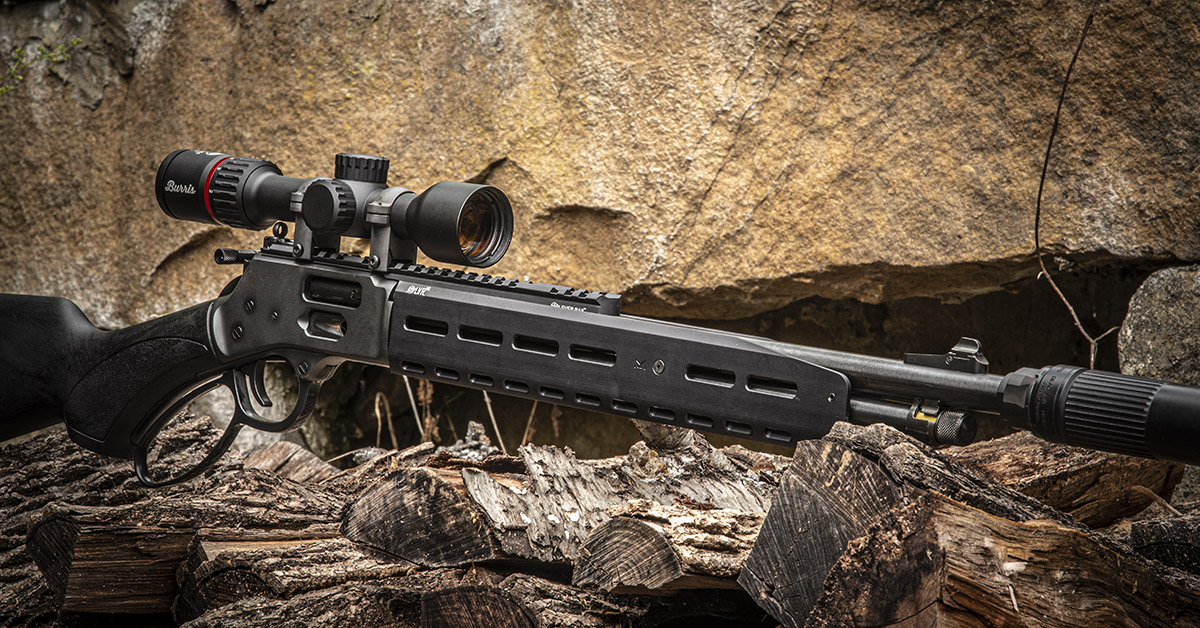
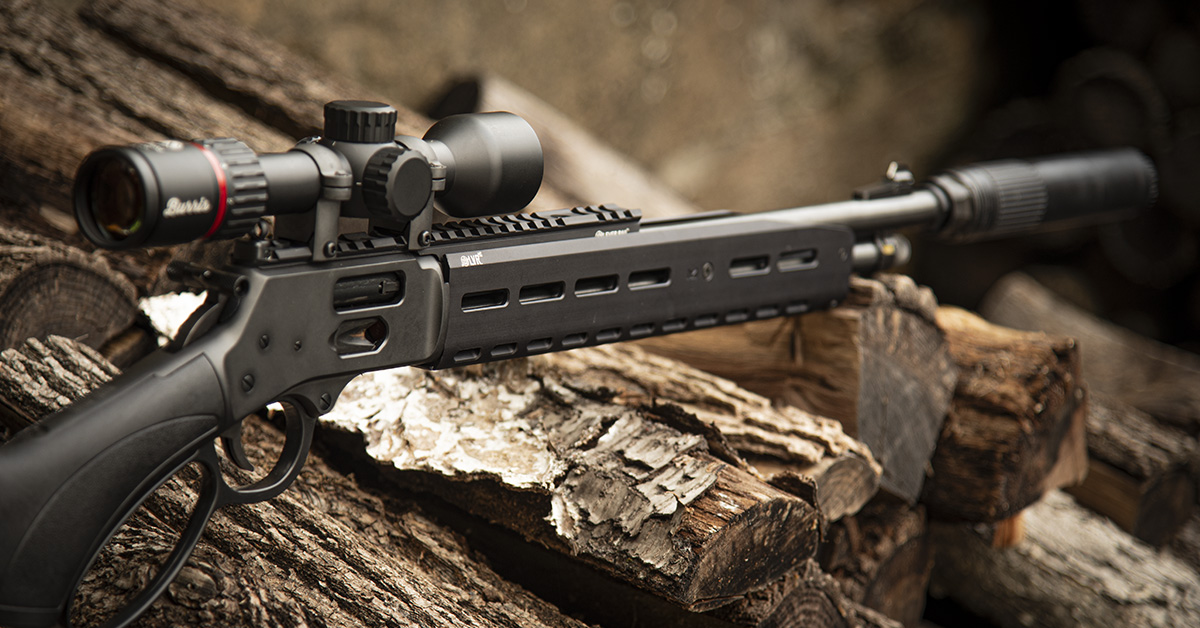
Here is the complete XS Sights makeover with the Henry Big Boy X. The combination handguard and ghost ring sight system totally transforms the rifle’s character and capabilities. The open sight system delivers a serious uptick in accuracy potential compared to the factory sights, and the handguard improves both the aesthetics, ergonomics, and diversity of function with its extensive M-LOK slotting. Add a light, a side saddle, a bipod mount, or customize your sling attachment point to suit your carry style.
Burris Fullfield 2-8x35mm
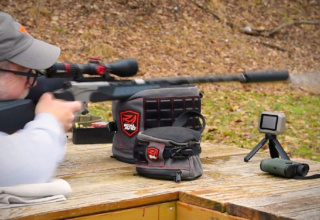
Much as we like shooting open sights, the inherent accuracy of the Henry rifle begs for even more aiming precision when big game hunting is on the menu. The XS Sights rail provides plenty of acreage for optics accommodation, be it an electronic or conventional magnified optic.
Since deer and hog hunting are the primary missions for our Henry Big Boy X chambered in .44 Magnum, we wanted to add a riflescope suited for this carbine platform. Our choice — the new Burris Fullfield 2-8x35mm.
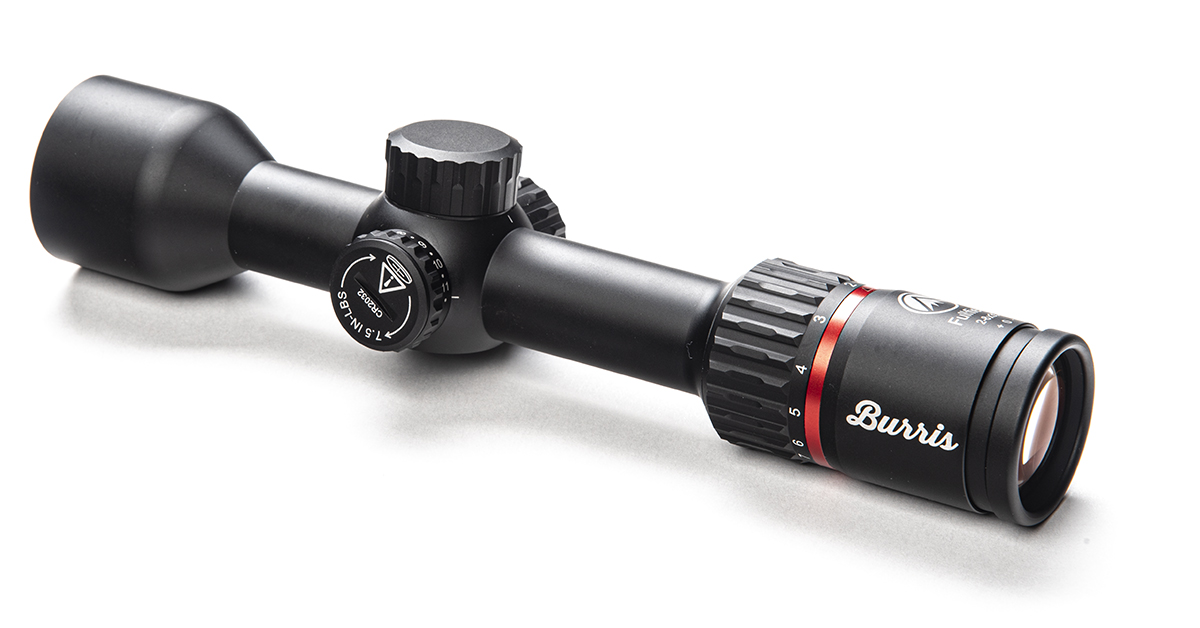
Burris completely revamped its long-lived Fullfield line of hunting riflescopes this year, offering several models ranging from 2-8x35mm to 6-24x50mm. For our pistol caliber carbine, the 2-8x35mm model seemed the ideal choice.
This is one of what we are calling a “new class” of riflescopes that is emerging with an emphasis on compact design. The overall length of the Fullfield 2-8x35mm is a mere 9.8 inches and the overall weight is a carbine-friendly 14.1 ounces when optioned with Burris’ Ballistic E3 drop- and drift-compensating reticle. While not a long-eye-relief scout-type scope, it is nevertheless ideally suited for carbine use.
The Fullfield 2-8x35mm features a 4X zoom system. The lower end of the magnification range is perfect for fast-action, close-in shooting for swamp-bound hogs and pursuing whitetail in tight timber. Crank up the power and the scope will far outpace a pistol cartridge’s effective range. In other words, if your lever-action is chambered for a longer-reaching rifle cartridge, the Fullfield will ensure confident shot placement well within your ballistic range while still delivering a light carry and compact profile.
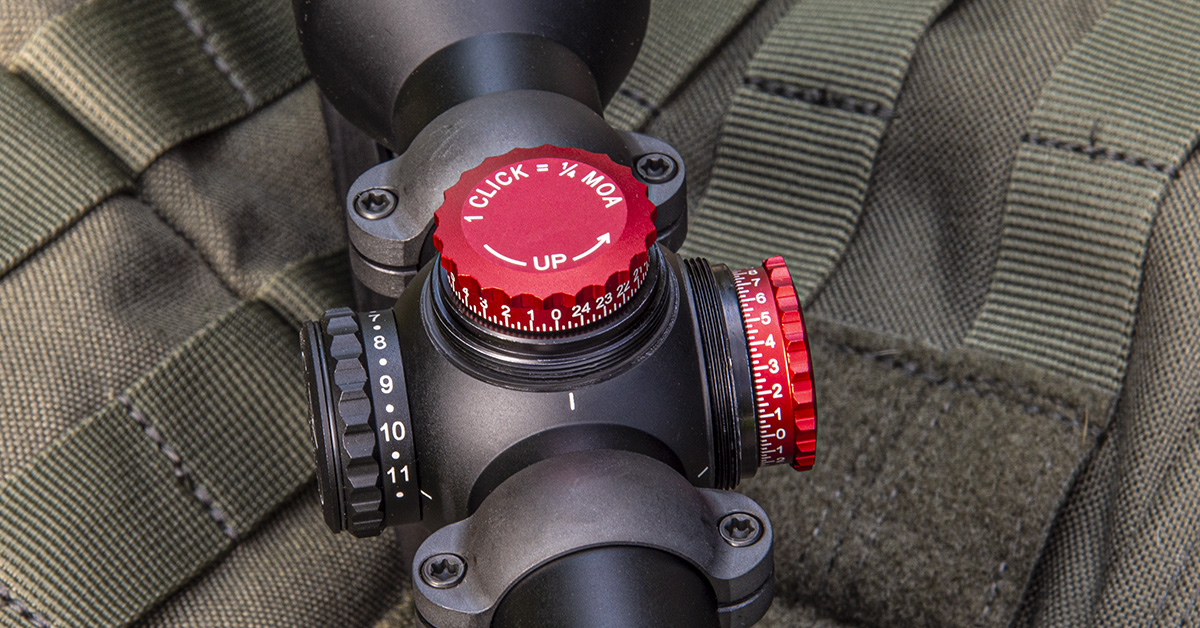
Part of the Fullfield redesign is the incorporation of Burris’ new Knob Synergy system. Knob Synergy comprises an interchangeable turret knob system that lets you choose one of several knobs to meet your specific shooting needs. These include the standard capped knob, advanced capped knob, and advanced exposed knob. Since we will have no need to dial dope with our .44 Magnum, we chose the standard capped version seen here. This variant offers easy, toolless adjustment, protective caps, and reset-to-zero capability should you wish to dial-in bullet drop.
Models with the Ballistic E3 reticle are also illuminated with 11 brightness settings. That’s great, but you’ll appreciate it even more given that there is an “off” position between each setting. This allows you to turn off the illumination with one “click” and return to that setting just as easily. No more spinning the dial to “off” and then running through the dial to get back to your last setting.
Overall, we find the new-generation Burris Fullfield 2-8x35mm to be an excellent riflescope for its class and cost ($228 MSRP with the Ballistic E3), with good optical qualities and a mix of features you would typically find in higher-priced optics.
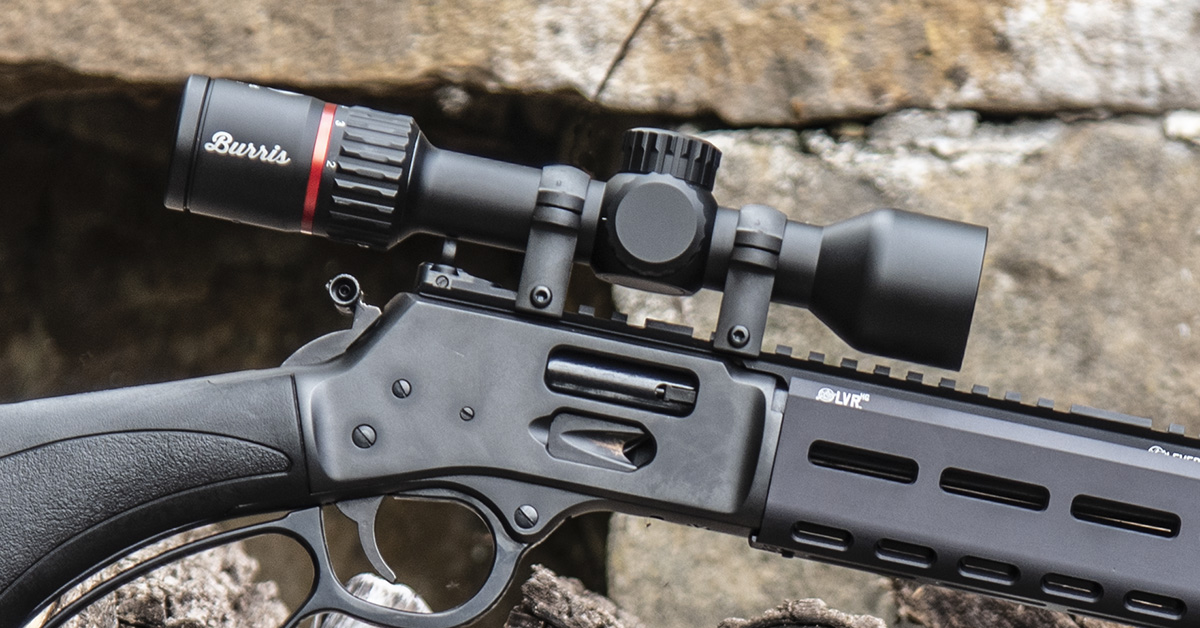
Despite its compact 35mm objective diameter, mounting the Fullfield 2-8×35 onto the XS Sights rail requires tall rings. For our application, we picked Burris’ high Zee Rings (#420087) for the Fullfield’s one-inch diameter tube. This provided just enough clearance for both the rail and the ghost ring sight.

Clearance for hammer manipulation did pose a problem due to interference with the eyepiece. We easily solved that by installing a Carlson’s Choke Tubes Henry Rifle Hammer Expander. Tighten one screw and we had ample room for cocking and lowering the hammer…even with gloved hands.
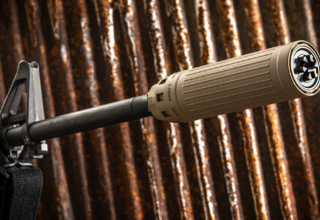
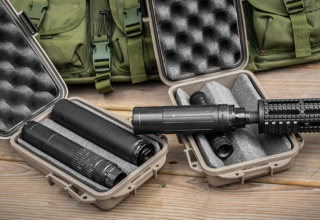
Dead Air Mojave 45 Suppressor
Since Henry provides the Big Boy X series with a 5/8-24 threaded muzzle, it was only natural that we would want to suppress a carbine with this level of modification. For this, we selected the new Mojave 45 from Dead Air Silencers.

The Mojave 45 is rated full-auto for pistol calibers up to .45 Auto with 8-inch barrels and semi-auto in .300 BLK, .350 Legend, .400 Legend subsonic, .450 Bushmaster subsonic, and both .357 Magnum and .44 Magnum lever-actions with 16-inch barrels.
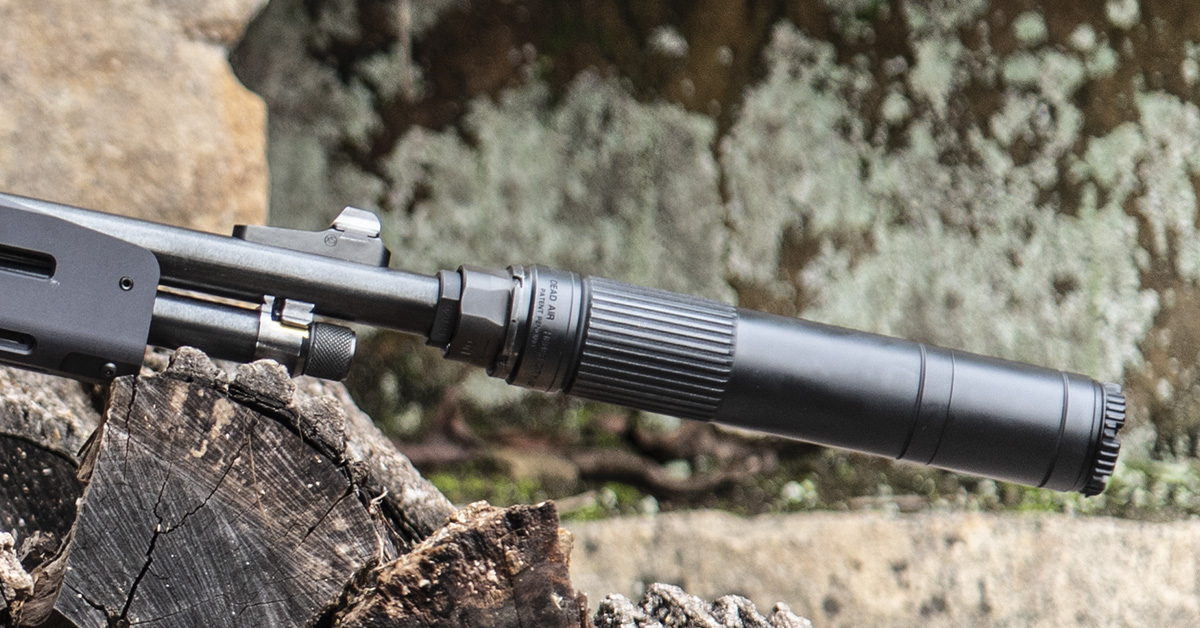
Made from titanium and available in black or FDE Cerakote, this suppressor comes with a booster assembly, but you can remove it for direct-mount to your Henry when used with a DA128 Xeno Xero taper mount and DA457 Xeno Adapter.
We will publish a full review on the Mojave 45 suppressor shortly, so stay tuned.
Henry lever-action carbines are winners straight out of the box. Modification opportunities may seem limited compared to other platforms, such as the 10/22, Remington 700, or AR-15s, but if you’re willing to roll up your sleeves and get to work, you can transform this evergreen firearm into something truly outstanding. The XS Sights LVR-HG may be just the start you are looking for.