For serious shooters and hunters, grandpa’s classic gun cabinet doesn’t cut it and standard gun safes aren’t always practical for many folks. If you have some spare “closet room,” this custom concept might be what you’re looking for.
by Rob Reaser
For the last several months, my shop/office has been a constant disaster area. The unfinished building I’ve labored in for far too long was finally getting completed with…shockingly…a proper electrical system, insulation, walls, and even a ceiling (adios bare trusses!).
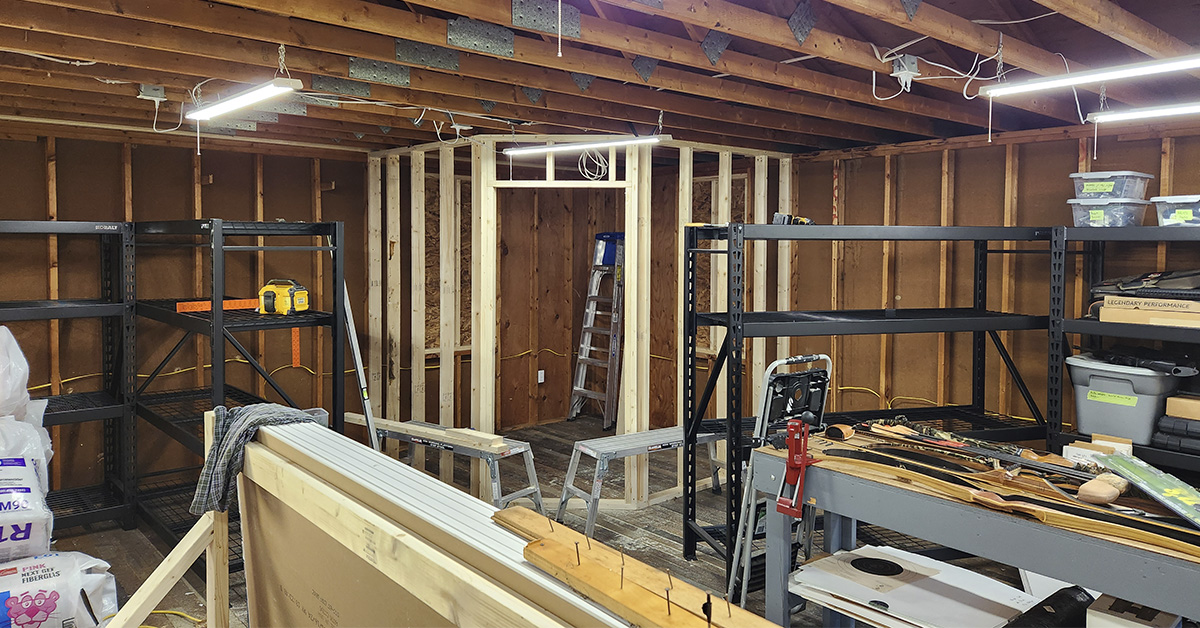
As part of this one-room makeover, I needed a secure and discreet place to store my guns and ammunition, and so I designated a 7.5×7.5-ft. corner to be the weapons and ammo closet. My licensed handyman buddy Scott considered my request and framed in a cozy cubicle with a swing-out door angling the outer corner to maximize interior wall and floor space efficiency. The only thing lacking once Scott completed his end of the work was to come up with a rack solution for my long guns.
Although having just over seven feet of wall to line up guns might seem like a lot, it’s not as much as you might think if you have more than a few firearms. I quickly realized that the only way I was going to fit everything into the secured closet would be to create a double-decker gun rack system.
Searching the internet for free plans (yeah, I’m cheap that way) proved fruitless, but I did find one random photo someone had posted somewhere that inspired a design I thought would be perfect for the area I had to work with. I also realized that this same concept would be ideal for anyone who needs to maximize their wall and floor area to get as many guns and ammunition as possible into a condensed space.
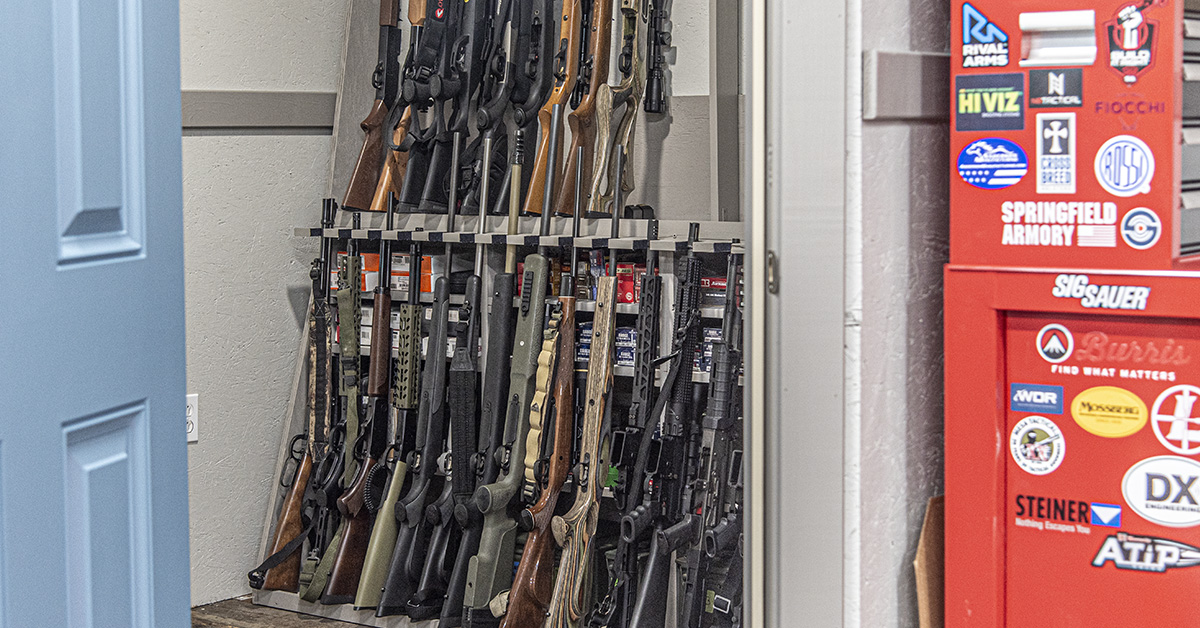
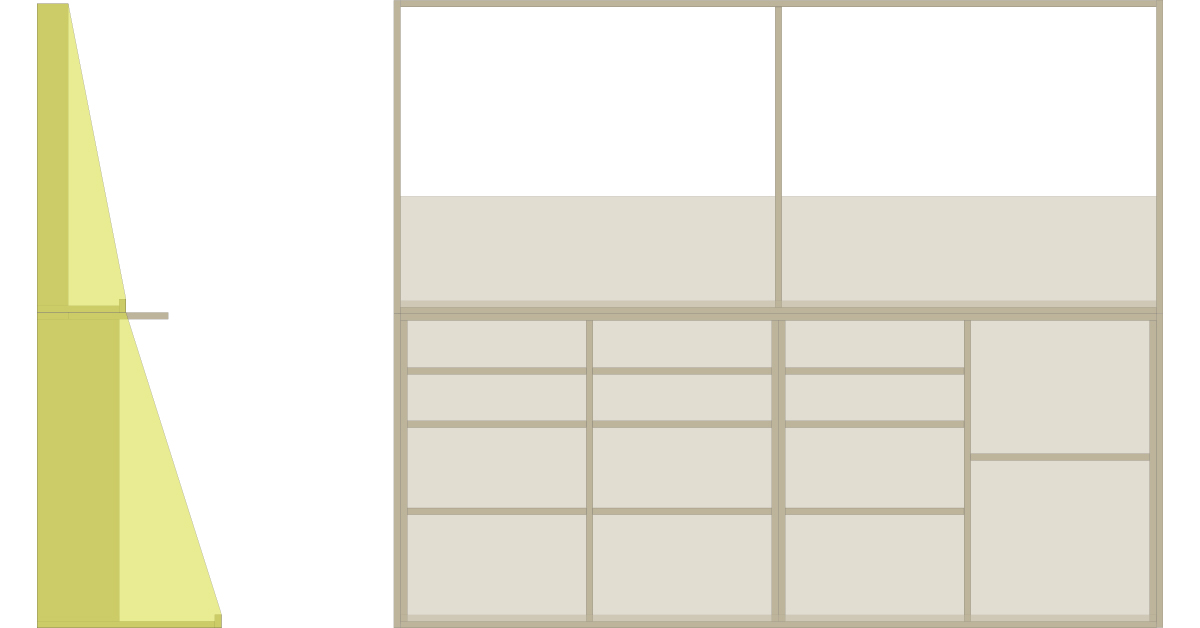
The double-decker design, of course, means guns can be aligned horizontally and vertically, thereby eliminating the “dead” wall space you would otherwise have above a single-deck gun rack. A double-decker rack also mandates that the guns aligned along the bottom rack be out further from the wall than those on the top rack. Room is also needed to accommodate the dual rows and allow guns on both rows to lean backward into their slots. The result is a significant void behind the guns on the bottom rack.
Wasted space? No way!
Shelving can be built into the lower rack, making it perfect for stowing ammunition, handguns, or anything else you may wish to securely store.
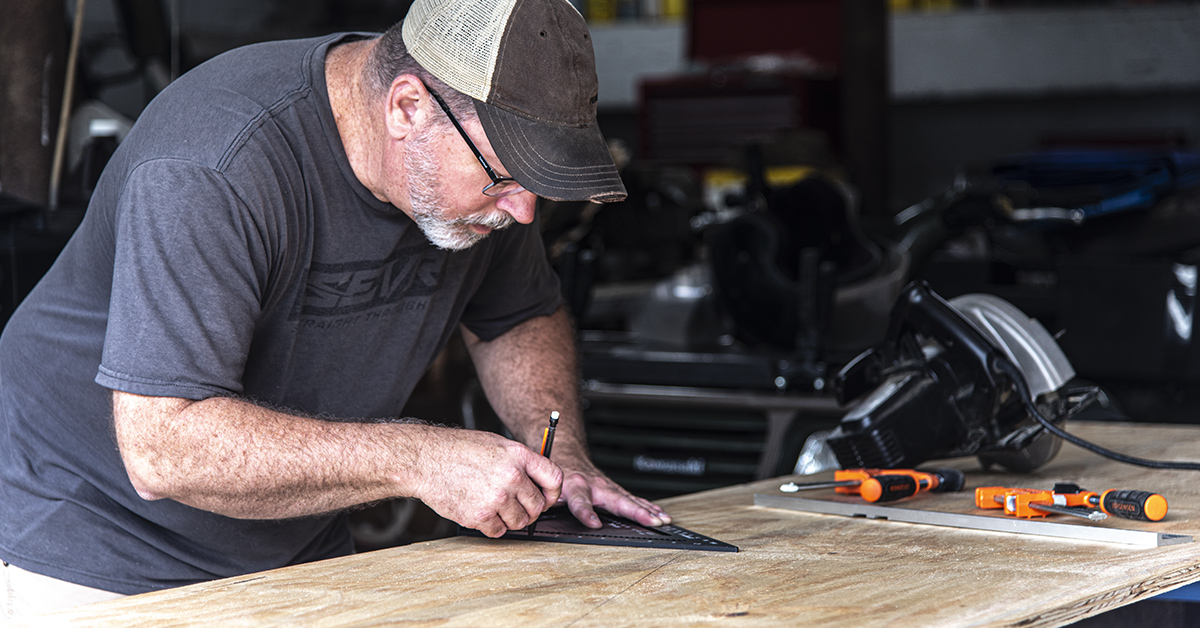
I began by measuring my horizontal wall space to determine how much rack I could get away with and then guesstimating the vertical support needed for the top rack. Next, tried to forecast the assembly process of the nascent design and concluded that a stand-alone and moveable rack system was the best option.
First, I didn’t want to build everything into my fresh walls and possibly bugger up Scott’s fabulous handiwork. Second, a standalone rack meant that I would be able to move it to a different location in the shop should I so-choose later.
This is the general plan I developed. Is it the best solution? Probably not. I write words, take photos, and pull triggers for a living, not design furniture and make sawdust. Nevertheless, it worked for me and, with the necessary modifications to fit your available wall space, should work for you.
The biggest challenge for me was ripping and cutting on the 4x8x3/4-inch plywood sheet used for the side panels, base, and backboard. I’m still not sure how I plucked all the pieces out of a single sheet, but that’s how it went.
The construction list for this project was surprisingly short. Everything was made from 4x8x3/4 plywood (backing, platform, and side panels), 1x12x8 pine (6 pieces), 1x4x8 pine (5 pieces), 11/16×1-5/8 pine screen stock (two 8-ft. pieces), and 1x1x8 pine (3 pieces). Attaching hardware included 1-1/4×8 exterior screws and several 4-packs of 1.5-inch corner braces.
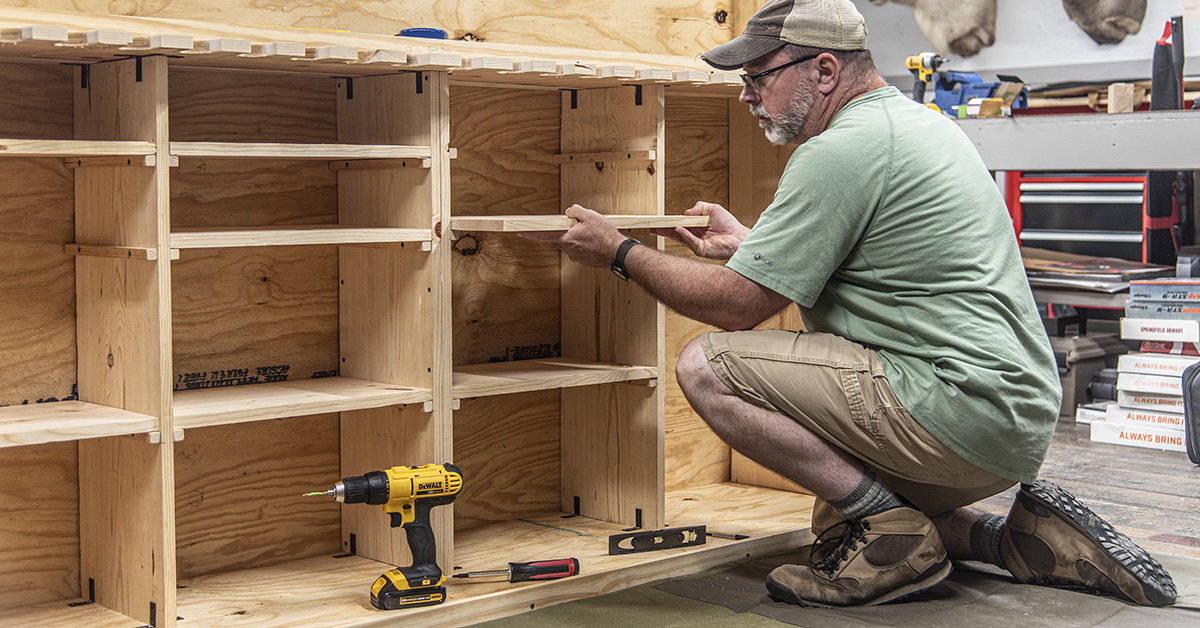
Originally, I had intended to build two rows of shelves into the rack and secure them to the uprights with corner braces (which you can see I used to secure the top rack platform to the uprights). Then it hit me that a removable shelf system was the better way to go. Using the 1x1s as the shelf supports, I could then move the shelves as needed to fit different size ammo boxes or whatever as necessary. The trick here was to get the supports positioned so the shelves would be level.
Another veering off from my original plan was to leave one quarter of the shelving area open to accommodate a rack slot for shotgun barrels and barreled actions. Those are always a challenge to store in an organized fashion, and this provided the solution.
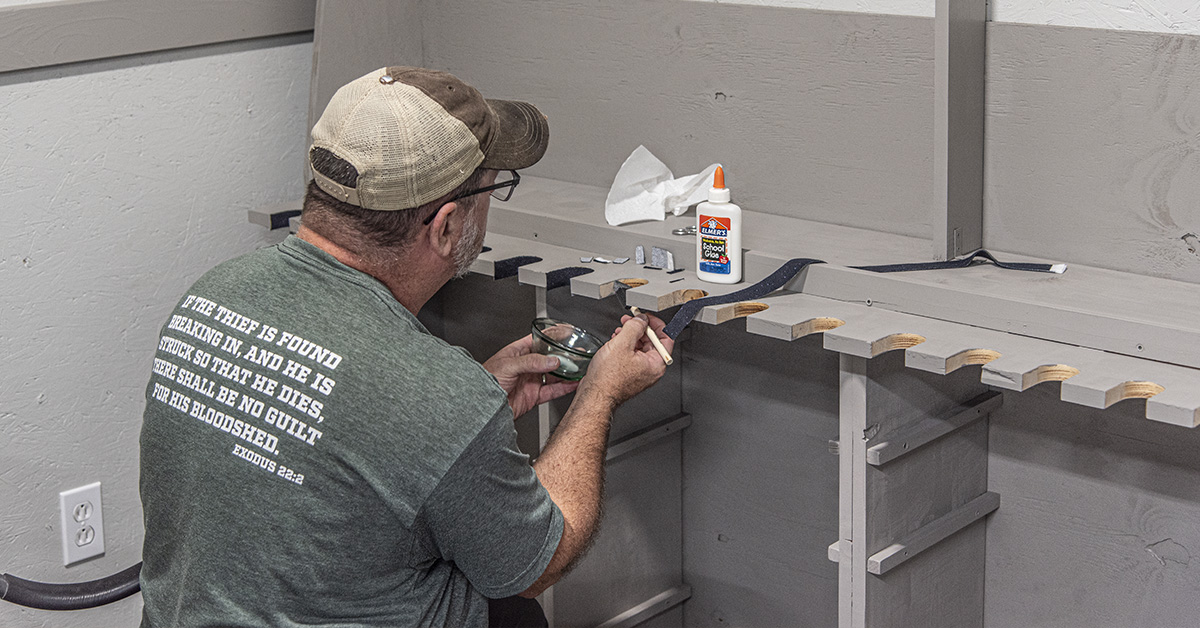
After giving the completed rack a paint job to match my shop’s trim molding, I moved the beast into the gun closet with nary a frog’s hair of maneuvering room to spare. To trim out the barrel slots, which I cut using a 1 3/4-inch hole saw and a jigsaw, I acquired some felt strips from a local quilting store. Elmer’s glue, a paint sponge, and an X-Acto knife made short work of lining the slots for a non-marring surface.
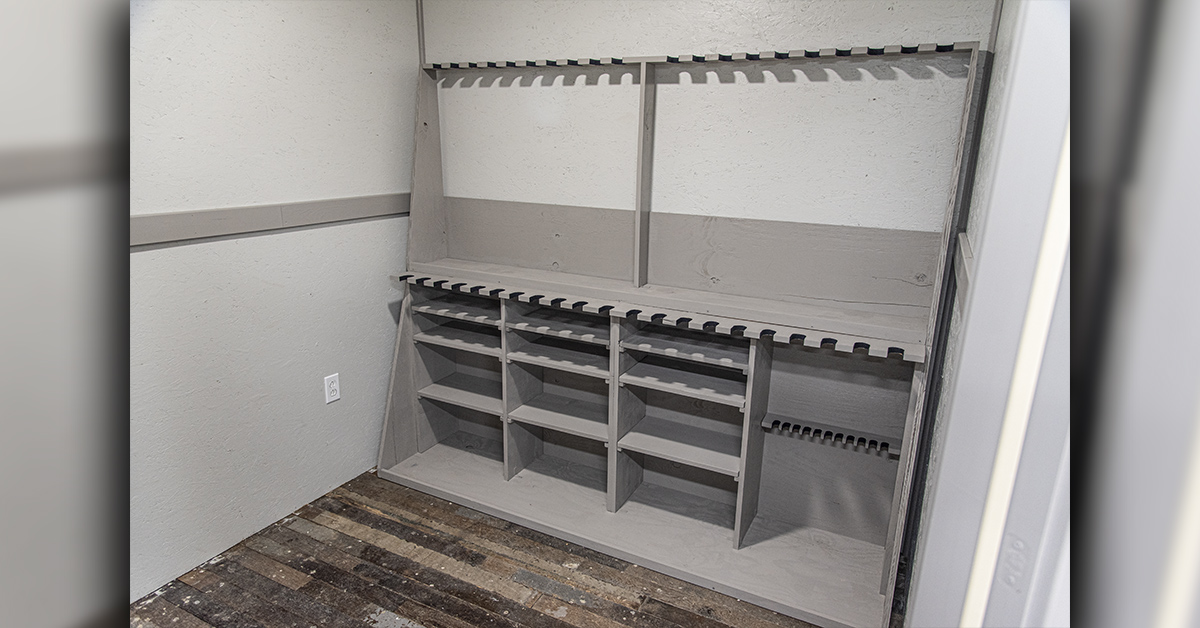
With the room I had to work with, I was able to make a rack that accepts up to 41 long guns — 21 on the bottom rack and 20 on the top rack — plus 11 shotgun barrels/barreled actions (the shotgun barrel slots were cut with a 1-inch hole saw).
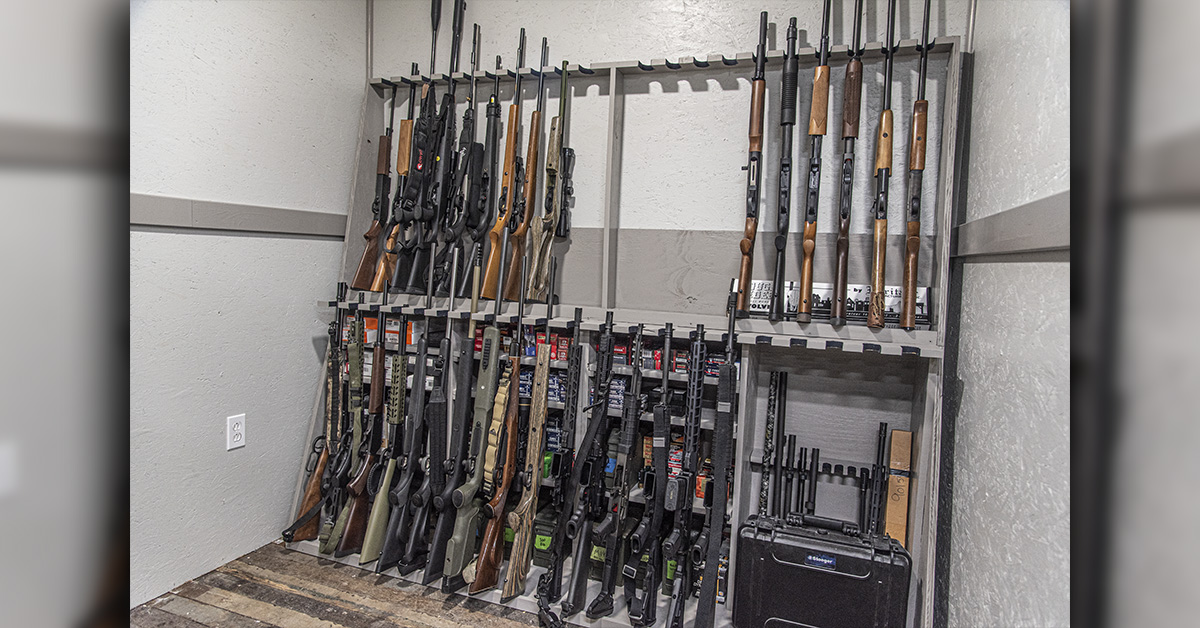
The shelving system turned out to be just the ticket for stowing ammo and pistols in their original boxes. I was able to fit large ammo cans on the bottom two shelving layers while the top two layers greedily accepted factory ammo boxes. A benefit of the rack’s back panel, aside from providing needed structural rigidity, is that it serves as a backstop to prevent smaller items from falling behind the shelves.
The total cost of materials for this project was right around $300. I’m embarrassed to say how long it took me from first cut to completion (remember…I’m not a carpenter), but anyone with common hand tools (drills, chop saw, circular saw, jigsaw), a sturdy set of sawhorses, and at least a modest proclivity for woodworking can get it done in no time.