Nothing helps a shooter deliver tighter shot groups more quickly than a performance trigger. Here’s the scuttle on aftermarket AR-platform trigger systems and why you may want one now.
It really doesn’t matter what firearm platform you’re shooting—bolt rifle, semi-auto, or handgun—installing a crisp, smartly-tuned trigger is the necessary first step to shrinking group sizes through better control of your trigger. Those who have never shot anything in their AR-15 except for the MILSPEC-style trigger have no idea how much better their rifle can feel or shoot with a more refined trigger installed. those who have can’t imagine ever going back to the stock variety.
Yes, the difference is that great.
If you are among the former group, you probably think, “Well, that’s just the way ARs shoot.” You wouldn’t be incorrect in that thinking.
The single-stage MILSPEC trigger is, of course, a continuation of the same trigger installed in countless M4s and M16s—the military progenitor of the semi-auto-only AR-15. Being designed for battlefield weapons, precision trigger operation was never deemed necessary nor was a light-pull trigger desirable in combat situations. In fact, a longer and more abrasive trigger pull was considered something of a safety assurance for troops operating under high-stress conditions—a passive (if not exactly effective) safeguard against accidental discharge.
But what makes sense on the battlefield doesn’t necessarily translate to desirable attributes in other situations. Since its rise in popularity, the AR-15 has explored every possible path, from law enforcement sniper duty to big-game hunting, precision target to 3-gun competition and everything in-between.
Suddenly, that long and gritty MILSPEC trigger just doesn’t cut it.
When we talk about “precision” in AR triggers, our focus is the same as it is for triggers intended for any other firearm, that being the ability to deliver a crisp, creep-free, controllable break of the engagement surfaces. A fine-tuned (precision-engineered) trigger will typically exhibit shorter travel between the time you begin to pull the trigger rearward and the moment the trigger sear disengages the hammer. Additionally, the trigger will move smoothly and predictably throughout its range of travel without any gritty or crunky feeling. In fact, the travel is so smooth in a high-quality trigger that you likely won’t detect any trigger creep before gun goes BANG.
By contrast, a MILSPEC AR trigger is going to let you know what’s happening throughout the trigger pull. Trigger movement along its engagement surface with the hammer is long and rough. Some trigger actions are so rough that you can feel the sear face (forward surface of the trigger that contacts the hammer notch) “grind” as it moves through the hammer notch.
Why is this type of creep a bad thing? Simply put, it compounds the biomechanical influence of the shot. With a precision trigger that exhibits no obvious creep and that allows the sear to smoothly disengage, the chance of the shooter torqueing the rifle during the trigger squeeze phase is minimized, if not eliminated entirely. In other words, minimal shot disturbance. You also know that when you have achieved proper sight alignment and are at the bottom of your breathing cycle, if you squeeze the trigger, it will release the hammer right when you want it to release. With a creepy MILSPEC trigger, it not only takes time to pull through the shot, fighting the rough sear movement on a slow trigger pull can cause you to torque the firearm and move it off target.
It is for these reasons that trigger work is almost always the first step in helping the shooter to shoot more accurately, and the AR-15 is no different in this regard.
Do a bit of research on premium AR triggers and you will see that many manufacturers have jumped into this arena. While there are differences, of course, in materials, engineering, and the overall design between them, all performance aftermarket triggers generally fall into one of two categories—two-stage or single-stage—and in one of two configurations—conventional three-piece, with a separate hammer, trigger, and disconnector assembly, or captured (also called “drop-in”), featuring a machined housing that contains these components.
Which trigger design is right for you? That really depends on your shooting style, intended use, and personal preference.
Single-Stage Trigger
In a MILSPEC single-stage trigger, there is only one “trigger action.” When the hammer is cocked, the forward edge of the trigger is fully engaged with the hammer notch. Pull back on the trigger and the trigger engagement surface moves down and out of the hammer’s (notch) until it disengages and releases the hammer.

Here is a MILSPEC trigger assembly in the cocked position. The forward face of the trigger is engaged with the hammer notch (arrow).

When the trigger is pulled back, the forward face of the trigger disengages from the hammer notch, allowing the hammer to move forward under spring tension and strike the back of the firing pin.

As the bolt carrier moves back under gas pressure, the bottom of the carrier pushes the hammer back, where the hammer hook (arrow A) engages the disconnector (arrow B). Here the hammer will stay until the trigger is allowed to move forward.

As the trigger moves forward under tension from the trigger spring, the disconnector releases the hammer hook and engagement transfers to the forward face of the trigger and the notch located in the hammer (arrow). This is the primary engagement surface. The hammer is cocked, the trigger is reset, and the rifle is ready to fire again.
Two-Stage Trigger
Two-stage triggers operate quite differently than the single-stage variety. This Rock River Arms chromed National Match trigger is representative of most premium two-stage trigger systems. With a two-stage trigger such as this one, there are two phases of trigger pull (although in theory there is still only one action, which is a straight pull-through of the trigger to release the hammer). Here’s how it works…

Two-stage triggers have a completely different trigger and hammer design than MILSPEC triggers. This shows the two-stage trigger assembly in its cocked position. Although this trigger looks similar up front when compared to a MILSPEC unit, there is no trigger/hammer engagement here (arrow A). Instead, the trigger and hammer engagement is here (arrow B).

This is the completion of the first stage pull of a two-stage trigger. The initial pull of the trigger moves the assembly to this point, where the trigger hook and hammer hook are still engaged (arrow A) and the rear hammer hook is against the disconnector (arrow B). Typically, this first stage of pull is a light 1-2 pounds. As you gently pull the trigger back, you will feel a noticeable stop of rearward trigger movement. From here, an additional 2.5-3 pounds of pull is required to release the hammer. This happens as the trigger hook disengages the forward hammer hook while the rear hammer hook simultaneously nudges the disconnector. As you can see, there is little engagement surface between the trigger hook and forward hammer hook at this point, so the trigger break through the second stage of the pull is short, crisp, and very predictable.

Pulling through the second stage releases the hammer.

Rearward travel of the bolt carrier moves the hammer back, allowing the disconnector to engage the rear hammer hook (arrow).

Allowing the trigger to move forward transfers the trigger/hammer engagement to the trigger hook and forward hammer hook (arrow), resetting the trigger assembly into its cocked and ready-to-fire position.

Drop-In Triggers
If you have ever installed a MILSPEC or conventional-style two-piece AR trigger assembly, you probably already understand that the relationship of the components is dependent upon their positions relative to the hammer and trigger pins. This relationship can be somewhat “loose” due to variations in manufacturer components and the whole issue of tolerance stacking. As a result, a degree of excess is necessarily built into some of these components to ensure proper engagement of the trigger and hammer. It is this generous overlap that is largely responsible for the MILSPEC trigger’s hairy performance.

One way some manufacturers have tackled this issue is by eliminating this trigger/hammer pin relationship dependency. By enclosing the trigger assembly within a solid housing or case and establishing more precise, fixed relationships between the trigger and hammer, the trigger group can be precision-tuned for predictable sear engagement and pull weight. Sure, the housing is still fixed in the receiver via the standard trigger and hammer pins, but trigger/hammer operation is no longer subject to variances in the associated components (i.e. trigger pin diameters, pin hole diameters and position, et cetera). What you get is a trigger group that is tuned to exacting specifications with consistent performance shot after shot.
Drop-in triggers are easy to install. They literally drop into place and are secured by standard hammer and trigger pins. Some models also use a set screw to further eliminate any movement of the housing within the receiver.
The biggest downside of drop-in triggers for some folks may be the price. The good ones don’t come cheap, yet price is relative when you’re chasing quality and performance. For many, the ease of installation and the ability to choose your trigger pull weight, added to the exquisite trigger performance, is worth the price of admission.
[HOW-TO SEGMENT]
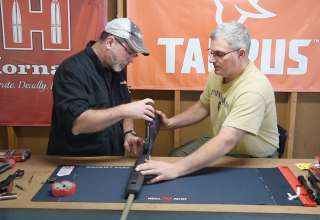
AR-15 Trigger R&R
If you’ve never removed or installed an AR trigger before, it may seem like a daunting task. It’s a simple procedure that requires only a punch, small hammer, bench block, and some firearm grease. Here’s how you do it…

- With the upper receiver separated from the lower, hammer in the fired (up) position, and the selector lever in the fire position, place the lower receiver on a bench block and, working from the left side, use a punch and hammer to tap out the hammer pin and remove the hammer.

- Do the same for the trigger assembly. Be sure that the disconnector and disconnector spring come out with the assembly.

- Use firearm grease to lightly lubricate the trigger assembly at these points. A small piece of wire or similar-sized tool dabbed with grease will allow you to lubricate the inside of the hammer and trigger pin holes.

- Install the trigger assembly in this orientation. The back of the trigger will slip under the safety selector and the trigger spring arms should point towards the front of the receiver, one arm on each side of the trigger hole in the receiver.

- The trigger pin securely holds the trigger and disconnector in place. Align the trigger assembly pin hole with its hole in the receiver. Working from the right side, insert the trigger pin. Carefully holding the trigger and disconnector to maintain alignment as you simultaneously push in the pin is usually enough for a proper installation. You can also insert an appropriately sized punch in the opposite hole to help align the parts as you push in the pin.

- Now install the hammer in this orientation. Note the hammer spring orientation. The hammer spring arms must point toward the rear of the receiver and sit on top of the trigger pin. There is a flat on top of each side of the trigger for the hammer spring arms to rest on.

- The hammer spring is rather stout, yet it must be compressed in order to line up with the pin holes. As you work the hammer into position, make sure the spring arms do not move off the top of their place on the trigger pin. Once the holes are aligned, insert the hammer pin to secure the hammer in position. If it is excessively difficult to align the hammer pin hole with the receiver hammer pin holes, check to ensure that the selector lever is in the fire position.

- Turn the receiver over and place it on a bench block. Carefully tap the pin into place with a nylon hammer face. If it stops before the pin is fully seated in the receiver, stop tapping. The hammer pin hole is probably not aligned with the hammer pin hole on the opposite side of the receiver. Pick up the receiver, manipulate the hammer until the pin holes line up, and then tap the pin into position.

- Both pins should be evenly flush with both sides of the receiver. Check the trigger operation by cocking the hammer, checking the reset, and pulling back the trigger to release the hammer. Be sure to hold the hammer to prevent it from striking the receiver. Allowing the hammer to fall on the aluminum receiver could damage the hammer or receiver. Perform a function check after the upper and lower receivers are reassembled.
ARTICLE COURTESY OF GUNS DIY MAGAZINE. ON SALE JULY 17TH.
- Build Your Pistol Marksmanship Foundation - June 29, 2021
- Upgrade Your Long Range Rifle the Easy (and Inexpensive) Way - October 22, 2020
- Your Best Survival Choice if it All Goes South - October 13, 2020