Clearing up the murkiness and confusion of a simple maintenance procedure
by Lou Patrick
One of the more common discussions among firearm enthusiasts concerns the correct process of gun cleaning and lubrication. During my gunsmithing career, I have been engaged in this conversation numerous times with customers. It seems to be a particularly hot topic with AR-15 owners. Questions abound concerning the best cleaning procedure or which type of cleaning solvent and lubricant to use.
These questions are understandable as the selection of solvents and lubricants appears to be endless and the manufacturer claims often add to the confusion.
To help sort through all this, my advice is to always start by consulting the firearm owner’s manual — something many gun owners NEVER do.
Many of our civilian firearms have a military counterpart, such as the AR-15, and a military operator’s manual. Take the M16, for example. This is the military version of the AR-15. When it comes to cleaning and lubricating, whatever works for the M16 will certainly work for our AR-15s. With decades of research and use, both in combat and competition, and with a seemingly unlimited budget, it’s hard for me to imagine that we can improve upon the procedures in use by the U.S. military. If you have an AR-15 and no owner’s manual, or you wish to follow the military process for use and maintenance of the M16 and apply it to your AR, here’s a free download of the Operator’s Manual for the M16/M16A1.

Upon reading the firearms manual and the military operator’s manual, we are still faced with the question of what lubricant to use. Fortunately, most lubricants produced by reputable manufacturers and marketed for firearms use will work just fine for our AR-15. My personal favorite is military surplus LSA, and I use it on all my firearms. LSA or “Lubricating oil, Semifluid” as it says on the can, is just that, a semifluid. LSA is somewhat thicker than oil but thinner than grease. As such, it tends to stay in place yet flows easily, providing good lubrication. I have found that when using LSA and lubricating properly (don’t overdo it), my AR-15 is easier to clean. LSA also provides proper protection throughout the common temperature ranges found in the U.S.
LSA is rated for use down to -10 degrees Fahrenheit, so it takes extreme cold before we need to be concerned about switching to a specialized cold-weather lubricant. Looking at the opposite extreme and going from artic conditions to those of the desert environment, the concern is that the lubricant becomes contaminated with sand — all the more reason not to “over-lube” your firearm.
The most common problem that I have seen on customer firearms when it comes to lubrication is not so much the type of lubricant used, but that of over-lubrication. Before we proceed with lubricating our AR-15, we must first define some terms.
Lightly lubricated: A coat of oil that is just visible. A light coat is normally used for protection against corrosion.
Generously lubricated: A coat of oil that is spread with the fingers. A generous coat is normally used for the lubrication of moving parts.
The AR-15 is lubricated after all the components have been properly cleaned and dried. While cleaning and lubricating the parts, inspect them for any deformities. Of course, we will also inspect the bore for signs of any rust pitting, but also pay particular attention to the following.

Bolt: Look for cracks around the cam pin hole and locking lugs. Look for pits on the bolt face, primarily pits that also intersect with the firing pin hole. If your bolt has any of these, it will need to be replaced by a gunsmith.
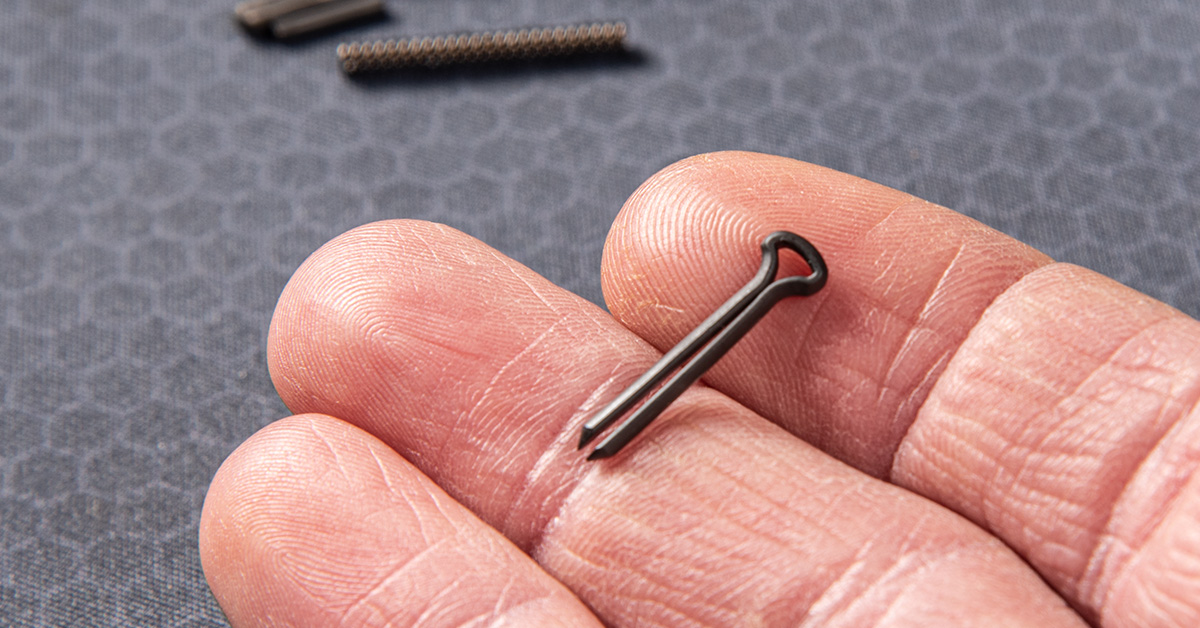
Cam pin: Chips or cracks found in the cam pin mean the cam pin must be replaced.
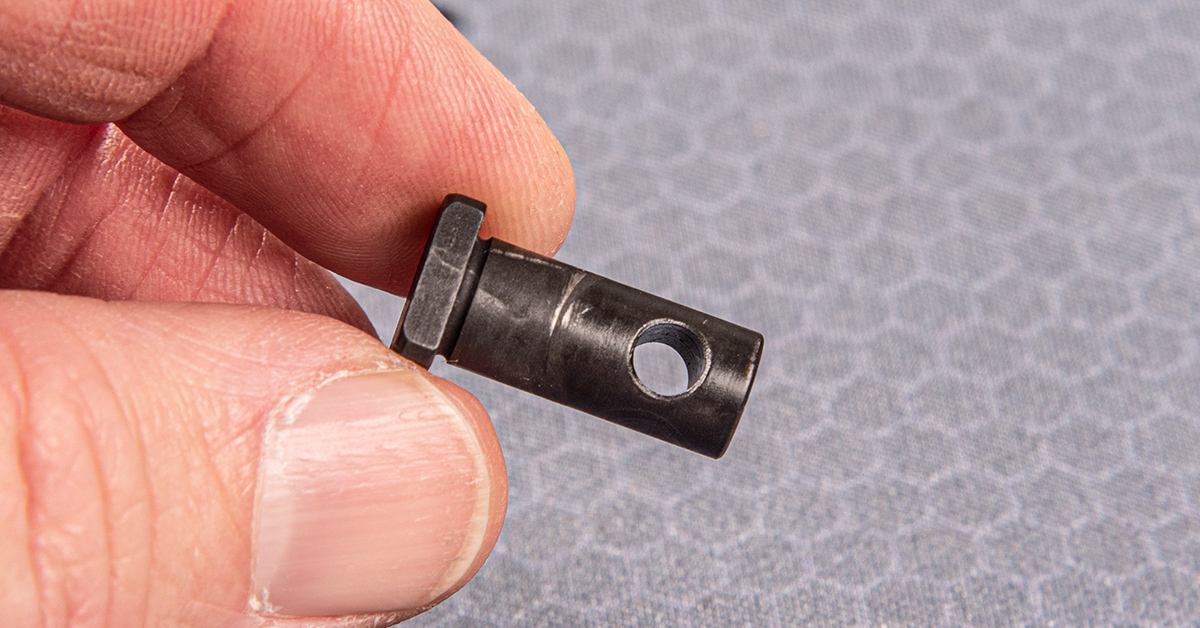
Firing pin retaining pin: Replace if bent or badly worn.

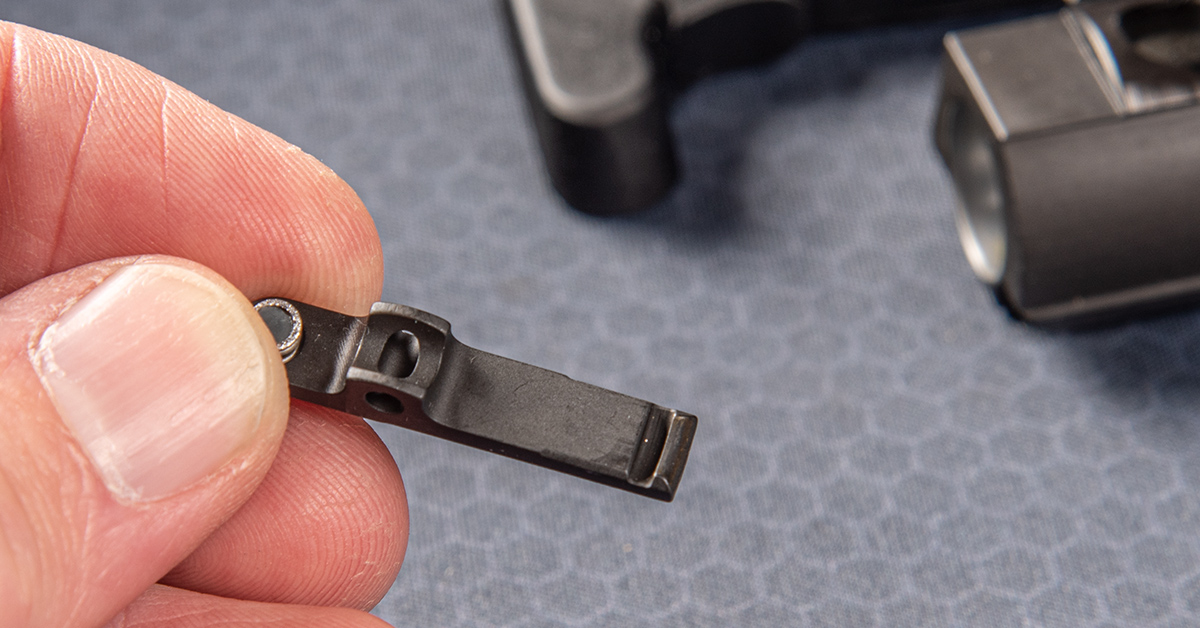
Firing Pin: The firing pin is not a carbon scraper. Do not use it as a cleaning tool! A gunsmith will need to replace the firing pin if it is bent or cracked. The firing pin tip should also end in a radius — it should not be sharp or flat on the end.
Extractor and extractor spring: Do not remove the spring from the extractor. Ensure the rubber insert is in place. Check the extractor for any chips or cracks, paying particular attention to the lip of the extractor that engages the cartridge case head during extraction.
Lubricating the Upper Receiver Group
Lightly lubricate the following upper receiver components. Using a clean cotton cleaning patch, lightly lubricate the bore, chamber, and the inner surface of the upper receiver.
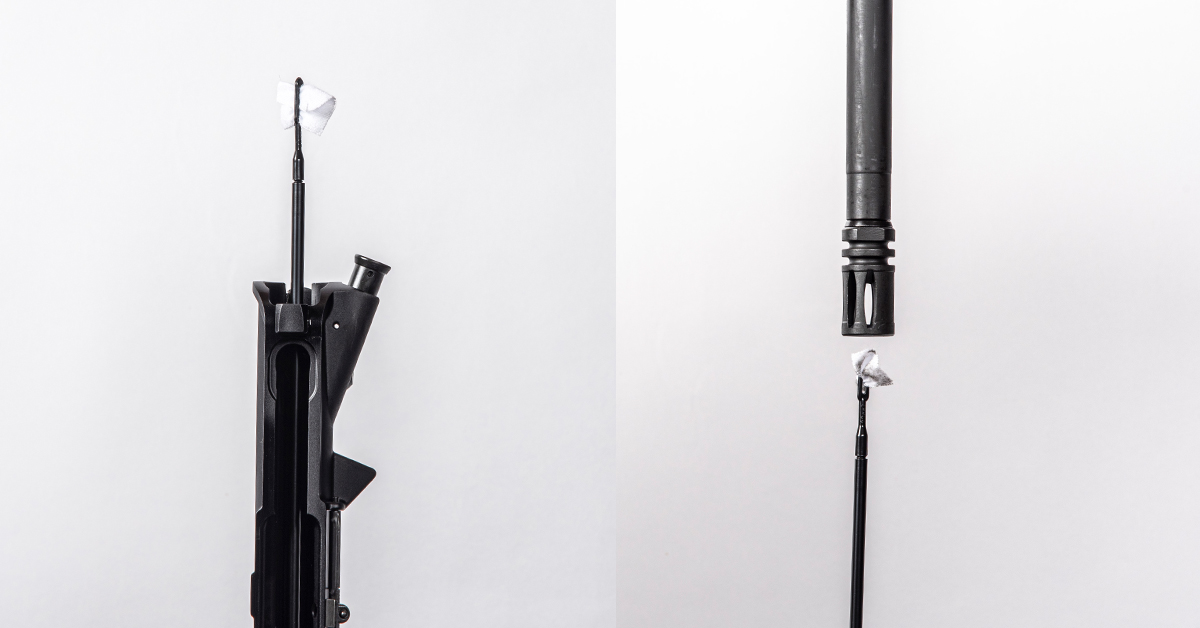
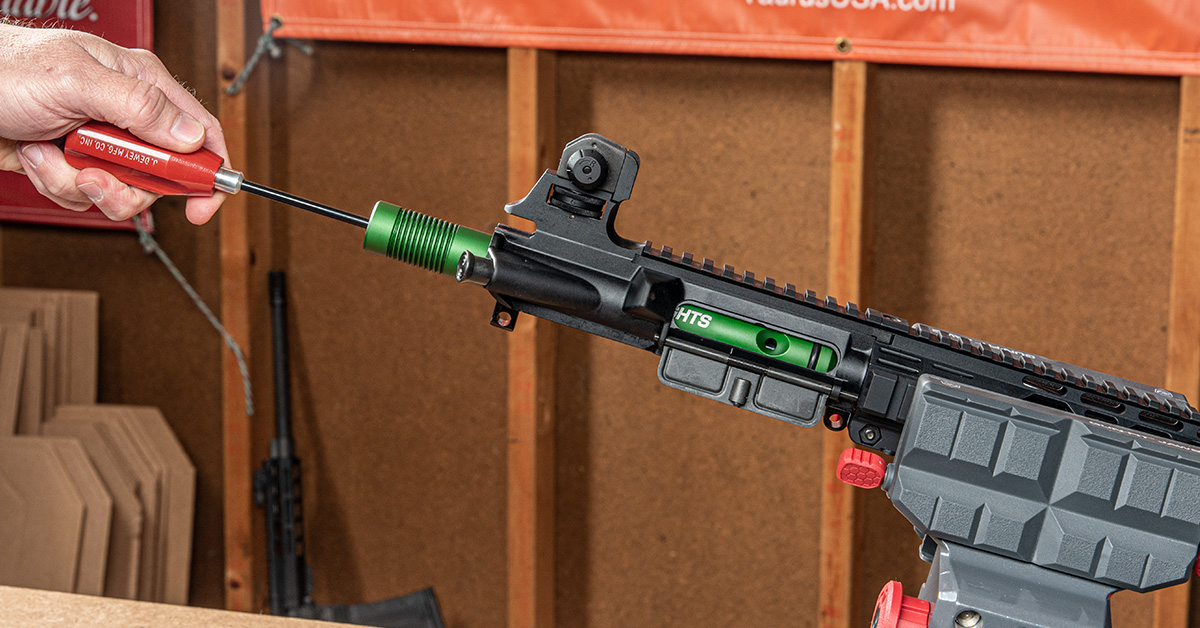
Damage to the rifle’s bore can occur with improper use of a cleaning rod. The U.S. military multi-section cleaning rods and similar rods commercially produced can be used effectively to maintain your AR; however, these multi-section rods are not as rigid as a single-piece rod. When pushing a multi-section rod through the bore, it has a greater tendency to flex and contact the inner surface of the bore, possibly causing damage. If you must use a multi-section rod (such as in the field), the solution is to use the rod as pictured above, pulling it straight through the bore. This practice keeps the cleaning rod straight and helps to prevent damage to the bore.
Next, lightly lubricate the locking lugs and the exterior surface of the upper receiver, barrel, and front sight housing.
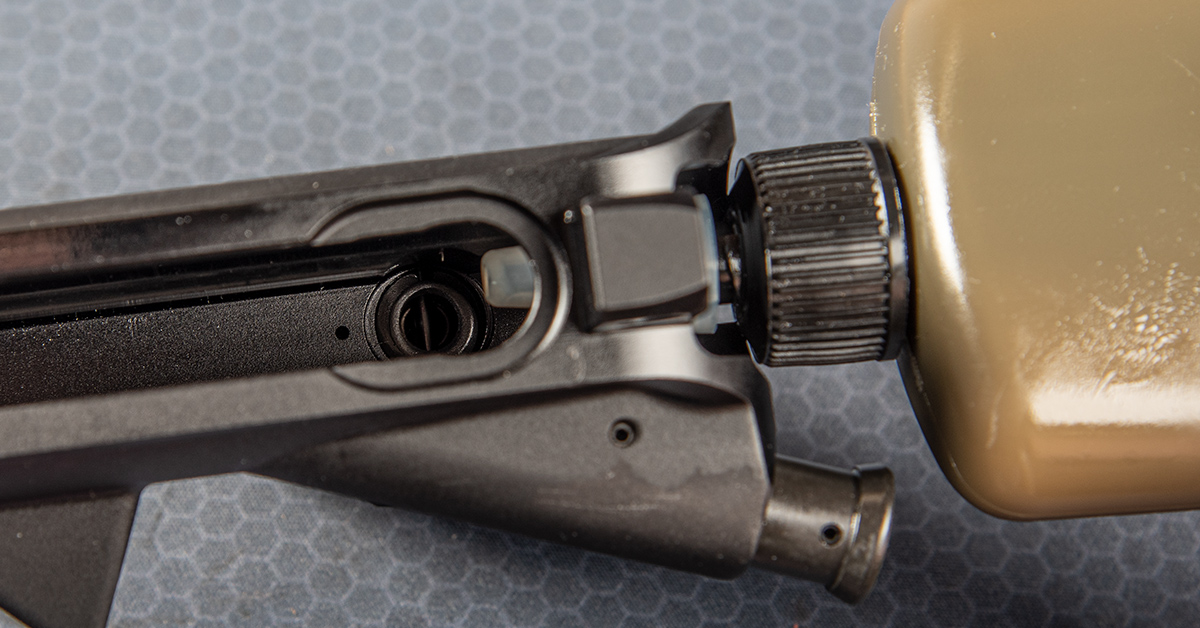
For the front sight, place two or three drops of oil in the front sight detent and work detent in and out to disperse the oil throughout the front sight mechanism.
Lubricating the Bolt Carrier Group
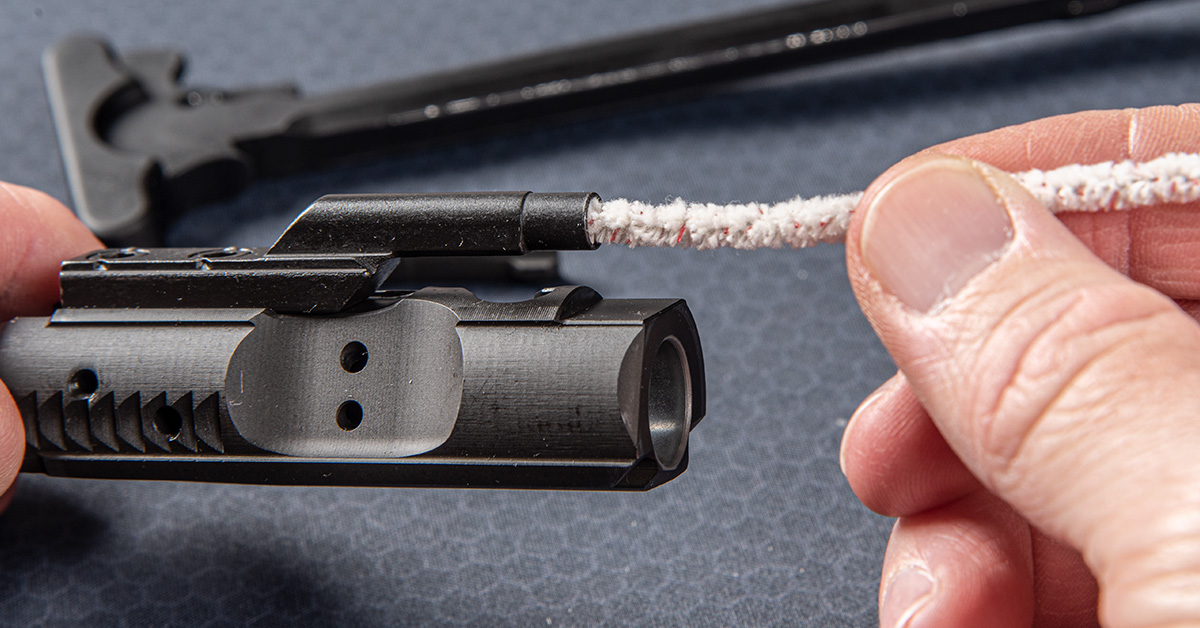
Carrier key: Using a pipe cleaner, ensure that the inside of the key is dry and that all traces of cleaning solvent have been removed. Place one drop of oil inside the key.

Bolt, cam pin, firing pin retaining pin: Generously lubricate the outside surfaces of the bolt, cam pin, firing pin retaining pin, and the bolt or “gas” rings.
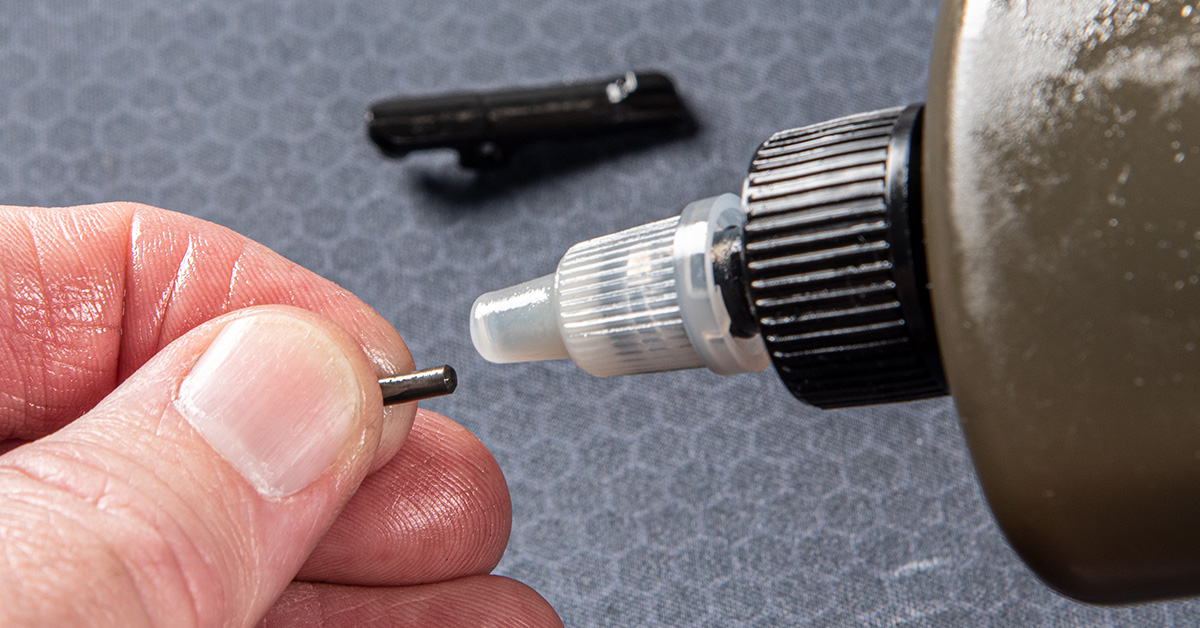
Firing pin: Lightly lubricate the firing pin and firing pin recess within the bolt.
Extractor and extractor pin: Lightly lubricate the extractor and the extractor retaining pin.
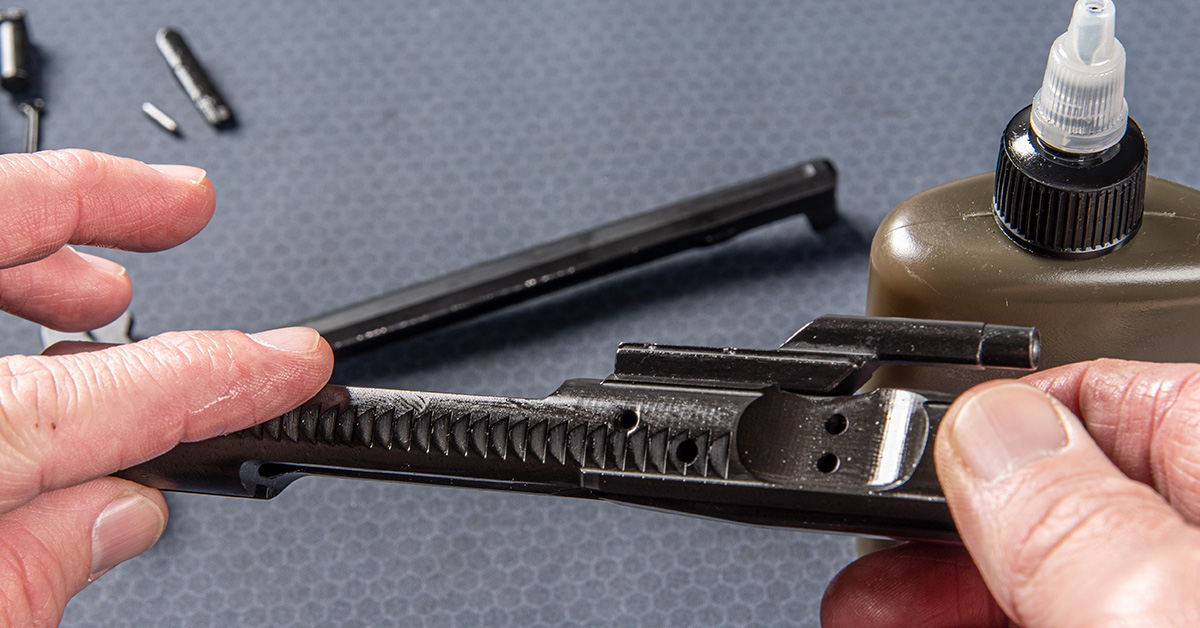
Bolt carrier and charging handle: Lightly lubricate the surface of the charging handle. Lightly lubricate the external and interior surfaces of the bolt carrier. Generously lubricate the cam pin recess within the bolt carrier and the slide.
Lubricating the Lower Receiver Group
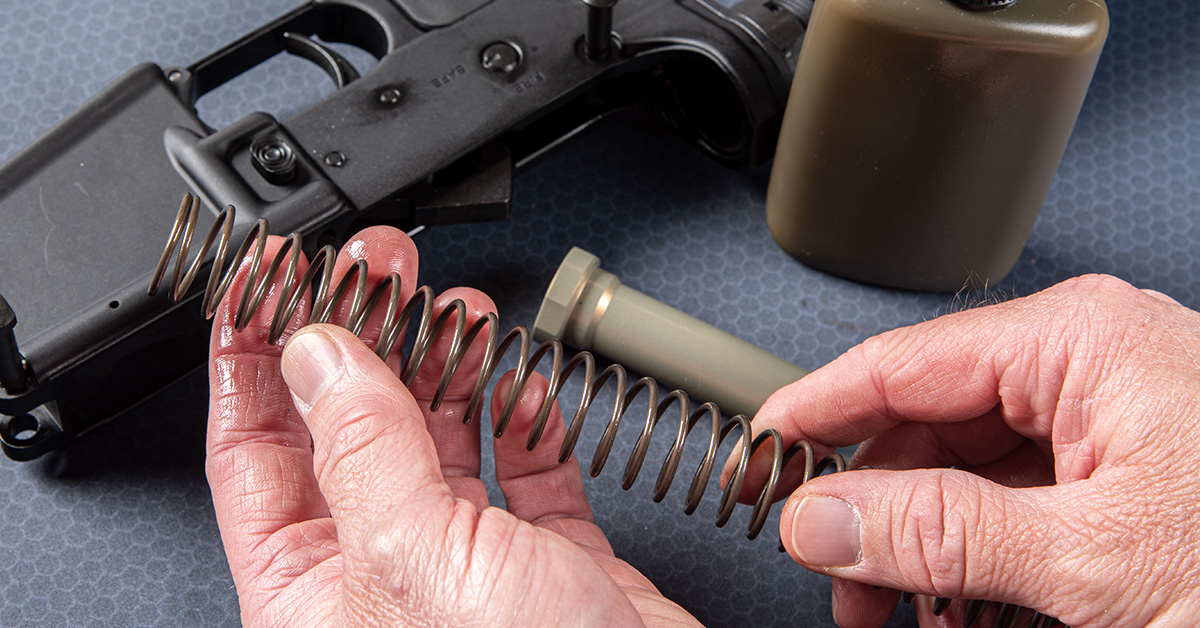
Lower receiver: Lightly lubricate the buffer, action spring, and inside the lower receiver extension.
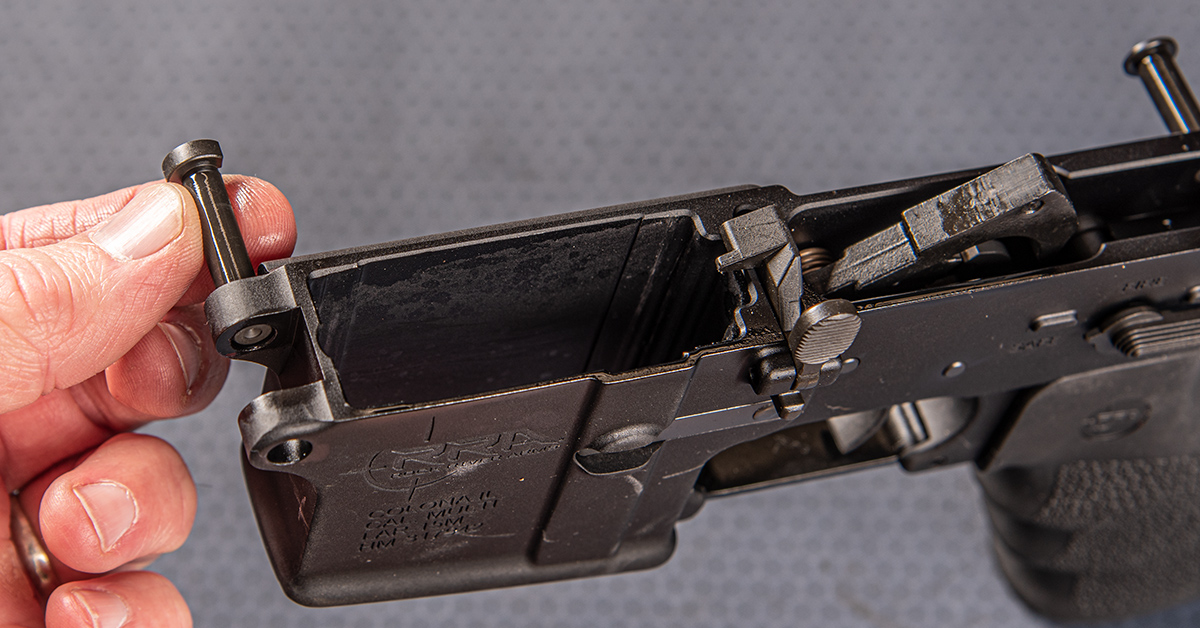
Generously lubricate the take down and pivot pins and their detents. Also, generously lubricate the moving parts inside the lower receiver and their retaining pins.
Rear Sight: Using one or two drops of oil, lubricate the moving rear sight components. Each moving part will be rotated to ensure dispersion of the oil throughout the mechanism. Make note as to how far the parts are rotated so that they can be returned to their original setting. The parts for lubrication include the elevation knob, elevation screw shaft, windage knob (max 5 clicks left or right), windage screw, and the detent holes.
The following concerns standard AR-15 receivers with the carry handle incorporated in the receiver. For flat top receivers with a removable carry handle, you’ll need to remove the carry handle from the receiver to access these lubrication points.
Turn the upper receiver upside down and apply two or three drops of oil to the bottom of the elevation screw shaft and to the inside of the elevation spring detent hole. Keeping the upper receiver upside down, rotate the elevation dial a few turns in each direction to disperse the lubricant.
Many years ago, while attending Pennsylvania Gunsmith School, an instructor advised me of the K.I.S.S. acronym — Keep It Simple Stupid. This isn’t to imply we are stupid, but that we often tend to over complicate things. Over the years, I have found the K.I.S.S. acronym to be applicable and sound advice. Lubricating our firearms should be a relatively simple affair that is easily accomplished. By “keeping it simple” and your gun properly maintained, you’ll find that your AR-15 will give a lifetime of trouble-free service and be easier to clean after firing.
Deep Clean Assists
The barrel lubrication process we just discussed is an in-the-field operation intended to minimize corrosion or to remove any dust or debris that may have entered the barrel. After firing the rifle, though, the barrel must be properly cleaned. The best place to do that is on the home bench with the proper tools.
Now, we want to touch on a couple of products we use in the Shoot On shop when it is time for cleaning the AR on the bench.
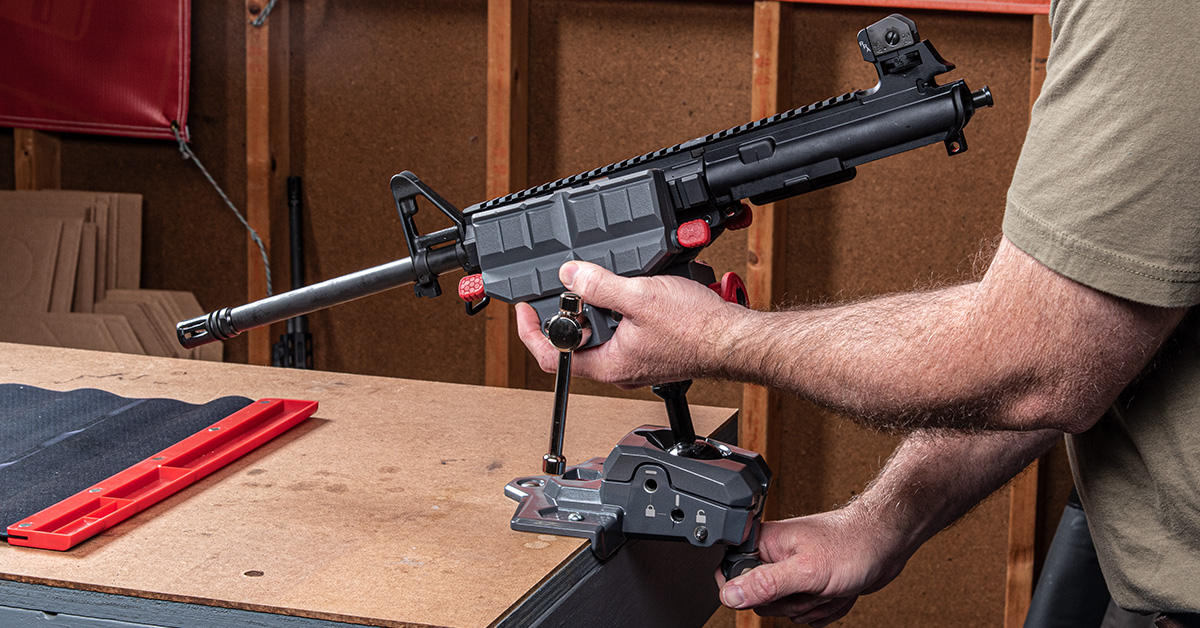
First is the Real Avid Master Gun Vise. This came out about a year ago, and we have been using it diligently ever since for numerous gun build projects and always for gun cleaning — from handguns to long guns. This is a multi-axis vise that mounts directly to your gun bench for convenience and rigidity. What makes this ideal for AR barrel cleaning is that you can place the upper receiver safely in the vise jaws and rotate or angle the receiver as needed for the various cleaning processes.
For example, we always begin bore cleaning by liberally coating the bore with solvent and allowing it to work on the fouling. This is best accomplished by orienting the barrel with a slight muzzle-down attitude and allowing the excess solvent to drip out. The Master Gun Vise lets you rotate the upper receiver into the desired position to the side of your bench, where the excess solvent can drip out into a container or trash can. Once you are ready to work the barrel with a bore brush and jag, the multi-axis ball-and-socket base lets you orient the upper receiver horizontally in the best position for your workstation.
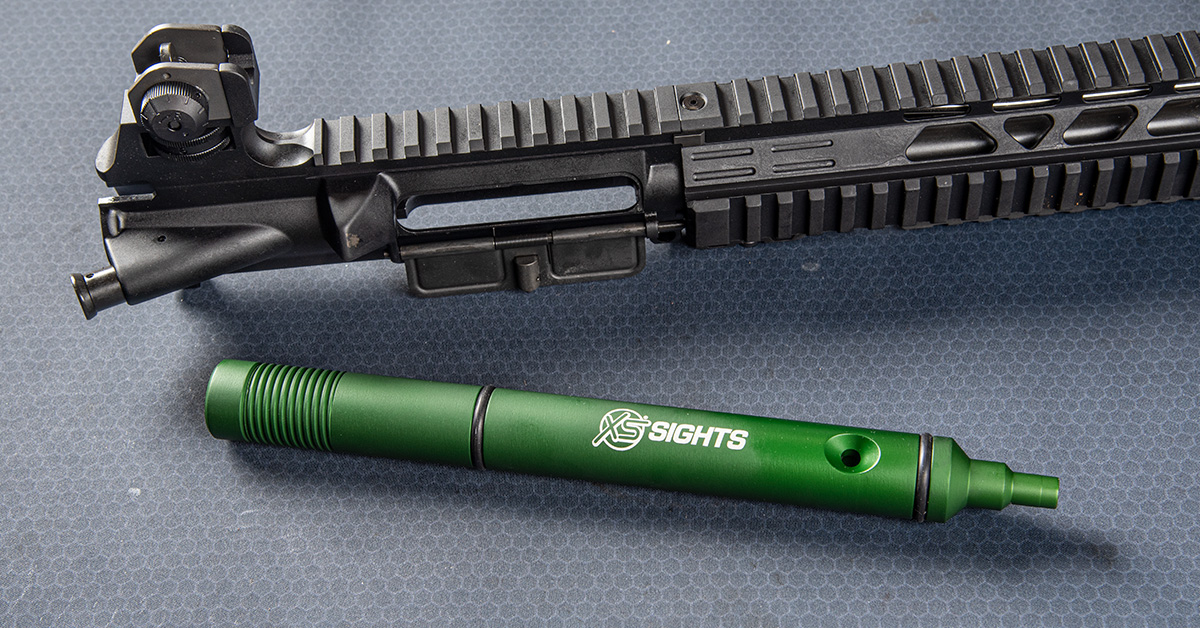
Next is the XS Bore Guide from XS Sights. This guide is designed for use on ARs that utilize a standard AR-15/M16 bolt carrier diameter with a bore diameter of .308 or smaller. It is a stout piece of anodized hardware featuring dual O-rings to ensure a snug, no-slip fit inside the upper receiver. The purpose of this tool is to precisely guide the cleaning rod through the bore to prevent bore damage. This guide also includes a solvent port, which really cuts down on cleaning mess since you can apply solvent to a dry patch or brush while it is in the bore guide.
For clean, safe, and efficient barrel cleaning, the XS Bore Guide is a must-use in our shop.