Built to serious duty standards, Steiner enters the pistol red dot market with an optic that moves the needle on the enclosed emitter sight concept
by Rob Reaser
Anyone familiar with the optics landscape understands that German manufacturer Steiner holds a dominant position in military and LE sighting systems. The company’s riflescopes and battle sights have proven themselves in the toughest conditions and missions around the world, but Steiner hasn’t made a huge push into the red dot segment when compared to other top-tier optics manufacturers — especially red dots destined for handgun applications.
On the flip side, when Steiner does go for something, they usually go big. That is certainly the case with the brand’s freshest red dot offering, the Steiner MPS (Micro Pistol Sight).
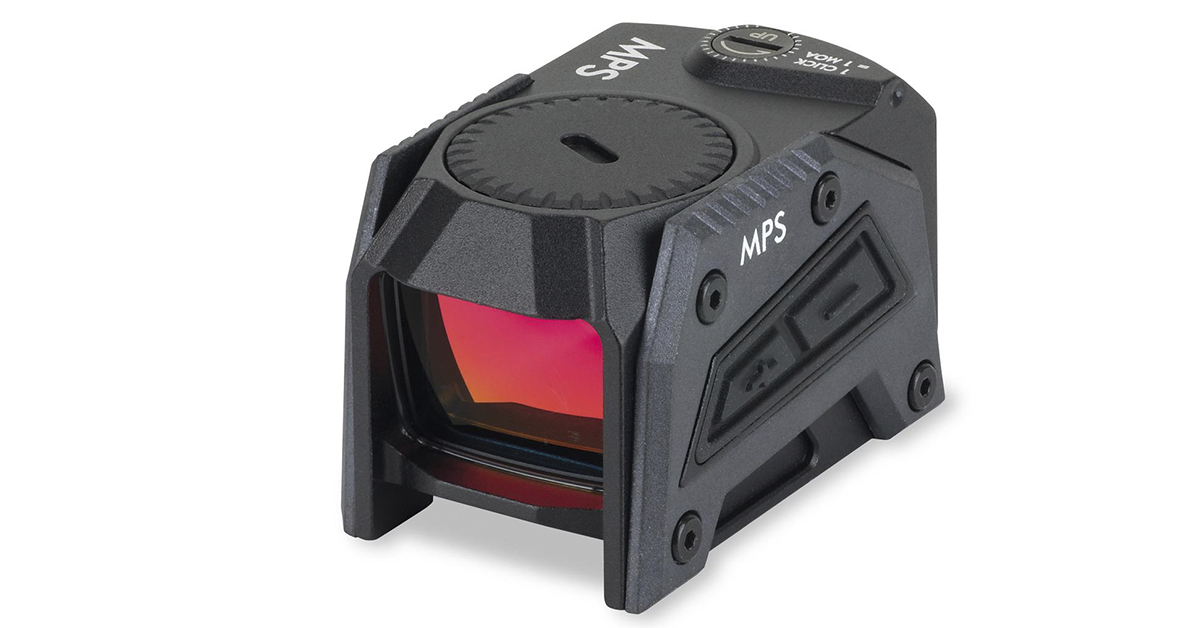
As you can see, the Steiner MPS red dot does not fall into the ultra-light micro segment à la Leupold’s Deltapoint or the HEX Wasp. No, the MPS tips the opposite end of the scale, more akin to the Holosun 509 or Aimpoint’s ACRO series.
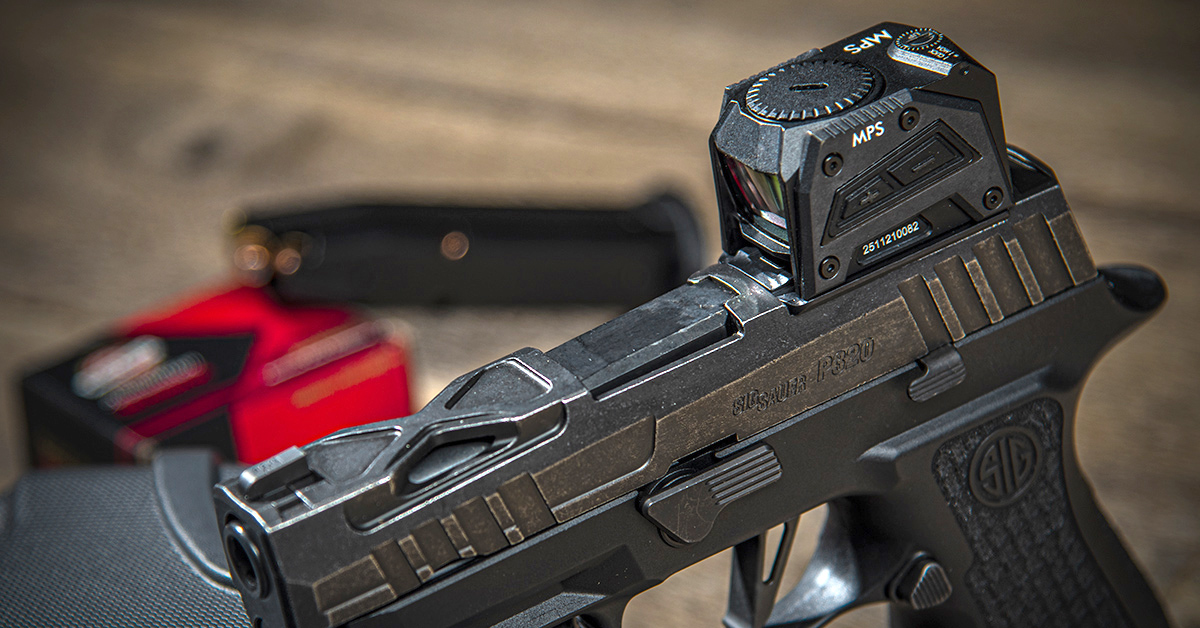
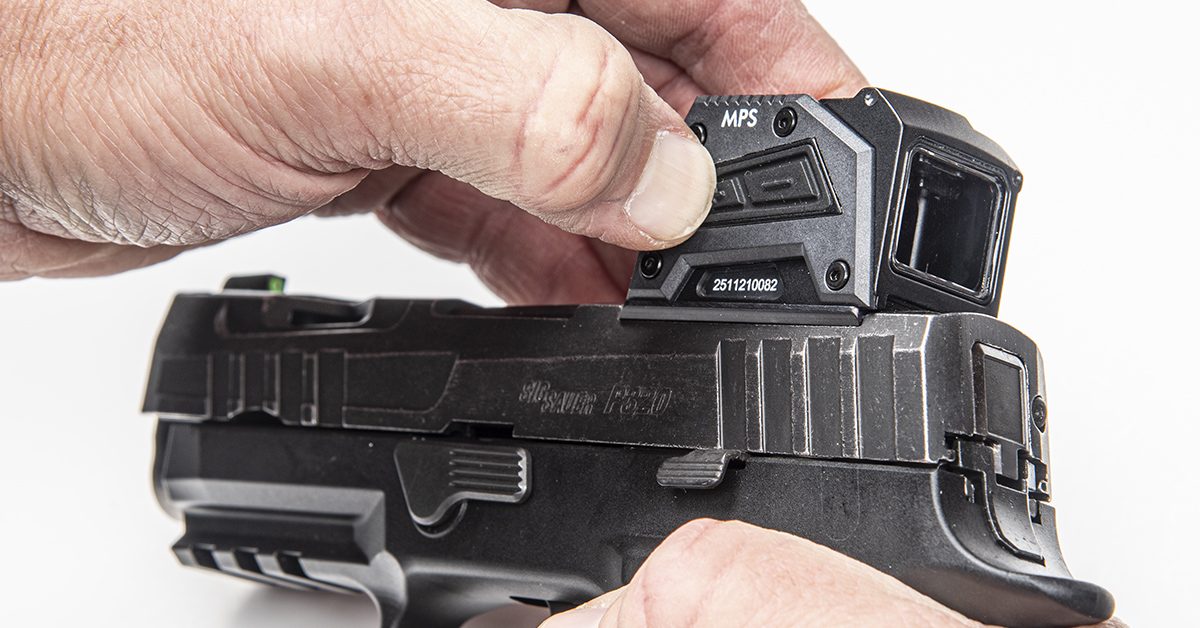
On a pistol…any pistol…the MPS is a commanding presence. It has size (2.17 inches in length), it has heft (2.05 ounces), but most notably, it is built like the proverbial tank.
Confidence in equipment means a lot, and to be honest, I’ve never felt much of it with most red dots sitting atop EDC pistols. It is one of the reasons I’ve never cottoned to red dots on my carry guns. Deep down, I just don’t trust them, and that lack of confidence makes me more than a bit queasy.
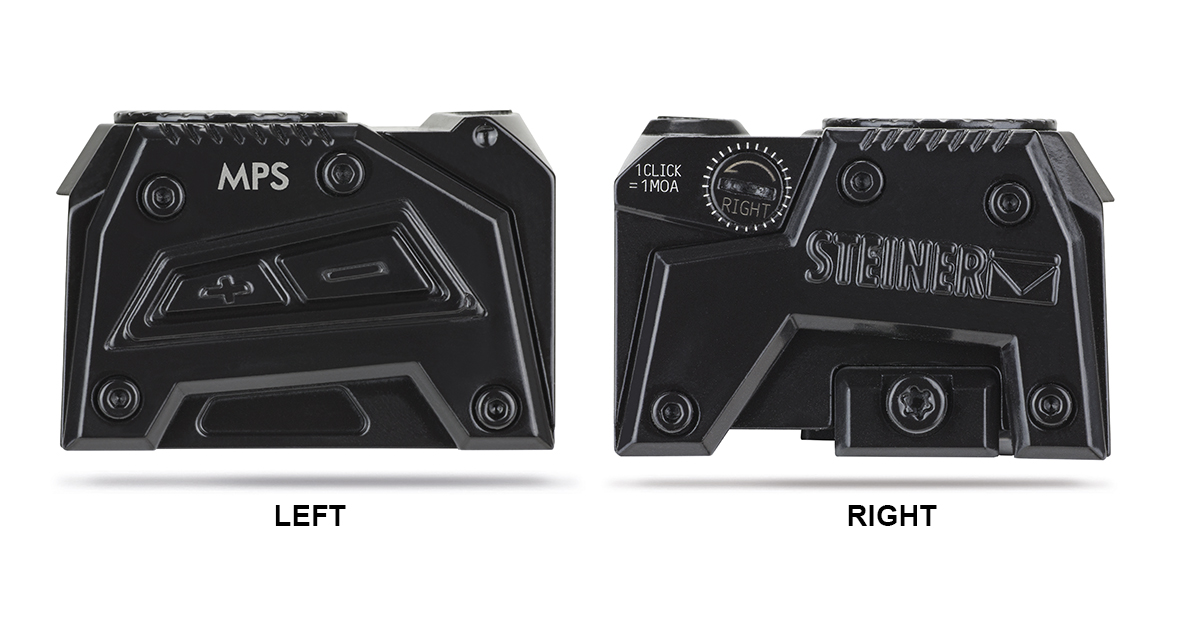
The MPS chassis alone inspires confidence. The housing boasts all-metal construction that is further bolstered with metal sidewalls. Think of this as armor plating bolted to the sides of the sight housing. The sidewalls not only mitigate impact damage, but the beveled edging also sleekens the profile and contributes, if only slightly, to smoothing draw from deep concealment.
In short, hard use is the core competency of the MPS. The housing boasts a 1,000 g shock rating, and it is completely sealed and nitrogen filled so it will not fog up and is waterproof for pressure down to 10 meters.
The 1X objective lens is also protected. It sits recessed in the housing, reducing the chance of hard hits and scrapes. A slight hood across the top adds another protective edge. Combined, the front lens has sufficient cover and the housing is so strong that you can push the sight against most surfaces — a wall, a boot, a concrete block — for one-handed slide manipulation without fear of damaging the lens.
As you’ve probably figured out by now, the MPS features a closed emitter. In other words, the emitter is secured inside the housing. While this design necessitates the larger housing, it also means the emitter remains clear of accidental obstruction from debris or mud. Contrast this to red dots with open emitters. If a splash of mud were to cover the emitter, the red dot disappears, and it may take some work to get it cleared off. With an enclosed emitter, all you need to do is wipe off any obstructions on the lens(es) and you’re back in the game.
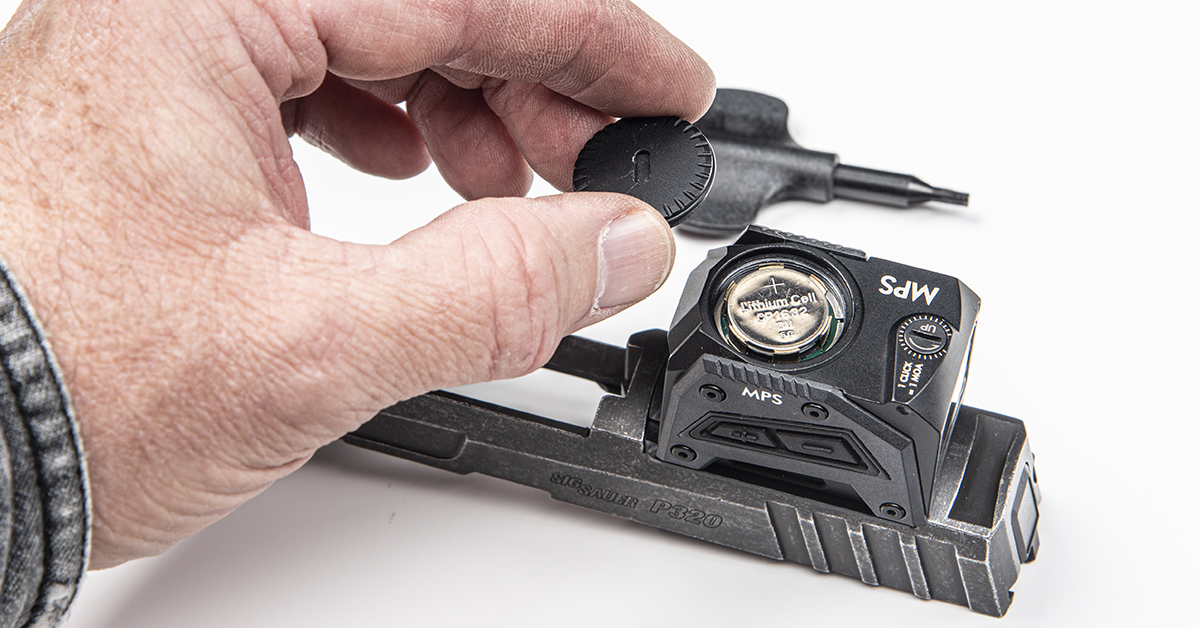
Speaking of the emitter, it is positioned in the top of the sight housing, which is also where you’ll find the battery compartment. This is a big plus because moving the heavy electronics to the top of the housing delivers two key benefits.
First, the top-mounted battery means you don’t have to remove the sight from the slide (and likely lose your zero) just to change the battery. Second, the housing can be thinner on the bottom. This reduces the distance between the line-of-sight and the bore line, allowing the sight to sit lower on the slide. For many shooters, that translates to faster sight acquisition.
Operational controls on the MPS are unsurprisingly simple. The sight offers eight illumination settings — six low- to high-intensity day/night levels and two night vision levels. Illumination of the 3.3 MOA red dot is controlled by a rubber-covered switch assembly with “+” and “-” switches. These switches are positive in operation, meaning you must want to push them. Press firmly and you’ll feel and hear the switches engaging. These won’t easily move by accident. Also, the side plate makes the switch assembly flush with the plate so the “+” and “-” buttons don’t sit proud, making it hard to hit them without intent. Furthermore, the flush profile means the rubber covering likely won’t wear from constant carry.
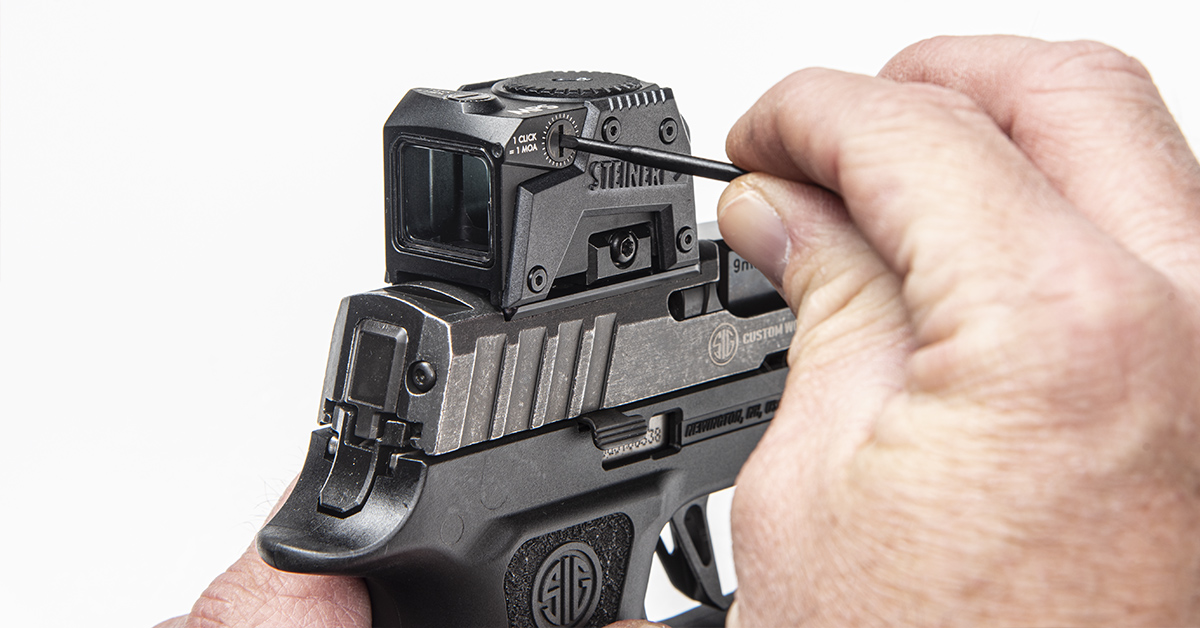
One of the issues I’ve had with many pistol red dots is “mushy” windage and elevation adjustment. If you have worked with several red dots, you have probably come across this yourself. Turn a knob with a small screwdriver or Torx wrench and the knob sort of “frictions” into place in a very uncertain manner. Not so with the MPS. The detents in the windage and elevations knobs are precise and positive. You feel and hear the clicks with no uncertainty. One click is equivalent to one MOA adjustment.
As you would expect of any Steiner optic, the glass on the MPS is top level. A true 1X magnification lens does not magnify the image you see through the sight, so it is easier to find the dot and to shoot with both eyes open. The image is also flat, meaning there are no lens aberrations to distort the sight picture.
You’ll also note the slight blue tint to the rear lens. This coating is effectively a notch filter, which blocks certain light wavelengths while permitting targeted wavelengths to pass. In terms of a red dot, this filter improves the efficiency of the laser’s projected image so that less power is needed to maintain a crisp and highly visible dot.
Overall, the MPS delivers a sight picture that is as clear and easy to acquire or more so than any other red dot I’ve used. If it could be improved upon, I wouldn’t know how.
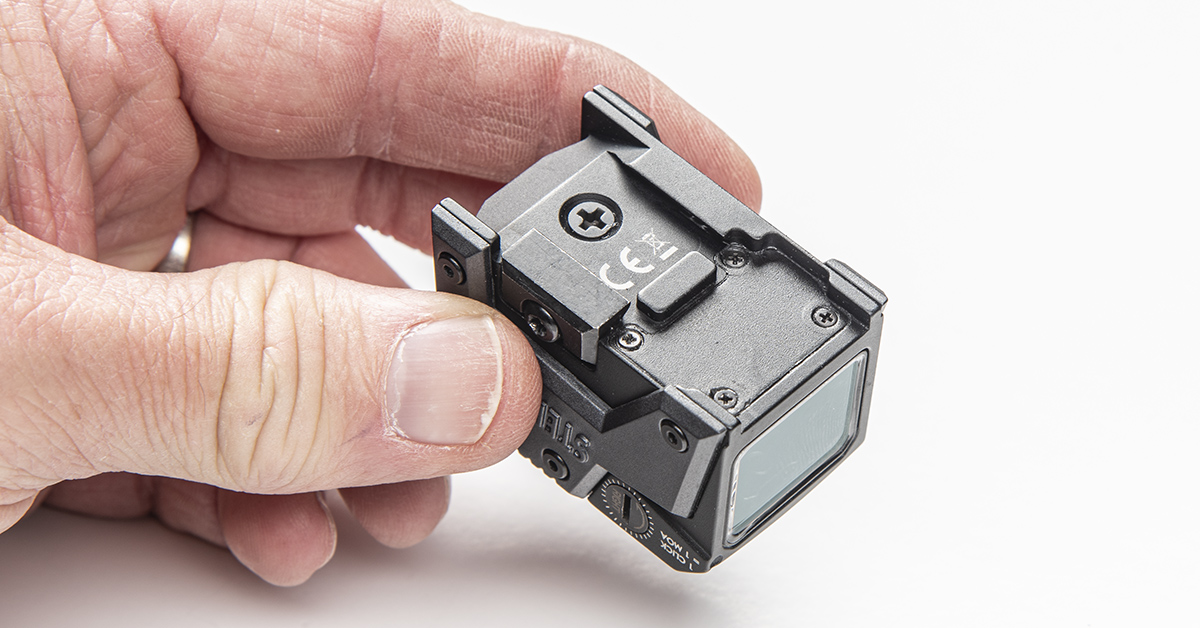
The MPS is designed to be compatible with the Aimpoint ACRO footprint. Why Steiner went with that is anyone’s guess, but there it is. That means if your slide is cut for a different optic pattern, you’ll need to use an adapter plate. The MPS does ship with a Docter-pattern adapter plate, but that, of course, necessitates a Docter slide cut on your slide.
Steiner MPS Meets Sig P320 XCompact Spectre
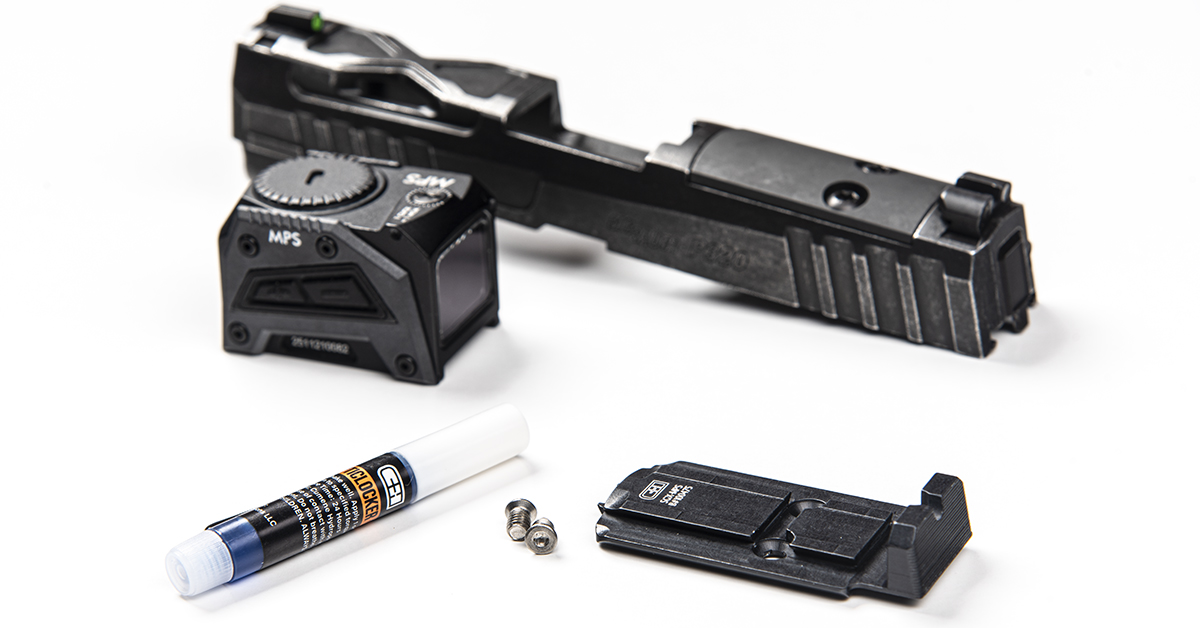
My intent was to install the MPS on my heretofore naked Sig P320 XCompact Spectre 9mm. Since this gun is cut for Sig’s Romeo series red dots and is compatible with Leupold’s Deltapoint and Trijicon’s RMR, adding the MPS would demand an adapter plate. For this, I tapped C&H Precision Weapons out of Richmond Hill, Georgia.
CHPWS specializes in providing shooters with expert solutions to their optic mounting challenges. Not only does the company offer a broad inventory of ready-to-go adapter plates that match the most popular factory slide cut handguns to the most popular red dot systems on the market, they also offer custom slide milling. Want to put an optic on your old-gen G17 that is collecting dust? Send it to CHPWS and they can mill the slide to accept the optic you want to install. With standard milling services coming with a four weeks or less turnaround and machining prices that are reasonable, CHPWS is the perfect solution for your slide modification needs.
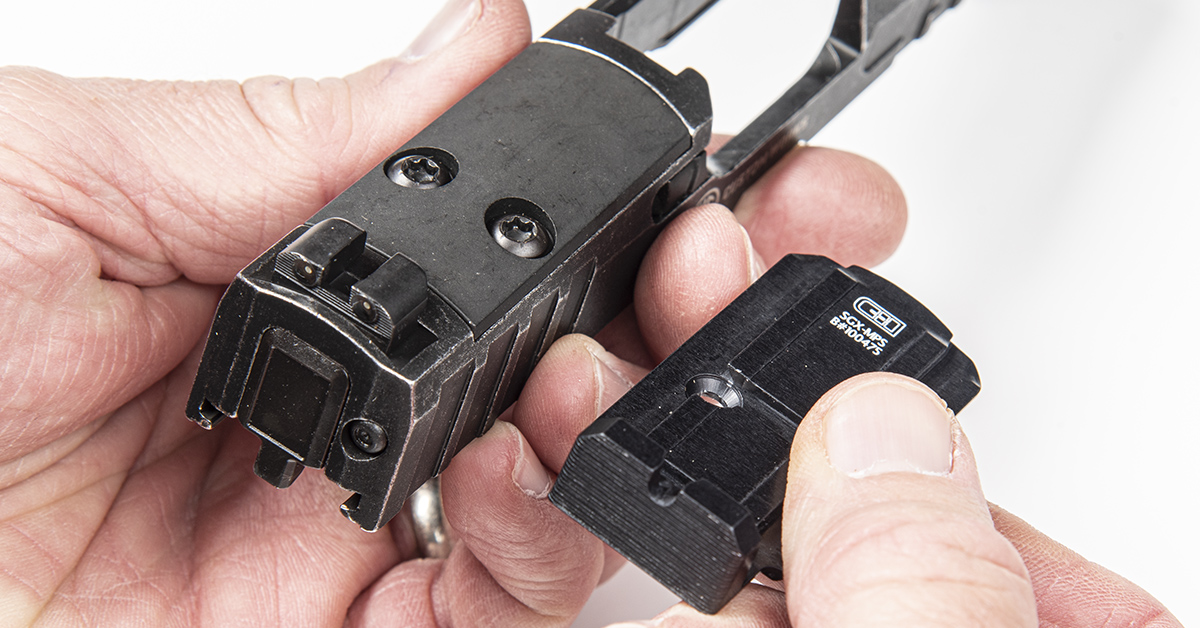
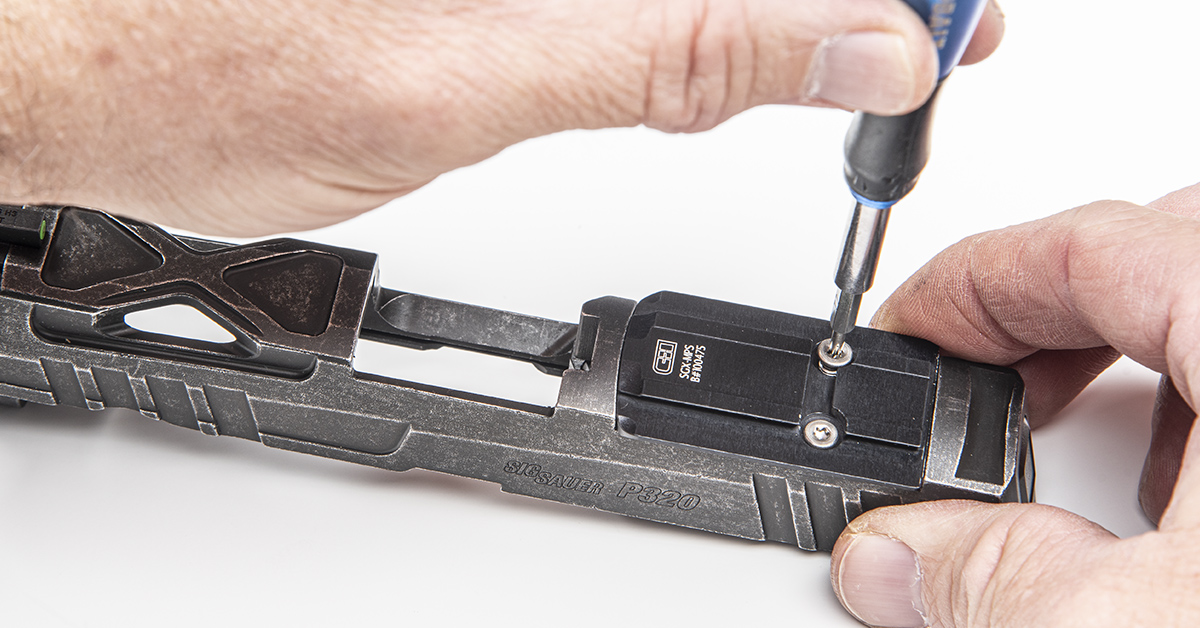
The CHPWS adapter plate replaces the factory cover plate on the Sig P320. As you can see, the model I acquired (SGX-MPS B#100475) came with an integrated and taller rear sight to allow for backup visibility through the optic. No problem. I was planning on installing a set of taller sights at some point anyway.
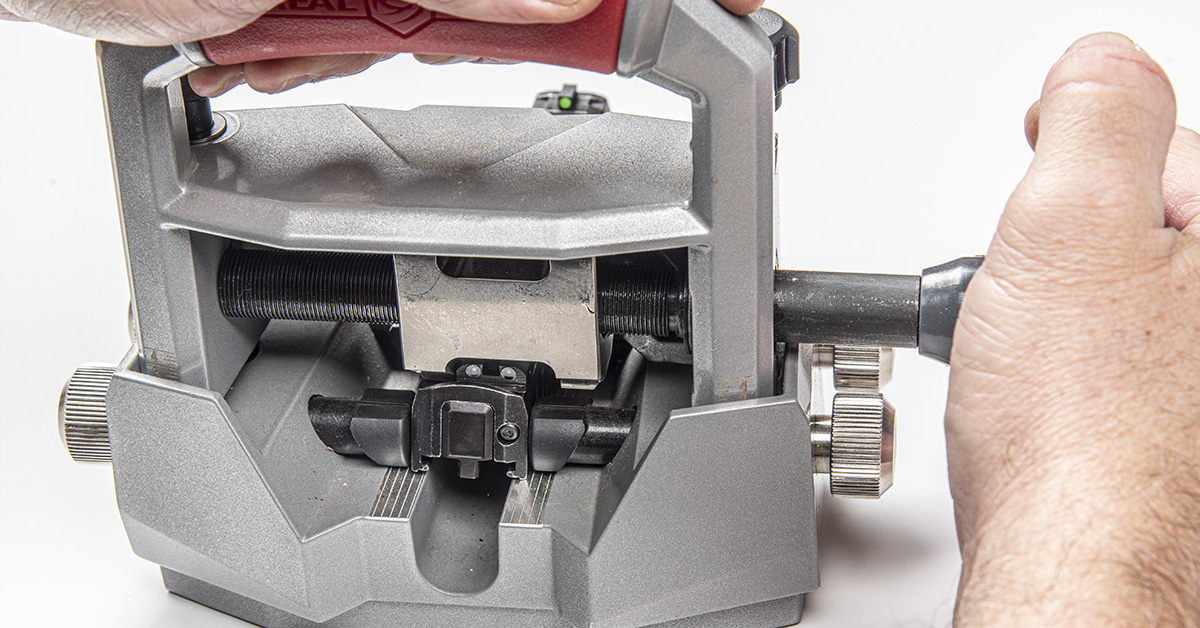
To remove the rear sight, I installed the slide into Real Avid’s Master Sight Pusher. While I favor gun-specific sight installation tools, the Master Sight Pusher’s universal design often comes in handy because it works on every gun we’ve thrown at it so far. Operation is simple. Just install the slide so it is centered in the device, align the ram to the rear sight, adjust the plunge depth, and rotate the ram to push the sight out of the dovetail. Installing a sight is the reverse.
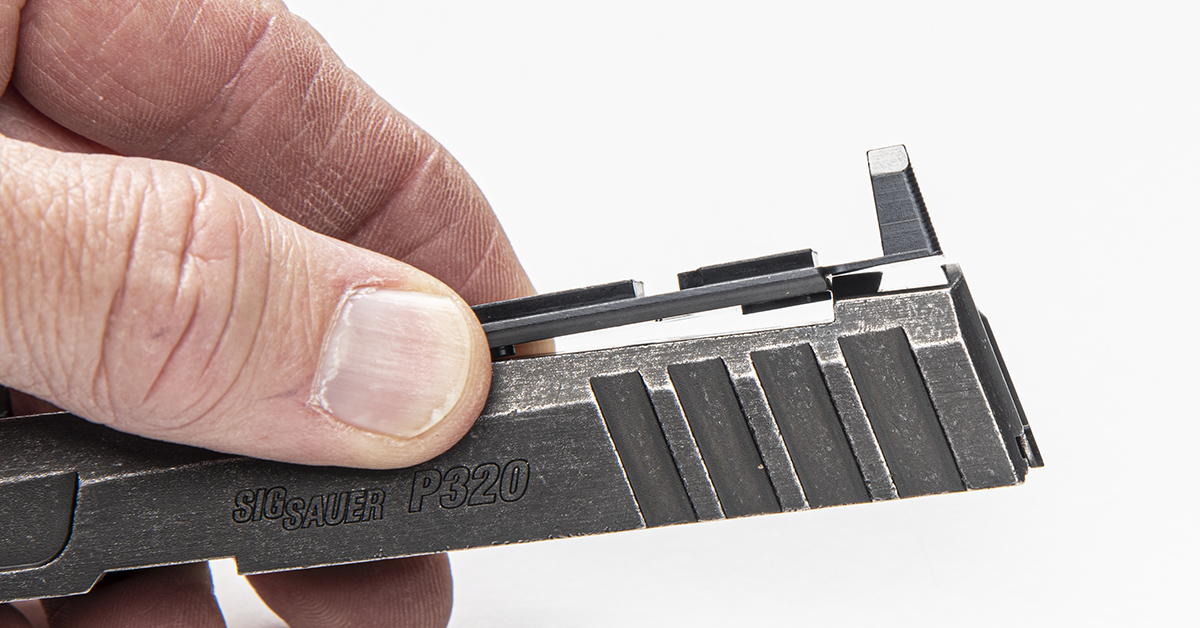
With the sight removed, a quick test-fit revealed that the rear sight extension would not fit over the slide. It is possible that I should have ordered model SGRX-MPS B#100595. Whatever the case, this hiccup was easily remedied.
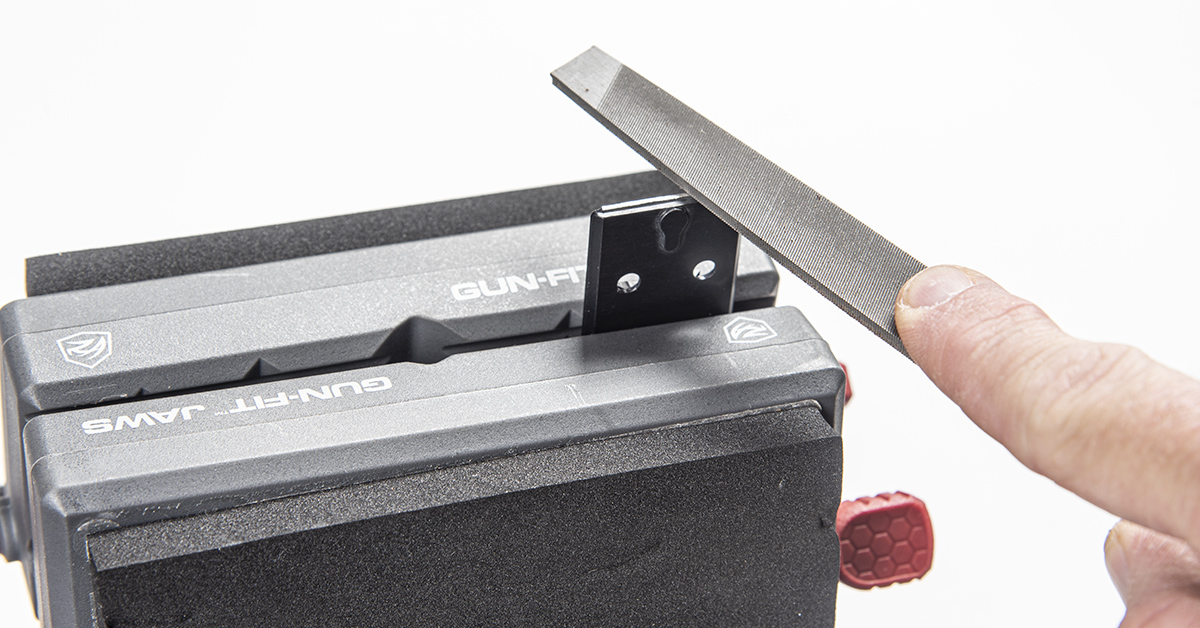
My solution was to cut off the rear sight extension from the adapter. Securing the adapter in the Real Avid Master Gun Vise, I used a Dremel cut-off wheel to cut off the sight extension and then carefully dressed up the rear of the adapter with a file. Once the extension was removed, the adapter slipped into the slide cut with minimal tolerance. The problem was, it wouldn’t sit flat in the cut. There are two small bosses machined into the bottom of the adapter that are intended to engage the two half-moon slots in the bottom of the slide cut. The forward boss of the adapter aligned perfectly, but the rear boss did not. Some careful material removal with the Dremel solved that issue.
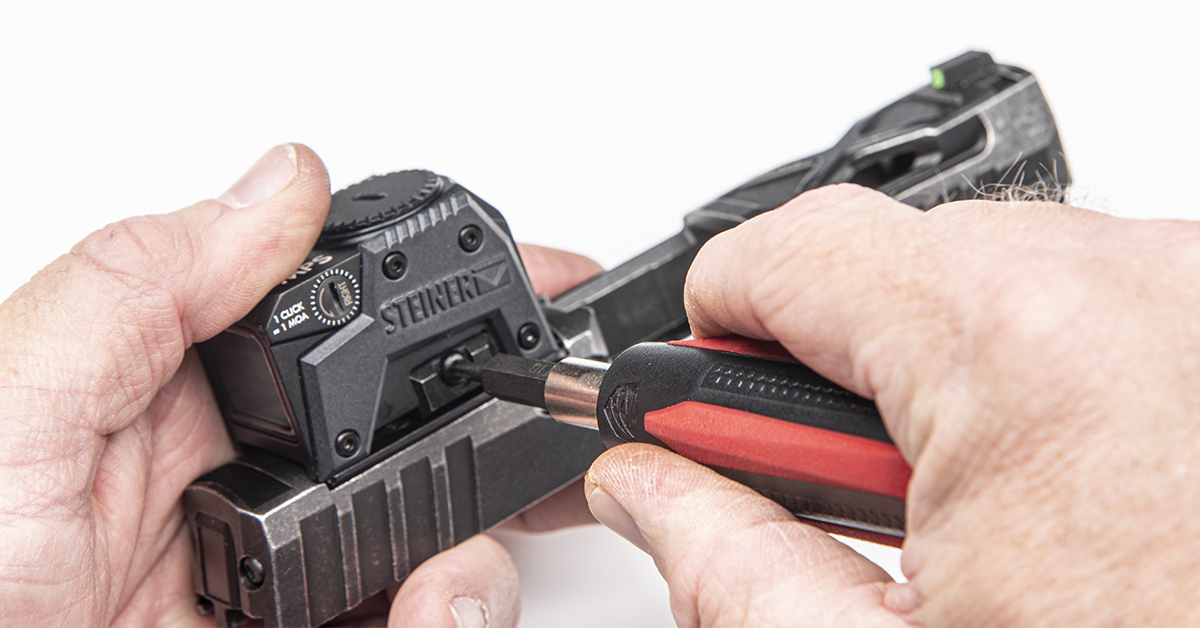
Once I had the adapter fitting sharply in the slide, it was ready to install. I cleaned the threads with denatured alcohol to remove any oils, added a drop of the supplied threadlocker to the screw threads, and installed. Be aware that you’ll need a #7 Torx bit for these screws, as no Torx wrench was supplied with the adapter kit.
A single rail clamp secures the sight to the mount. It may not seem like much, but the dovetail interface of the slide clamp coupled with the crossbar/channel of the ACRO-style mount means this sight is going nowhere.
The Steiner MPS has an MSRP of $574.99. I’ve seen it at $499.99 from some online retail outlets. At any rate, pricing is competitive with Holosun and Aimpoint offerings of the same class optics. Check it out if you’re looking for a new red dot that instills confidence in your rig and that you’re not afraid to use hard because the MPS is built to take the hits.
Steiner MPS Specifications
- Magnification: 1X
- Dimensions: 45×31.5×30.5 mm
- Effective Lens: 20mm x 16mm
- Parallax Compensation Fixed: 25 m
- Adjustment Resolution: 1 click = 1 MOA
- Elevation Adjustment Range: 90 MOA (50 Mil)
- Windage Adjustment Range: 90 MOA (50 Mil)
- Battery: CR 1632
- Battery Life: 13,000 h (average brightness)
- Auto-Off: 13 h
- Dot: red, 3.3 MOA
- Brightness Controls: 8 levels (6 day/night, 2 night)
- Water Pressure Tight: 10m
- Operating Temperature: -40° C to +60° C
- Shockproof: 1,000 g
- Weight (w/o adapter): 58 g

