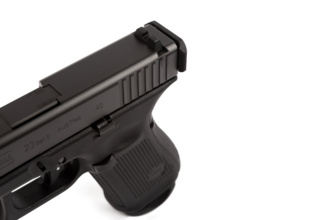
In another era, I worked for a company that, among other things, provided CQB training for military and law enforcement clientele. The firearm vault was flush with all manner of Class III exotics and enough GLOCK pistols to equip a small force. Needless to say, those pistols lived a “challenged” life. They were run hard, sometimes put up wet, and would certainly be relegated to backup duty by most discerning shooters. Yet when I traded one for a weekend’s worth of overtime, I was grinning.
Flash forward several years and that “buttery-loose” G17 had been collecting a good bit of dust, displaced by fresher, tighter, and somewhat more novel pistols. While my other handguns received plenty of exercise and fresh air, the GLOCK stayed home, holding down a spot by the front door, where it was always ready to answer a sketchy visitor (something it had to do only once, thankfully).
Although the gun ran fine, I figured it was time to give the respect it was due. After seeing the various hardware offerings at the 2019 SHOT show, I was impressed with the consolidated line of products from start-up company Rival Arms.
Based in Dallas, Texas, Rival Arms represents a “bringing together” of some of the leading product designers, material coating specialists, and machinists from across the shooting industry with the goal of producing premium, made-in-the-USA performance pistol components. Included in that mission is providing DIY firearm enthusiasts a one-brand, one-stop-shopping opportunity. Rather than buying an aftermarket barrel from this company, a slide from that company, and assorted small parts from various other companies, Rival Arms intends to manufacture precision components for the entire slide assembly.
That they have done, starting with 3rd and 4th Gen GLOCK pistols. Although the company does offer a selection of barrels for the 9mm Smith & Wesson M&P Shield, as of this writing, it is the GLOCK components that carry the brand flag.
As a company that is focused on the needs of the do-it-yourself consumer, it only made sense that Rival Arms launch its business by catering to the GLOCK enthusiast. Scads of the pistols have been sold in the U.S., and their ingeniously simple design is credited not only for the pistol’s reliability and ease of operation, but also for its ability to be disassembled and reassembled with the most basic of tools. Of course, there are some nuances to properly assembling a safe-to-operate GLOCK, and we’ll cover those areas in this article. But first, let’s look at the components we selected to revamp our beater GLOCK.
Slide

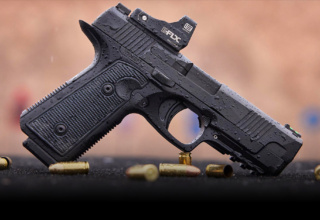
Job 1 for all Rival Arms components is to improve in some way on performance and construction compared to factory components. This could mean reduced weight, stronger materials, smoother operation, or increased wear and corrosion resistance. From what we’ve seen so far, it means all the above. But in addition to improving functional performance, Rival Arms components, where possible, also deliver a bit of attitude in terms of style. That is certainly the case with their GLOCK slides.
Their match-grade slides are CNC-machined from 17-4PH stainless steel billet—itself a robust material with inherent corrosion resistance, high strength, and reliable durability. To that end, Rival Arms adds QPQ (quench-polish-quench) thermo-chemical case hardening for extra wear resistance.
One of the advantages of utilizing 17-4PH stainless steel is its exceptional machining qualities. This bears out in the slide’s crisp lines—especially in the front and rear serrations and the optic cutout. All Rival Arms GLOCK slides, except for the G43, have an optic cutout to accommodate a Trijicon RMR or other brand optics. The fill plate (for use when open sights are preferred) and slide have such close machining tolerance that the plate must be precisely aligned with the cutout in order to install it, so don’t expect any wiggle with a mounted optic.
As for the styling, the slides feature window cuts on both sides and on top. Located mid-barrel, these promote cooling and give a peek at the spiral-fluted barrel (if you go down that road).
Barrel

Rival Arms classifies their barrels as “match-grade.” Since our pistols are all destined for daily carry or CQB training and not precision target shooting, we can’t verify the match-grade claim. But if appearances and our subjective wiggle test of the barrel’s fitment into the slide (noticeably more precise than the factory combo) are any indication, we’ll take the company at its word.
All Rival Arms barrels are CNC-machined from 416R stainless steel, which is a premium material for precision barrels across the competitive shooting segment. To this is added a low-temperature vacuum PVD coating to ensure high wear-resistance. The barrel bore, however, gets the Boron Nitride treatment, which is intended to minimize heat and corrosion build-up.
Beyond the clean, crisp machining, the Rival Arms barrel comes with a sexy spiral fluting. Undoubtedly an aid in cooling, it just looks downright cool. Making that cool look even more enticing are the available barrel color options. DIY builders can choose between black, graphite, or bronze to give their pistols a distinctive touch.
Another option is muzzle threading. Should you want to run a suppressor or compensator, take the threaded barrel option in 1/2-28 thread.
We were interested to see how this barrel compared to our factory barrel on the scale. We assumed it was lighter, and our guess wasn’t unfounded. Our standard Rival Arms barrel weighed .25 ounces less than the factory model.
Precision Striker, Slide Completion Kit, and Sundries

One of the hassles beginner DIYers face when revamping their GLOCKs is rounding up all the small parts. Since Rival Arms focuses on the slide assembly (for now anyway), they’ve eased the struggle by providing all the components you need. Items such as the firing pin and guide rod and spring assembly can be purchased separately should you only want to replace those on your current GLOCK setup. The company also offers a slide completion kit, which gives you everything required to finish out a new slide assembly. These components, where applicable, are also made from CNC-machined solid stainless-steel billet to tighter-than-factory tolerances and are treated with PVD coating for added wear resistance.

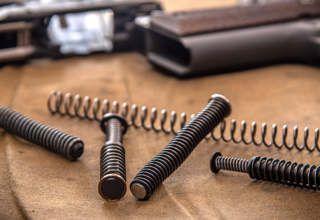
Sold separately is the guide rod and spring assembly. The Rival Arms version features a guide rod made from CNC-machined solid stainless-steel billet (versus the factory plastic guide rod) and a pre-assembled spring in the stock weight. It’s a worthy upgrade, whether you’re building a new slide assembly or want to freshen your factory GLOCK. That extra weight in the guide rod will also reduce muzzle flip and offer quicker sight alignment for follow-up shots.

While the slide completion kit comes with a precision striker, Rival Arms also sells separately a premium striker. It is, like the barrel, spiral-fluted but is made from the same 17-4 PH stainless-steel billet as the slide. And as with the barrel, these strikers are offered in black, graphite, or bronze colors.
Finally, one of the few items made by Rival Arms that is not intended for the slide assembly is a frame pin kit. Offered in either stainless-steel or titanium, these replace the factory trigger, trigger mechanism housing, and locking block pins.
Before you begin disassembling your GLOCK and start the rebuild process, be sure you have a clean and organized work area. There are several small parts involved, so it is essential to keep everything compartmentalized to prevent losing them. We found Real Avid’s Handgun Smart Mat to be the ideal solution for keeping pins, springs, small items safe on the bench.
The following will give you a good understanding of the process involved in building a GLOCK slide assembly and replacing the trigger. For a deep-dive into the nuances of GLOCK-style pistol building, check out the book Build Your Own Semi-Auto Handgun on amazon.com, available in print or instant Kindle download.
Apex Action Enhancement Kit

Any serious effort to tweak a GLOCK’s performance almost always includes some trigger work. To give our GLOCK the full makeover treatment, we cast an eye towards Apex Tactical, one of the foremost GLOCK aftermarket trigger system manufacturers in the industry.
Our choice was the Apex Action Enhancement Kit, which includes a precision-machined trigger shoe/trigger safety assembly and trigger bar, plus the company’s own firing pin safety (Ultimate Safety Plunger) and a Performance Connector. The trigger assembly is a straightforward drop-in replacement for the factory setup.
Overall, the Apex trigger system delivers a more precise, confident feel over the stock trigger, with incremental performance enhancements such as slightly reduced travel and reset, a notably crisper break, and about a one-pound reduction in trigger pull weight courtesy of the Apex Performance Connector.
For most folks, swapping out the factory connector is a must-do. The connector is a functional spring that exerts pressure against the trigger bar. The factory connector delivers a 5- to 5.5-pound trigger pull weight. Many shooters—especially those focused on competition—prefer a lighter trigger pull weight and so opt for an aftermarket connector. This reduction in pull weight comes not from altering the connector tension against the trigger bar, but by changing the angle of the rearmost ledge of the connector.
The “Off-the-Books” Polymer 80 Option

Handgun enthusiasts who would like to take the DIY thing to the next level will want to consider building their own GLOCK-style pistol by acquiring a Polymer 80 kit. These kits are what are commonly classified at “80-percenters,” meaning there is enough unfinished areas on the receiver that the BATFE does not classify these as firearms. Per BATFE regulations, owners of such receivers can complete the necessary work to transform them into functional firearms without going through an FFL or completing Form 4473. That is, of course, assuming you live in a state, county, or municipality that honors and legally abides by the U.S. Constitution.
 Preparing a Polymer 80 frame is relatively light work but does require drilling the assorted pin holes, trimming excess slide rail material, and milling out the barrel block—tasks best completed on a quality vertical mill but that can be done with a good home vertical drill press. After that, it is basic GLOCK pistol assembling.
For more information on the Polymer 80 kits available, go to polymer80.com. For a detailed guide on how to build a Polymer 80 handgun or for advanced-level building of a GLOCK pistol, purchase the book Build Your Own Semi-Auto Handgun by Lou Patrick and Rob Reaser.
HOW-TO

- Our well-worn G17 in field-stripped form. Before working on any firearm, be sure to remove the magazine and check the mag well and chamber to ensure there are no loose rounds.

- A new firing pin channel liner is included in the Rival Arms slide completion kit. The liner must be installed with a liner installation tool to prevent damaging the plastic and to ensure proper seating in the slide. With tight-fitting liners, it may be necessary to tap the back of the tool with a small hammer until the liner seats all the way forward in its channel.

- Before the slide is assembled, it is recommended to verify that the chamber length for the barrel and slide combination falls within the minimum and maximum chamber dimensions per SAAMI specifications. This is done by placing the barrel in the slide and carefully sliding the assembly onto the frame. Begin by placing a caliber-appropriate and thoroughly clean GO gauge into the chamber.

- Slowly push the slide into battery. The barrel should move into its closed and locked firing position as seen here, if the chamber meets the minimum safe chamber length.

- Repeat the process with the NO-GO gauge installed in the chamber. If the chamber length is within the maximum allowed specifications, the barrel should not close into its locked firing position, as seen here. If the barrel and slide combination fails to close on the GO gauge or closes on the NO-GO gauge, the barrel and slide combination should be considered unsafe to fire and a different combination must be tried.

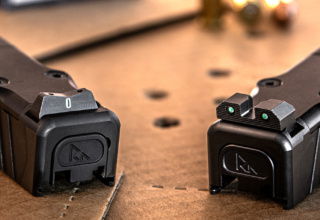
- If you don’t intend to use an optic, now is a good time to install open sights. For the rear sight, insert the sight base into the slide’s dovetail slot and push into place from right to left with finger pressure. The sight should only slide about halfway into the dovetail. Next, use a sight installer, such as this one made by TRUGLO, to press the sight into its final position. Follow the instruction provided by the tool manufacturer for your specific model.

- The goal is to install the sight perfectly centered in the slide. A depth gauge is a good tool to use to measure both sides of the sight relative to the machined edges (left and right side) of the dovetail. Try to achieve center while pushing in from the right. Moving the sight back to center (left to right) in the event of pushing too far can weaken the interference fit. The TRUGLO Tritium Pro night sights we’re installing here feature a set screw that allow you to further secure the sight once it is properly aligned on the slide.

- The front sight installs easily with the sight’s provided screw. After cleaning the screw threads with denatured alcohol, apply a small amount of blue Loctite to the threads and use the front sight installation tool to secure it to the slide.

- Lightly lubricate the firing pin with firearm grease and then install the firing pin sleeve, followed by the firing pin spring, as shown.

- The firing pin spring is secured to the firing pin by the two firing pin retainers. You will need to simultaneously compress the spring with one hand while inserting the retainers with your other hand, one retainer at a time. Be sure the seam between the two retainers is perpendicular to the end of the spring and not aligned with the spring end.

- Assemble the extractor depressor plunger, spring, and spring-loaded bearing in the order shown. Before doing so, apply a light coating of firearm grease to the plunger and spring.

- Install the firing pin safety spring into the firing pin safety and lightly lubricate both with firearm grease.

- Insert the firing pin safety and spring assembly into its slot in the bottom of the slide, spring first.

- After lightly lubricating the inner surfaces of the extractor, depress the firing pin safety into the slide and drop the extractor into its slot in the slide, with the extractor claw oriented toward the front of the slide. Once in place, release the firing pin safety. Both the firing pin assembly and the extractor should be locked into place in the slide.

- Insert the extractor depressor assembly into the back of the slide (arrow), followed by the firing pin and sleeve assembly.

- Start the armorer cover plate into the slide. As you push the plate up, depress the firing pin sleeve (under spring tension) and the spring-loaded bearing until the cover plate is fully seated. If you are only modifying your pistol’s slide assembly, you can skip to caption 25.

- If you are taking this time to replace your trigger or upgrade your connector, place the frame onto a bench block and, using the GLOCK pin tool, push out the trigger mechanism housing pin and the trigger and locking block pins (arrow). Remember that, when removing pins, push from the left to the right side of the work piece.

- To remove the locking block, insert the GLOCK tool through the trigger pin hole and pry up on the locking block until you can remove it with your fingers. Note that this method can eventually egg-out the pin hole in the frame, if you plan on several future trigger swaps. A better long-term method is to use a flat screwdriver to gently pry upward under the forward edge of the locking block.

- Pull out the slide stop lever assembly and then lift out the trigger assembly.

- Remove the connector bar from the trigger mechanism housing and replace it with the new unit.

- The easy way to swap a trigger and trigger bar assembly is to rotate the cruciform out of the trigger mechanism housing and hold the trigger spring in one hand while separating it from the trigger bar with the other. Without letting go of the spring or losing its orientation, install the new trigger and trigger bar assembly in the reverse of the disassembly.

- Install the trigger bar into its place in the trigger mechanism housing.

- Install the locking block into the frame, followed by the trigger mechanism housing and locking block pins. Next, install the trigger pin, but only push it halfway through the trigger pin hole. This is to provide clearance to align the slide stop lever hole.

- Position the slide stop lever (spring up) between the frame and the trigger shoe, aligning the pivot hole with the trigger pin hole, and then finish inserting the trigger pin.

- After reassembling the slide, barrel, and guide rod/spring assembly, install the slide onto the receiver and perform a function check (see page XX in this issue) to ensure the pistol is operating correctly.

- The purpose of an armorer’s slide cover plate is to allow you to see the firing pin lug and trigger bar extension engagement (arrow), and to observe the trigger bar and drop safety operation when the trigger is pulled rearward. The firing pin lug engagement should cover no less than two-thirds of the rear trigger bar tab for safe operation. If the engagement passes inspection, remove the armorer’s cover plate and install the new Rival Arms cover plate. Never fire a gun with an inspection plate installed.
Before test-firing, lubricate the firearm per your GLOCK owner’s manual and repeat the function check. There are additional checks that should be made before assuming the gun is in a safe firing condition, such as firing pin protrusion and cartridge case expansion. It is also a good idea to run a few Snap Caps through a complete cycle of operation to ensure proper feeding and extraction. For complete details, check out Build Your Own Semi-Auto Handbook on amazon.com.


