Texas-based XS Sights has long proven its engineering prowess with duty-grade night sights for defensive handguns, carbines, and shotguns. Now, the company further refines its popular R3D series tritium sights for an improved sight picture and greater installation ease.
by Rob Reaser
As much as I appreciate the precise shot placement capabilities of a red dot on a handgun, I (along with many, many personal defense practitioners) still prefer iron sights on my EDC weapons. The comfortable assurance of knowing my sight system is always there and won’t fail me no matter what is something I just can’t give up. Plus, try as I might to speed up my red dot proficiency, I remain more effective (speed plus accuracy) with iron sights than a red dot.
That said, low-light visibility is necessary if you’re going to stay with irons on your personal defense handgun. Finding the ideal combination that delivers a super-clear front/rear sight silhouette for precise aiming, a highly visible front sight that presents quickly at close distances, good transition between ambient light levels, and no-question front and rear alignment in dark conditions is challenging. The new R3D 2.0 tritium sight system from XS Sights, though, earns an “A” on all these points.
I have used numerous tritium sights on a variety of handguns but have always found the XS Sights R3D system to be just right for my style. Below is the original R3D configuration. The housings are solid steel and minimalist in size, which I like.
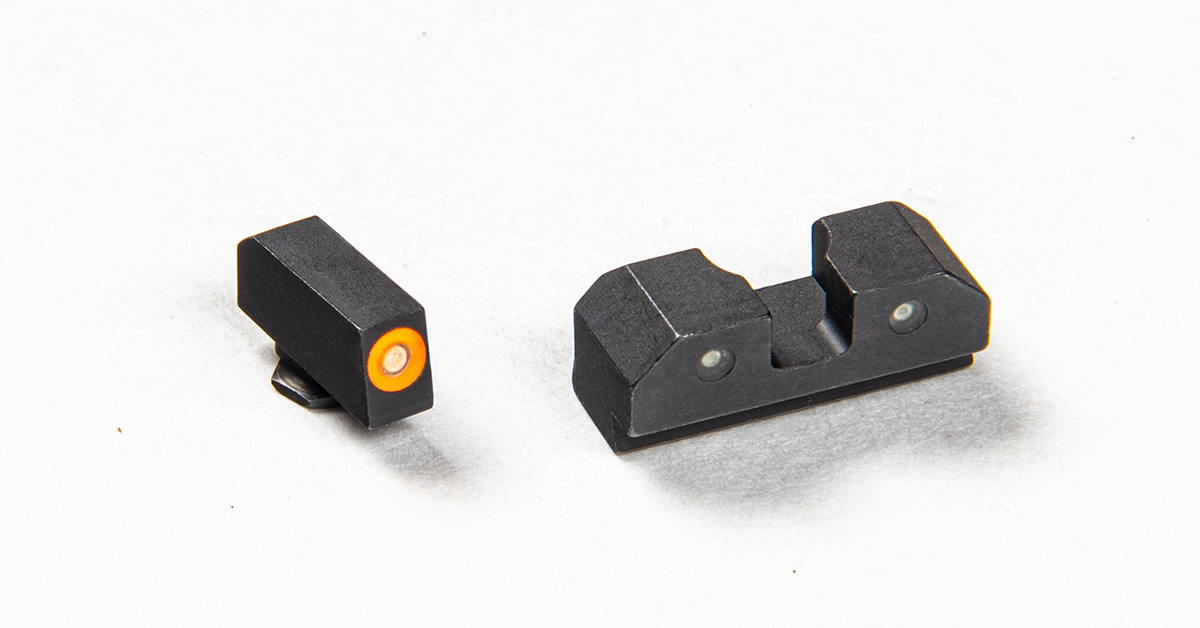
This has been a good upgrade for me on GLOCKs and assorted compact and micro-compact handguns I’ve used. They are rugged to the extreme, and most importantly, offer generous spacing between the front post and notch so there is no struggle to achieve quick and accurate sight alignment.
Recently, XS Sights released the second-generation R3D system, and the changes made take this already standout upgrade to the next level with some strategic refinements that further elevate functionality.
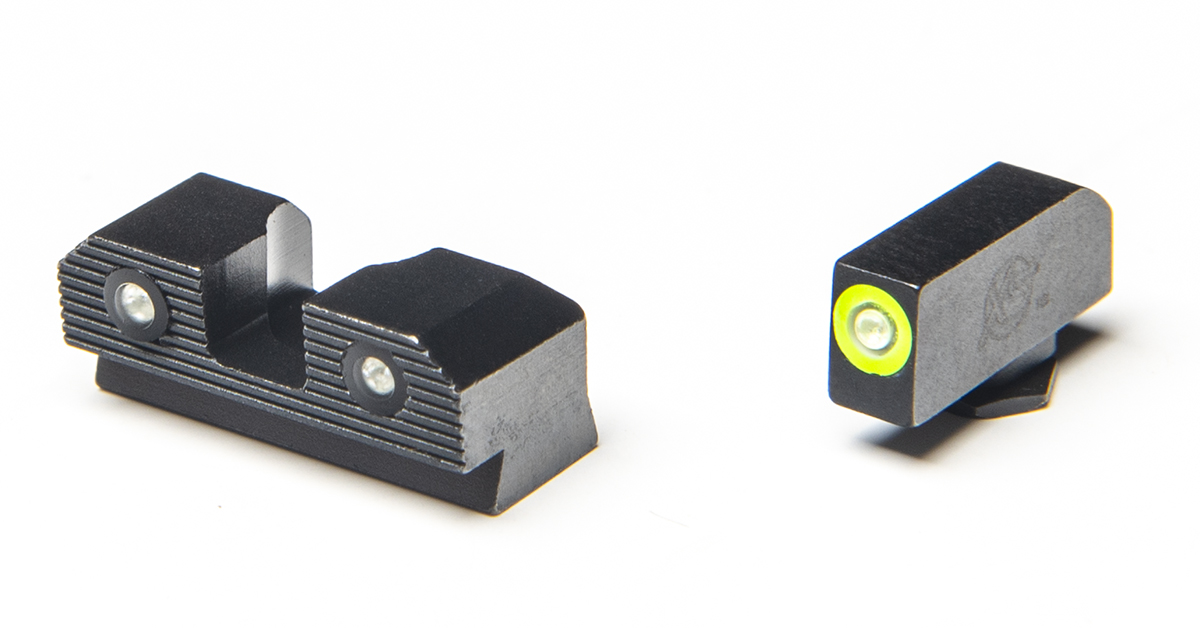
As you can see by comparing the R3D 2.0 (above) to the first-generation R3D sights (previous photo), the new system incorporates blackout serrations in the rear sight housing to reduce glare. More importantly for low-light work, the self-illuminating tritium vials, or “lamps,” are slightly larger than the originals and are a skosh brighter, so they are easier to see. You can also see that the XS engineers added black PVC rings around the rear sight lamps, and the lenses are non-reflective to minimize glare. These provide a crisper sight picture, effectively reducing the depth-of-field blur while maintaining light intensity and providing a more defined edge around the lamps. The forward edge of the rear sight is perpendicular to the slide, allowing for one-handed slide manipulation against a firm surface.
Moving to the front sight, it features the same 0.145-inch post width as the original. The tritium lamp works in conjunction with a high-contrast photoluminescent glow ring that absorbs ambient light. Combined, these two elements make up the R3D’s Glow Dot. At essentially the width of the front post, this delivers a big, bright aiming point from dim to full-intensity ambient light levels.
Both the front and rear sights are treated to a black nitride finish to withstand the wear and elemental exposure typical of a duty or EDC handgun.
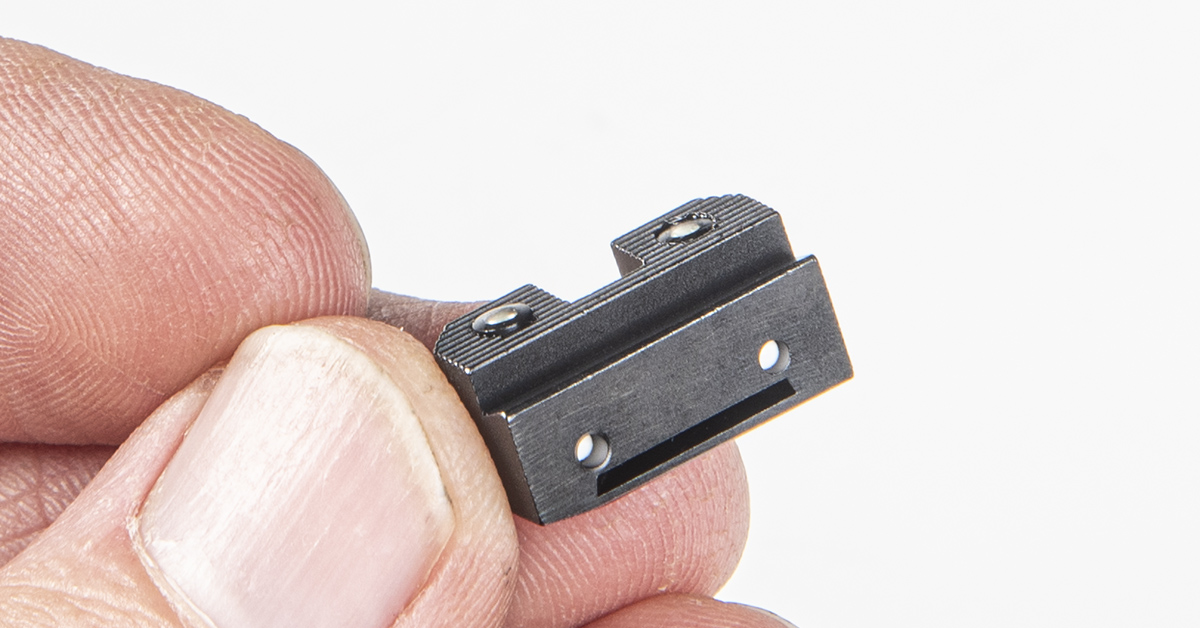
Another change to the R3D is found in the dovetail mount. Rather than a solid steel dovetail, the R3D 2.0 comes with a crush zone that collapses to the width of the slide’s dovetail slot while still providing the necessary press fit to keep it in place. The advantage of this compared to a solid steel dovetail is that it requires significantly less force to move the sight into the dovetail slot. Pair this with the equally new angle machined into the left side of the dovetail (the lead-in edge) and you have a press-fit sight that is easier for the DIYer to install. No more filing the dovetail base to get the right fit. The sight starts in easily and pushes into position with moderate pressure.
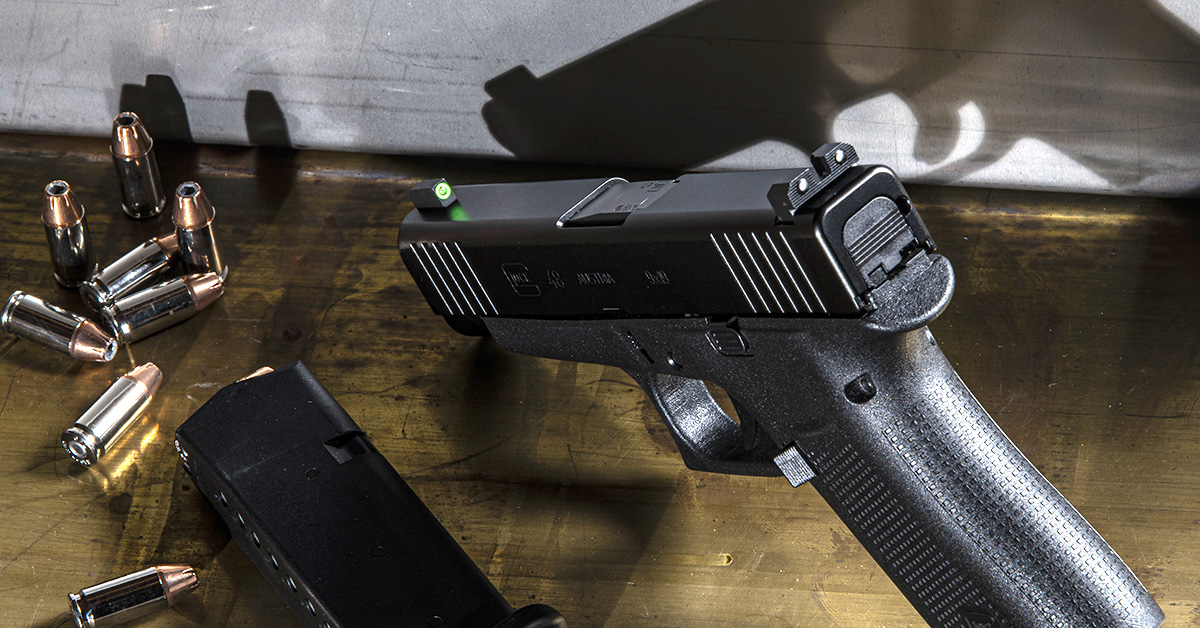
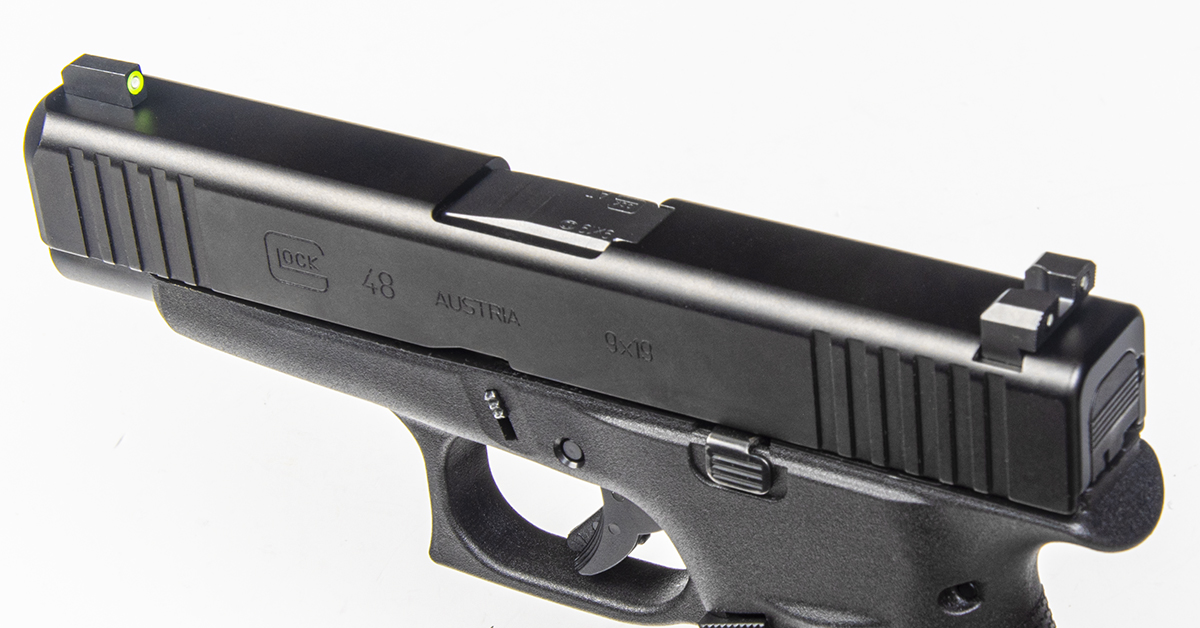
To test the new R3D 2.0 system, I chose to install it on my GLOCK 48. If GLOCK is your thing, know that the R3D 2.0 is available for all model GLOCKS in both standard and suppressor heights. Options are also offered for several S&W M&P and Shield models in standard and suppressor height configurations.
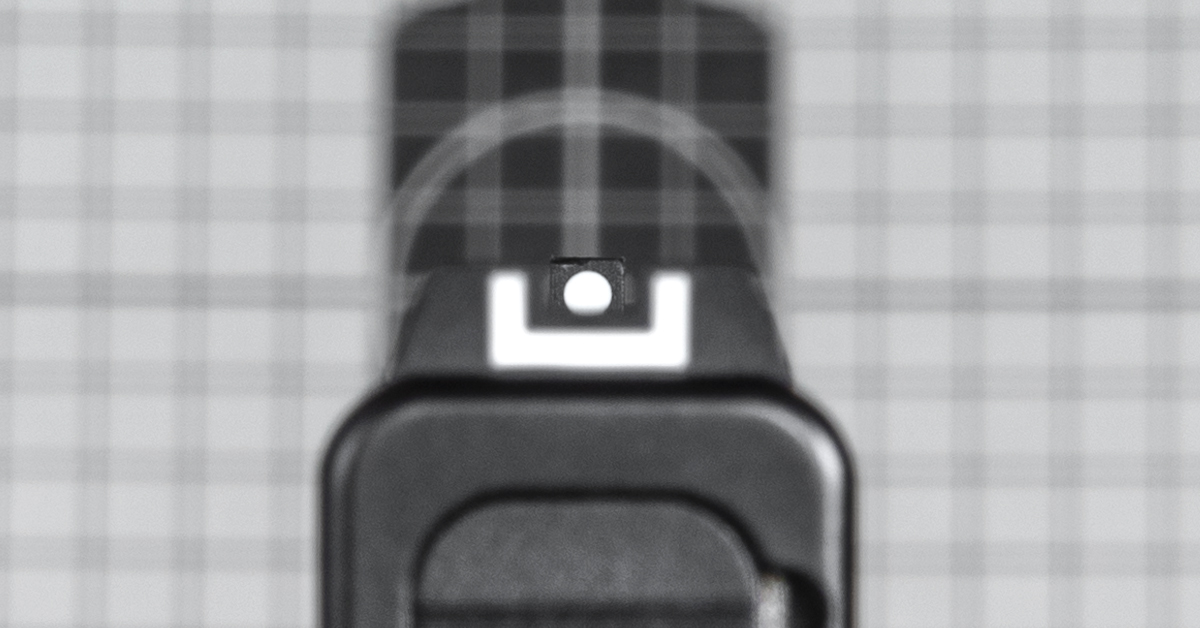
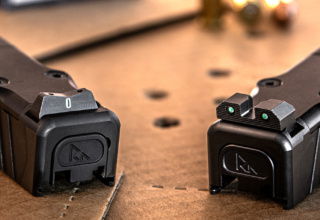
Here is a sight picture that GLOCK owners are familiar with. Much as I like my GLOCKs, I’ve never been a fan of the down-slide view. The white “notch” and white dot front do well for fast sight picture acquisition under most lighting conditions, but I’ve always found the overall sight picture to be too crowded and complicated for my taste. I also prefer more space between the sides of the post and the rear notch.
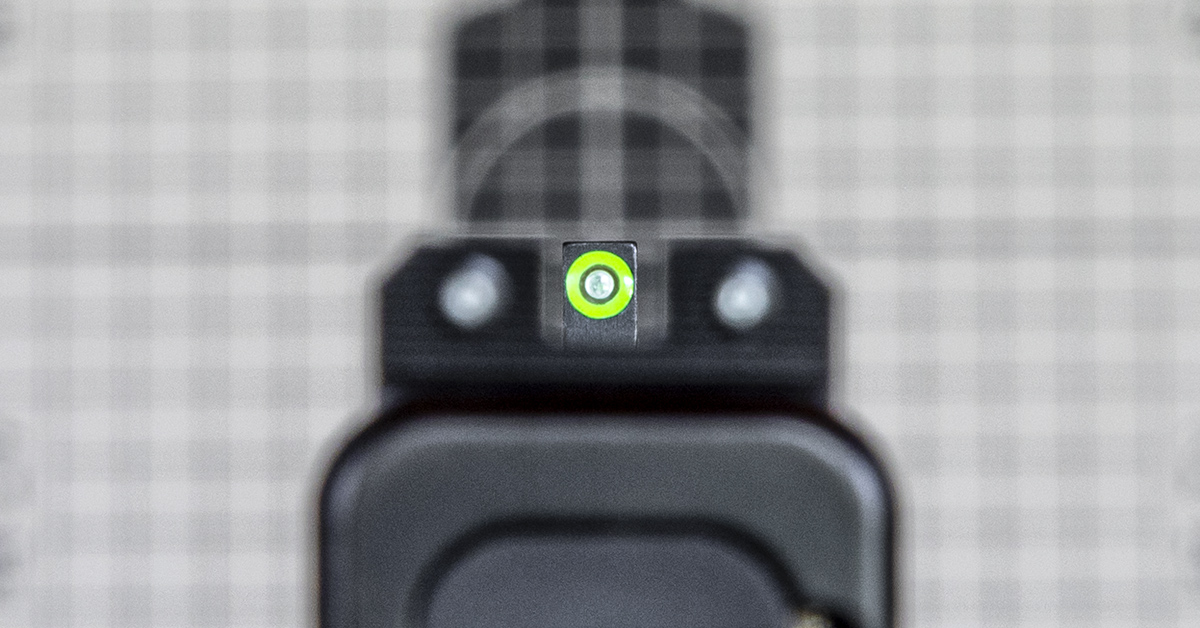
The XS R3D 2.0, as you can see above, offers a stark contrast to the factory GLOCK sight. Visibility of the front sight post is massively improved to my eye. Plenty of space to the left and right of the front sight post and the deep cut of the rear notch makes for lightning fast and precise sight alignment. Also, the prominence of the forward Glow Dot directs your eye right where you need it…the front sight. If you must rely on the tritium in low-light conditions, the rear lamps are comfortably configured for easy alignment with the front.
I spent time testing the effectiveness of the tritium lamps after dark on my rural property and was quite pleased. Moving through shadows around my shop and in and out of the glare of my dusk-to-dawn exterior lights, the R3D 2.0 maintained an easy-to-see illumination and unquestioning sight picture. In typical daylight conditions, the green Glow Dot handily stood out for fast placement on silhouette targets.
For $131.99 MSRP (standard height), the R3D 2.0 sight system is a solid upgrade to your factory GLOCK or S&W sights and well worth the investment for a defensive handgun. While the original R3D performed flawlessly, the second-generation upgrades make a good thing even better.
Installing the R3D 2.0 Sight System
As mentioned, the second-generation upgrades to the R3D include a revised dovetail that makes it easier for the DIY gun enthusiast to do their own installation.
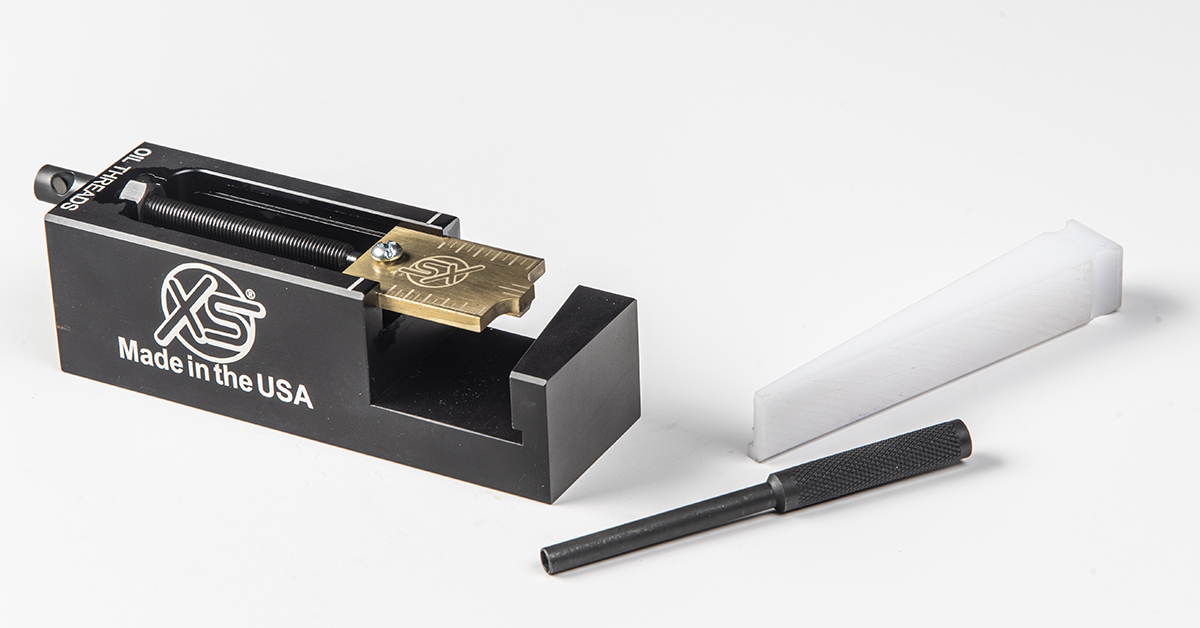
Removing the factory sight and installing the R3D will, as with any dovetail press fit, require the use of a rear sight pusher and a front sight tool. XS Sights makes a couple versions of its sight pusher that has everything you need to get the job done — the DIY Series and the Gunsmith Series Inline Sight Pusher Kit for GLOCK. It is a minor investment, but one that will pay for itself with one or two uses by not having to use the services of a gunsmith. It is a simple tool to use, and one I find to be quicker and much less complicated than conventional or “universal-style” sight pushers.
Begin by using the front sight tool to remove the front sight retaining screw. This requires a dedicated tool to remove because of the shallow height of the retaining screw head. XS incorporates this tool as part of its sight pusher ram handle.
Unlike the GLOCK factory front sight, which has a threaded nylon base, the R3D sight is all steel. In my mind, this makes for a better sight foundation.
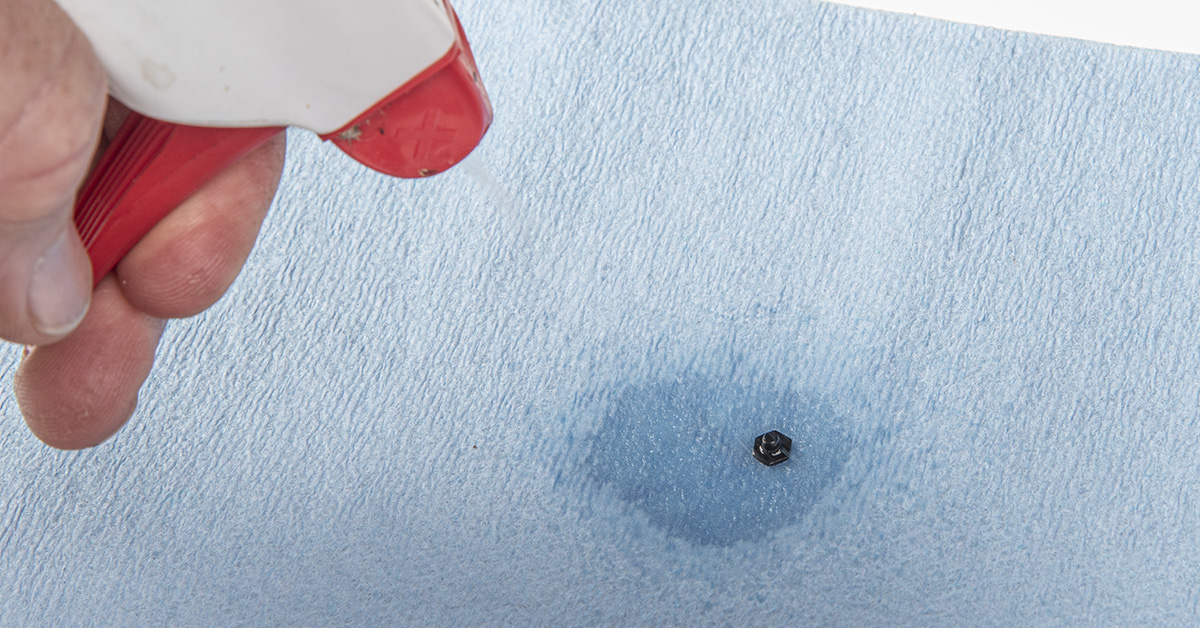
As with all screw-in front sights, thread locker is required. Too much torque on the retaining screw and the screw can shear under recoil, leaving you without a sight. Thread locker helps retain the screw without the need for heavy torque and running the risk of the screw shearing. To prepare the screw, clean it thoroughly with denatured alcohol to remove all oils and manufacturing residue.
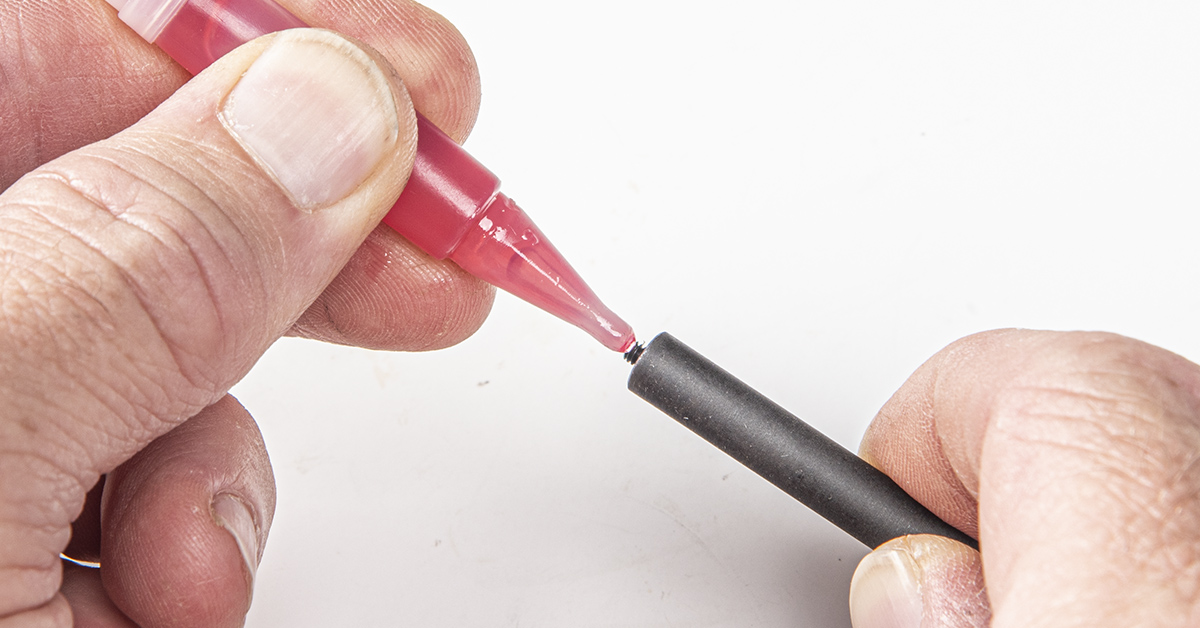
XS supplies thread locker with each sight kit. Apply a drop to the clean front retaining screw threads.
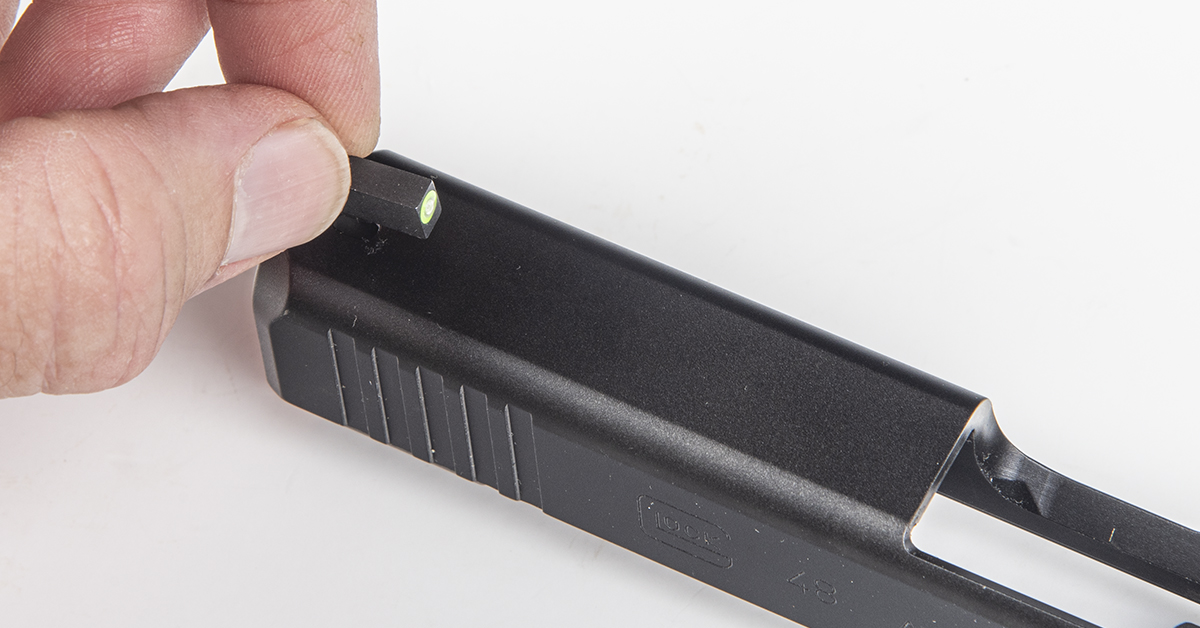
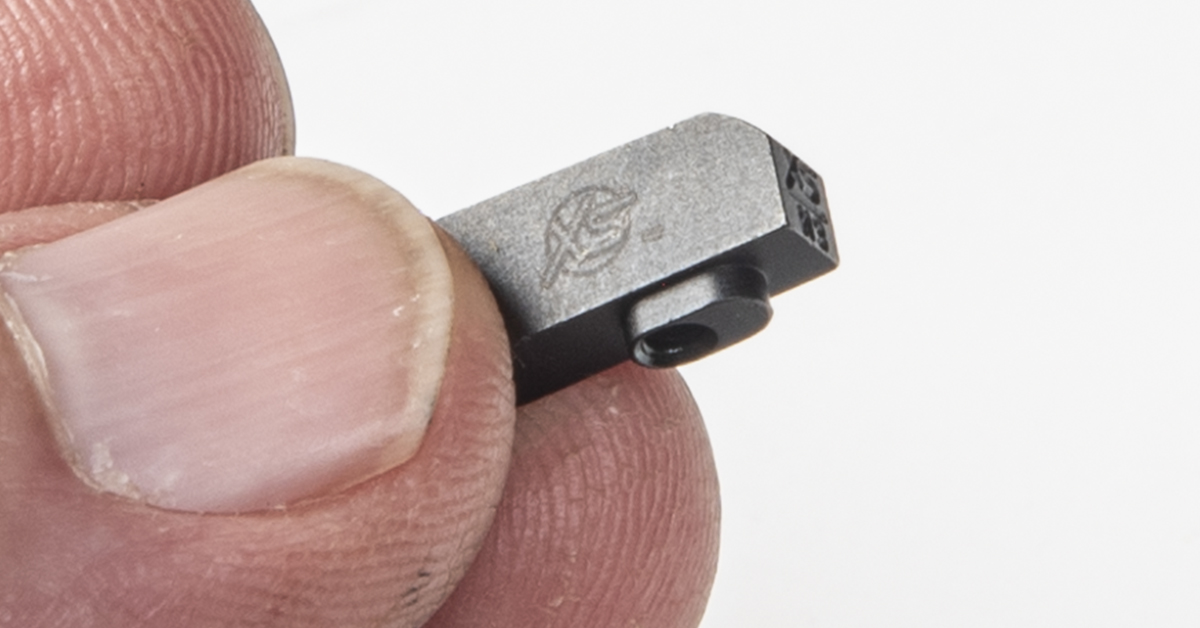
Place the front sight into its slot in the receiver with the Glow Dot facing rearward.
Secure the screw snugly to the front sight, making sure not to overtighten.
Check to ensure the front sight is perfectly parallel with the slide.
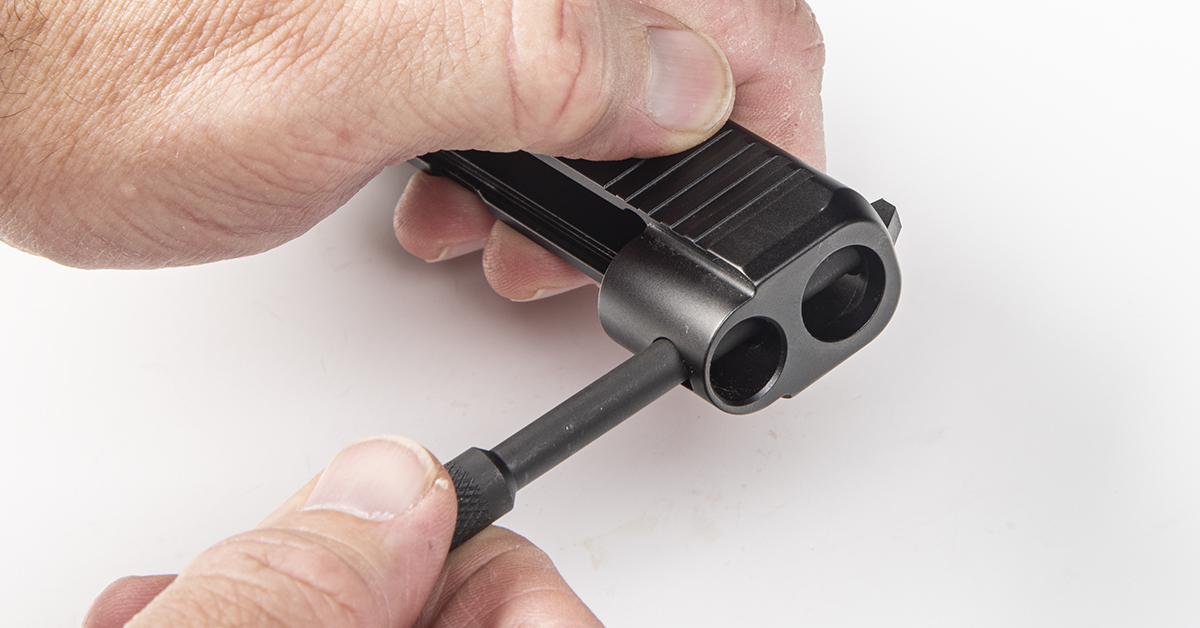
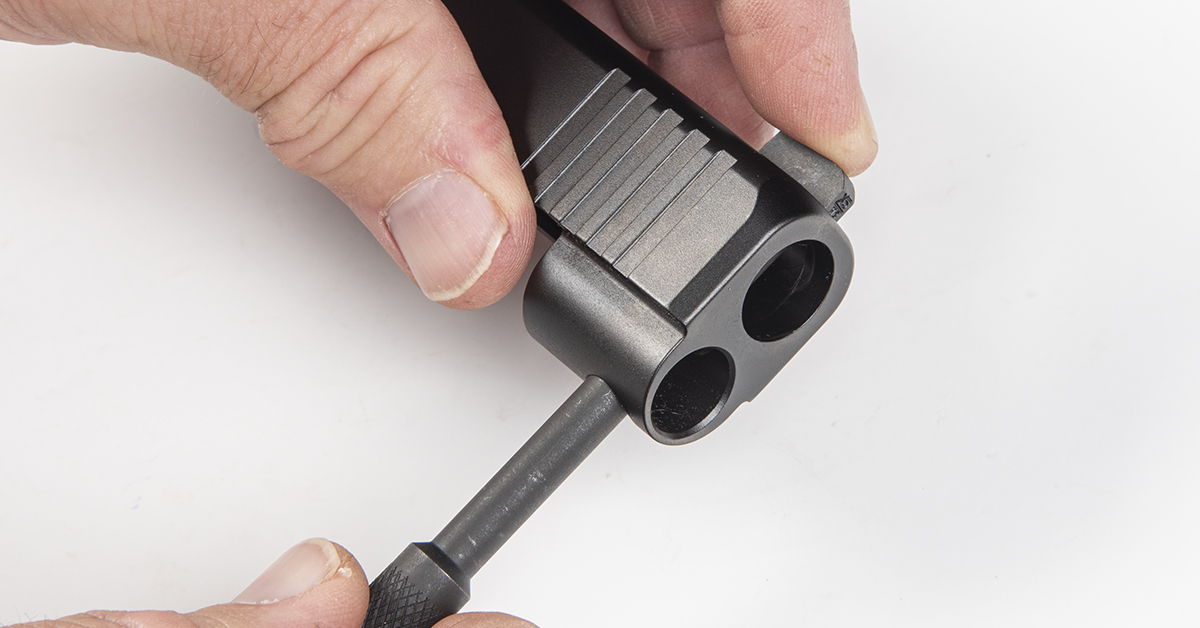
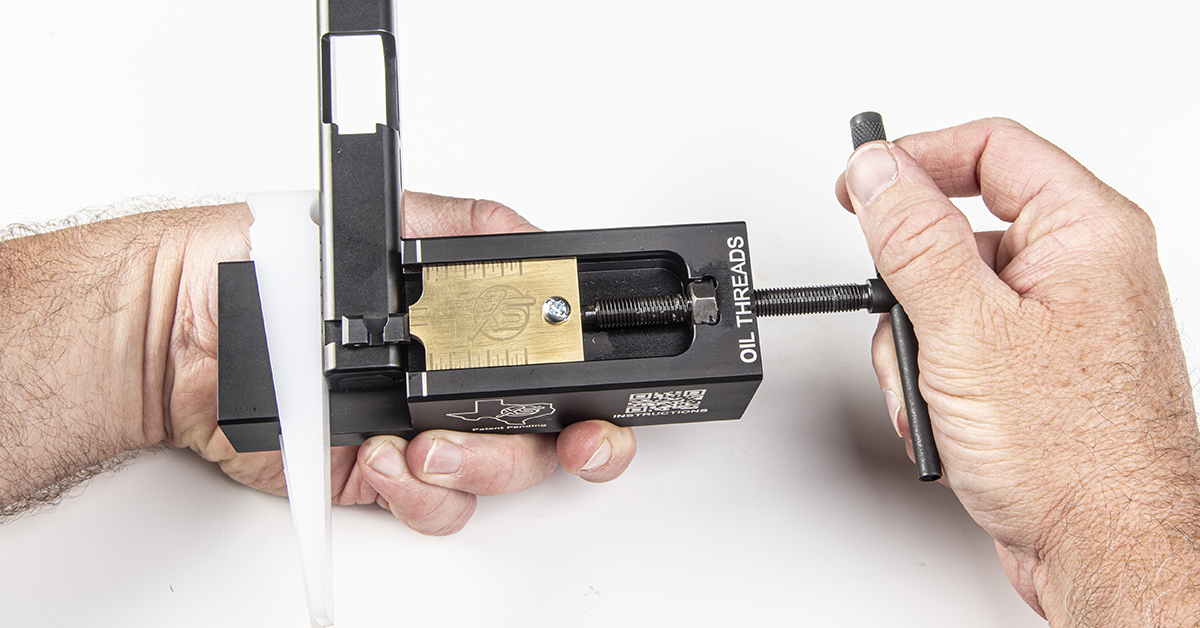
Follow the supplied sight pusher instructions for setup and push the factory rear sight off the slide, moving from left to right, as shown.
Flip the slide 180 degrees and align the sight pusher with the dovetail slot. The sight will be pushed into the slide from right to left.
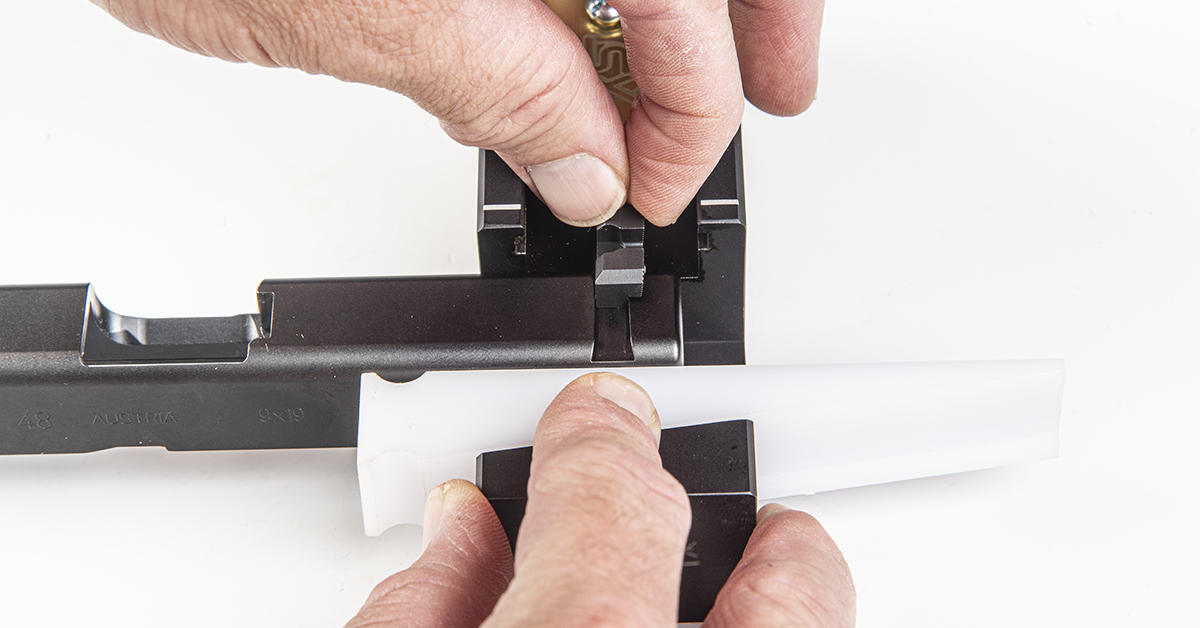
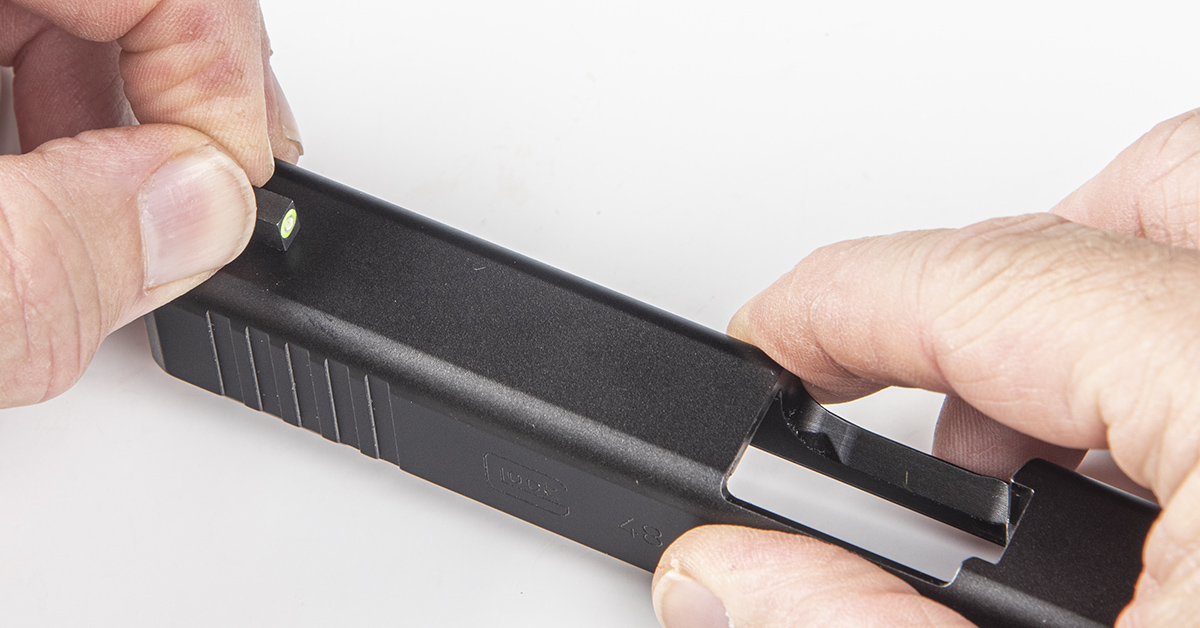
Back the ram out of the way and insert the R3D rear sight into the dovetail slot in the slide from right to left with the tritium lamps facing the rear. Push as far as you can by hand. It should move about 1/3 of the way into the dovetail slot.
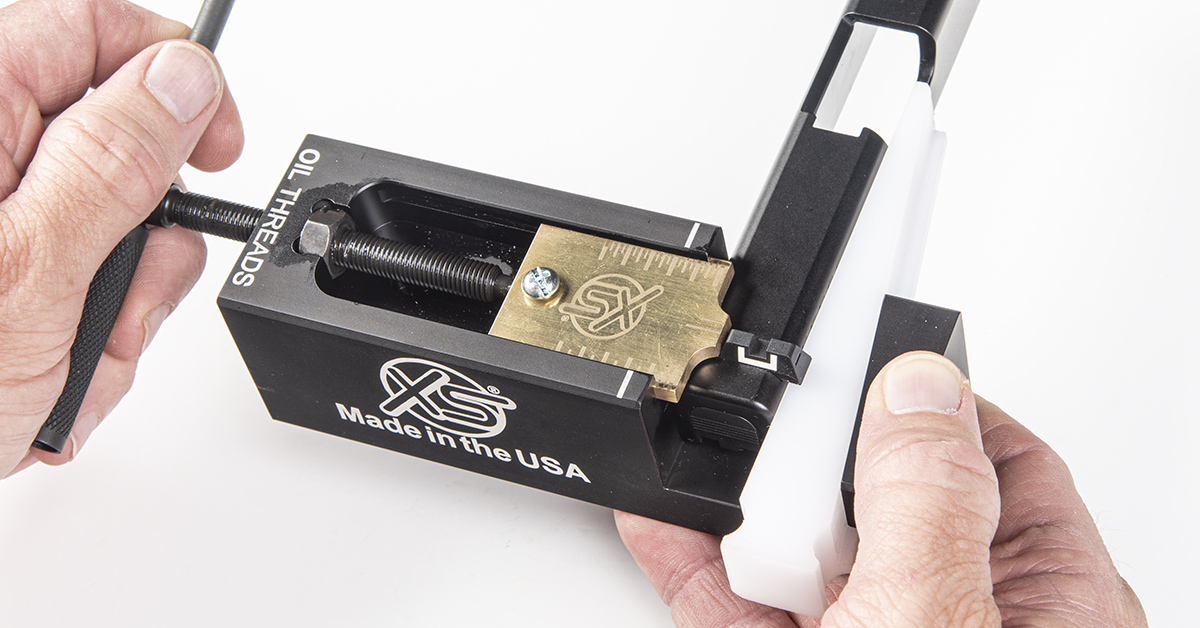
Slowly rotate the ram handle clockwise, allowing the ram to push the sight into the dovetail slot. Go slowly as the sight nears the center of the slide and stop just shy of the center. It is important — especially when installing a sight with a crush zone — to not push the sight past the center of the slide. If you do go over the center, the sight will need to be pushed back accordingly and this can weaken the interference fit and possibly allow the sight to be knocked out of alignment under a hard blow.

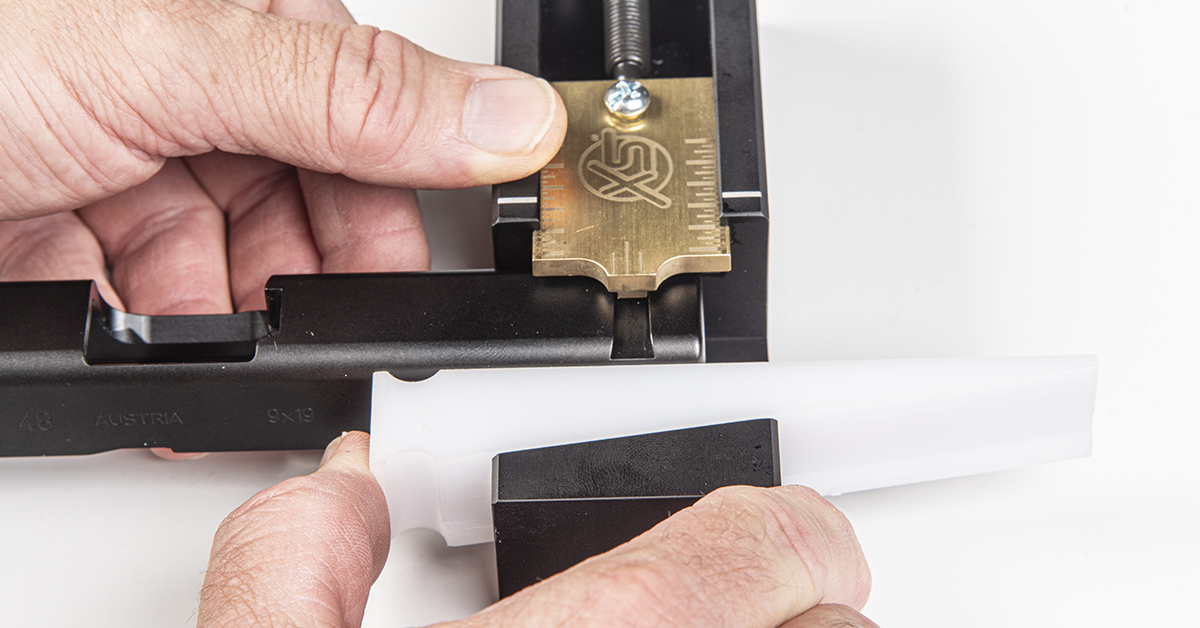
Use a depth gauge or machinist’s ruler to measure the left- and right-side distance of the sight relative to the sides of the slide. The goal is to press the sight, measure the distances, and repeat as necessary until the sight is perfectly centered in the slide without going over the center in the process.
Once the sight is centered on the slide, the sight installation is complete.