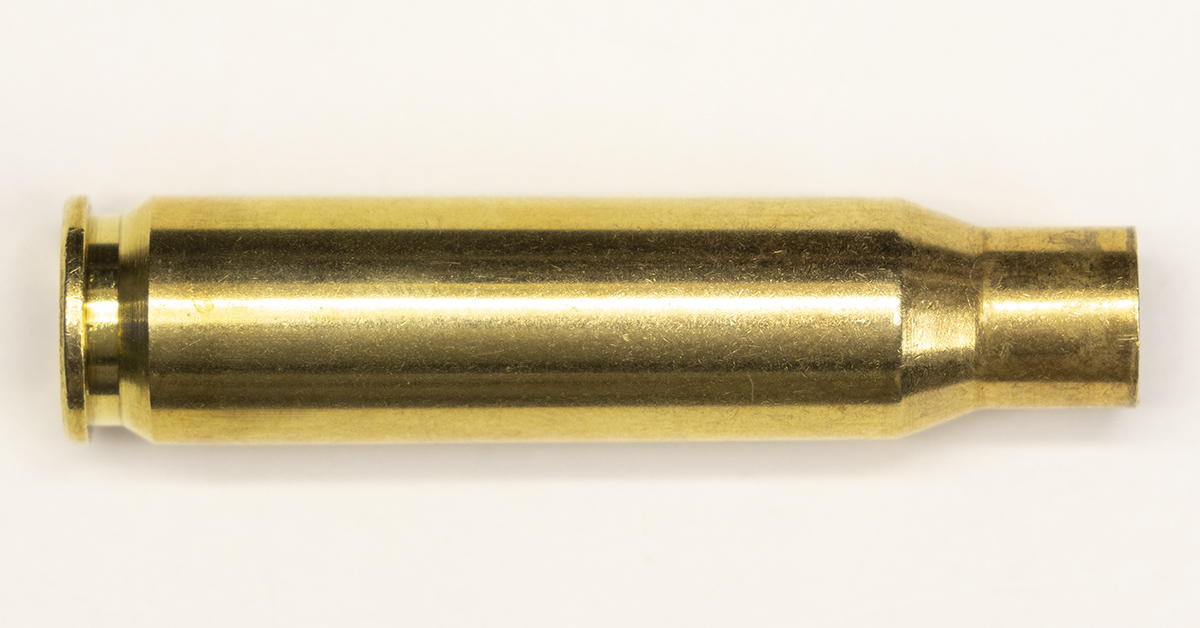
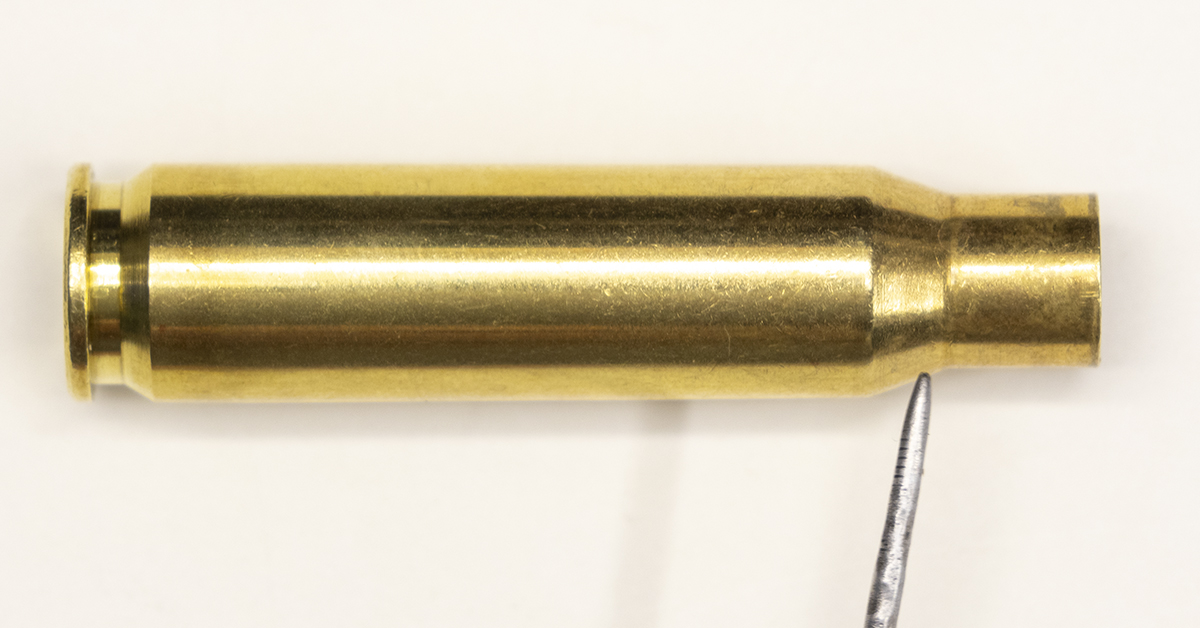
Managing brass is a fundamental part of developing safe, reliable, and accurate handloads. In this installment, we break down the nuances of expansive cartridge cases and discuss the several steps involved in preparing brass for loading.
by Lou Patrick
From its development in the early 1800s to today, the most important invention related to firearms is, in my opinion, that of the expansive cartridge case. Currently, we use several different terms to identify this invention, which include metallic cartridge case, case, or simply brass. Of course, the term brass is born out of the most common material used to produce the expansive cartridge case. For the reloader, the cartridge case is also the most important reloading component, for it is the case that makes the entire reloading process possible.
The reloading process begins with the cartridge case. While we may tend to take the cartridge case for granted from its not so impressive appearance and seemingly uncomplicated nature, don’t let appearances fool you. The cartridge case plays a vital role in the safe, reliable functioning of your firearm. It is the expansive cartridge case that makes modern firearms as we know them possible. Without it, we’re back to muzzleloaders. As a reloader, it will be up to you to maintain this safe, reliable function. To accomplish this, you should know and understand how the cartridge case fulfills its role.
Cartridge Case Features
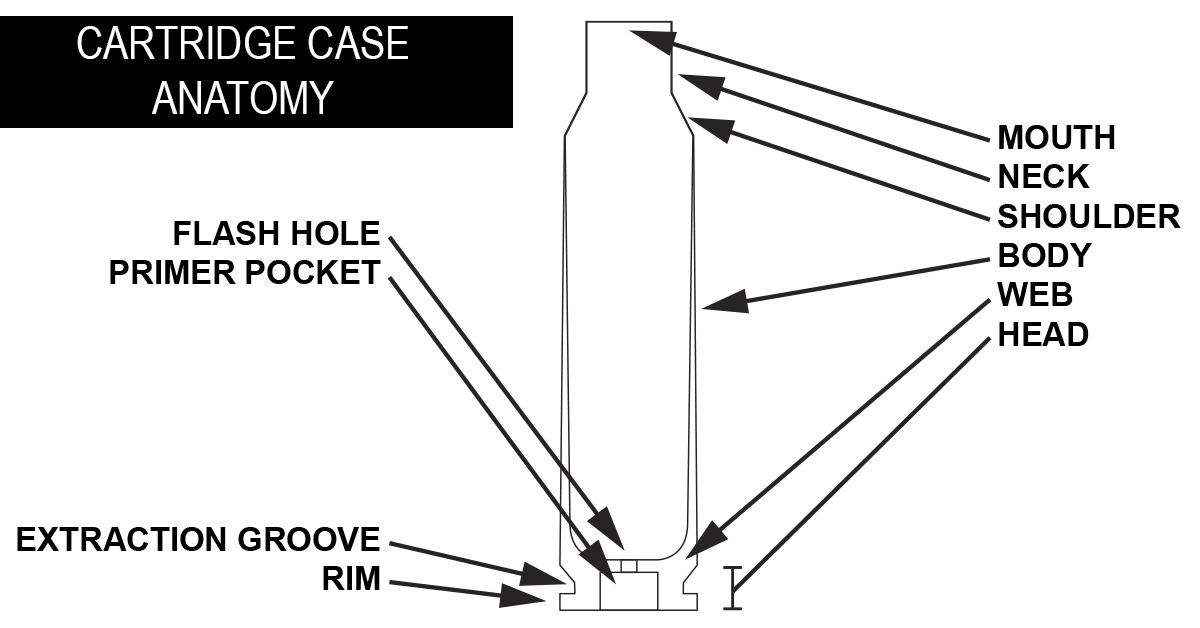
All metallic cartridge cases will include most of the features depicted below. Some may be missing a feature, such as the shoulder, while others may have an additional feature, such as a belt.
Welcome to the world of reloading, where things really aren’t that difficult, yet it can be a little confusing, especially for those just getting started.
For example, this diagram depicts a rimless cartridge case, yet the rim of this rimless case is clearly labeled. This case design is referred to as rimless because the rim does not protrude past the body of the case. A rimmed case like the 30-30 Winchester will have a rim that noticeably protrudes past the body of the case. The case depicted also has a shoulder. This shoulder gives the case a shape that is similar to a bottle, which is where we get the term “bottlenecked” cartridge case. While the rimless “bottlenecked” cartridge case is the most common cartridge case in use today, not all rimless cases have a shoulder.
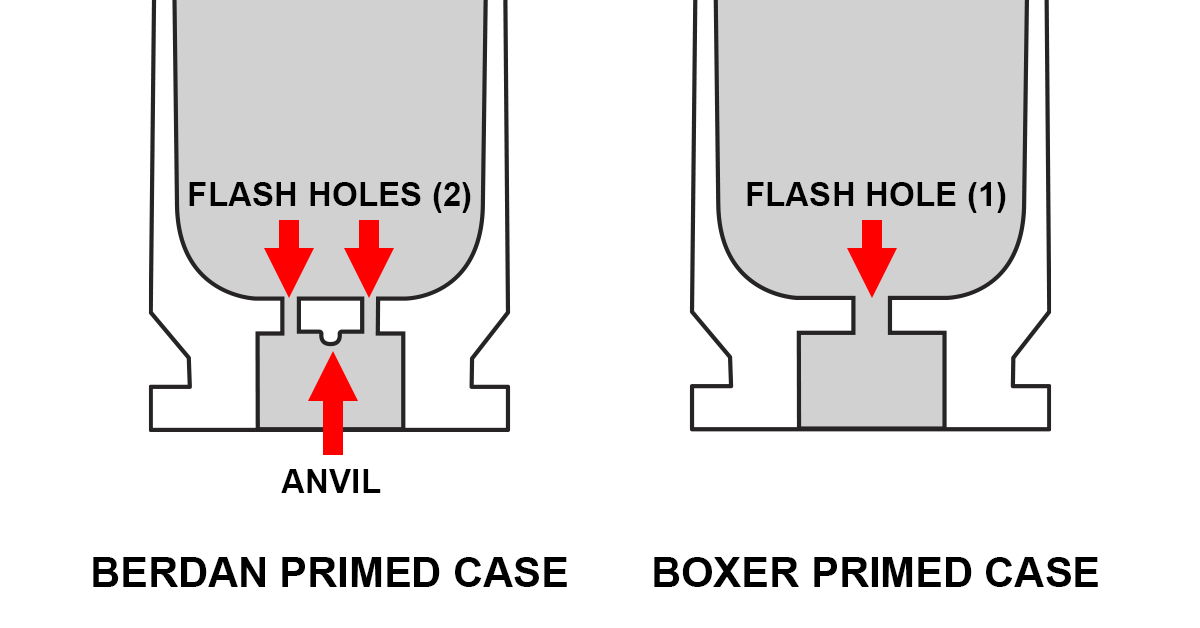
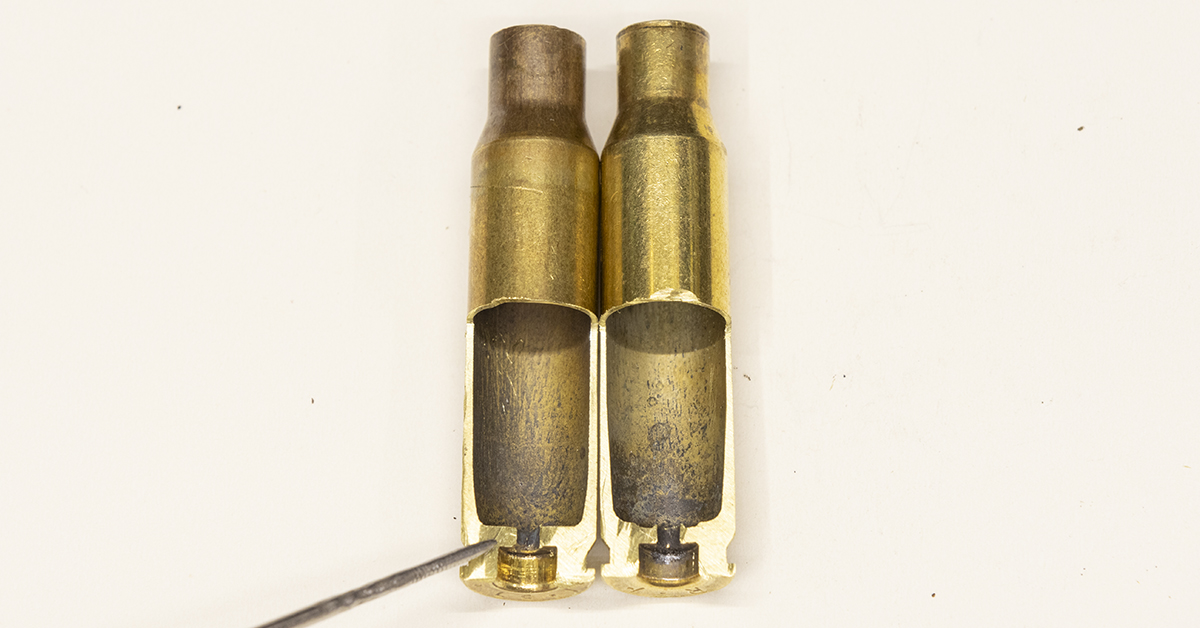
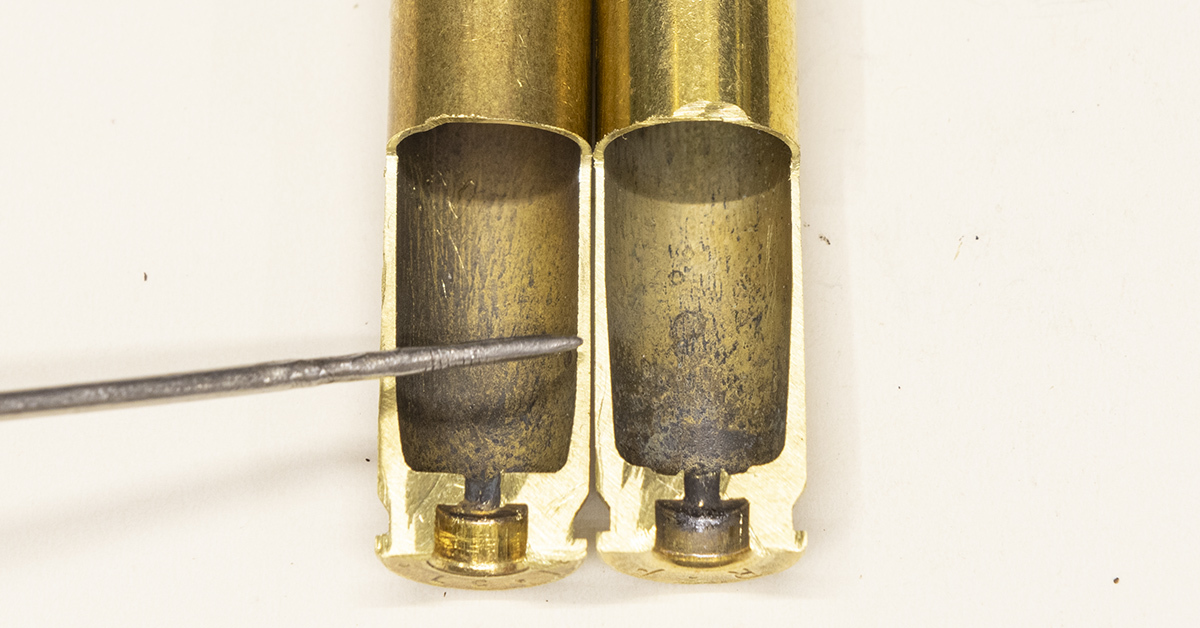
A feature that is usually not depicted in cartridge case diagrams is the anvil found in cases that are designed for use with Berdan primers. This is understandable, as Berdan primed cases are not very common, especially here in the U.S.; however, there are two different methods that are used to prime the cartridge case. These different priming methods are not interchangeable since the case is manufactured for use with a specific type of primer.
The Berdan primed case pictured above left has the priming anvil built into the center of the primer pocket and uses two smaller-diameter flash holes — one on either side of the anvil. The boxer primed case pictured to the right has a larger-diameter flash hole in the center of the primer pocket, which eliminates the anvil. The primer anvil is not a needed feature of this case since the Boxer primer contains its own anvil. By far the most common type of primer in use is the Boxer primer, although you must be aware that Berdan primed cases do exist. These are usually found in European military surplus ammunition that has been imported to the U.S. Knowledge of this becomes important during the resizing/depriming operation. Inadvertently trying to deprime a Berdan primed case with your resizing die will most likely result in a broken or bent depriming pin as it strikes the anvil.
Case Design
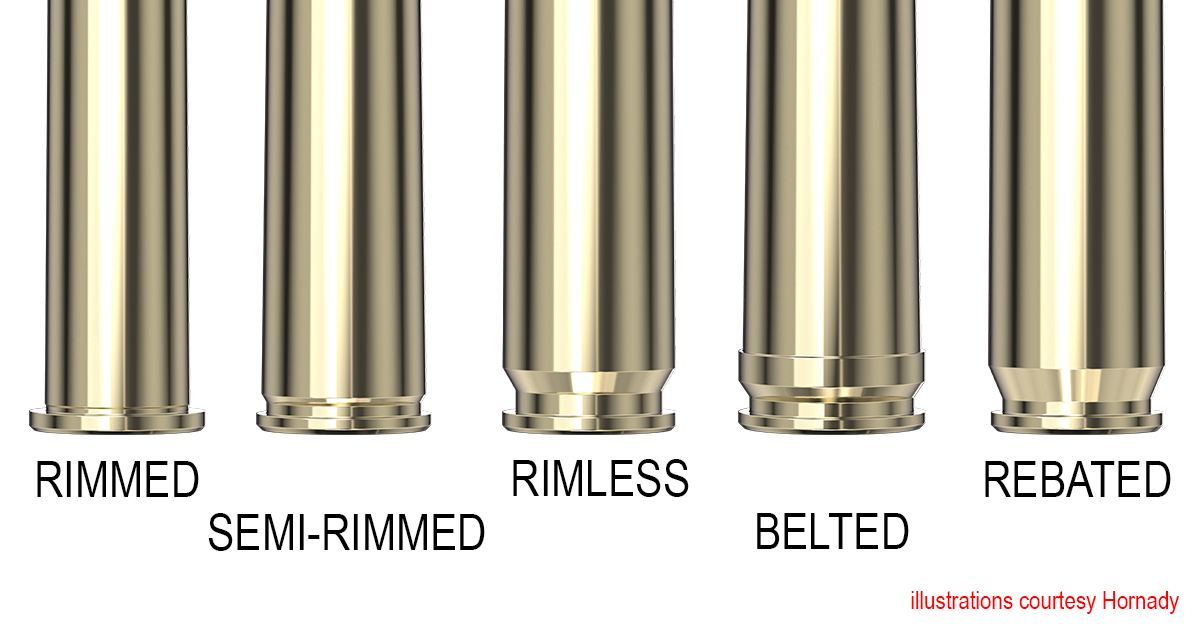
Cartridge case design (more correctly called cartridge case head design, in my opinion) is separated into five different types that are easily identifiable by examining the case head.
- Rimmed – The case rim noticeably protrudes past the body of the case.
- Semi-Rimmed – The case rim slightly protrudes past the body of the case.
- Rimless – The case rim does not protrude past the body of the case.
- Belted – The case head contains a belt that noticeably protrudes past the body of the case.
- Rebated – The case head is smaller than the body of the case.
Regardless of case head design, all will accomplish the same basic function demanded of all cartridge cases, although there are some advantages of a particular design as compared to another. For example, rimmed, semi- rimmed, and belted cases are not going to feed as easily through a box magazine as compared to a rimless or rebated case. Also, with the rim and belt diameter being larger than the body of the case, this will also influence box magazine size/capacity.
Case Identification
As a reloader, you must be able to identify the type of cartridge case that you are reloading and understand its operating characteristics, and then apply the proper reloading techniques required to reload a safe cartridge that will function reliably in your firearm.
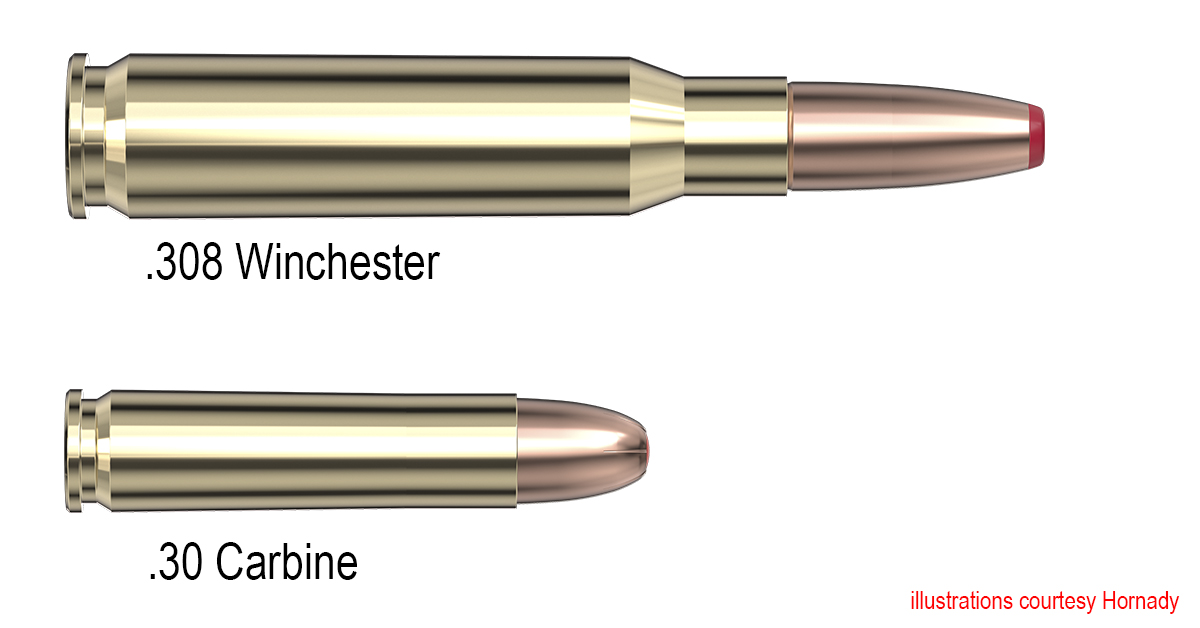
Above are two different rimless cartridge cases. The .308 Winchester case has a shoulder, the .30 Carbine case does not. Still, they both have the same rimless case head design. Both cases will perform all the functions required of a cartridge case, although they do so somewhat differently. The forward motion (headspace) of the .308 Winchester case into the rifle’s chamber will be controlled or stopped by the shoulder. Excessive resizing (moving the shoulder too far back) of this case design will allow the case to move further forward in the rifle’s chamber. The result will be excessive headspace. The forward motion of the .30 Carbine case into the rifle’s chamber is controlled by the case mouth. Excessive trimming of this case design will ultimately result in excessive headspace.
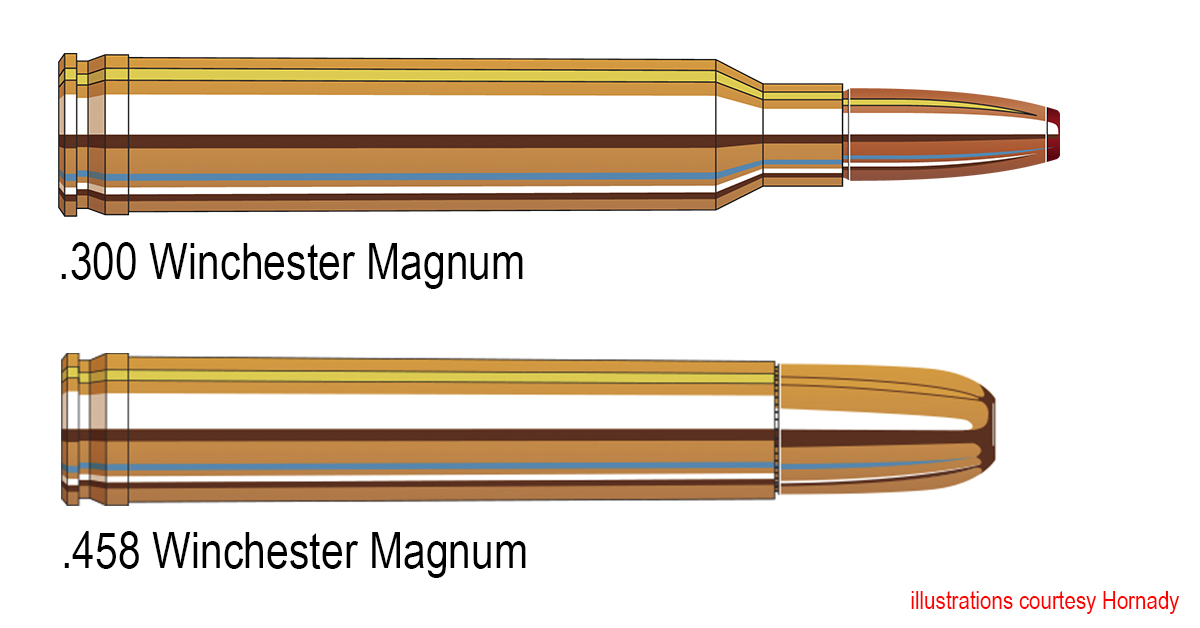
The .300 Winchester Magnum case has a shoulder while the .458 Winchester Magnum case does not; however, each of these cases are of the belted case head design. Forward motion (headspace) of the case into the rifle’s chamber is controlled or stopped by the forward edge of the belt, not the shoulder or case mouth.
Of course, none of this negates following proper reloading procedures. Cartridge case resizing and trimming needs to be properly performed regardless of the case design. It is good to know how the different case designs are intended to function and what may be a little more critical to one type of case may not be quite so critical to another.
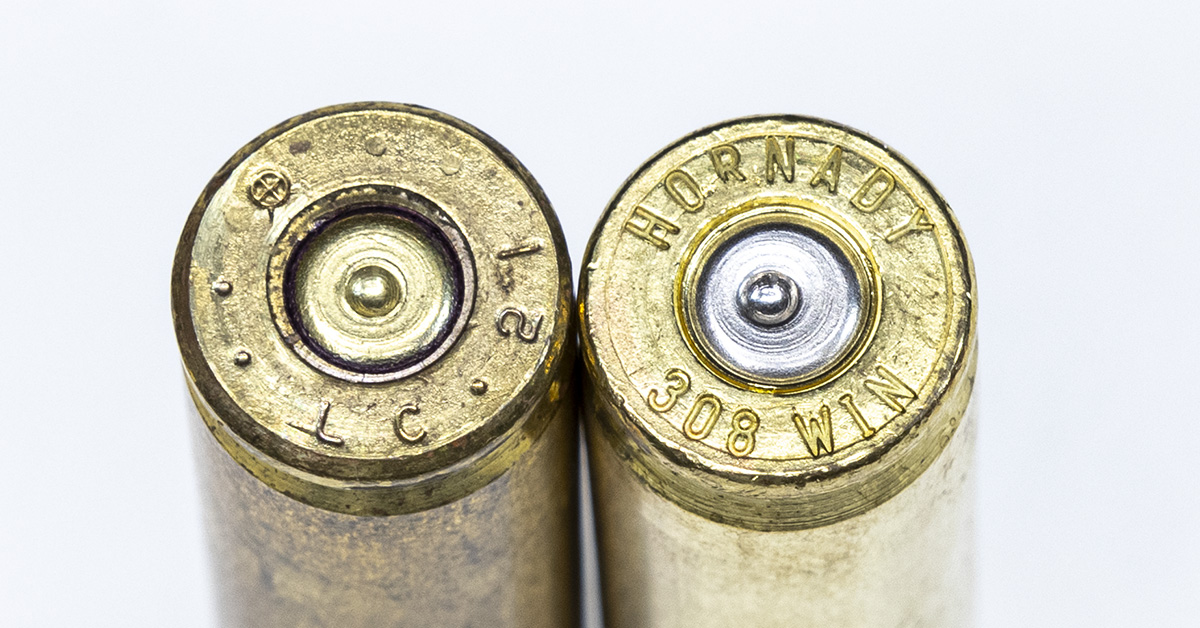
The cartridge case head stamp identifies the manufacturer of the cartridge case and usually identifies the cartridge. The case pictured at right is manufactured by Hornady and is a .308 Winchester cartridge case. Most, if not all, civilian-manufactured cases will be stamped in similar fashion. The case pictured at left is a U.S. military case. The circled cross indicates that it meets NATO standards, “21” is the last two digits of the year of manufacture, and “LC” is the abbreviation for the Lake City Army Ammunition Plant. Military cases do not contain the cartridge designation, such as .308 Winchester, which is found on civilian-manufactured cases, although military cases are perfectly safe to reload and are among my favorites.
To properly identify a cartridge case, look at the headstamp first to determine the manufacturer and cartridge designation (.308 Win, 30-06 et cetera) and then examine the case head. Is it rimless, rebated, semi-rimmed, rimmed, or belted? Next, examine the case body: shouldered or straight? Straight body cases are generally referred to as “straight wall” cases. You must take all of this into consideration to properly identify the case that you are reloading.
Function of the Cartridge Case
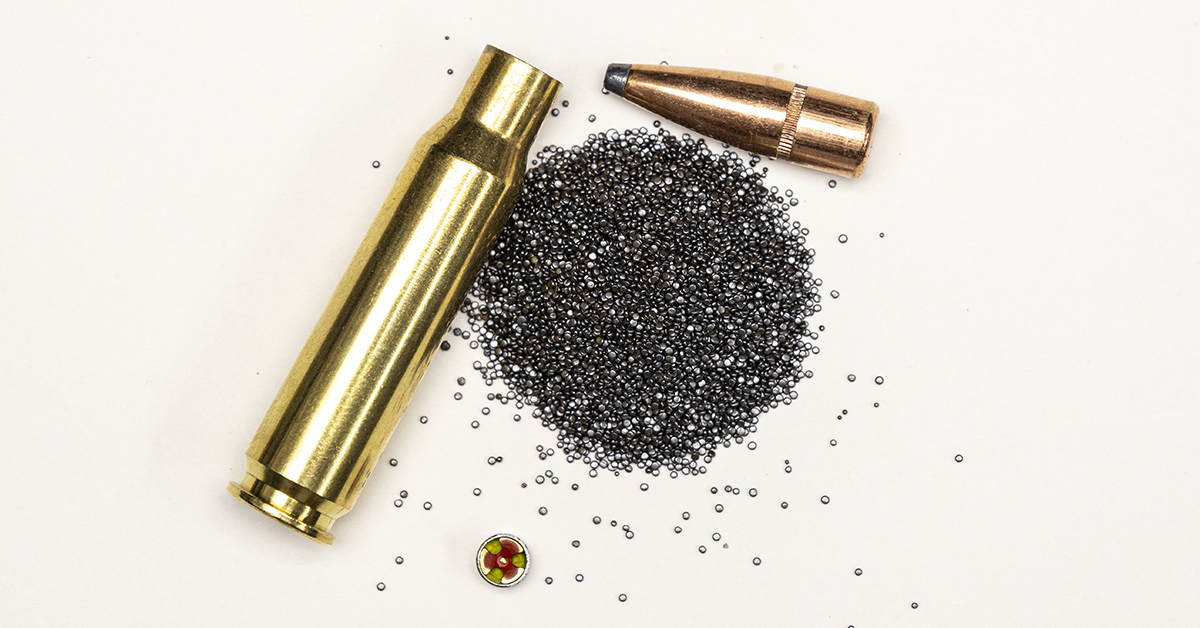
The most common function attributed to the cartridge case is that of being a container for the primer, powder, and bullet.
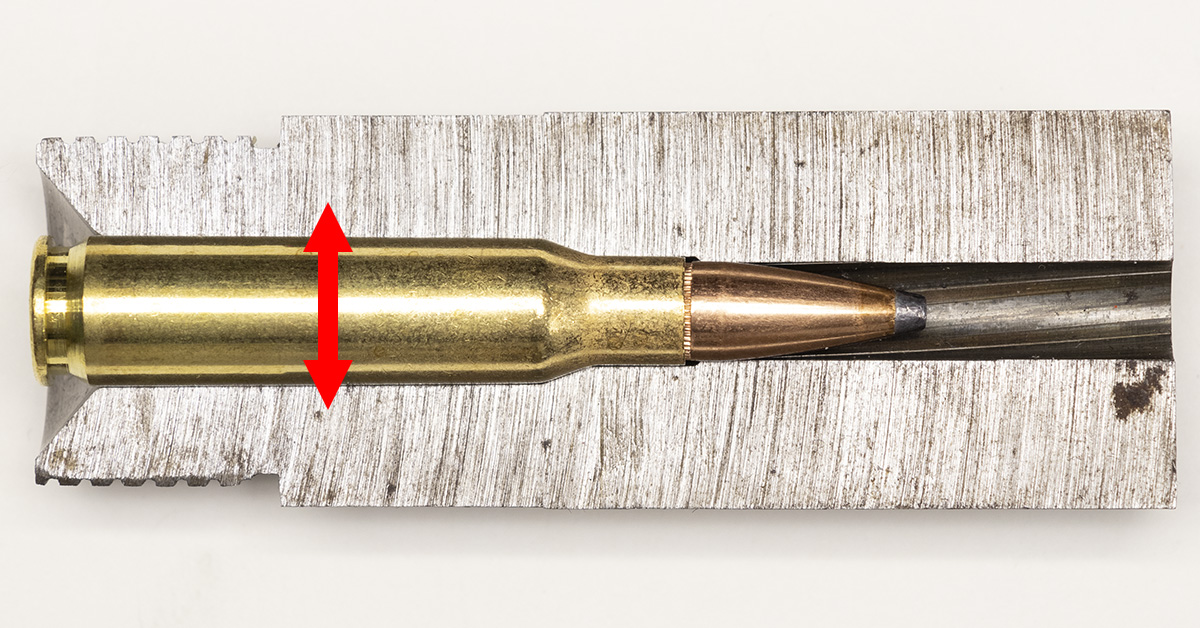
The cartridge case also serves as a gasket, sealing off the rifle’s chamber when fired. Upon firing, as chamber pressure increases, the case will expand (hence “expansive cartridge case”). This expansion is limited by the interior walls of the rifle’s chamber, with rearward expansion being limited by the rifle’s bolt. This expansion happens in an instant, effectively sealing off the chamber. With the bullet being the weak link, the hot, expanding, high pressure gas is forced down the barrel, propelling the bullet forward. Once chamber pressure drops, the case will no longer be pressed against the chamber walls, allowing the case to be easily extracted from the chamber.
The cartridge case also provides a point of reference to control its position within the rifle’s chamber. While the cartridge case is designed to expand and seal the chamber during firing, it can only expand so much. Exceed its expansion limits and the case will rupture, allowing hot, high-pressure gas (60,000 PSI) to escape the chamber rearward towards the shooter. This point of reference is what is used to control or maintain proper headspace, which ensures that the expansion limits of the case will not be exceeded.
Headspace – The unfilled space that exists above the contents and below the seal (lid) of a sealed container.
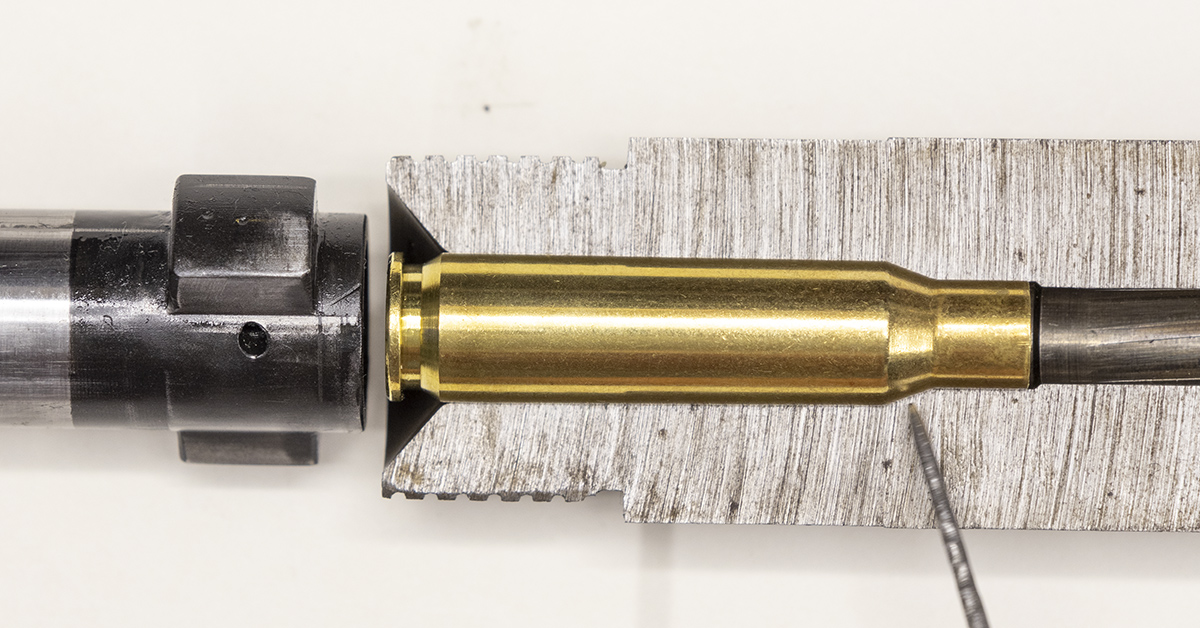
The .308 Winchester case pictured above is a rimless case with a shoulder. Its position within the rifle’s chamber is controlled by the shoulder. Rather than thinking in terms of headspace, think of chamber length from the chamber’s shoulder to the bolt face, case length from shoulder to case head. The amount of headspace that will be present is the difference between the two.
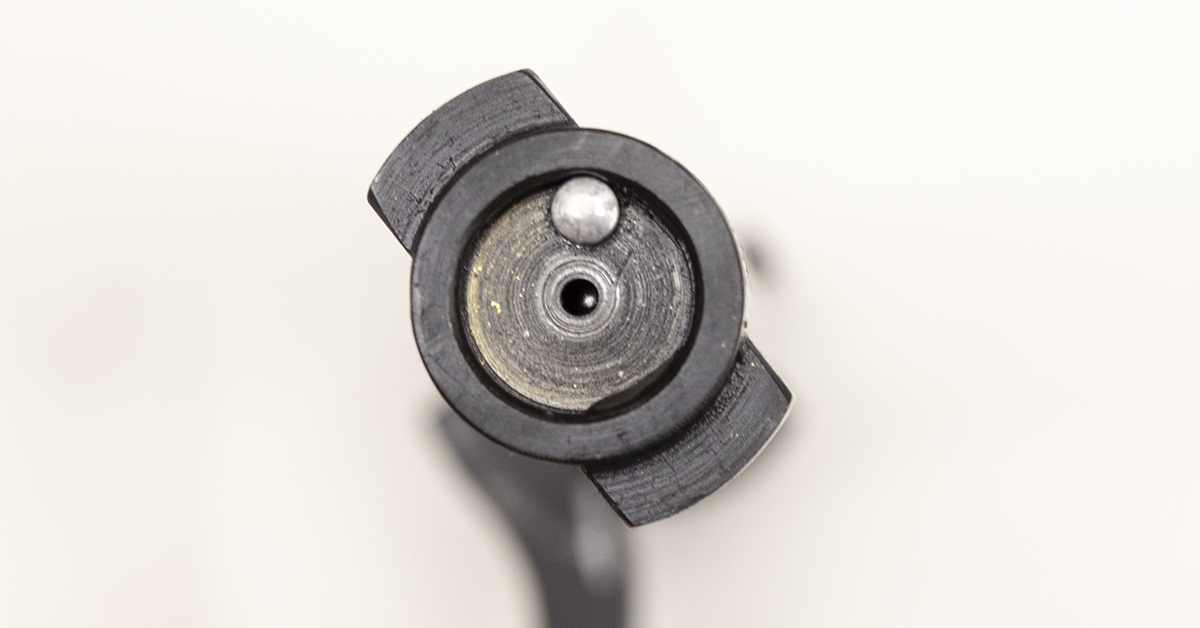
The firing pin hole is found in the center of the bolt face. With the bolt closed in its locked firing position, the case head will be positioned very close to or lightly contacting the bolt face. From the previous headspace definition, the bolt face is the seal or lid, the chamber is the container, and the cartridge is the contents.
When chambering a round, as you push the bolt forward, the cartridge moves forward into the chamber, “filling” the container.
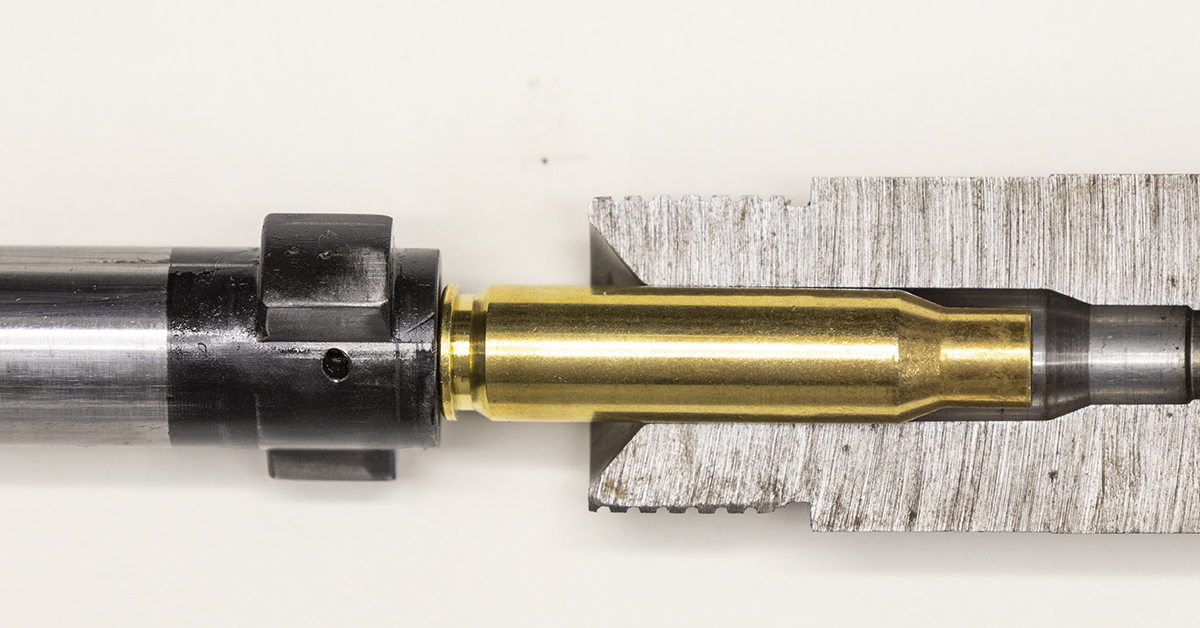
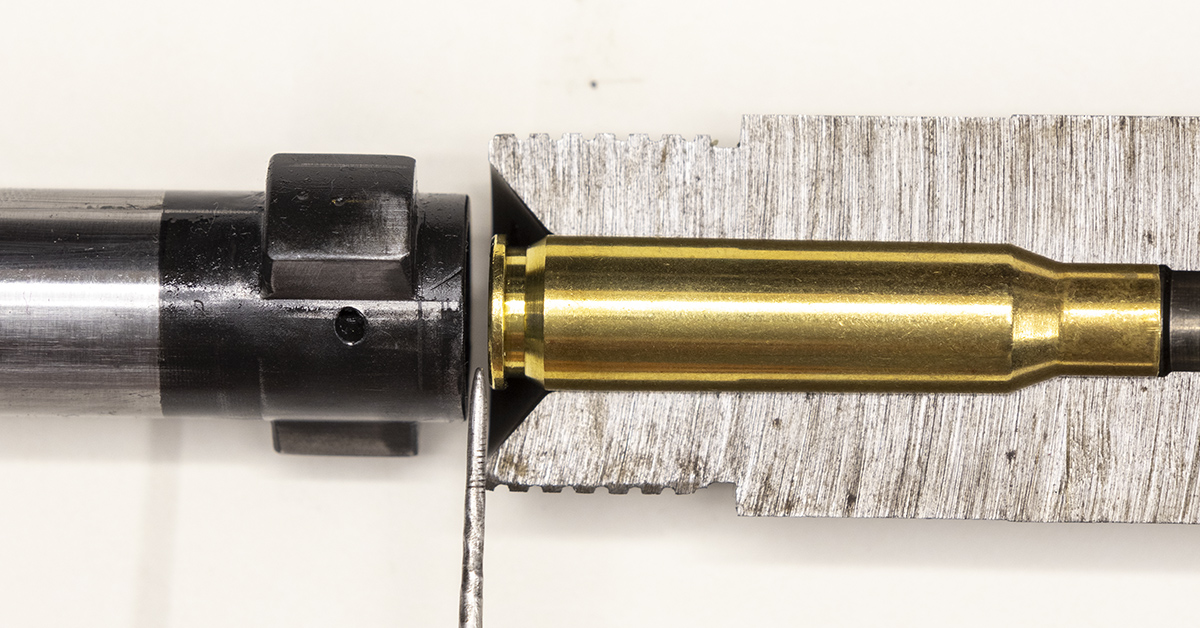
The bolt and cartridge move forward until the forward motion is stopped by the shoulder of the rifle’s chamber coming into contact with the case’s shoulder. The bolt handle is then rotated downward, locking the bolt in place with the bolt face directly behind the case head. This effectively tightens the seal or “lid” to the container.
The space that exists between the bolt face and the case head is what is referred to as headspace. Of course, the headspace depicted here is exaggerated for illustration purposes. The amount of headspace that can safely exist can and does vary from cartridge to cartridge. But as a general rule, just to put a number on it to help provide a visual aid, around .006 of inch is about maximum. The paper in your printer will measure about .005 in thickness. For safe, reliable operation of your firearm, headspace is best kept to a minimum but should always be within SAAMI specifications for the particular cartridge.
Cartridge Cases are not Identical
Of course, cartridge cases are not identical. The .308 Winchester is obviously different from a .300 Remington Ultra Mag. But what if we take a little deeper look at cartridges cases of the same cartridge but from different manufacturers?
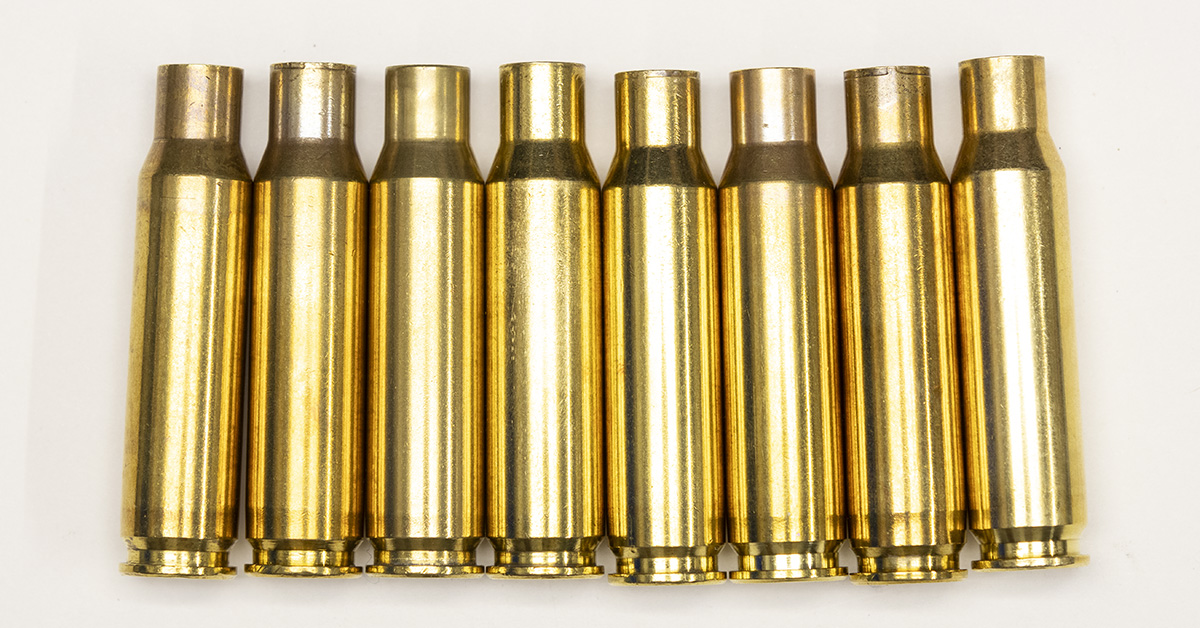
Using the .308 Winchester case as an example and considering that the case must fit into the chamber, you can expect the exterior dimensions to be very similar if not identical. All eight of the cases pictured here have different head stamps. As expected, they look identical, but are they?
Head stamps from left to right:
Military Headstamp
- LC – Lake City Army Ammunition Plant 2018
- WCC – Winchester Cartridge Company 2014
- LC – Lake City Army Ammunition Plant Match brass used in competition only 1977
Civilian/Commercial Headstamp
- FC – Federal Cartridge Corporation .308 Winchester
- R-P – Remington-Peters .308 Winchester
- Norma – .308 Winchester
- Winchester – .308 Winchester
- Hornady – .308 Winchester
All cases have been once-fired from the same rifle, deprimed, and cleaned.
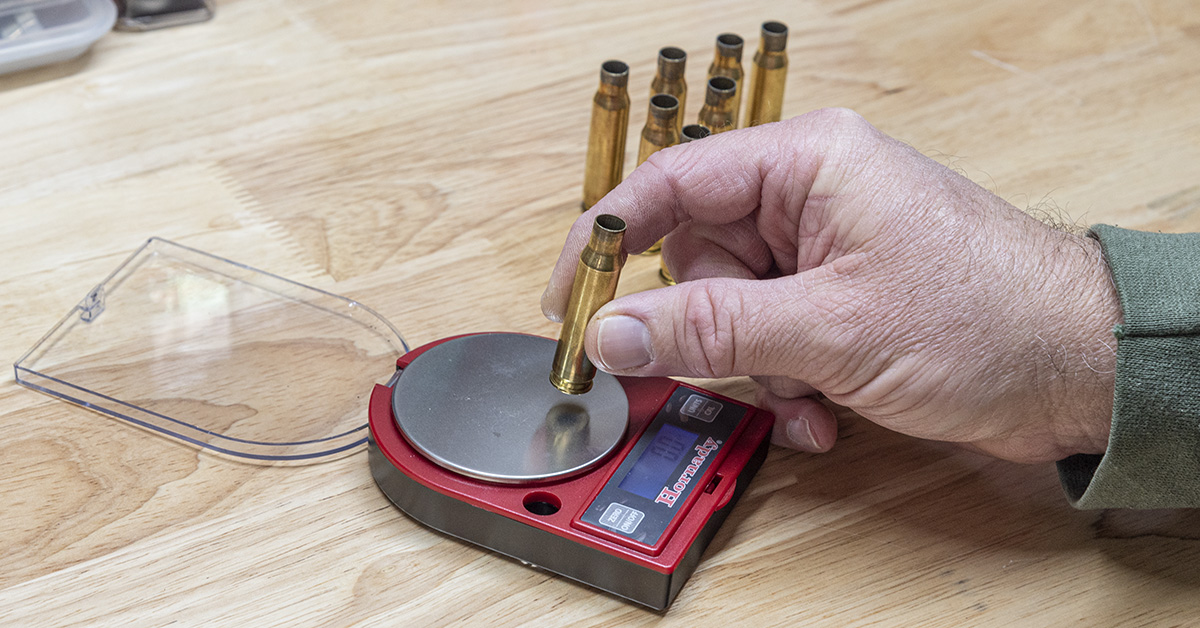
Each case was weighed on a digital scale. Case weight, lightest to heaviest:
- Winchester: 156.7 gr.
- Remington-Peters: 166.7 gr.
- Hornady: 168.0 gr.
- Norma: 174.3 gr.
- Winchester Cartridge Company 2014: 176.4 gr.
- Lake City 2018: 177.3 gr.
- Federal Cartridge Corporation: 178.3 gr.
- Lake City Match 1977: 178.9 gr.
The cases are not identical. They can vary from manufacturer to manufacturer, they vary within the manufacturer from one production lot to another, and manufacturers can also change specifications at any time.
Three of the four heaviest cases weighed are military cases. The second heaviest case weighed was made by the Federal Cartridge Company, which is listed as a military contractor. With the external dimensions being similar, the difference in weight is often found internally. The military case pictured above left has a much thicker case web as compared to the commercial case on the right.
The body of the military case (left) is also thicker. With external dimensions being similar, this increase in case wall and web thickness will result in a reduced internal capacity. This is important to the reloader as pressure is directly related to the size of its container. If using the same powder charge, pressure will be higher in the case with the smaller internal capacity.
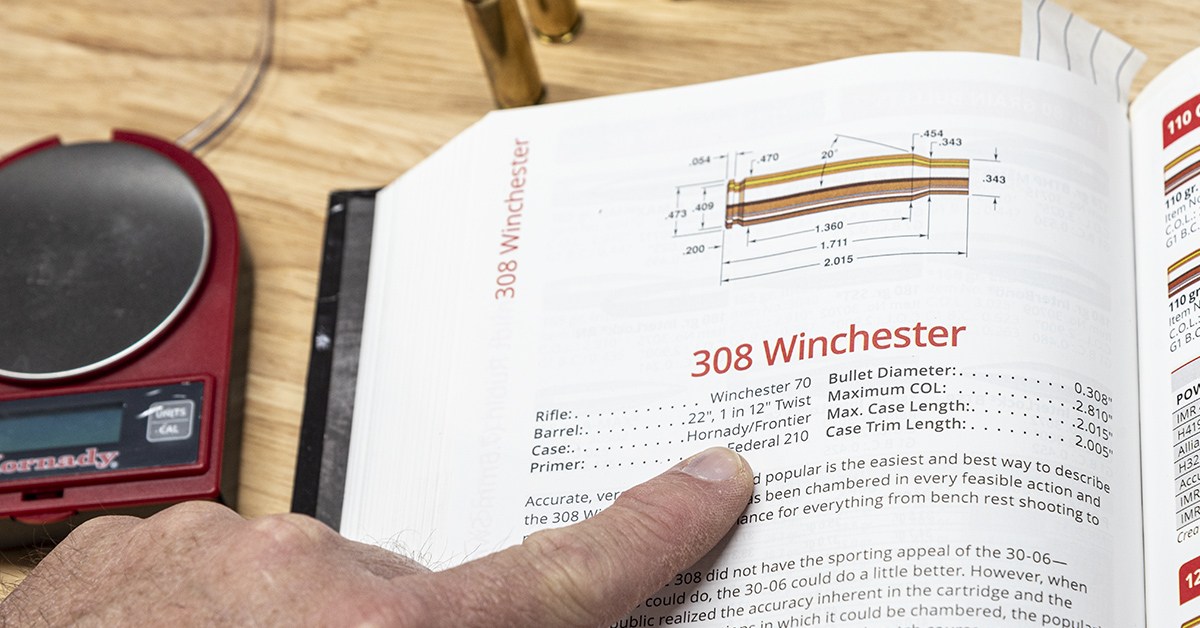
Differences in internal case capacity is one of the reasons why your reloading manual will list the manufacturer of the case used in establishing their reloading data. Using a different case will most likely necessitate a slight change to the powder charge. This is something to be aware of because this is why you should always start with a low powder charge and carefully increase the powder charge while monitoring for signs of excessive pressure. Here is where we get the term “working up a load.”
Accuracy Enhancement
In a constant quest for accuracy, many reloaders will seek to make improvements to the cartridge case prior to reloading. This quest for accuracy usually begins with sorting the cases by weight. The most common modifications to the cartridge case are neck turning, flash hole deburring, and primer pocket uniforming.
Weight-Sorting Brass
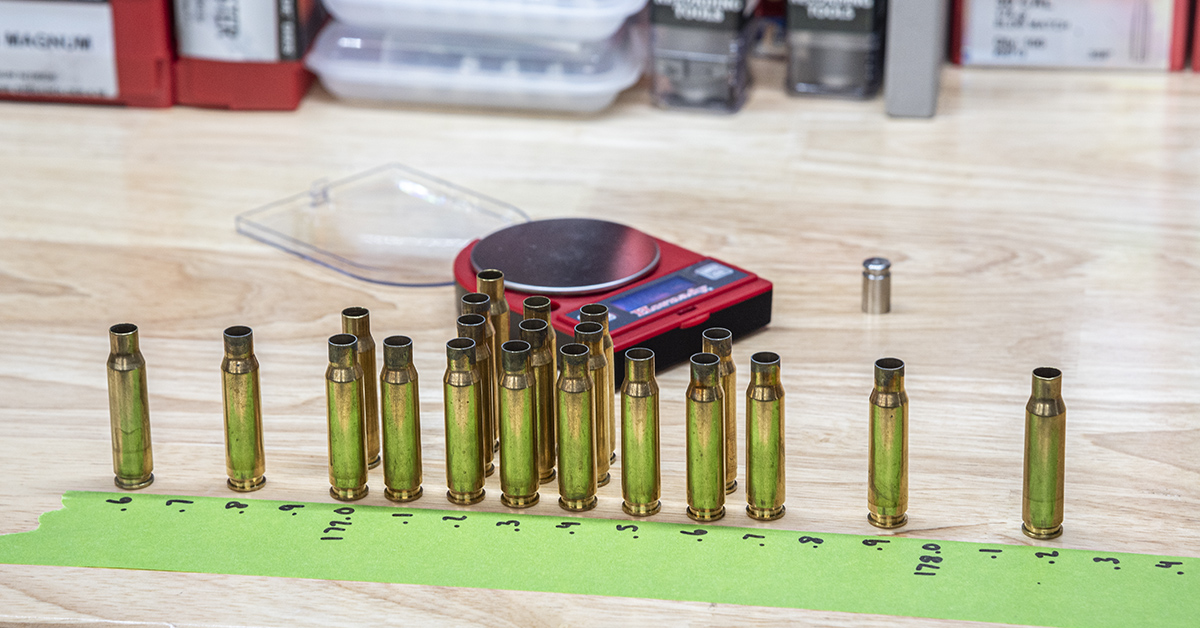
For the utmost in accuracy, it is best to reload cartridge cases that are from the same manufacturer with the same production lot number (although cartridge case weight can and will vary within a given manufacturer’s lot number, and internal case capacity may vary with case weight). Reloaders will often sort their cases by weight. The problem here is that case weight within a particular manufacturer’s production run can vary for several reasons — many of which do not affect the internal capacity of the case, such as the depth of the extractor groove cut. My experience has been that internal case capacity differences within a particular manufacturer’s production lot are not as great as when comparing one manufacturer with another — especially when comparing military brass with commercial brass. I see little, if anything, to be gained from weight-sorting brass, especially for use in a factory grade hunting rifle. Keep your brass segregated by manufacturer and lot number and you’ll be fine.
Case Neck Turning
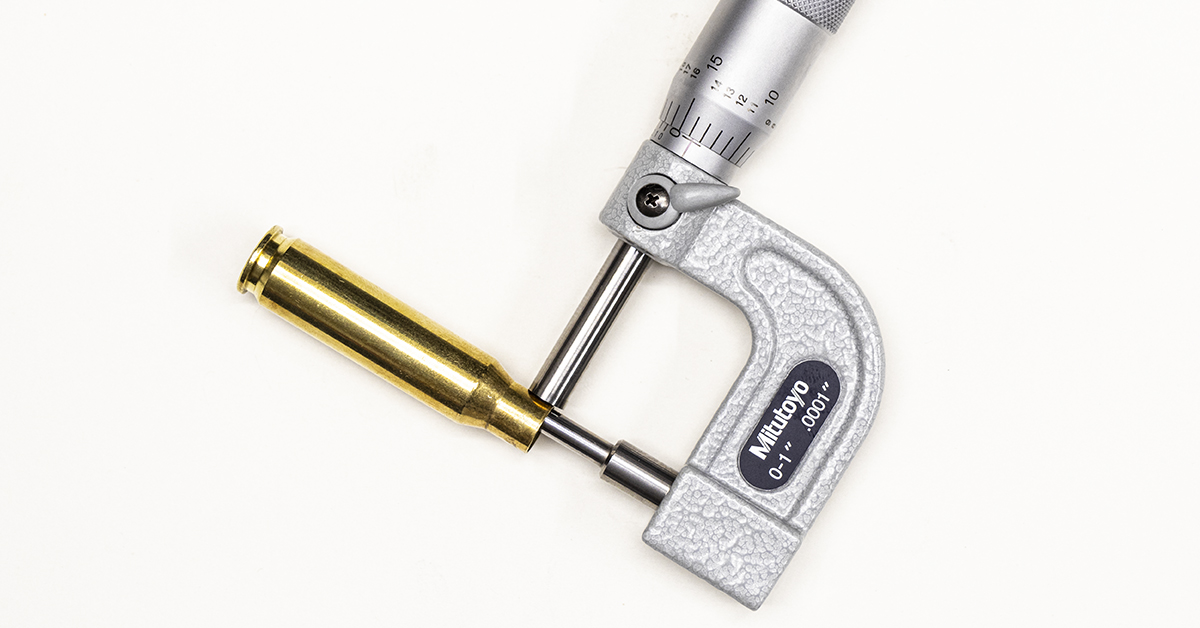
Using a tubing micrometer, measure the neck wall thickness of a cartridge case then rotate it 180 degrees. Take another measurement at the new location and most likely it will not measure the same.
Neck turning involves the use of specialized tools that allow you to “true up” the case necks to a uniform thickness. The goal, of course, is increased accuracy. With the neck wall thickness being uniform around the circumference of the case neck, its grip and ultimate release of the bullet will be uniform as well. While this technique is beneficial and often a requirement for bench rest competitors using rifles with custom chamber dimensions, in my opinion, there is nothing to be gained in neck turning cases for use in a factory hunting rifle.
Flash Hole Deburring
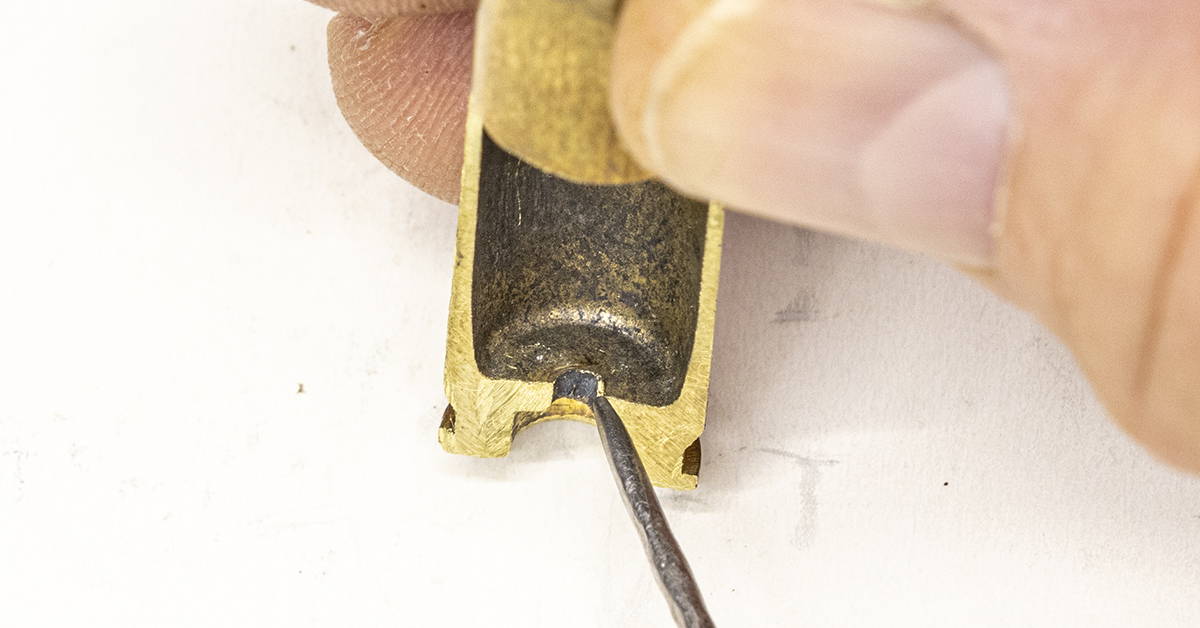
There is usually a small burr left behind during the manufacturing process that surrounds the flash hole. The thought is that this burr can have a negative impact on the ignition of the powder charge. Inconsistent ignition, of course, will lead to inaccuracy. This burr can and will vary in size. I have removed some burrs over the years that are best described (extremely rare) as a small flap rather than a burr. There is no doubt that a large burr or a small flap will have a negative impact on the ignition of the powder charge, and accuracy will suffer.
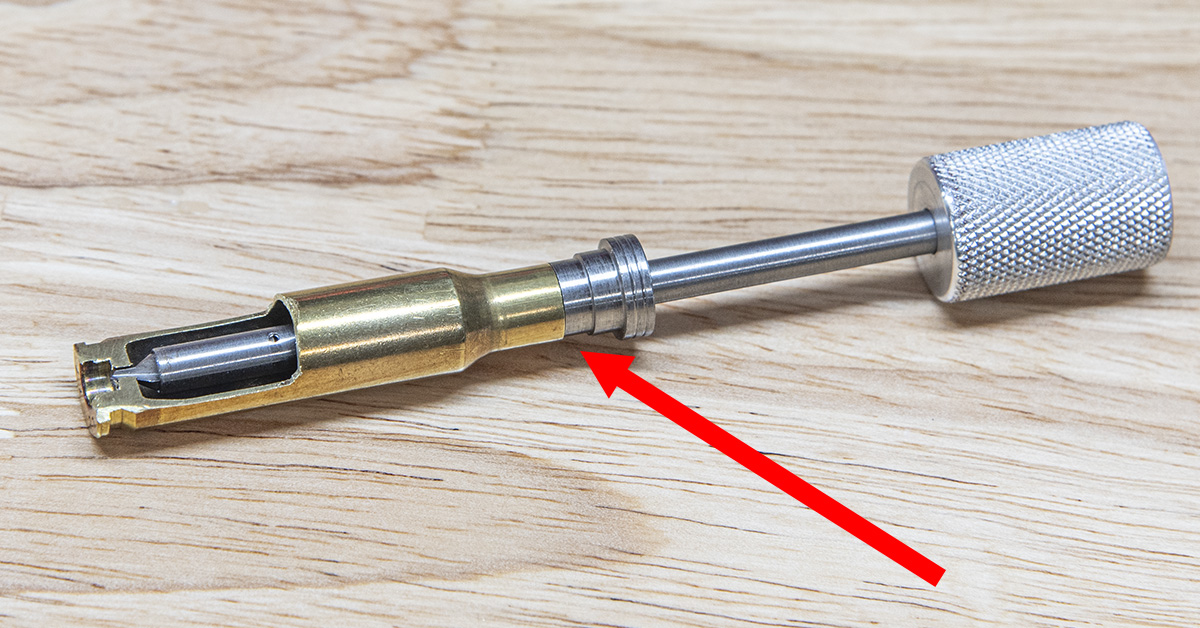
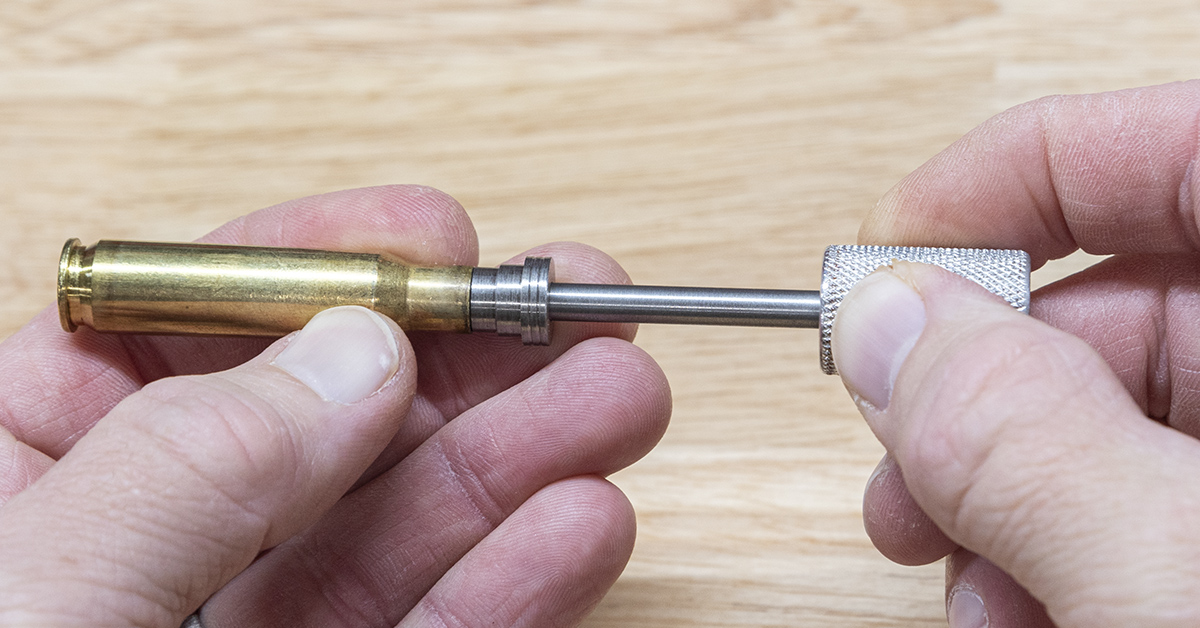
Flash hole deburring is performed after resizing and trimming the case. Having the cases first trimmed to the proper length is necessary. The deburring tool is adjustable for length and indexes off the case mouth.
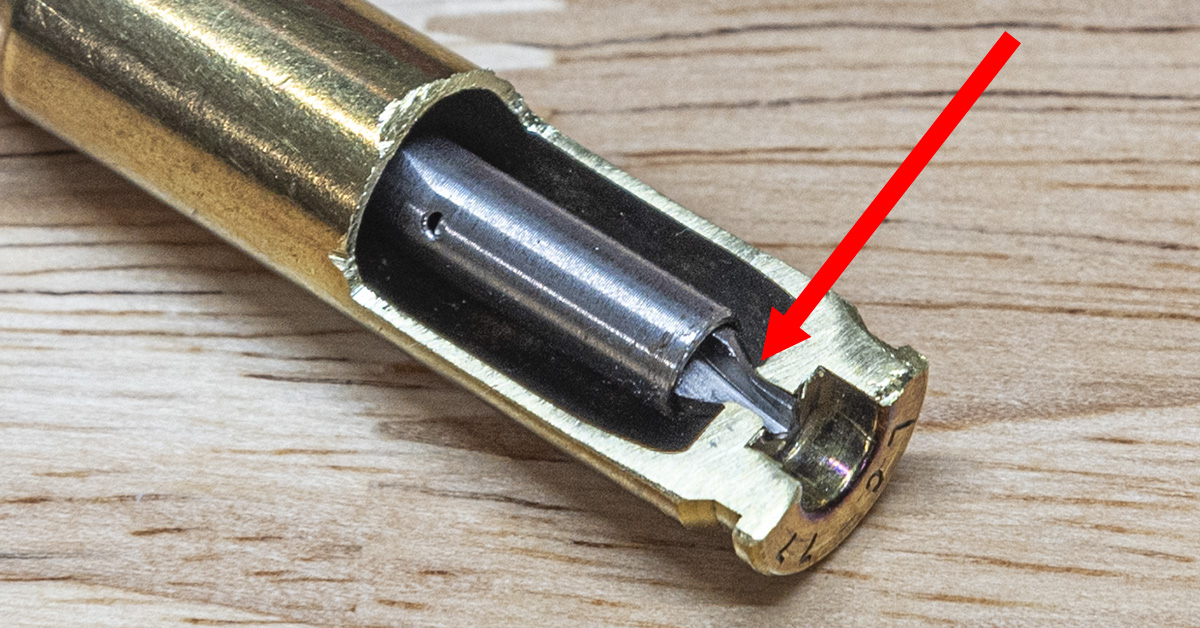
The deburring tool’s length is adjusted so that the cutting edge of the tool barely engages the flash hole. The goal here is to remove the burr, not to cut a large funnel-shaped chamfer into the flash hole. You only want to remove the burr.
Once adjusted, use just enough pressure to keep the tool engaged with the burr. It only takes a couple clockwise twists of the tool to remove the burr. When the burr is removed, invert the case and give it a few light taps on the reloading bench to remove the chips. It is an easy enough job if you’re only doing about 20 cases, however, if you have 50 or 100 cases to deburr, this becomes rather tedious, boring, and time consuming in a hurry. The decades old question is, is it worth the time and effort?
Primer Pocket Uniforming
Primer pockets are typically formed in the case using a punch. This punch will leave the bottom of the pocket with somewhat rounded corners rather than square. The primer that is going to be pressed into the pocket has a distinct square corner. This isn’t a big problem, but there is a little fitment issue here that may prevent the primer from being properly seated. We must also consider that the primer pocket is most likely not exactly the same depth when comparing one case to another. Primer pocket uniforming will ensure that the primer pockets are of a uniform depth while also providing a square corner at the bottom of the pocket that will more readily accept the primer.
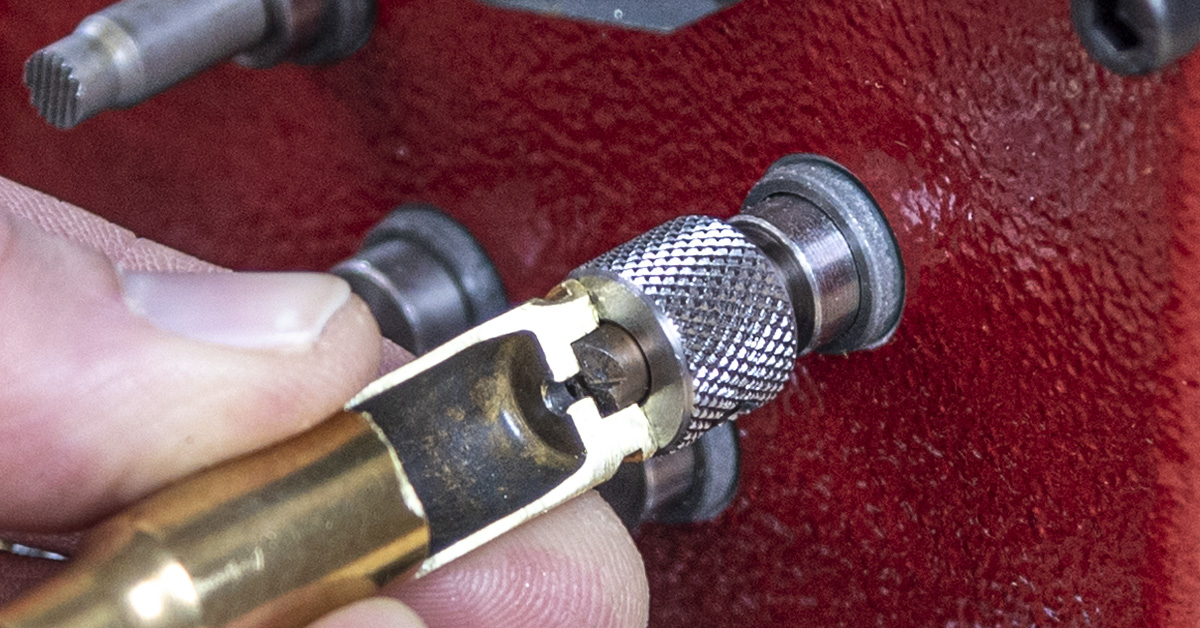
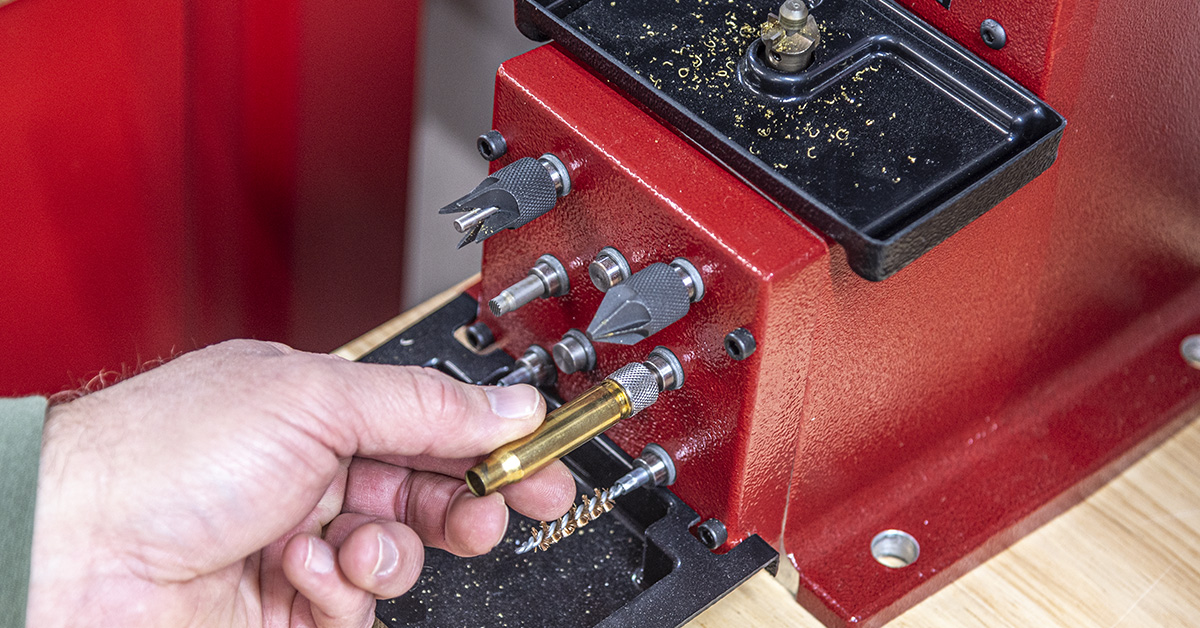
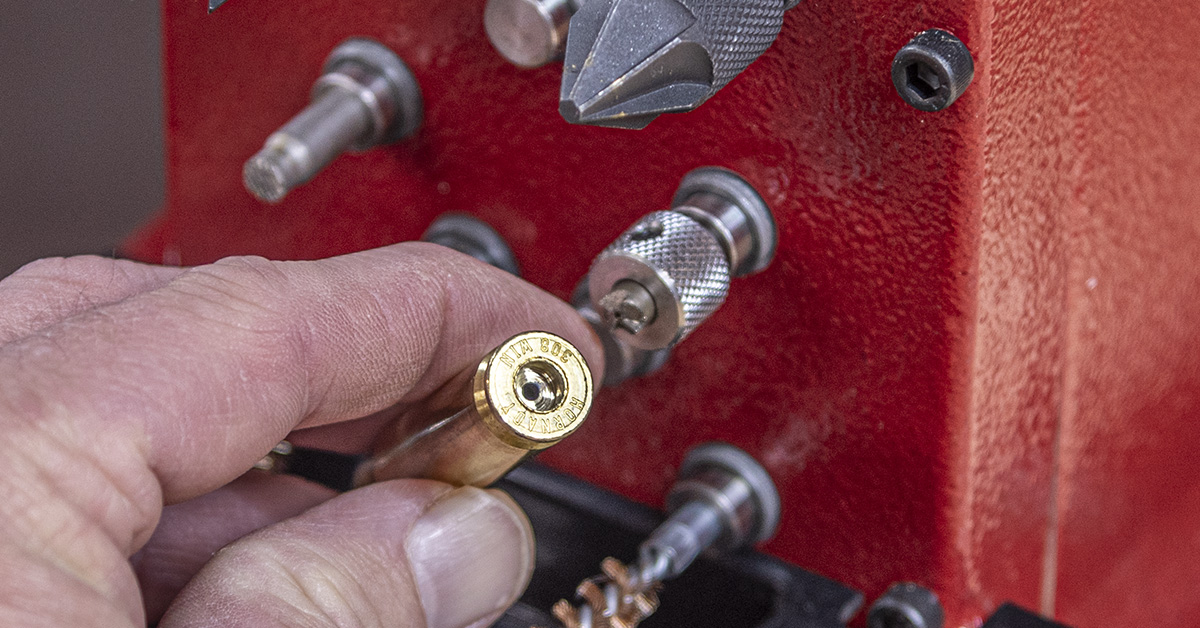
Primer pocket uniforming tools are large or small rifle primer size specific. They require no adjustment and the design of the tool prevents you from removing too much material. Simply insert the tool into the primer pocket, using just enough hand pressure to keep the tool cutting. Turn the tool clockwise until the cutting action stops and then tap the case head on the reloading bench a couple times to remove the brass chips. While you can use a manual pocket uniforming tool, here we are using a pocket uniforming tool attached to Hornady’s Lock-N-Load Power Case Prep Center, making the job much faster and easier.
Once completed, the primer pockets will be of a uniform depth and the rounded corners at the bottom of the pocket will now be cut square to more readily accept the new primer. In my experience, this is where I see the greatest advantage to primer pocket uniforming, as primers are generally seated by “feel.” Once the pocket is uniformed, I have found that they seat with a more solid feel as they go into place while it feels rather “squishy” to me if the pocket is not uniformed. Having uniformed probably thousands of primer pockets over the years, I have noticed that they are not all the same. When uniforming pockets using cases from the same manufacturer and lot number, some pockets will require the removal of more material as compared to others. Once again, we are faced with the question, is it worth the time and effort?
Flash hole deburring and primer pocket uniforming are one-time operations. Once completed, you’ll never need to do them again for the life of the brass. While I cannot directly attribute any accuracy advantage to these operations and doubt that you’ll see any, they were all the rage years ago when I started reloading. Consequently, I have deburred and uniformed a lot of flash holes and primer pockets. In doing so, I have found a few rather large flash hole burrs — emphasize “few.” I have also noticed that primer pockets are not of a uniform depth and that primers seat with a solid, more desirable feel after the pocket has been uniformed. Of course, I can’t get this experience out of my mind, nor can I stop. It’s become who I am and what I do. After all, the next case may have that extra-large flap/burr covering half of the flash hole. Ultimately, only you can decide if these operations are worth your time and effort. Thankfully, gone are the hand tools! The Hornady Power Case Prep Center has brought some much-needed automation to these tasks.
Rather than purchasing a large quantity of new brass, it is my advice that the novice reloader begins reloading with brass that started life as factory ammunition — brass that was once-fired in the rifle for which you are reloading. We are following this approach as we continue in Part 7 of our series with resizing the brass that was used in the ammunition test in Part 5. Stay tuned…
- Shoot ON Reloading Series Pt. 1
- Shoot ON Reloading Series Pt. 2
- Shoot ON Reloading Series Pt. 3
- Shoot ON Reloading Series Pt. 4
- Shoot ON Reloading Series Pt. 5
For additional info on cartridge cases, check out Ep. 071 of the Hornady podcast Let’s Talk Cartridge Cases with Jeff Siewert.

