Springfield Armory smacked a home run with their Hellcat micro pistol. Now, Apex Tactical has a kit to make it even better.
by Rob Reaser
There’s no denying that the hottest tickets in the personal defense series of handguns are micro pistols. We’re not talking about the uncomfortable, unwieldy, and the ergonomically and functionally compromised palm-blasters of yore but the current crop of double-stack wonders that deliver the kind of performance that doesn’t make you feel like you’ve “settled” for anything in the deep-concealment category.
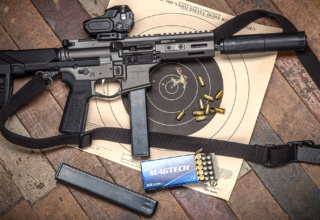
Top-of-mind when it comes to robust micro pistols today is Springfield Armory’s Hellcat. The Hellcat delivers an impressive 11+1 or 13+3 9mm capacity in a platform that is comfortable to shoot and reliably accurate yet is sized to carry deep or with minimal printing under street clothes. Check out our review of the Hellcat for a deeper dive into this pint-sized performer.
That said, the aftermarket usually finds a way to make a good thing just a bit better. It’s not that the original firearm manufactures can’t do it, but that they typically walk a thin tightrope, balancing quality and performance with cost and what the market will bear. Triggers can always be better. Sights can be of the tritium persuasion. Slides and barrels could be treated with the latest and greatest coatings impervious to everything shy of a neutron explosion. Such guns would also cost more than you or I would likely want to pay.
So enters the aftermarket—specializing in buy-as-you-can-afford-it component upgrades. If you’ve purchased a Hellcat in the last year and a half, your firearm DIY upgrade opportunity is here thanks to Apex Tactical.
Known widely for their Action Enhancement trigger kits, Apex has come out with a kit designed for the Springfield Hellcat.
As kits go, this one’s fairly simple. Included is a machined aluminum trigger, a sear spring, and a striker spring. The springs combine with the trigger to offer several performance benefits, including a reduction in trigger pull weight from around 6.5 pounds to 5 to 5.5 pounds after break-in, a reduction in trigger overall travel, shorter reset distance, and the kind of overall crisp performance modern shooters demand in a handgun.
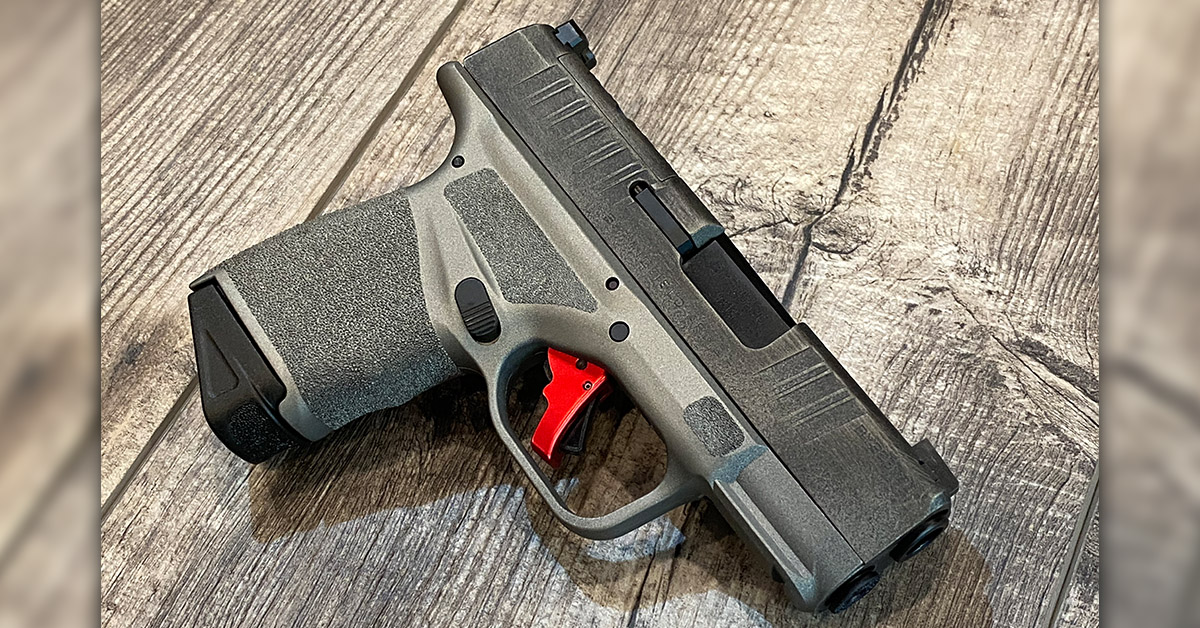
The trigger shoe offers a more defined edge than the stock trigger. The flat-face shoe presents a decidedly more positive purchase than the original, which many will appreciate in such a small pistol. Of course, the robust aluminum construction is a welcome upgrade from the factory polymer version.
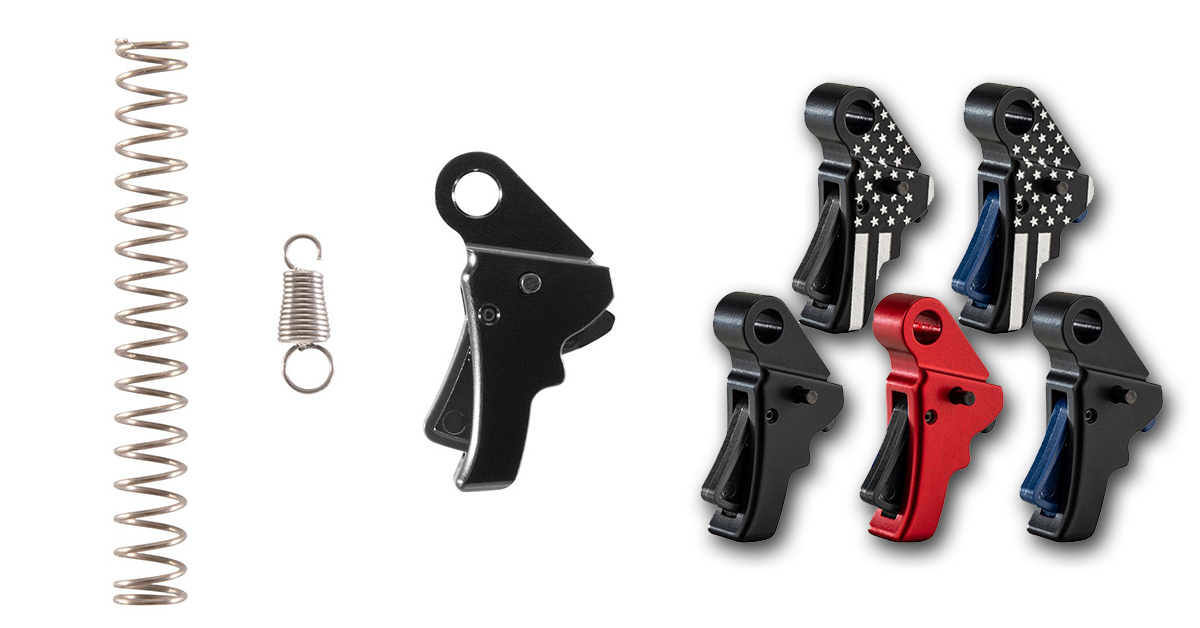
Speaking of the trigger, Apex offers the Hellcat model in a few flavors in a mix of solid black or red, flag motifs, and blue safety blades. We thought a red bang button would be a cool accent with our black receiver and OD green Cerakote slide. Pick your poison!
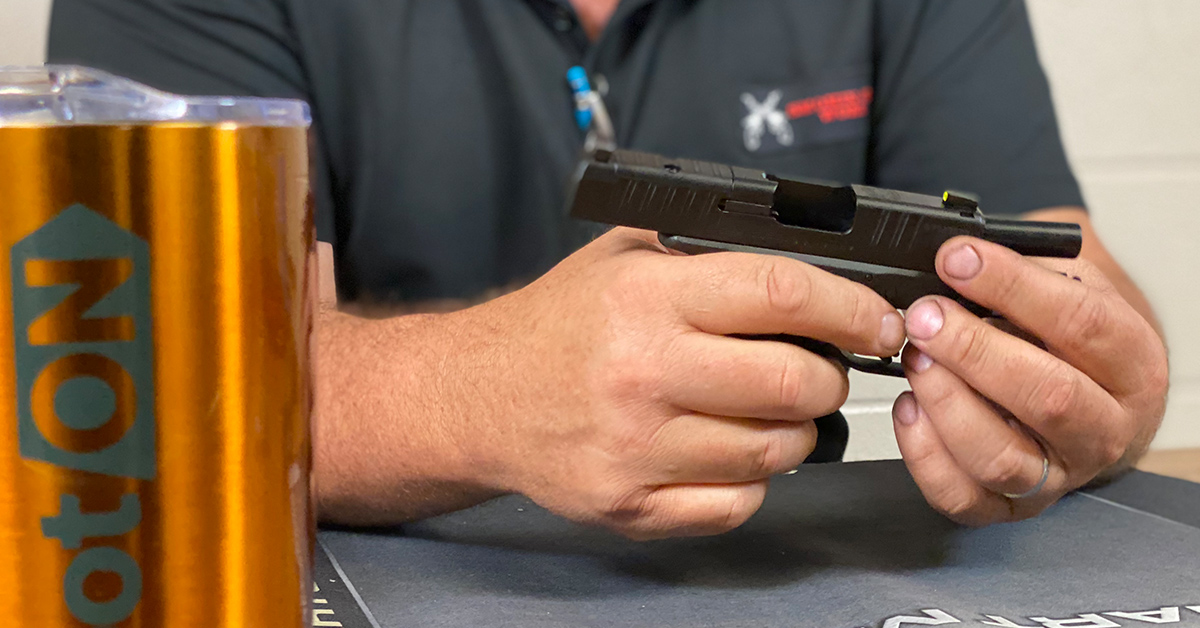
Before beginning any work, be sure to render the pistol safe by removing the magazine and ensuring there are no cartridges in the chamber or the mag well. Also, remove any ammunition from your work area. Once the gun is rendered safe, separate the slide assembly from the receiver per Springfield’s directions.
Trigger Disassembly

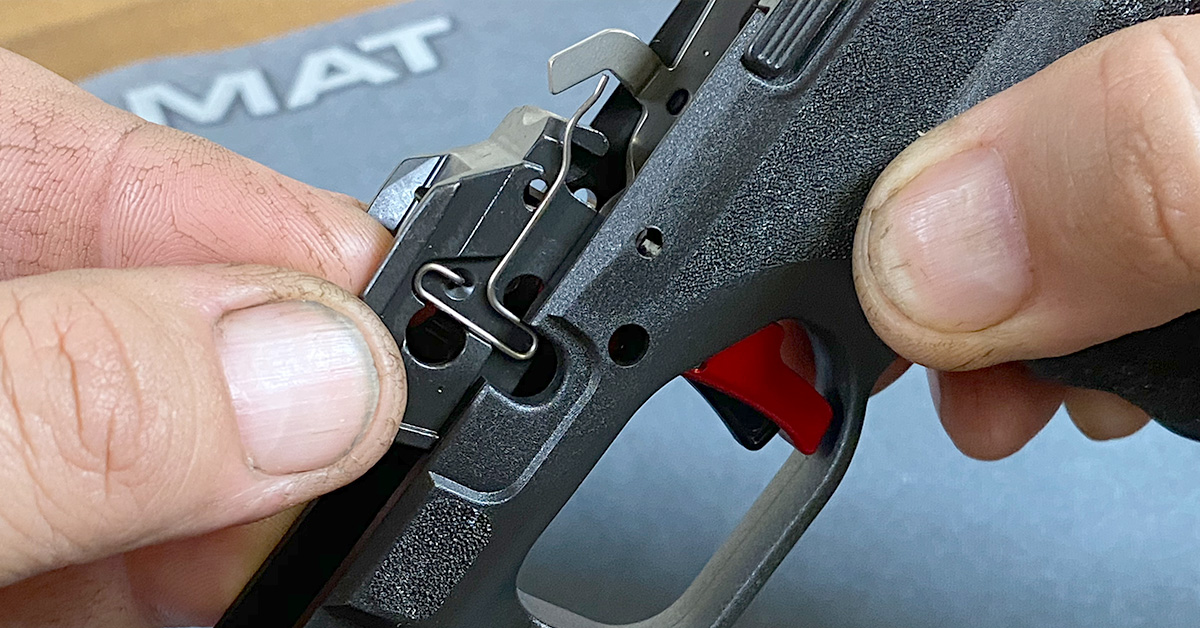
Rotate the disassembly lever forward about 45 degrees and pull it out of the locking block.
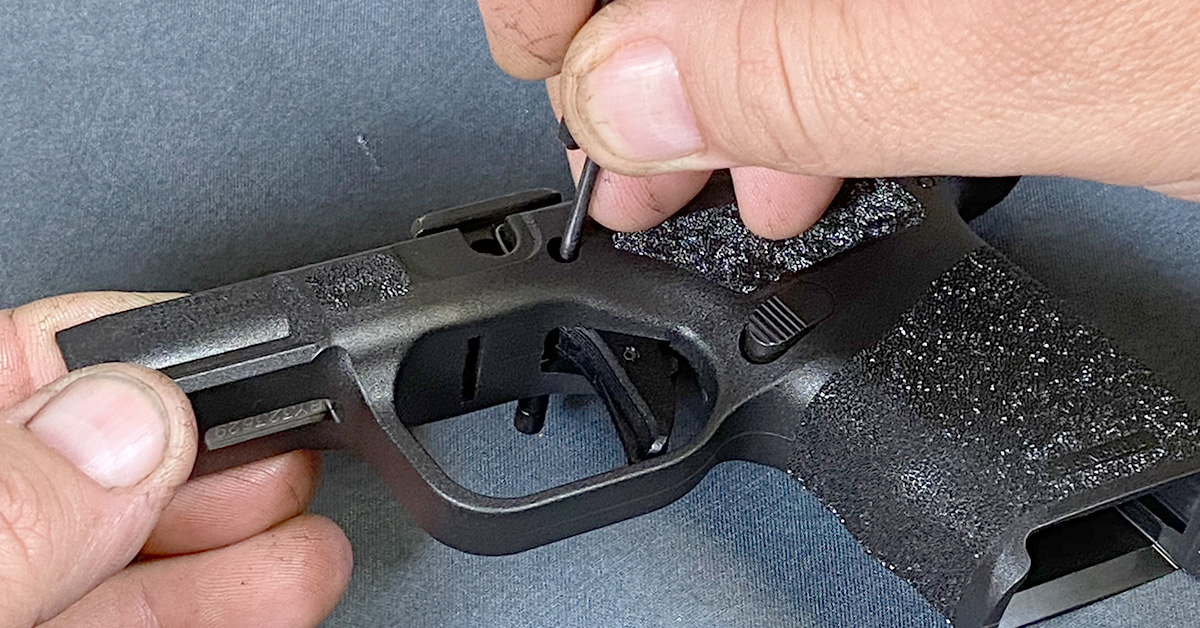
Use a punch to push out the trigger pin from the left to the right side of the receiver.
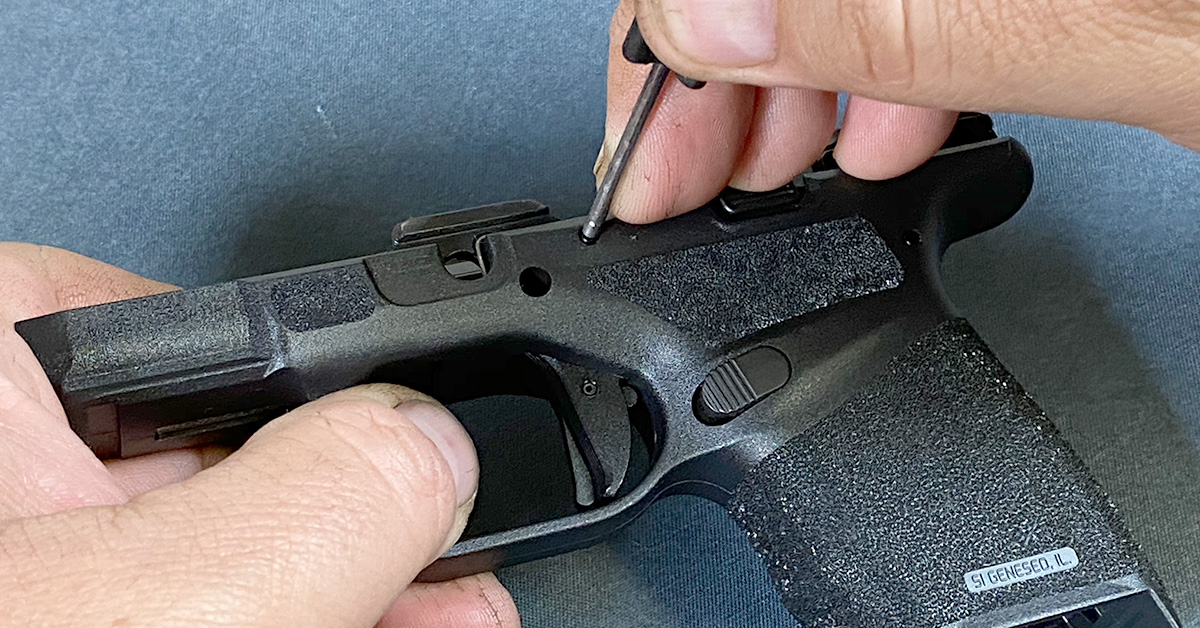
Push out the locking block pin with a punch, again, from left to right.

Use a punch to tap out the sear housing pin from left to right.
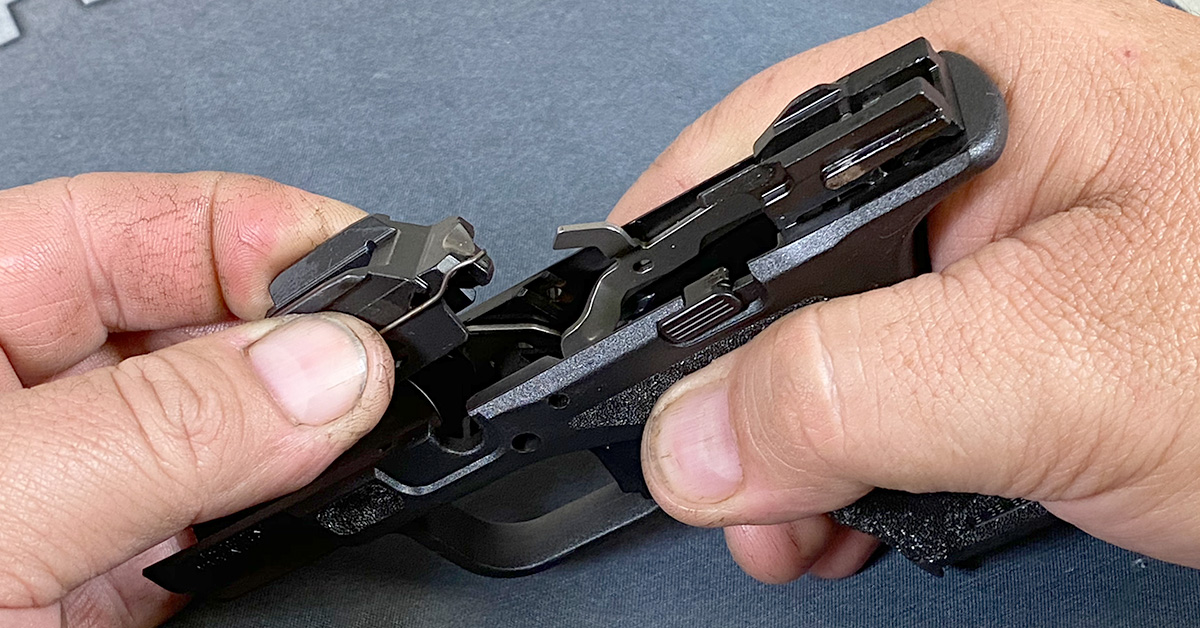
Lift the locking block out of the receiver.

Remove the slide stop lever.

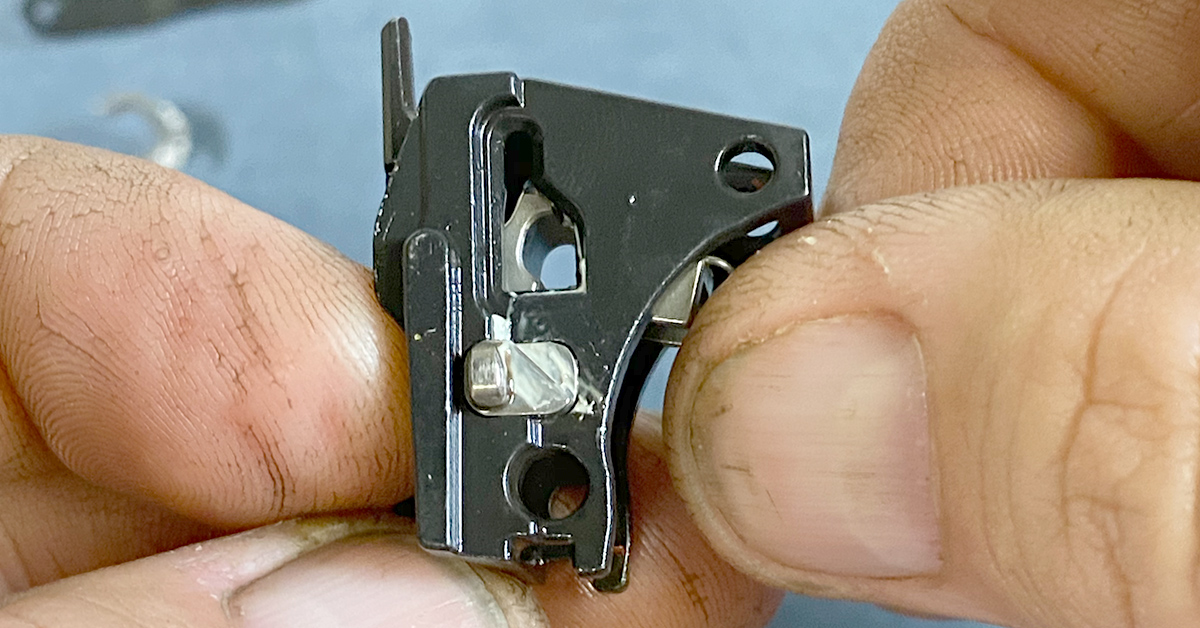
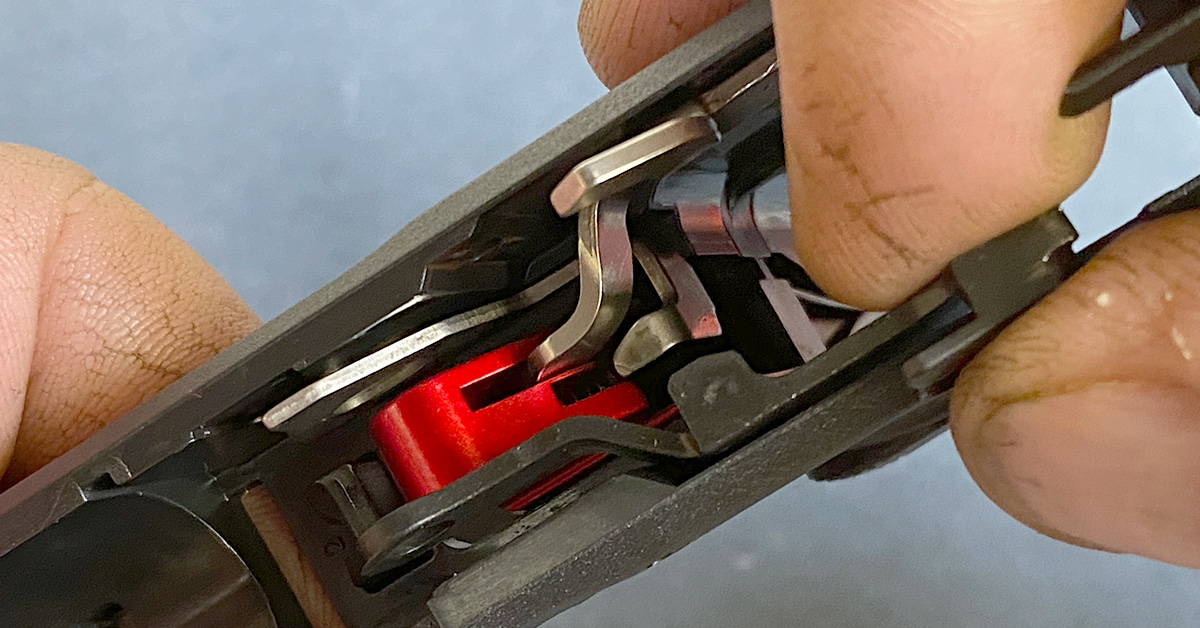
The trigger assembly, sear housing, and trigger bar can now be lifted from the receiver as a unit. Pay attention to the sear housing pin safety (arrow). This c-clip helps hold the pin in place. It will likely remain in place as you remove the housing, but it can fall out. You may want to remove it and set it aside until it is time to reinstall the housing to prevent loss.
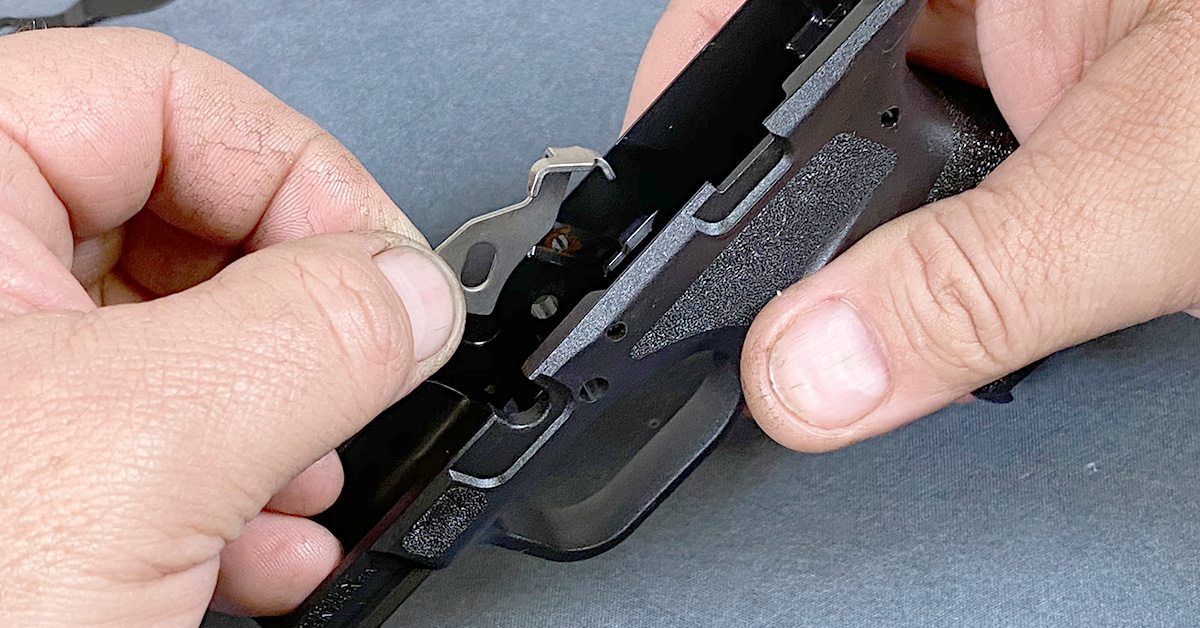
Remove the magazine blocking lever from the receiver.
Separate the trigger bar from the sear housing. You’ll need to move it up and forward (to the right, as shown) to wiggle it out.
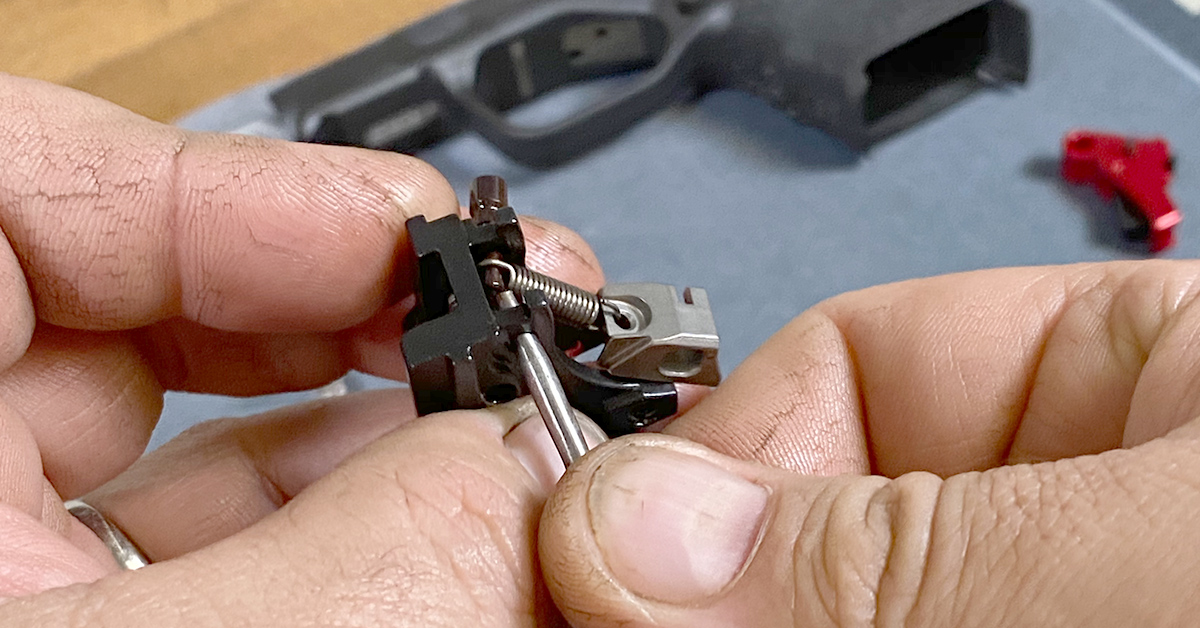
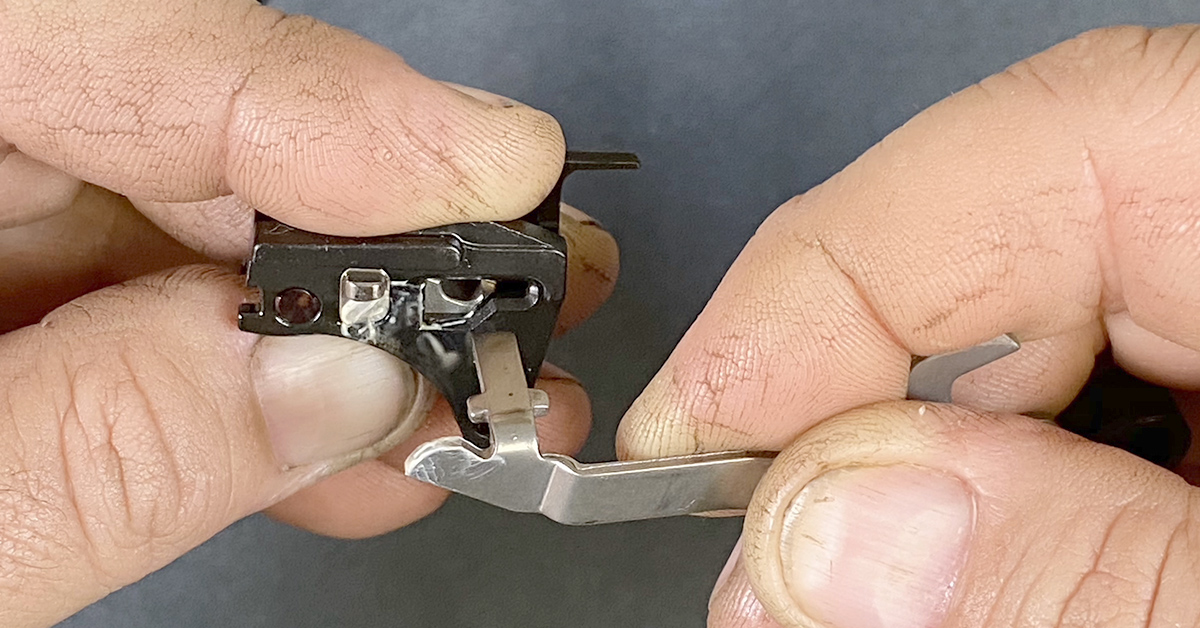
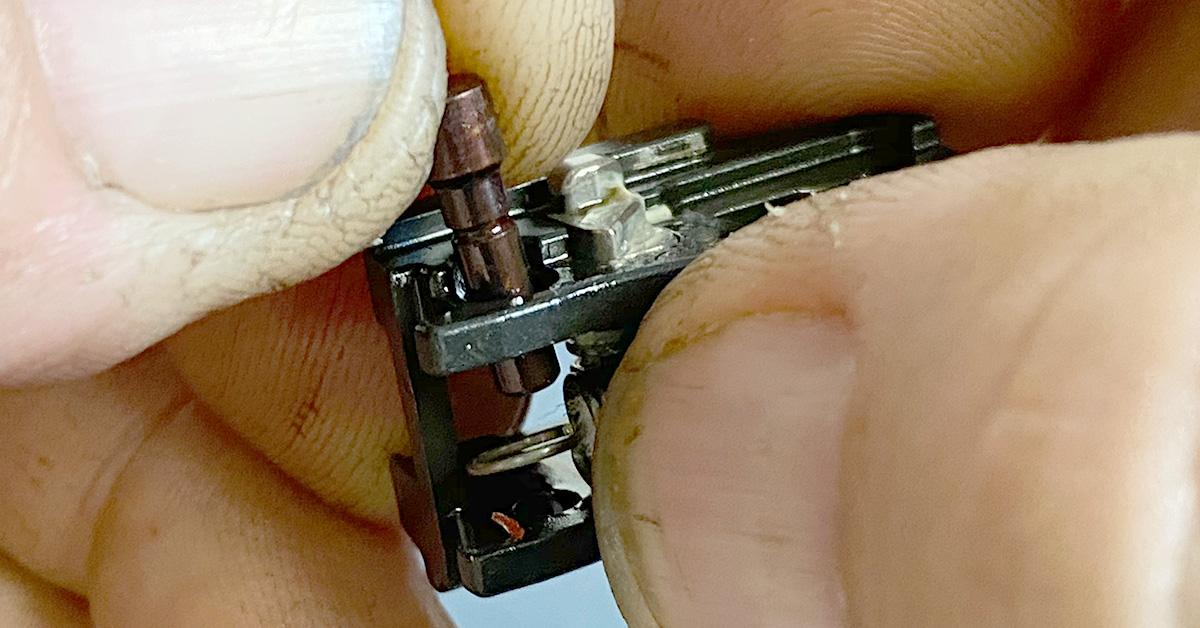
Push the sear spring pin partially out of the trigger assembly housing with a punch.
Pull the sear spring pin outward to release it from the sear spring.
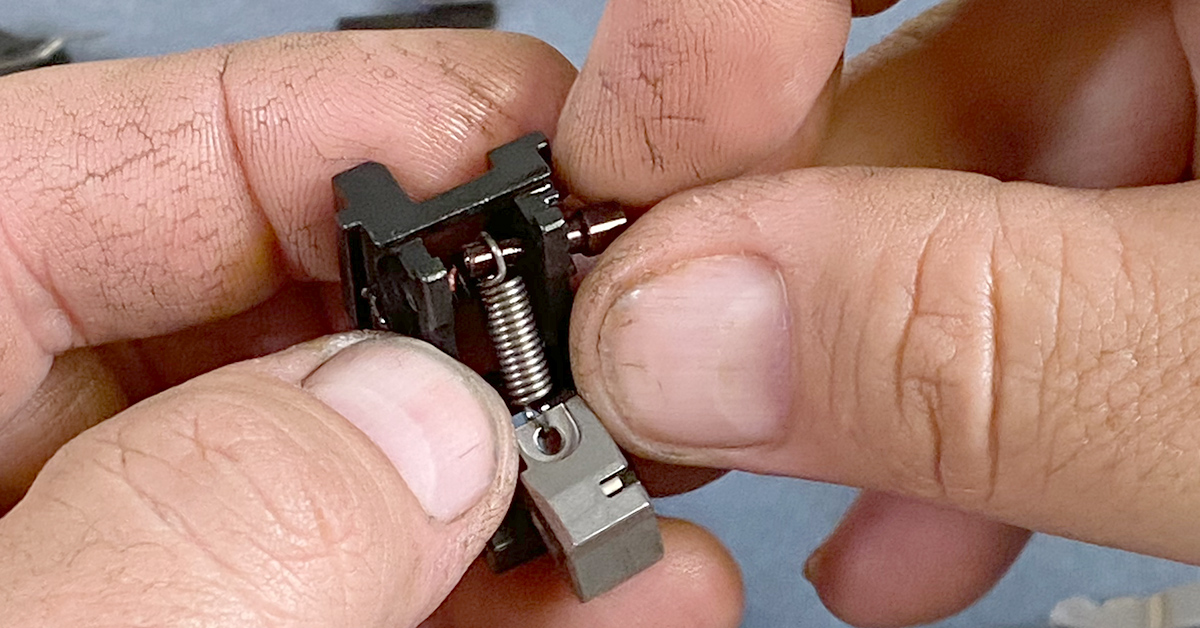
Remove the sear spring from the sear. Note the spring orientation.
Trigger Assembly

The new Apex spring (bottom) features a different profile and length than the OE spring. It also includes a felt core inside the coils. Do not remove this core.
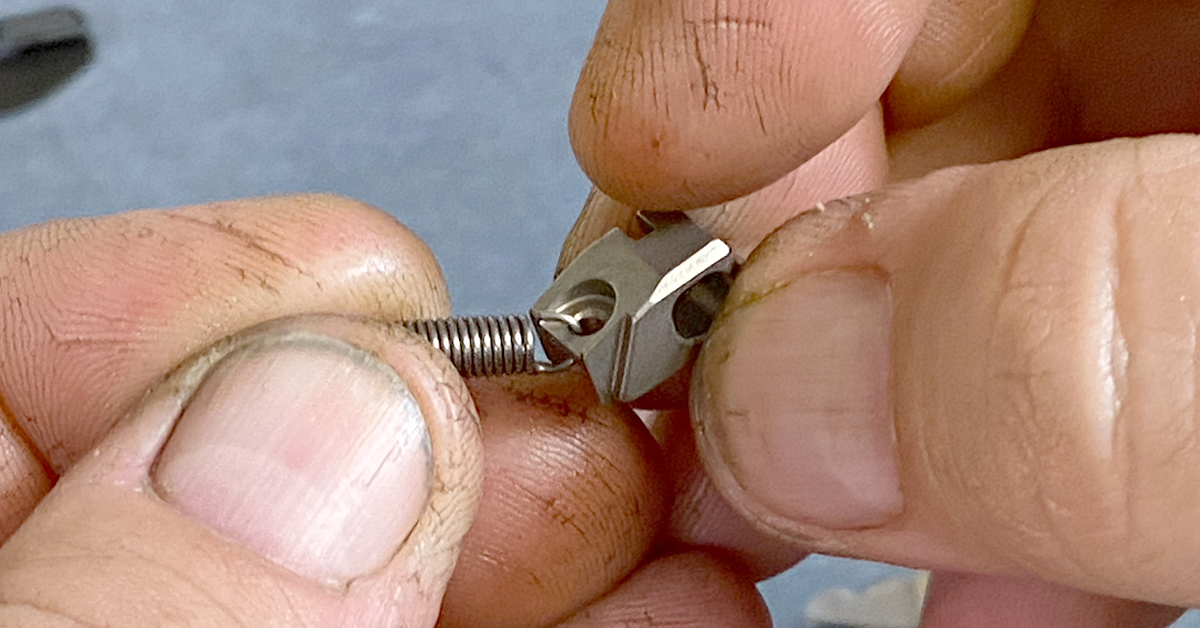
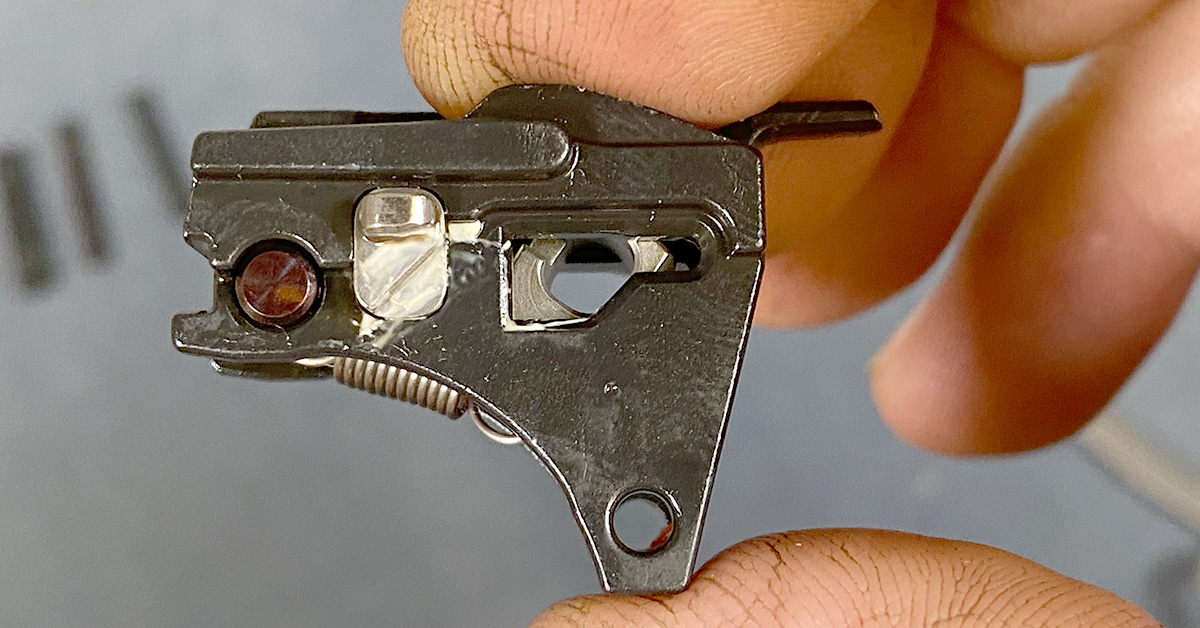
Install the new Apex sear spring into the sear with the narrow end pointing toward the sear and the spring tail oriented as shown. Apply a drop or two of lubricant to the felt core for spring lubrication.
Apply lubricant to the sides of the sear where it contacts the housing and the striker. Reinstall the sear into the trigger assembly housing as shown.
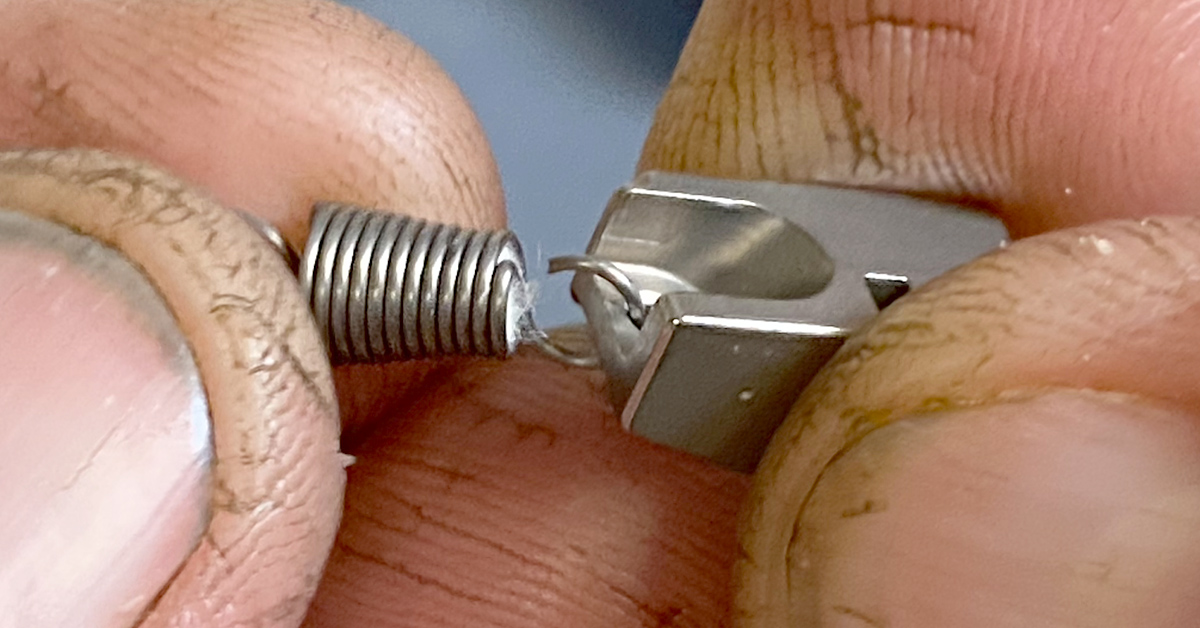
Push in on the sear spring pin to capture the rear spring loop.
Seat the sear spring pin equidistance in the trigger assembly housing to complete the sear spring swap.

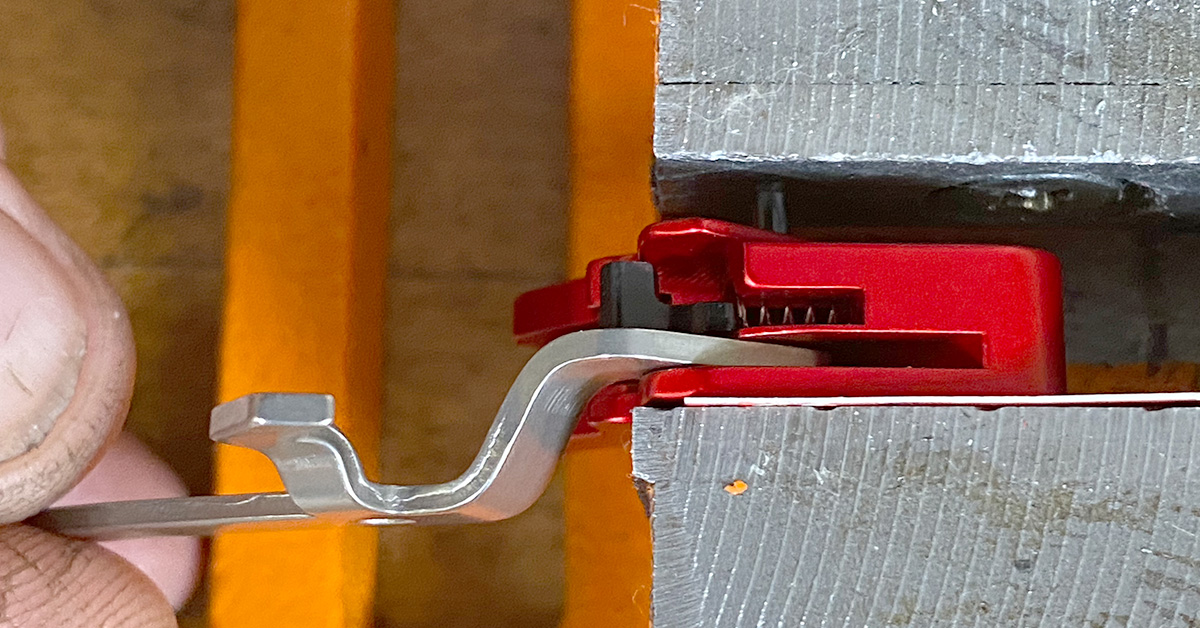
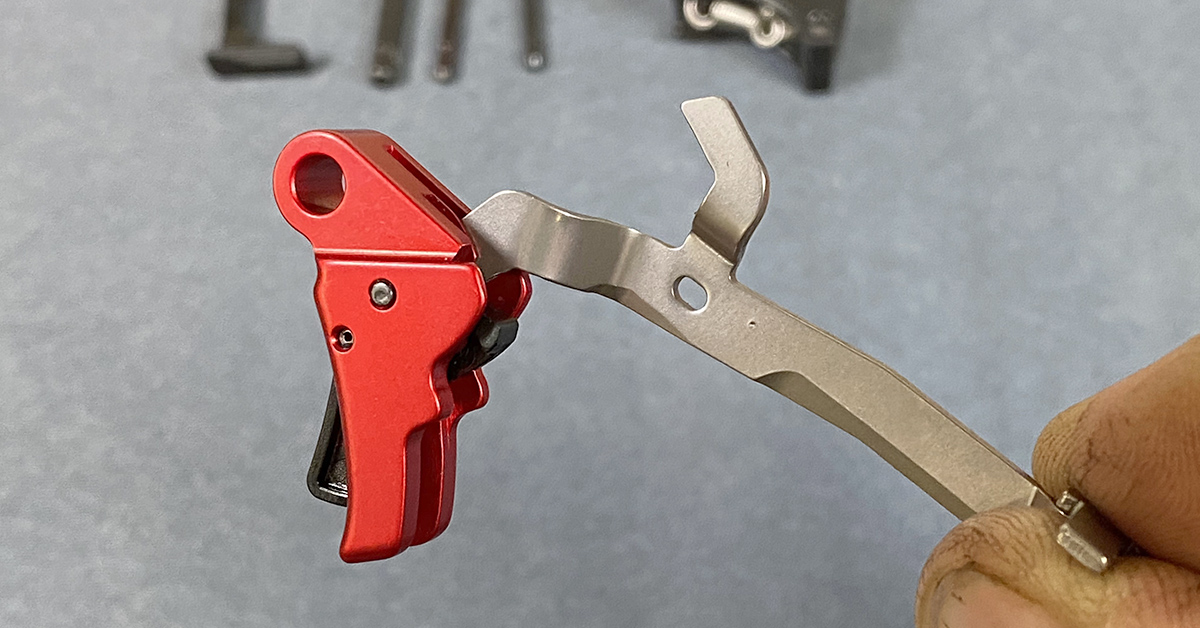
Use a punch to remove the trigger bar pin and separate the trigger shoe from the trigger bar.
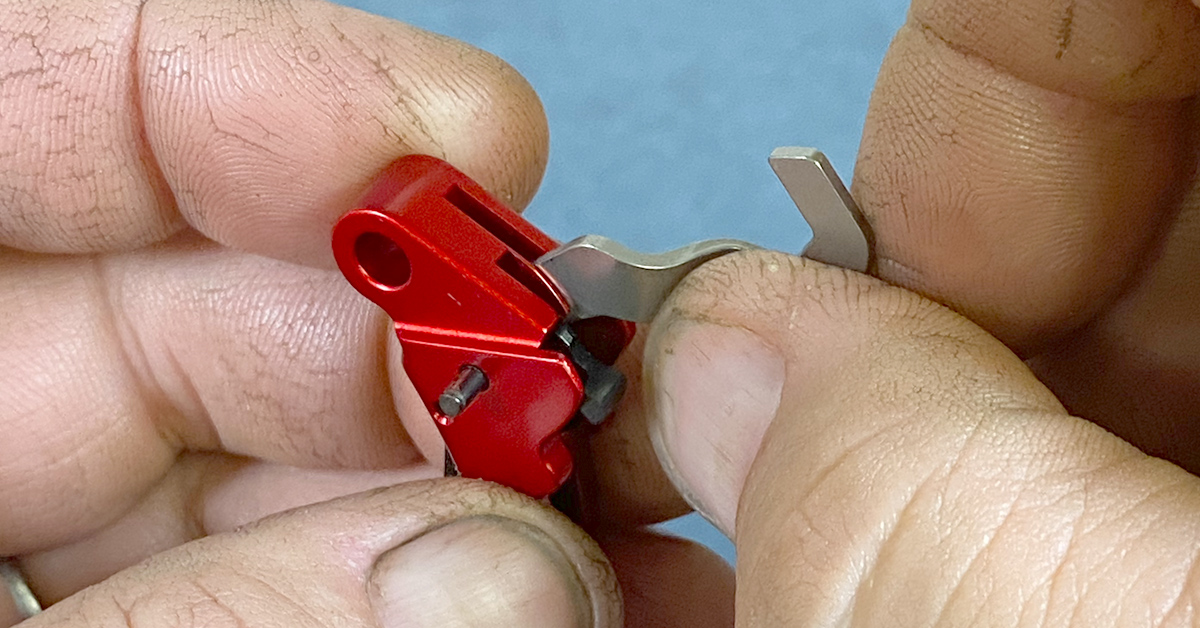
The Apex trigger comes with its own trigger bar pin that is started into the trigger body from the factory. Insert the factor trigger bar into the new Apex trigger body and align the trigger bar pin hole with the pin. To help align the pin and bar, insert a small piece of business card or part of the packaging card that came with the trigger in the slot between the bar and the trigger (right side of the trigger). This will provide some friction to allow you to perfectly align the pin holes and to keep everything in place before moving to the bench vise. The card can also prevent crushing the trigger body during the trigger bar installation.
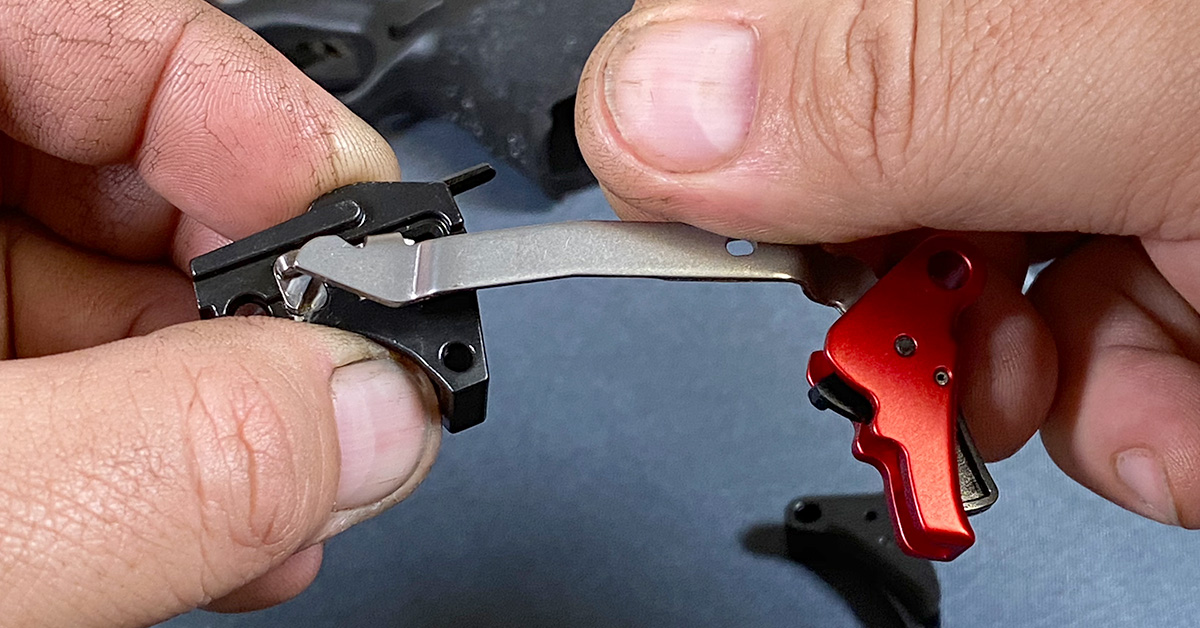
Place the assembly into a vise with smooth jaw faces (or use a piece of business card) to protect the work pieces. With the trigger bar pin hole perfectly aligned with the trigger pin hole in the trigger body, slowly close the vise. When you feel the pin capture in the opposite hole, wiggle the trigger bar to ensure it is moving freely. If so, continue to squeeze the pin into place. If the pin is above flush with the trigger body, you can carefully tap it flush with a flat punch and hammer. Once done, the trigger should rotate easily around the pin and there should be no catch in the safety.
The properly assembled trigger shoe and trigger bar assembly.
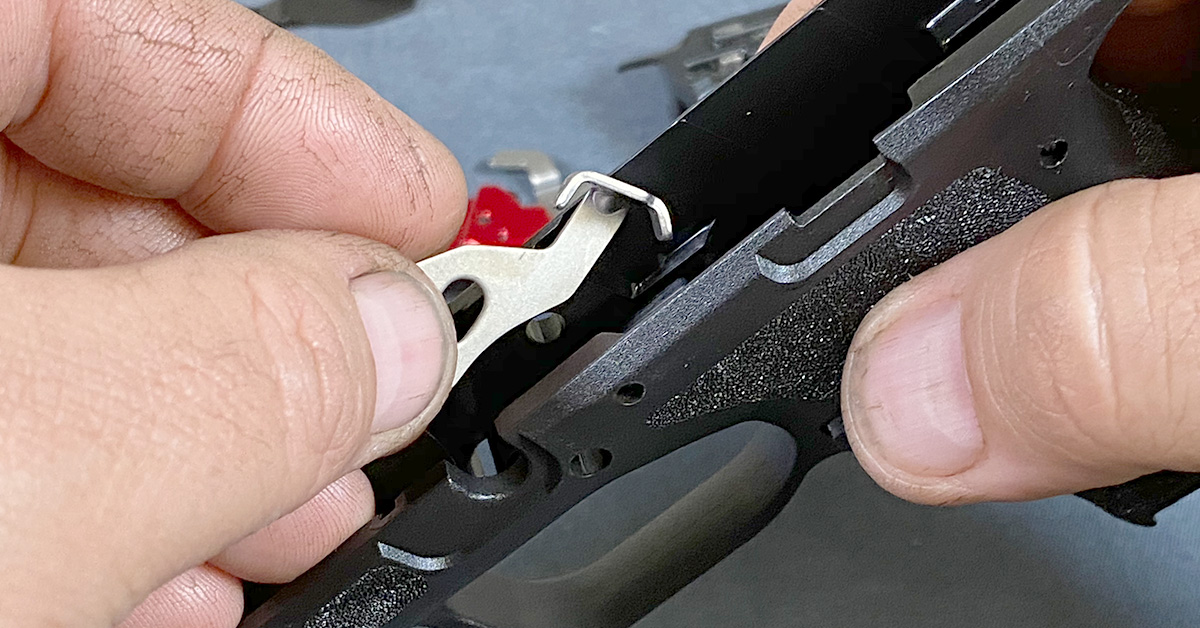
Lubricate the end of the trigger bar on the side and along the disconnect surface. Install the trigger shoe/trigger bar assembly into the trigger assembly housing as shown. Once installed, move the tail of the sear spring into the annular groove of the sear spring pin. If you removed the sear housing pin safety, reinstall it at this time.
Reinstall the magazine blocking lever into the receiver.

Place the trigger assembly into the receiver.

Reinstall the trigger assembly housing pin. Be sure the pin is equidistance in the receiver.
Reinstall the slide stop lever.
Reinstall the locking block assembly into the receiver.

Secure the locking block by reinstalling the locking block pin.
Secure the trigger in the receiver by installing the trigger pin. Be sure both the trigger pin and the locking block pin are positioned equidistance inside the receiver (both sides flush to the outside of the receiver).
Reinstall the disassembly lever.
Striker Spring Swap

Begin the striker spring (or firing pin spring) swap by removing the guide rod/recoil spring assembly and barrel from the slide.
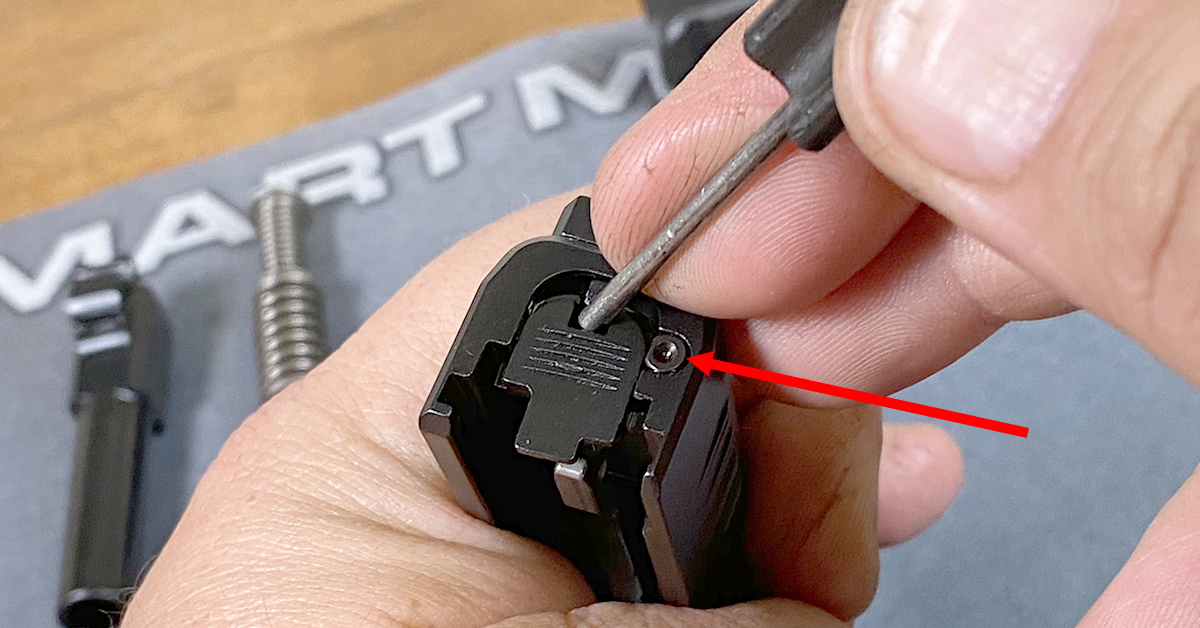
Use a punch to remove the slide cover plate. The extractor pin assembly and the striker and spring assembly are held under pressure beneath the plate, so wear safety glasses and use caution when removing the plate. Begin by pushing in on the striker guide tab with a punch and sliding the plate down slightly. Next, use the punch to push in on the extractor spring plate (arrow) while simultaneously using your thumb to slide the cover plate down until it clears the extractor spring plate. Be sure to maintain control of the extractor pin and spring assembly, as it is under significant spring pressure! Once the cover plate has disengaged the notch in the extractor spring plate, carefully let up on the extractor pin and spring assembly and slide the cover plate out of the slide.

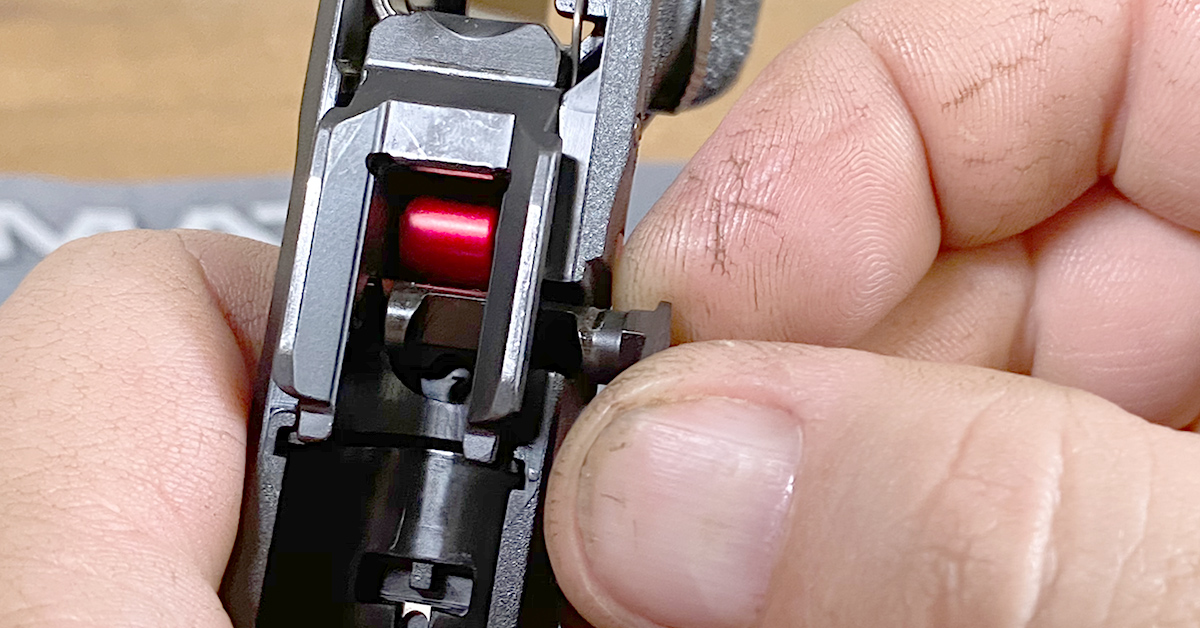
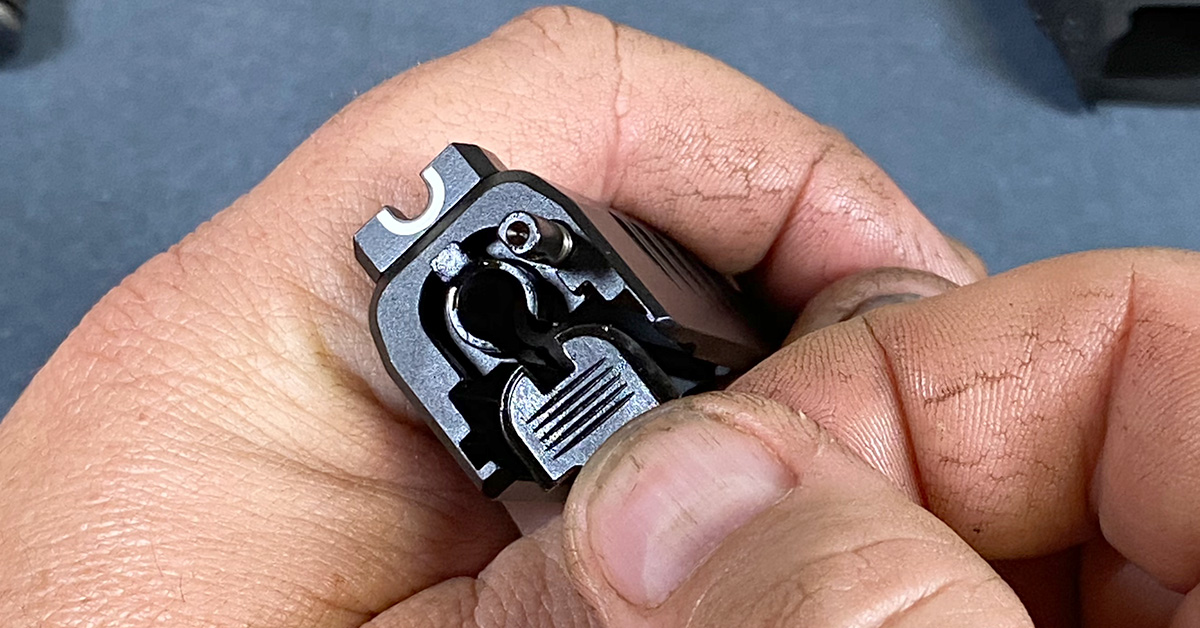
With the slide cover plate removed, remove the striker and spring assembly (A) and the extractor pin and spring assembly (B). Note the orientation of the extractor pin notch (where it engages the extractor on the front end) as you remove it from the slide. The assembly must be in the same orientation upon reassembly.
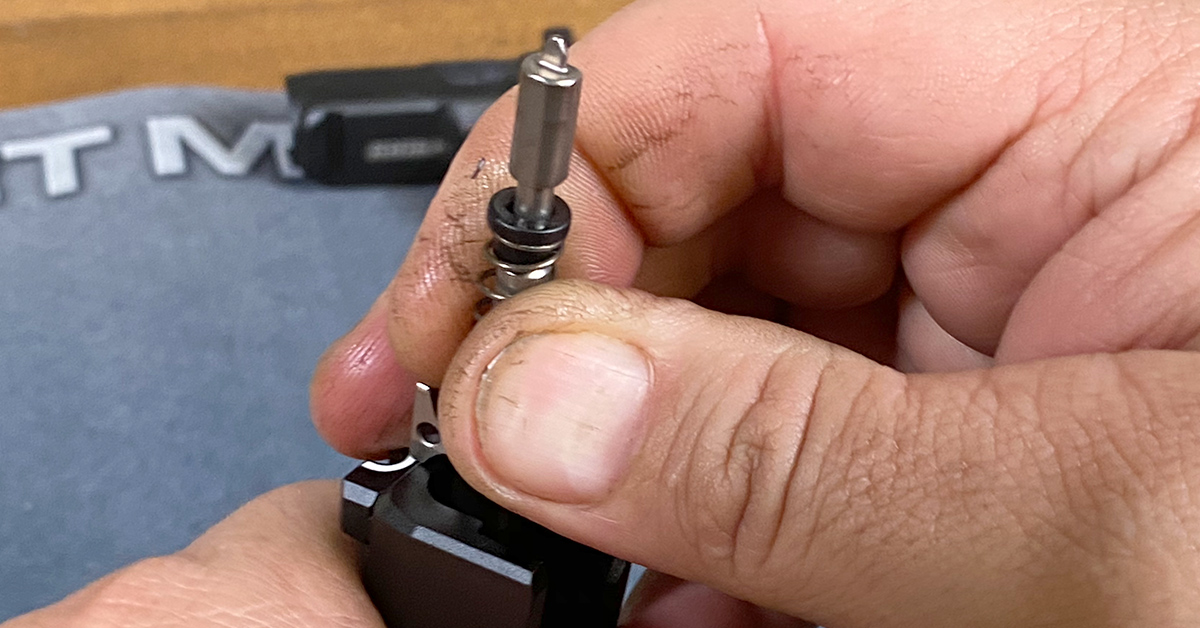
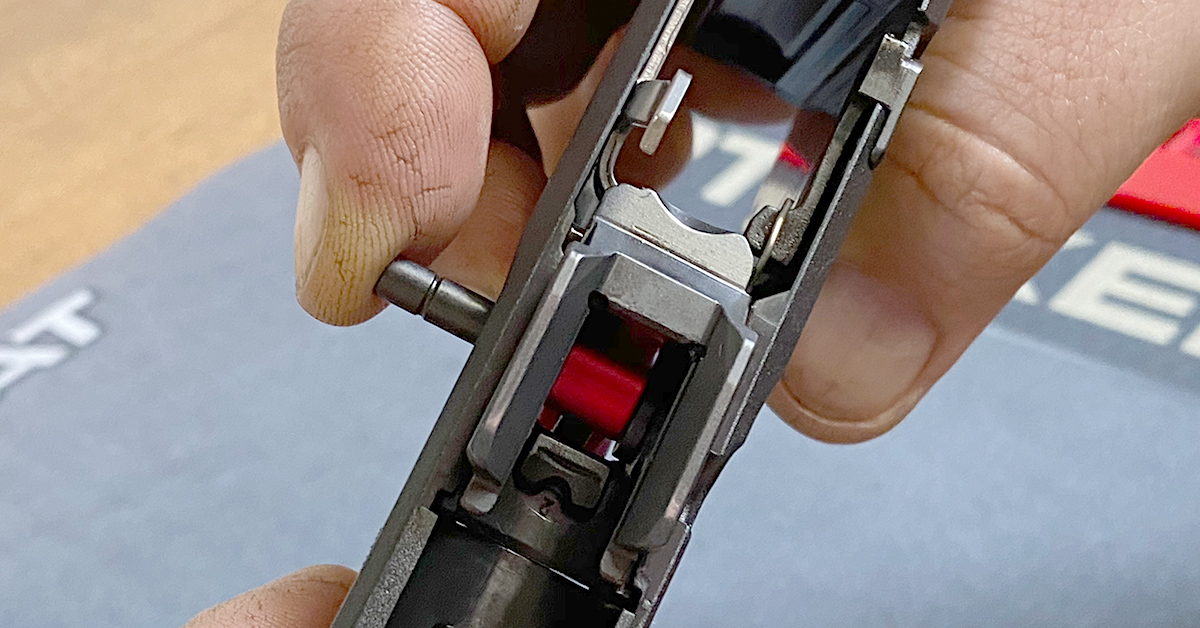
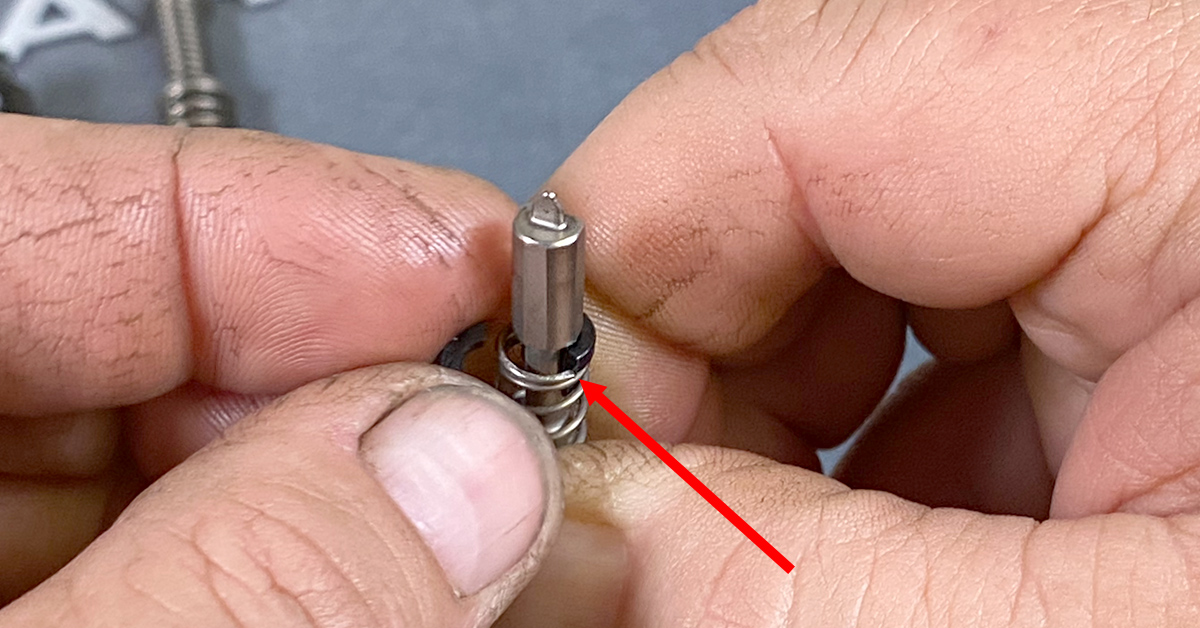
To remove the striker spring, place the assembly upside down in the slide so that the striker lug is against the back of the slide. Stand the slide up on the work bench.
Next, compress the striker spring and remove the two striker spring retainer cups.
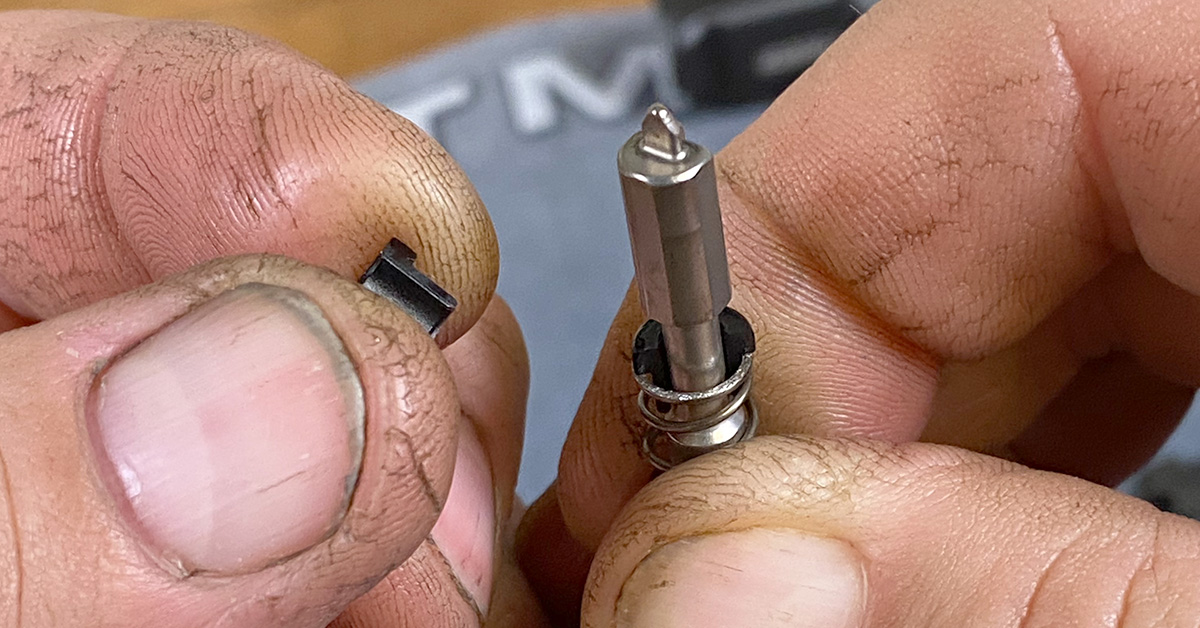
Remove the spring from the striker and replace with the Apex striker spring.
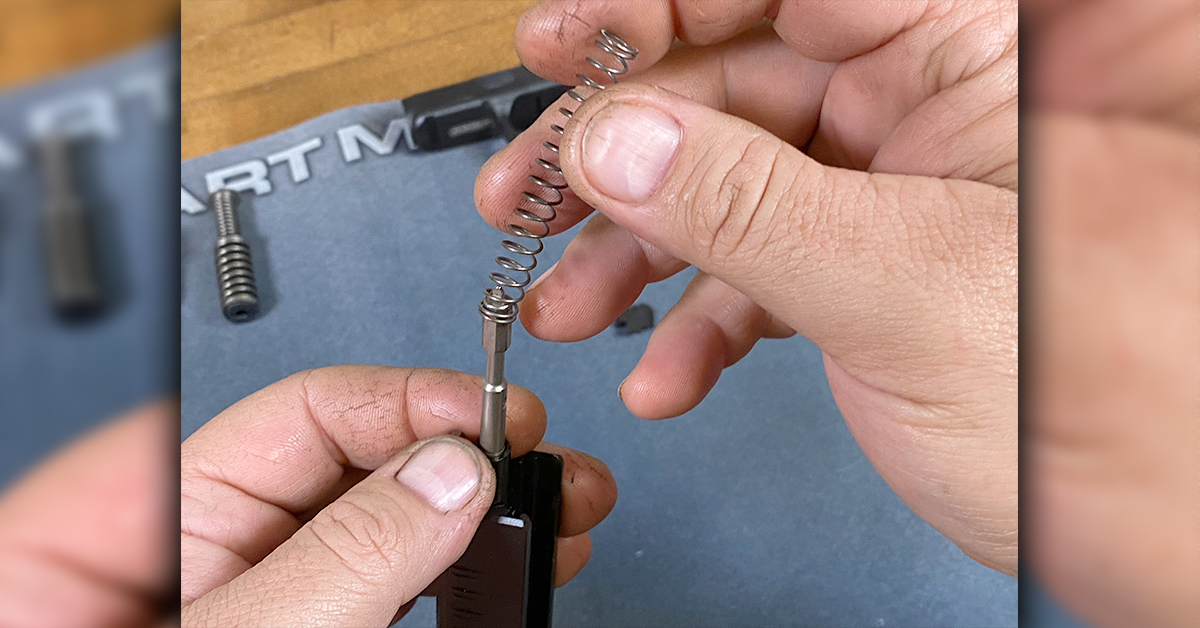
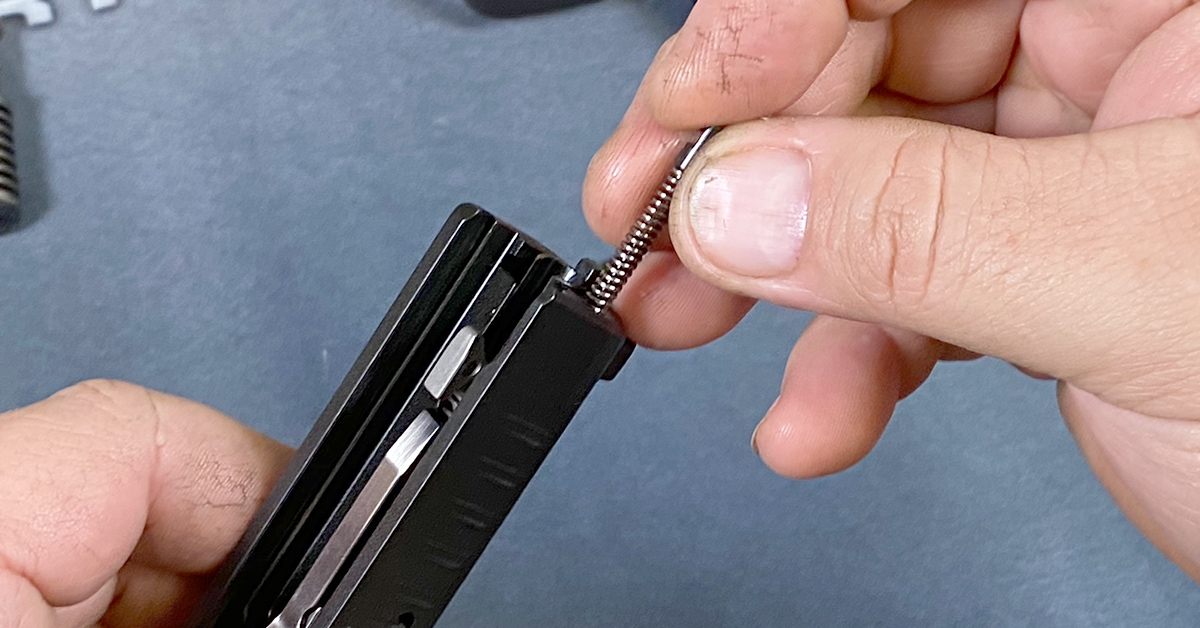
Install the spring retainers. Note that the seam of the assembled retainers should be 90 degrees to the end of the spring coil (arrow). Rotate the retainers as needed to achieve this offset. The striker and spring assembly can now be installed into the slide.
Reinstall the extractor pin and spring assembly into the receiver in the same orientation as it was removed.
Reinstall the slide cover plate by pressing down on the striker guide and inserting the plate until it contacts the extractor spring plate.

Use a punch to depress the extractor pin and spring assembly while simultaneously sliding the cover plate up until it covers and can retain the extractor assembly. Remove the punch and push the cover plate into its fully seated position.
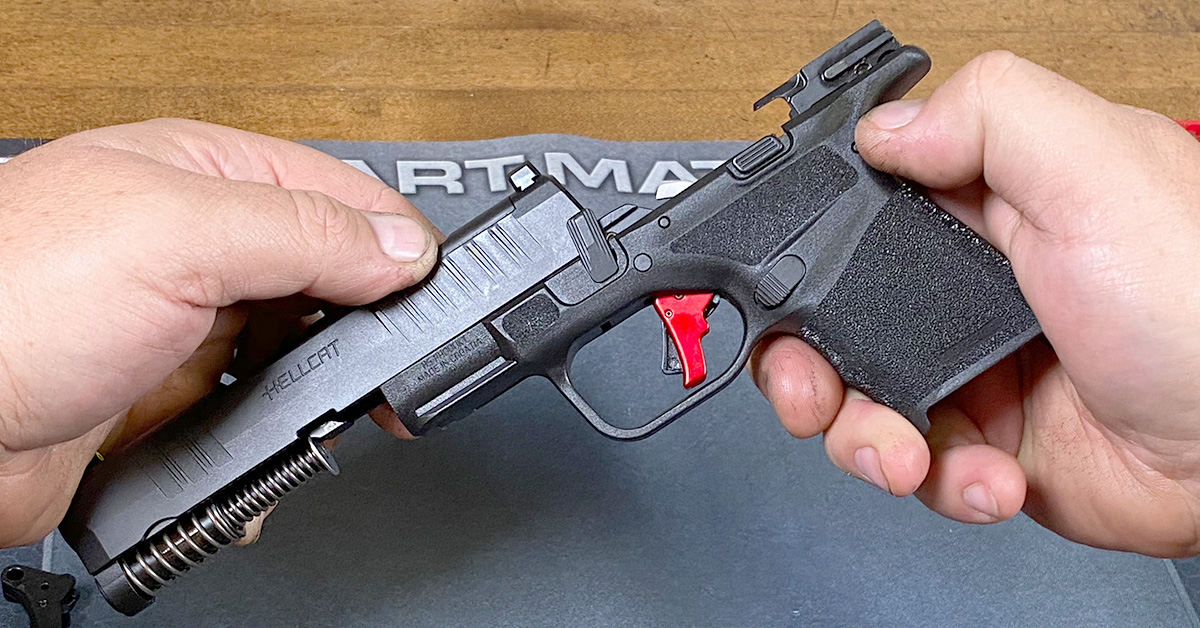
Reinstall the barrel and guide rod/recoil spring assembly and install the slide assembly onto the receiver. Perform a complete function check to ensure the pistol is in good working order.
If you’re more of a “show, don’t tell” kind of DIYer, check out the video below from the folks at Apex Tactical as they walk you through the trigger install process with plenty of tips to help make this upgrade a breeze.