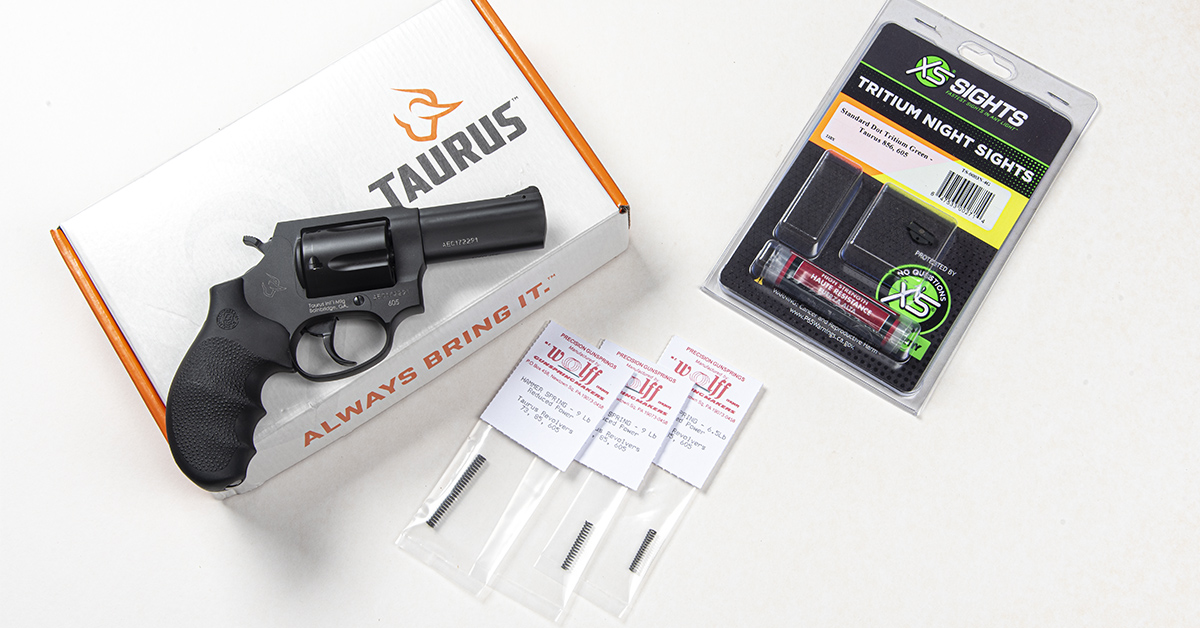
The Taurus small-frames offer dependable revolver performance right out of the box, but add an XS Sights tritium front sight and a spring conversion kit from Wolff Gunsprings and you’ve really upped your game
by Rob Reaser
While Taurus has carved a respectable position for itself in the crowded striker-fired, polymer-frame pistol segment — especially since the launch of its G3 series 9mms over the last several years — the company has built a solid legacy with its diverse and continually expanding lineup of revolvers. The way-out-there Judge chambered in .410/.45 Colt put Taurus on the map and the take-no-prisoners Raging Hunter line has certainly placed the bull brand in the top tier of hunting-grade handguns.
Yet despite the company’s deep bench of high-profile wheel guns, it is the small-frame Taurus revolvers that enjoy the strongest position in the company’s revolver portfolio. With over 80 years of revolver manufacturing experience to its credit, Taurus knows how to deliver dependable, lightweight, and concealable defensive revolvers.
Arguably the most popular of the lot are the 856 and 605 models chambered in .38 SPL +P and .357 Magnum, respectively. With MSRPs running in the upper $300s and into the $400s, these revolvers are an easy buy-in with performance that belies the price. Options are plentiful: 2- or 3-inch barrel configurations, multiple finish and sight variations, optic-ready, spurred or spurless hammers, and several grip options are among the choices. Take your pick. It is not difficult to find a model to suit your tastes or your carry preferences.

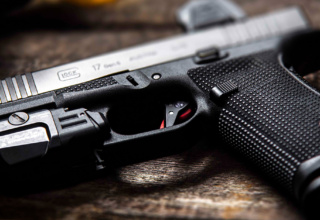
I recently acquired a Taurus Defender 605 in a 3-inch barrel configuration because I favor having the option of running either .357 Magnum or .38 SPL +P loads. The gun came with the always-welcome Hogue rubber grip, which I much prefer over the standard compact grip. It is a fine gun that holds comfortably and is well-balanced in the hand, but…
Last year, I installed XS Sights’ R3D sight system on my Taurus GX4, and I liked it. XS Sights, whether the R3D, standard dot, or Big Dot, feature a prominent and brightly colored sighting ring around the tritium vial. The sight is easy to see in multiple lighting conditions and is fast to deliver a sight picture. So, when XS Sights announced last month that they are now offering their standard tritium front sight for the Taurus 586 and 605 revolvers, I immediately put in my order.
The saying goes, “In for a penny, in for a pound.” Since my 605 was about to go under the knife with the sight upgrade, I figured this would be the perfect time to lighten up the hammer and trigger action.
In a defensive engagement, revolvers are typically fired in double-action mode. The trigger pull cocks the hammer (action one) and then releases the hammer to fire (action two). Seldom does the defensive shooter have the time or the mental wherewithal to manually cock the hammer and then pull the trigger to fire (single-action mode). That’s all fine; however, the long and often stout double-action pull of a revolver tends to reduce accuracy for most people. Pulling the shot on that final stretch of trigger squeeze, where the pull weight is at its peak, is not uncommon. A lighter trigger pull weight (not to mention deliberate practice) can help mitigate that issue.
The good news is, lightening the trigger pull weight is a simple job on a Taurus revolver. This includes the small-frame models like the 856 and 605, as well as the medium- and large-frame variants. Two springs are replaced: the mainspring (hammer spring) and the trigger return spring. For our aftermarket spring needs, Wolff Gunsprings is our go-to source.
Because the grip must be removed to change out the springs, this is a perfect time to swap your grip if you want — maybe for something a bit larger, a bit “grippier,” or simply for aesthetics. Being that I prefer the Hogue grip that came with my 605, this wasn’t an issue I needed to address.
Two easy-to-install products (three, if you plan to change your grip) can make a big difference in small-frame revolver performance — a high-visibility, 24/7 front sight and reduced power springs. This is a DIY job that doesn’t cost a lot yet can deliver big dividends on the range or in a sketchy parking garage.
As for the tools required, they are minimal. You’ll need a 1/16th roll pin punch, small hammer, bench block, a couple of paper clips, quality bit set and driver, and a bench block. I also make use of a bench vise for this job, which I’ll explain later.
The bit set is the really important part of the tool requirements. You DO NOT EVER want to use run-of-the-mill tapered slot-head screwdrivers for gun work. EVER. The standard screwdrivers you find in hardware or auto parts stores will invariably damage your gun’s screw heads or even the gun itself. It is imperative that you have a selection of hollow-ground slot-head (flathead) bits in various widths and lengths. These bits, with their parallel shanks, can be selected to precisely fit the screw slot head, providing maximum torque with a significantly reduced chance of the bit slipping out of the slot and damaging the screw head or scratching and gouging gun metal.
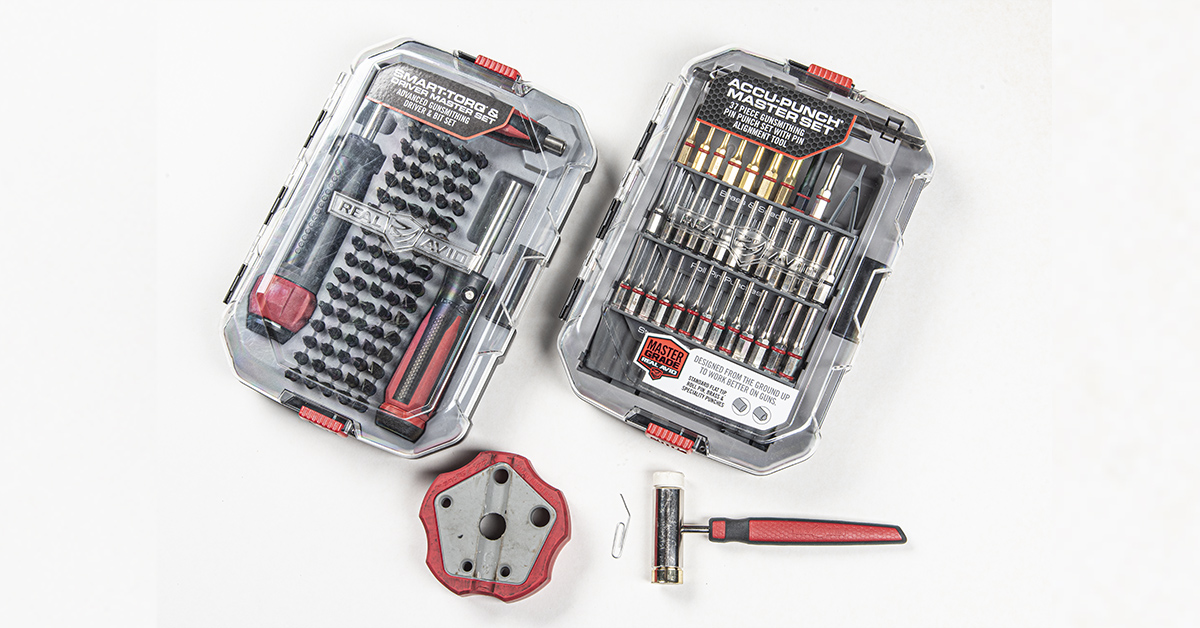
For all of our tooling needs, we draw on several Real Avid products, such as their Smart-Torq & Driver Master Set, Accu-Punch Master Set, and Smart Bench Block.
Sight Upgrade
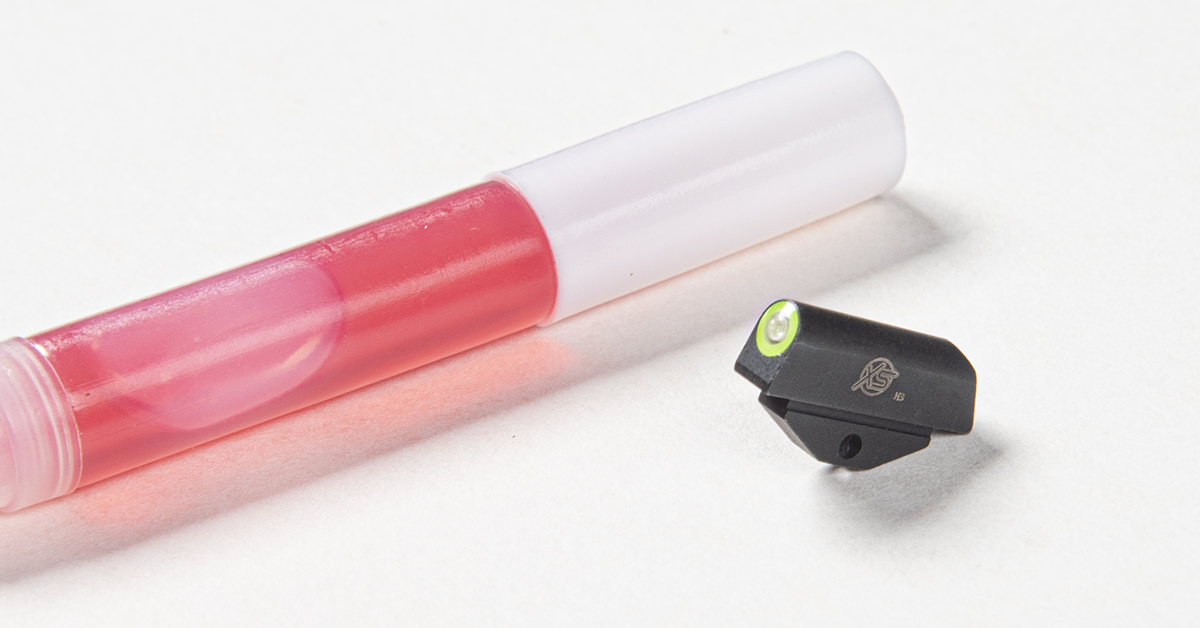
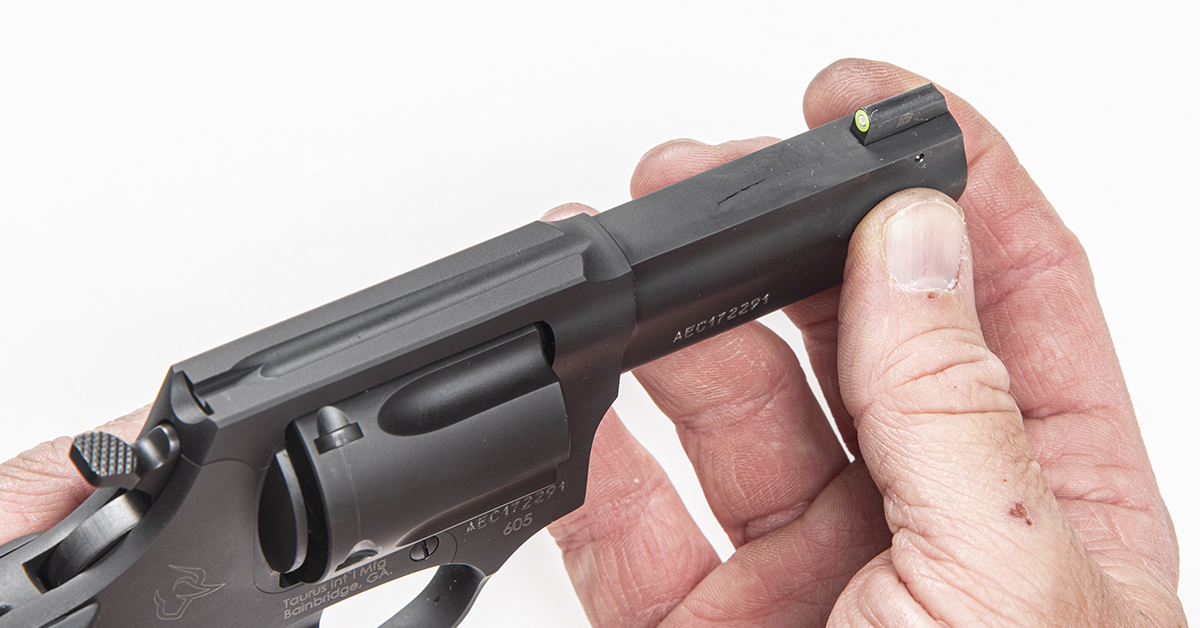
The new XS Sights Standard Dot Tritium Sight for Taurus 856 and 605 is tough to beat. Housed in the rugged iron sight is a tritium vial that delivers illumination in dark environments. Surrounding the tritium center is XS Sights’ Glow Dot, available in green or orange. This is a photoluminescent dot that further adds to the sight’s high visibility in low light. For close-quarter shooting, I’ve found this sight easy to pick up and get on target.
The sight is a direct-fit replacement for the 856 and 605 Taurus revolvers and comes with an adhesive vial for use in installation.
Before doing any work, make sure the gun is unloaded.
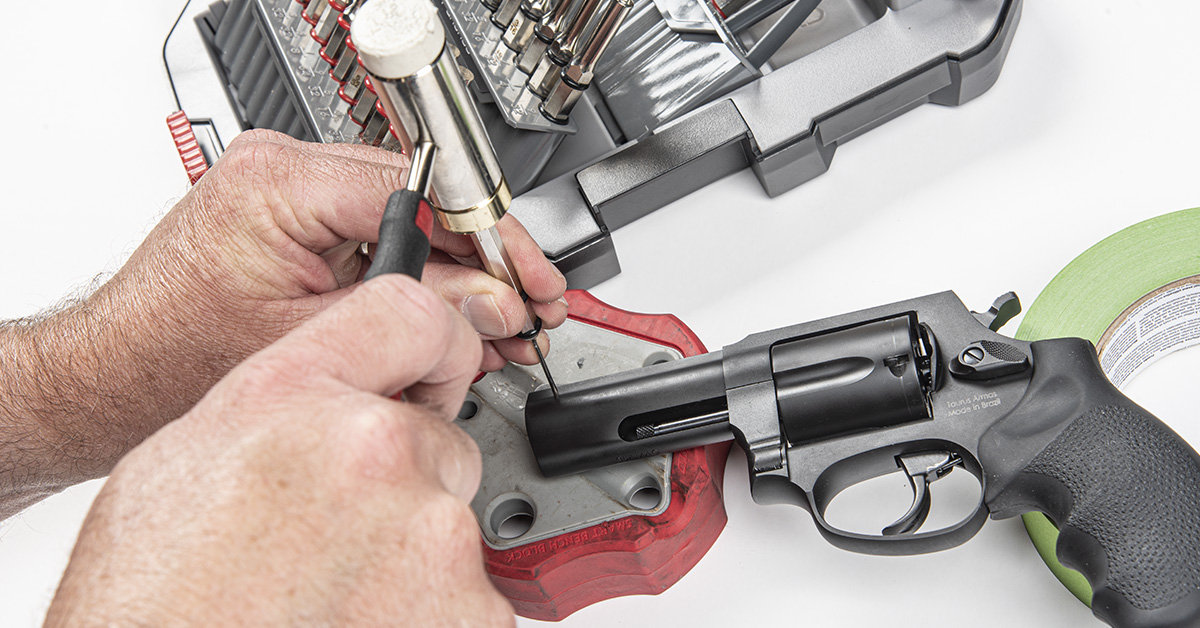
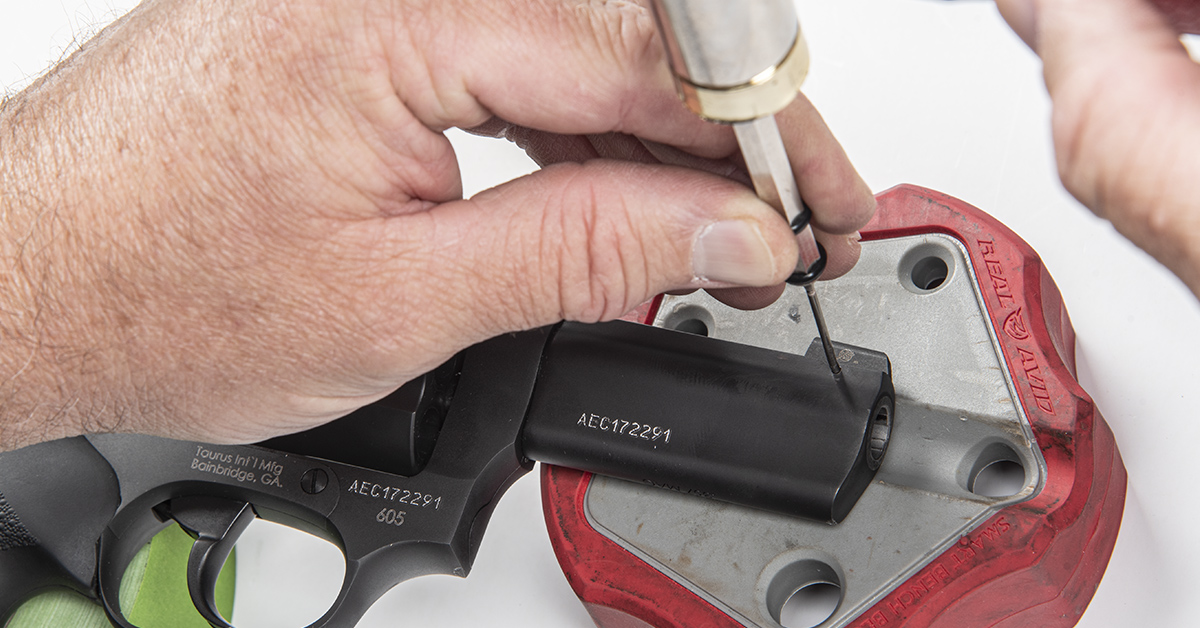
Begin by removing the factory sight. Here, I’m using a Real Avid bench block and roll of tape to provide a solid, wobble-free support for the gun. The sight is secured to the barrel with a 1/16-inch roll pin. Use a 1/16th-inch roll pin punch to knock out the pin from left to right.
The tolerances on the roll pin hole and sight are exceptionally close, and the smallest deviation in the punch diameter can cause the punch to hang up. Note that you may have to try different 1/16th-inch roll pin punches for the removal. Also, a slight interference fit between the roll pin hole and the punch may require some twisting and pulling to remove the punch from the barrel once the pin is free. Just be careful not to bend or break off the punch in the process.
Be sure not to lose the factory roll pin. It will be reused to install the new sight.
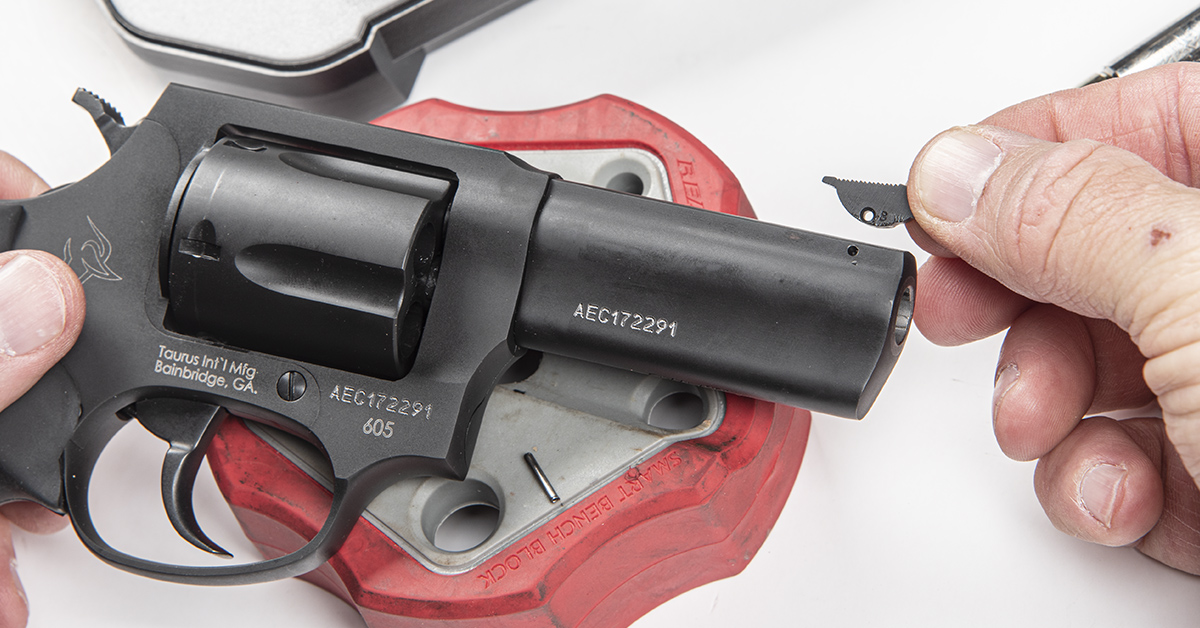
Once the roll pin is out, the factory sight simply lifts out of its slot in the barrel.
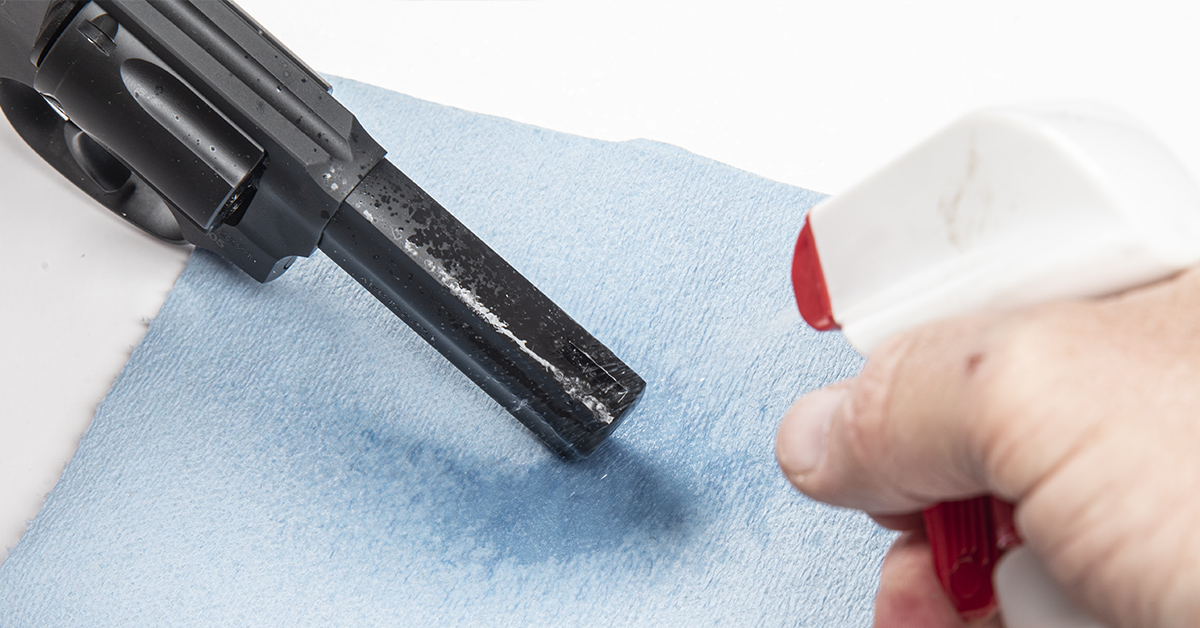
In preparation for the adhesive, use denatured alcohol to remove any oils or grease from the sight slot.
Any oil will prevent the adhesive from doing its job.
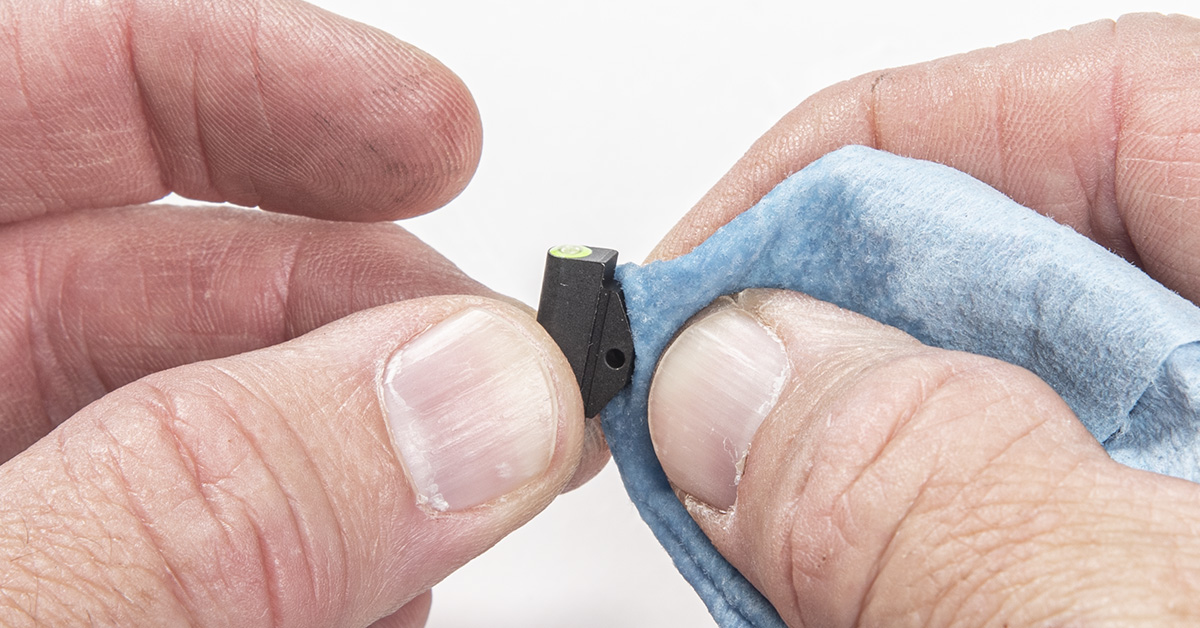
It is also a good idea to clean the sight base with denatured alcohol.
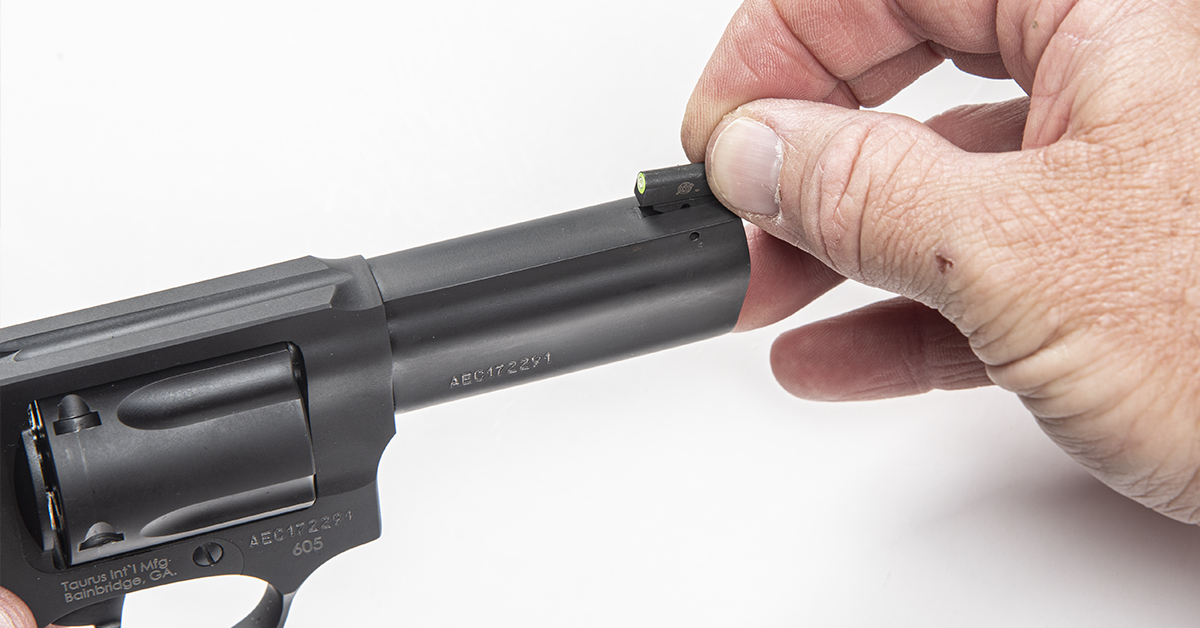
Trial-fit the sight onto the barrel. Mine fit perfectly in place. The included instructions provide guidance on how to modify the sight if there are fitment or alignment issues. With the sight on the barrel, check to ensure there is a clear path for the roll pin. I like to insert a punch through the barrel and sight roll pin holes at this time to ensure everything lines up correctly.
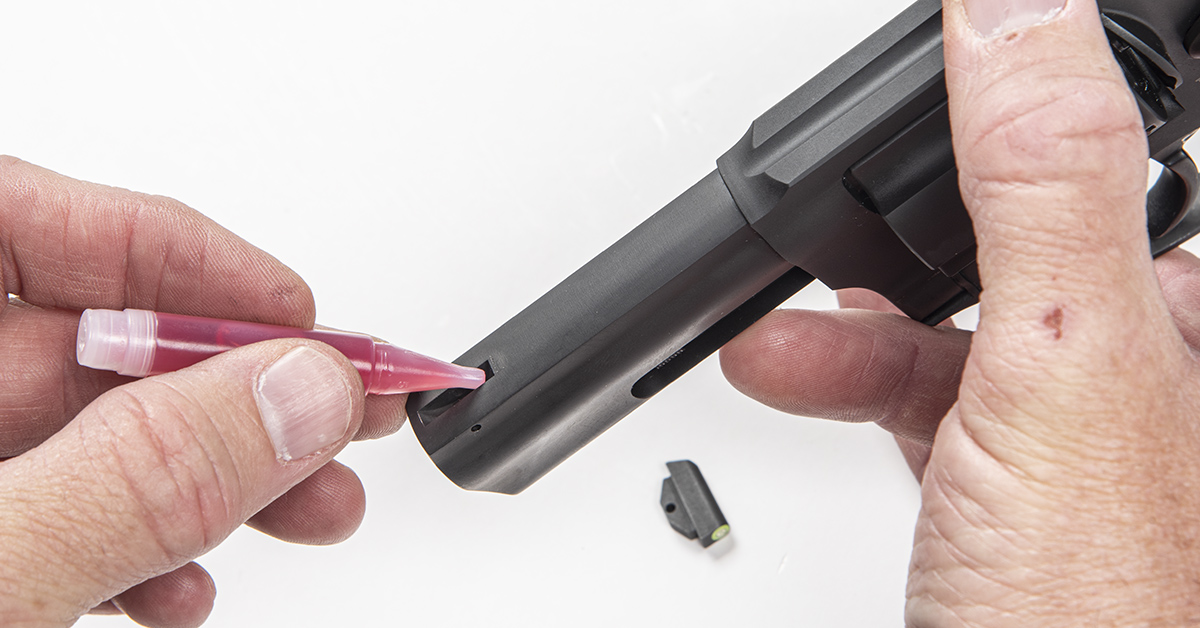
After the trial-fit, apply a couple drops of the included adhesive in the barrel’s sight slot.
Install the sight onto the barrel, again making sure that the roll pin has a clear path through the barrel and sight.
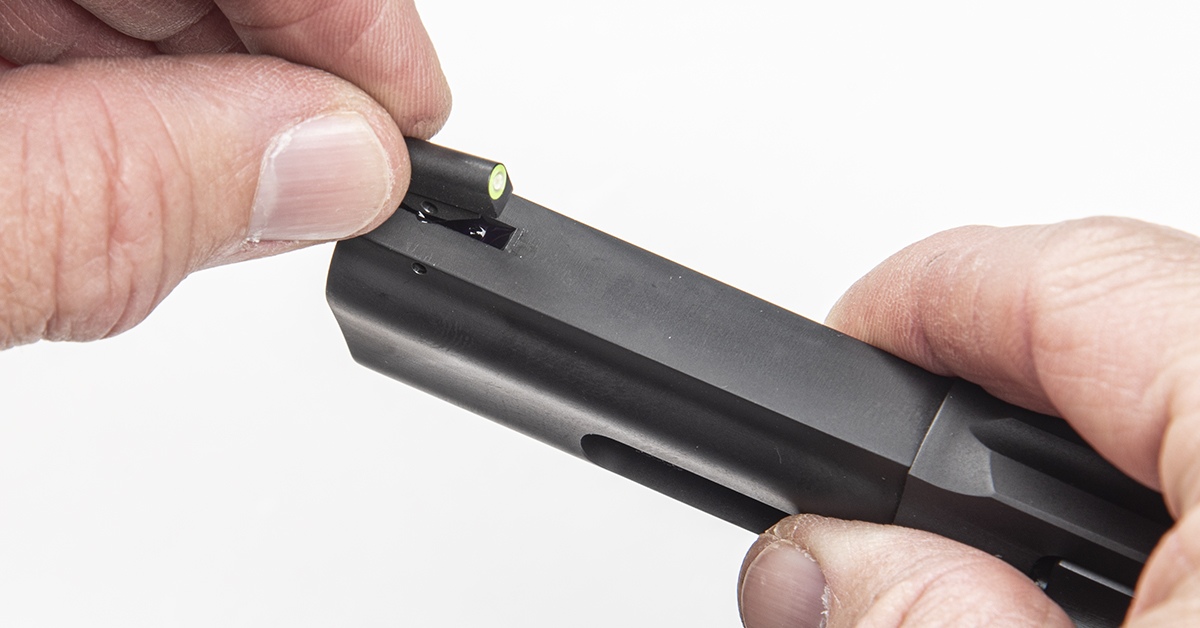
With the sight aligned in the barrel, reinstall the original roll pin with a roll pin punch, working right to left. Be sure to seat the roll pin evenly in its slot.
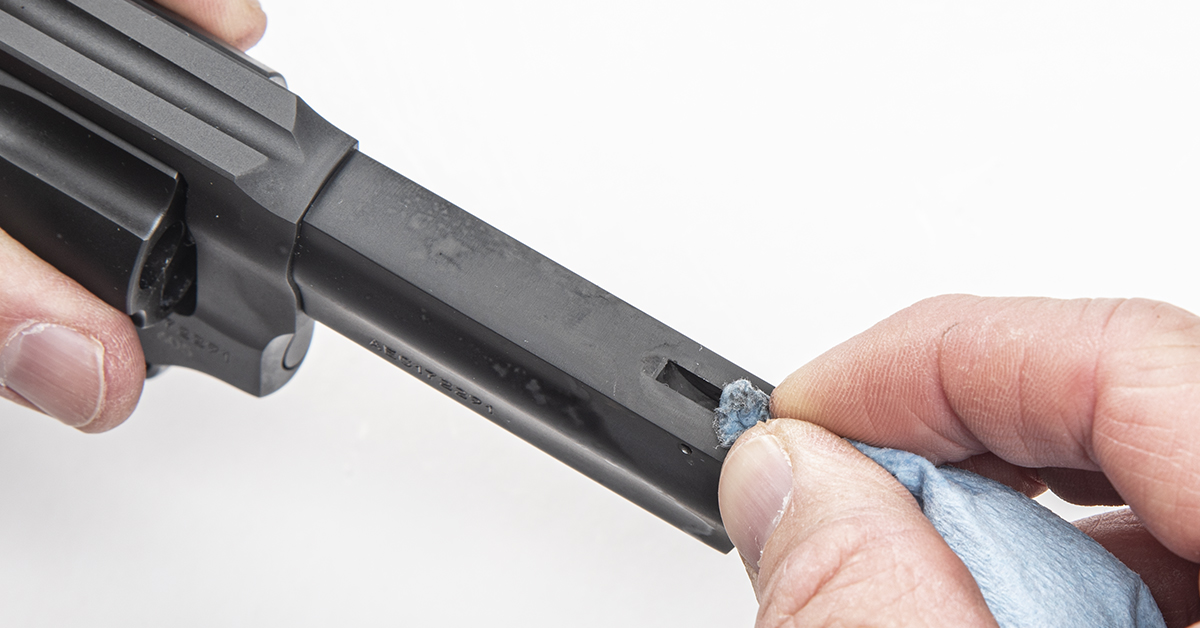
Use denatured alcohol on a shop towel to remove any adhesive outflow.
Spring Swap
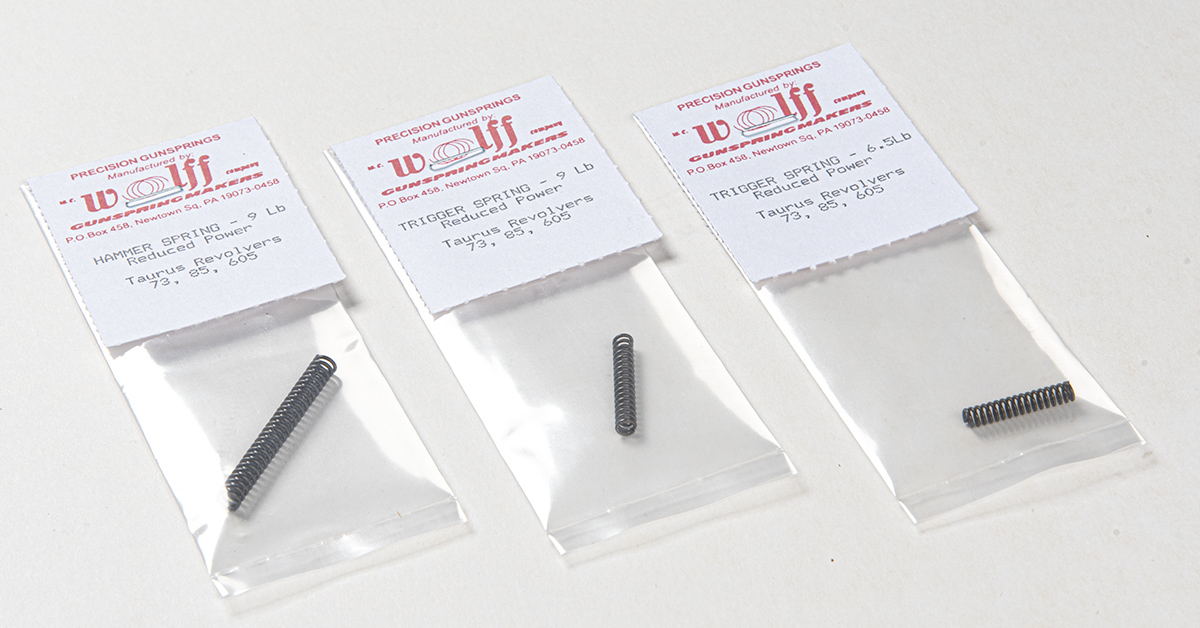
Wolff Gunsprings offers their Shooter’s Pak of reduced power springs for Taurus small-frame revolvers, PN# 30151. This kit contains a9-lb. hammer spring, a 9-lb. trigger spring, and a 6.5-lb. trigger spring.
According to Wolff Gunsprings, the factory mainspring is 11 lbs. and the trigger return spring is 14 lbs. The combination of the two on my 605, as it came from the factory, exceeded the 12-lb. limit on my Lyman trigger scale for double-action pulls. It wasn’t overly stiff for me, but I certainly welcomed a lighter pull and hoped the Wolff springs would do the trick.
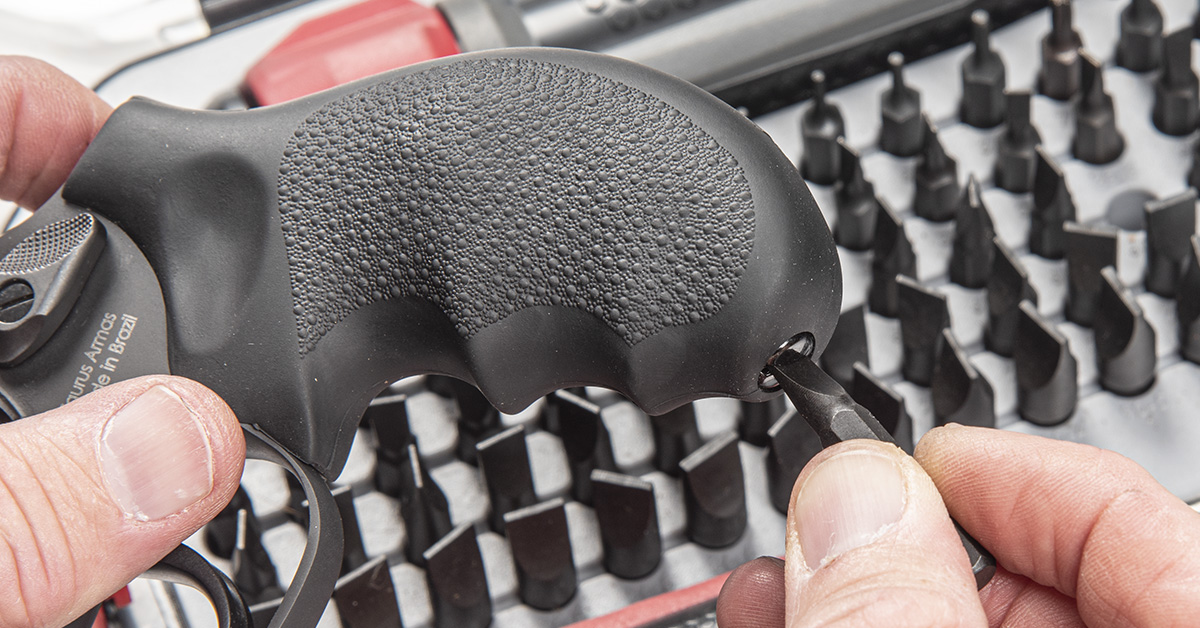
Changing the springs begins with removing the grip. This varies with the gun’s grip option. The Hogue grip secures with a nut and screw assembly. The standard Taurus compact grip uses a large roll pin. Wood handles have a transverse screw.

Whichever grip your gun has, removal is simple enough: remove the retainer and pull the grip off or away from the frame.
The Hogue grip uses this retained nut and a loose-fit roll pin, which is removed for convenience.
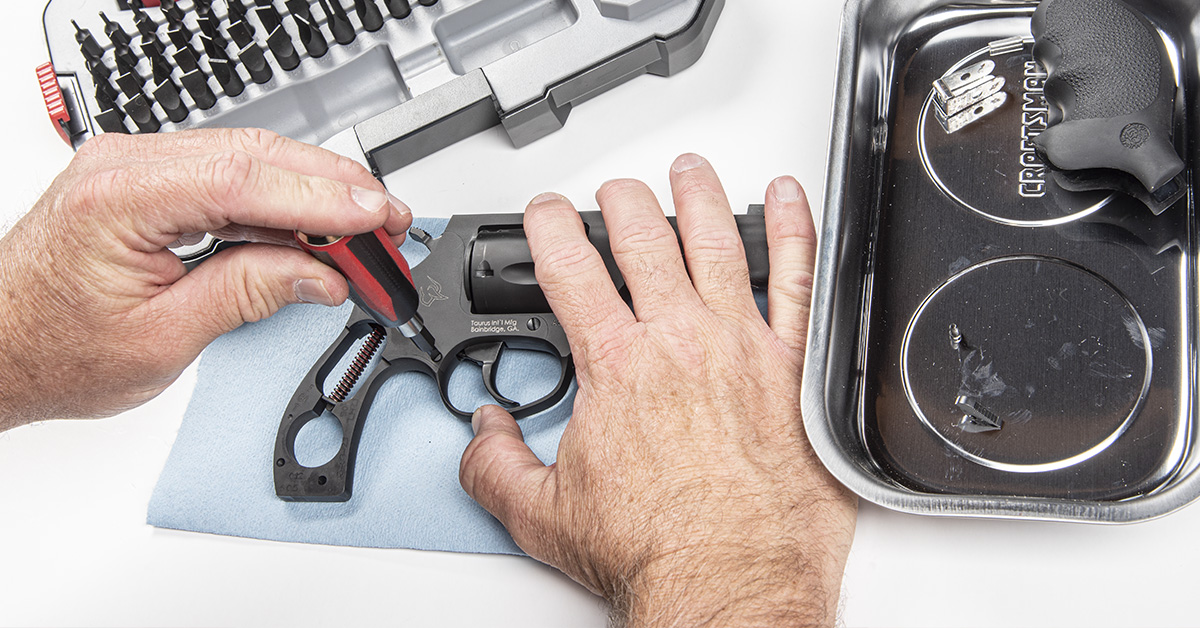
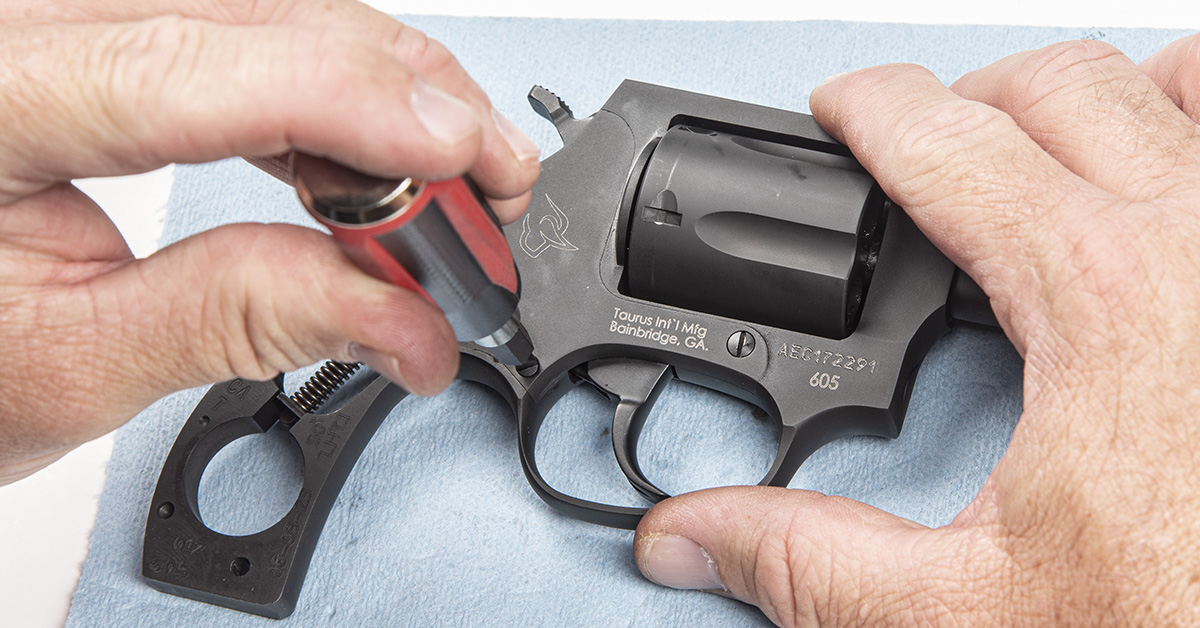
From a hollow-ground bit set, find the bit that best fits the slot heads of the two side plate screws and the yoke screw. Be careful when unscrewing these that you don’t slip and scratch the gun’s finish or deform the screw heads. These screws are generally not difficult to remove as not a lot of torque is used to install them. If you find yours are difficult to turn, apply a few drops of Kroil to the screw heads and let it sit for 24 hours so the Kroil can seep down into the threads and try again.
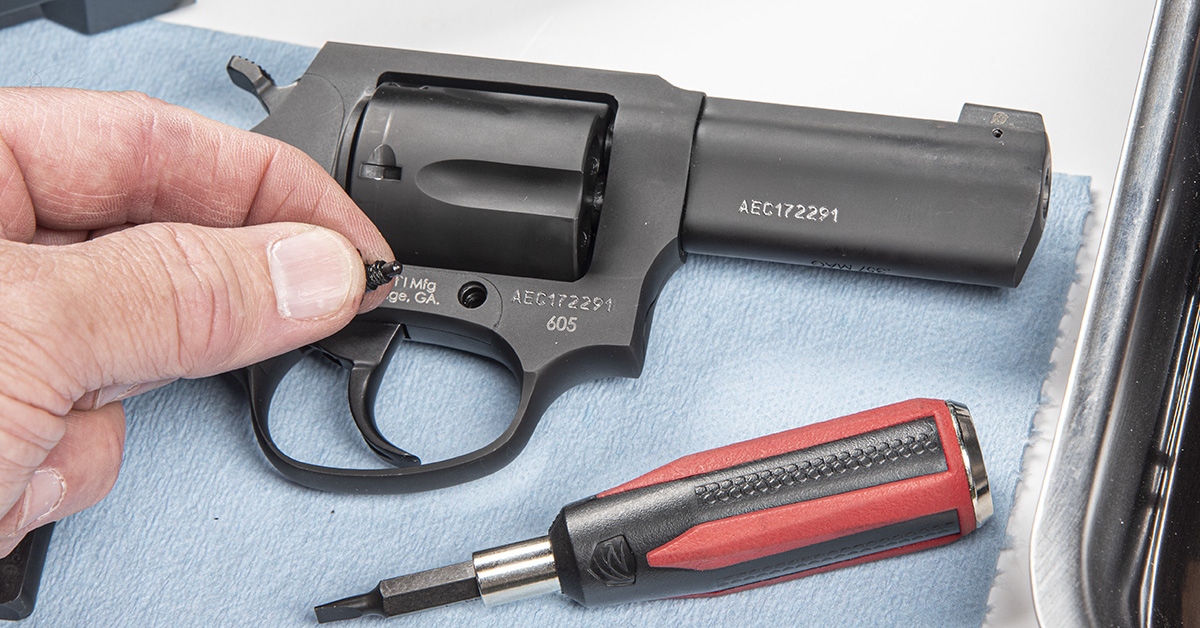
The yoke screw found below the cylinder is larger than the two side plate screws and contains a spring and pin. Be careful not to lose the spring and pin, as they can fall out of the screw shank.
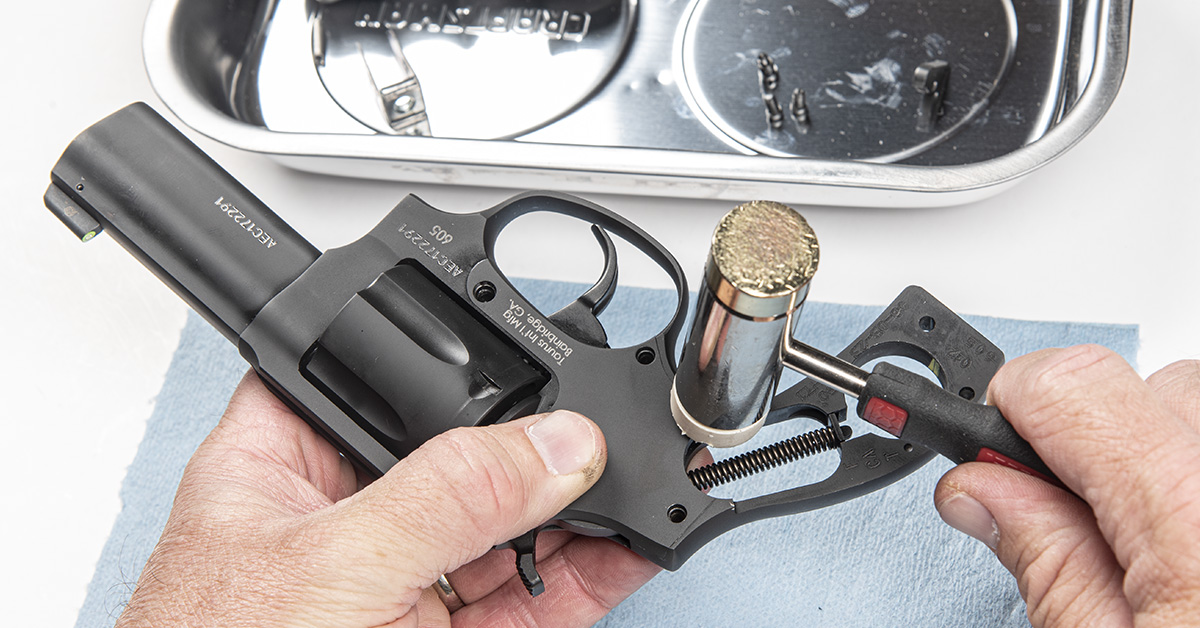
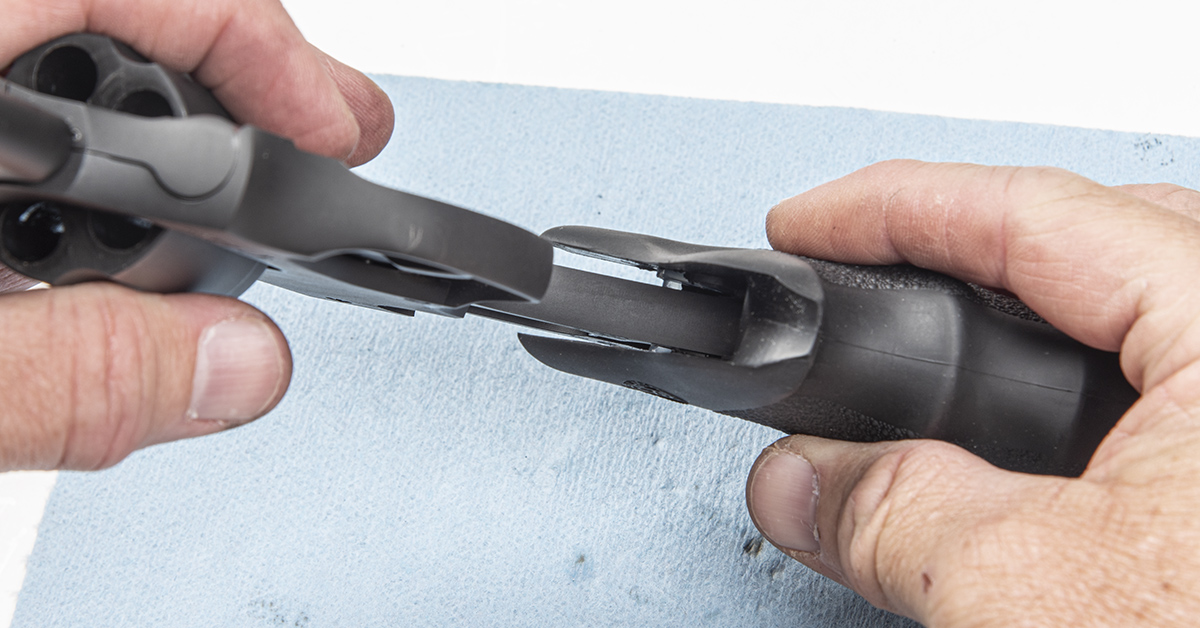
With the yoke and side plate screws removed, hold the gun in your hand and tap the handle with a rubber or nylon hammer face. Repeated tapping around the handle will allow the side plate to vibrate out of its position in the frame. Do not attempt to pry the plate off with a tool! The tolerances are too tight, and you will end up damaging the plate and/or frame.
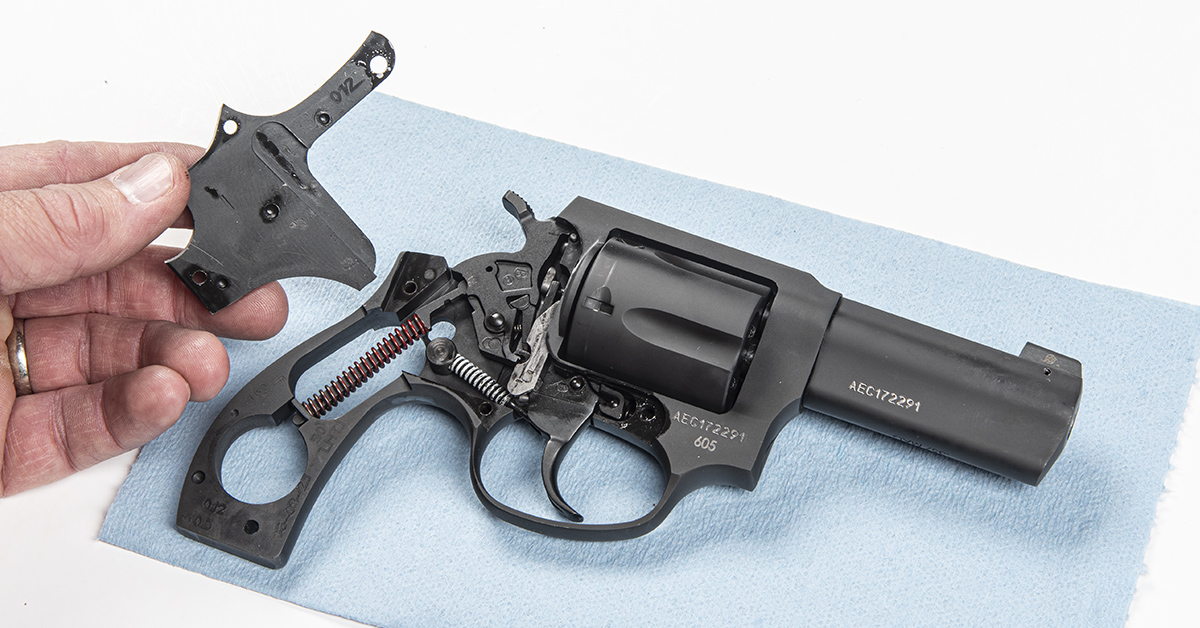
Once free, set the side plate aside to prevent any scratches or dings while you work.
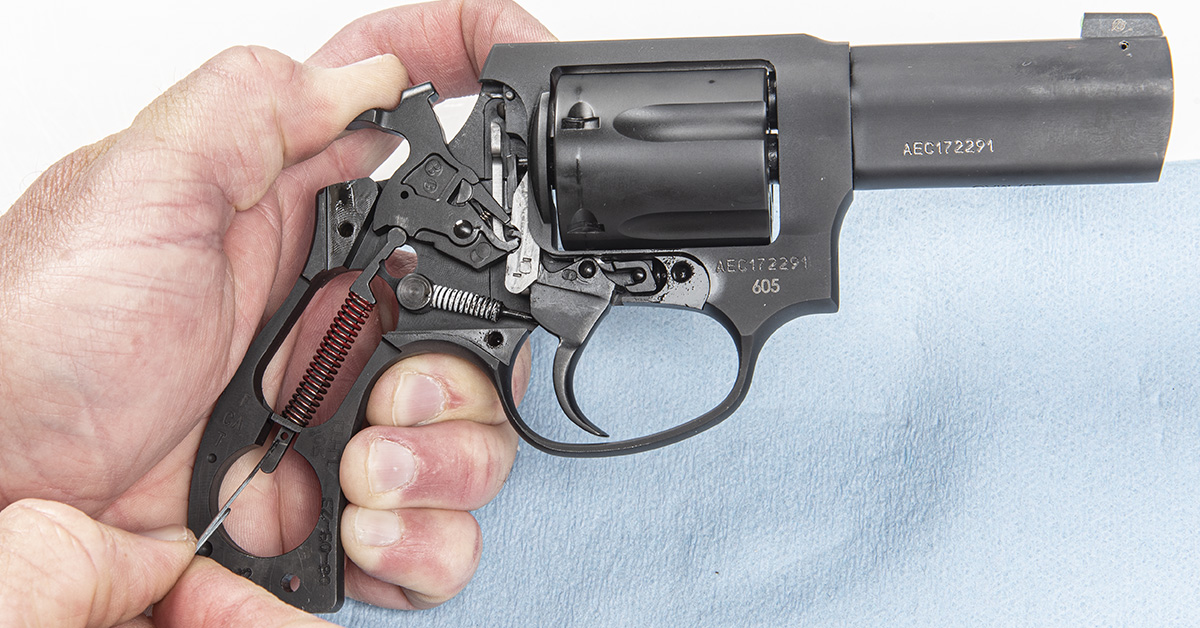
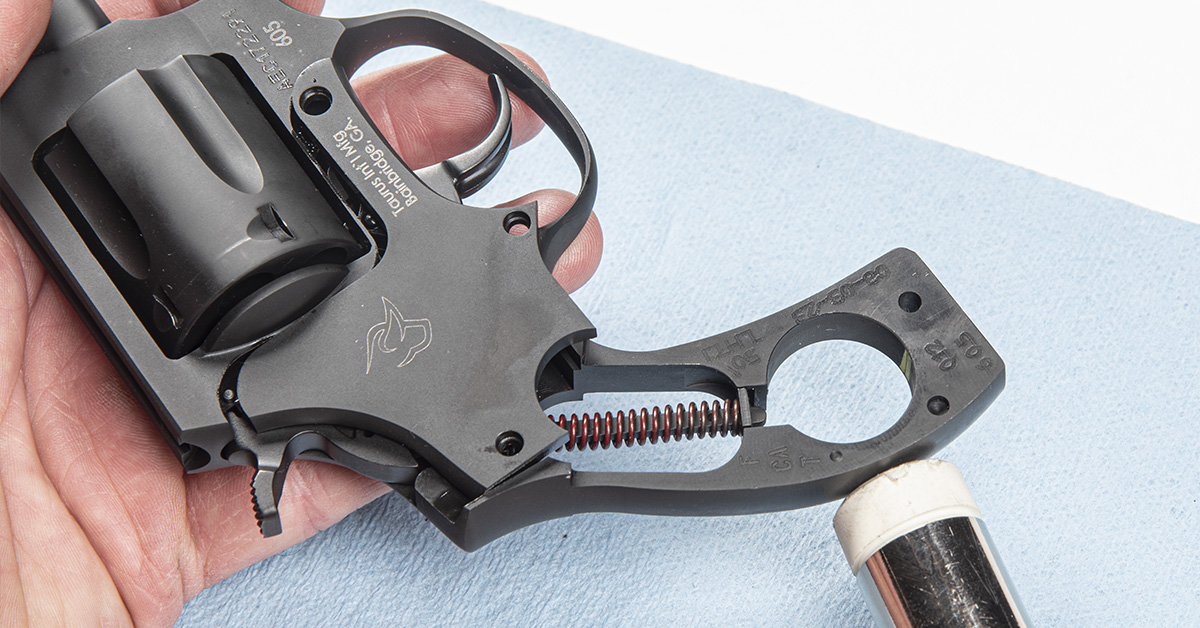
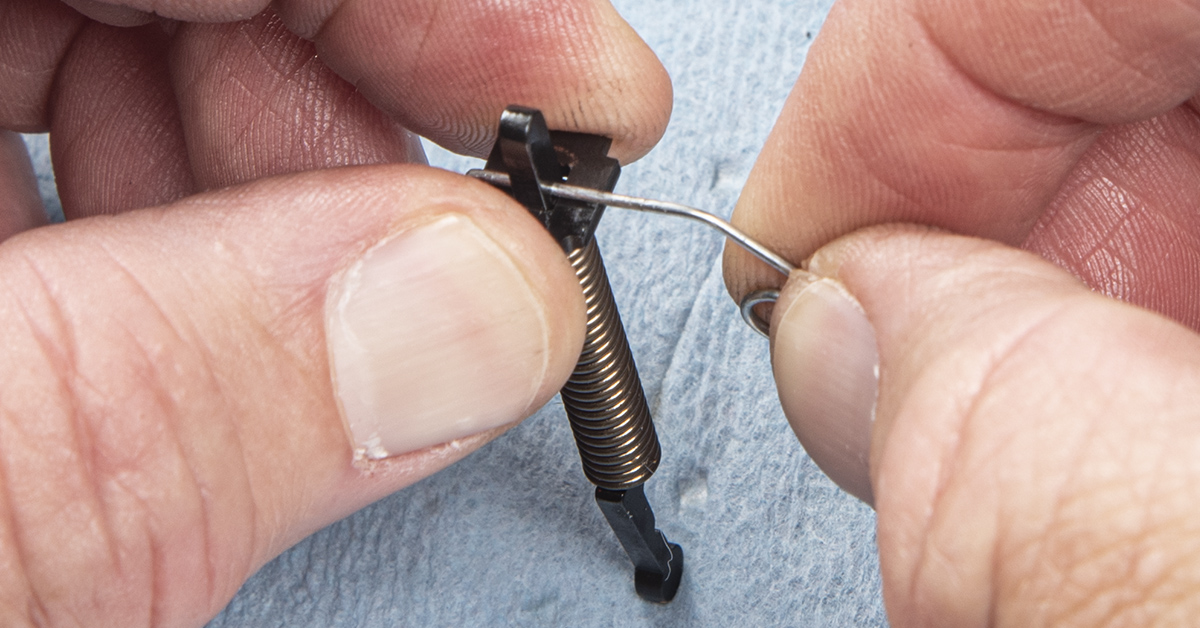
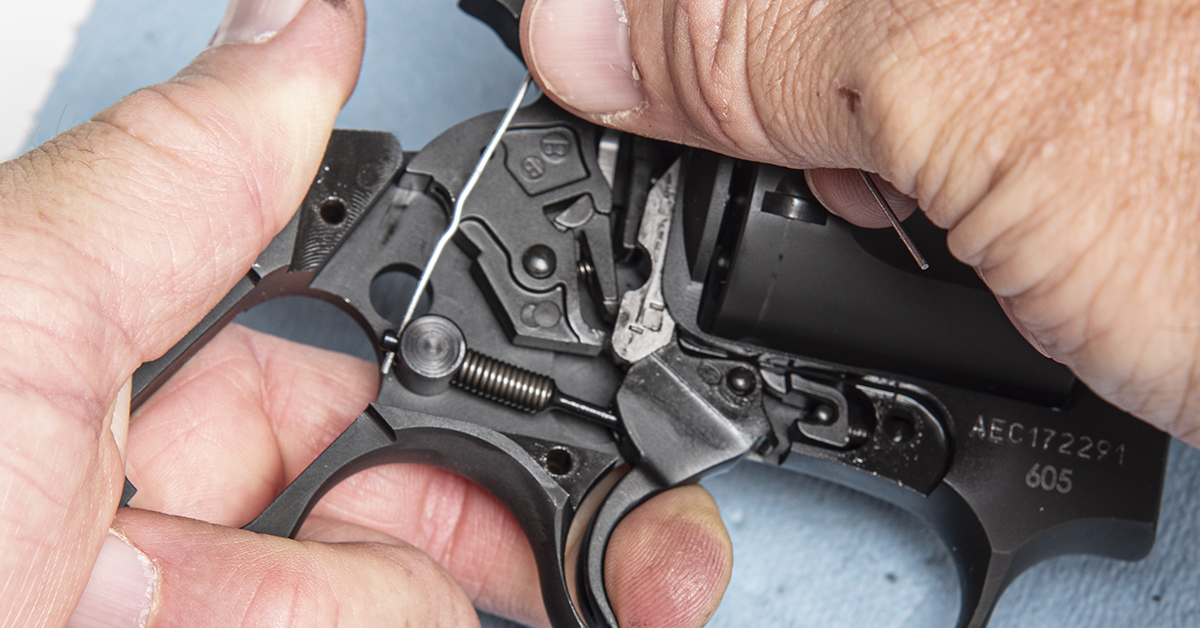
Step one is to remove the mainspring assembly from the gun. To do this, you will need a straightened paper clip. Pull back on the hammer until the small hole near the bottom of the mainspring center pin is below the mainspring plate. Once the hole is exposed, insert the end of the paper clip through the hole and move the hammer forward.

With the hammer forward, lift the mainspring out of the frame.
While maintaining control of the mainspring, push down on the mainspring plate until you can remove the paper clip. Note: always wear safety glasses when working with springs under pressure!

With the paper clip removed, relax the mainspring and remove it and the mainspring plate from the mainspring center pin.
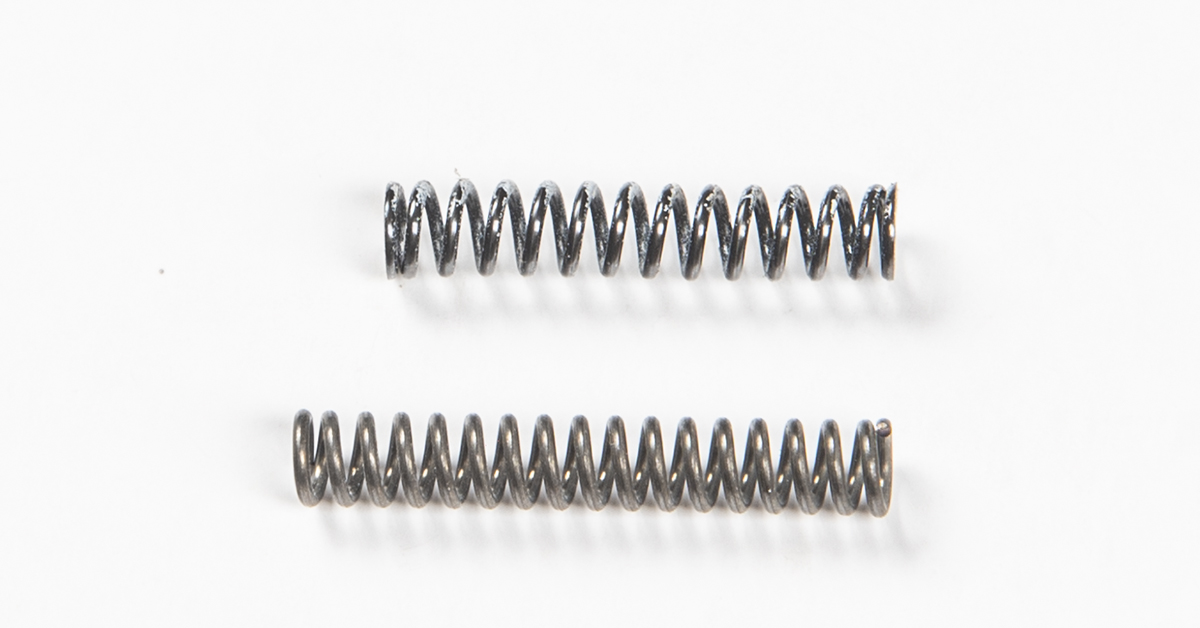
The new Wolff mainspring (below) is the same length as the original mainspring (top). Notice, though, the difference in the wire diameter and the coil density. When installing replacement springs in a revolver, some trial-and-error may be required to ensure the new springs do not bind under compression and prevent full movement of the hammer and trigger. If this occurs, it is necessary to incrementally trim coils from the spring (one-quarter to one-half coilat a time) until there is no binding.
Lightly lubricate the mainspring center pin, mainspring, and mainspring plate.
Reassemble the mainspring assembly in the reverse of disassembly. Again, this spring is under pressure, so be sure to wear safety glasses and maintain control of the spring.
Before installing the mainspring plate, you may notice that one side of the plate is flat and the other side has slightly contoured edges. The side with the contoured edges should face the spring so that the flat portion correctly seats in its pocket in the frame handle.
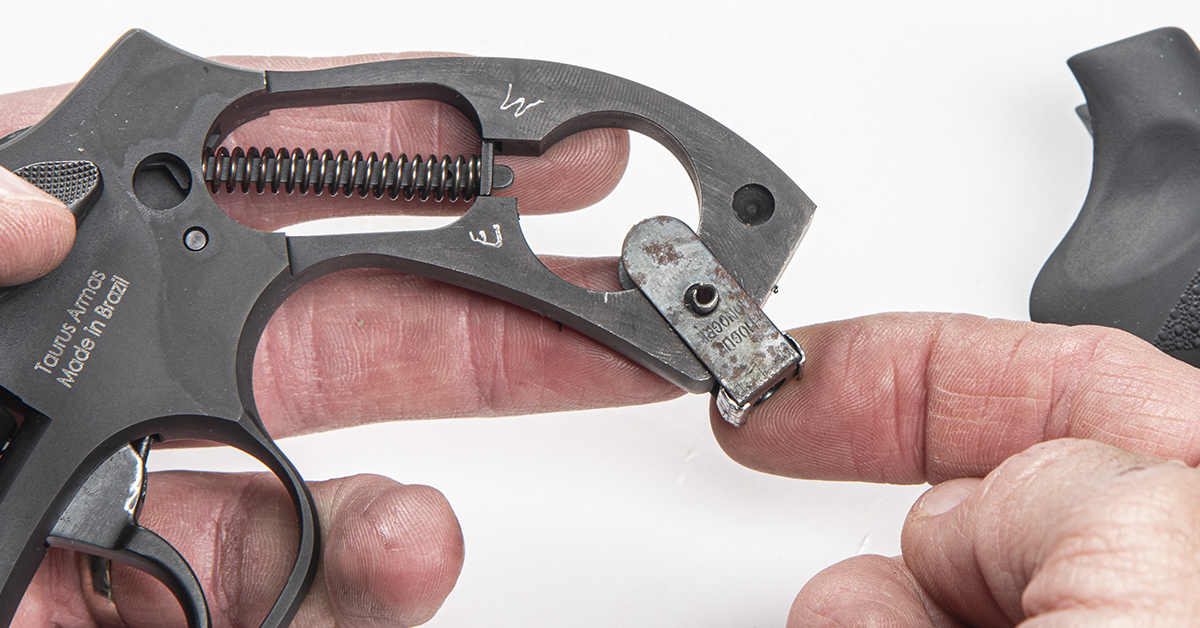
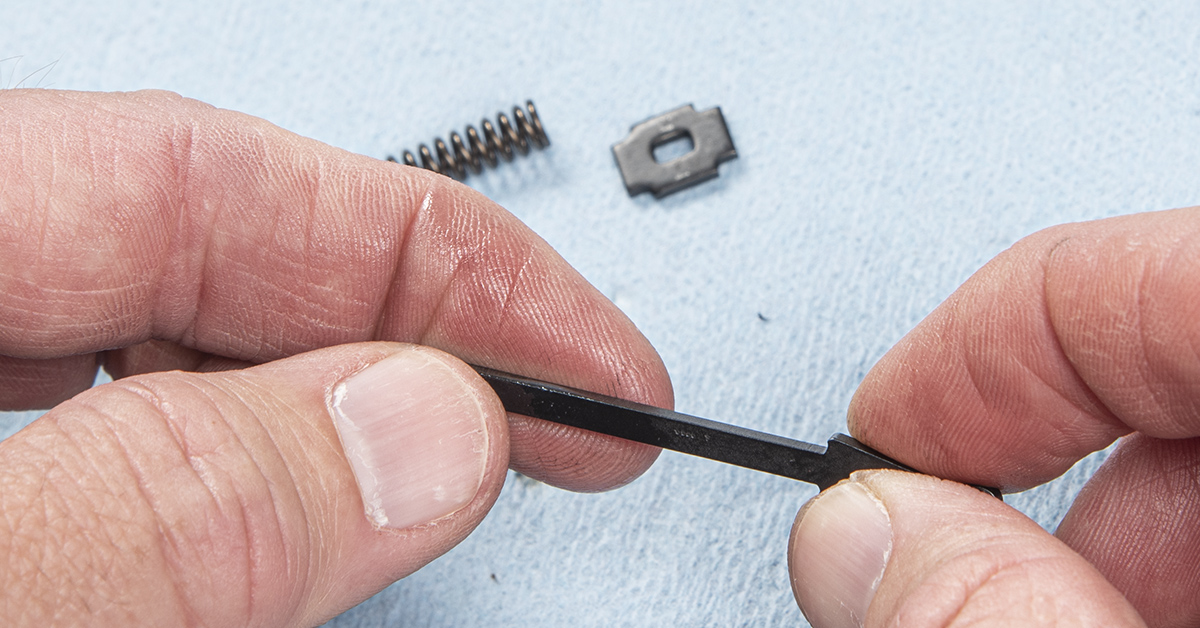
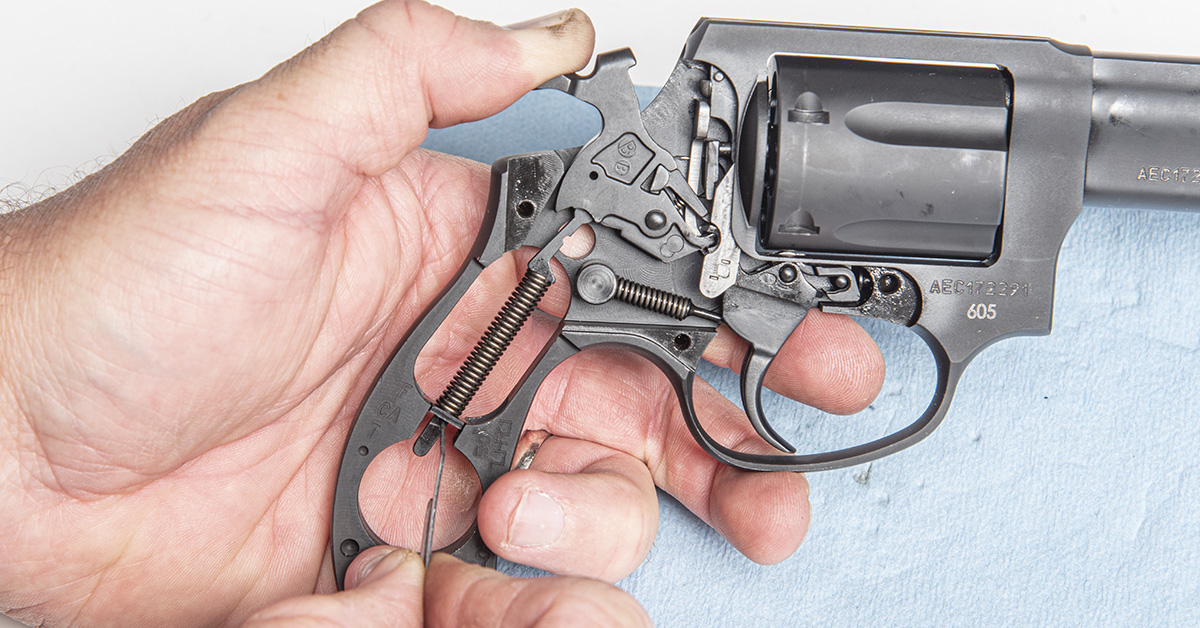
Next is removal of the trigger spring assembly. Pull back on the trigger until the small hole in the trigger spring center pin is exposed behind the trigger spring swivel. Once exposed, place a paper clip through the center pin. With the spring captured under compression, move the trigger forward and lift out the trigger spring assembly. It may be necessary to push the spring swivel out of the frame with an appropriately-sized punch from the opposite side of the frame.
Assembling and disassembling the trigger spring assembly is the most difficult part of this project because the parts are small and the spring is quite stiff. Disassemble by pushing down on the spring swivel until you can remove the paper clip. Note the orientation of the swivel. While maintaining control of the spring, allow the spring to decompress and then remove the swivel and spring from the trigger spring center pin.
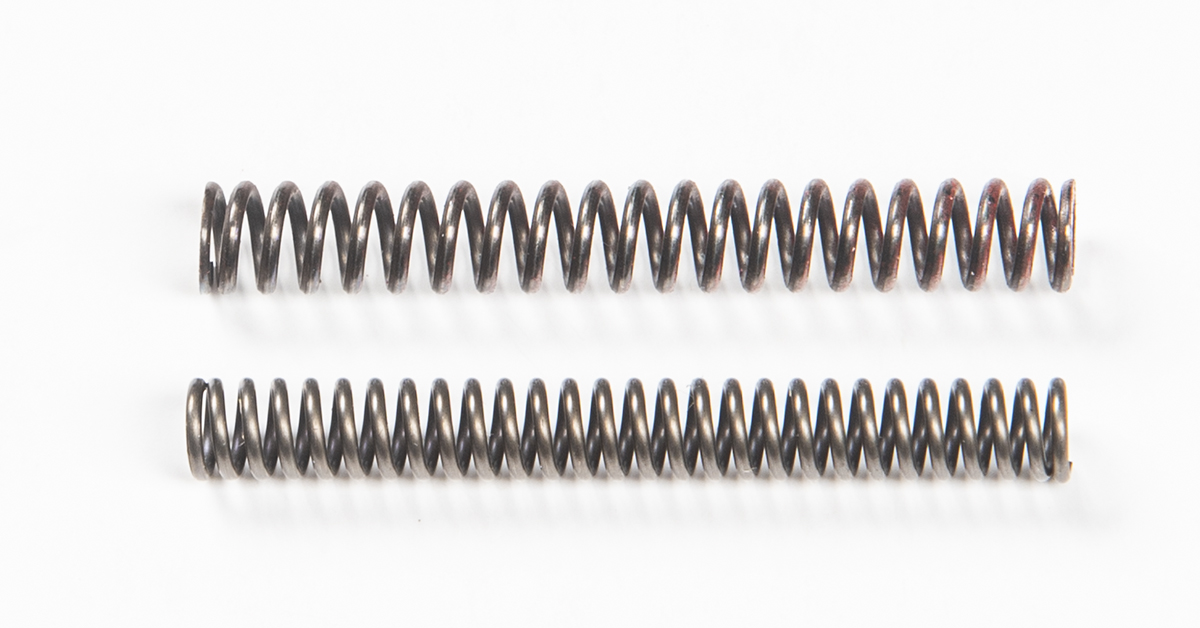
I opted to install the 9-lb. trigger spring (below), which, as you can see, is longer than the factory trigger spring and has slightly tighter-wound coils.

Using a pair of wire cutters, I trimmed three coils from one end of the new spring so that the length matched that of the original spring.

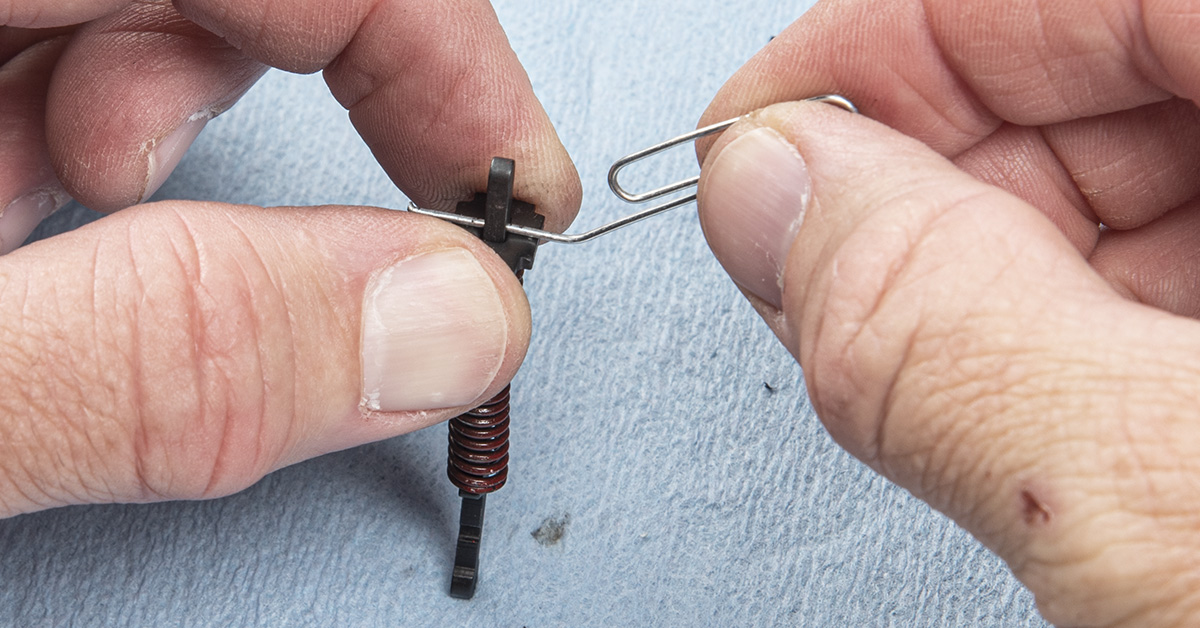
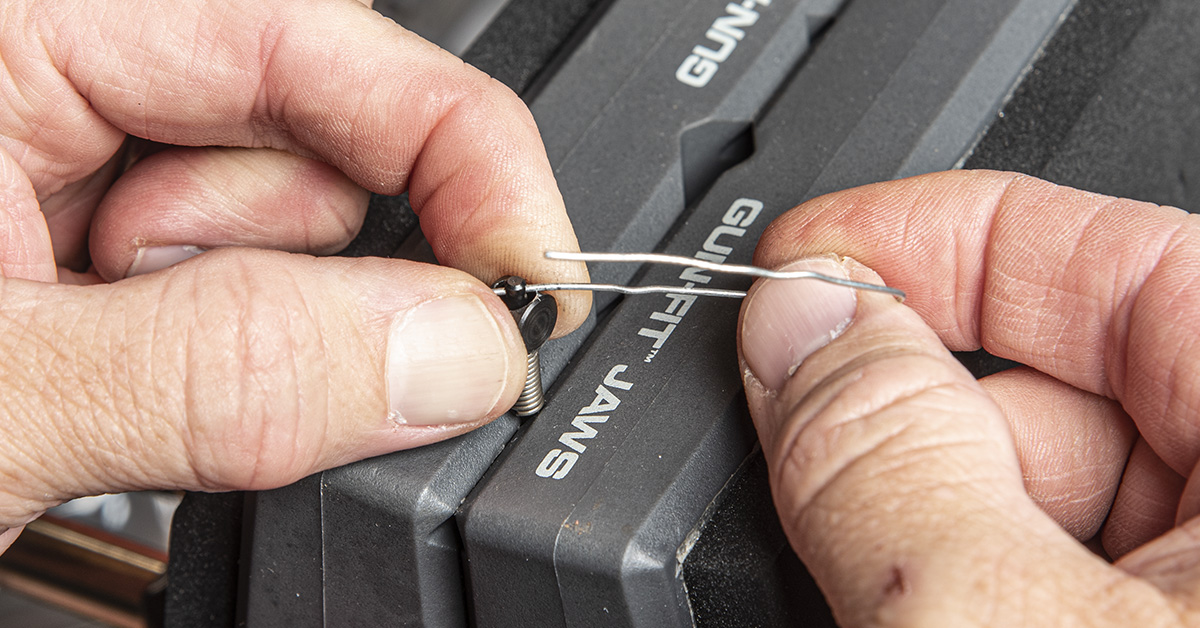
Here is where things can get frustrating: reassembling the trigger spring assembly. That spring is mighty stiff under compression, and the spring swivel doesn’t provide much finger purchase. Fortunately, my Real Avid Master Gun Vise proved ideally suited to the task because the vice’s reversible polymer sleeves perfectly accommodated the spring center pin. These allowed me to clamp onto the center pin without damaging or deforming the ball end of the pin, which seats in the small pocket on the back side of the trigger.
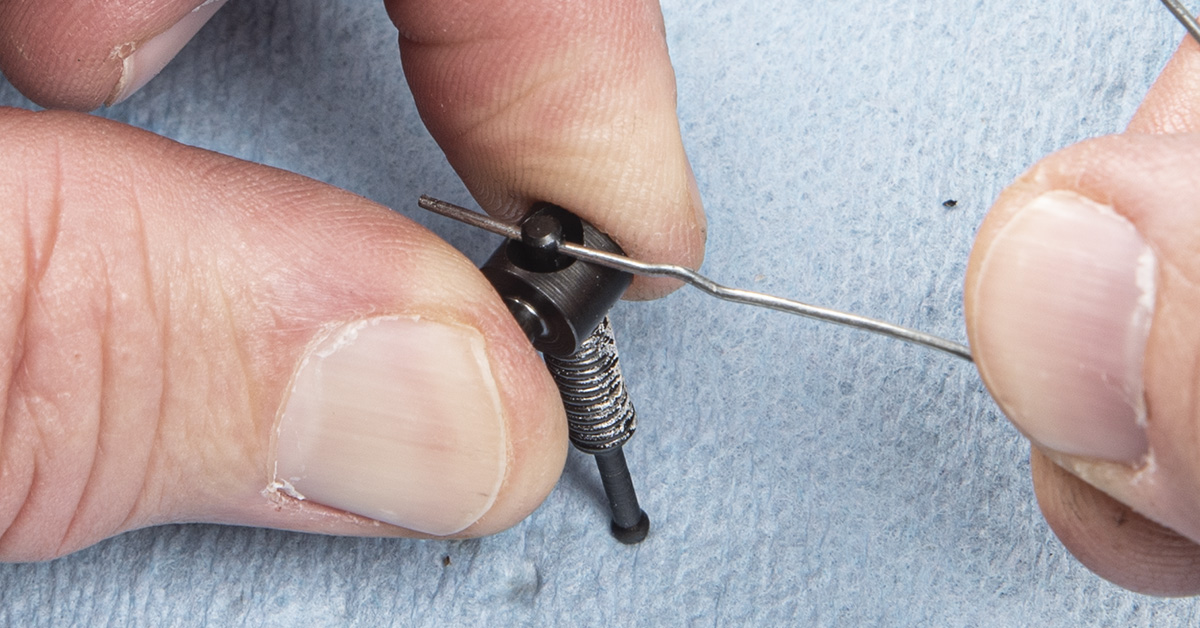
Note the orientation of the spring swivel. One side has a flat, recessed ledge (which goes toward the spring) and the other has a conical recess (seen here) that faces away from the spring. Be sure the spring swivel is in this orientation.
Next, compress the spring by pushing down on the swivel until the hole in the center pin is accessible. Once accessible, insert the end of the paper clip to capture the spring in its compressed position.
Here is where some additional trimming of the trigger spring may be required. Initially, I cut the new Wolff spring by three coils to equal the length of the factory spring. When I tried to install the spring swivel, the new spring bottomed out before I could insert the paper clip. I had to trim another coil and a half off the new spring before I could capture it with the paper clip. I did this same spring upgrade to my dad’s 856 revolver the next day with the same results — four and a half coils removed before I could capture the spring. The key to spring fitment is to go slow when removing coils, trimming 1/4 to 1/2 a coil at a time. You don’t want to shorten the spring more than is necessary.
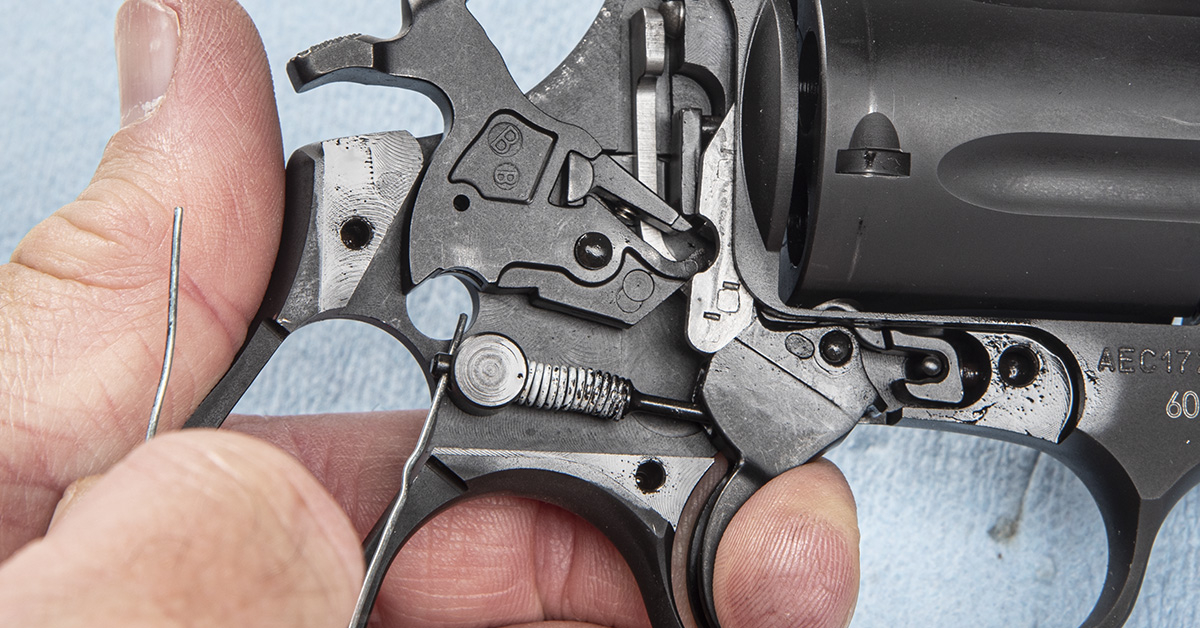
Reinstall the trigger spring assembly into the frame, making sure the swivel is seated flush in the frame and the ball end of the center pin is positioned in its socket at the back of the trigger, as shown. Once in place, squeeze the trigger until the center pin is back far enough so you can pull out the paper clip. Once the paper clip is out, allow the trigger to move forward.
Should you find that the trigger cannot be pulled back far enough to free the paper clip from the center pin, the spring is too long and must be trimmed. Again, trim in small increments until the issue is resolved. This is the trial-and-error part of this upgrade.
With the trigger spring assembly in place, reinstall the mainspring assembly in the reverse of disassembly. The round end of the center pin goes into its slot in the back of the hammer as shown while the mainspring plate seats squarely in its pocket in the handle. Pull back the hammer to compress the mainspring until the paper clip can be removed from the center pin. Once removed, allow the hammer to move forward.

Without disturbing or mis-aligning any trigger and hammer components, carefully manipulate the hammer and trigger to ensure that the mechanisms are working throughout their range of motion (cocking and firing) and that the trigger spring and mainspring are not binding. If you detect any binding (meaning the hammer cannot be cocked or the trigger cannot be pulled back enough to break the sear and allow the hammer to fall), then one or both springs must be further trimmed. If this preliminary function check reveals no problems, the side plate can now be reinstalled.
Carefully place the side plate into its position on the frame. The top of the plate near the hammer and the front of the plate forward of the trigger should be engaged in the frame while the bottom and rear portions (behind the trigger guard and at the handle) will likely be catching the edge of the frame. With the plate in this position, press it firmly against the frame while tapping the edge with a rubber- or nylon-faced hammer. A few easy taps should move the plate flush with the frame. If you feel the need to force the plate into position…STOP. You don’t want to damage the work piece. All it takes is gentle persuasion and a little patience if you are having trouble.
Reinstall the two frame screws and the yoke screw assembly (front) to secure the side plate to the frame. Be careful with the driver bit that you don’t damage the screw heads or finish. These screws should be firmly snug but not over-tightened.
Reinstall the grip in the reverse of disassembly to complete the project.
Trigger Pull Weight Reduction
Before installing the reduced power springs, I tested the trigger pull weight on my 605 using a Lyman digital scale for a 10-pull average. This was followed by the same test, post-spring install. The results are as follows:
- Stock Springs, Double-Action – No recording. Trigger pull weight more than 12 lbs. (Lyman scale maxes out at 12 lbs.)
- Stock Springs, Single-Action – 5 lbs., 5.2 oz.
- Wolff Springs, Double-Action – 8 lbs., 2.3 oz.
- Wolff Springs, Single-Action – 3 lbs., 6.7 oz.
The spring upgrade proved significant, with somewhere around a 4-lb. reduction in double-action pull weight. That’s just about perfect for me on a defensive handgun — not too light, but light enough for good trigger control and point-of-aim, point-of-impact performance. Single-action pull weight, while a non-issue for defensive purposes, is exquisite for slow-speed target shooting. Overall, a great investment for 15 minutes of work and $7.99 in parts.
One thing to keep in mind when altering spring rates is that there is no free lunch. The mainspring is responsible for driving the hammer forward hard enough that the firing pin will strike the cartridge primer with sufficient force to reliably ignite the primer. As you reduce the mainspring spring rate, you also reduce the striking power of the hammer. Generally, you will have no issues reliably firing primers with the Wolff reduced power mainspring, but you might encounter some ammo brands with harder or thicker primer pockets that won’t allow for reliable ignition with each hammer strike. This is why it is important to test your preferred ammunition following a spring swap to ensure the gun will always fire.
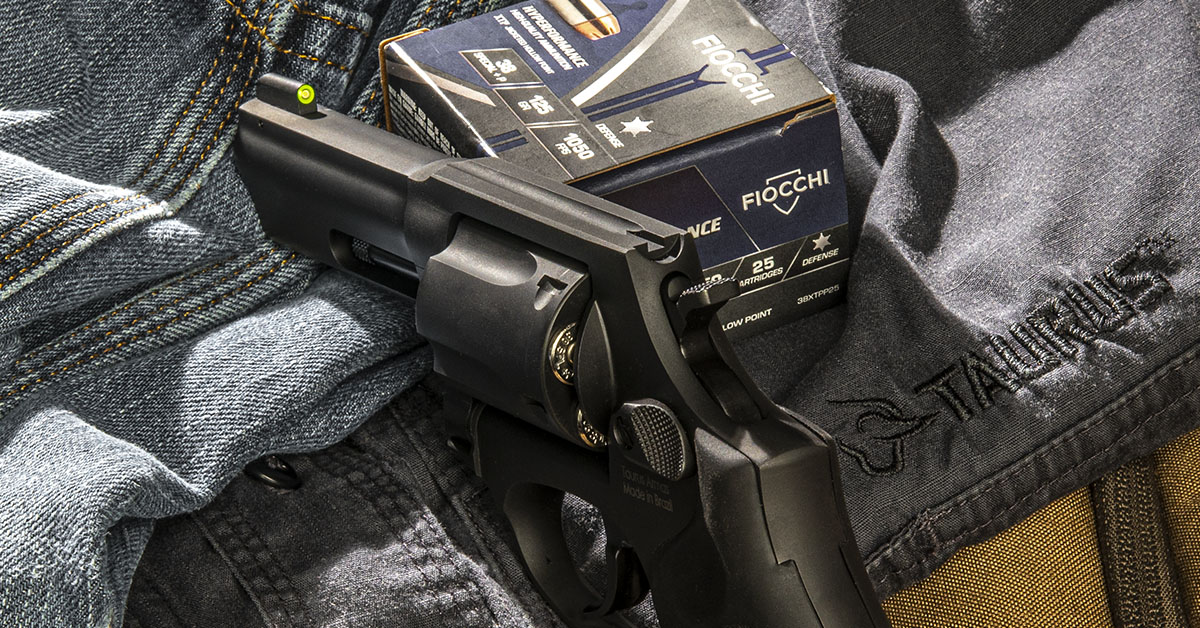
Revolvers will likely never again hold a dominant position over semi-auto pistols, but for many shooters and personal defense practitioners, compact and lightweight wheel guns like the Taurus 856 and 605 series have their place and they fill a niche in the everyday carry world. By lightening the trigger pull weight and adding a reliable, high-visibility, 24/7 sight like the XS Sights Standard Dot, you can raise the custom performance notch a few steps higher.