For a simple practice routine designed to reinforce several defensive handgun skills, the Step Back Drill is hard to beat
by Richard Mann
There are countless defensive handgun drills you can use to improve or evaluate your skills. The variety exists partly because some drills focus on different skills and partly because shooting the same drill can get monotonous. Monotony might be boring, but repetitiveness helps us learn.
I’ve been seriously shooting defensive handguns as a professional since I became a police officer in 1992, which is about the same time I also started competing. Since then, I’ve used many different drills. Recently, though, I’ve pretty much settled on the Step Back Drill almost exclusively because of how well it incorporates the core defensive handgun skills.
There are essentially seven core defensive handgun skills you need to learn, practice, and as much as possible, master. These include safety, maintenance, stance, grip, presentation, trigger control, and handgun manipulation. Regardless of the drill, handgun maintenance matters because handguns that don’t work make it difficult to learn. And, of course, safety matters any time you’re working with any firearm. What the Step Back Drill is especially good for is developing and evaluating the other five core skills as they relate to the universally standard response of two shots delivered to the center mass of a threat.
Drill Description
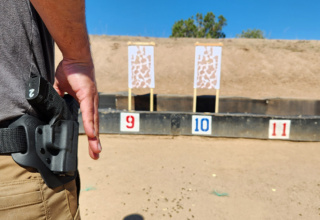
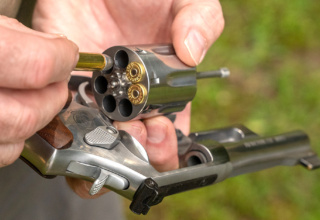
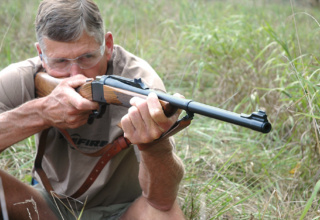
For the Step Back Drill, you need an eight-inch circle target, a shot timer, and a range where you can shoot from five to 25 yards. Naturally, you’ll need your defensive handgun, extra magazines or speed loaders, ammunition, and a good holster. Ideally, you run this drill from concealment, but beginners should start from an open holster.

There are five stages to the drill and two shots in each stage. You fire the first stage from five yards, and the goal is to draw the handgun and get two hits on an eight-inch target. Five yards is a bit close to shoot steel, so at this distance, a paper target is advisable. Stages 2, 3, 4, and 5 are identical to stage 1 except you shoot them from 10, 15, 20, and 25 yards, respectively. You use the shot timer to time each individual stage — each two-shot string — and then add the five times together.
Scoring the Drill
If you miss any of the 10 shots, you fail. If you get all your hits, you simply add the five times together. The faster the total time, the better. The overall goal is 10 hits in less than 20 seconds. Broken down by stage, optimally, you’d get the two hits at five yards in less than two seconds, the hits at 10 yards in less than three, both hits at 15 yards in less than four seconds, and your hits at 20 and 25 yards in less than five and six seconds.

Unlike some drills or qualifications with different performance levels, it does not apply to the Step Back Drill. Faster is better, but the overall drill par time takes into account shooters using a harder recoiling pistol like a .45 Auto instead of a 9mm, or a revolver instead of a semi-automatic. It’s simple: beat the 20-second par time and you pass, and the faster your time the better you perform.
Reloads

Reloading your defensive handgun is part of the handgun manipulation skill, and a comprehensive drill should include a reload. If you’re using a handgun with less than a 10-round capacity, you could leave a reloading mandate out of the drill because to successfully complete the drill you’ll have to reload at some point. With this method, ammo management simply becomes integral to the drill and your responsibility. The other method is to mandate one reload between the first and second shot on one of the five stages.
Shot Timers

A shot timer is indispensable for this drill, but effective shot timer use is important. During training, use a shot timer to see how long it takes you to perform a stage correctly before you advance to a stage at a longer range. It’s not a race against the clock; it’s used to establish a metric of your performance. For evaluation, use the shot timer to see how fast you can complete a stage. Although the distinction between these two approaches is small, it’s important, and it is what separates training from testing or evaluation.
As a Training Tool

The great thing about the Step Back Drill is that it incorporates all five core elements of defensive handgun skill. From each distance, or stage, you must use a balanced stance, execute the proper grip, present the gun efficiently, control the trigger, and manipulate the handgun competently. Your hits or misses combined with what the shot timer tells you will allow you to diagnose the elements needing work, and this lets you isolate them for additional training, starting with dry fire and progressing to live fire. Keep detailed records of your performance so you can track progress and plan future training.

For example, if you miss the target, your trigger pull is substandard. If your first shot is slow, you need to work on presentation. If your second shot is slow, you need to work on recoil control. If you’re having trouble getting both hits in double the allotted time, you’re probably not using a balanced stance or a good grip. Also, because the drill incorporates different distances, it also necessitates shot cadence variation, which is a critical aspect of defensive handgun application.
As a Qualification or Skill Test

You can use the Step Back Drill as a qualification or overall skill test. If you feel you’re better than average with a defensive handgun, run the drill to see if you meet the standard. If you can, that’s great; you’re performing better than most law enforcement officers across the country. But it does not mean there’s no room for improvement. By careful analysis, you can evaluate your performance using information from the targets and shot timer and work to improve. If you cannot meet the standard, the answer is the same. Use the drill as a training tool, isolating, dry firing, and then live firing, while focusing on doing everything correctly.
Not Written in Stone
The key to working with any drill is to not act like it’s written in stone. Drills are merely tools to help you get better, so modify as needed. For example, you can add shots to each stage or even use two targets for each stage instead of one. If you’re smart, you’ll also include movement within each stage, either before, during, or after shooting, because it’s important to learn to shoot from a balanced stance that’s not static.

The beautiful thing about the Step Back Drill is it works as a foundational tool to build on as your skill increases. And it’s based on the time-honored premise that you can solve most defensive encounters with two fast and well-placed shots. I generally use this drill several times each week, practicing with my carry gun or with another handgun gun I might be testing. I’d suggest you give it an honest try to see how much it might be able to help you become better with your defensive handgun.
- Exploring the 25 Creedmoor - March 18, 2026
- Meet the 284 Winchester - February 18, 2026
- What is SAAMI? - January 14, 2026