Topdon expands its outdoor thermal lineup with the value-oriented, performance-proven TS006 thermal riflescope
by Rob Reaser
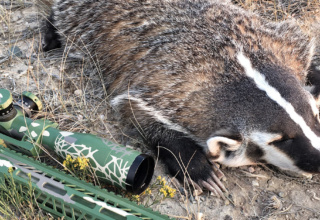
The time for serious coyote hunting is not yet nigh in my neck of the woods, but thinking about it and prepping for it is a year-round affair. This year, I wanted to switch the clip-on thermal scope on my coyote blaster to a mounted scope. And just when my thoughts were turning to those crisp, clear nights and sunset howling, I got the opportunity to acquire and test a new thermal scope from the folks at Topdon.
Topdon is a big player in the automotive electronics segment. They are primarily known for their diagnostic, battery service, and thermal imaging tools. Recently, the company has leveraged their experience in thermal imaging technology to produce thermal monoculars and now thermal riflescopes.
Last fall, we tested a budget-priced thermal monocular from Topdon called the TS004. For the price, the unit came well-equipped. So, when I heard that the company was introducing their first thermal riflescope, I raised my hand to do a bit of testing.
The TS006 thermal scope is one of two units Topdon has developed for the varmint hunting segment. The 35mm TS006 we’re reviewing here is the on-ramp model with an MSRP of $2299. If you want to step up your game even further, consider the TS006 Pro in 50mm with its larger thermal sensor. Just be prepared to shell out another $1200 for the privilege.
The Kit
When the TS006 arrived, I opened the box and my first impression was, “Oooh…nice and tidy.”
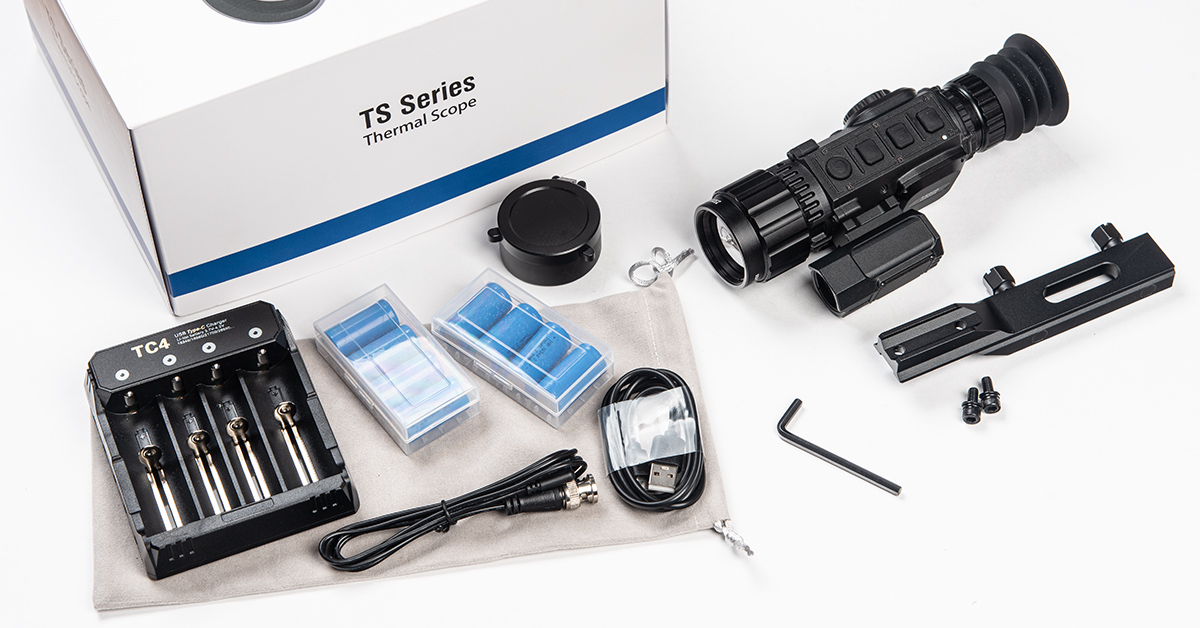
The unit measures 10.24 x 2.36 x 3.14 inches and weighs just under 1.5 pounds — a far cry from the hefty scope/clip-on thermal combo I’d been running for the last couple of years. The kit includes a cantilever-style Picatinny rail mount and attaching hardware for quick upfitting, two sets of four CR123A rechargeable lithium batteries, an eight-battery charger, Type C power and CVBS cables, a lens cover, and a soft accessories bag.
Features Overview
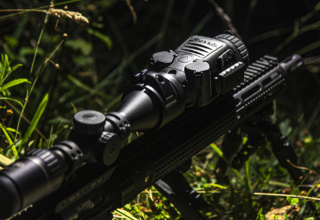
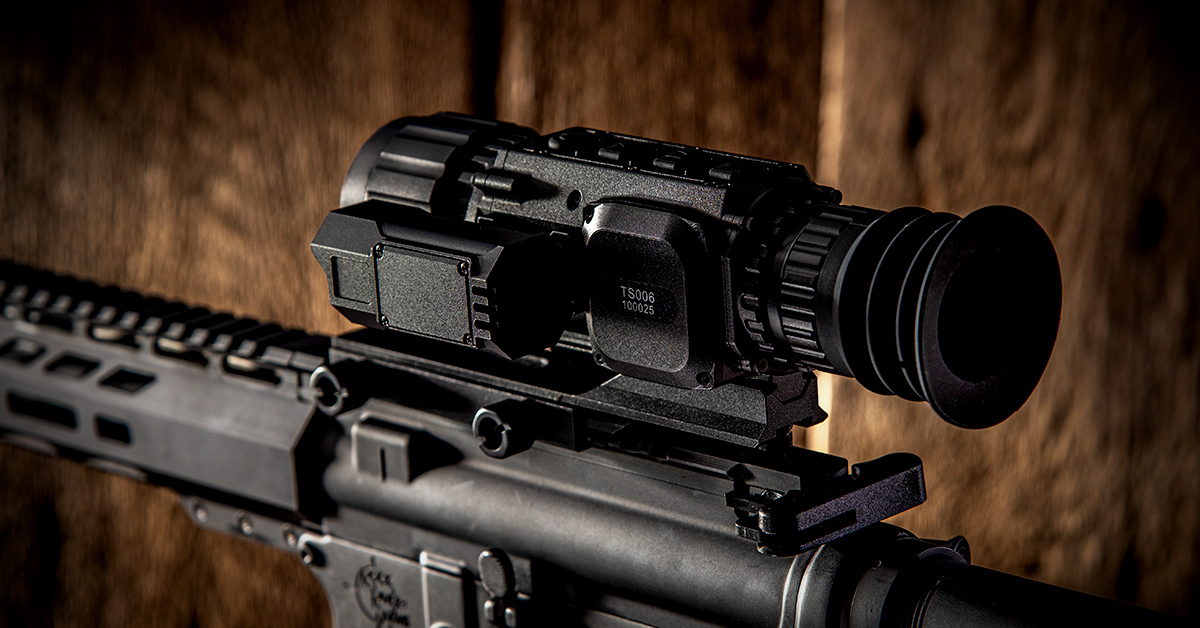
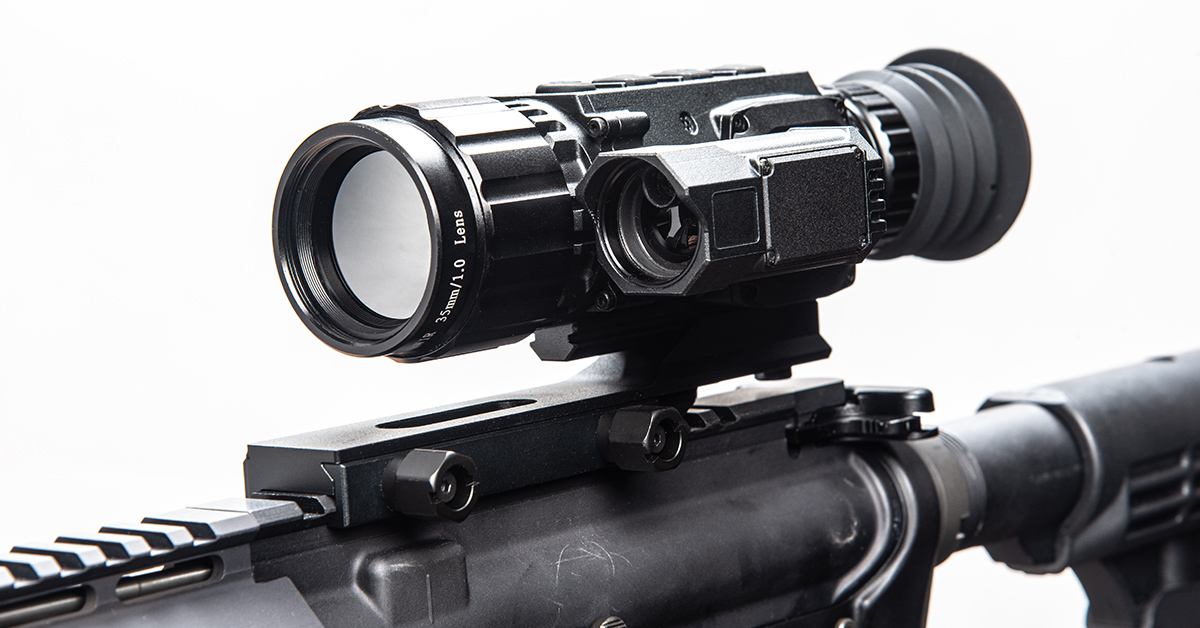
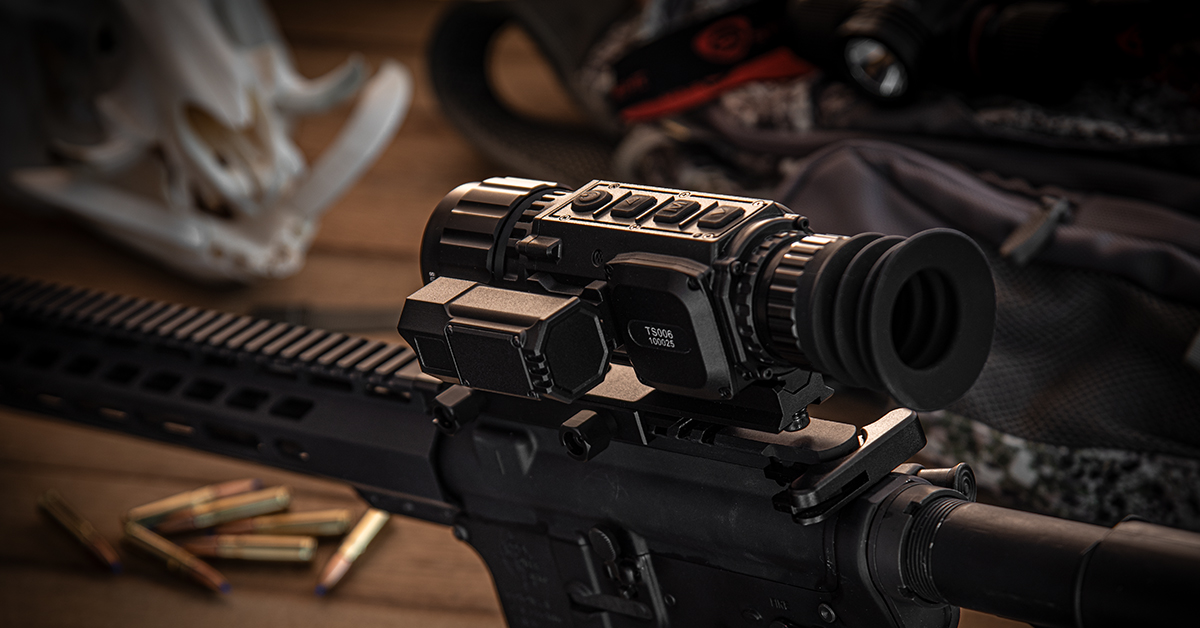
The TS006 is built on a sturdy aluminum chassis. The finish is all black with an elegant matte texturing to minimize glare when concealment is essential. The front lens offers manual focusing, allowing for optimal sharpness and clarity at varying distances. The eyepiece is also adjustable from -8 to +3 diopter. Both the objective lens and diopter adjustment rings include robust ribbing, which makes rotation easier when wearing gloves.
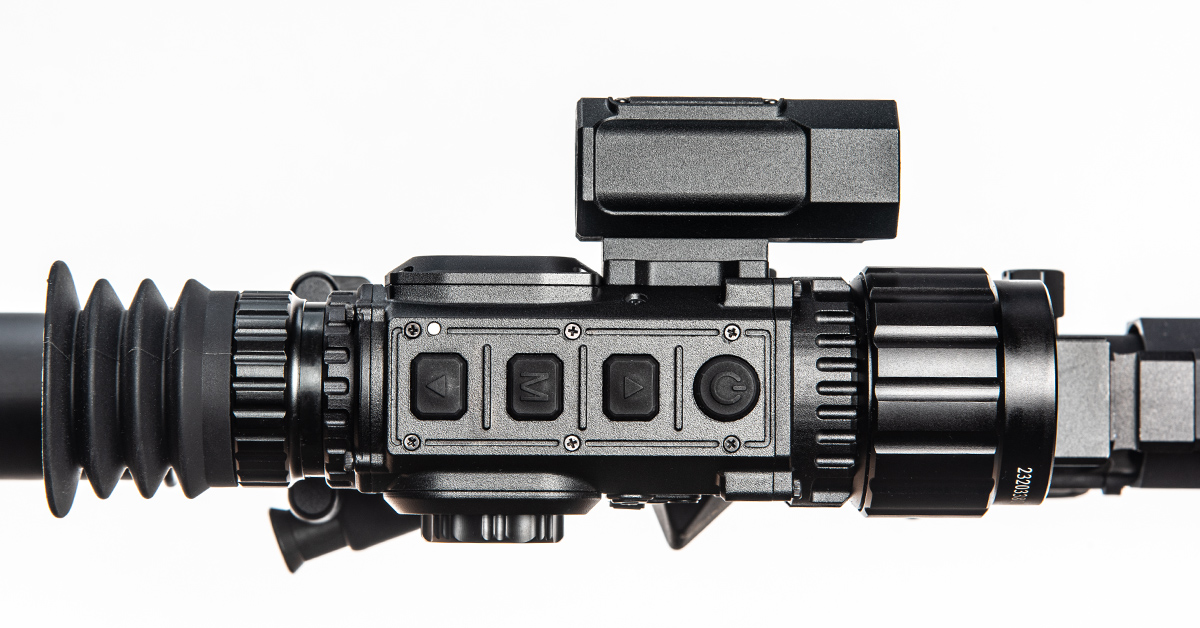
Four in-line buttons positioned atop the chassis control the operational functions. These include power on/off, up, menu, and down. The buttons are rubber-coated and, again, are sized and textured to make them easy to manipulate in cold weather. There is also an LED visible at the top of the housing to reveal the charging status when the unit is plugged into an outside power source.
You can see from this top view that a good third of the TS006’s width is credited to the side-mounted rangefinder. More on that in a moment.
The eyepiece includes a rubber accordion-style hood to mitigate ambient light dispersion on the viewing screen.
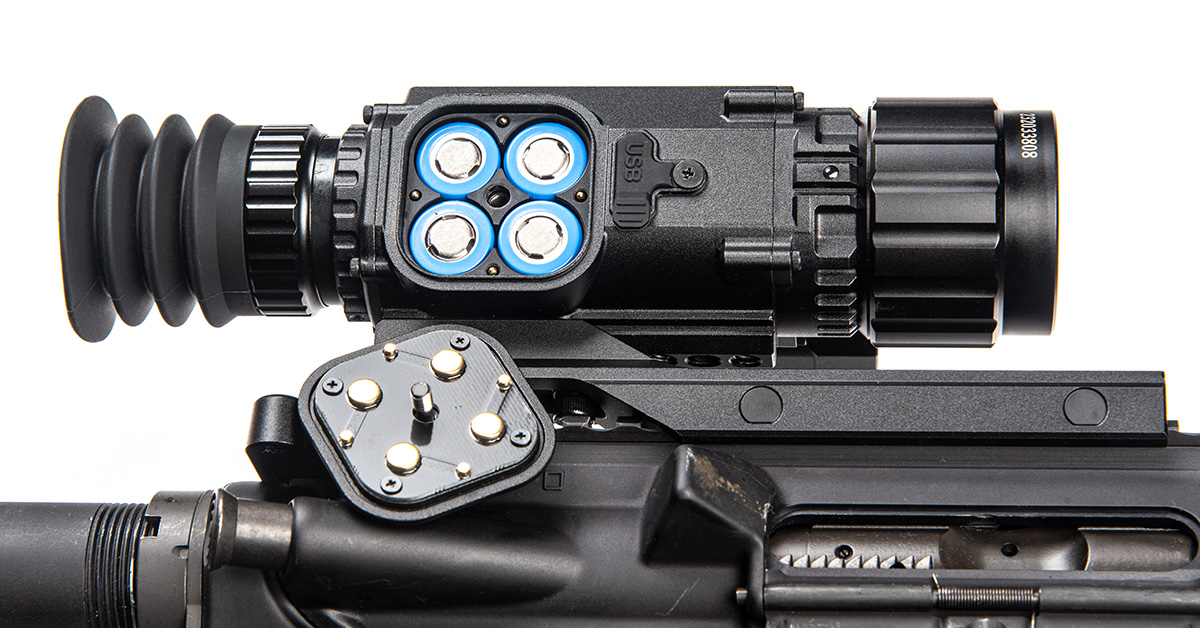
Powering the TS006 are four CR123A batteries. The battery compartment is in the center of the chassis, right in front of the display screen.
Now, here’s something interesting. The TS006 comes with what Topdon calls “smart power management.” What this refers to is that battery polarity need not be observed when installing the batteries. Put them in however you like and the unit will still run. I tried it. It worked. Don’t ask me how, but for a hunting scope this is kind of a big deal. No need to fumble around with a lamp and give away your position when replacing batteries on a coyote set.
Pretty darn neat.
In keeping with its hunting mission, the TS006 comes with an integrated laser rangefinder mounted on the left side of the chassis. For those of you who hunt varmints in environments where long pokes are the norm, this is a highly welcome feature. The rangefinder, while providing distance for guesstimating holdover, also works with the thermal unit’s internal ballistic calculator.
I have not yet tested this part of the TS006, but the programming includes three customizable ballistic profiles, into which you can upload all the usual environmental data and four additional data points for the load you are shooting — “Muzzle_vt” (muzzle velocity), “Merge_Distance” (the zeroed distance), “FL DVert” (bullet drop relative to the zeroed distance), and “FL DHort” (windage drift relative to the zeroed distance).
The TS006 owner’s manual is remiss in adequately explaining the ballistic compensation programming, and the off-key programming terminology can be confusing. So, I checked with Topdon US Vice President Chad Schnitz for clarification.
“The scope uses the two data points you provide,” said Schnitz, “your zero distance (Merge_Distance) and your real-world data from a far distance (FL DVert/DHort), along with muzzle velocity (Muzzle_vt) to calculate a precise ballistic curve tailored to your specific rifle and ammunition. Once calibrated, when [the unit] laser-ranges a target, it will instantly display a compensated aiming point in the reticle.”
“First, zero your scope at a close range (e.g., 50m) to set your Merge_Distance. Then, shoot at a far range (e.g., 100m) to measure and input your FL DVert and FL DHort values. Input your chronographed muzzle velocity. After these steps, the ballistic compensation feature will be active and functional.”
With this data setup in one of the three available Ballistic Modes, the shooter can select the customized mode, use the integrated rangefinder to range the distance, and the TS006 is supposed to calculate and display the corrected aimpoint, displayed as a small, red X.
For most varmint hunters shooting inside of 200 yards, I don’t believe that calculating a firing solution is a big to-do. By the time you hit the required buttons to get your ballistic point for a particular range, that dog is likely to be somewhere else. Generally, hunters will be familiar enough with the holdover of their load that BDC is unnecessary. Nevertheless, it’s there if you want to use it.
Mounting
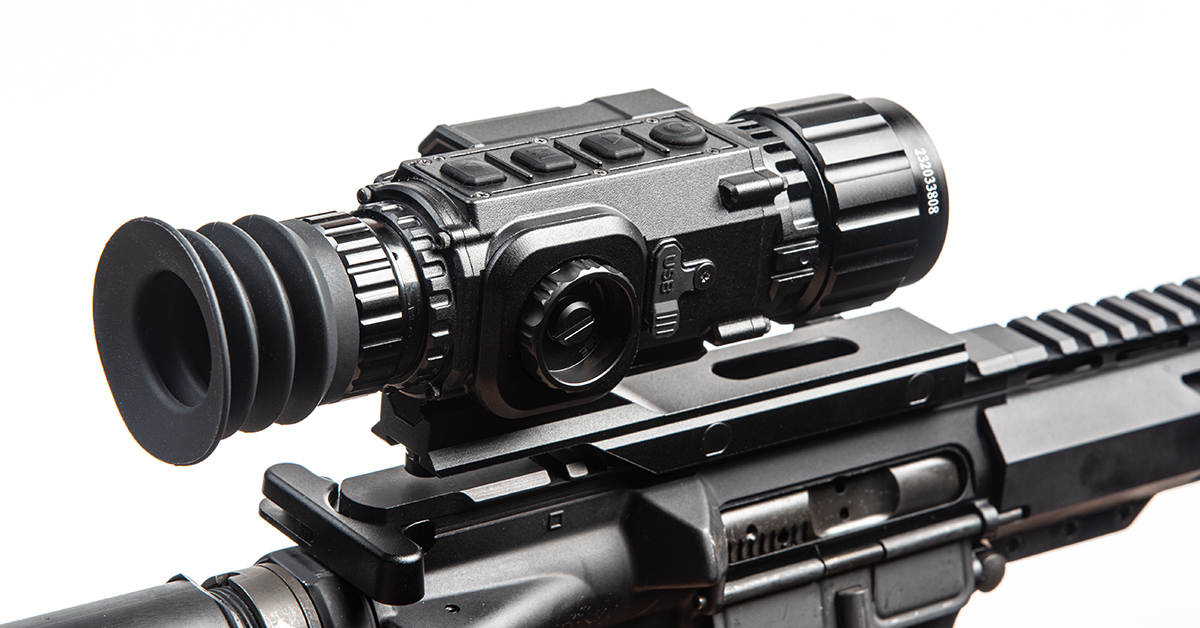
The TS006 does require the host gun to use a Picatinny rail for mounting.

There are five screw holes along the bottom of the thermal unit. These threaded holes provide three positions to mount the TS006 to the rail to achieve the best sight position. Attach the thermal unit to the mount, install the assembly onto your gun’s Picatinny rail, and secure with the mount’s two cross-bolts.
I would suggest lightly snugging all attaching hardware to begin with. That will allow you to find the optimal fore/aft position of the TS006 before final tightening.
Power Up / Menu Navigation
After inserting charged batteries, long-press the power button to turn on the TS006. The four button combinations allow you to scroll through the menu options.
Short-press the menu button to bring up the Quick Menu. This menu contains the high-level functions, including the color pallet, OLED brightness, image brightness, sharpness, contrast, zeroing mode, and rangefinder. Long-press the menu button to bring up the Main Menu, where you find 14 options to customize the various performance features offered by the TS006. These include:
- video and still image playback
- Wi-Fi
- CVBS output
- interior shutter
- compass
- gravity sensor
- reticle
- zeroing
- hot track
- laser calibration
- pixel defect
- compass correction
- settings
- ballistic
From this list you can see most of the key features offered by the TS006. The unit boasts 64G internal memory for recording still images and video/audio files, which you can review on screen or on your mobile device via Wi-Fi. Wi-Fi viewing and minimal feature controls can only be used only with Android devices hosting the ClearView APK file app, which you can download directly from the product web page. I didn’t have any difficulty downloading this file and connecting to the TS006 Wi-Fi network, but again, this is a minimalist app, so don’t expect much in terms of remote device control. Basically, I used it for image and video reviewing.
Other available features that are activated outside of the menu (simply pressing one of the four control buttons) include digital zoom, picture-in-picture (PIP), still image/video capture, and OLED standby.
Most important to the hunter are the several features designed to put bullets where you want them. The unit allows you to set up five different profiles. Think of this as being able to set zero for five different loads or five different firearms. You can choose the reticle style and color for each profile, and within each profile you can set up three different zeros at specified distances.
Another valued feature for the longer-range shooter is the integrated compass plus pitch and roll displays. When turned on, the TS006 presents the azimuth plus pitch and roll angles. The latter two are useful minders for managing bullet drop at long distances and for maintaining vertical bore/sight alignment.
Zeroing
Learning to operate feature-rich thermal units can be, for some of us in the over-50 crowd, a mix of challenge and occasional frustration. For me, the TS006 required no more or no less effort to figure out than any other thermal unit I’ve tested. It simply takes a bit of time to become comfortably familiar with menu navigation and to figure out what the various features do and how to customize them. Once I got the hang of it, the operation proved fairly simple.
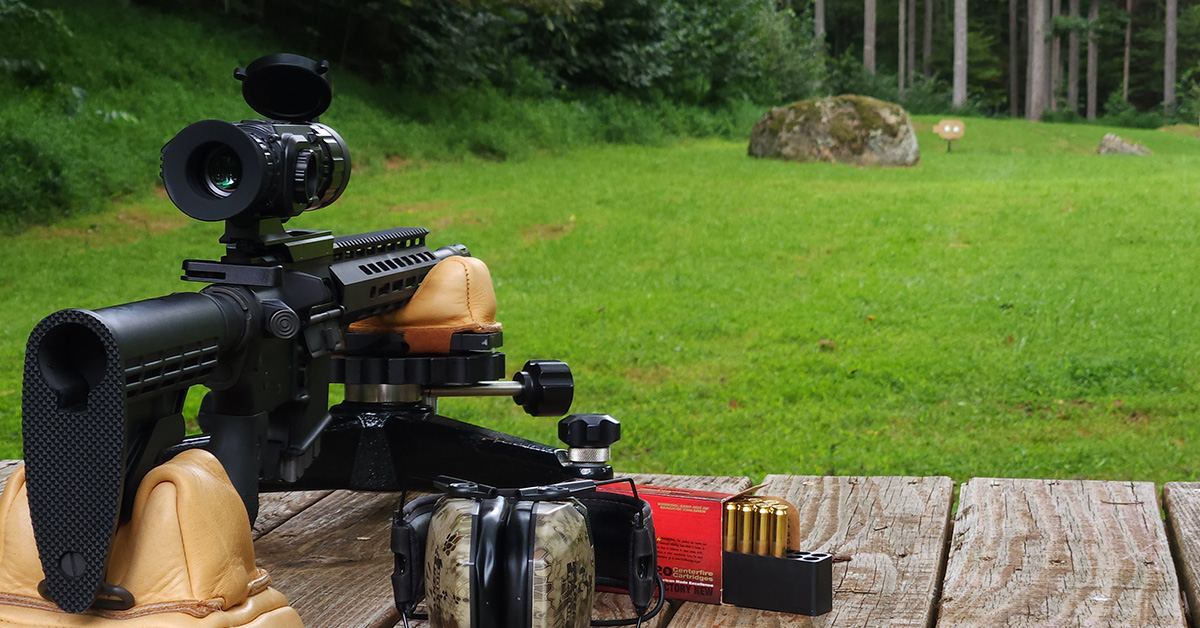
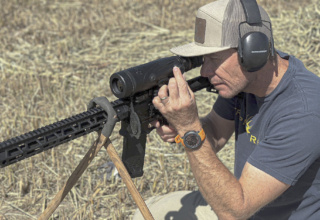
I mounted the TS006 onto a .300 BLK in anticipation of near-range coyote hunting this fall and hopefully a bit of hog hunting come winter. Hence, the goal was to zero the unit to 100 yards.
Range day proved unseasonably cool, with a mix of clouds. I had two other guns to test that day, so the TS006 zeroing didn’t begin until later in the afternoon.
I started the process at 25 yards because, with a thermal, there is no way to “bore sight.” You must start firing and see where the bullets hit and adjust from there. That’s why it is necessary to begin close and work your way out.
For the target, I cut several pieces of cardboard squares and covered each in aluminum foil. When the sun is out, the aluminum heats up and provides a clear target against the cooler target backer.
The TS006 uses what is called a “freeze” zeroing method. Here’s how it works:
- Place the reticle in the center of the target, or bullseye, and fire.
- Note where the bullet impacted.
- In the Zeroing profile menu, select the image freeze icon and, while holding the reticle in the center of the target, short-press the menu button to freeze the image.
- Next, move the reticle along the X and Y axis using the up/down buttons until the reticle is aligned with the observed bullet point-of-impact (on the physical, downrange target) on the image.
- Fire the next shot. The point-of-impact should be on or near the point-of-aim (target).
- Refine the adjustment with as many shots as necessary until you are satisfied that the point-of-aim matches the point-of-impact.
- Continue this process until you are zeroed at your preferred distance.
Another feature of the TS006 is that you can have three zeros for each of the five available zero profiles. For my .300 BLK, with its heavy bullet and “lopey” trajectory, this is great because I can set a zero for, say, 25 yards, one for 50, and one for 100 yards…or whatever distances I want…at 1-yard increments. Were I shooting .223 Remington loads with a flatter trajectory, I could set the three zeroes, for example, at 100, 200, and 300 yards.
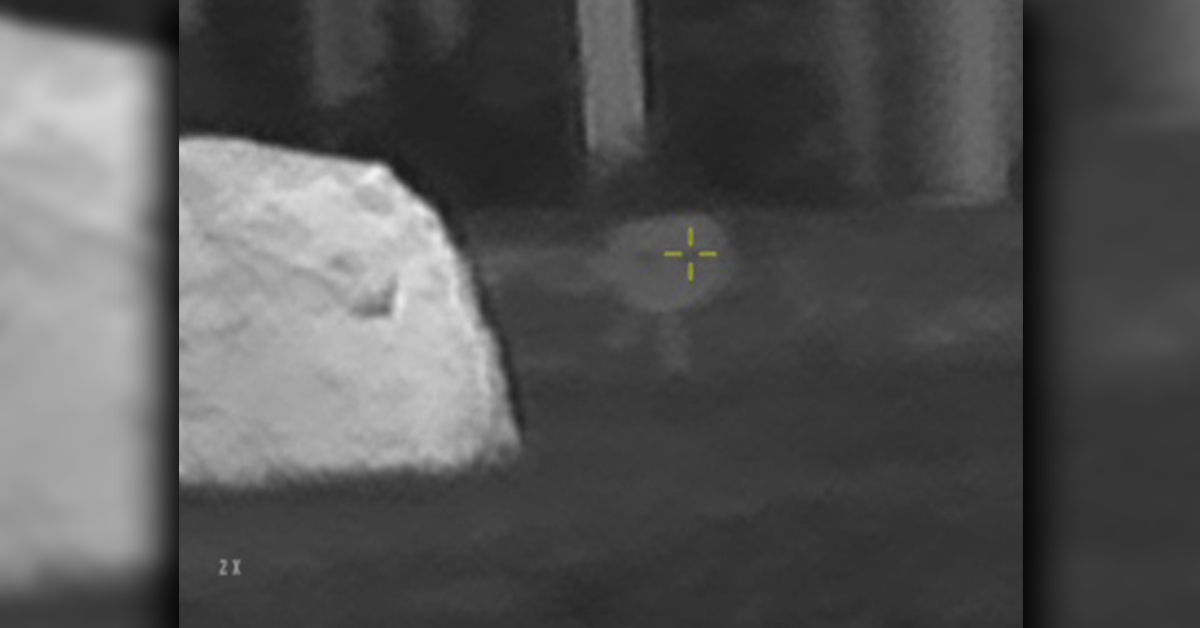
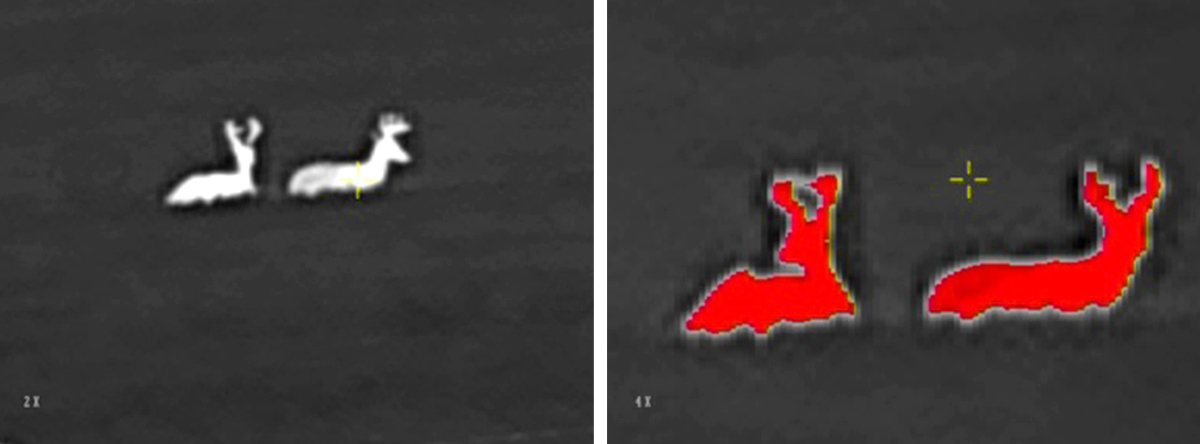
By the time I had moved out to 75 yards, the sun had cast a shadow on my target and then the sky clouded up. This, naturally, cooled the aluminum-covered targets, so my aiming point quickly disappeared. Eventually, the aluminum became ever-so-slightly cooler than the cardboard backer, and all I could see were faint suggestions of slightly darkened targets. The above image is what I saw through the TS006 at 75 yards. No fault of the thermal unit, but that was all I had to focus on since the target and backer temperature differential was so slight. Nevertheless, I took a final zeroing shot. Satisfied, I moved to a clean target and sent three successive rounds downrange.
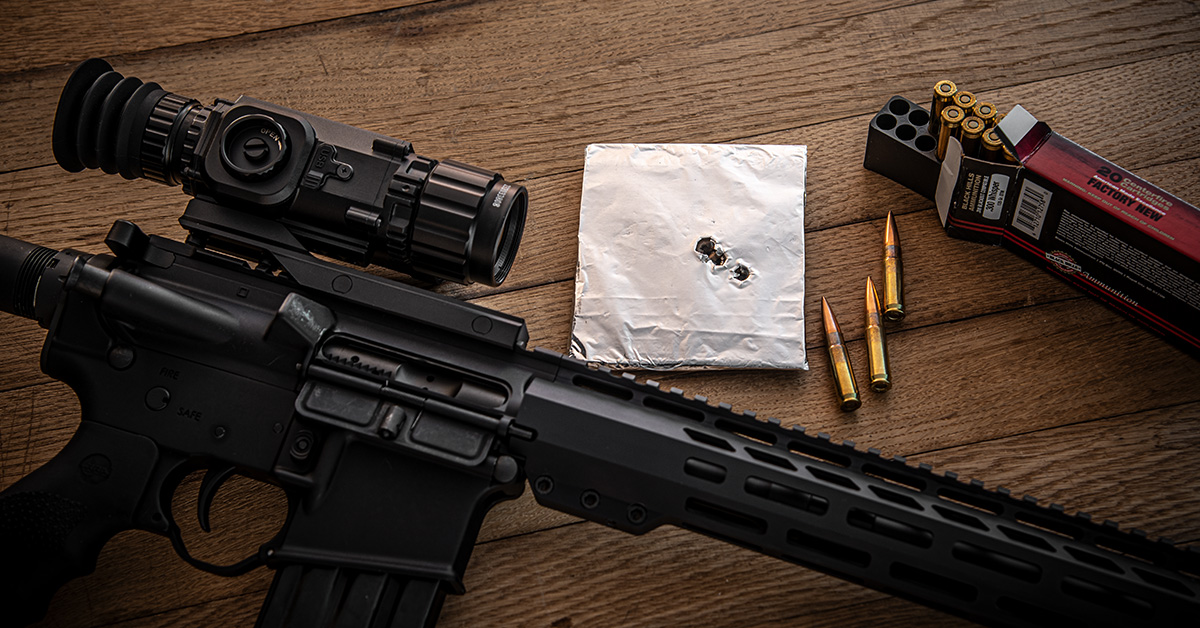
As you can see, the TS006 delivered an admirable sighting solution despite the poor temperature gradient on my target. By this time, I conceded the battle to the weather — satisfied with the 75-yard zero but committed to returning on a full-sun day and setting the system up for 100, 125, and 150 yards to complete the zeroing profile.
As thermal riflescopes go, the Topdon TS006 has a lot going for it, and more than you might expect. Once you become familiar with the menu navigation and spend some time exploring the various features, you’ll find it easy to operate and quick to deliver good results. And at $2299, it packs a serious punch for its 384×288 resolution class.
Topdon TS006 Thermal Riflescope Specifications
- Detector Type: VOx uncooled microbolometer
- Resolution: 384×288
- Spectral Range: 8 μm ~ 14 μm
- NETD: ≤40 mK @ 25°C, @ F1.0
- Frame Rate: 50 Hz
- Lens Focal Length: 35mm F1
- Field of View: 7.5° x 5.6° (35mm) / 3.4x
- Focusing: manual
- Display: monocular color OLED, 0.39 in., 1024×768
- Diopter: -8 ~ +3
- Exit Pupil: 38mm
- Digital Zoom: 1x / 2x / 3x / 4x
- Picture-in-Picture: yes
- Pseudo Colors: white hot, black hot, rainbow, red hot, iron red
- Detection Distance (standing adult): 1450 m
- Recognition Distance (standing adult): 730 m
- Power Supply: CR123A rechargeable lithium batteries (4)
- Battery Life: ≥ 4 h
- Memory: 64G
- Mounting Interface: Picatinny
- Weight: 1.43 lbs. (with batteries)
- Dimensions: 10.24 x 2.36 x 3.14 in.
- Electrical Interface: Type-C (power supply, CVBS output, media management)
- Operating Temperature: -4F° ~ 131F°
- Laser Rangefinder: 1093 yards
- Wi-Fi: image transmission (Android only)
- MSRP: $2299