Ready for a graduate-level course in 1911 pistol cleaning and maintenance? Our first of a three-part series takes you into the proverbial nuts-and-bolts of this legendary American handgun.
by Lou Patrick
As iconic handguns go, the 1911-pattern pistol is second only to the 1873 Single-Action Army Colt (although some might say the 1911 even rivals “the gun that won the West”). John Browning certainly came up with a winner when he designed this pistol, and with over a hundred years passing since its introduction, the 1911 is still going strong.
The pistol was first adopted for military use by the U.S. Army in March of 1911, where it remained in service for the next 74 years. In 1985, the U.S. Army decided to replace the 1911 with the 9mm M9 Beretta. This decision was met with some controversy, as the 1911 had proven to be very reliable and quite capable through two world wars, along with major conflicts in Korea and Vietnam. It also had become well-liked by service members of all branches of military service, making it rather difficult to “let go” of the 1911. Despite having been replaced as the general issue sidearm in 1985, the 1911 continues its military service, having become the sidearm of choice for many of the special operations units within all branches of the U.S. military, and it remains in service to this day.
While we tend to call this pistol a 1911, many, if not most of these pistols are 1911A1s. It was the 1911 that was issued in WWI, and with the experience gained in that war, some improvements to the original design were recommended. These minor external changes were completed in 1924 and resulted in the new pistol designation of 1911A1. Pistols made prior to 1924 would have been marked 1911; after 1924, they would be marked 1911A1.
This is one element of our current project that I find interesting. The old 1911 currently sitting on my bench has a slide that is marked U.S. Army 1911. Unfortunately, it’s not all original, as it has an Essex frame. The slide, though, is 100 years old or older!
This 1911 came to be through the assemblage of a collection of parts — some of these parts being quite old. The only way to know the condition of the internal parts is through disassembly of the entire pistol, then cleaning and inspecting each part prior to reassembly. When doing a project such as this, it’s best to plan your work first. Springs don’t cost much, yet they are vital components to the proper operation of your firearm. Why go through all this effort only to reinstall the old, worn, weak springs, for example? When doing a project such as this, I find it wise to have a new set of springs on hand before work begins, and then address the possible replacement of other parts as the needs arise.
Before beginning any work on your firearm, ensure that it is unloaded (magazine removed and no cartridge in the chamber) and that ammunition is not present in the work area. Also, always wear safety glasses while working on your firearm.
One of the cool things about 1911s is that the fundamentals are the same regardless of the firearm’s age. What applies to this century-old .45 auto in terms of disassembly, maintenance, and parts replacement will generally (there are minor exceptions) apply to any 1911 you can pick up at your local gun dealer today.
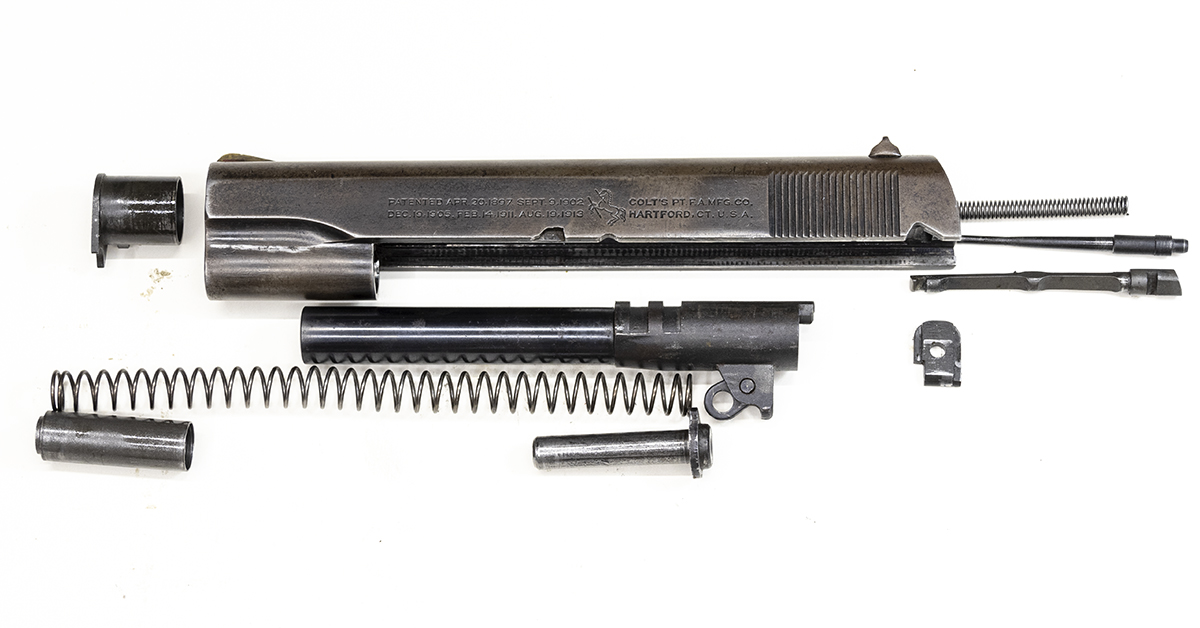
For this first of a three-part series on 1911 deep-cleaning and maintenance, we are going to focus on the slide. We’ll hit the frame work in Part 2, followed by lubrication, final assembly, function check, and field testing in Part 3, so stay tuned…
Slide Disassembly, Cleaning, and Inspection
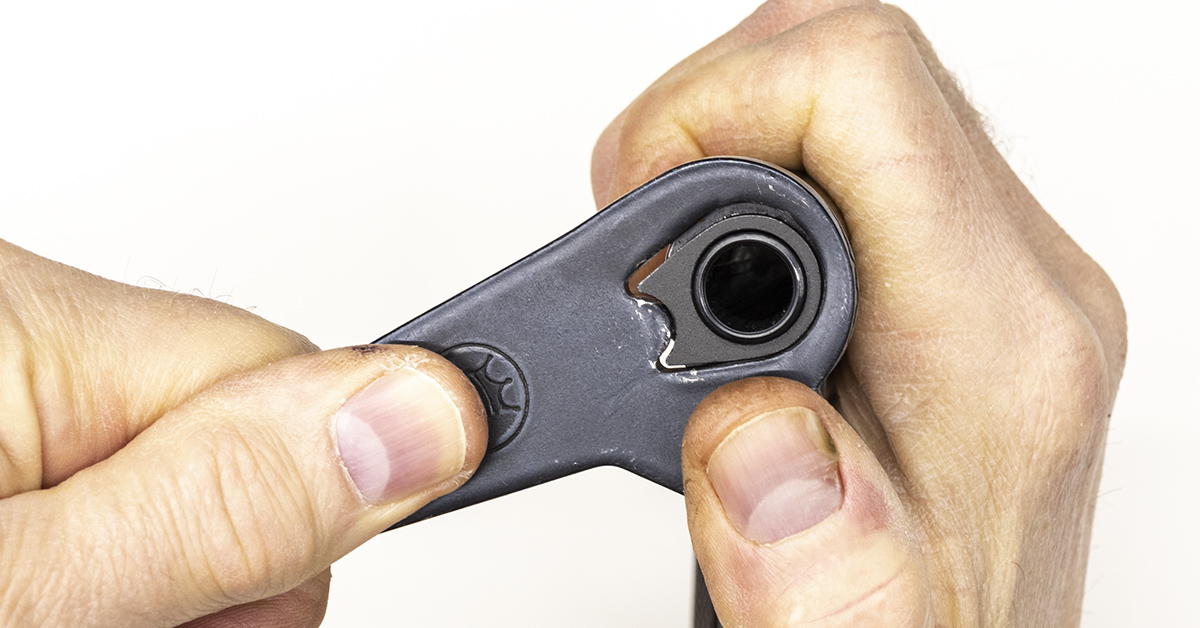
While maintaining control of the spring tension, use a barrel bushing wrench and rotate the barrel bushing clockwise until it stops.

Carefully release the spring tension and then remove the spring plug and recoil spring.
Rotate the barrel bushing counterclockwise and remove it from the barrel.
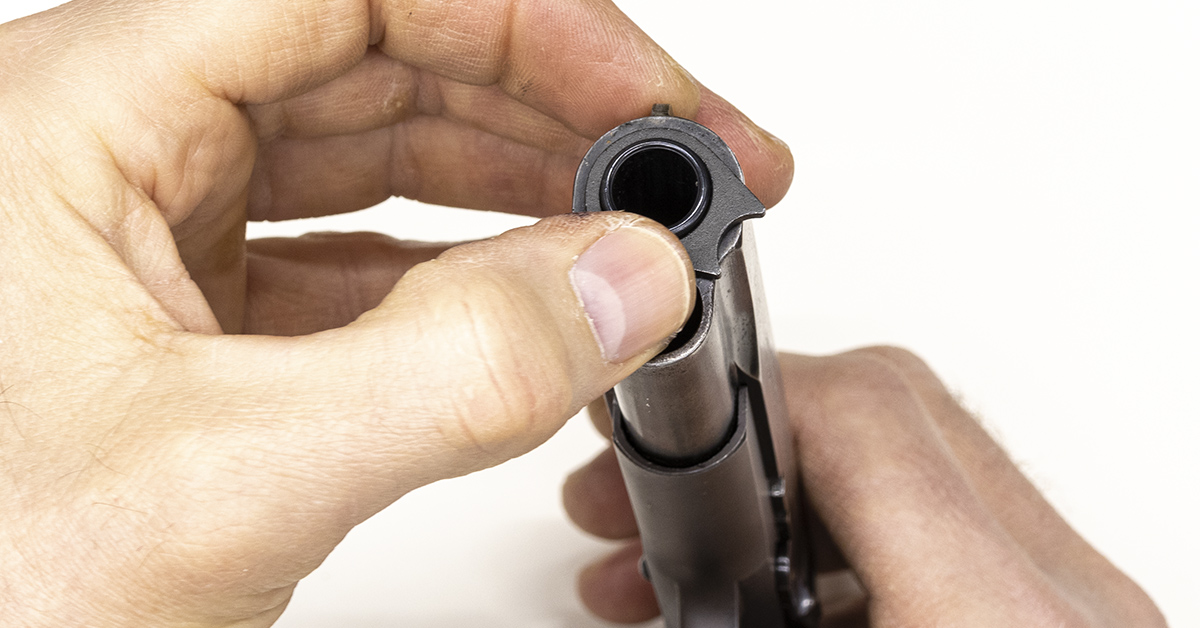
To remove the slide from the frame, the takedown notch on the slide must align with the slide stop. Always cock the hammer first before removing or installing the slide.
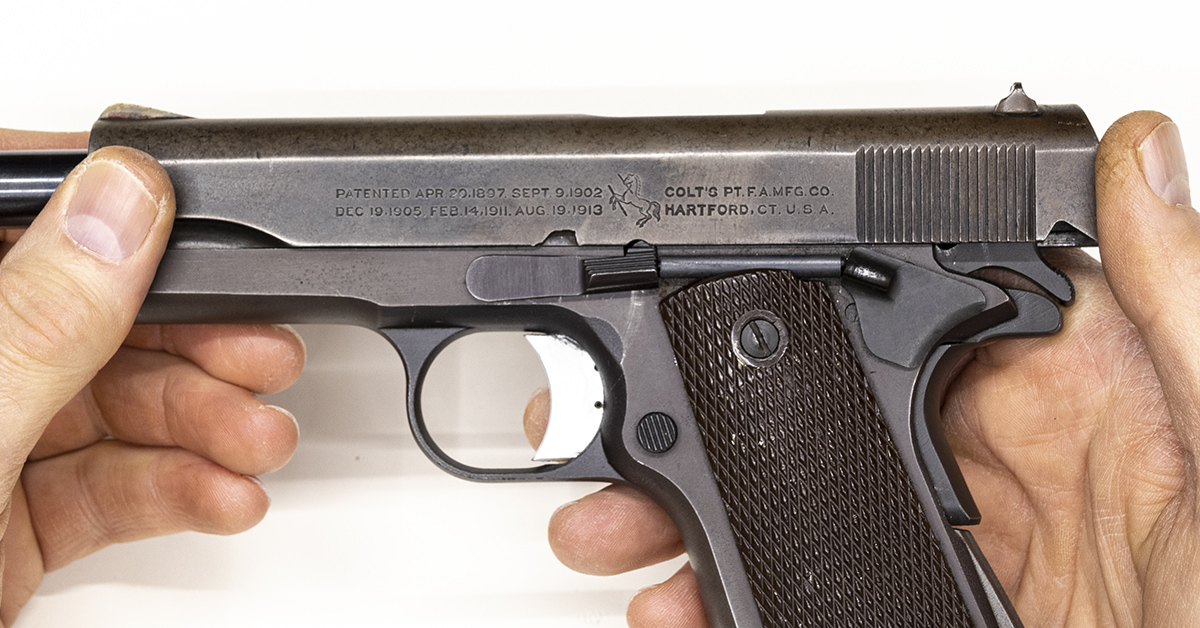
Align the takedown notch with the slide stop.
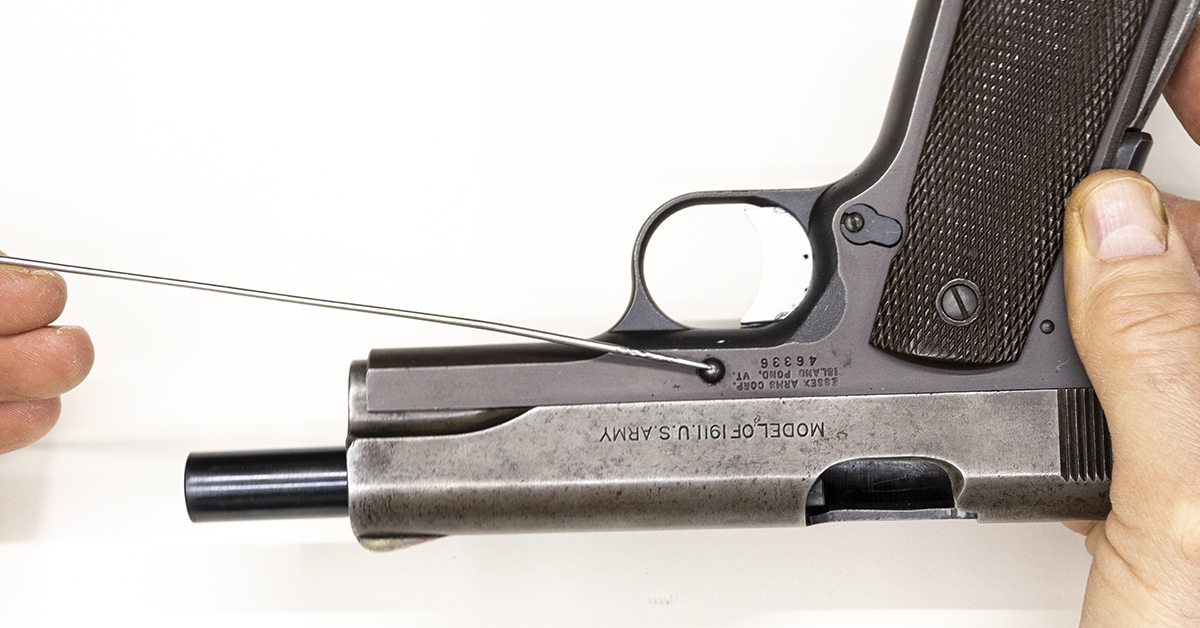
The slide stop pin is on the opposite (right) side of the frame.
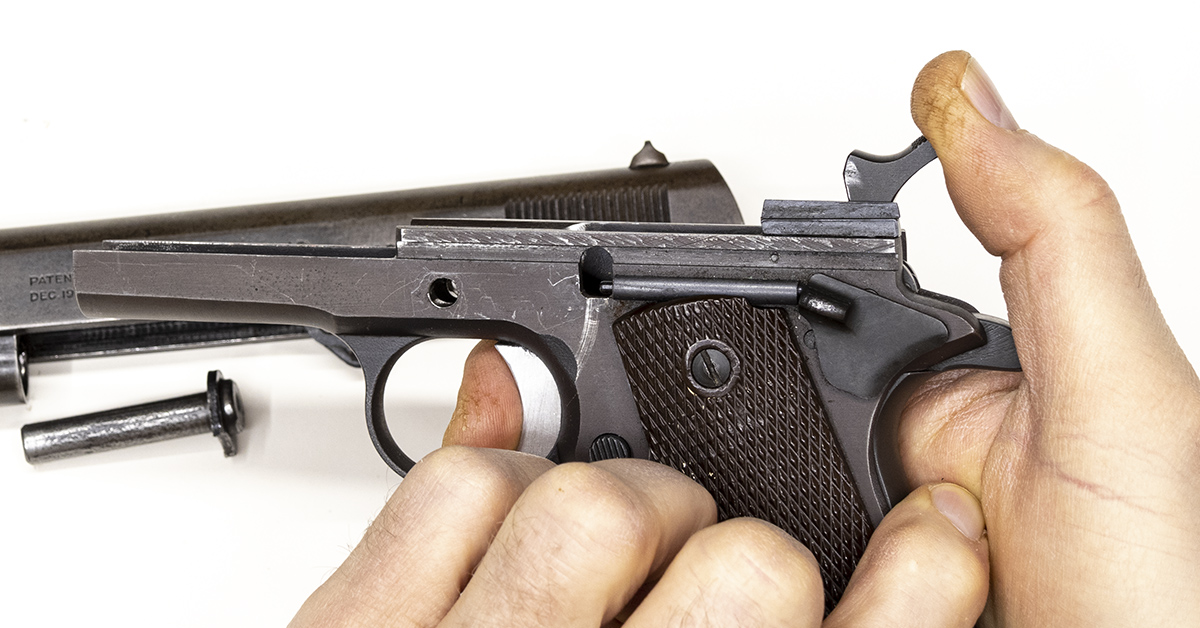
Push inward on the slide stop pin with one hand and pull the slide stop up and out of the frame with the other.

Pull the slide forward and off the frame.
While maintaining control of the hammer, squeeze the trigger and ease the hammer forward, uncocking the pistol.
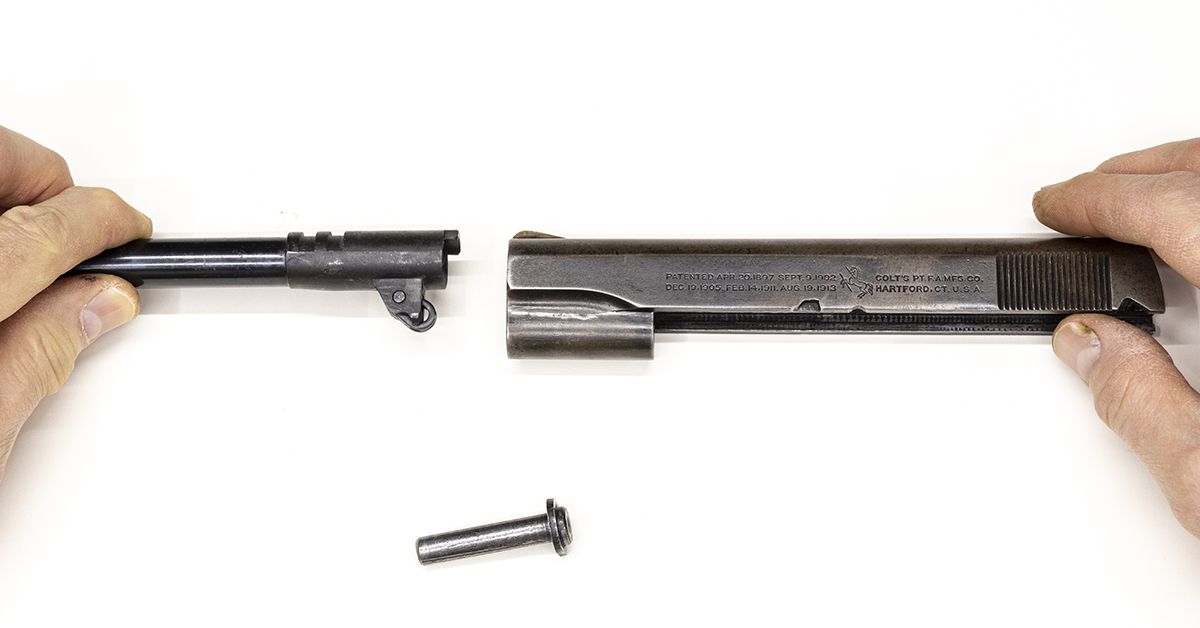
Remove the recoil spring guide and slide the barrel forward and out of the slide.

The barrel link is attached to the bottom of the barrel via the link pin. Some link pins can be rather difficult to remove. Ensure that the barrel link pivots freely on the link pin. If so, there is no need to remove the link pin.

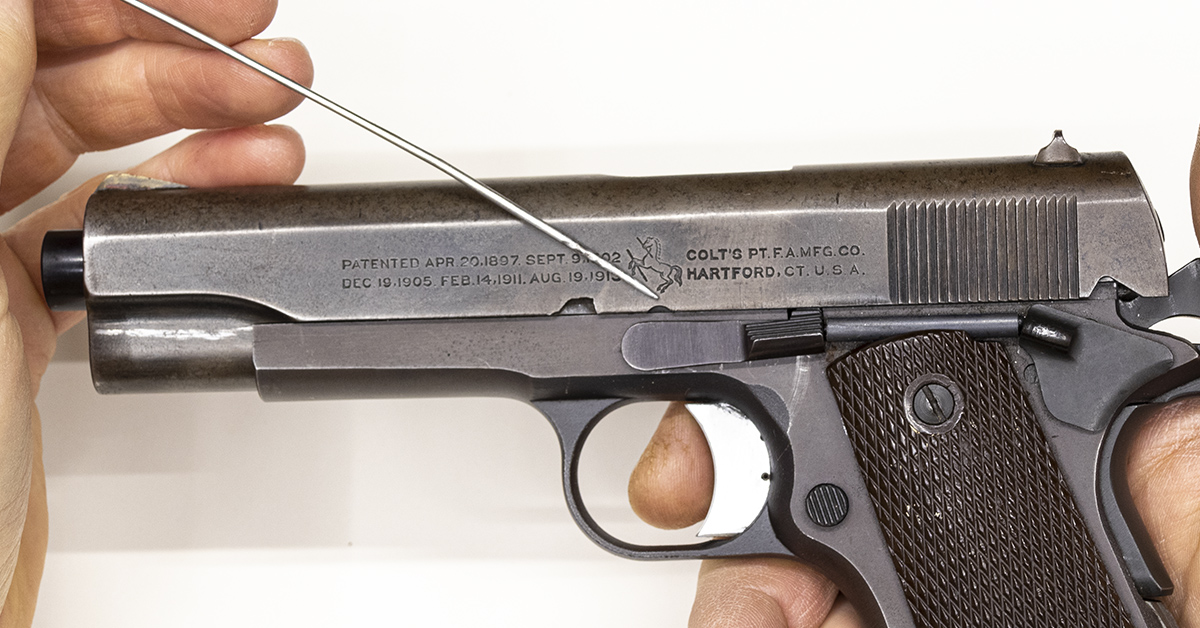
The firing pin is under spring tension and is held in place by the firing pin stop.
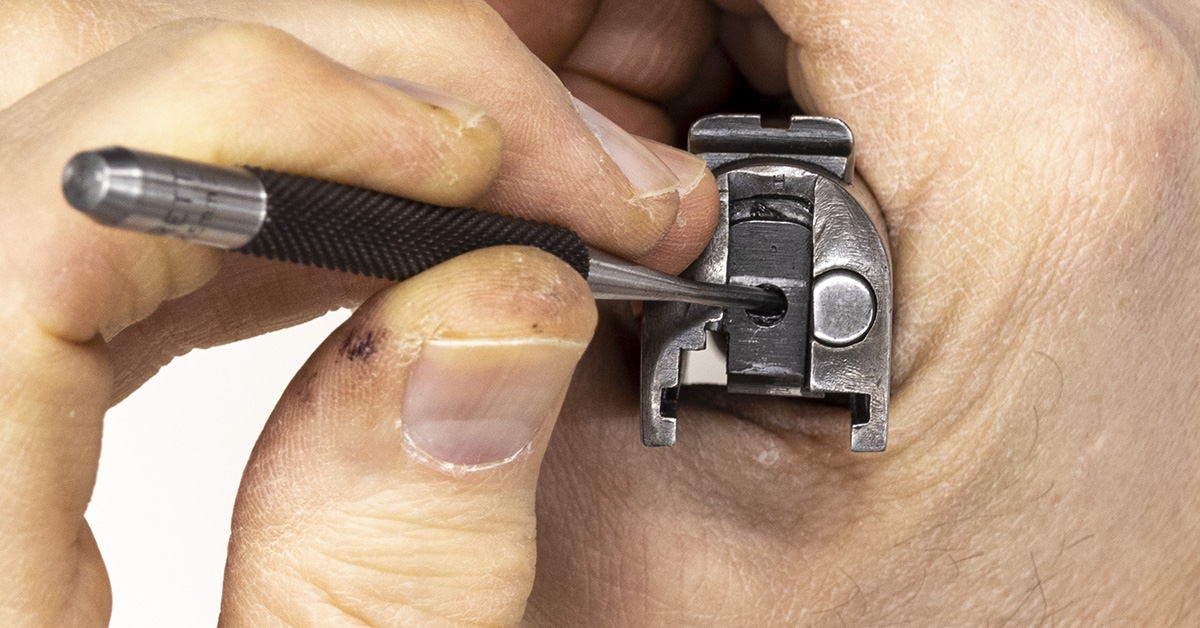
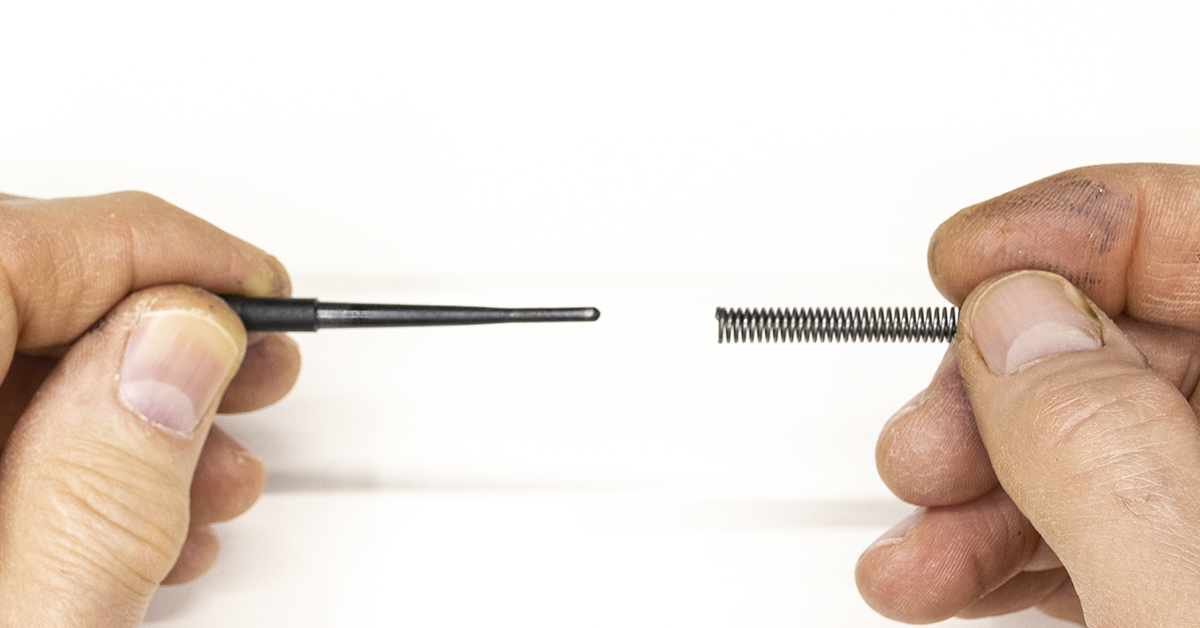
Using a small punch, push inward on the firing pin while simultaneously sliding the stop downward. As you are sliding the stop downward, you are not trying to remove it at this time. The goal is to get the end of the firing pin clear from the hole in the stop and allow it to rest against the flat surface of the stop just above the hole.
Once the firing pin is clear of the hole, maintain control of the spring tension by placing your thumb over the firing pin.

Remove the stop and the firing pin will pop up.
Remove the firing pin and spring. When doing so, the spring should remain attached to the firing pin.
Separate the firing pin and spring. You may need to slightly compress the spring and rotate it to loosen the coils’ grip on the firing pin.
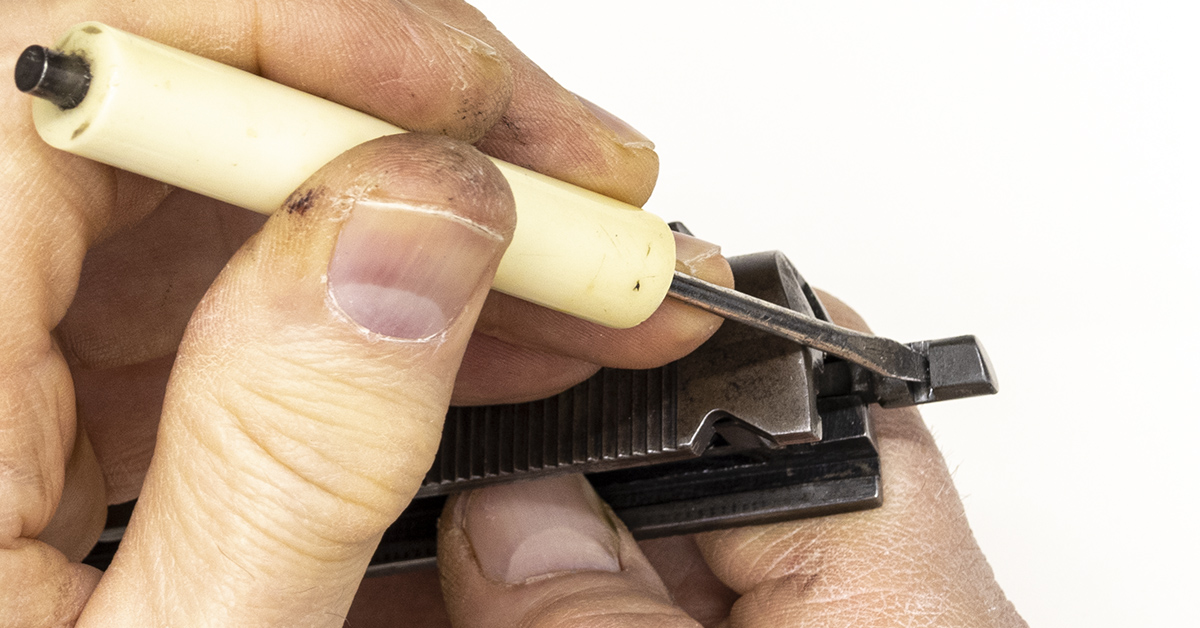
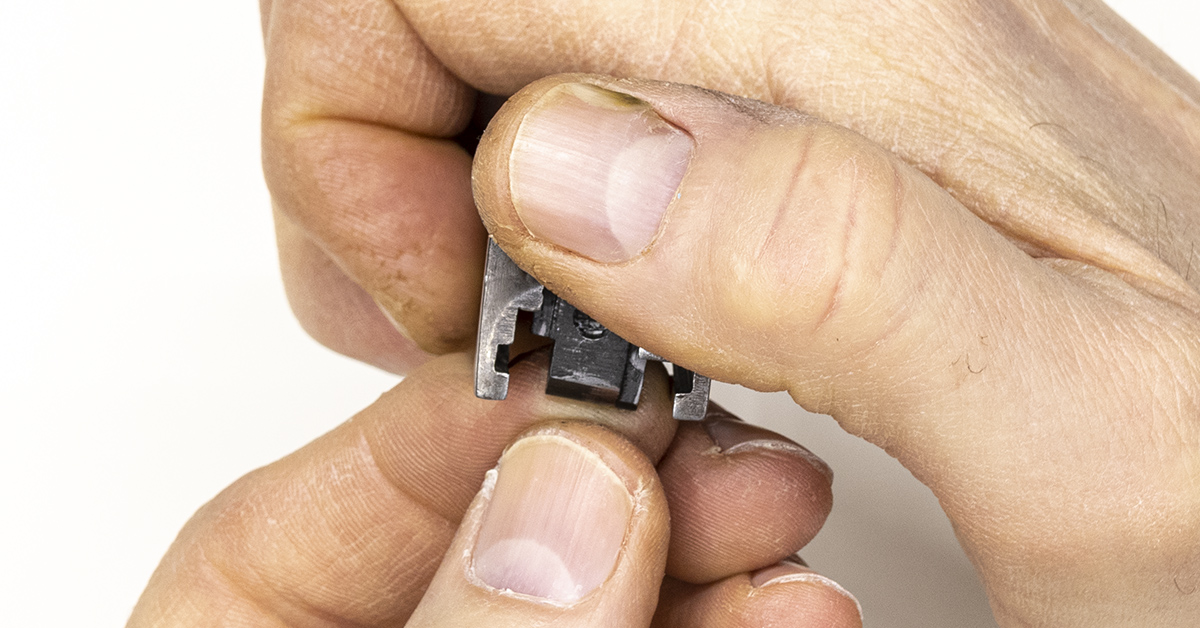
Insert a small screwdriver into the slot on the side of the extractor and gently pry rearward on the extractor to unseat it.
Remove the extractor.
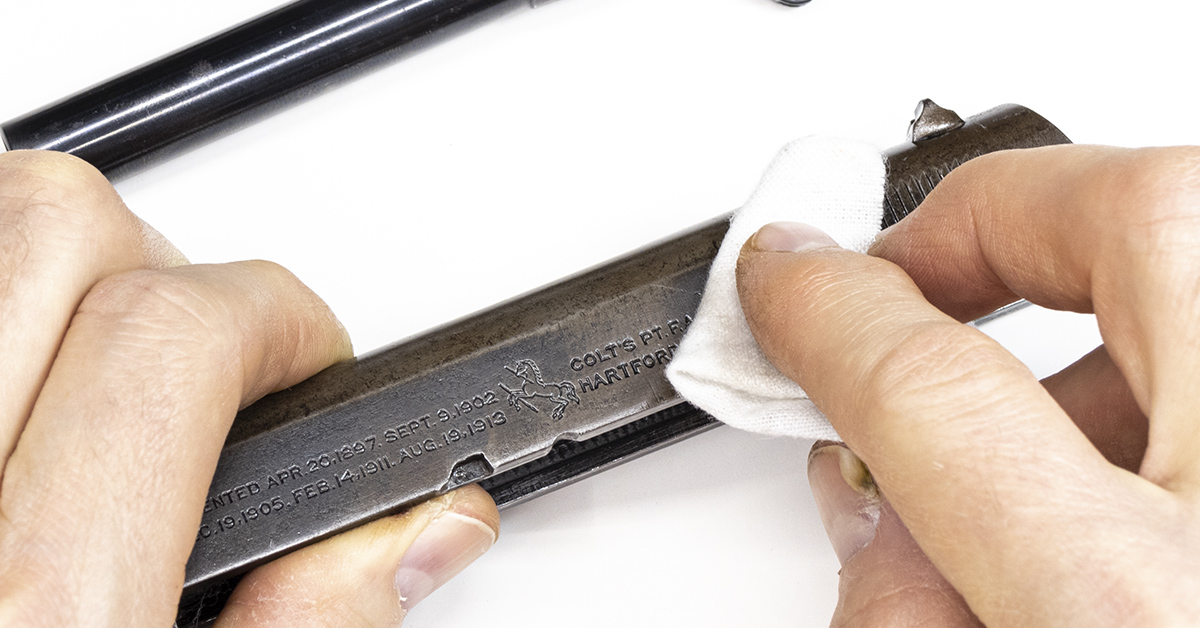
Thoroughly clean and degrease all the slide components. This can be accomplished with bore solvent and a brush, followed by a mild degreasing agent such as denatured alcohol. The goal is to have the parts clean and dry, meaning free of any fouling, solvent, or oil. My preference when doing a project such as this is hot water and Dawn dish liquid. Once clean, the hot water evaporates quickly; however, to ensure all traces of moisture are removed, parts are immediately dried using compressed air.
The bore is cleaned in the traditional fashion, using a bore brush, patches, and solvent. Inspect each part as you clean, checking for any abnormalities such as burrs or signs of excessive wear.
Barrel bushing-to-slide fitment plays a vital role in the accuracy of the pistol. If the bushing is too loose, accuracy will suffer. If the bushing is too tight, the pistol will be difficult to disassemble. Ideally for a service pistol (meaning non-competition use), my preference for bushing-to-slide fit is that the bushing is tight enough that using a bushing wrench to disassemble it makes it easier yet is not required. If needed, I can turn the bushing by hand.
Barrel bushing-to-barrel fitment is also critical to the accuracy of the pistol. If the barrel is too loose inside the bushing, accuracy will suffer. If the fit is too tight, the pistol will not function properly. Slide the bushing onto the barrel so that the end of the barrel is even with the front of the bushing. While maintaining this alignment, move the bushing left and right (3-9 o’clock) and then try moving it up and down (12-6 o’clock). Very little play should be detected while doing this. Ideal fitment for a service pistol will be .001-.002 of clearance, which will be barely perceptible movement of the bushing on the barrel. Properly fitting the bushing to the slide and then to the barrel can be a little tricky. If you find that the bushing on your 1911 is loose, it is best to have a gunsmith fit a new bushing to your slide and barrel.
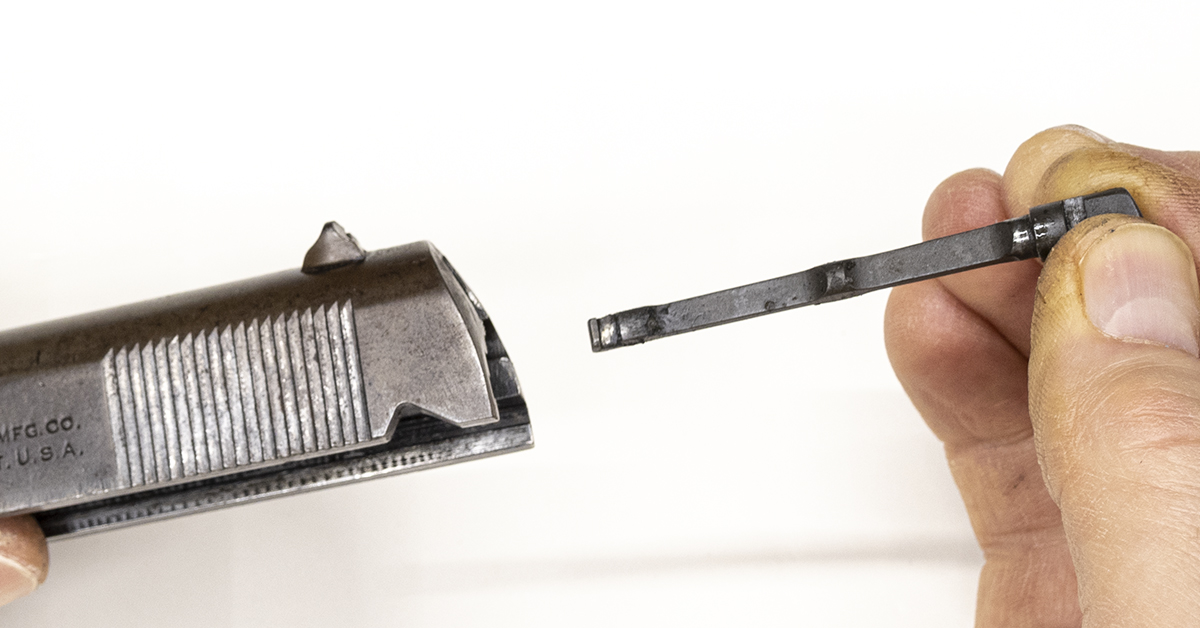
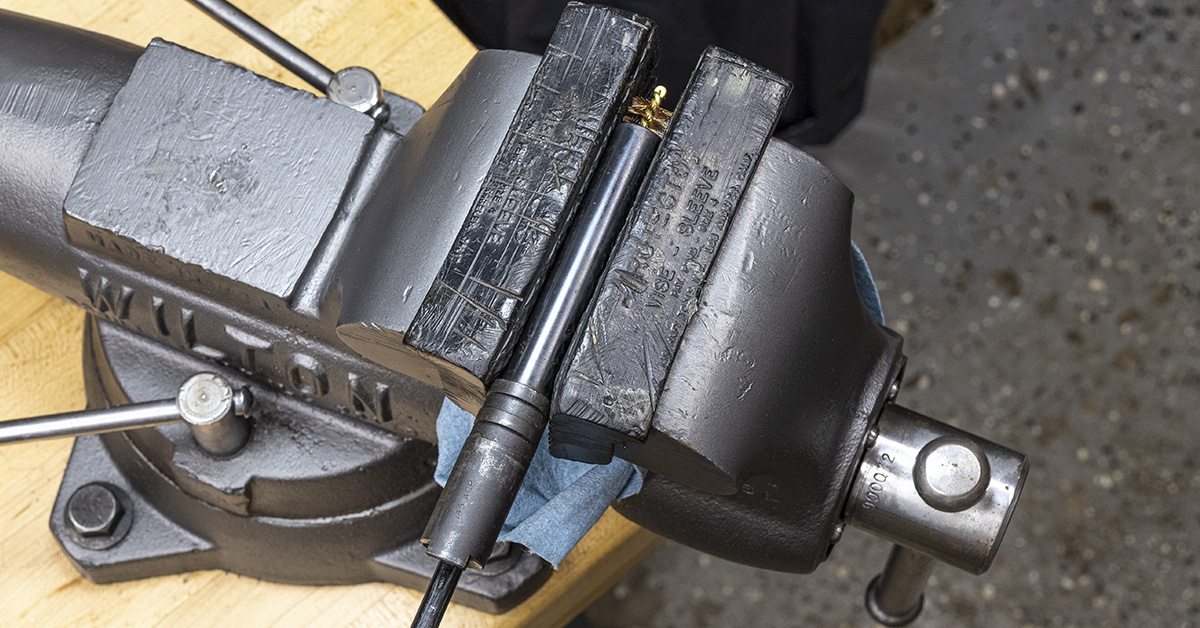
Ensure that the front sight is tight. Originally, 1911 front sights were installed by staking them to the slide. The front sight (left) has a tenon that protrudes from the bottom of the sight blade and through the slide (right). It is then staked into place on the slide with a special tool. It is not uncommon for the front sight to become loose through years of use. If your front sight is loose, seek assistance from a gunsmith. Properly staked, the front sight will remain tight for many years; however, if staked incorrectly, the front sight can fly off while shooting.
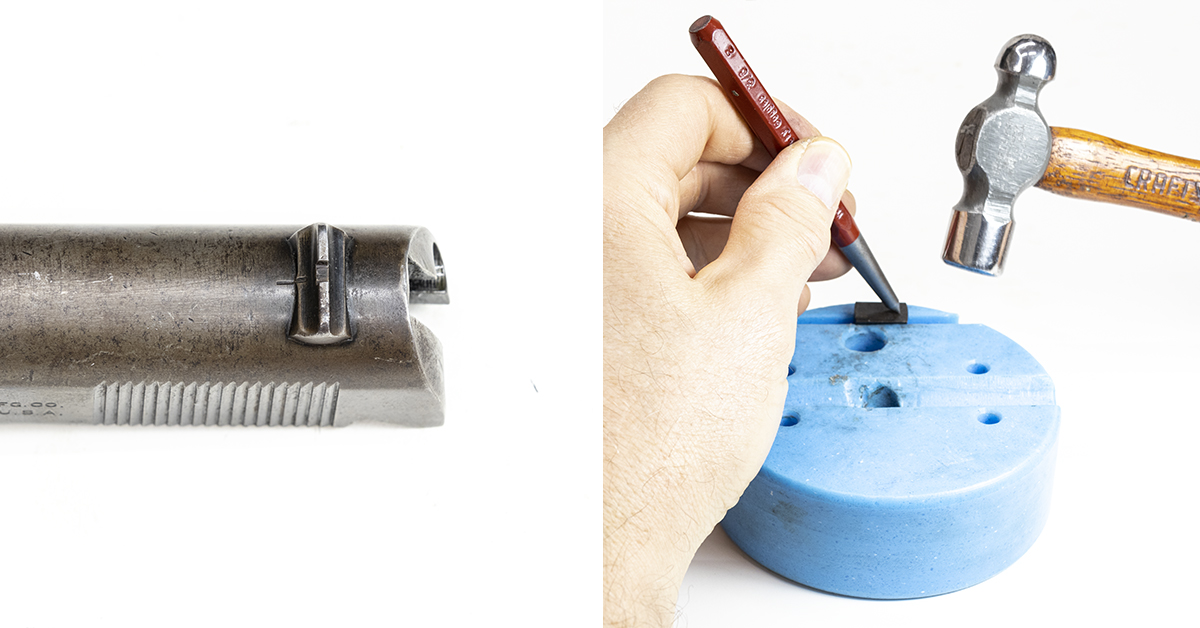
The rear sight should be tight in its dovetail. If it is not, it can be tightened with a hammer and center punch. If the rear sight is loose in its dovetail, remove it from the slide and place it on a bench block with the bottom of the sight facing up. Use a hammer and center punch to make two or three center punch marks along the bottom center of the rear sight. This will cause a burr to be raised around the center punch marks, which will increase the interference between the sight and its dovetail. This may be all that is required to provide a satisfactory fit in the dovetail slot. Before reinstalling, apply Loctite 660 to the bottom of the sight to help hold it in place.
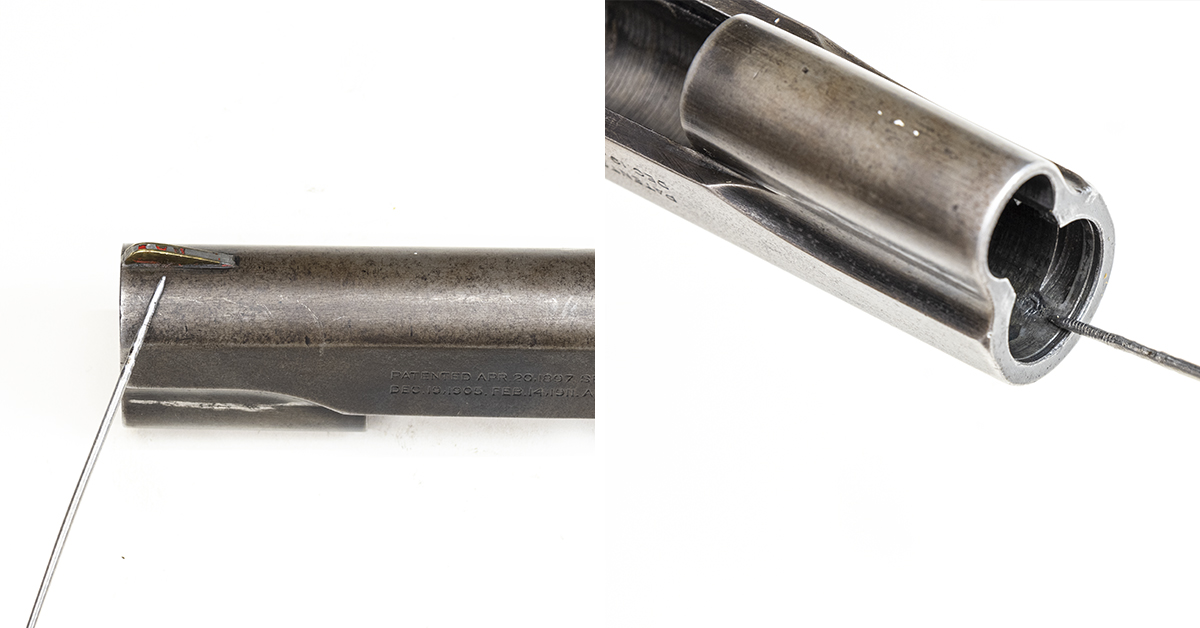
The locking lug recesses in the slide and the corresponding locking lugs on the barrel should be free of defect and show no signs of battering. If the lugs appear to be misshaped, seek assistance from a gunsmith.
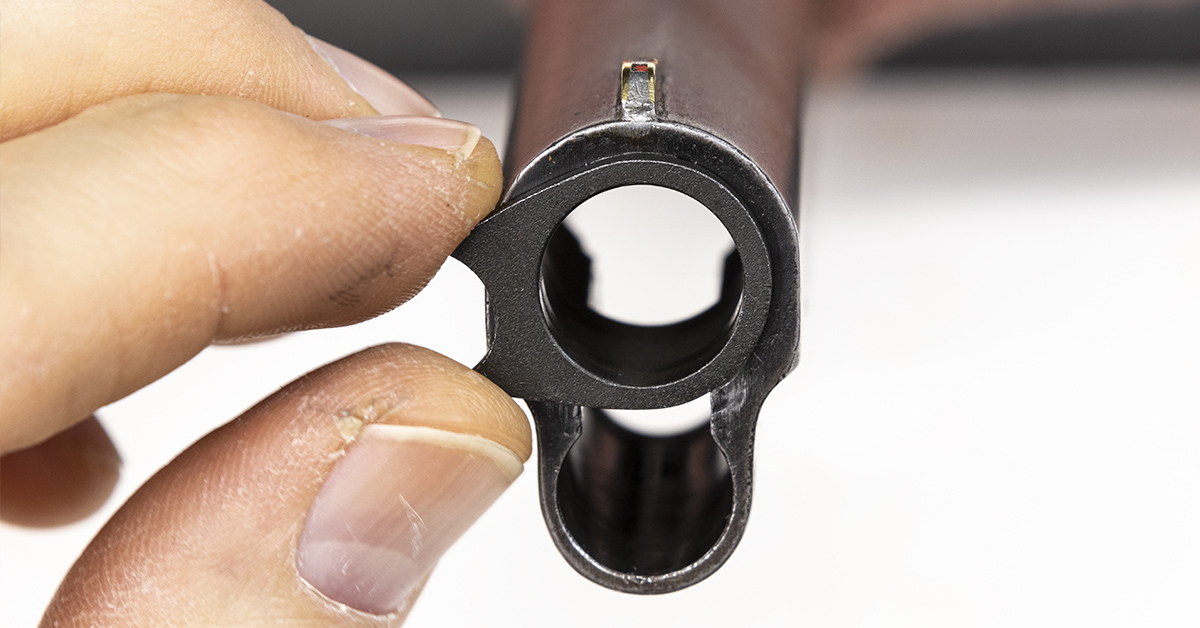
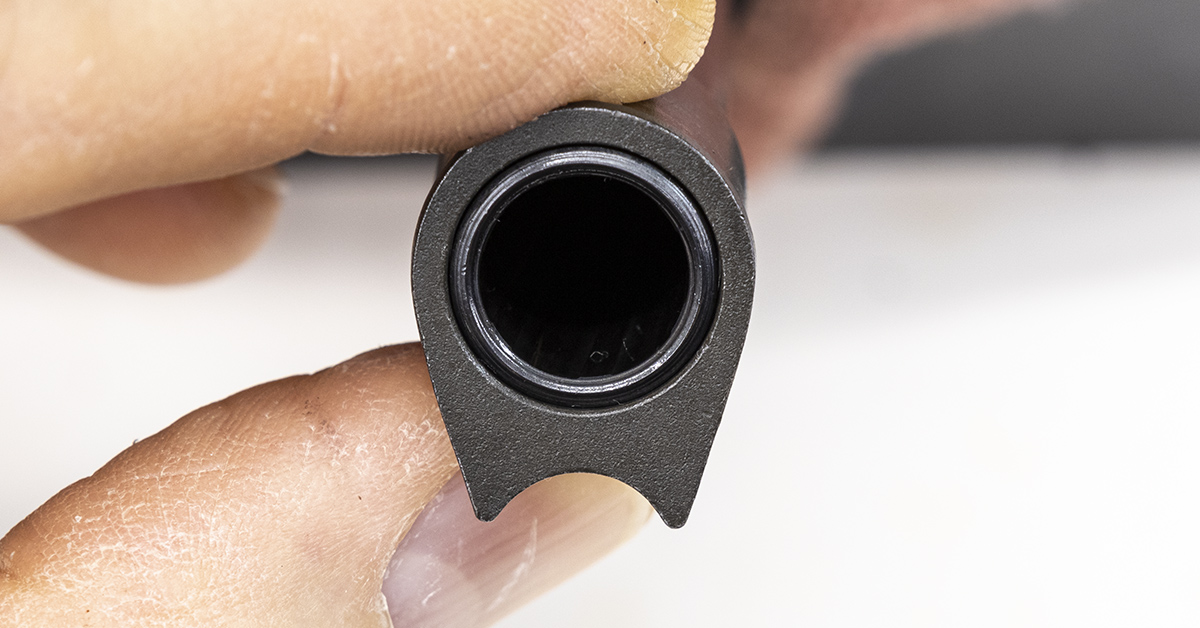
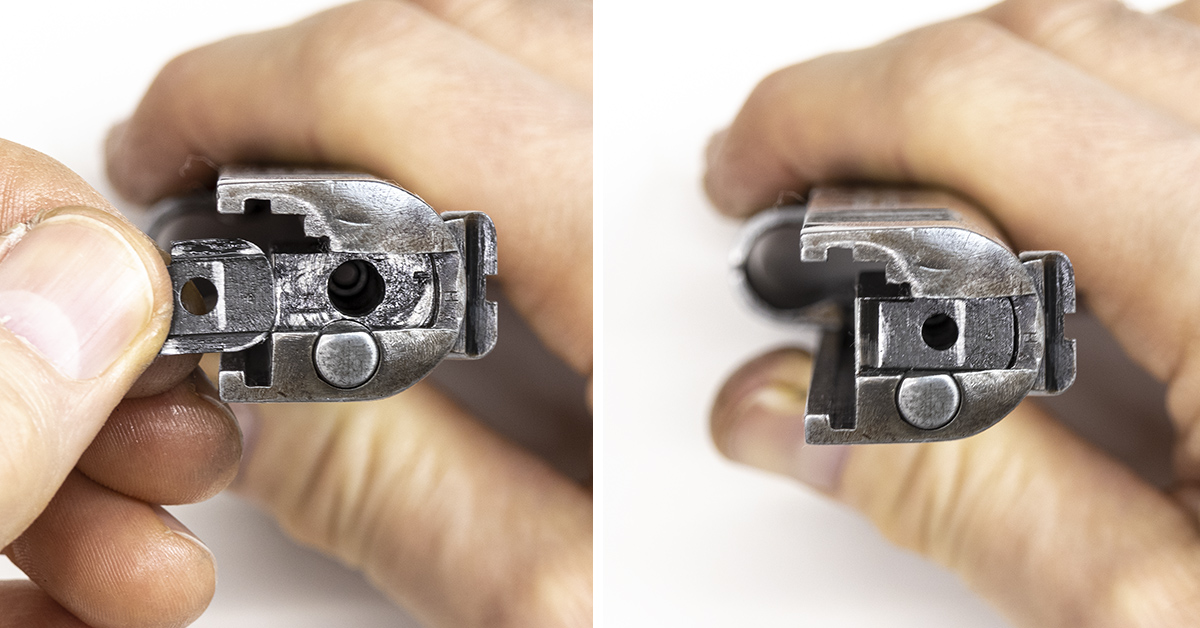
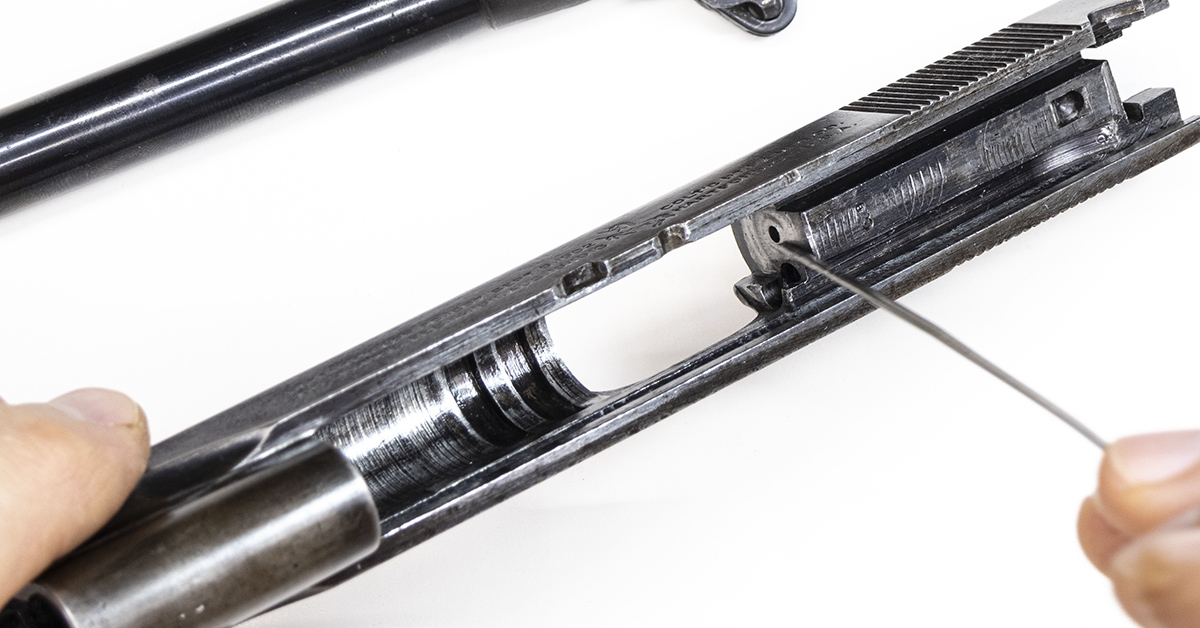 The firing pin hole should be round and the breech face should be smooth and free of any rust pits.
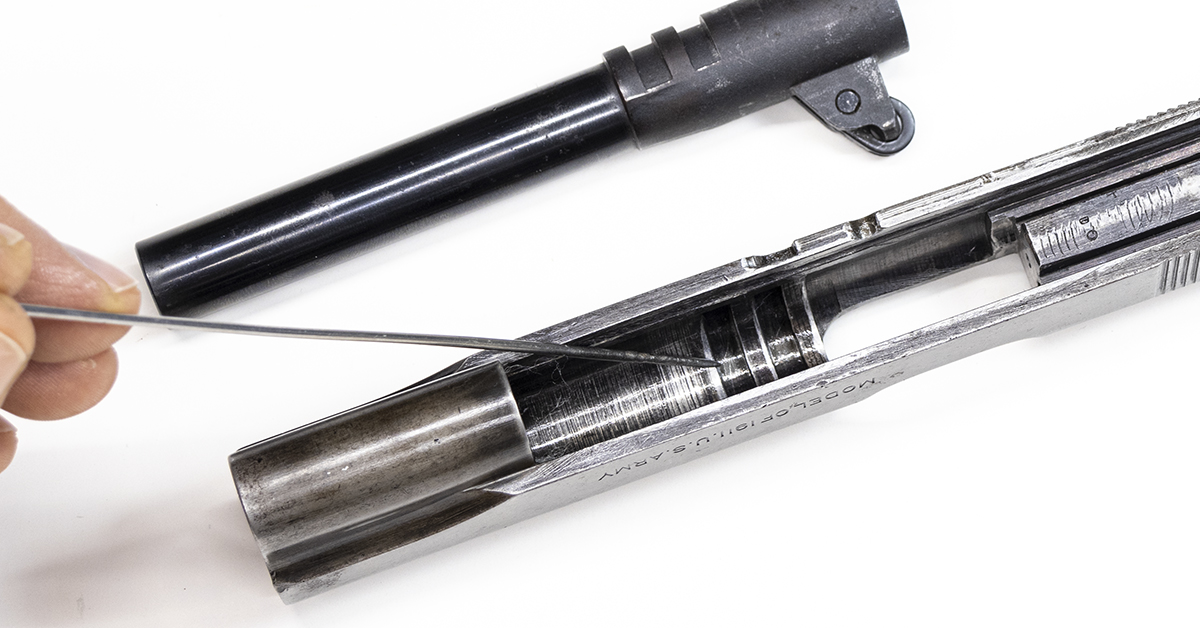
The groove in the extractor is where the cartridge case rim will reside once a round is chambered. A 90-degree angle should be formed with the groove and the forward edge of the extractor that engages the cartridge case rim. Anything less than a 90-degree angle can allow the extractor to slip off the case rim, leading to a failure to extract.
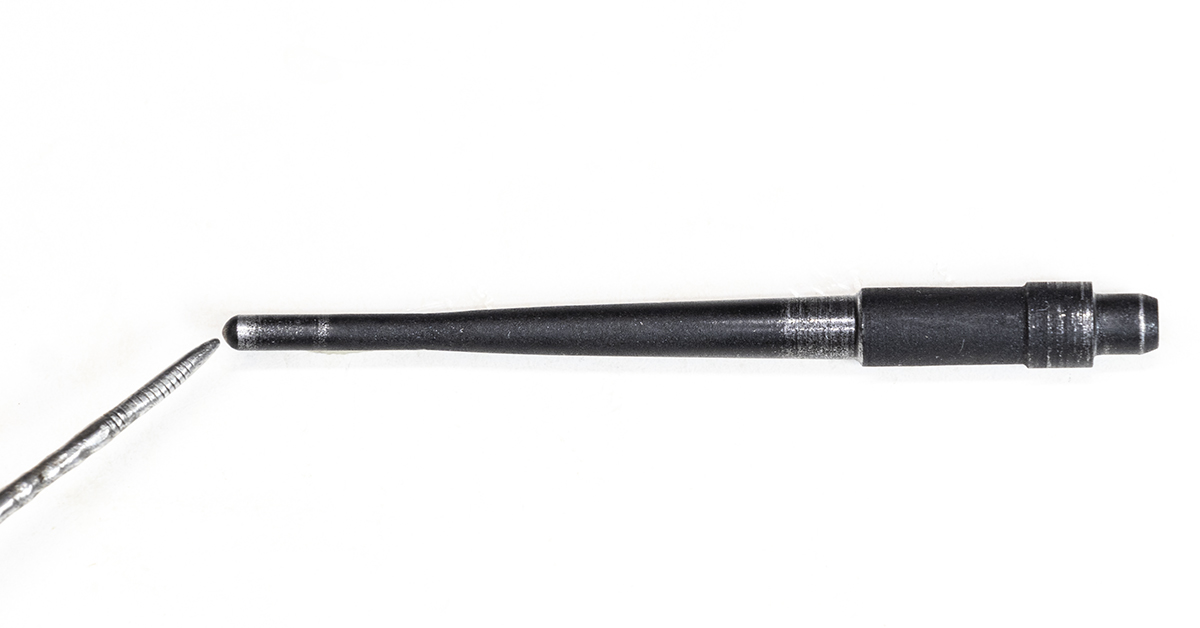
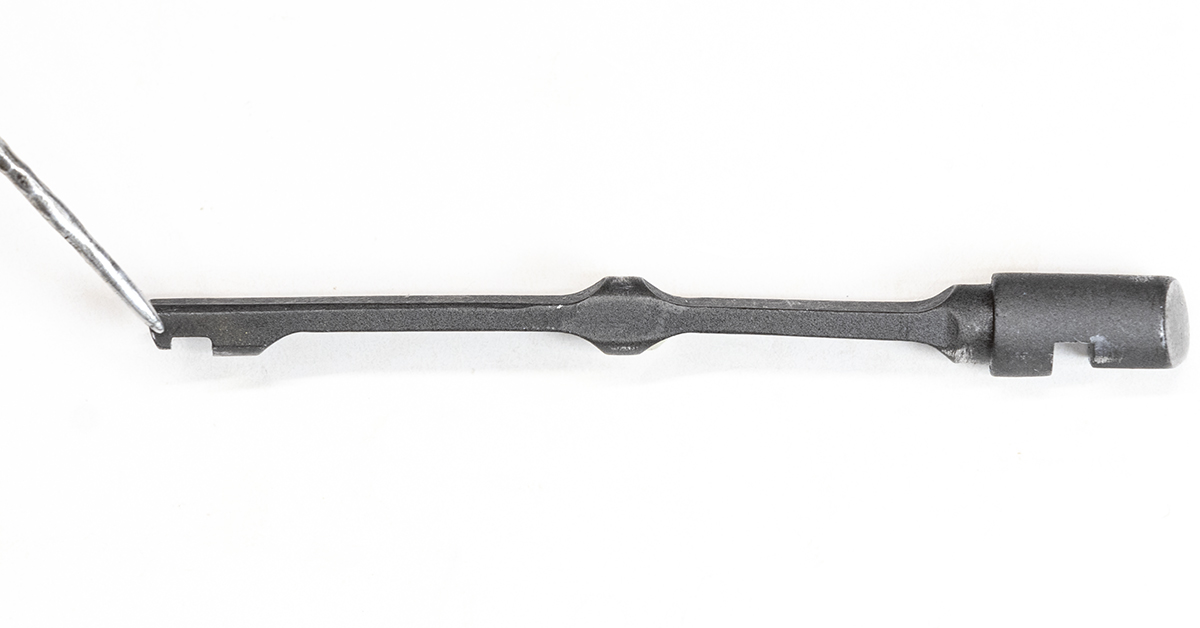
The shape of the firing pin tip is critical to the safe and reliable operation of your pistol. If the pin tip is too blunt, it may not detonate the primer; too sharp and the primer may be pierced. As pictured, the firing pin tip should have a clean, crisp, uniform radius and the firing pin should be straight. An easy check for straightness is to simply roll the firing pin across the top of your workbench. It will want to roll in somewhat of an arc, but if it is bent, you’ll see it.
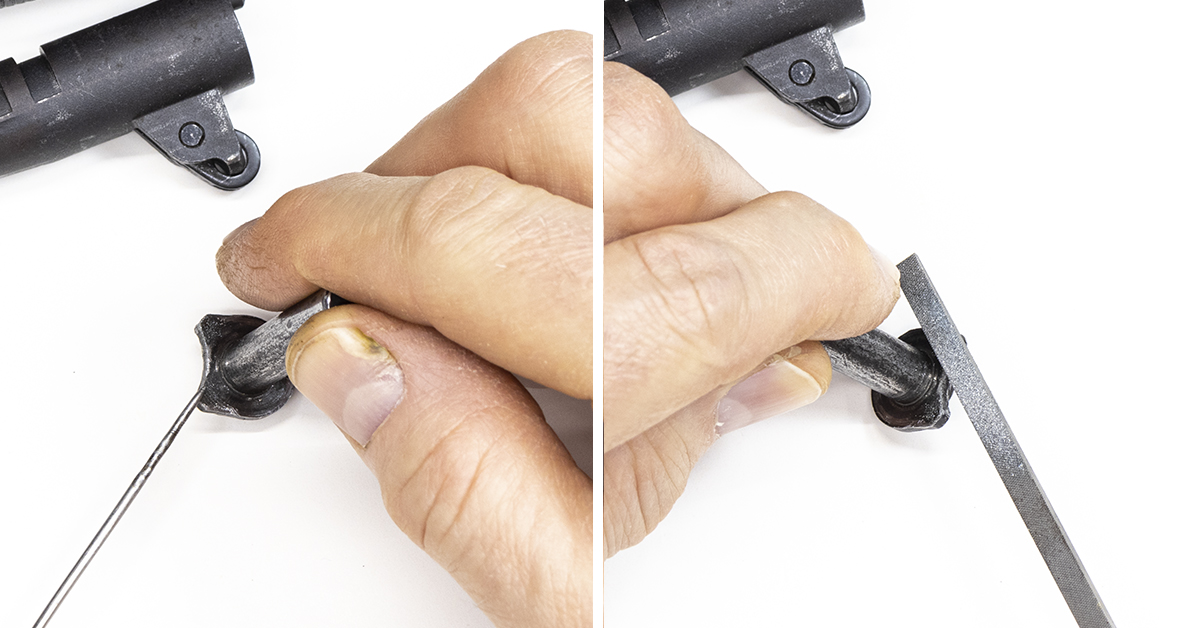
Inspect all components closely for any burrs. Burrs that are found are easily removed with a small file.

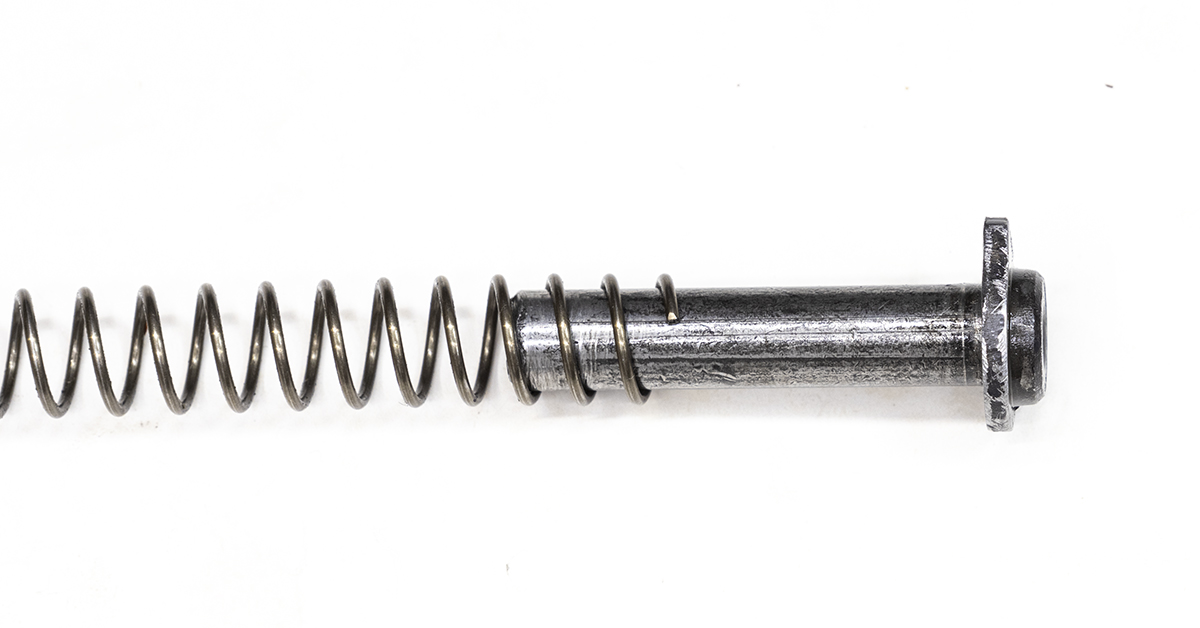
The original Government specification for the recoil spring calls for a 16-pound spring that is 6.5 inches long. The spring from this 1911 is of an unknown weight and measures under 6.5 inches in length.
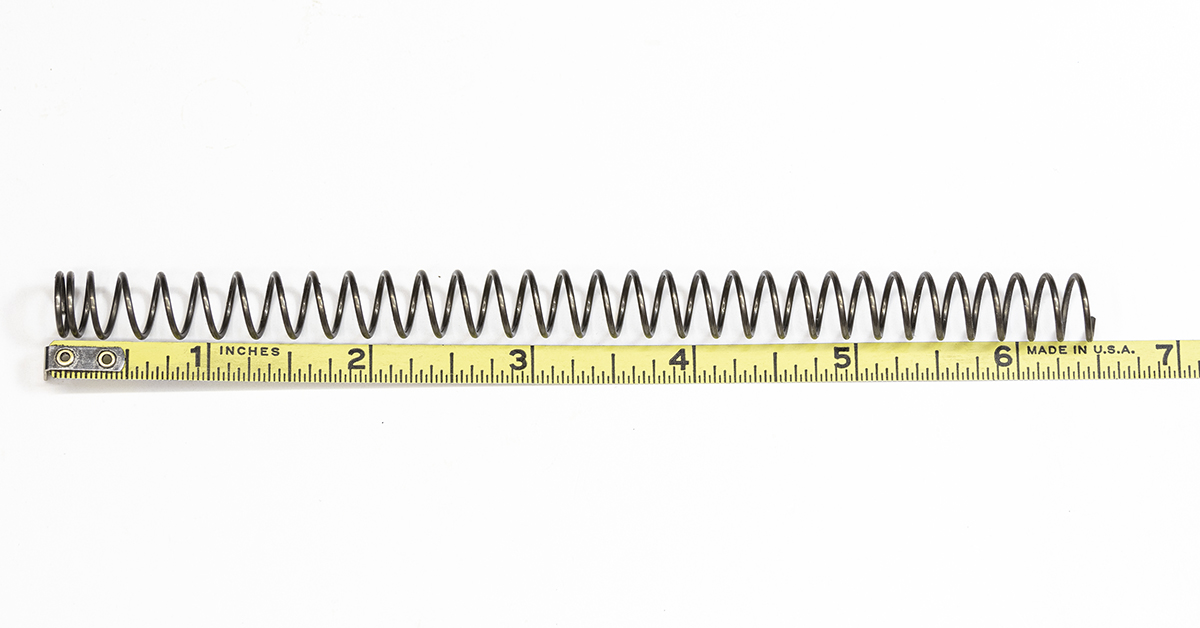
The recoil spring will be replaced with a new spring from Wolff Gunsprings (part #41916). This is a 16-pound spring of the correct length.
Apply a light coat of oil to all cleaned and dried slide components. It is important that nothing be overlooked during this procedure.
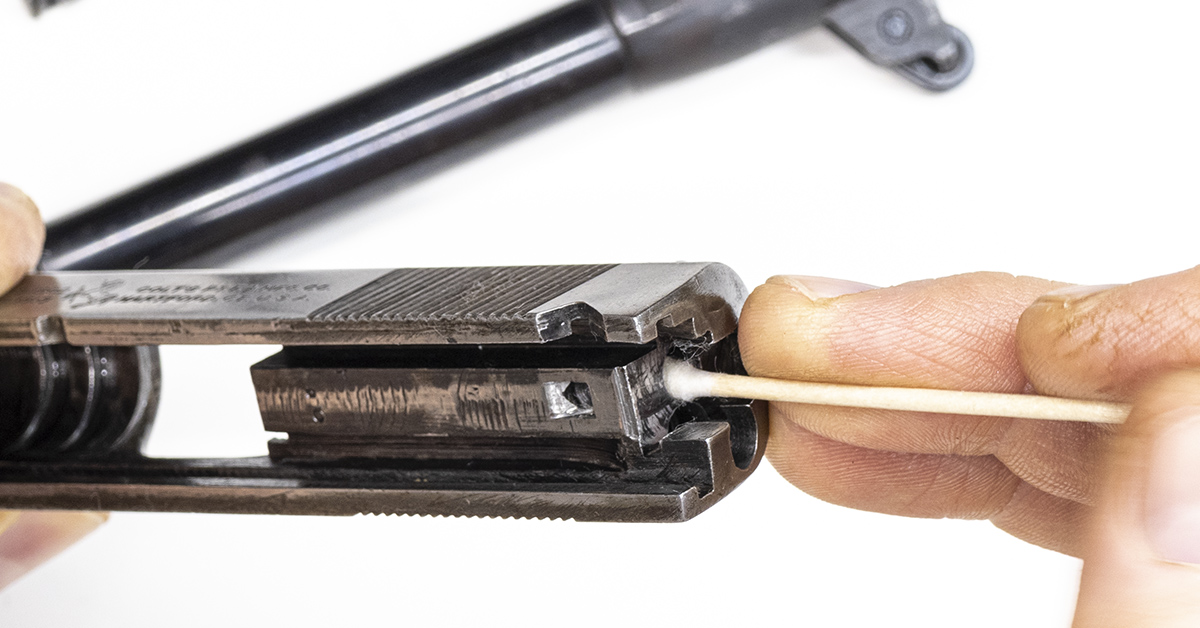
Use a cotton swab to apply a light coat of oil into each recess of the slide.

Reassembly is the reverse of disassembly. Begin by installing the extractor prior to installing the firing pin.
With the extractor fully seated in place, trial-fit the firing pin stop. This will ensure that the stop properly engages the slot in the extractor. With extractor slot in proper alignment, remove the firing pin stop.
Install the firing pin assembly and the firing pin stop. The firing pin spring on this 1911 appeared to be in good condition, although it is of an unknown age and origin. I installed a new spring from Wolff Gunsprings (part #26101).
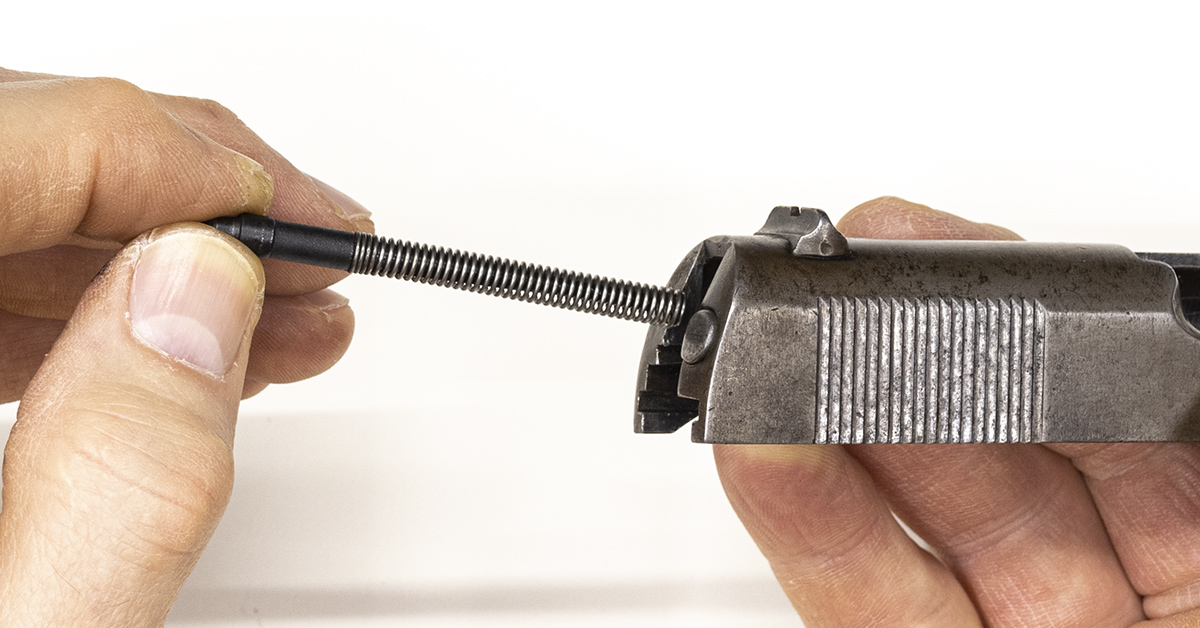
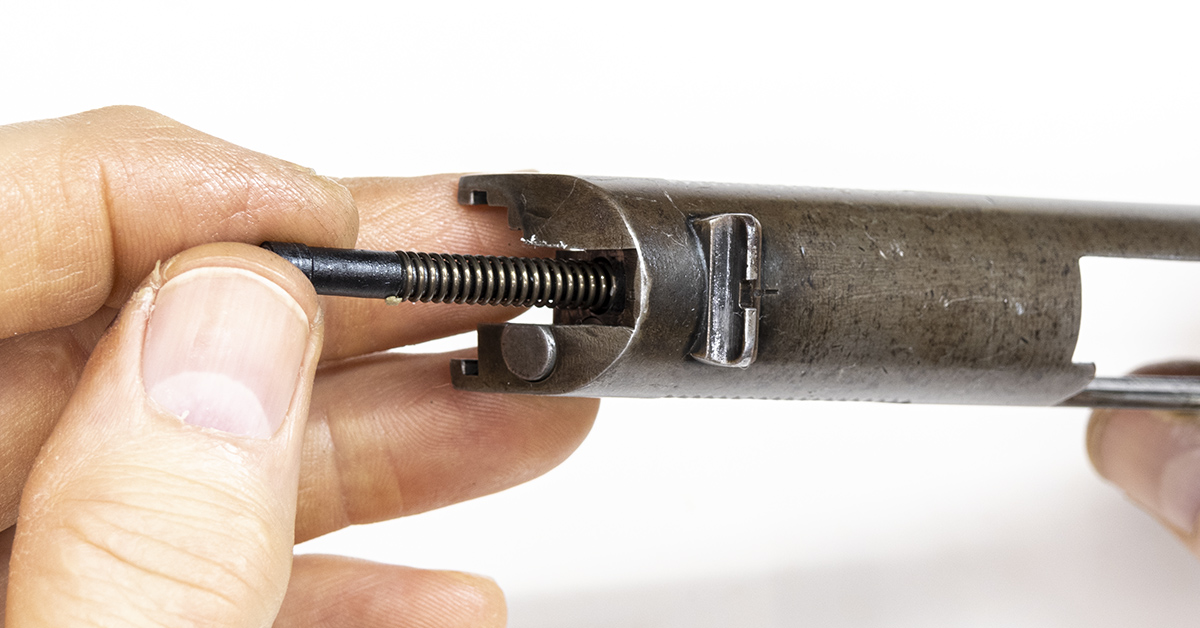
The open end of the recoil spring goes onto the guide rod as shown. Fully seat the spring against the flange of the guide rod.

Install the barrel into the slide, followed by the guide rod, recoil spring, spring plug, and barrel bushing in the reverse of disassembly. The slide is now complete and you can turn your attention to the frame.
Stay tuned for the second installment of our 1911 deep-clean and maintenance where we walk through the frame assembly.