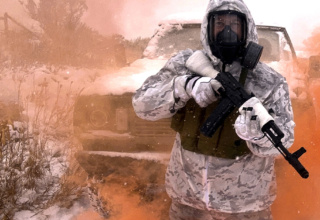
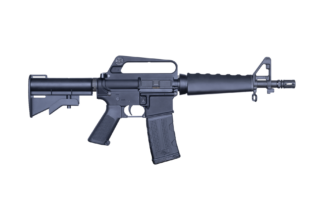
Got a thing for the popular WASR AKM? These simple upgrades can turn that “one of many” rifle into a personalized hot rod.
by Jeremy D. Clough
I was doing a ball-and-dummy drill during Gunsite’s AK class when Rangemaster Freddie Blish suddenly said, “Don’t move.”
I froze. A group of students gathered ominously behind me.
“Is that what I think it is?” one asked. “I’ve never seen one of those before.”
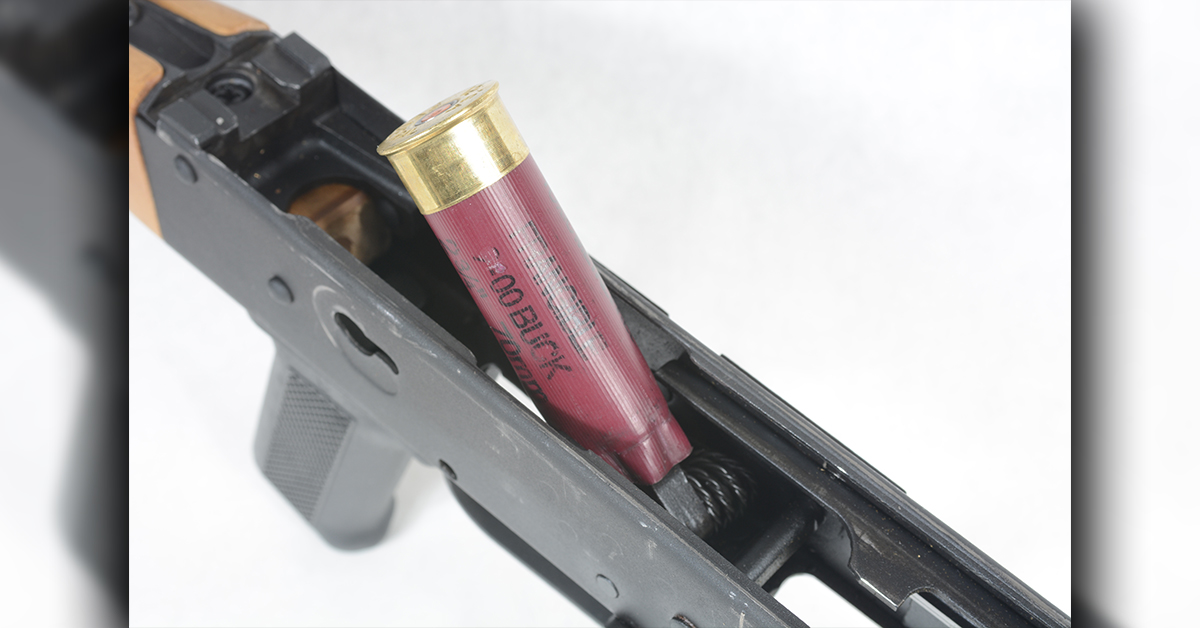
Well aware of Mojave rattlers and Arizona’s other potentially lethal fauna, I remained in suspended animation until Blish held up the separated case my borrowed rifle had spat out.
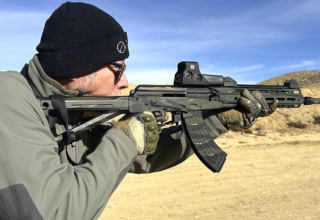
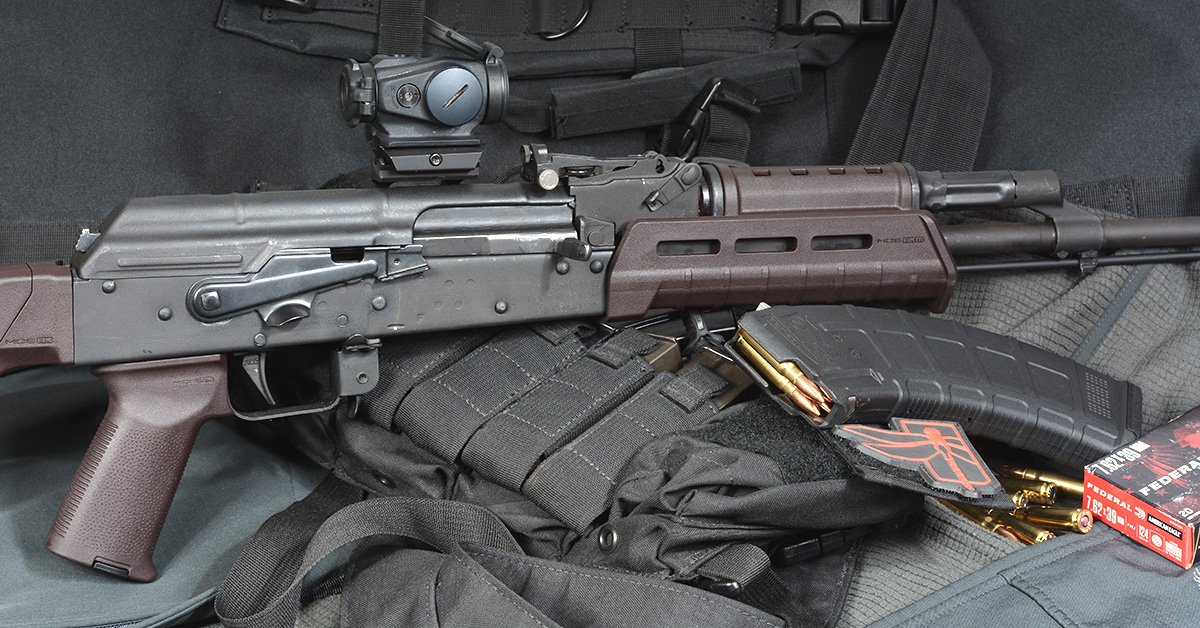
That’s kinda the way it was with that gun, which displayed a truly impressive breadth of failures, combining many of the AK vices with few of its virtues. The best things about it were its Magpul furniture, the Aimpoint Duty RDS I brought with me, and the chest rig lent by Haley Strategic.
After Century Arms sourced the WASR AK, it was time to apply what I’d been taught by AK guru Jim Fuller in the armorer portion of the class. And if you want to work on AKs, you should take the class. What follows may be helpful but does not compare to having a master watch over your shoulder. It worked for me, but when in doubt, have a gunsmith do it for you. Guns are dangerous, and any cost pales in comparison to the property damage, injury, or death that can result from what may seem like a minor mistake. Make sure the gun is unloaded and follow all safety rules at all times. Any liability is yours and yours alone.
I struggle with post-and-notch AK sights, so I replaced the rear with a fully adjustable peep sight from KNS Precision.
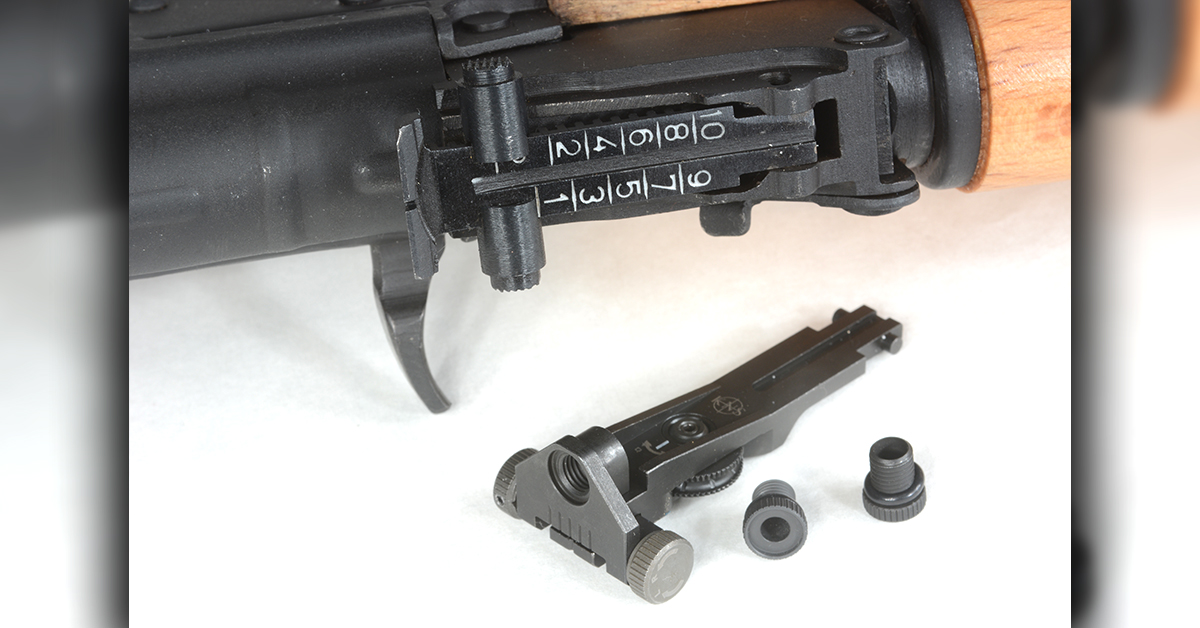
There are other options, but I’m used to HK/AR-style aperture sights, so I purchased the one with several different sized apertures to find the one closest to the sight picture I’m used to using. Installation is simple but requires effort: compress the powerful leaf spring beneath the rear sight and the sight will slide backwards out of its mounting grooves. I used a screwdriver and a considerable amount of force, with the rifle oriented upwards so the old sight just fell out when the spring was pushed down far enough. Reassembly is in reverse order. A whack from a rubber mallet will help seat the new sight.
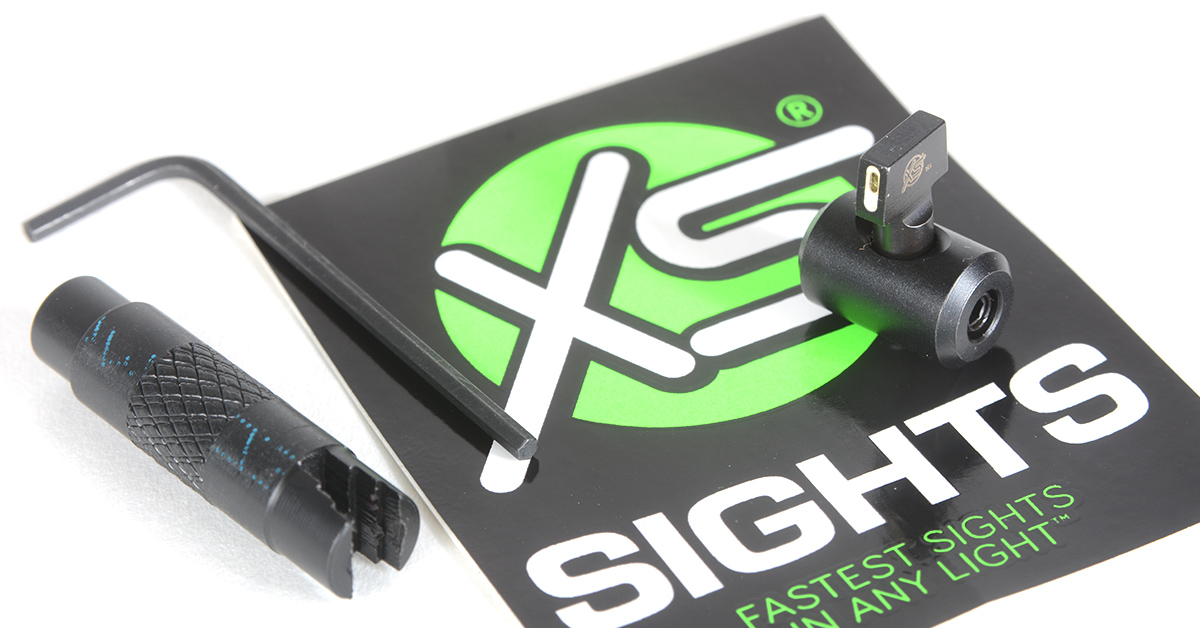
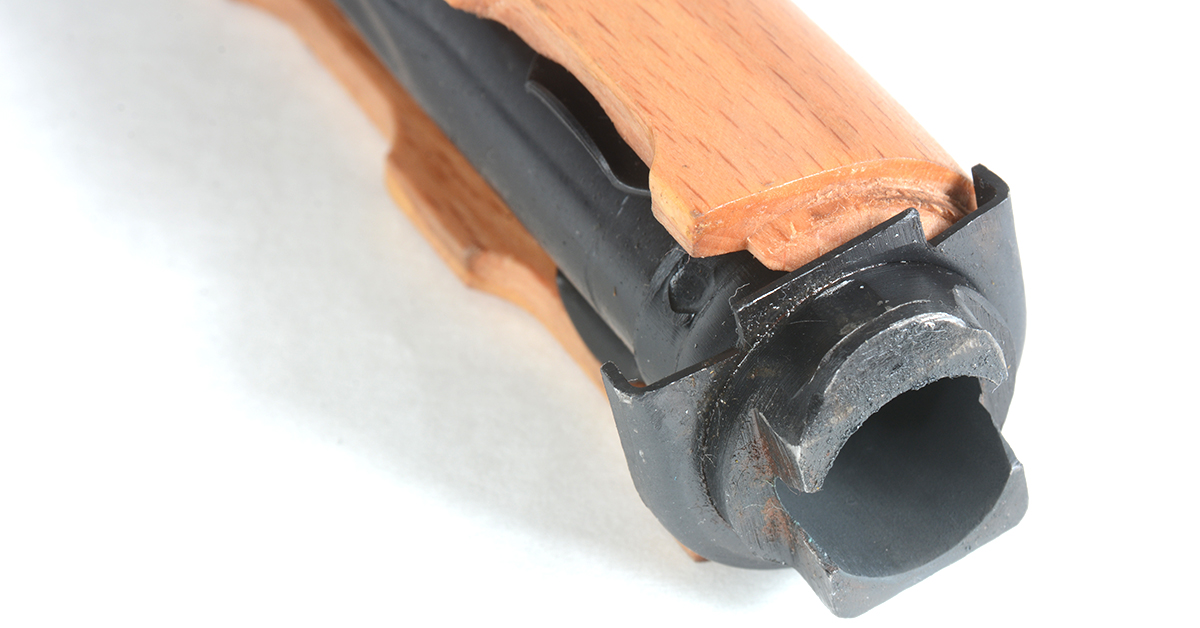
The front sight was provided by XS Sights, which sells both full sight sets and separate tritium fronts. I’m more used to tritium dots but requested the stripe version because I wanted to keep the square profile it offers (the other options had rounded posts).
To give credit where due, the good stuff I did on this gun came from Fuller’s instruction; dumb stuff I figured out on my own. This includes neglecting to get a front sight tool. The XS sight comes with a tool to install the new blade, but you’ll need a different one to unscrew the original post and remove the drum into which it is screwed (it’ll also be replaced). It’s possible to use needlenose pliers, a dissembled carabiner, or whatever to unscrew the post, but plan on buggering up the protective ears around it. It’s easier to improvise on the drum, which can be driven in/out with a drift (I used an aluminum rod) or pressed out in a vise.
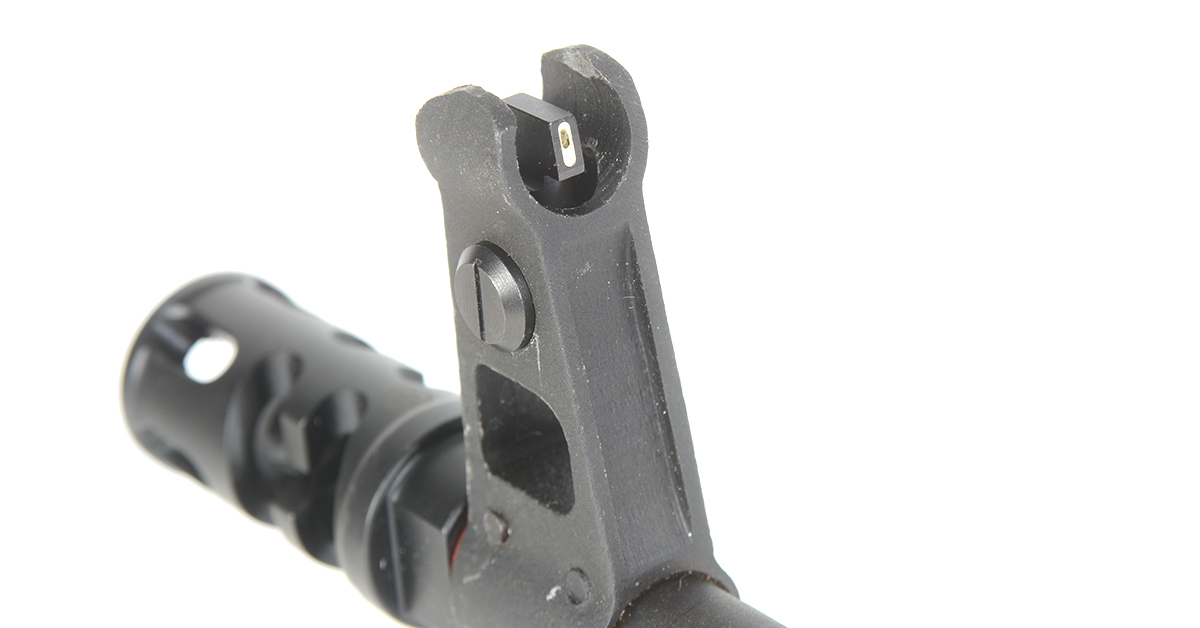
One side of the XS drum has a line that must be kept vertical so the sight insert can be screwed in once it’s in place. The other side has a set screw to lock-in the post. The instructions say to screw the post in about .125 inches below the ears. I used a set of dial calipers to measure this and center the drum, but after test firing, mine needed to be a bit higher.
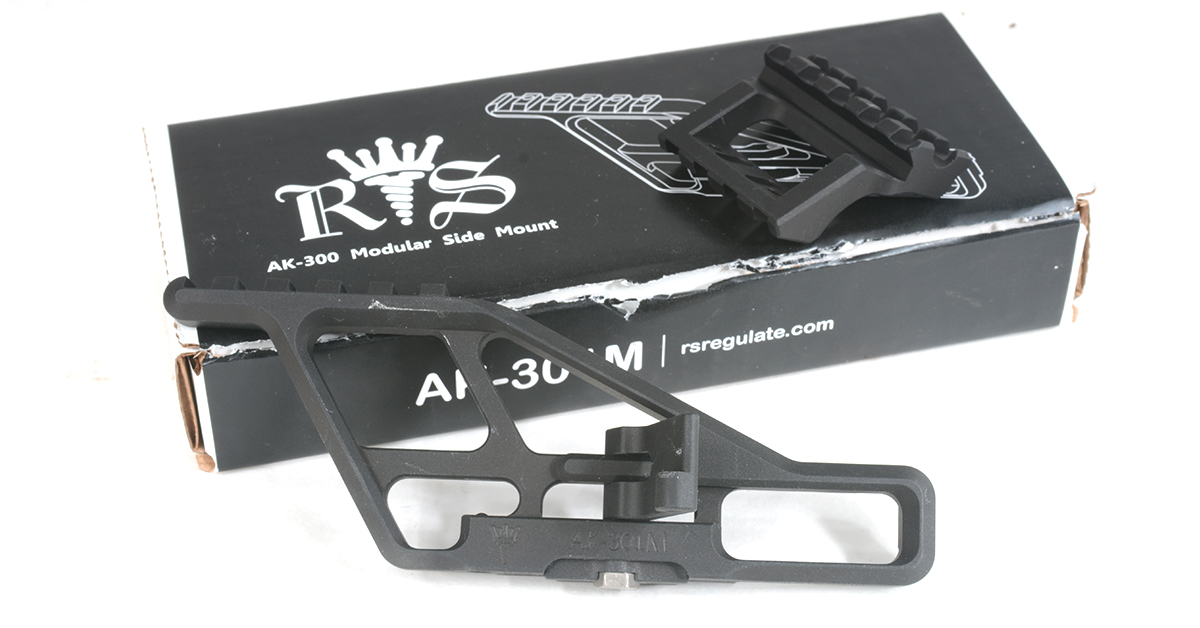
Brownells provided many of the other parts, including the RS Regulate modular optic mount. These come in two pieces, ordered separately: the lower mount, which interfaces with the bracket riveted on the side of the receiver, and the upper, to which the optic mounts. I chose a short length of Pic rail sized to match the Aimpoint Duty RDS. The tension-adjustable lower mount slides on from the rear and locks firmly in place with a snag-free latch that’s still easy to remove.
The top rail section has a lengthwise groove to help align it during assembly so that it’s not off to one side. It also comes with a pair of roll pins so the two parts can be drilled and pinned together for a permanent assembly, though applying Loctite to the screws will probably work for most.
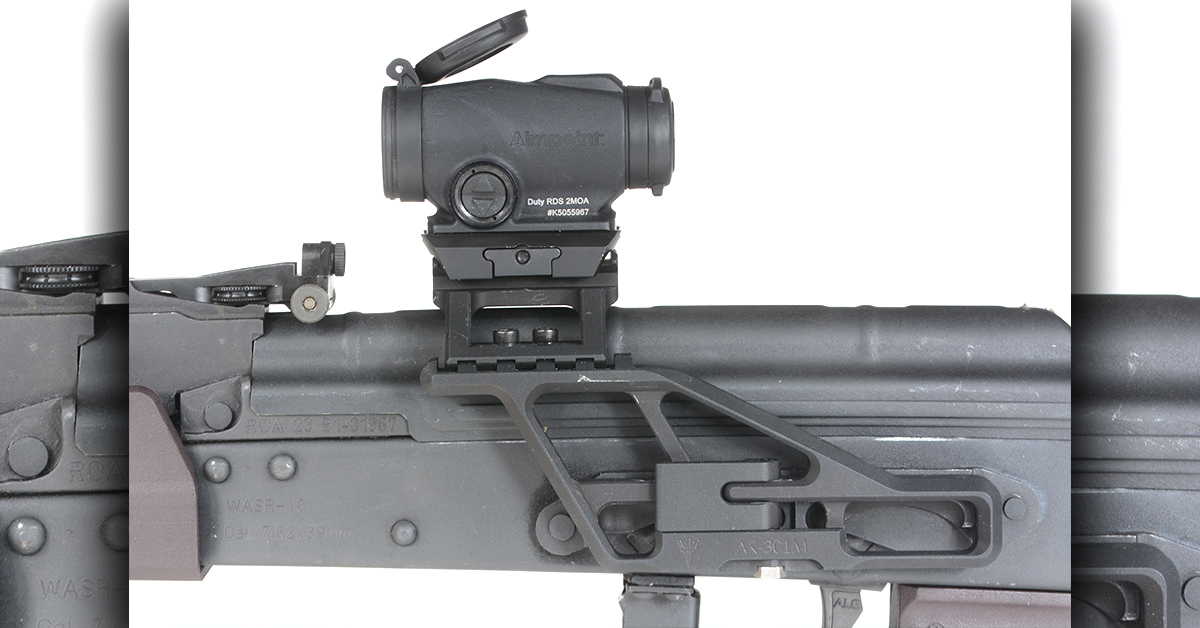
A major benefit of the RS Regulate system is that it keeps the optic away from the hot gas tube that can cook it. Even so, I could still fieldstrip the rifle without taking it off, reducing the odds of a zero shift. I generally distrust anything to return to zero after removal, but I have yet to notice a change at 25 yards.
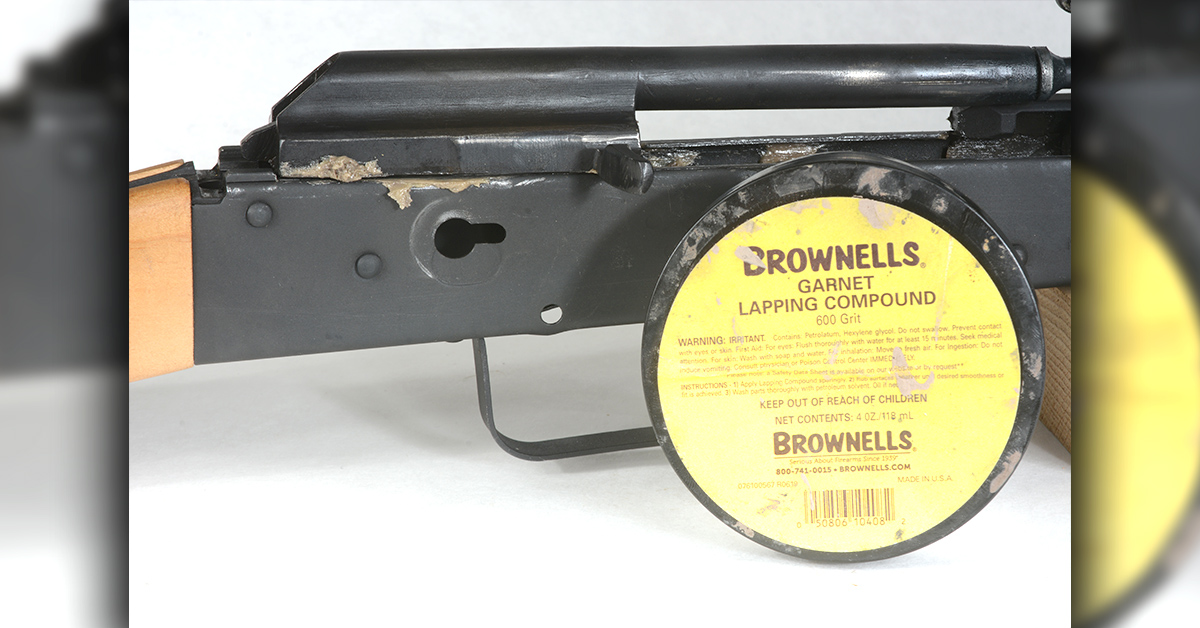
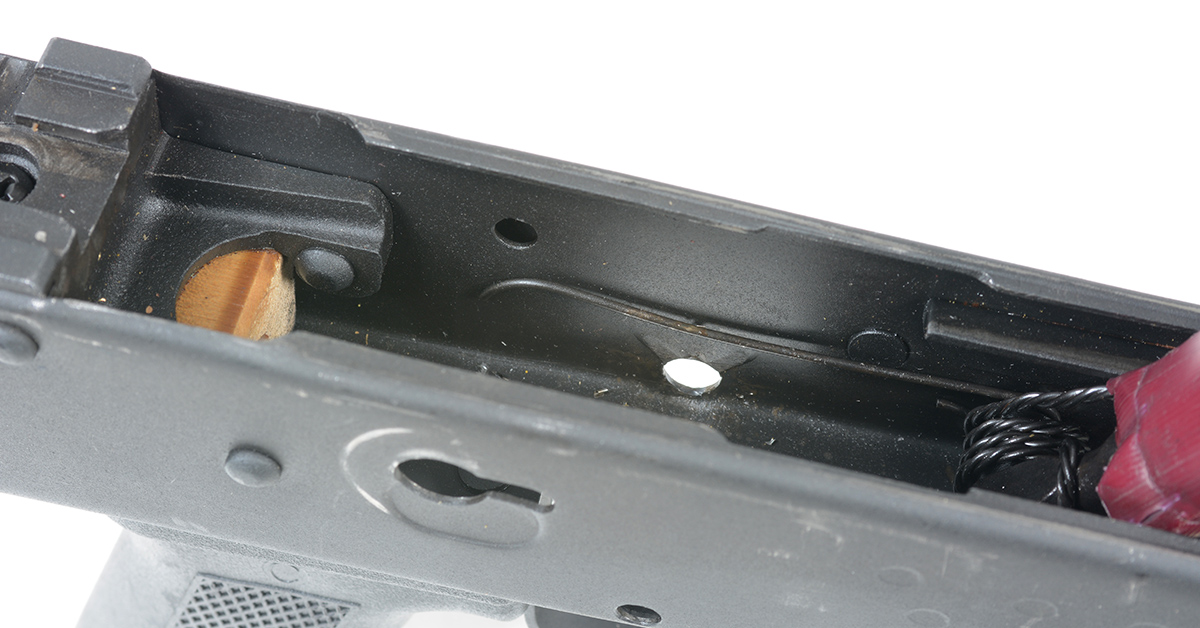
AKs are known for reliability, but it never hurts to be smooth. After complete disassembly, I applied Brownell’s lapping compound to the bolt rails and cycled it two or three hundred times. Sandpaper also works, but in either case, remove all abrasive residue before reassembly. I scrubbed mine out in a solvent tank. Since the WASR’s mag well is re-machined after importation, I broke those edges with a round needle file and applied cold blue.
Disassembly is simple and logical: remove the top cover by pushing in on the button at the rear, which is the back of the action spring assembly. Pushing it further forward frees it from its rails, and it can be lifted out. The bolt comes out similarly. Rotate the safety to vertical and pull it out.
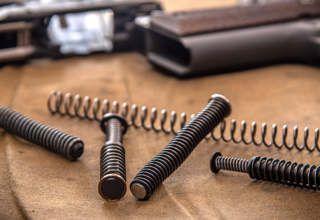
The ends of the hammer spring are bent into nasty little fangs resting on the rear of the trigger. After lowering the hammer, carefully lift each leg of the spring and rest it on the hammer, then capture the lot of them with an empty 12-gauge hull.
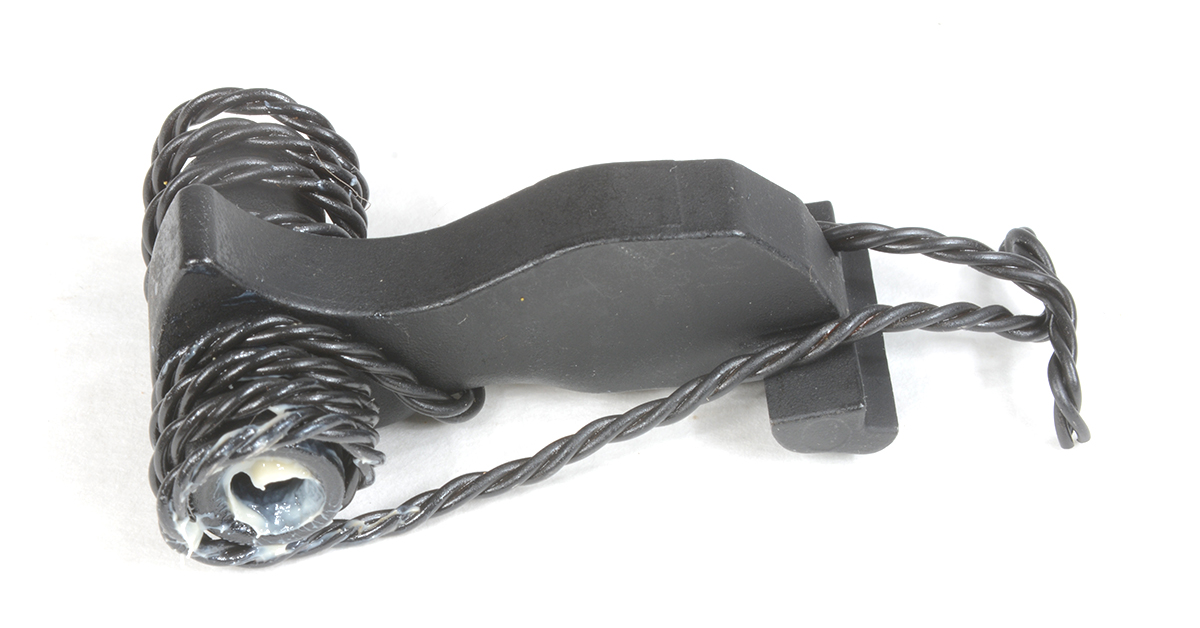
While the AR’s pins are locked into place by the fire control group springs, the AK uses a separate bent piece of wire, AKA “the shepherd’s hook.”
It’s a royal pain to deal with and easily replaced with a pin retainer plate that has two notches (one for each pin) and a hole where it’s locked in place by the safety. It’ll take a little wrestling, but it gets progressively easier to install and will save lots of heartache.
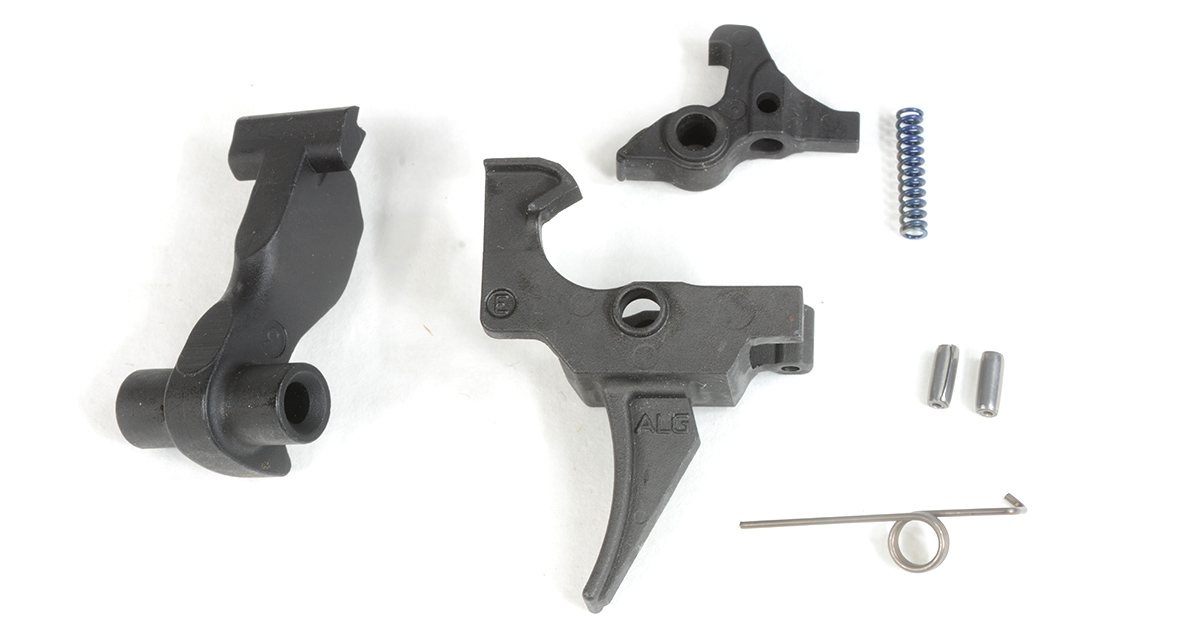
That brings us to the ALG trigger. While there’s a lighter version, since this gun is set up for defensive use, I chose the AKT-Enhanced trigger. First, check the height of the trigger guard rivet, which will need to be shaved down if it’s over .062 inches. Fortunately, mine was around .040 inches. Next, check clearance between the trigger and the safety, which is done without the disconnect in place. Measuring between the rear of the trigger and the Krebs Enhanced Safety lever showed an enormous gap, handily solved by the roll pin ALG includes with the trigger kit.
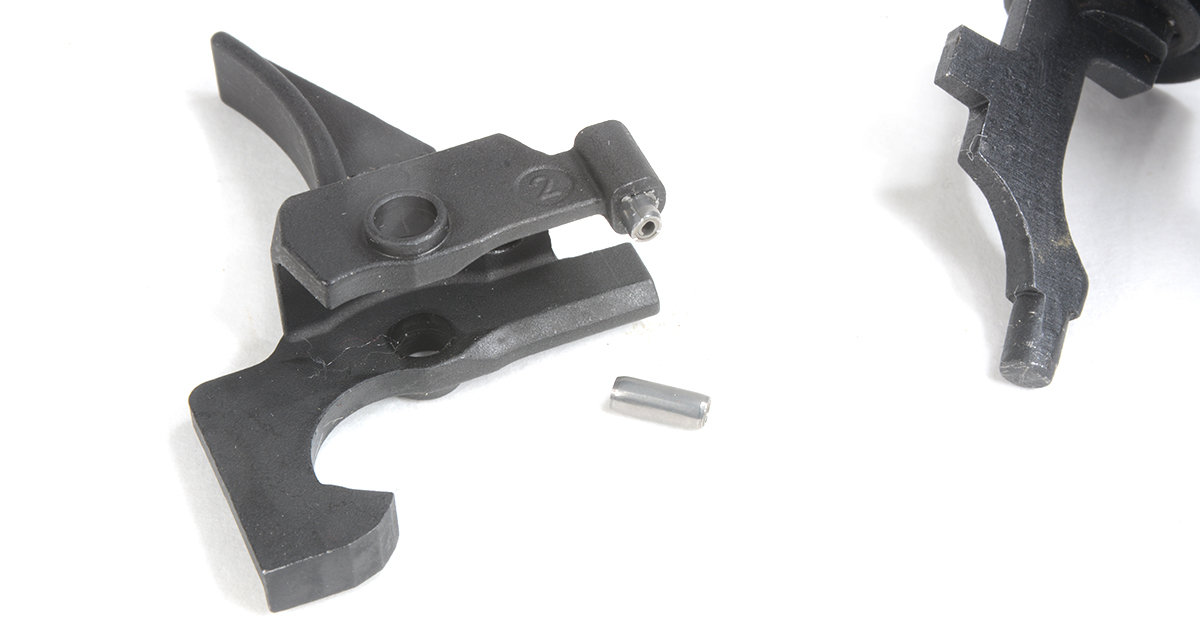
Drive or press it into the trigger (I used a vise) and file fit until the safety can be applied, which I did using a Swiss pillar file from Brownells. With no more than .010 inches between the two, it’s time to install the springs, disconnect, and hammer. My trigger came in quite light at 2 lbs., 5.2 oz., so I added the included auxiliary spring that brought the pull up over 3 lbs. with a smooth roll and a surprisingly positive reset.
With the gun fully assembled, I found it hard to operate the safety, and noticed the top cover and safety were interfering with one another. A little smoothing and some bending with the vise solved this.
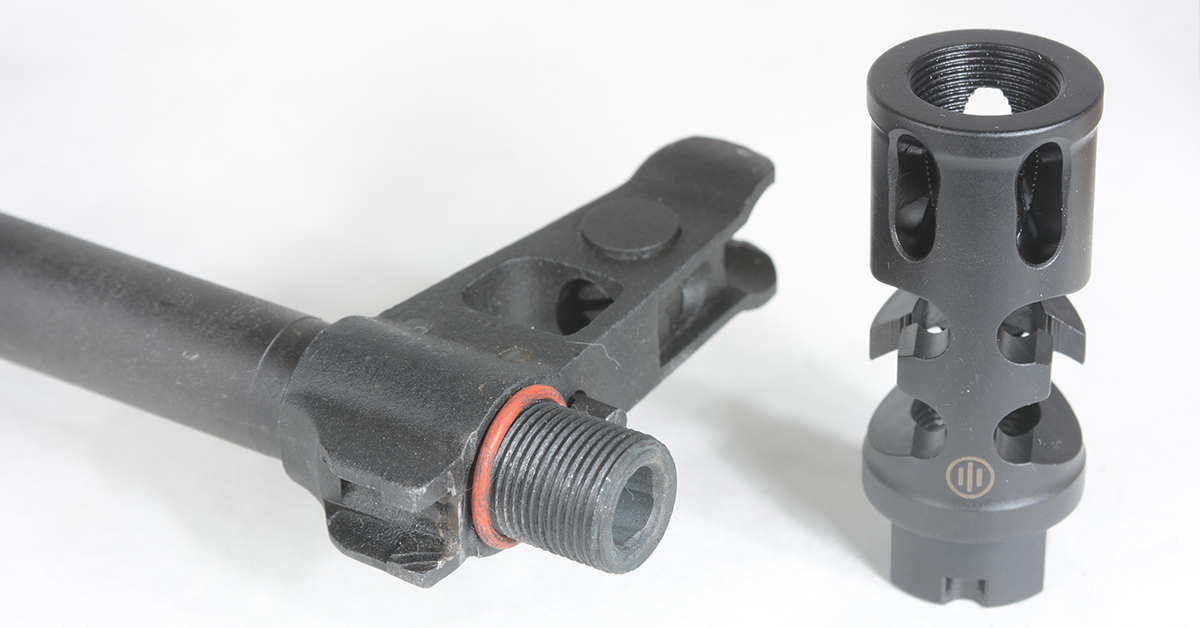
AK recoil isn’t punishing, but it’s more than a .223, so I added the FSC47 muzzle brake from PWS. I’ve used PWS stuff since right after they changed their name from AK Concepts, and have always been impressed, including by the PWS brake on my 16-inch .308. Installation is simple: push in the locking plunger and unscrew the left-hand-threaded factory flash hider. Install the O-ring that takes up the slack between the front sight tower and the brake, then tighten the brake to the tightest position in which it will clock correctly.
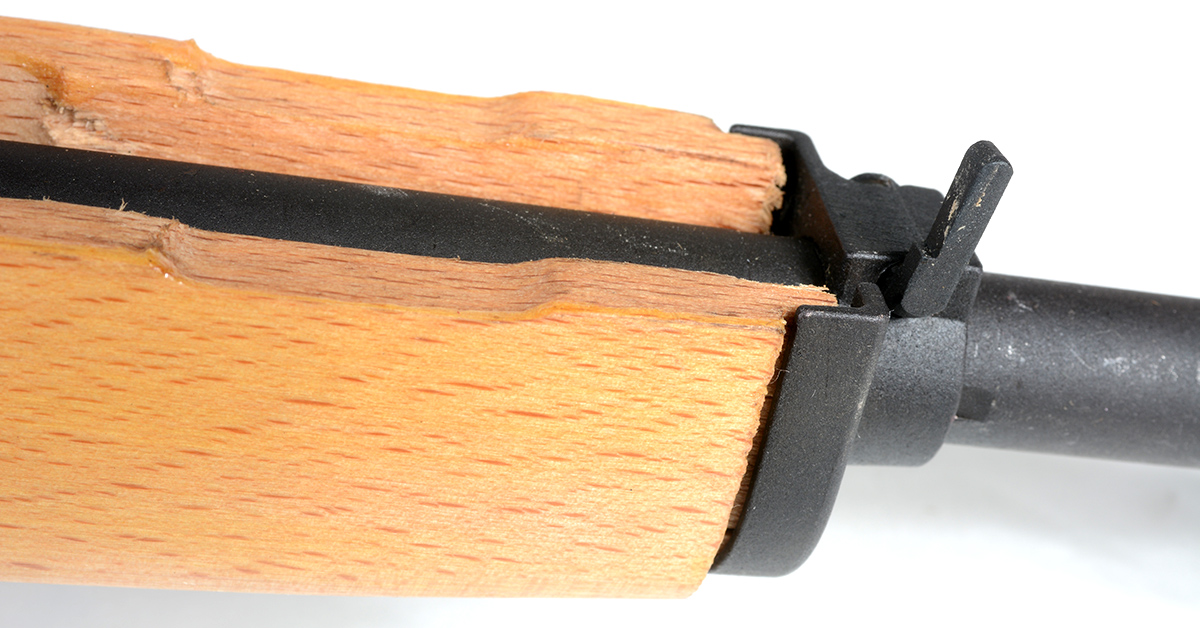
To replace the furniture, fieldstrip the rifle and remove the gas tube. Flip the latch forward that locks the wooden forend on the barrel and pull it forward and free. It may take some force.
Installing the new one will also require effort but fitting it may cause it to be loose once it’s all together. As long as no metal parts bulge, just push it until it seats.
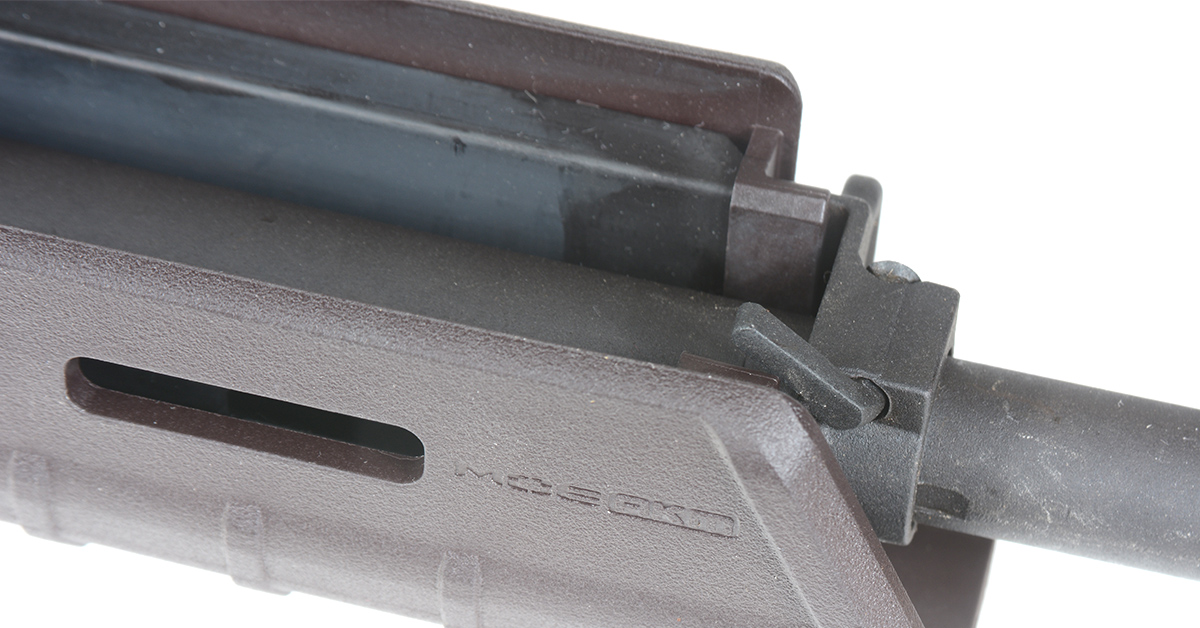
The upper handguard is tougher, requiring a vise and significant hand strength. It rotates into place around the gas tube from underneath and, on my rifle, required some minor filing to go into place. The pistol grip is simple: just remember to keep the loose T-bolt oriented correctly in the receiver.
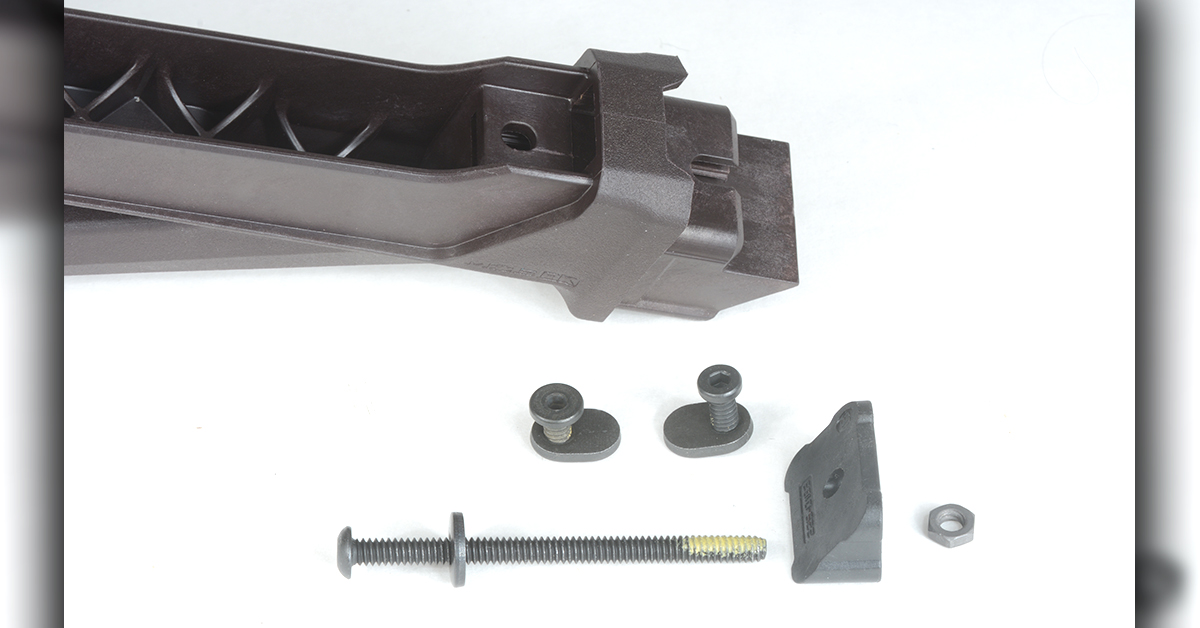
The Magpul buttstock has a clever wedge arrangement to account for variances among the different rifles and has an order in which the screws must be torqued into place. On mine, the first of these two screws was too short and required a stop by the big box store to find one long enough.
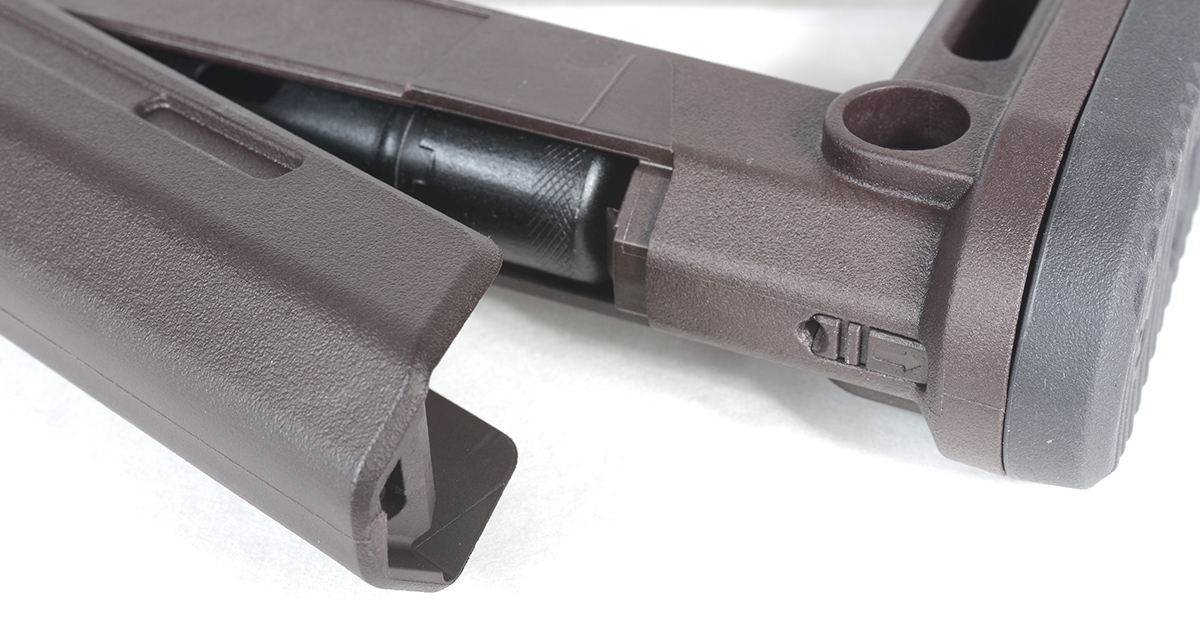
The stock also has a storage compartment beneath the cheekpiece, which holds a factory cleaning kit. Like the cleaning rod, this is omitted from the WASR, so I dropped in one I had on hand and purchased a surplus rod from RTG.
Not only is the gun now comfortable to shoot and faster handling, but changing the parts also brought my 922 count high enough to use foreign magazines.
Man, I wish I’d had this thing at Gunsite…
- TESTED: Century Arms’ AP53 5.56mm Pistol - March 2, 2026
- HUSH 101: Suppressor Basics - January 9, 2026
- Modifying Century Arms’ WASR AK - October 29, 2025