Practicing fundamental techniques with a pellet rifle will make you a better shooter.
by Larry Case
“Old things are in good repute, new things in disfavor.” – Tacitus
Once upon a time when the earth was shiny and new, I did a lot of shooting with open sights. The fact that most of this shooting was done on the banks of Coal River with a Daisy BB gun (a model 25 pump gun, to be exact) makes no difference. Like other hill jacks from my area, I progressed from the Daisy to a pellet rifle to a .22 rimfire. I was shooting almost every day, getting plenty of practice, and it was all with open sights. It saddens me that using open sights has become something of an oddity in this wonderful modern age we live in.
Think about it for a minute. We have a whole generation of shooters and hunters who have probably never used open sights. Many rifles manufactured today do not even have open sights as an option. The young shooter — some of them mere babes — are handed a rifle with a telescopic sight or a red dot optic and told to put the crosshair or the dot the target and pull the trigger. Simple, right?
Well, yes and no.
It will be my position in this little dissertation that shooters who first learn open sights will become better marksman than those who do not. Now, I don’t for a minute claim that everyone in the wide world agrees with this. You will not have to look far to find dissenting views, some of them from knowledgeable and accomplished shooters. That is fine. You go to your church and I will go to mine. More on this later.
Advantages of Open Sights
The supplied open sights that came on your rifle will obviously be less expensive. There are some good aftermarket open sight options out there and most of these will still be cheaper than an optic. Open sights will always be more durable and less likely to fail than any scope or red dot-type optic. On anything that you may have to trust your life to, including a firearm, simple is better. Open sights have no glass, reticles, batteries, or mounts that can fail. A notched rear sight and a bead front sight are about as simple as you can get. In general, open sights make for faster target acquisition/getting on target than most scopes. Whether they are faster than red dot type optics is something we could argue until every last cow comes home. Finally, consider that scopes do add weight to a rifle, and for a hunting rifle, I figure the lighter the better. In hunting applications, we carry a gun a lot more than we shoot it.
Like anything in life, there are disadvantages as well. It is true that a telescopic sight will permit you to see the target better, and most of us don’t think about this until we reach a certain age. So, for longer range applications, a scope will definitely be an advantage.
Using Open Sights
While using open sights is a little more involved than lining up the crosshair on a scope, it’s not that difficult. So, let’s keep it simple, shall we? All we must do is remember that we focus on the front sight and the front sight only. Commonly, the new shooter wants to focus on the target. The human eye can only focus on one thing, so this gives us a blurry picture of the sights. We focus on the front sight, align it with the rear sight, and align them on the target. The target will appear slightly blurry, but that is the proper sight picture.

Like I said before, many of us don’t know how to properly align the sights (because you were raised on a scope) and get the correct sight picture, which is what we see when we have the sights aligned on the target. Most firearms have a simple blade rear sight (slightly notched) and a bead front sight, or a peep (small hole) or ghost ring (bigger hole) rear sight and a post front. Aligning these sights is quite simple if we remember to focus on the front sight.
The All-Important 4 Fundamentals
I know this will be a wave of nostalgia for many veterans out there, but a good source for the shooting fundamentals we are talking about here is none other than the Army Field Manual Rifle Marksmanship M16-/M4-Series Weapons (FM-3 22.9). As you can imagine, there is a world of shooting instruction there.
The manual tells us that in order to make an accurate shot, the shooter needs to remember four important fundamentals:
- Have a steady position
- Proper aiming (sight picture)
- Breath control
- Trigger squeeze
That steady position thing is important. We cannot accurately shoot the rifle unless we have a steady platform to shoot from. When we don’t have a rest to help us — a tree, a rock, or something to help support us — we must have a steady position with our own body. This brings us to the basic shooting positions.
Prone Position
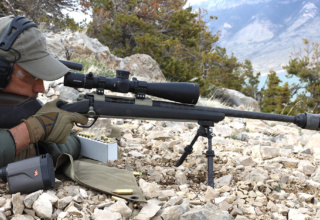
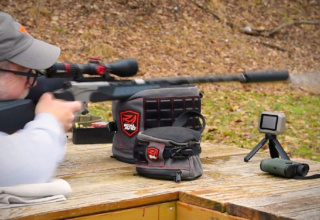
Some of your hunting buddies may call this the “lay down” position, and it will probably be your most steady shooting position. Circumstances, cover, and shot angle may not make this position possible at times. For hunting purposes, the most practical prone method may be the supported prone position, which is basically using a backpack, sandbags, or other item to support the forearm and support hand on the rifle. In this position, the chest of the shooter is mostly flat on the ground.
The Rifle Marksmanship M16-/M4-Series Weapons describes an alternate, unsupported prone position where the shooter comes up on his elbows, which you might have to do to get the proper elevation, but you are not going to be as steady.
In the prone position, the shooter should take care to align the body as straight behind the gun as possible. The legs are spread, and the feet should be positioned with the inside ankle and side of the foot flat against the ground, if possible. (Some shooters may not be able to do this as age, wear and tear on the body, and other factors may make this impossible…I can’t do it!) The Army manual allows for one variation to make it more comfortable for the shooter in that the right knee can be brought forward and offer some support (right hand shooter).
The buttstock is placed in the pocket of the shoulder and the weapon is pulled back against the body. As in all these positions, a good cheek weld on the stock is important.
Kneeling Position
This position may be useful when prone does not give you the elevation you need. The Army Marksmanship Manual advises the right-handed shooter to keep the left foot in place and bring the right foot back one step. Drop to the right knee and with the left hand supporting the forearm of the rifle, bring the triceps of the left arm in contact with the left knee for support. Any instructor in the country will scold you for putting the elbow against the kneecap, as two rounded surfaces in contact are not steady.
The right buttock can be rested on the heel of the right foot. The weapon is pulled into the body and the shooter should relax and lean forward slightly to help absorb recoil.
Sitting Position
It is my experience that sitting to shoot a rifle can be a problem for some shooters. Tall shooters with a long torso may have difficulty getting into this shooting position but it is usually a matter of how flexible we are and if we are showing the effects of eating too well. (Could we have a show of hands?) If you are just not comfortable in any shooting position, then don’t use it; if you are not comfortable you are not going to shoot well. It is noteworthy to me that Rifle Marksmanship M16-/M4-Series Weapons does not feature a sitting position.
Most of those who can sit and shoot will have the posterior and both feet flat on the ground. The knees are up and give support to the upper arms to steady the rifle. (Much like you would sit with your gun up for an approaching spring gobbler) The right-handed shooter may be able to press the elbow of the left arm against the thigh of the left leg near the knee for stability.
Some shooters will want to sit cross-legged with forearms on the knees and claim they are more stable like this. If you can sit in a cross-legged position and shoot a rifle, you are a much better man (or woman) than me. Again, age, flexibility, past injuries, and mileage on the body will influence all this. I tried the sitting position once and it took several members of an EMS crew to get me back into a standing position.
Standing Position
The standing position is also known as the offhand position and is the least stable. This is a shame because it is the position that most of our shots in a hunting situation may be taken. On the upside, standing offers the best view of our target area and it can be assumed quickly, if needed.
The shooter should relax and assume a position where he is naturally aligned with the target. The right-handed shooter will place the left foot slightly forward and position the feet a comfortable distance apart. The right elbow is tucked into the body as close as possible. Leaning forward slightly will help with recoil. Proper breathing on the trigger squeeze is especially important in the standing position.
The Perfect Practice Rifle
All this information is useless to us unless we practice shooting and practice a lot. (Remember I told you about that kid doing all that shooting on the riverbank with BB and pellet guns?) To do this, we need a gun that is easy and economical to shoot. If we want to get better and improve our shooting with our .30/06 or .300 Win. Mag, we are not going to expend 200 rounds on an afternoon or a weekend of shooting. A .22 caliber air rifle is an easy and inexpensive alternative.
Gamo makes a lot of air rifles and one that I like is the Swarm Fusion 10X Gen2. Gamo has had the Swarm technology out for a few years. It is a unique loading system that is very handy, especially for the pellet rifle hunter. By means of a detachable rotary magazine, the shooter loads up to ten pellets and snaps the magazine onto the top of the barrel. The Swarm Fusion requires that you cock the rifle with a break action system each time, but the magazine automatically loads the pellet. For hunting purposes, this is huge. The magazine lies horizontal to the barrel, is low profile, and this allows for the use of open sights, which, on this rifle, includes a fully adjustable rear sight. Both front and rear sights are fiber optic. The rifle also ships with a Gamo 3-9×40 scope, has a two-stage adjustable trigger that’s adjustable from 3.2 to 2.6 pounds of pressure — pretty heady stuff, if you think about it, for a pellet rifle that has an MSRP of $269.99.
All of this means the Swarm Fusion 10X Gen2 is a great little air rifle to practice all the basic marksmanship fundamentals we have been talking about. Here is the other thing — this little air rifle is more than up to the task of small game hunting. I have seen it take dozens of squirrels, and those can be tough customers.
Now, way back there (you thought I forgot about it) I said I believe shooters who learn the basics of marksmanship on open sights become better shooters with optics than those who learn on scopes from the beginning. I will tell you why. The shooters who learn on open sights find out the importance of marksmanship fundamentals: stance, grip on the weapon, breathing, trigger squeeze, sight picture, and so on. All these things affect the shot even more so with open sights than when we use a scope. The shooter and hunter who first learns these basics on open sights is a much better shooter when they move on to some kind of optic. It is just my opinion, you know, but I’m right.
Try the air rifle for practice and concentrate on the fundamentals. In November, that big eight point is going to be in real trouble when he comes by your stand.


