With many shooters setting their ARs to long-range tasks, precision scope mounting becomes increasingly important
by Lou Patrick
There are many factors that influence a shooter’s ability to consistently shoot small groups or to engage targets at varying ranges. One of these factors is cant error. For the shooter with a telescopic sight mounted on their rifle, there are two possible sources of cant error.
The first is shooter-induced cant, which is generally defined as tilting the rifle to one side relative to its orientation when zero’d. The second is cant error, introduced by an improperly mounted scope. The two sources of cant error tend to compound one another because an improperly mounted scope will generally cause the shooter to hold the rifle so that the reticle appears to be square when, in fact, it isn’t, inducing even more cant.
Why is eliminating cant important? For a scoped rifle to function properly, the vertical stadia of the reticle must be perpendicular to the Earth’s surface, with the rifle being held such that the scope and rifle are in the same vertical plane. In other words, the rifle should be directly beneath scope.
Once fired, the bullet will rise, intersecting the line of sight, and continue to rise until it reaches the apex of its trajectory before beginning its downward path, intersecting the line of sight a second time.
Now, imagine that the rifle is canted to one side. The scope (line of sight) is still above the rifle but it’s also to the left or right of the bore. In this instance, the bullet will cross the line of sight from the left or right and will continue its now angular path (comparatively), crossing the line of sight only once. This makes it more difficult to hit targets at varying distances because the bullet is coming into the line of sight from the right or left and the system can only be truly “sighted in” at one specific range. If you were to make an elevation adjustment to hit a target at, say, a distance greater than the distance at which the rifle is zero’d, a now unexpected windage error is being introduced because of cant. A rifle canted to the right will cause bullet impact to be low and right; cant to the left and the bullet strike will be low and left.
Given the nature of shooting in the field, often with ad hoc field rests, it is understood that our rifle will not always be held in perfect vertical alignment. There is no reason, however, to add to the error by working with a canted scope.
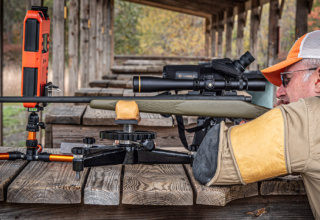
To remove the variable of an improperly mounted (or canted) scope, we suggest using the Level-Right Pro scope mounting system from Real Avid. This new tool allows you to easily install a scope onto most any rifle in perfect alignment with the bore and with the reticle’s vertical stadia perpendicular to the Earth’s surface. It’s an ingeniously designed tool that we’ve used on a couple of rifles thus far with excellent results. Here’s the process for using the Level-Right Pro on the AR platform. For this illustration, we’re installing the AR-friendly Omnia 8 tactical rifle scope from TRUGLO onto our Rock River Arms upper receiver.
Install the scope onto the rifle to establish the proper scope mounting position and scope eye relief. Apply a piece of masking tape onto the scope tube where it intersects one of the scope rings. The will allow the scope to be mounted and secured in the proper location on the bench. Once the correct position is established, remove the scope and mount assembly from the receiver.
Next, separate the upper and lower receivers, removing the bolt carrier group and charging handle, and place the upper receiver assembly in a padded bench vice. Use bubble levels to ensure the handguard and receiver Picatinny rails are level with each other, and level the upper receiver assembly in the vice.
Reinstall the scope and mount assembly into the established position and then remove the scope ring cap screws followed by the scope.
Clean the ring cap screws and the inside of the scope rings with denatured alcohol to remove any oils. Apply a thin coat of powdered rosin to the scope rings. This rosin can help secure the scope in the ring caps after final assembly and provide a controllable, “friction slip” surface when rotating the scope for vertical alignment.
Place the scope into the rings, using the masking tape as a reference for the scope position. Lightly install the ring cap screws. The scope should be loose enough to be rotated yet secure enough to stay in position when released.
Follow the provided Level-Right Pro instructions for proper tool setup. Next, attach the Level-Right Pro to the handguard Picatinny rail and slide it into position in front of the objective lens. The level atop the Level-Right Pro should confirm the previously established level of the upper receiver.
Place the Level-Right Pro alignment grid behind the scope’s ocular lens and level the grid using the integrated level.
Turn on the light projector and focus the reticle on the grid by turning the scope’s focus ring.
Rotate the scope so that the reticle’s vertical stadia aligns with the vertical lines on the grid. At this point, the barrel and the scope are in the correct perpendicular alignment with the Earth’s surface and there is no inherent scope cant.
Tighten (snug) the ring cap screws while observing the grid to maintain proper scope alignment.
Remove one cap screw at a time and apply blue Loctite to the screw threads and install the screw.
Once all screws have received blue Loctite, they can be torqued to the manufacturer’s specifications. Here, we are using the Smart Torq torque driver from Real Avid. Once complete, reassemble the upper and lower receivers and verify that the proper eye relief has been maintained.
In addition to the Level-Right Pro and Smart Torq, Real Avid offers a wide variety of specialty tools for the DIY gun enthusiasts. Visit Real Avid to check out their tooling solutions for applications you might never have even considered.


