Want to lighten the trigger on your Taurus revolver for improved accuracy and smoother performance? A hammer and trigger return spring swap is your ticket.
by Rob Reaser
There are many reasons for changing out your revolver’s factory hammer and trigger return springs. A lighter pull weight during single- and double-action modes is the biggest reason most shooters perform this operation. Why? A lighter pull translates to reduced shot disturbance, which, in turn, tends to improve shooter accuracy. That improvement can be especially significant in revolvers with heavy factory springs and a long sear engagement.
The Taurus Raging Hunter we recently picked up for big game hunting this fall had a fairly smooth trigger setup out of the box, but at 11 lbs./12.6 oz. of trigger pull weight in double-action mode and 6 lbs./8.7 oz. in singe-action, we felt that a lighter tug would help deliver those tight 50- to 100-yard groups we were searching for.
Our first stop was Wolff gun springs—makers of the industry’s most respected handgun upgrade springs. Although Wolff did not list any springs specifically for the Raging Hunter, the company did have springs for the Taurus “large frame” and “small frame” revolvers. We took a chance that the large frame springs would be compatible with the Raging Hunter, so we ordered the reduced power Revolver Shooter’s Pack (PN 17190). This pack comes with 10-, 11-, and 12-pound hammer springs and 10- and 11-pound trigger return springs.
Performing a spring swap on a Taurus revolver is a task easily accomplished with a little patience and the right tools, which, fortunately, are minimal. Real Avid’s Smart Drive 90 set comes with a wide assortment of driver tips that offer a precise fit for most gun screws, from slot-head and Phillips to Allen and Torx. We used these plus a dual-face hammer from our Real Avid Accu-Punch kit and a paper clip (more on that in the following details) to do the work.
[NOTE: Before working on any firearm, ensure it is unloaded. Open the cylinder to make sure there are no cartridges present, and always keep the muzzle pointed in a safe direction.]
We started by measuring the double-action and single-action pull weights with a Lyman trigger pull weight scale. Ten pulls in each mode provided the average. The factory single-action averaged 6 lbs./5.2 oz. and the double-action 11 lbs./10.7 oz.
The Wolff reduced power Revolver Shooter’s Pak comes with multiple hammer and trigger return springs of different weights so you can experiment to find the spring combination that best suits your hunting style. We went with the 10-pound versions of each.
Start by removing the grip. The Raging Hunter requires a #3 Allen driver.
Once the screw is removed, the grip pulls off the frame with some firm tugging.
Using an appropriately sized slot-head screw (we used a 38-2 slot-head), remove the two side plate screws and the yoke screw assembly and set aside in a safe place so that you do not lose them.
The two side plate screws are similar. The forward screw is the yoke screw assembly, which contains the yoke retaining pin and retaining pin spring.
The side plate on this or any revolver has an extremely close fit with the frame. The ONLY way you want to remove the side plate is to tap the frame (not the side plate) with a nylon or rubber hammer face. The resulting vibration will eventually cause the side plate to lift off the frame. NEVER use a screwdriver or similar tool to try and pry off the side plate. This will likely damage the gun.
Just keep tapping around the frame until it comes off.
The Taurus hammer spring (or main spring) assembly consists of the main spring center pin, main spring, and main spring plate. The top of the center pin fits into its recess at the back of the hammer while the main spring plate sits in the frame as shown. To remove the main spring assembly, pull back on the hammer until you see a small hole in the center pin (arrow). Place the end of a straightened paper clip through this hole and then allow the hammer to move forward until there is no spring pressure pushing it forward.
With the spring tension relieved from the hammer, the main spring assembly can be removed from the frame.
Turn the main spring assembly upside down as shown and press down on the main spring plate until you can remove the paper clip. Be careful to maintain control of the spring once the paper clip is removed and slowly allow the spring to extend.
Remove the factory main spring and plate from the center pin.
Lightly lubricate the main spring center pin.
Install the new main spring onto the center pin, compressing the spring by pushing down on the main spring plate until the hole is exposed enough to insert the paper clip. Reposition the main spring assembly into the frame in the same position as it was removed. Once the main spring assembly is in its proper position, pull back on the hammer to compress the spring, remove the paper clip, and then allow the hammer to move forward to its uncocked position.
Removing the trigger return spring assembly is similar to removing the main spring assembly. Pull and hold the hammer back while pulling back on the trigger. This exposes the small hole (arrow) near the end of the trigger spring center pin.
Insert the paper clip through the hole in the trigger spring center pin and allow the hammer and trigger to move to their at-rest position. Note the position where the center pin engages the back of the trigger.
Pull the trigger spring assembly out of the frame.
Swapping the trigger return spring is the same procedure as doing so for the main spring, if not a bit more challenging. Compress the spring by pushing on the trigger spring swivel and pulling out the paper clip. Be careful to maintain control of the spring assembly as you release the tension.
Here is the disassembled trigger spring assembly. Note the pocket on the spring swivel where the spring engages the swivel. This must be in the proper orientation for reassembly.
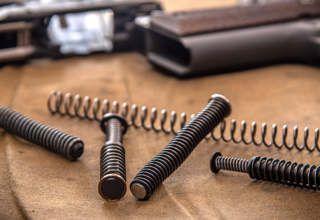
At left is the factory trigger return spring. At right is the 10-pound Wolff reduced power spring. As you can see, the aftermarket spring is longer, but the coils are not as close as those of the factory spring. It may be necessary to cut a few coils from the aftermarket spring during replacement, however, we elected to install the Wolff spring without cutting it to see if it would work.
After lightly lubricating the new spring and center pin, install the spring onto the center pin and orient the spring swivel spring pocket with the end of the spring. Compress the spring and insert the paper clip through the center pin.
Reinstall the trigger return spring assembly. The spring swivel stud inserts into the frame and the end of the center pin seats in its pocket at the back of the trigger, as shown. Once installed, allow the hammer and trigger to move back to their at-rest position.
Check to ensure that the new spring fits properly and works in the gun by manipulating the trigger and hammer through their normal range of motion. If the spring is excessively long, it will bottom out and prevent the trigger from being pulled back to its rearmost position. If this is the case, remove the spring and incrementally remove coils from one end of the spring until proper function is achieved. Despite being longer (at rest) than the factory spring, our new spring worked fine and did not need to be trimmed.
Once proper trigger/hammer operation has been achieved, reinstall the side plate by carefully positioning it into the frame. Because of the close-tolerance machining, you will need to tap the side plate into its final position using a nylon-faced or rubber hammer. Just be sure the plate is correctly positioned to go into the frame before tapping it into place or you could damage the side plate or frame along the edges of the mating surfaces.
Reinstall the side plate screws and the yoke retaining pin. When installing the yoke retaining pin, tighten it just to the point where it begins to put too much pressure on the yoke, causing the yoke to bind when you try to open the cylinder, then back off slightly. You want the yoke to allow the cylinder to swing freely when you depress the thumb piece and front latch to open the cylinder.
Reinstall the grip onto the frame and tighten the retaining screw. Once installed, ensure that the revolver functions correctly and that there is no binding of the hammer or trigger when operating in double-action or single-action modes, and that the cylinder rotates freely with each cycle and the cylinder swings freely on the yoke upon opening.
Our spring swap, using the 10-pound Wolff hammer spring and 10-pound trigger return spring, dropped our double-action pull weight to 9 lbs./7.7 oz. and the single-action pull weight to 4 lbs./14.0 oz. This reduced effort proved significant in reducing shot disturbance in single-action mode, and made our double-action shooting much easier. Was it worth the time and the $10.50 price of the Wolff reduced power spring pack? Absolutely!
To finish off our upgrade, we installed TRUGLO’s Tru-Tec Micro Sub-Compact open red dot sight onto the Raging Hunter’s Picatinny rail. This sight quickly provides an excellent sight picture and its reduced weight and profile (compared to standard red dot housings or reticle scopes) is the perfect solution for your hunting handgun needs.
Ammunition
Part of the ongoing fun of hunting with a handgun is developing the optimal load that delivers maximum accuracy and knockdown power along with reliable terminal performance. The big question is, “Where to start?”
Since we have had good success shooting both Hornady (hornady.com) XTP and FTX bullets in .44 Magnum — with decisive results on burly Florida hogs — we picked up some of both along with a jar of WIN 296 powder — the last handgun powder we could find locally before the pandemic rush cleared the shelves. Consulting our Hornady reloading book, we chose two middle ground powder charges for each bullet, providing four different loads to evaluate:
- Hornady 225 gr FTX (19.6 gr WIN 296); 5-shot average; velocity @ muzzle: 1276.6 fps; velocity @ 50 yds: 1130 fps; KE @ muzzle: 814 ft-lb; KE, 50 yds: 637.8 ft-lb
- Hornady 225 gr FTX (20.4 gr WIN 296); 5-shot average; velocity @ muzzle: 1314 fps; velocity @ 50 yds: 1158.8 fps; KE @ muzzle: 862 ft-lb; KE@ 50 yds: 670.6 ft-lb
- Hornady 240 gr XTP (23.3 gr WIN 296); 5-shot average; velocity @ muzzle: 1375.4 fps; velocity @ 50 yds: 1240.4 fps; KE @ muzzle: 1007 ft-lb; KE @ 50 yds: 819.2 ft-lb
- Hornady 240 gr XTP (23.9 gr WIN 296), 5-shot average; velocity @ muzzle: 1381.4 fps; velocity @ 50 yds: 1246 fps; KE @ muzzle: 1017.2 ft-lb; KE @ 50 yds: 827.6 ft-lb
We gave each cartridge a 5-shot, sink-or-swim opportunity to reveal its accuracy potential. The best group sizes came from the 240 gr. XTP bullets, at 1.918 inches. This was somewhat surprising given the sleek, pointed tip profile of the FTX bullets versus the hollow point XTPs, but there you go. The middle ground powder charge per the Hornady handbook also gave the speed and kinetic energy edge to the slightly heavier XTPs.
Between the two XTP cartridges, the slightly lower 23.3 gr. charge of WIN 296 proved more palatable to our Raging Hunter’s tastes. This is why experimentation is so important when working up the ideal hunting cartridge. Even a few grains variation in powder weight (.6 grains, in this case) can make a decisive difference in group sizes.
No doubt, the 3 MOA dot on our optic played a part in the group sizes. With the red dot completely covering our 1-inch bullseye on a black target face, maintaining a center-of-target aim proved challenging. A magnified reticle scope would likely shave a half-inch or more off our groups at 50 yards. Keep this in mind when you develop your own loads.
As you can see, half the fun of hunting with a handgun is setting up the firearm and working through the load development until you have it tuned just right. This can be an ongoing process as you expand your handgun hunting enjoyment over a broader species of game animals.


