A professional approach and the right tools will yield top results for your next AR project
by Lou Patrick
While AR-15s may seem complicated given the multitude of small parts, springs, and pins required to assemble, the job is not as difficult as it may seem to the beginner. With proper guidance and the right tools and supplies, building your own AR is not only fun but also relatively easy. The best results, as with any project, will be achieved by approaching the task in an orderly manner. This means ensuring you have all the necessary parts on hand, have a clean and organized workspace with adequate lighting, and have the various tools needed to make the job go smoothly and without damaging components.
Regarding tools, veteran AR builders will likely have, over the years, gathered the assortment of punches, wrenches, and bench blocks needed to turn a pile of parts into a functioning rifle. Those new to the do-it-yourself world of AR building and modification will likely be starting at ground zero when it comes to tools. If that includes you, we can offer no better advice than to consider the AR15 Armorer’s Master Kit from by Real Avid.
The AR15 Armorer’s Master Kit comes with all the tools you’ll need to build an AR-15 the right way. We’ve been using this kit over the last couple of years and feel it important to stress that this is more than an assembly of basic tools that can get the job done. The beauty of the AR15 Armorer’s Master Kit is that the Real Avid designers closely examined the more challenging aspects of an AR build and designed the tools not only to overcome those challenges, but to do so in the most cost-effective manner.
A good example of this is the included AR15 Master Bench Block. A typical nylon bench block will provide support for driving certain pins found on an AR, such as the gas block and bolt, and can cost between $20 and $40 dollars. The Real Avid AR15 Armorer’s Master Kit, on the other hand, can handle all those functions and perform other tasks that require expensive specialty tools (such as a $25 bolt vise) or provide solutions for which there are no other specialty tools on the market (such as trigger guard assembly, forward assist assembly, charging handle assembly, and bolt stop assembly).
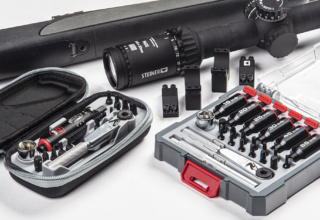
Additionally, the AR15 Armorer’s Master Kit includes all the pin punches needed for assembling the AR, a torque wrench, upper and lower receiver vise blocks, AR armorer’s wrench, handguard installation tool, multiple hammer heads, assorted picks, and more. Those are lot of tools, and the fact that they all come in a unified storage case makes it all the better to keep your work area organized and the items readily available.
5 Quick AR Build Tips
We’ve covered most aspects of building ARs in our DIY section of Shoot On but want to call out some specific areas that will help the beginner make the job go easier. We’re also including a couple tips that those who may have built one or two ARs already may find beneficial.
1. Headspace Check
Ensuring that your barrel and bolt combination falls within the minimum and maximum headspace dimension is the single-most important safety consideration when building an AR (or any firearm, for that matter). This requires the use of caliber-specific headspace gauges and is best accomplished before the barrel is attached to the receiver. Check out this article for a rundown on determining safe headspace dimension in the AR platform.
2. Magazine Release Installation
Install the magazine release assembly FIRST when building the lower receiver. If you work your way from the top down and begin by installing the bolt catch, you will not be able to screw on the magazine release button due to interference. Lightly lubricate the magazine catch components and then install the magazine catch spring and button into the right side of the receiver. Push in on the button and begin rotating the magazine catch clockwise until the threaded end of the catch is flush with the magazine button head.
3. Bolt Catch Installation
With the magazine catch assembly installed, you can now install the bolt catch assembly. The AR15 Master Bench Block really simplifies this job because it offers support for the receiver as the bolt catch retaining pin is installed through the receiver bosses. Before you begin, place a piece of masking tape along the side of the receiver to prevent damaging the finish as you start the pin into place. Next, lightly lubricate and install the bolt catch spring, bolt catch plunger, and bolt catch into the receiver. Secure by installing the spring pin with a 3/32-inch punch and hammer.
4. Forward Assist Installation
One of the ingenious inclusions built into the AR15 Master Bench Block is a recess to hold the upper receiver for installing the forward assist. The forward assist must be installed under spring tension, requiring the use of that elusive “third hand.” The AR15 Master Bench Block allows you to insert the forward assist assembly into the upper receiver and keep all parts in their installation position while you use two hands to tap the retaining pin into place. Simply align the flat of the forward assist plunger toward the receiver before seating the spring pin with a 3/32-inch punch and hammer.
5. Barrel Nut Torqueing
Many AR builders, including those with a few builds under their belts, do not realize that specifications call for “two times torqueing” of the barrel nut, which secures the barrel to the receiver. In other words, the barrel must be torqued to 30 ft-lbs, backed off, torqued again to 30 ft-lbs., backed off, and then torqued a final time to 30 ft-lbs. At no time should the torque wrench be used to back off the barrel nut.
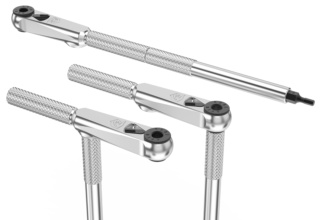
Use the Lug-Lok Upper Vise Block supplied in the Armorer’s Master Kit to secure the upper receiver to your bench vise. Apply molybdenum disulfide grease to the receiver threads before torqueing. The kit’s Armorer’s Master Wrench and torque wrench can be used in combination to apply the correct torque. Remember to never loosen the barrel nut assembly to align for gas tube clearance. The barrel nut may instead be tightened beyond 30 ft-lbs to align the barrel nut serrations for gas tube clearance, however, do not exceed 80 ft-lbs.
AR-platform firearms represent straightforward builds for experienced gun enthusiasts and novices alike provided you follow proper instructions, exercise gunsmithing best practices, and have the proper tools for the job. If you’re looking to ramp up your DIY tool section, be sure to check out all the tooling solutions offered by Real Avid.


