If you’re thinking about getting into bowhunting this year but are confused by the technology and terminology, here’s what you need to know…
by Gabriel Surgeon
Archery and bowhunting continue to be bright spots in the outdoor segment, with new recruits every year picking up the challenge. Those new to the bowhunting scene—and even some who have been out of it for a while—can understandably be overwhelmed with the terminology and technology found on the modern compound bow.
While the specialized tools and expertise needed to set up and tune a compound for optimal performance is something most bowhunters relegate to their local archery pro shop staff, it is still beneficial to understand the details and nuances that comprise a bow to get the most out of it and to make more informed choices when it’s time for equipment upgrades.
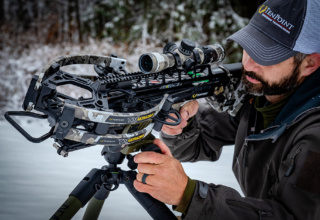
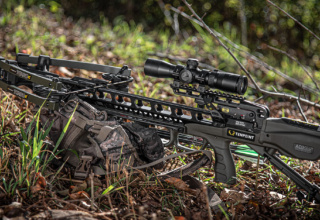
There are three main types of bows: compound, traditional, and crossbow. Traditional bows—be they recurves or longbows—are a great way to stay true to our archery past and offer several benefits over modern bows. Crossbows are a different critter altogether and can be quite complex or simple in their design. These are an easy on-ramp for those who want to take advantage of their states’ archery or crossbow seasons but don’t wish to invest time in developing the skill sets necessary for shooting vertical bows. Compound bows utilize cams to deliver lightning-fast arrow launches and reduced hold weights, and these are the ones we will be discussing here.
A Basic Setup: The Beginning
When you walk into a fully stocked archery shop, the possibilities seem endless. There are bows ranging from 28- to 40-inch-plus axle-to-axle lengths (axle-to-axle is the measurement between the top and bottom cam pins), split limbs or solid limbs, hunting or target bows, color differences, and the list goes on. You need to walk into the shop with three things in mind before researching and making your pick:
1) Am I going to be using this bow for hunting or target archery (whether 3D or field shoots)?
2) If I’m using it for hunting, how will the axle-to-axle size affect my maneuverability in the stand?
3) Does it feel right? Simply put, draw it back. Do you like the type of let-off the bow offers (the amount of weight you hold at full draw)? What about the “valley” or “stiff wall” during the cam cycle? Is the riser and grip width comfortable?
Those are all crucial areas to consider before making a purchase.
Getting Fit
After deciding on a bow, being measured for draw length, and settling on a draw weight, it’s time to pick out the essential accessories. Your new bow will require a sighting system (riser-mounted sight and a string-mounted peep sight), an arrow rest, and a release aid, at a minimum. The pro shop technician can help walk you through the selection process.
After the sight and arrow rest are installed on the riser and the peep is positioned in the string, it’s time to adjust the peep sight.
The peep placement is to me (along with torque of your hand), one of the key precision factors in a bow setup. The peep acts as your rear sight pin, and any miscalculation there will cause inconsistency and headaches until it’s properly adjusted. In archery, consistency is key, and comfort contributes to uniform, repetitive performance.
For a starting point, open your hand. The distance between your thumb and pinky is a ballpark starter for where the peep sight will be placed above the nocking point. From there, draw your bow with your eyes closed and come back to a spot where you can draw comfortably and anchor consistently each time. Now, open your eyes and slide the peep to where it is perfectly aligned between your eye and the sight.
Once the peep is properly aligned, the technician will serve it into the string to keep it in place. After that, your rest will get squared, followed by a paper tuning to ensure a straight launch of the arrow.
It’s now time to hit the range.
Real Fun Begins
The basic rule of sighting in a bow is for the sight pins to “follow the arrow.” If you shoot high on the target, move the sight pin up. This will bring the bow down and result in a lower point of impact. The same holds true when adjusting for windage (left and right). During the sight-in process, start close to the target (usually ten yards) and work your way back, establishing sight pin zero in 10-yard increments (i.e. 20, 30, 40, and 50 yards for most sights).
Go slowly during the sight-in process—especially if you are new to archery. You are using new muscles and fatigue can quickly set in until your body becomes accustomed to the strain. Tired muscles lead to poor form, poor results, and poor shooting habits that you will later regret, so call it a day or take a long break when you feel tired. Fighting through tired muscles can cause target panic, bad form, lost arrows, and many other headaches.
Most pro shops will have an indoor range. Other shooters on the range or pro shop staff (if they’re not too busy) will be glad to provide you with tips and pointers to help you get started. Take advantage of the opportunity, if you can, before setting up your backyard range and honing your shooting skills. It’s always better to start off on the right foot than to later correct ingrained errors in shooting form.
Taking the Deeper Dive
Tuning and tweaking your bow to shoot better, tighter groups is an ongoing process and one you will likely engage as soon as you establish good form and become more comfortable with shooting.
One of the biggest topics in the archery and bowhunting realms is arrow weight and front-to-rear weight ratio.
A light shaft weighs between 5 and 6.5 grains-per-inch (GPI); medium weight is around 7-9 GPI; a heavy arrow is anything beyond that. If I’m shooting a 29-inch arrow that weighs 9.5 GPI, the insert weighs 16 grains, and I’m shooting a 100-grain tip, that means my overall arrow weight is around 400 grains with my wrap and fletching. That’s a basic arrow that would perform exceptionally well, in most cases. From there, we can change to heavier brass inserts or collars at the end of the shaft and add some FOC weight (Front of Center), upping our weight to 125 grains at the tip, for example. Arrows with a decided front-of-center weight bias (up to a point) tend to fly better and hit harder (better penetration). Play around with your arrow weight in your allotted spine chart and see how you can better manipulate that carbon or aluminum shaft to your performance advantage. Just remember—penetration is based on kinetic energy (a combination of speed and weight).
Takeaway
Modern archery equipment has certainly shortened the learning curve when compared to the skill development required to shoot traditional-style bows without sights or release aids. That said, shooting the modern compound bow is not purely mechanical. There are numerous motor and mental skills that must be nurtured—and that is part of the fun of archery. The sport offers a consistent personal challenge to improve oneself and it opens numerous opportunities for hunting and filling the freezer thanks to the long archery seasons offered in most states. So, if you’ve been considering trying your hand at bowhunting but have been somewhat daunted by the technology, have no fear. It’s not as complicated as it seems, and your local pro shop can offer all the guidance you need to get started!
Arrow & Broadhead Storage Solution
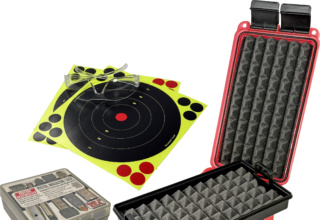
Something a lot of bowhunters don’t consider in their bowhunting equipment list is arrow and broadhead storage. Whether you’re travelling to camp or heading out for an evening hunt, it’s important that your arrows and broadheads are secure for transportation.
MTM Case-Gard is a company known in firearms circles for developing crafty solutions for a variety of common challenges shooters face. What you may not know is that MTM also offers numerous products for archers and bowhunters. Products that we use regularly from MTM—especially during hunting season—include their arrow and broadhead cases.
To keep our arrows organized and safely stored at home, we use the Ultra Compact Arrow Case and Arrow Plus Case. These store 12-16 and 48 arrows, respectively, with foam dividers to keep the arrows and fletching separated. For travel to bow camp or a day in the field, the Traveler Arrow Case for full-length arrows and crossbow arrows are ideal. Simply toss them in the truck and go.
For stashing broadheads, MTM has cases that get the job done nicely. Several boxes are available, from pocket-sized compacts to full-on tackle boxes. The two we favor for traveling are the Mechanical Broadhead Case and the Broadhead Box.
NAP Spitfire Broadheads
Probably no more options and variations on bowhunting equipment can be found than in the broadhead segment. Unlike in decades past, where experimental and sometimes downright outlandish broadhead designs came to market, we now enjoy a wide range of cutting tips that do an excellent job. Among the pack leaders is the Spitfire from NAP.
The Spitfire is a 3-blade mechanical that deploys from the front and uses integrated spring clips to stay closed, so there is no need to fuss with rubber bands or O-rings. Based on an exceptionally aerodynamic ferrule with a hard, bone-drilling tip, the Spitfire comes in 100- or 125-grain weight and boasts a broad, 1.5-inch cutting diameter. These broadheads have proven themselves on whitetail and other big game critters for years and are an easy choice for first-time or veteran bowhunters. The Spitfire is recommended for compound bows and crossbows.
- Bowhunting 411: Back to Bow Basics - September 29, 2020


