Stressed out by the mountain of gun cleaning tools and supplies to choose from? Don’t be!
by Lou Patrick
With what amounts to nearly 50 years of firearms experience (almost half of which involved working as a professional gunsmith), one thing I have learned concerning firearms cleaning equipment is that “catch-all kits” are rarely the best option. In my experienced-based opinion, it is usually wise to buy the best individual items you need and that are intended for the specific job rather than to rely on a “This is everything you need” kit and hope the quality and function pass muster.
While firearm cleaning is an easy, straightforward process, beginner and even veteran shooters are sometimes perplexed as to what tools and supplies they actually need to get the job done right. This is further complicated by the vast amount of cleaning supplies, tools, widgets, and gizmos on the market that promise to be the better mousetrap.
That is not to say that there hasn’t been innovation in firearm cleaning tools and chemicals over the years, but the sheer number of products on the shelves require close examination to ensure you have what you need to keep your firearm in good condition and functioning for years to come.
A shooter needs to build a solid gun cleaning knowledge and supplies base before exploring the many options for cleaning tools and supplies packed on retail or “virtual” store shelves because deciding amongst the many variables can be overwhelming and overly expensive.
First Things First
A firearm barrel should always be cleaned from the chamber end and out the muzzle, whenever possible. Some popular firearms such as the Ruger 10/22 or the Springfield Armory M1A require cleaning from the muzzle to the chamber (more on these later).
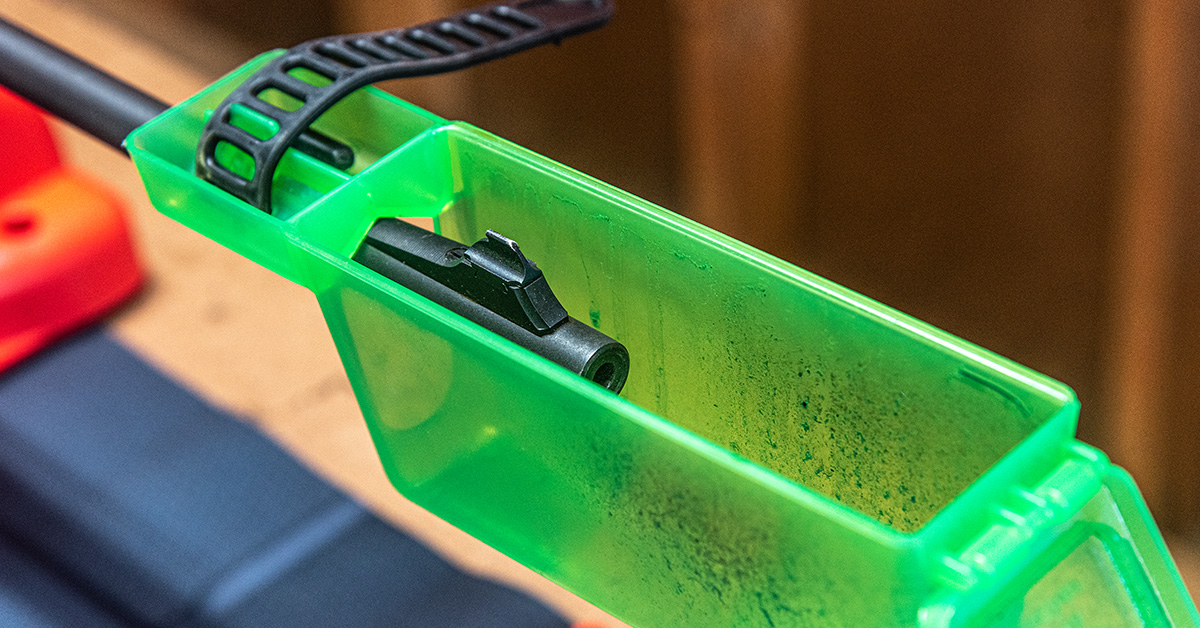
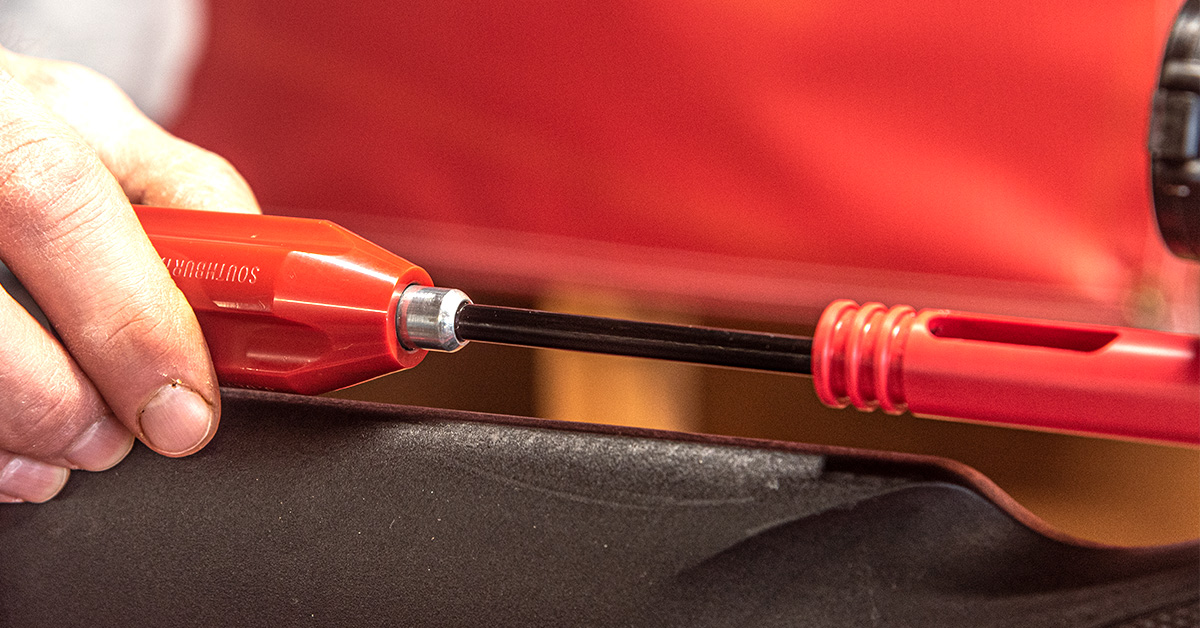
Generally, you achieve best results by securing the firearm/barrel in a protected bench vise or cradle (such as MTM’s Gun Vise) with a slight muzzle down attitude. Next, place something over or under the muzzle to catch the crude as it comes out. I’ve found MTM’s Patch Catcher (seen here) to be the perfect solution, but an empty plastic water or soda bottle placed over the muzzle can also work.
Now, for our bedrock discussion of gun cleaning tools and supplies…
Bore Guide
For cleaning bolt-action and AR-15 platform rifles, a bore guide is recommended. Here, the bolt will be removed from the receiver and the bore guide installed in its place.
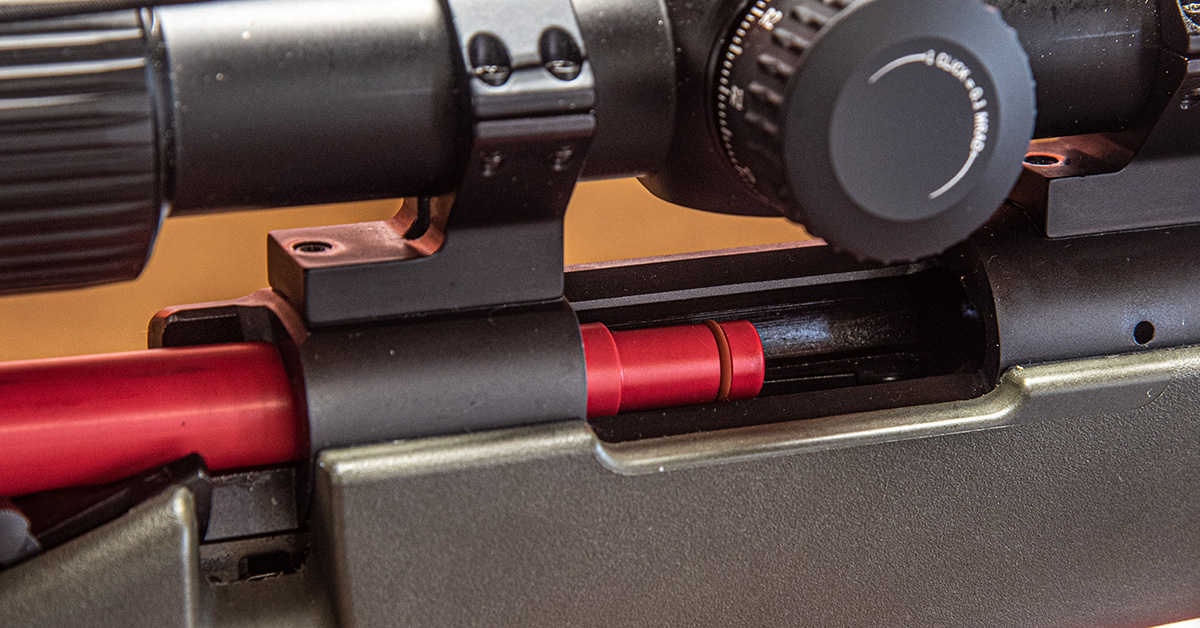
The bore guide simply serves as an aide to keep the cleaning rod in proper alignment as it passes fore and aft through the barrel. It also provides other benefits, such as keeping cleaning solvent and fouling out of the action during cleaning, provides an easy means of applying solvent to a patch or brush, and sealing the chamber to prevent solvent from flowing back through the chamber and into the action. The latter is especially important because solvent and oil can be harmful to epoxy bedding material found in some rifles and wooden stocks will eventually turn to mush under the receiver after having been soaked with oil over the years. For rifles such as the Ruger 10/22 or the Springfield Armory M1A, which must be cleaned from the muzzle to chamber, the bore guide simply slides over the muzzle to protect the crown (important to accuracy) from cleaning rod damage.
Like anything else on the market, there are several different bore guides available from multiple manufacturers.
Here’s what to look for in a bore guide:
- Constructed of non-marring material such as Delrin.
- Made specifically for the rifle model’s action type and chamber (cartridge/caliber). Note that there typically is some overlap in cartridge size applications.
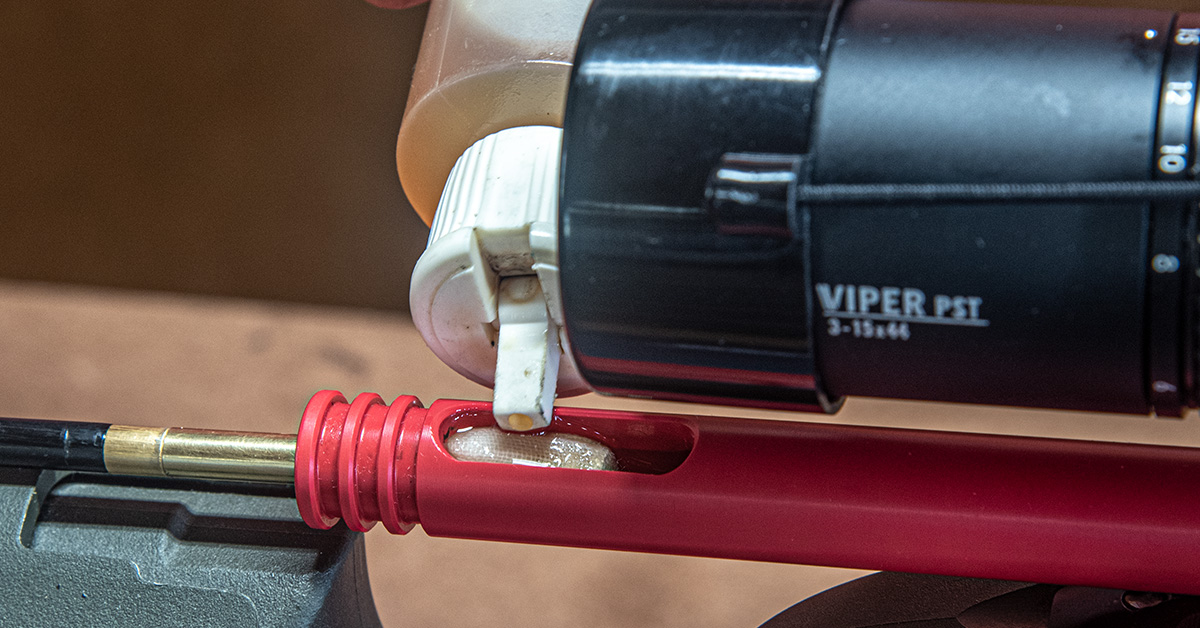
- Includes a solvent port.
- Uses an O-ring to seal the chamber.
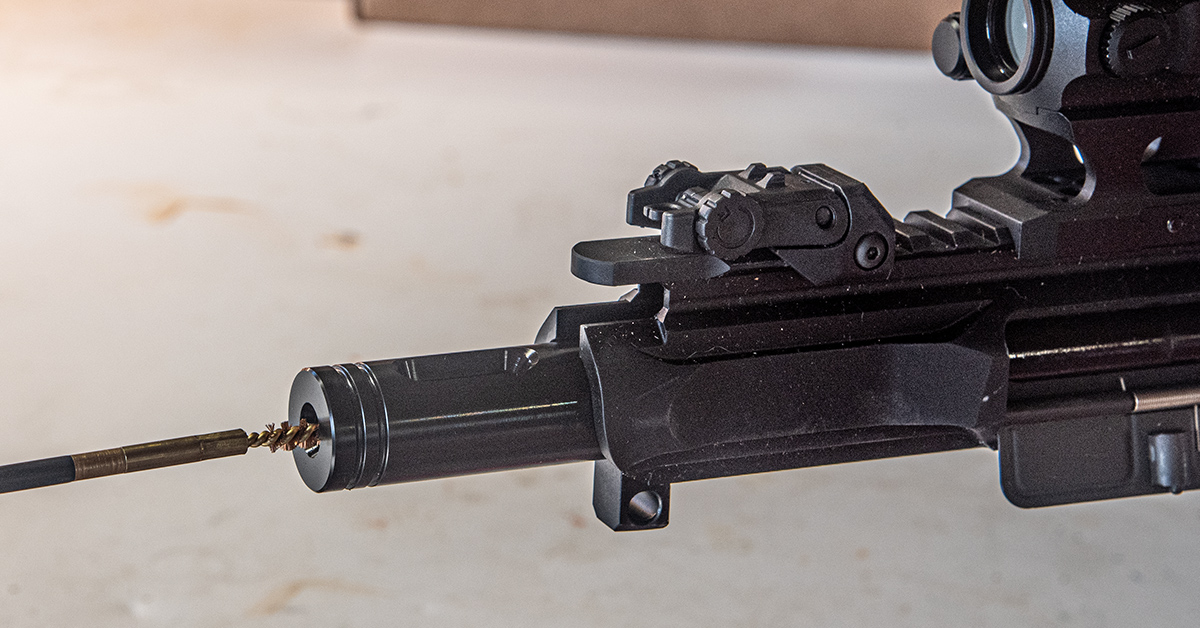
I have found that bore guides from Sinclair International fit these requirements. Just like bolt-action rifles, AR15s are cleaned from the chamber to the muzzle and for this, my Dewey AR15 bore guide has served me well.
Things are a little simpler for rifles that must be cleaned from the muzzle to the chamber. For this, we use a muzzle guard.
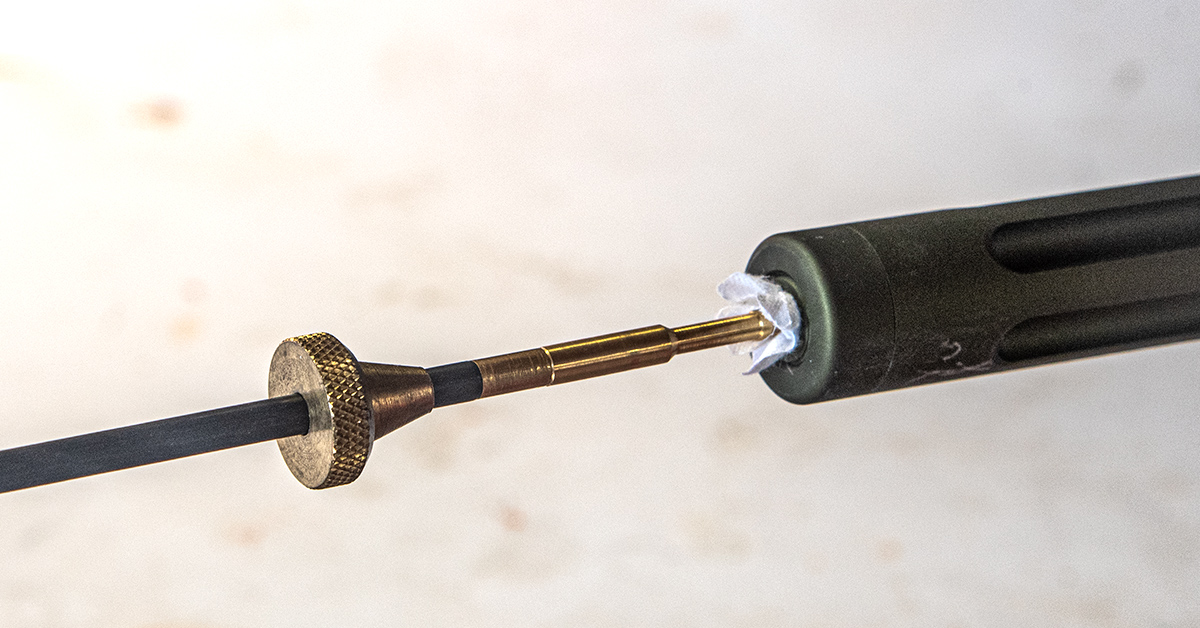
- The muzzle guard must fit snugly over the muzzle but not too tight.
- Should be made from a non-marring material such as Delrin, although brass is an acceptable material.
- The hole in the center of muzzle guard must be sized to accept the cleaning rod. Look for a comfortable slip fit but not so loose that it fails to provide proper guidance for the cleaning rod.
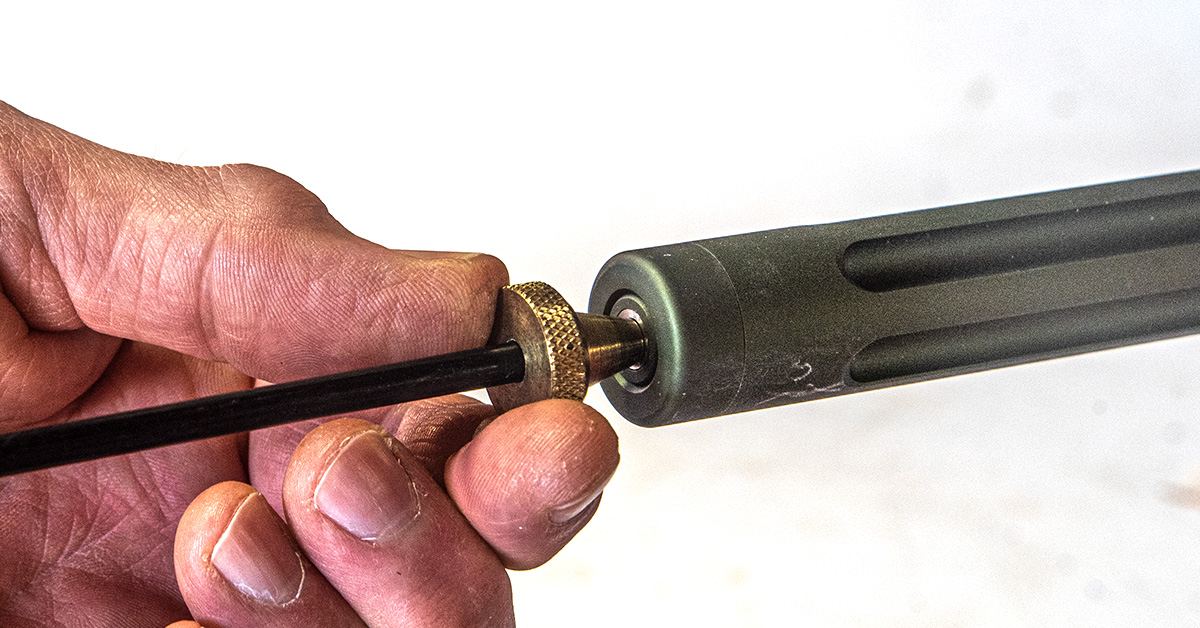
A Dewey brass muzzle guard has worked well for me while cleaning Ruger 10/22s and I use a Dewey Delrin muzzle guard for the M1A.
Cleaning Rods
Sectioned cleaning rods that break down to a smaller size, such as those issued by the military that fit inside the buttstock, are for field use only. The threaded joints required to make such a rod weakens the rod, causing it to be more flexible than a one-piece rod of the same diameter. This flex allows the rod to unnecessarily contact the rifling during cleaning.
For home shop use, the ideal cleaning rod will have the following features:
- A ball bearing handle that spins easily. Always hold the rod by the handle and allow the rod to freely rotate as the patch or brush follows the twist of the rifling.
- Solid, one-piece construction.
- A soft protective coating over a rigid steel core, such as those offered by Dewey, is optimal to prevent damaging the bore and crown.
- The diameter of the rod needed is determined by the caliber (internal diameter) of the barrel being cleaned.
A note about cleaning rod length is in order. The goal is to always use the shortest rod possible as this will be the most rigid and easiest to use. Considering that we are cleaning from the chamber end and out the muzzle, in most cases, the cleaning rod will also have to pass through the action/receiver. This requires rod length to be determined by the length of barreled action being cleaned plus any additional length that is added by the bore guide, add an additional couple of inches to ensure that the patch or brush will completely exit the muzzle. For those who own multiple rifles with different barrel lengths, if the difference in barrel length is only a couple of inches, purchasing one rod to clean the longest barrel will work fine for both. If, however, you are trying to clean a 16-inch barreled carbine with a 44-inch rod, you should purchase a second, shorter rod when funds permit. For handguns, 12-inch rod of the appropriate diameter seems to cover most needs without excessive flex.
Cleaning Jags
Jags provide the means of holding the cleaning patch and come in two preferred styles—pierce and wrap. The pierce-type jag holds the patch in place by piercing it in the center with the sharp point of the jag. With a wrap-type jag, the patch is simply wrapped around the jag. I prefer the pierce-type jag, although both are effective at cleaning your firearm.
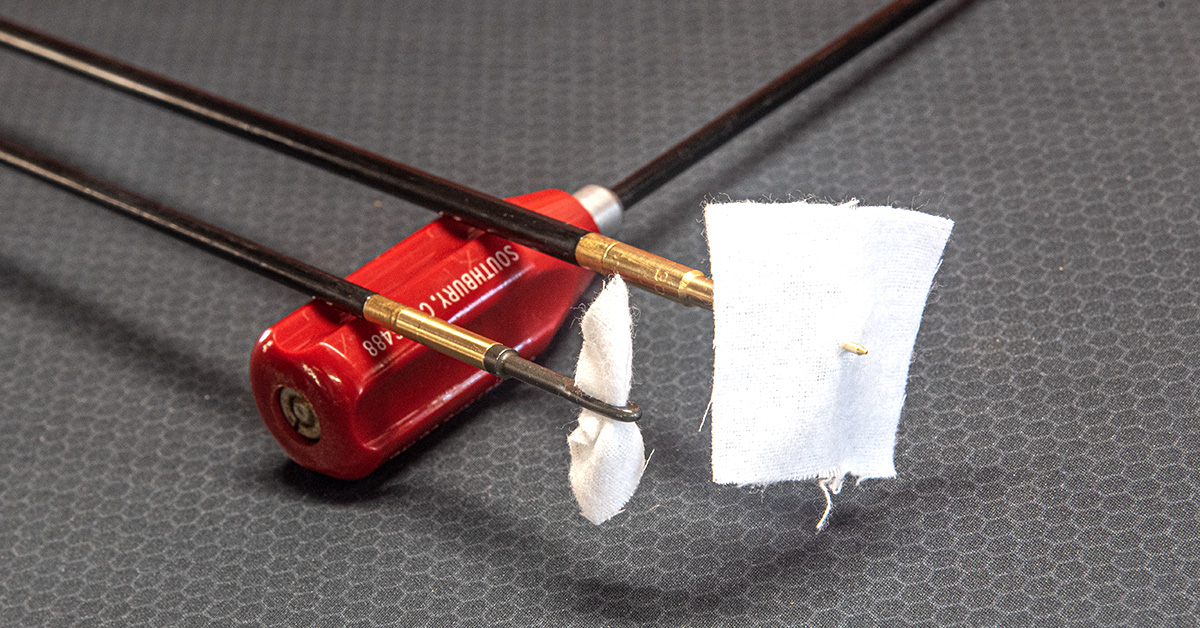
There is also a patch loop-style jag (above, left). I recommend avoiding this type unless necessary because this style jag does not provide for the full 360-degree patch contact with the bore that is needed, nor does it provide for a proper tight fit of the patch to the bore.
What to look for in a cleaning jag:
- Made from a non-marring material. Brass is the preference here. Avoid plastic.
- Properly threaded for the cleaning rod being used. I advise using jags and rods from the same manufacturer.
- Jag size is determined by the firearm bore diameter, with little overlap.
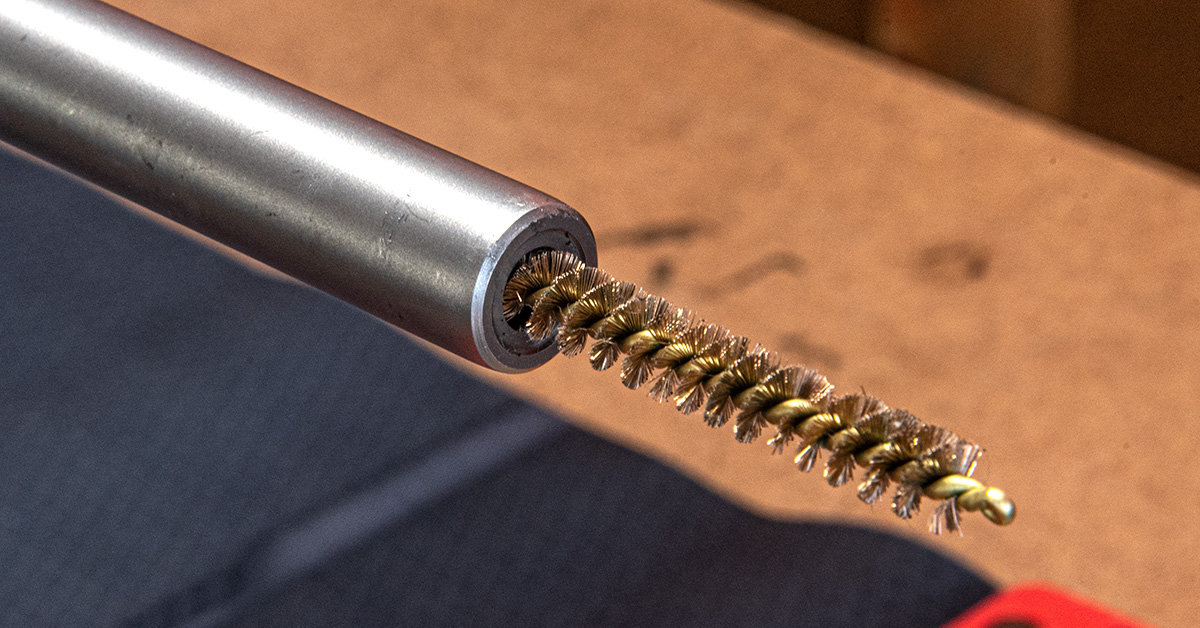
Bore Brushes
Bore brushes deliver the scrubbing power that simply cannot be accomplished with cleaning patches alone, making them essential for proper barrel cleaning.
Once a correctly sized bore brush is inserted into the bore, it must be pushed in the same direction until it exits the bore. Try to change direction with a bore brush inside the bore and it will become stuck and extremely difficult to remove. As the brush is initially inserted into the bore, the bristles slightly “lay back.” Change directions while the bristles are in the bore and they will try to lay in the new direction of travel. This will cause the brush diameter to increase and then become stuck.
Proper use of the bore brush is to maintain the same direction of travel through the bore. As the brush exits the bore, stop on the last row of bristles and reverse travel with the last row of bristles in the bore. This technique prevents the cleaning rod from contacting the crown and the internal rifling of the bore. To aid in using this technique, on the first pass, carefully push the bore brush through the bore. As the brush exits the bore, stop on the last row of bristles and then wrap a small piece of masking tape around the cleaning rod just behind the bore guide. On the next pass, it will be easy to see when to change direction while maintaining the last row of bristles in the bore.
Unfortunately, not all bore brushes are created equal and many are simply not worth having. While nylon bore brushes may have their place, many, if not most, of these brushes are simply not worth having. For general purpose cleaning of everyday hunting firearms or tactical firearms used by military and law enforcement personnel, the nylon bore brush offers no advantage and does not clean the bore as well as the copper bronze brush.
One of the problems with many nylon brushes is that the bristles are too thick in diameter and simply cannot get into the corners of the rifling as well as the smaller diameter copper brush bristles. The most effective nylon brushes are those made with black bristles by Sinclair international. These are not, though, considered better or equal to the traditional copper bristle brush.
Why nylon brushes? The concept is born out of the idea that copper fouling left behind as the bullet (copper jacket) passes down the bore must, or should be, removed. The removal of the copper fouling requires the use of aggressive cleaning solvents to attack the copper. While this solvent will attack copper, it also attacks the copper bristles, hence the idea of using nylon brushes.
While copper fouling may be of concern to the competitive shooter hunting for the smallest group possible, it is not as big a concern as we are made to believe. Military technical manuals, for example, do not address the need to remove copper fouling (and they should understand the high-volume impact of copper in rifle barrels!).
There is another type of brush on the market that uses looped ends of stainless-steel wire instead of cut bristles made of copper. The claim is that the looped wires won’t scratch the bore. It is the cut bristles in a traditional brush, however, that reach into the rifling corners and dig out fouling. Since copper is much softer than steel, the idea that copper brushes are detrimental to a rifle bore just doesn’t hold up in my opinion. Furthermore, no steel brush is going to go inside of this gunsmith’s firearm barrels!
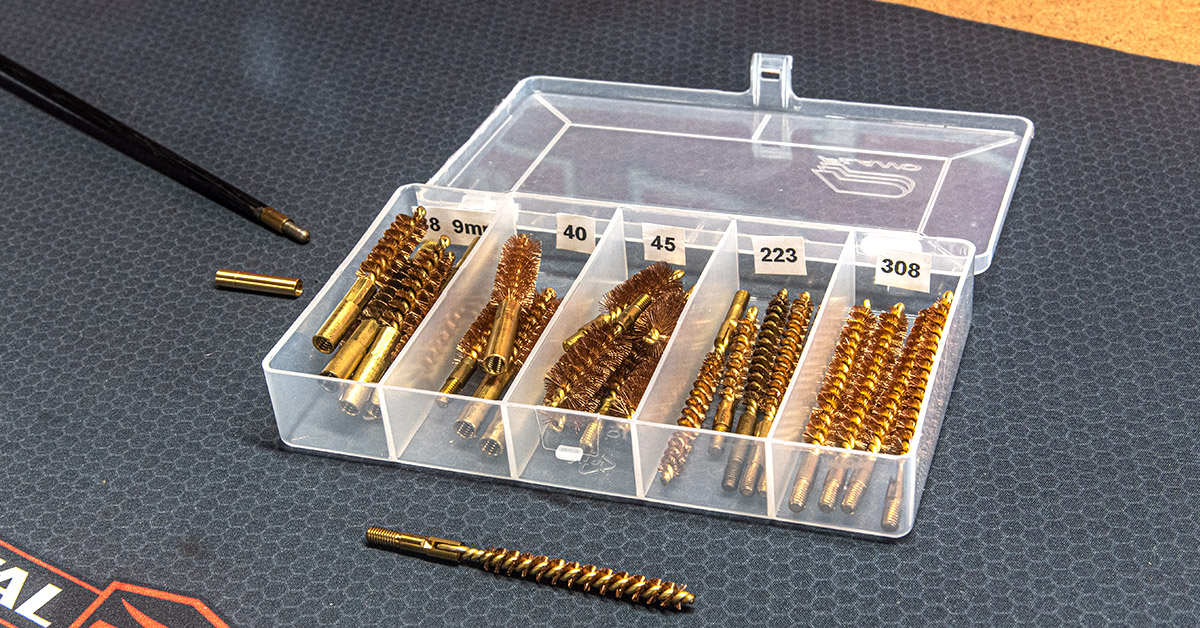
What to look for in a good bore brush:
- Continuous wound and looped at the end, bronze core.
- Copper bristles.
- Brushes appropriately sized for the bore (caliber specific).
- Appropriately threaded to fit onto the cleaning rod being used.
For those shooting 5.56 (.223) or .308 caliber, new military surplus brushes can be found at bargain prices and are constructed to the above recommendations.
My suggestion is to purchase bore brushes in bulk packages of a dozen or more as these are expendable items. This drives down the cost of the brushes, which will always be needed as long as you have the firearm. I recently bought 100 WWII surplus .30 caliber brushes from eBay and saved over 50% from the cost of new commercial brushes.
Cleaning Patches
As with everything else, there is a plethora of patches available on the market. These can be made from anything ranging from synthetic material to old underwear. The only desirable ones are those made from cotton flannel or military surplus patches. Military patches, while able to get the job done, tend to unravel rather easily and leave strings on the floor and workbench. I don’t really care for them, but if the price is right, they do work as intended.
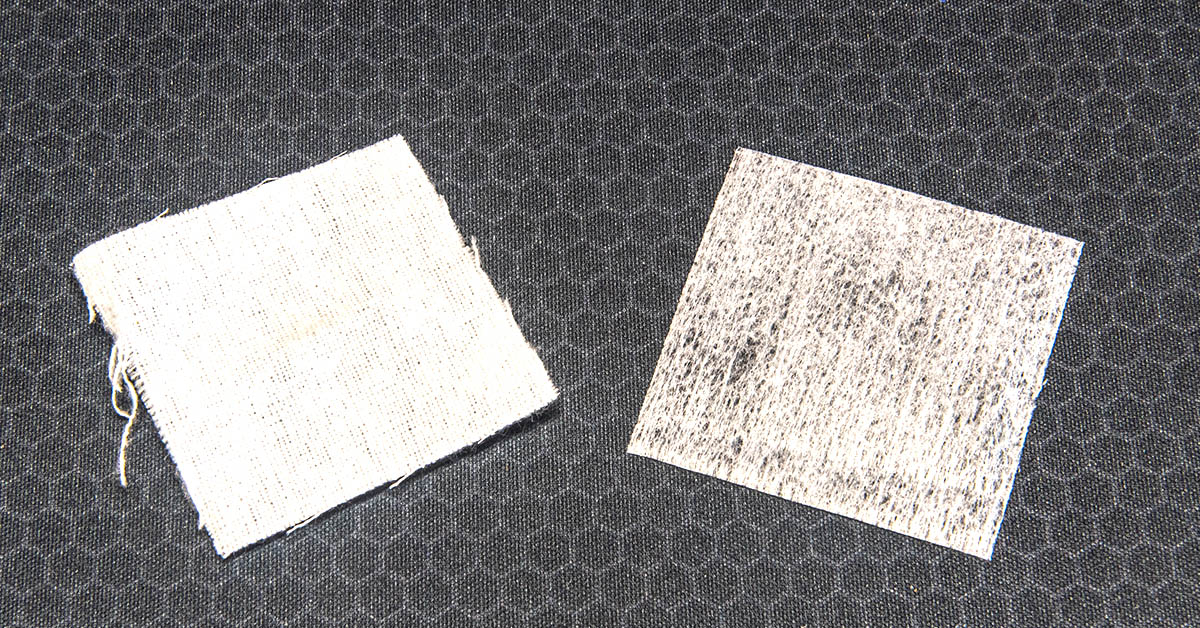
That same philosophy does not apply to the various synthetic type patches out there. They do not hold up well and often are too thin and offer poor absorbency.
As with bore brushes, try to buy your quality cotton flannel patches in bulk because you always need them, and you’ll save money in the long run. I like to purchase patches in quantities of 500 or 1000.
Here’s what to look for in cleaning patches:
- Should be sized appropriately for the bore diameter (caliber) and jag type being used, pierce or wrap.
- Cotton flannel or U.S. Military surplus.
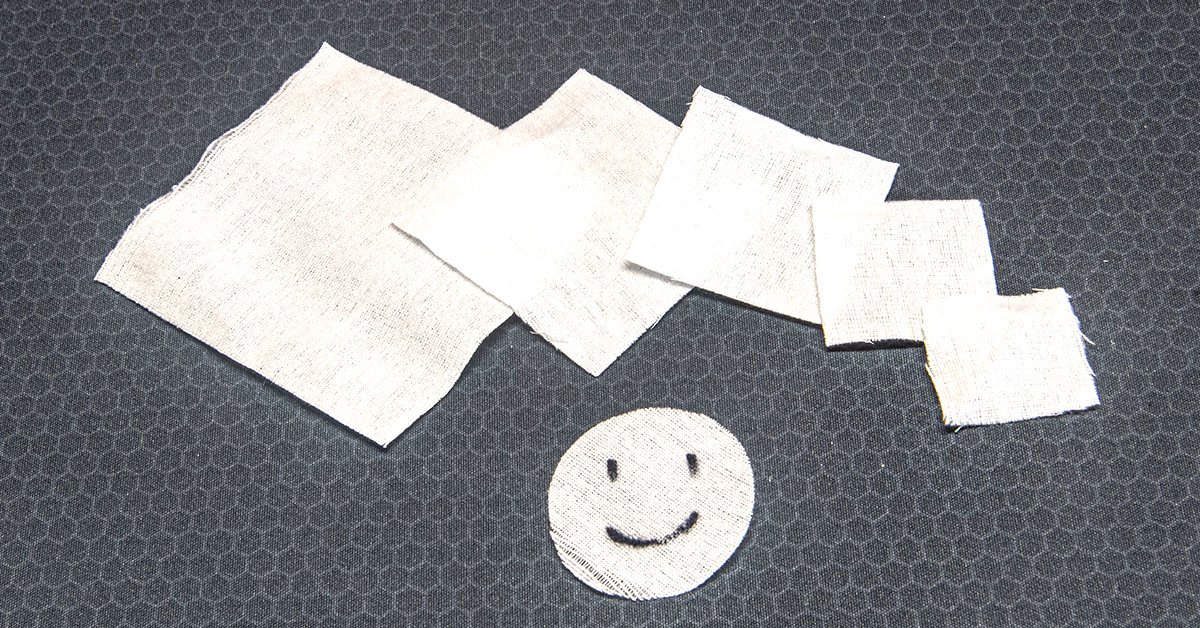
Patches are typically used to remove fouling that has been loosened with a bore brush and solvent. As such, each pass with a patch requires the use of a new, clean patch. I use the following square patch sizes with a Dewey pierce-type cleaning jag for these calibers:
Rifle
- .22 rimfire (1 inch)
- .22 centerfire (1-1/18 inch)
- .243/6mm, .25/6.5mm, .270 (1-3/8 inch)
- .284/7mm, .308 (1-3/4 inch)
- .338 (2 inch)
- .35, .375, .44, .45 (2-1/4 inch)
- .50 (3 inch)
Pistol
- .22 rimfire (1 inch)
- .38, .357, 9mm (1-3/4 inch)
- .40, 10mm (2 inch)
- .44, .45 (2 inch)
Note: Pistol jags are typically shorter than rifle jags and will, at times, require the use of a different sized patch to obtain the proper fit. If, when piercing the patch in the center, you find that the patch is too tight and requiring excessive force to push into the barrel, remove the patch and pierce it slightly off center.
Shotgun (use of brass patch loop):
- .410 and 28 gauge (2-3/4 inch)
- 20 gauge – 10 gauge (3 inch)
Cleaning Solvent
It’s easy to get lost in and over analyze all the choices of cleaning solvents available to the gun owner. The selection of a cleaning solvent can be among the most confusing as they all seem to claim how great they are, keeping in mind that we are only going to clean steel, which is a simple task. Regardless of what anyone claims, there is going to be a certain amount of “elbow grease” required. Keep in mind, also, that copper fouling is not the big concern many play it up to be.
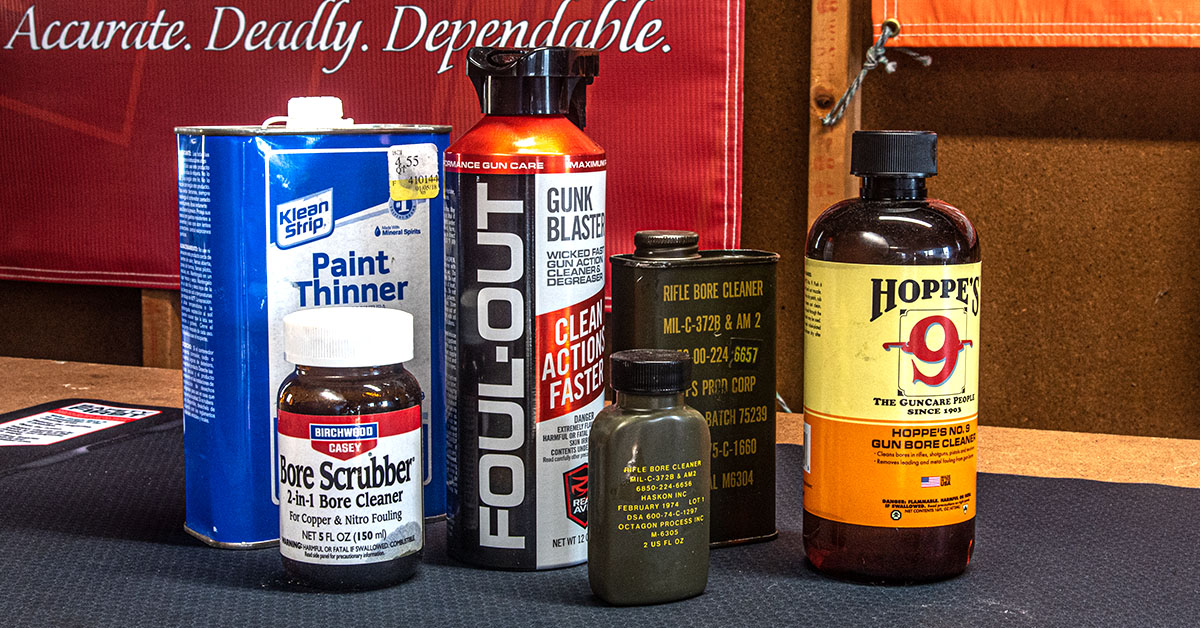
I have read in a military technical manual that mineral spirits are a viable alternative to a firearm-specific cleaning solvent. Again, we are just cleaning steel. My preference continues to be Hoppe’s #9 because there just isn’t any need for more expensive and often stronger smelling “specialty solvents.” If someone built a better mousetrap, I’ll give it a fair shake, but until then, Hoppe’s 9 is mine! Military surplus rifle bore cleaner (not the WWII stuff) found at the right price also works well.
As with bore brushes and cleaning patches, it is more efficient to purchase bore cleaner in bulk. Currently, 32 ounces of Hoppe’s #9 costs $19.95 and a 5-oz. bottle $5.95. Purchase 32 ounces and save over $15.75 (not to mention that 5 ounces isn’t going to last long). Buy the larger bottle and transfer some into a smaller bottle with a flip top spout so that it can easily be dispensed into the solvent port of your bore guide. Remember that solvent must be applied to a patch or brush. Do not dip the brush into the jar of cleaning solvent as this will contaminate the solvent.
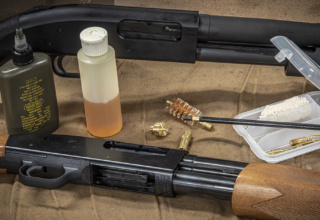
The Barrel Cleaning Process
Bore brushes, cleaning patches, and solvent are used to clean the bore. There is no magic number of passes to take with brushes or patches. Simply scrub until the bore is clean. Follow the safe practices mentioned in this article and you’ll soon develop your own technique.
I begin by flooding the bore with Hoppes #9 and immediately work a bore brush the full length of the barrel, making several passes (about a dozen or so…more or less isn’t going to hurt anything). I’ll then let that soak for about 30 minutes, giving the solvent time to work. In the interim, I clean the bore brush by spraying it with denatured alcohol and allowing the crud to run off and wiping off the cleaning rod. After allowing the barrel to soak for 30 minutes, I run three or four clean patches through the bore to remove all the gunk. Once a patch comes out dry and white (or fairly white), I return to the bore brush process, flooding the bore with solvent and giving it another dozen or so passes. The rod and brush will indicate how much crud remains. I may or may not let the solvent soak this time. This is, again, followed with fresh patches until they come out clean and dry. Keep repeating the process until the bore is clean.
Remember…all we’re doing is cleaning steel.
Lubrication
Firearm lubricant is much like cleaning solvent in that there seems to be a never-ending list of choices and they all claim to “be the best.” In all my years using and working on firearms personally and as a professional gunsmith, never have I examined a firearm that suffered from using a “bad lubricant.” Ever. So, there is no need to get all stressed out in trying to determine which lubricant to use. Any modern lubricant marketed for use in firearms will work just fine, as is stated in many of the firearm manufacturer’s owner’s manuals.
What CAN be problematic is over-lubrication. Most manufacturers, including the U.S. military technical manuals, warn against over-lubrication. It simply does not take much lubrication to protect and ensure proper operation of your firearm. GLOCKs, for example, only require a few drops placed at the proper locations. Other firearms may take a little more, but the difference isn’t that great. Over-lube a wooden stocked rifle and eventually the stock will become oil-soaked and turn to mush. The key to lubricating your firearm isn’t so much in the type of lube you use but in the proper application of the lube. A little goes a long way.
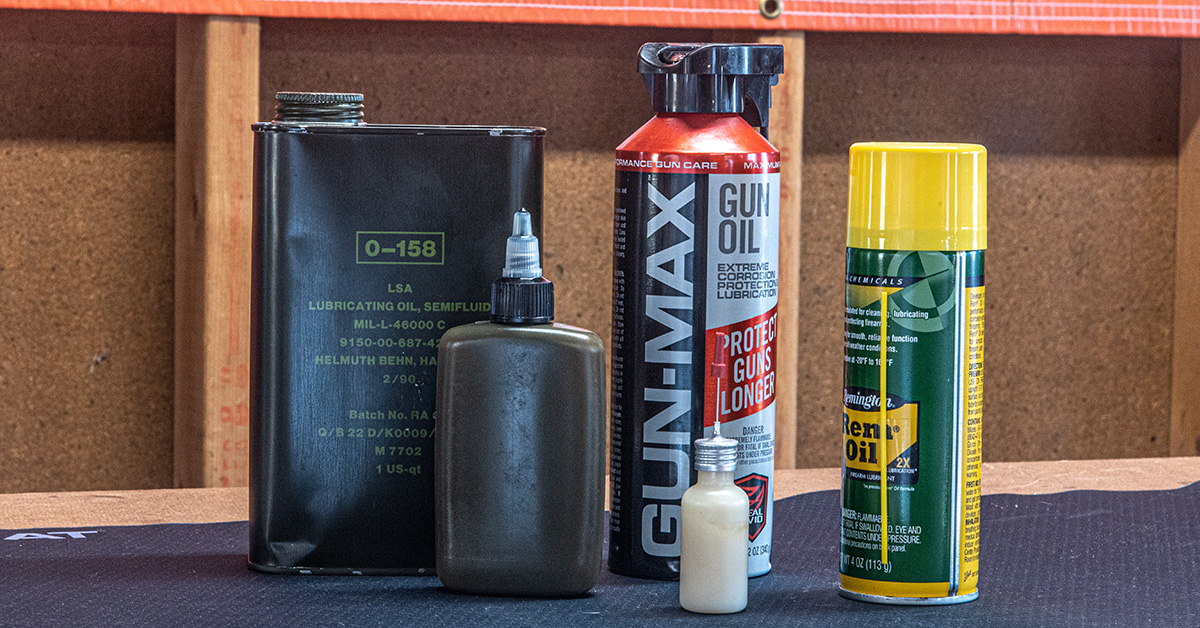
Of course, we must choose a lube, but which one?
I favor a lubricate used by the U.S. military—that being LSA, also known as “lubricating oil, semifluid.” It is also referred to as “lubricant, small arms.” As its name implies, this oil is a semifluid in that it is somewhat thicker than the typical gun oil we are used to using. While being thicker, it is not a grease, but in similar fashion to grease, it tends to stay where you put it. This lubricant has been in the U.S. military inventory for decades. It’s simply good stuff—the best, in my opinion—and who knows small arms better than the U.S. military?
LSA can be found at bargain prices online. I’ve recently purchased a quart for $10 and that quart will last a long time. Quite a savings compared to the typical $3 for a couple ounces of commercial name brand stuff!
As you can see, gun cleaning need not be the overly complicated, overly technical process many make it out to be. It also doesn’t require fancy chemical stews or a boxful of expensive tools. Approach the task with common sense and save your money for ammo!