If you are looking to recapture the fun of shooting and to build your no-fail marksmanship skills, open sights are the way to go.
by Rob Reaser
I have read many stories over the years of some of the most incredible shots having been taken by the early American pioneers, buffalo hunters, and other men-of-arms that would make today’s shooters simply reply, “No way!” Heck, I’ve said it myself. Of course, we’re talking about shooting without the benefit magnified optics and fine-tuned cartridge loads, BDC reticles, or fancy ballistic calculators.
You’ve doubtless heard of “Kentucky windage.” Well, that was a real thing back in the day — a combination of much shooting experience and a salting of intuition to make bullets hit on target at some incredible distances with nothing more than iron sights and a solid command of the marksmanship foundations.
Largely, today’s shooting enthusiasts have either given themselves over to the handicaps of high-technology-infused firearm and optic systems or have never known anything different ever since they put away the Red Ryder for a big boy gun.
But do enough shooting with open sights — I’m talking about really practiced shooting that considers all the fundamentals of proper marksmanship techniques — and you’ll eventually discover you can perform marvelously on the range or in the field without leaning on precision glass or electro-optics.
As you learn to shoot effectively with open sights, you will quickly discover that you are having fun…a lot of fun…in the doing. It’s all about seeing positive results from a learned skill — the kind of feedback that edifies through overcoming a challenge.
Not all open sights, though, are created equal or ideally suited for every shooter.
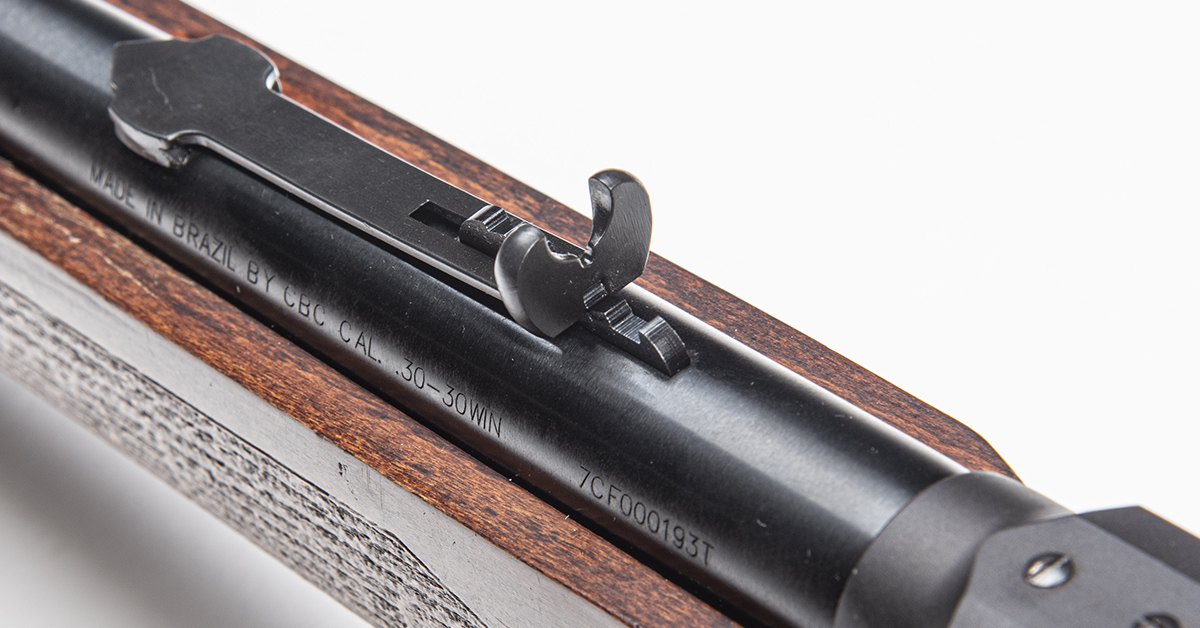
The classic U-, V-, or square-notch rear sight and post front sight combination are proven designs that stretch back to the earliest days of the long arm. There are even variations on these. One example is the classic buckhorn or semi-buckhorn style of rear sights, as seen with this semi-buckhorn on our Rossi R95 .30-30. You may wonder what purpose the buckhorn style serves, and you’d be right to ask.
Here is the sight picture of a buckhorn rear sight. These sights have the expected notch in the bottom for which to align the front sight, as shown above. Way back in the before times, when long shots were taken with crazy-heavy cast lead bullets (compared to today’s long-range precision spitzers) and propelled by black powder, the holdover would be significant. The buckhorn design provides a crude way to reference the front sight for those long-range shots. Placing the front “bead” in the middle of the sight window would provide reliable point-of-aim/point-of-impact at a specified distance. Placing the bead between the horn tips would do the same at an even greater distance. So, those horns weren’t just about style.
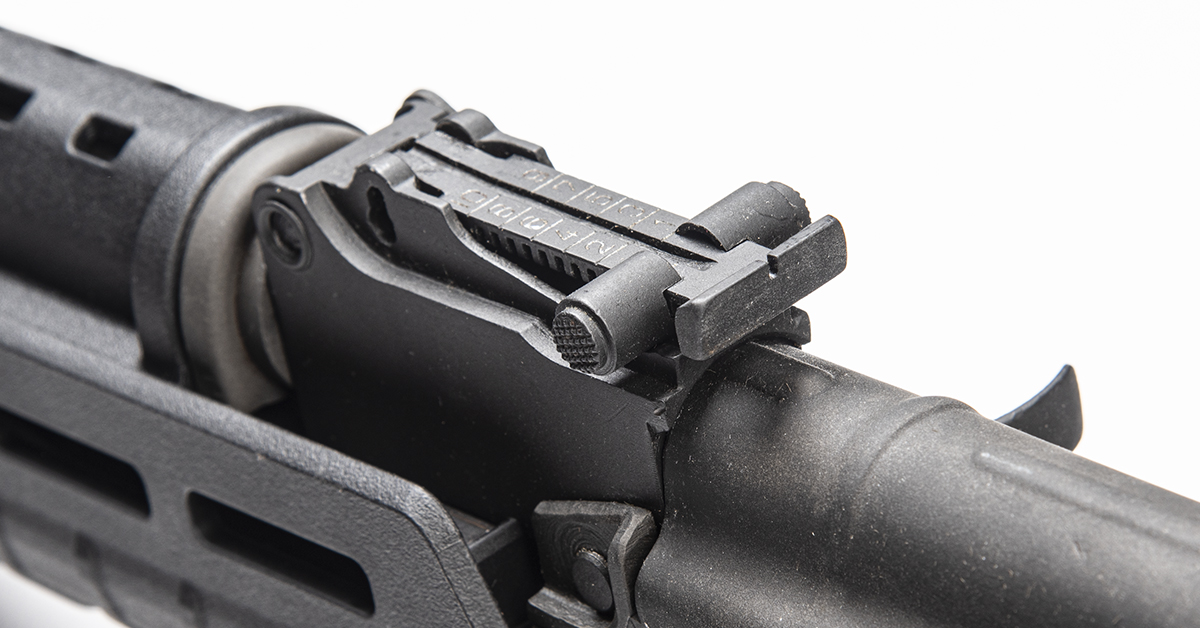
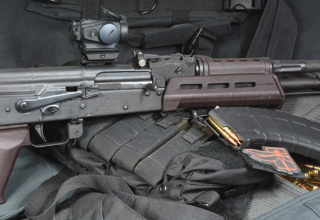
Now, consider the flat top rear sight as illustrated by this AKM version. If you tried to use it for a holdover shot, the correct position for the front post would be little more than a wild guess. That is why this sight is adjustable. Squeezing the adjustment cylinder and moving the cylinder fore or aft allows you to change the rear sight elevation to match the ranged distance to the target.
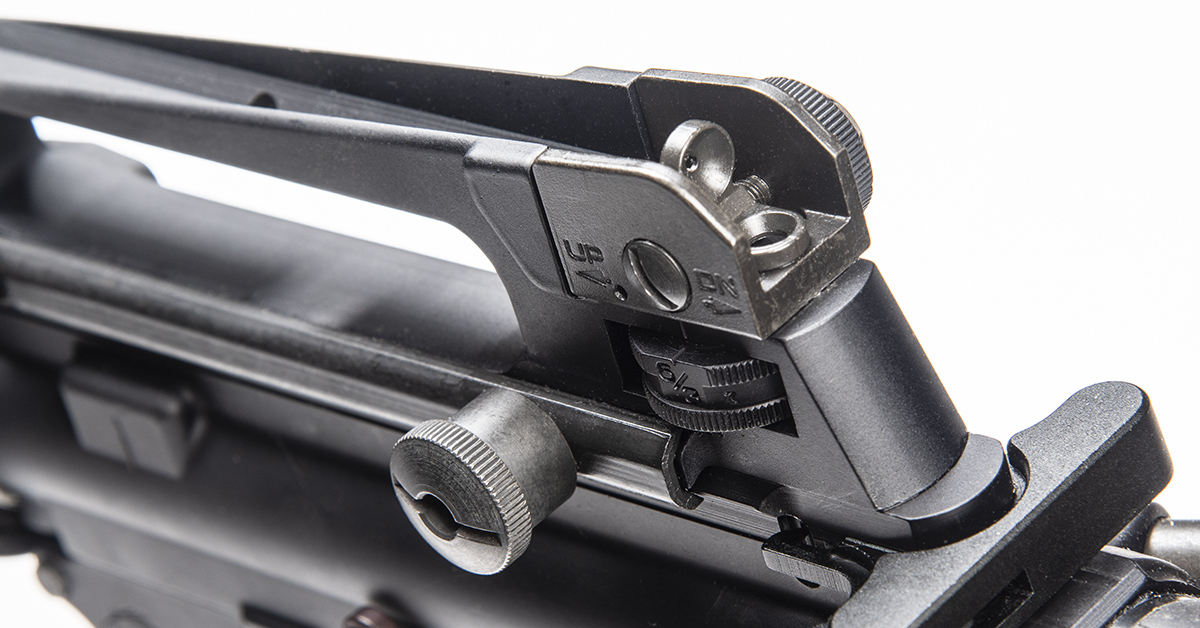
Another rear sight system — and the primary focus of this discussion — is the aperture, or peep, rear sight. These have been around for a looong time and have been used to great effectiveness at long distances in the hands of the practiced shooter. For a modern example of this, look no farther than the original M16/M4 carry handle sight configuration.
The original M16/M4 sight system comprises an adjustable post front sight and an adjustable rear aperture sight. Once the battlesight zero is established, this system can deliver accurate torso hits out to 300 meters easily enough and cause some problems for your target beyond that if you have a sharp eye and steady hand.
Why is it so effective? Because the aperture makes sight alignment intuitive.
The human eye is quite remarkable in being able to center a point within a circle. And that is all an aperture sight does. Align the top of the post to your intended point-of-impact and you’ll find that the aperture/peep/ghost ring (however you want to call it) rear sight will quickly and easily center around this point to provide the proper sight alignment.
While a good aperture-and-post sight system can deliver impressive results at distances those who’ve not tried it may not quite grasp, these sights really shine on carbine rifles employed for targets that are near-range — say, under 150 yards or so. The lever-action carbine is a fine example of a gun that comes into its own with such an open sight system.
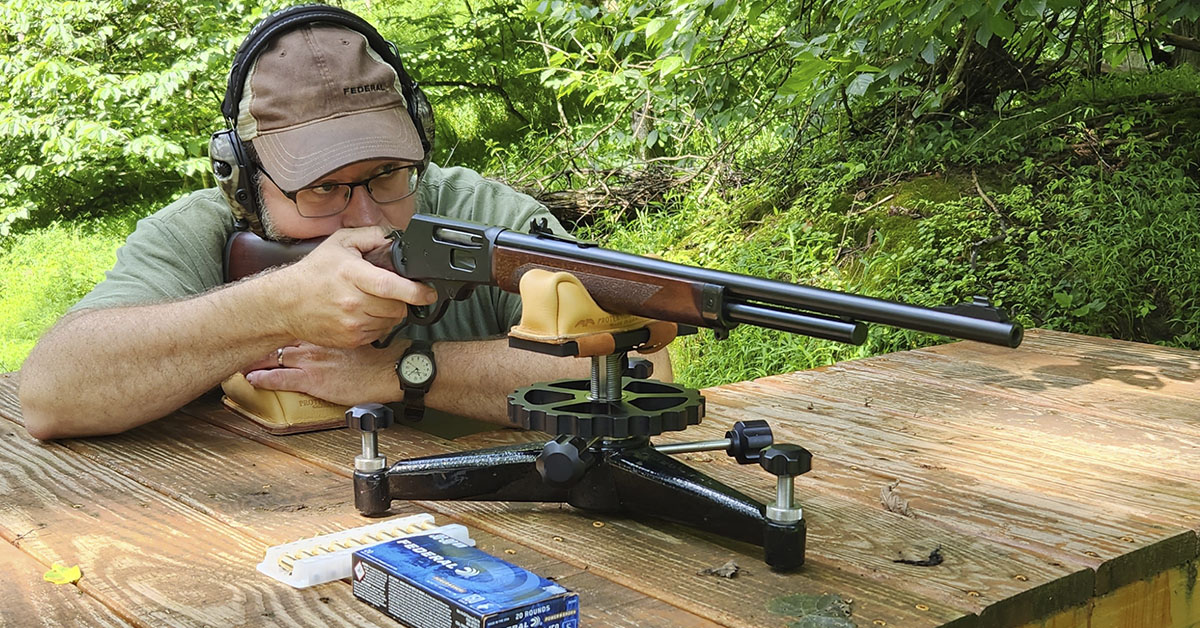
Last year, I picked up a Rossi R95 in .30-30. Great little gun, and the ideal platform to become reacquainted with this traditional hunting cartridge. The only issue I had with it was the included semi-buckhorn rear sight. With years of practice with the A2/A4 style sights on the AR-15 platform, I’ve pretty much fallen out of favor with the kind of semi-buckhorn iron sights that came with the R95. Fortunately, I’m in good company, as many lever-action fans seem to also prefer an aperture sight system on these handy carbines. And fortunately, again, there are many aftermarket solutions out there for those who want to swap their factory notched rear sights with an aperture system.
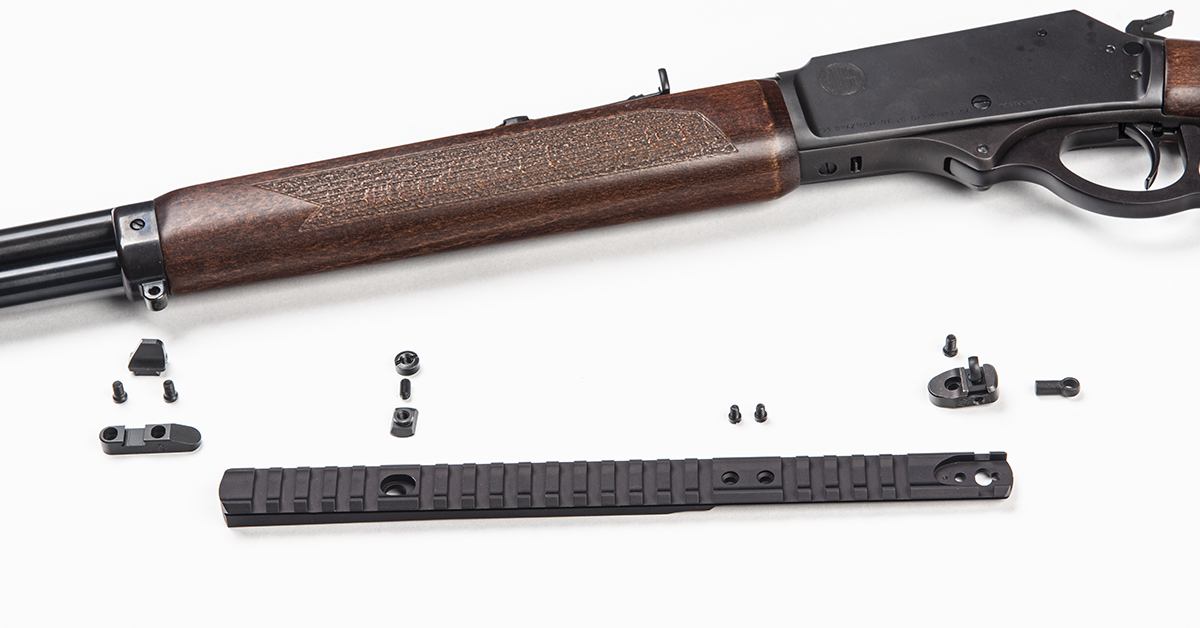
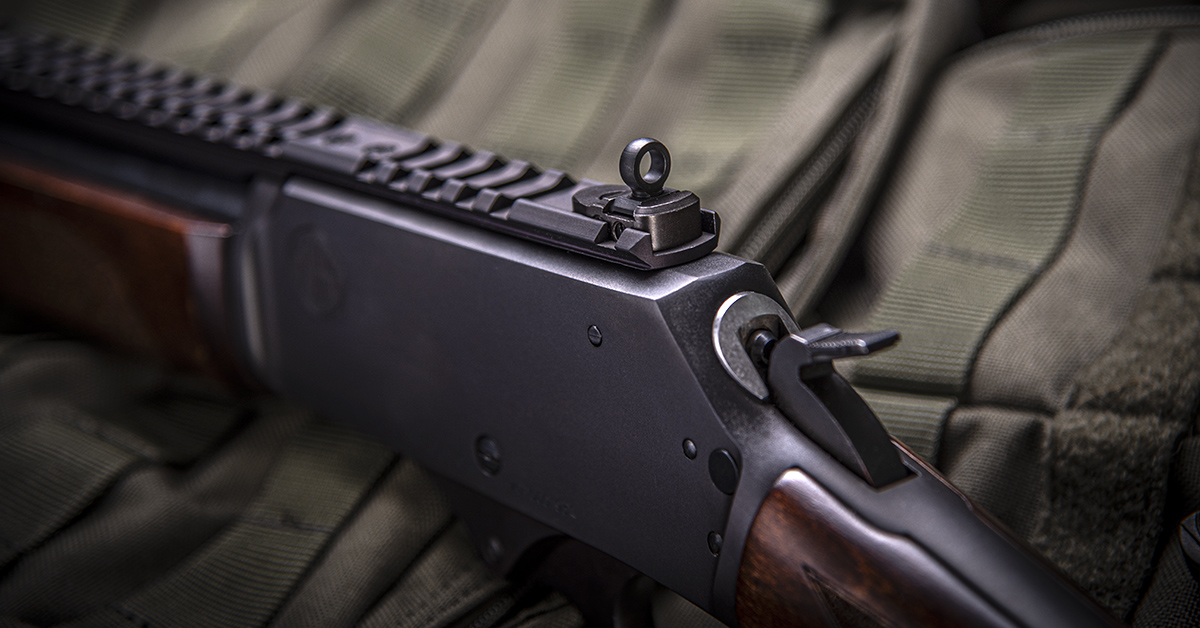
One of the leading companies in the carbine peep sight segment is XS Sights. The company offers rail and sight options for Henry, Marlin, Rossi, and Winchester lever guns. My pick for the R95 was their Optic Mount and Ghost Ring Sight Set, which includes a Picatinny rail, front sight, and an adjustable ghost ring rear sight.
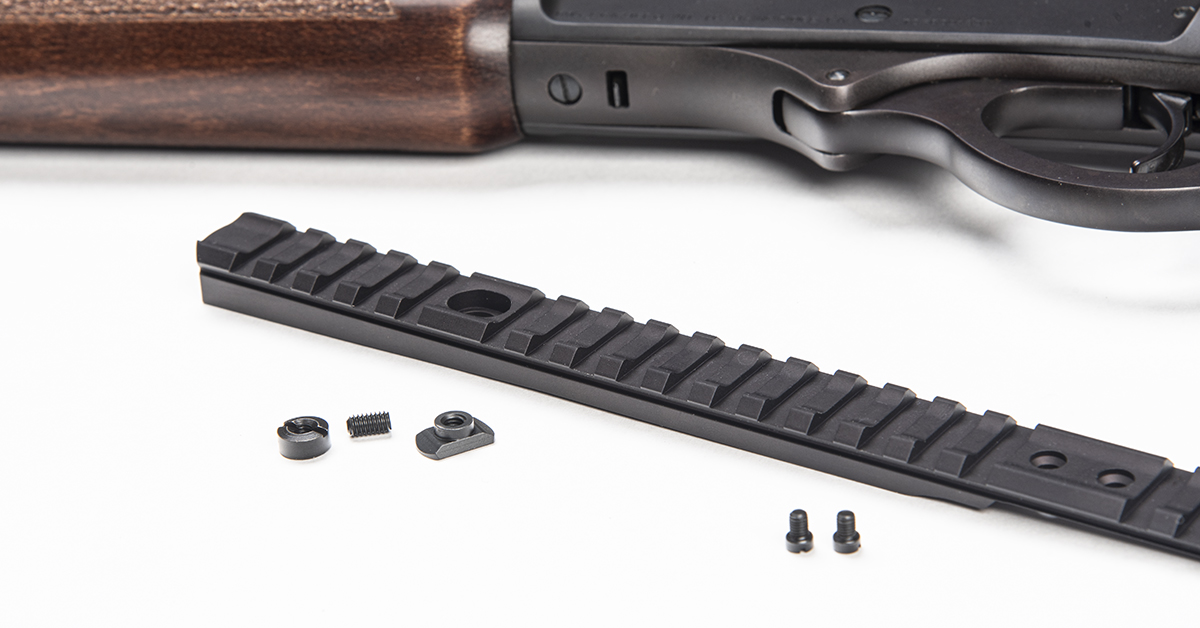
The foundation of the sight set is the Picatinny rail, which secures to the factory-tapped receiver holes and the factory rear sight dovetail. The base is contoured to match the disparate receiver and barrel height to ensure the top is parallel to the bore axis. A special nut and screw system secures the rail to the barrel, making the platform stable for a red dot or a rifle scope, should you wish it.
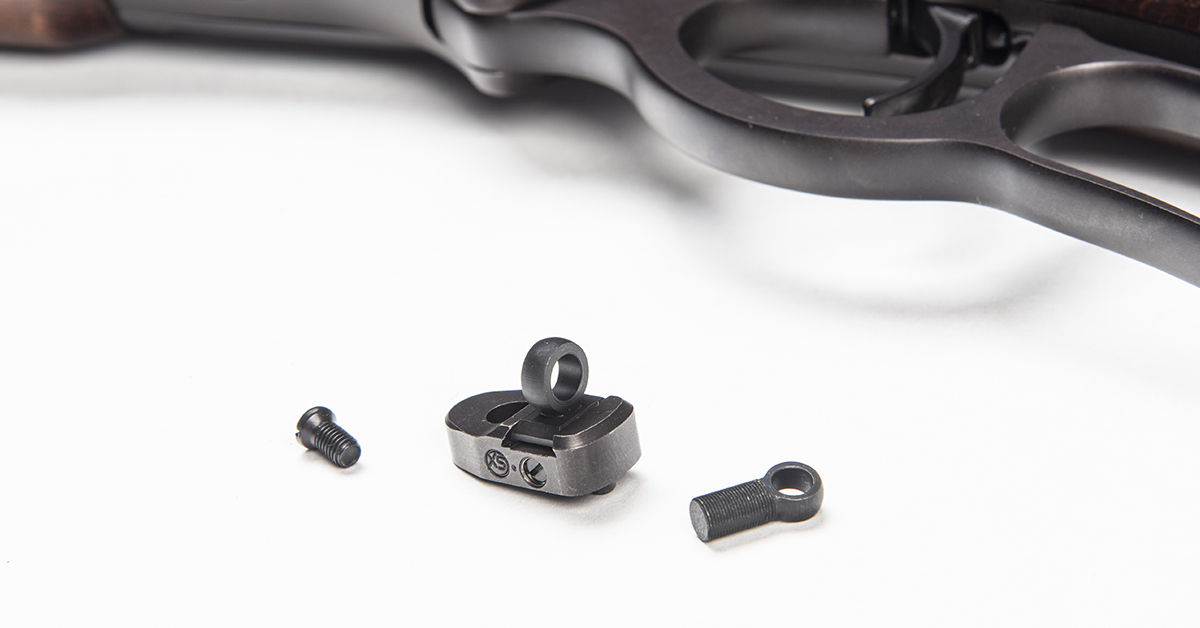
Replacing the factory semi-buckhorn is an adjustable ghost ring sight, meaning it is adjustable for both elevation and windage. It comes with two aperture posts to meet your shooting style preference. There is a large .230-inch aperture and a smaller .191-inch aperture.
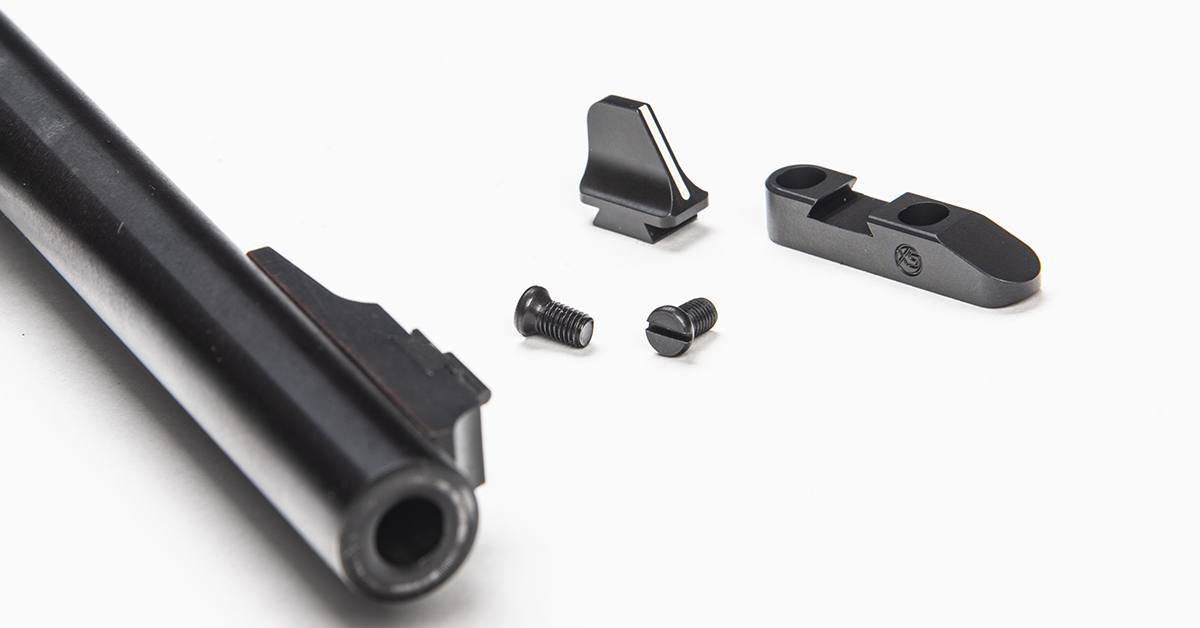
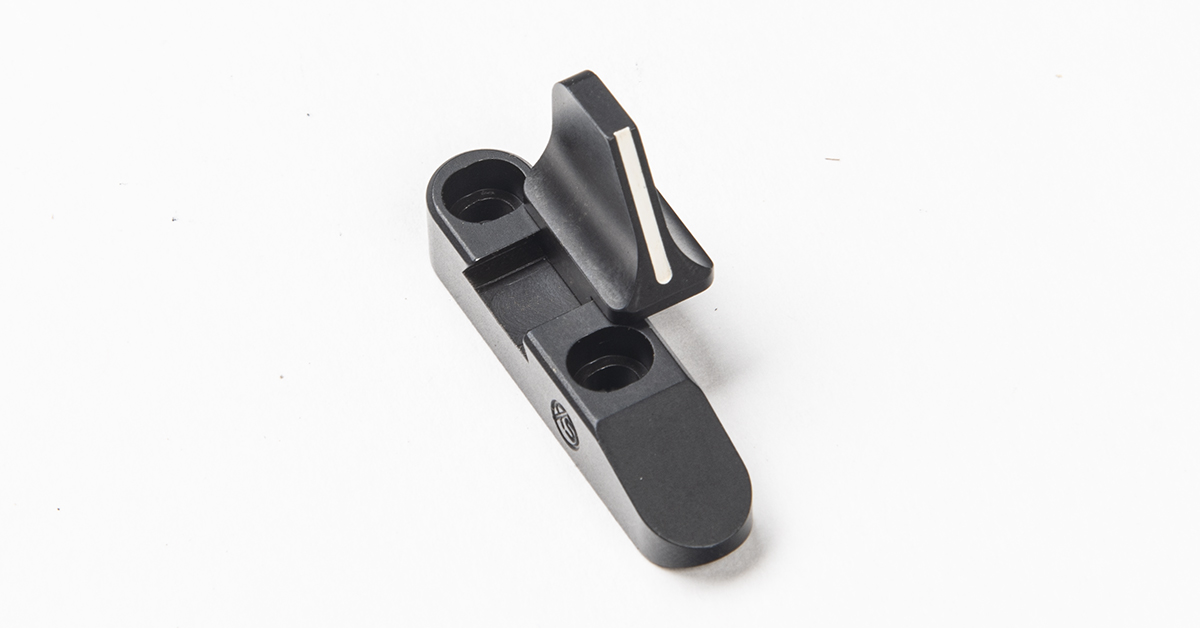
The elevated height of the rear sight necessitates a taller front sight, hence the need to replace the factory front sight. The new sight has a white strip along the front post. That is a huge plus because it really makes the aiming point stand out against dark backgrounds — a problem any open sight shooter can relate to. The flat top (versus round bead profile) also makes for a crisp point of focus.
Installing the XS Sight System
Installing the XS sight set is a DIY project, but there are a few tricks to the front sight install that will help the effort. As for tools, you’ll want a selection of hollow-ground screwdrivers. I used a combination of Brownells Magna-Tip bit drivers (the magnetic tip helps in placing small screws) and Real Avid’s Smart-Torq & Driver Master Set (you’ll need an in/lb torque wrench). A bench vise is recommended to help hold the work piece, and you’ll want a flat file, small hammer, brass punch, and a pointed metal punch.
Begin by ensuring the rifle is clear of all ammunition and is rendered safe. Remove all ammunition from the work area.
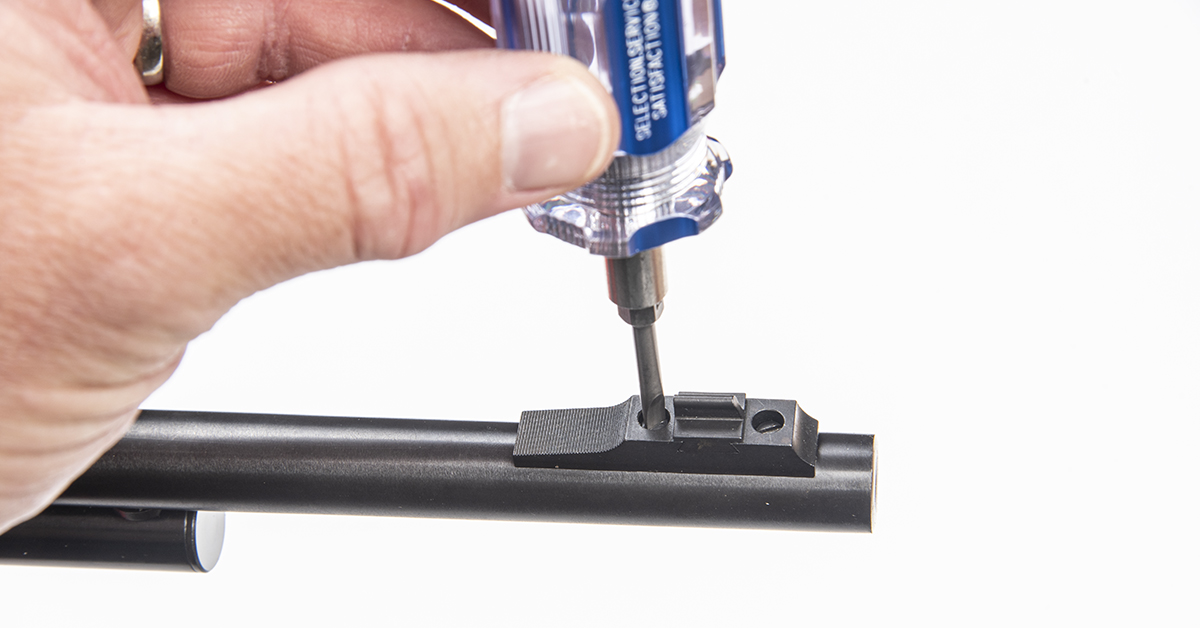
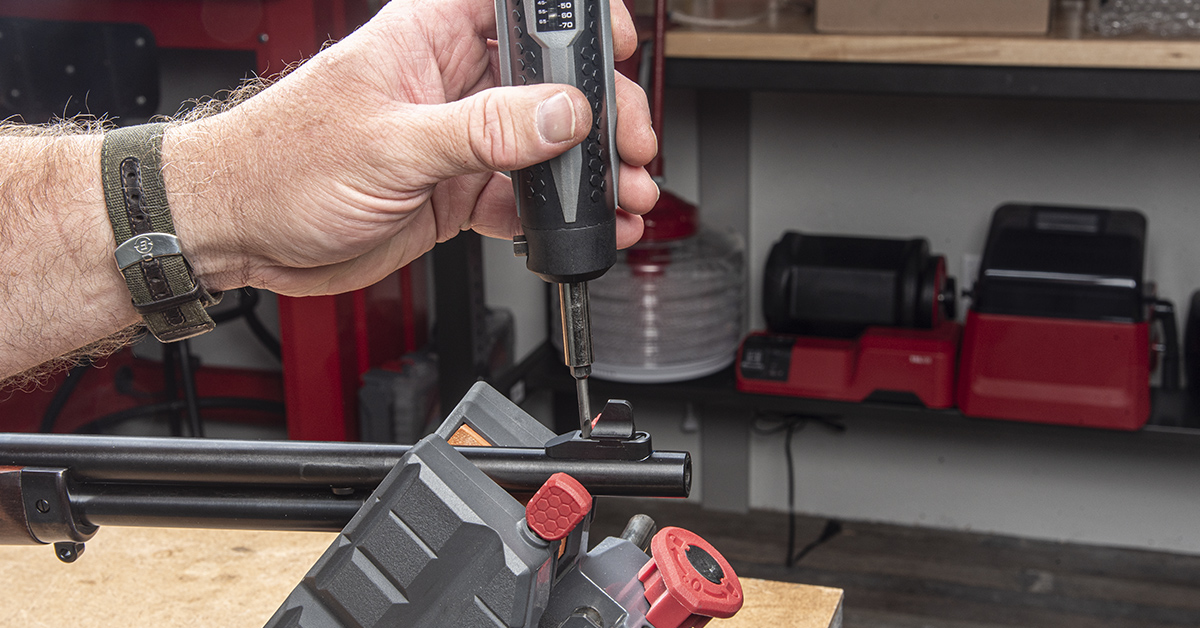
With a hollow-ground bit or screwdriver of the correct width and length to engage the screw slots, remove the two front sight base screws and lift the sight assembly from the barrel.
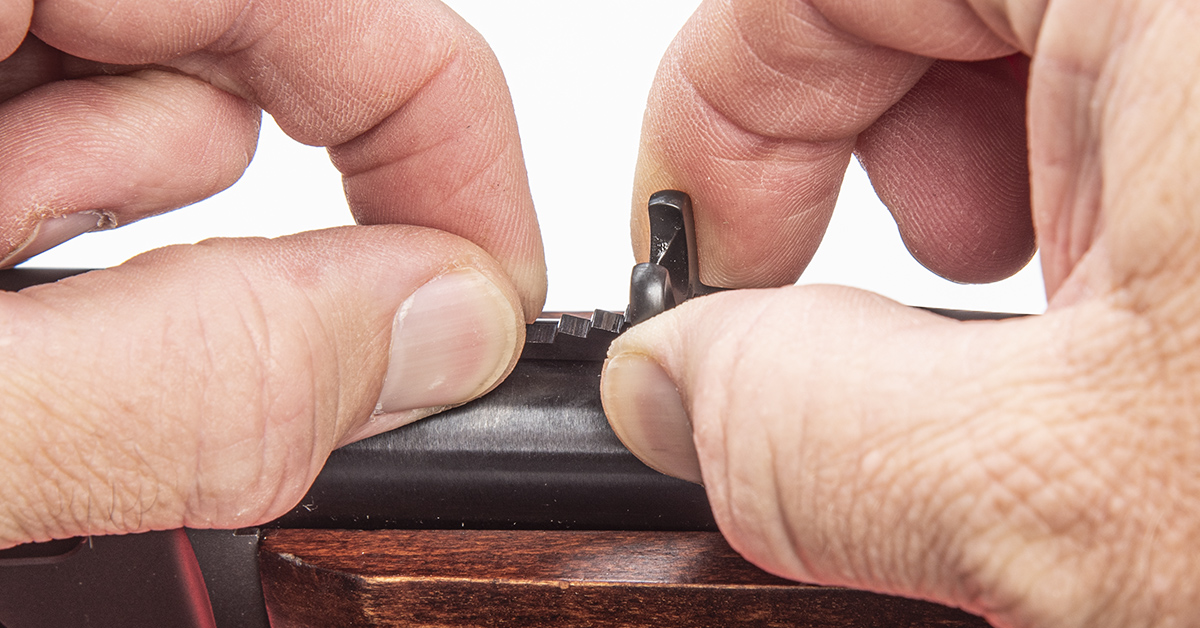
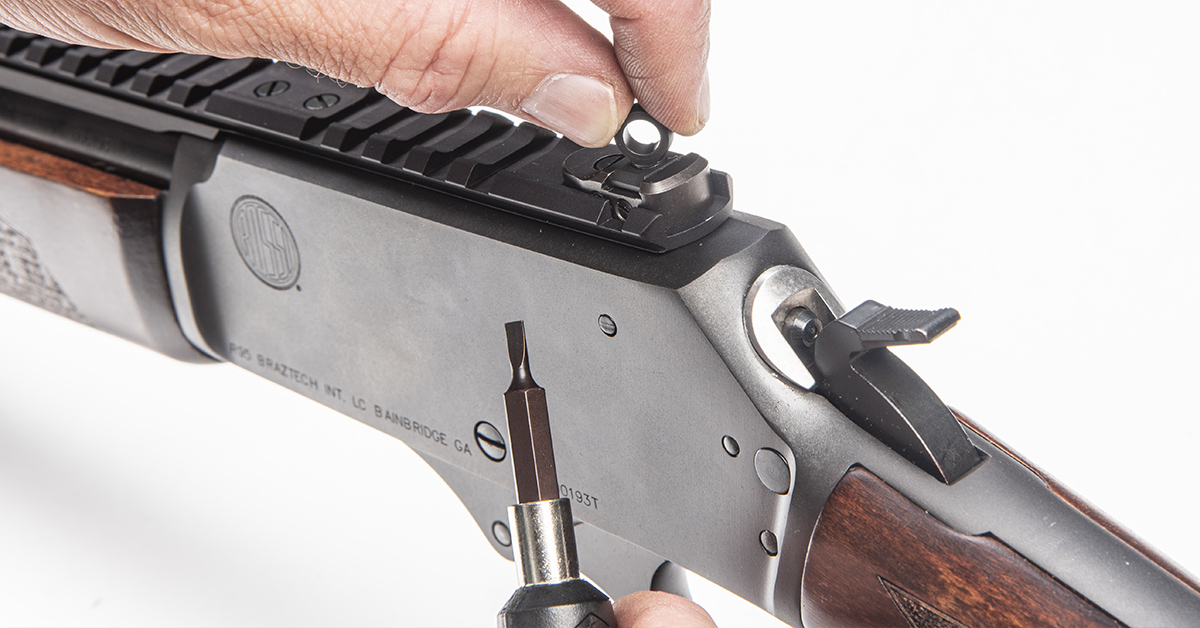
Remove the adjustable rear sight ramp by lifting up on the sight and pulling out the ramp from underneath it.
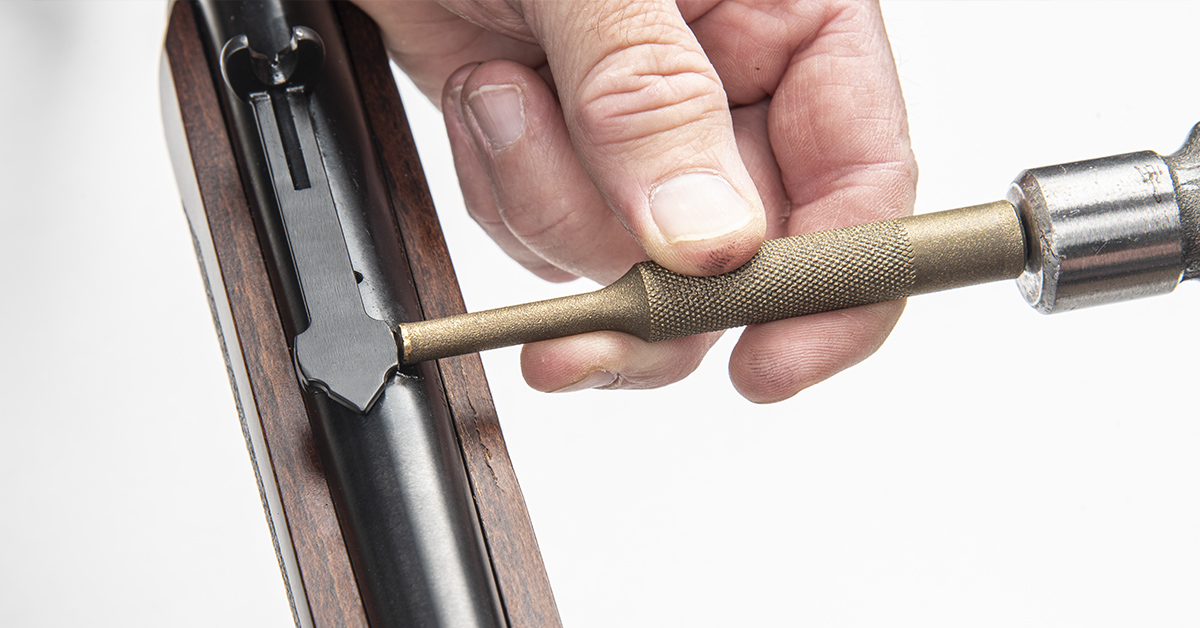
The rear sight can now be drifted out of its dovetail joint with a flat-faced brass punch and hammer. Drive the sight out of the slot from left to right, as shown.
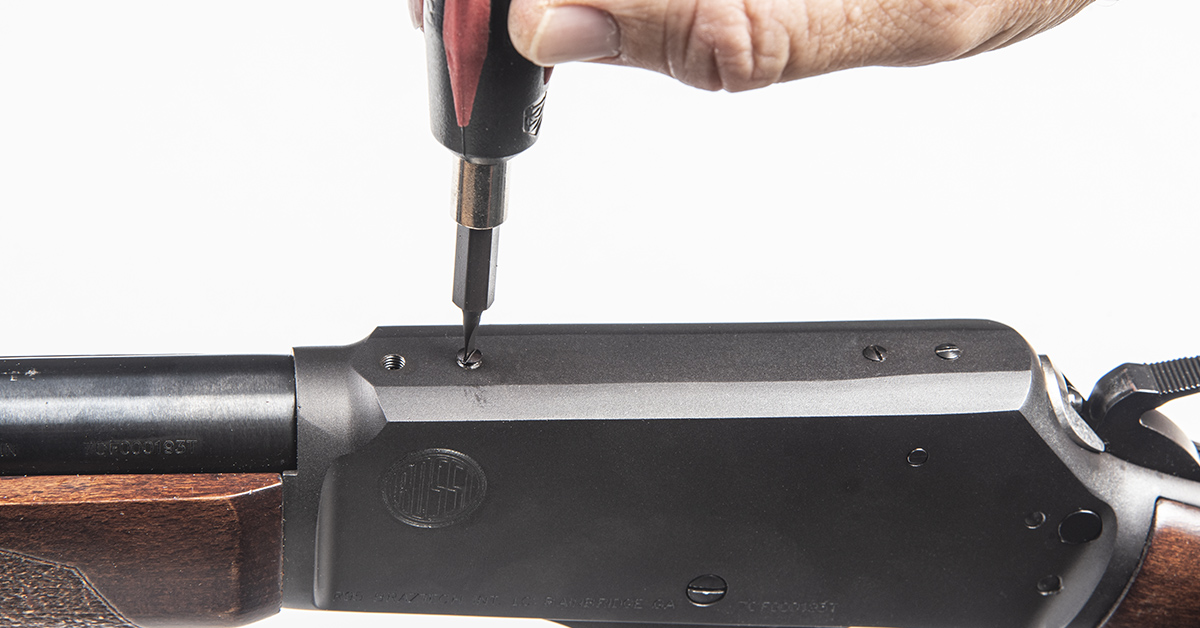
Remove the four plug screws from the top of the receiver.
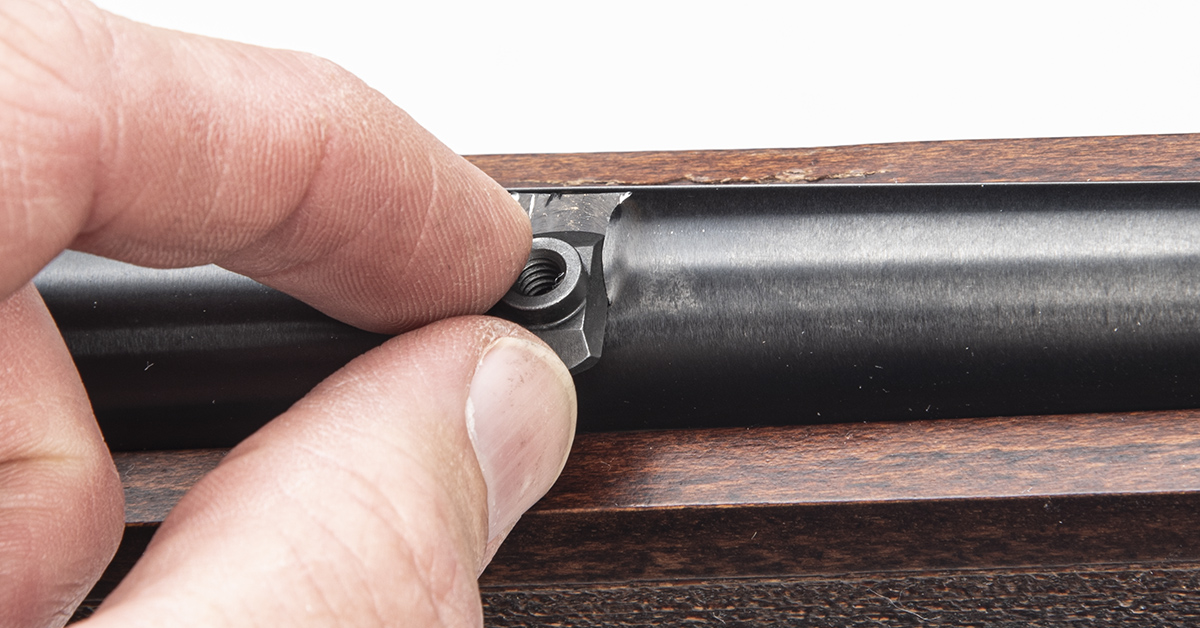
After cleaning all oils and any debris from the dovetail slot and screw holes with denatured alcohol, begin the installation by inserting the rail pillar into the front sight dovetail.
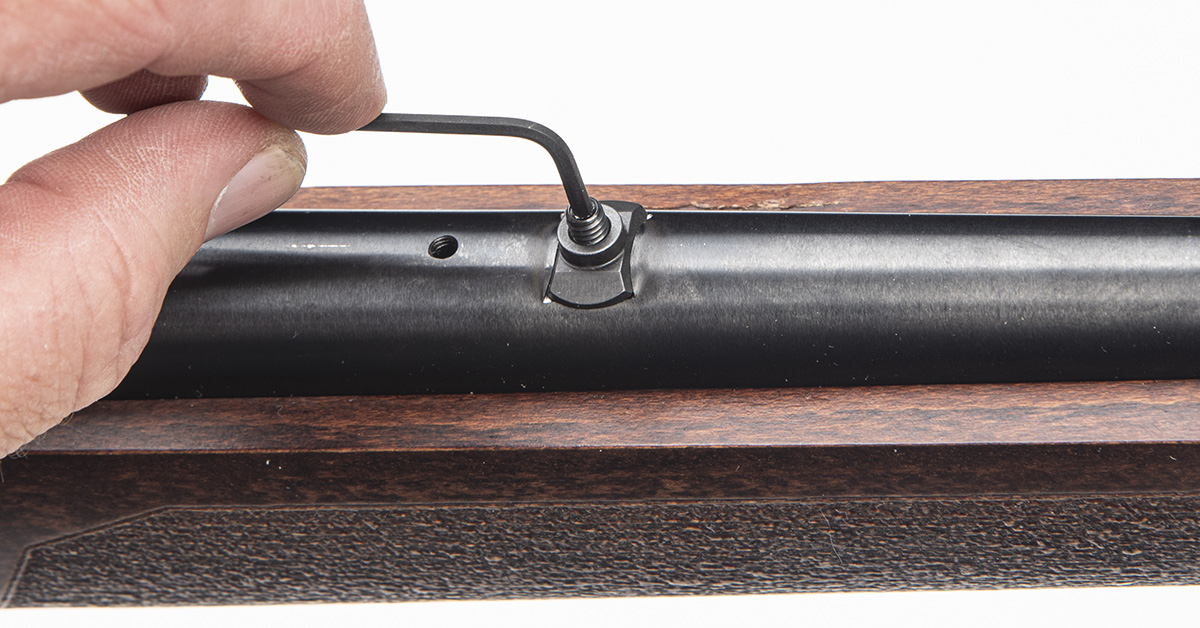
Align the pillar in the dovetail and loosely snug into place with the pillar jack screw and supplied Allen wrench.
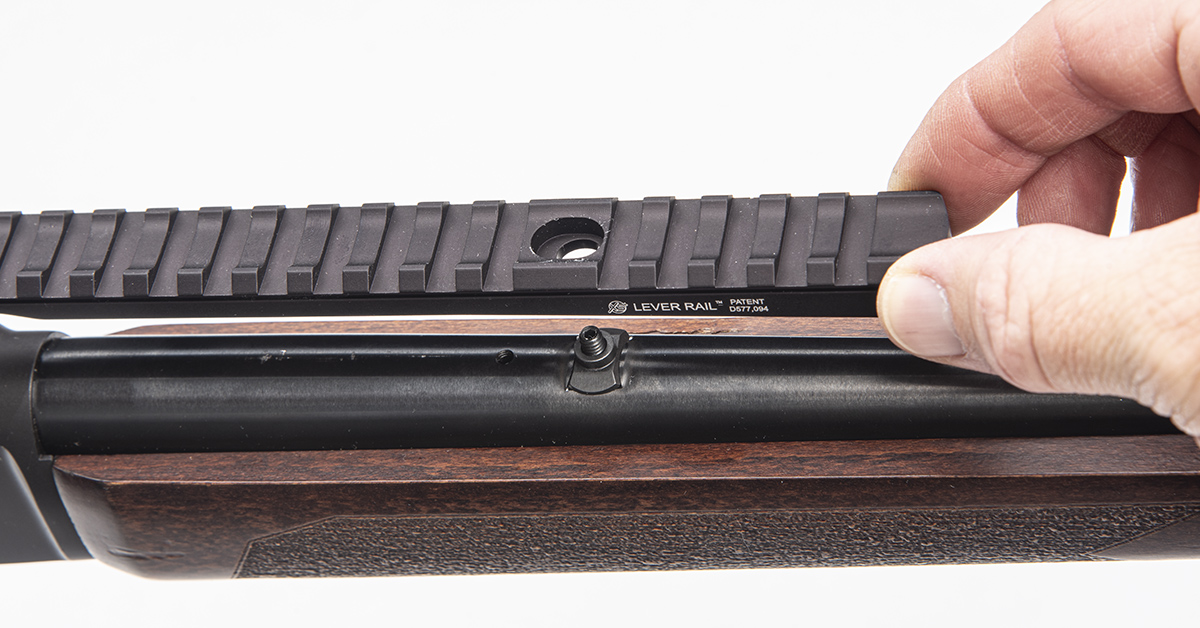
Align the rail pillar hole with the pillar and place the rail into position.
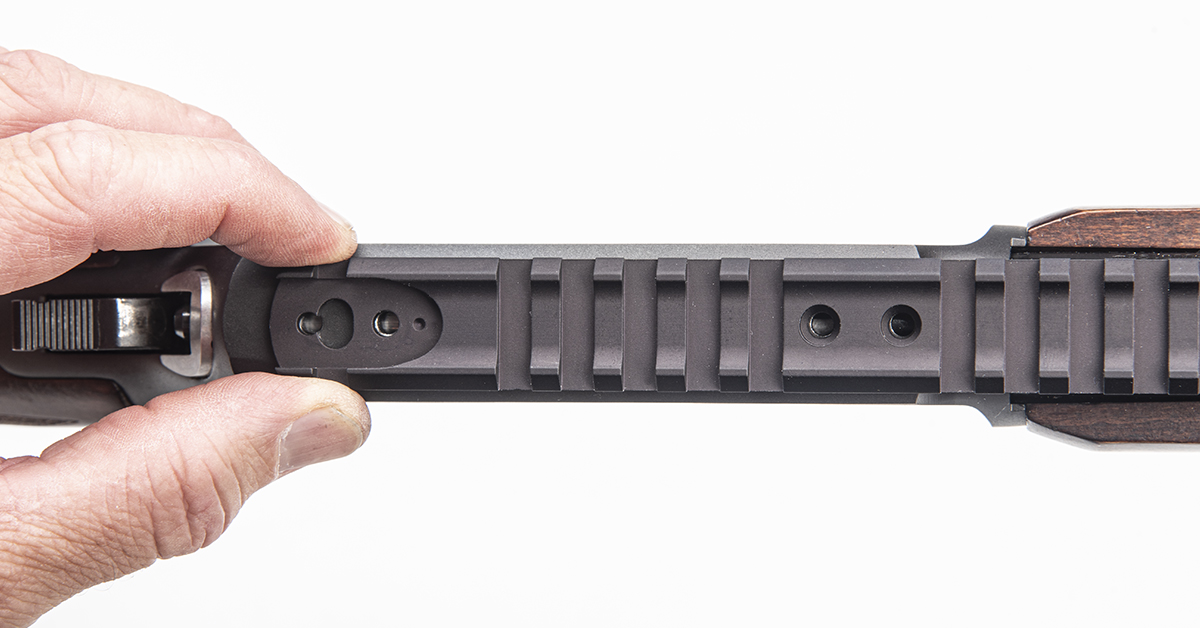
Due to potential machining variations, it is essential to ensure all screw holes in the receiver align with their respective holes in the rail.
Check the fitment by loosely installing the two rear rail screws and the rear sight assembly.
Moving to the front of the rail, loosely install the pillar nut. Again, this is only a trial-fit installation to ensure all holes are aligned and that the unit will correctly install onto the barreled action. If any adjustments must be made (most likely to the rail’s pillar hole), see the included XS instructions. Once you are sure everything lines up, remove all components except the pillar and pillar jack screw. Clean all screws and screw holes with denatured alcohol to remove any oils. Thread locking adhesive will be used to secure the screws.
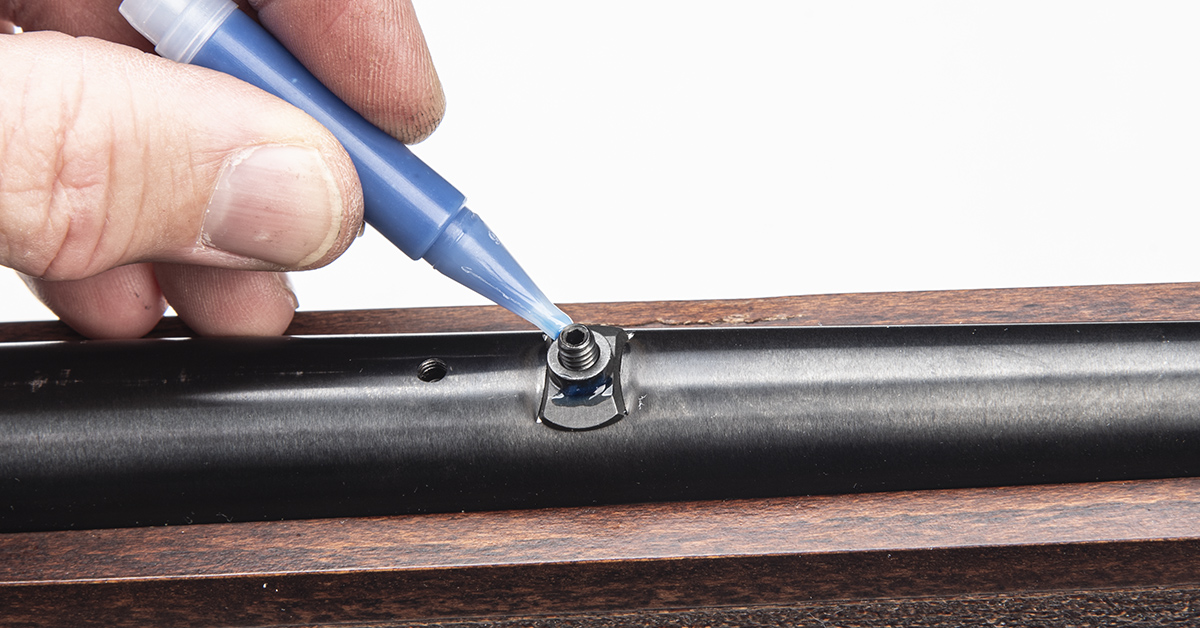
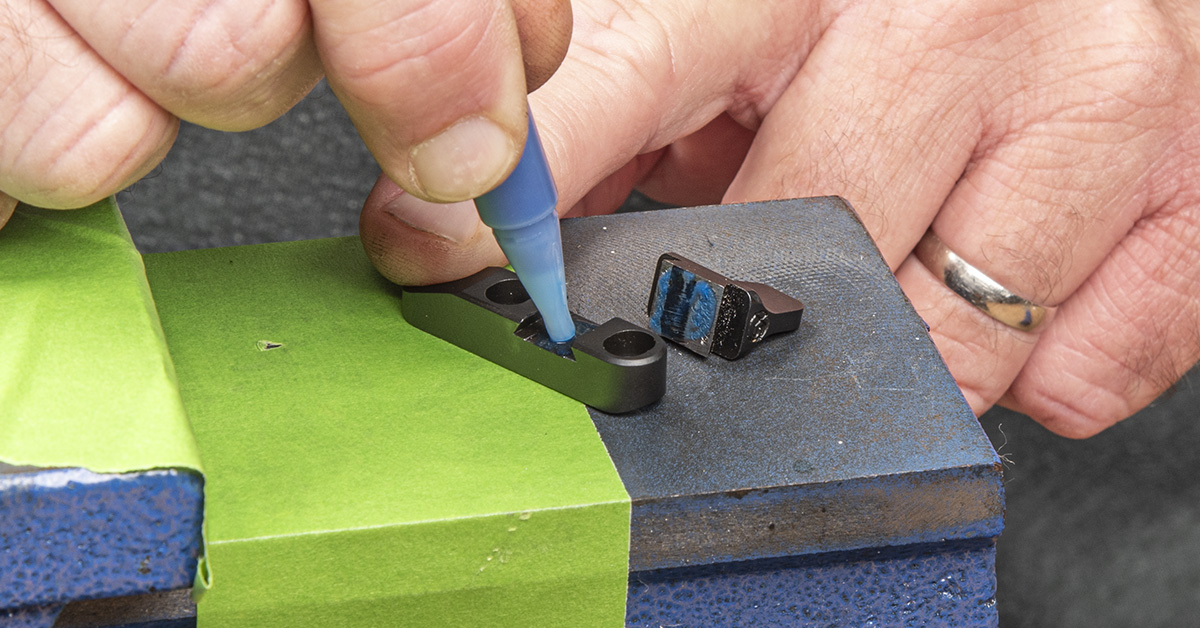
Apply thread locking adhesive around the circumference of the pillar and the pillar nut threads. The XS Sight instructions say to apply thread locking adhesive to the bottom of the rail as well. That seemed a bit excessive to me, so I skipped that part. The choice is yours.
Reinstall the rail, ensuring all mounting holes line up.
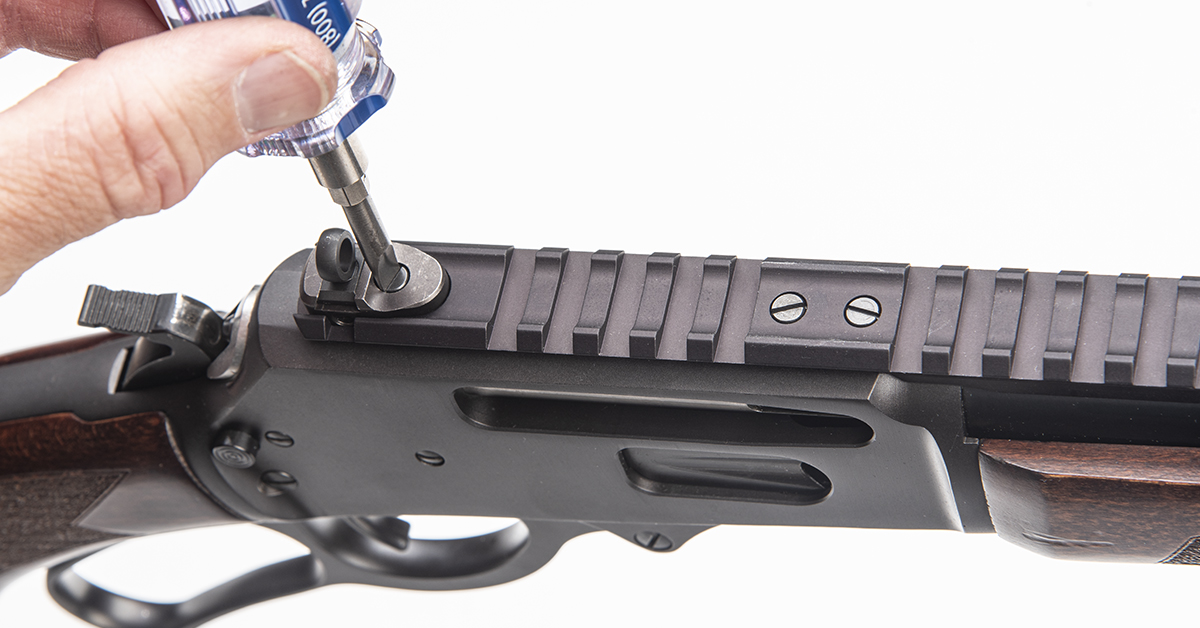
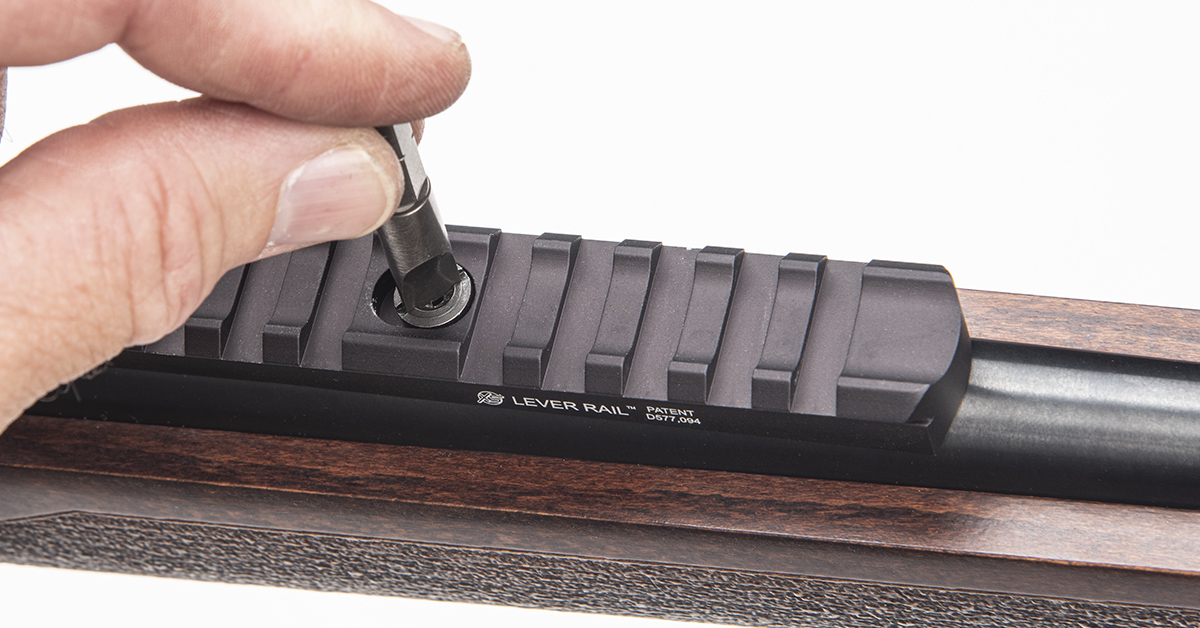
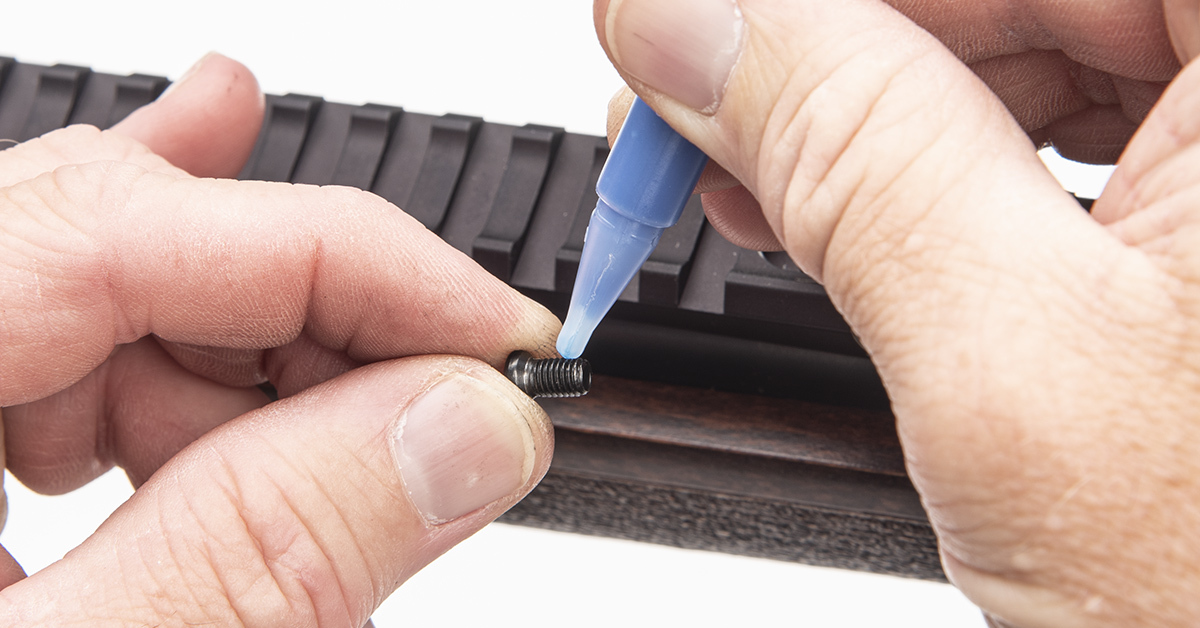
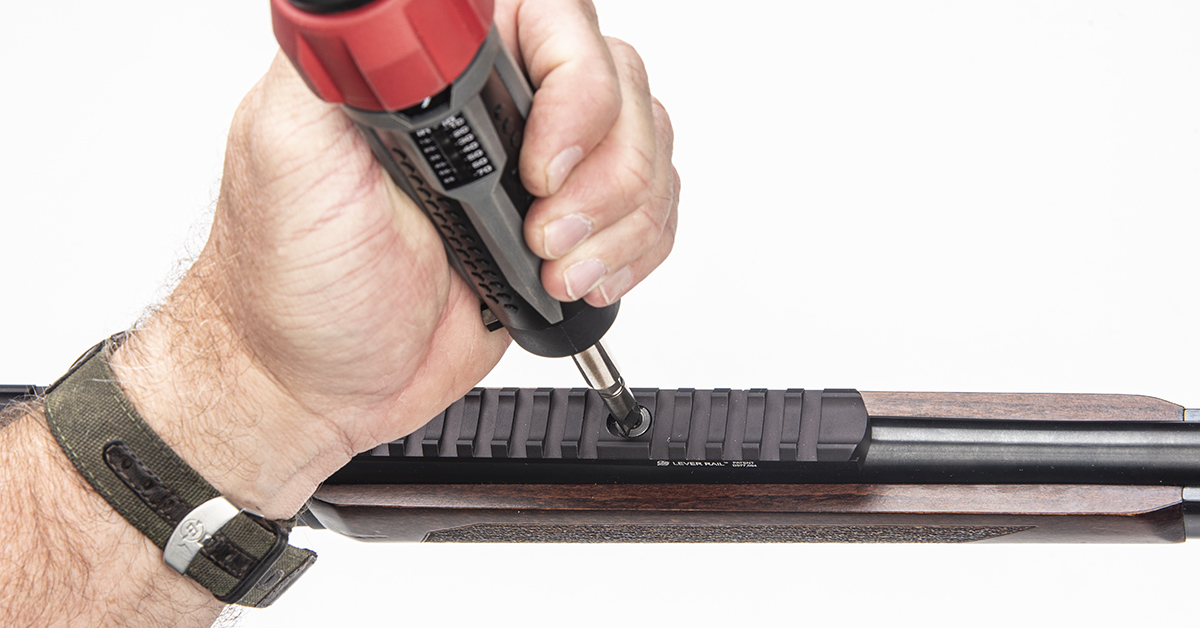
With all screws and screw threads cleaned with denature alcohol, apply a drop of the supplied thread locker to the screws and begin the final installation. This includes the two rail mounting screws and the rear sight mount screw. These screws should be tightened to 12-15 in/lbs.
Lastly, install and torque the pillar nut, torquing it to no more than 15-18 in/lbs. The rail and rear sight assembly is complete.
Installing the front sight is where things can get a bit challenging. It’s not a difficult process, but one that takes some patience and a bit of custom fitting.
The sight base will mount to the barrel just like the factory piece. The difference is that the post must be drifted into place after the two mounting screws are in the base. This is because the screws will not move into their slots in the base when the post is drifted into the dovetail. In theory, you could install the base and then drift the post into the dovetail, but this runs the risk of too much shearing force being applied to the mounting screws as you tap against the sight.
More on that in a moment.
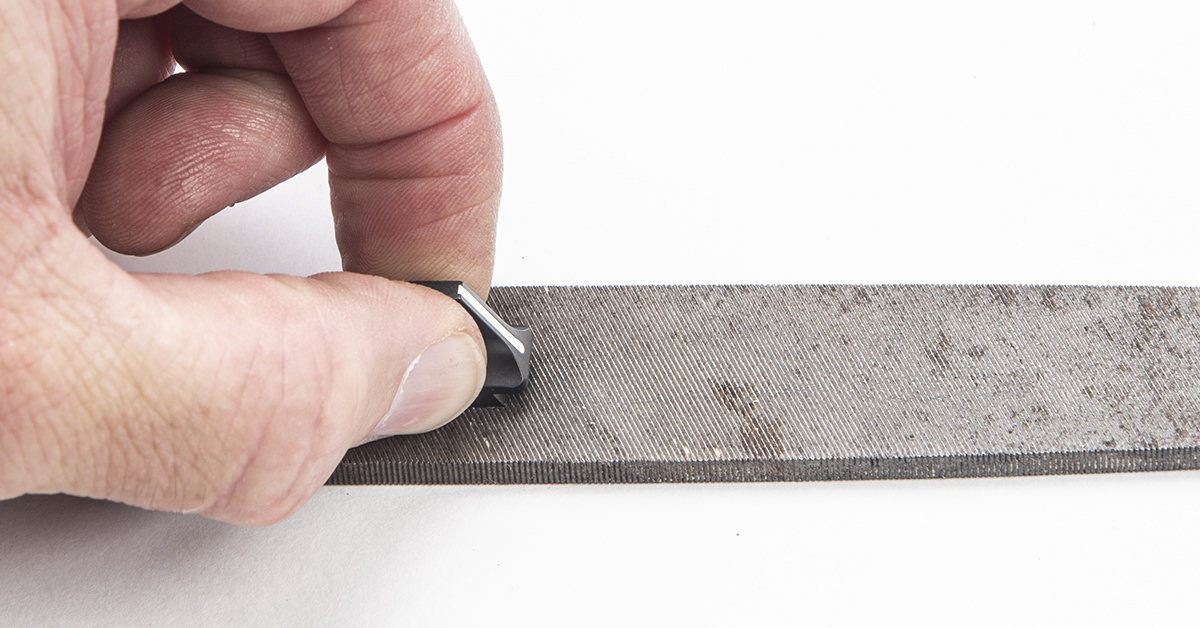
First, the post must be able to drift into the base dovetail. Most likely you will need to file off some of the post dovetail bottom to make that happen. I did. The objective is to remove enough material that the post can slide into the base dovetail about 1/3 of the way with hand pressure. My post base was too large even to start into the base, so some filing was required.
You must evenly remove material from the post base. To do this, grasp the sight and push it one stroke along the flat file. Lift the sight and bring it back to the starting point. Rotate the sight 180 degrees and make another stroke along the file. Keep repeating this process, checking the post-to-base dovetail fitment after every two or three series of filing strokes. Remember, you only want to remove enough material to allow the post base to move into the sight base dovetail about one-third of the way. If you remove too much material, it can be difficult to reestablish the required interference fit.
How do I know? Because this installation was the second time I got impatient with a dovetail filing and took off too much material, which meant the sight installed completely in the base dovetail with barely a push of the finger. I had made two or three strokes too many, and that was all it took. Fortunately, there is a fix for this. It’s not ideal, but it works.
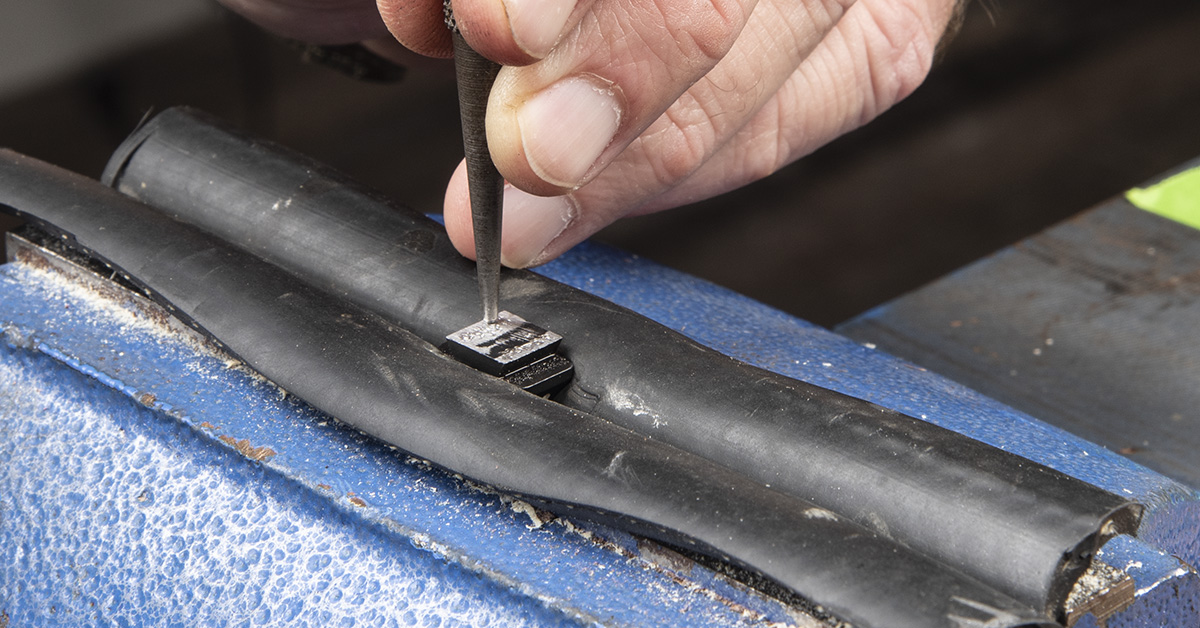
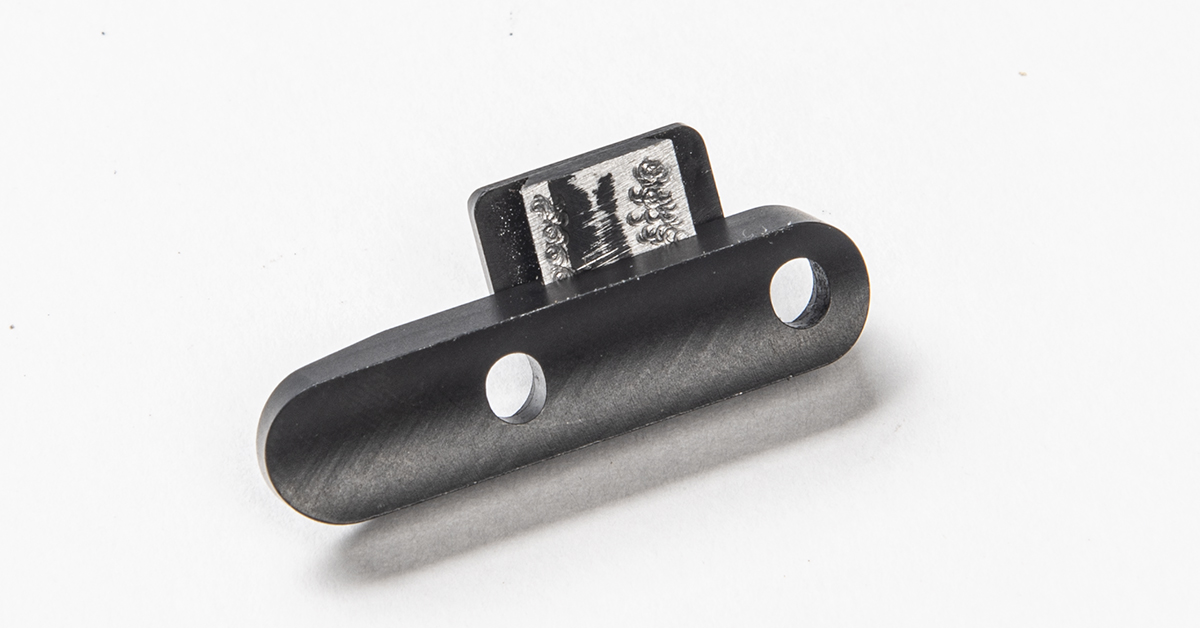
The fix is to displace enough metal on either the bottom of the post or the corresponding flat of the sight base. Doing this creates the necessary interference fit that, along with some thread adhesive, will keep the sight secure in its dovetail slot. I chose to displace metal along the base of the post since I could better secure it in a bench vise when striking it with a punch.
As you can see here, I carefully punched along the bottom of the post base, causing enough material to push out that I achieved the necessary interference fit. The post could now be pushed into the sight base a third of the way but no farther with finger pressure.
With that accomplished, I applied the adhesive to the two interfacing surfaces…
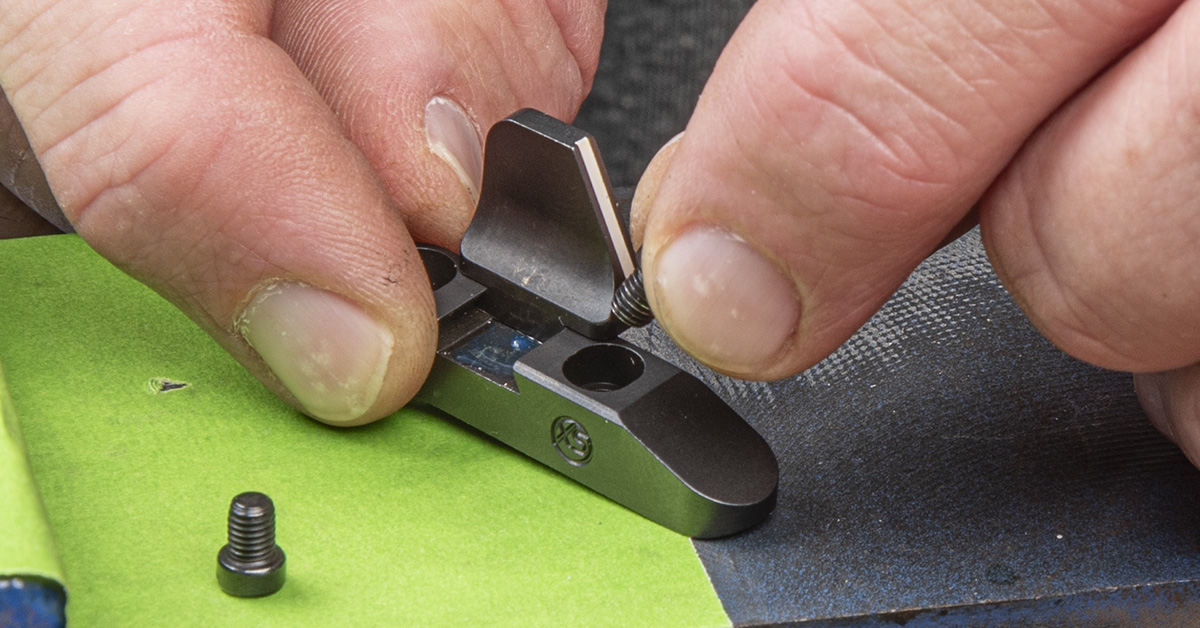
…and started the post into the sight base.
Before pushing the post any further onto the base, I installed the two mounting screws into the base.
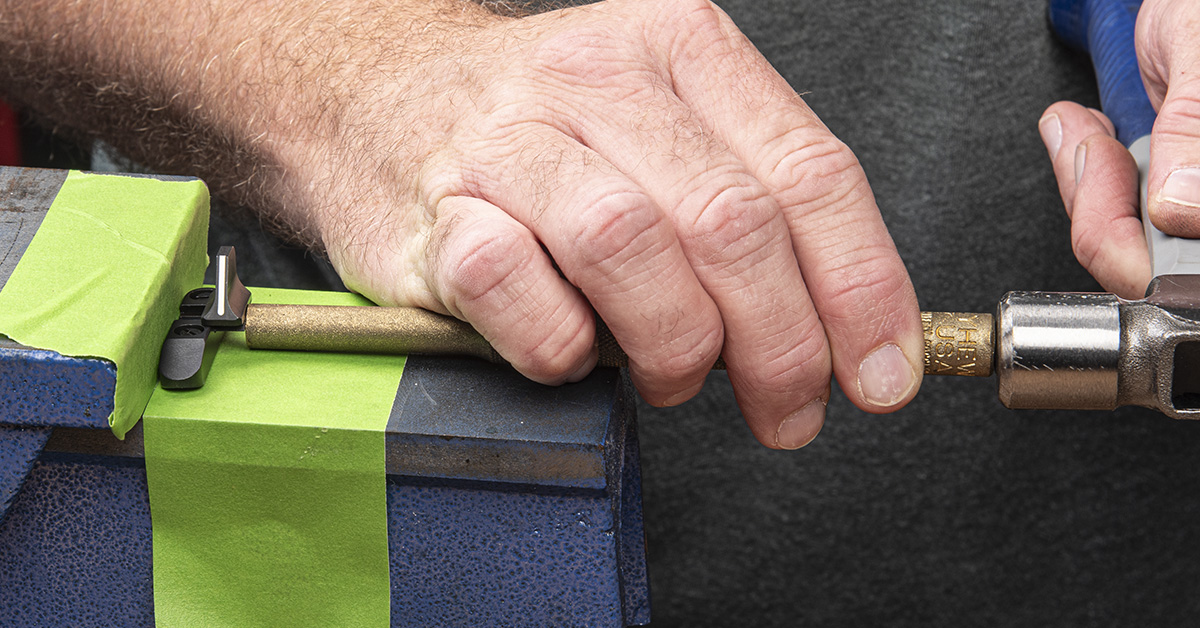
Next, I positioned the sight assembly square against my vise (the tape is to prevent marring the sight) and used a large brass punch and hammer to drift the post into position evenly in the sight base.
After applying thread adhesive to the mounting screws, tighten the screws to 12-15 in/lbs. Be careful not to overtighten these screws our you may damage them.
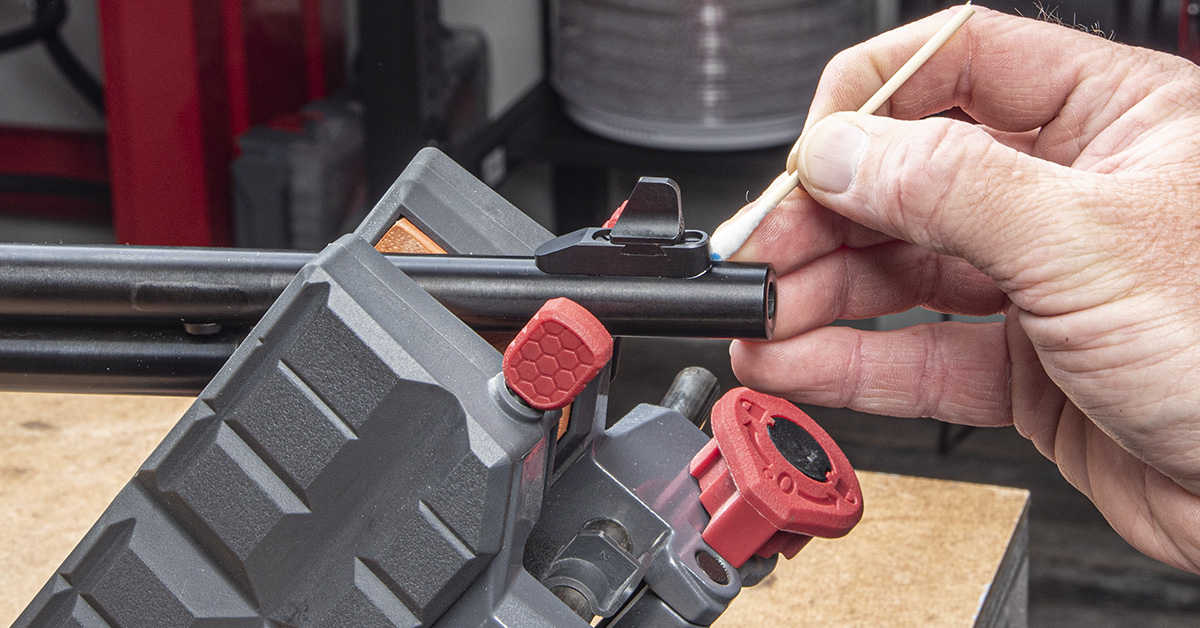
Use a swab to clean any excess thread adhesive that may have oozed out.
This finishes the sight set installation.
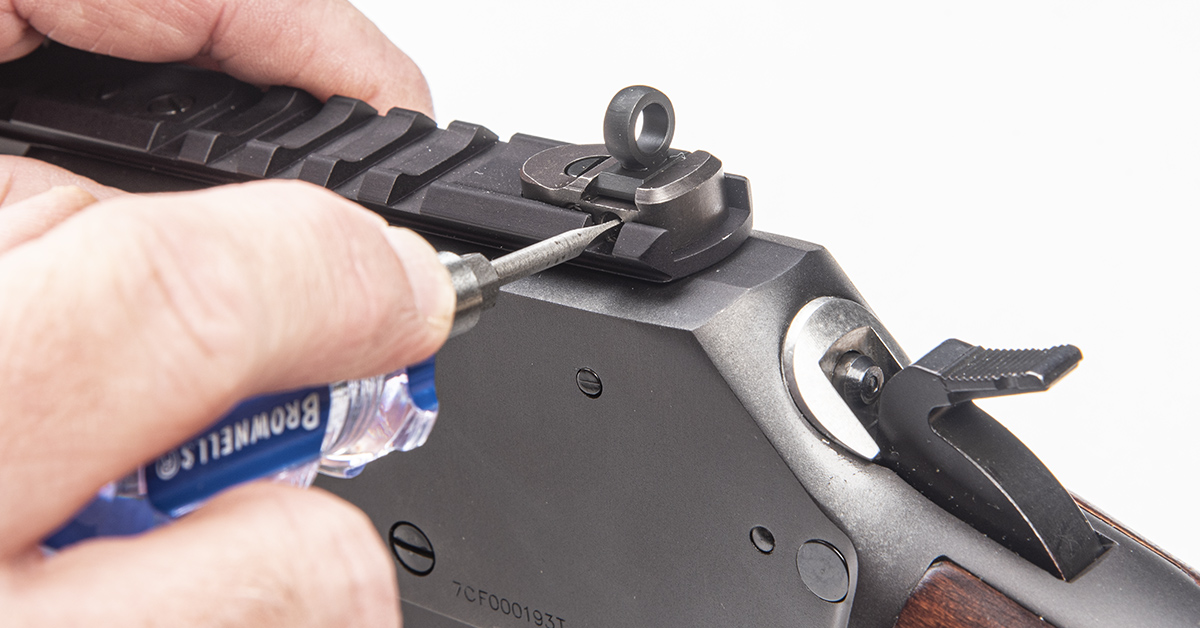
As mentioned earlier, the ghost ring can be adjusted for elevation and windage. Elevation adjustment comes by loosening the two side adjustment screws and threading the ghost ring up or down to achieve the correct height.
Windage adjustment is made in a similar manner. Just loosen the screw on the side you need to move the sight and rotate the opposite screw to move the ghost ring assembly. Once in the desired position, snug both screws to prevent them from rotating out.
Aperture sights have proven themselves on the target range, the hunting fields, and the battlefields for well over a century. They are easy to learn to shoot, and they are wicked accurate out to distances that will surprise you. If you want the freedom of open sights with your lever-action carbine, you’ll not find a better pairing this side of peas and carrots.

